George Vondriska

Table Saw Essentials # 1: Getting Started

George Vondriska
Duration:   46  mins

Before making any cuts, let’s make certain your table saw can do everything you ask it to do. We’ll look at:

•Parallelism between the blade and fence
•Getting perfectly square cuts
•Calibrating your rip fence and blade height
•Choosing the correct blade
•Ensuring your blades are sharp, clean, and ready to cut
•Taking care of your saw

Share tips, start a discussion or ask other students a question. If you have a question for the instructor, please click here.

Make a comment:
characters remaining

No Responses to “Table Saw Essentials # 1: Getting Started”

No Comments

I hope you're ready to learn all sorts of great stuff about mastering your table saw really important that you get these skills down because we use the table sauce so much. So here's what I'd like you to do. Watch the entire class start to finish then grab key components that you wanna take further, go out in the shop, start working on those key components and get those skills under your belt so that you get really good at these different techniques we're gonna show you, we're gonna take you through all sorts of safety, setup, blade selection, a lot of different information here. So that's why I think it's so important to watch the whole class start to finish then start practicing those skills. So I'm ready to teach table saw if you're ready to learn table saw let's get going.

I am quite convinced that the next step we're gonna do in this class is the most important aspect of this class and that is here on your table saw, making sure that it's set up correctly. If the saw is not set up correctly, not only will it not perform well, it's also dangerous to use so what we're gonna look at here is making sure the blade of your saw is parallel to the slots and parallel to the fence. So first thing, saw is unplugged then we don't need the guard for this. And in fact, it would get in our way. I'm gonna show you two approaches.

One is really, really low tech and easy to do but it has a disadvantage, the other one a little higher tech and a little cleaner way to do it but you've gotta have a specialized tool to do it. Here's low tech. This is a framing square. What I really need here is a straight edge, I want it the long leg of the square, the square is gonna go right up against the blade but notice that when you look at the connection the joint between the square and the blade it's up against the steel, the plate of the blade. So here at the front, look what happens if I'm not careful and I go up against a tooth, there's a gap.

Wanna make sure we don't have that what we need to do is get past that tooth. So part of what could come out of this is that you need to be careful about what blade you're doing this with. If it's a very fine toothed blade, 60 or 80 tooth blade you might not be able to get that straight edge in between the gullets of the teeth. The gullets being the valleys between each tooth. So this is a 40 tooth blade works very well for this.

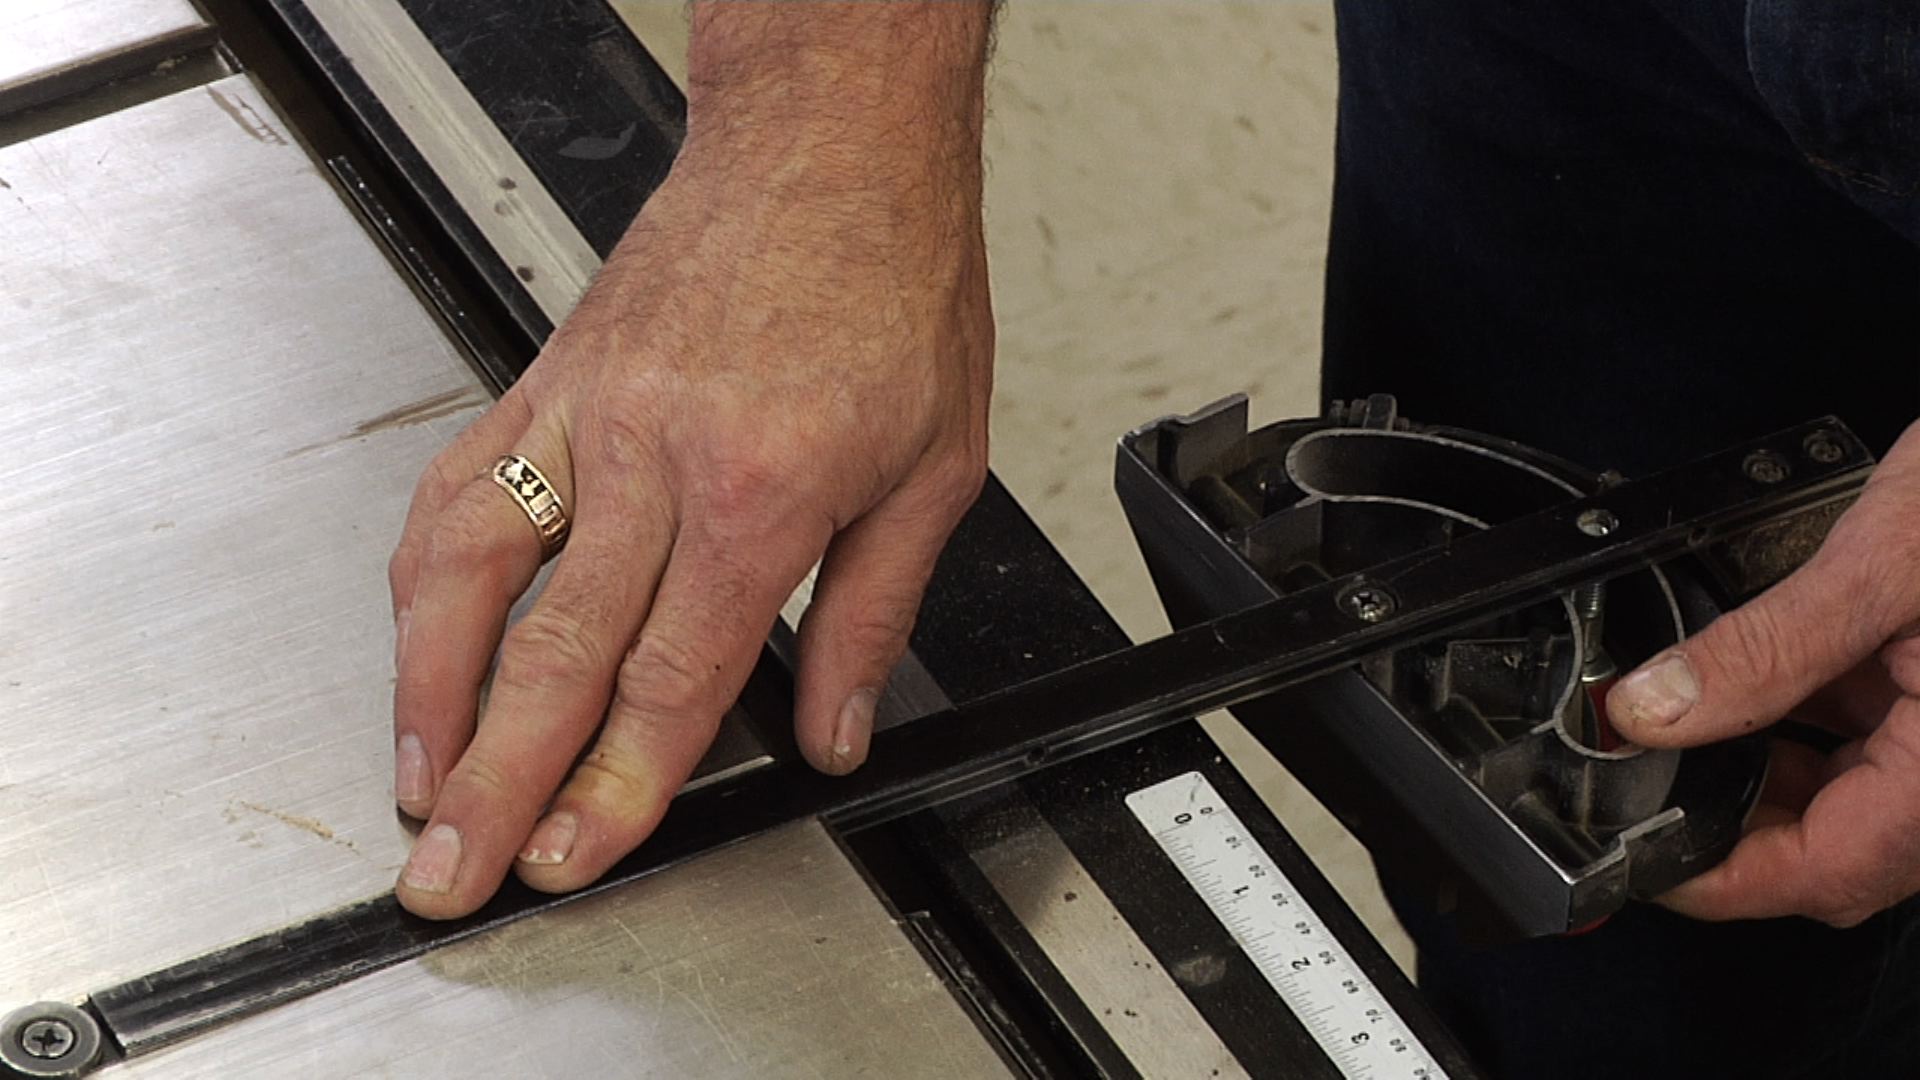
Then our miter gauge and then nothing more than a ruler. Now, one of the things that we have to be cognizant of is that miter gauges can have a little bit of a wiggle to them. A couple thousand seven inch there just wanna make sure I'm aware of that and what I'm gonna do as I do this next step is put a little pressure on the right side of the miter gauge my right, so I'm pushing it to the left. I'm taking the slop out of it by pushing it in that direction. Framing square is tight.

Miter gauge is to the left ruler, kisses the edge of that framing square and then we move forward and what I can feel is that ruler dragging along that edge. We can also start here at the back, kiss the framing square come this way, there you can even see it. And the key to this is that my drag here at the front my contact is exactly the same as it is at the back. If it's not, then we have to make a correction so there's a couple of scenarios here. One is it does what mine just did which is maintains uniform contact front to back.

Or I kiss it at the front and as I move toward the back to simulate this I end up with a gap between the ruler and the framing square or kiss it at the back and when I come to the front, we've got a gap here. If you've got a gap at either end we know we have to make a correction. That gap would tell us the blade is not parallel to the miter gauge slot. We'll talk about what to do, how you make that correction in just a second, let me show you the other approach. If you're not worried or you're not afraid of investing a little bit in your tool set up then this is a nice way to go.

This is called a dial indicator, the face of the dial reads in thousandths of an inch. So one little hash mark on there is a thousandth, full travel is an inch. Now what I can do with this is let my prawn let the point of the dial indicator read against the side of the blade, check what that reading is. I'm gonna also put a little bit of masking tape on that tooth. Cause what I wanna do is make sure that I'm reading off the same tooth at the front and at the back.

So remember one of the things when I first started out I said is a potential problem with that real low tech framing square method, the problem being if the plate of my blade isn't dead flat, when I take a reading off of it with a ruler and the miter gauge maybe what I'm reading is just the idea, the notion that the plate isn't straight the plate isn't flat that's possible. When I do this method because I'm marking that tooth and I'm using the same tooth at the back as I am let me lower my blade a little at the front. Then I'm eliminating that error because then we're no longer measuring the flatness of the blade because we're using the exact same registration point by marking that tooth. If the blade was gray or red or yellow, instead of black I would just mark that with a felt tip you'd be just fine. Two approaches then to making sure that you're parallel.

What if you're not, depends on what kind of saw you have. On saws that are this style cabinet saws, the bolts that hold the top to the base are typically around the outside of the saw underneath the table you can access them from the outside of the cabinet. When the bolts are loose, the top will wiggle independently of the base that's how you make the correction. If you have what's called a contractor style saw on those the mechanism bolts to the bottom of the cast iron, so you're gonna have to come in behind or under the saw, loosen those bolts and then basically the table is remaining stationary, the blade is moving independently on those trunnions on those loose bolts in order to make that correction. Bottom line you need to read the owner's manual and see how the manufacturer advises you to make this correction.

What you need to do then is make what you think is the right correction, tighten up the bolts, check it again. You've gotta be very patient about this and give yourself time to do it. It can take awhile to get this just right but it's imperative that it's perfect or within a tolerance if you're using the dial indicator, and the difference from front to back is 300ths inch or less you can leave it alone. That's about the thickness of a piece of paper. If it's more than 3000, you'll need to make a correction.

So check the owner's manual, make sure you get this just right before you move on. Now, in addition to knowing that the blade is parallel to the slots and the table, we wanna make sure that our rip fence is parallel to the blade. Here's how we're gonna do that. We're gonna do a little field test here. What I'm doing is positioning the fence so that as I slide it over the face of the fence is even with the edge of the slot.

Lock the fence and then feel that all the way back and they should be even all the way back. So let's try it again. Face the fence even with the edge of the slot right there, feel that all the way back if you're off, then you're gonna have to look at your owner's manual and see what you need to do there's two real common scenarios on a T square style fence which is what we have here, it's very common that there is a screw that as I dial that in or out, it affects the position of this pad which is riding up against the rail of my fence. So as I turn the screw in this pad would get pushed out, that would reposition my T-score style fence. As an alternative, let's flip this over.

What your fence could have are bolts or screws here on this end. Those fences, the way they work is that the bolts go through oversized holes so that when the bolts are loose, the body of the fence will wiggle independently of the head of the fence. Similar set up here, what we would do is lock the head in place, loosen the bolts, wiggle over the fence so it's in just the right spot, tighten the fence back up. Now here's a real good hint for you regardless of what style you have of saw or fence, when it comes to loosening bolts never loosen all the bolts. Because what happens is everything gets so wiggly that you lose control of your starting position.

What makes way more sense is loosened three of the four bolts, leave the fourth one tight as a pivot point and then you can use a dead blow mallet or a raw hide, never a steel hammer to tap the table or to tap the trunnions or to tap the fence until it's in just the right spot, then tighten up the other bolts and like I said, check it, check it, check it double, triple, quadruple till you make sure it's just right. Those set up items will take care of making sure that the blade is parallel to the slot, the fence is parallel to the slot which therefore makes the fence parallel to the blade, gives you optimum performance and the safest setup on your side to make sure you prevent kickback. Next thing I wanna have a look at is making sure that the blade is perpendicular to the table and that the miter gauge is cutting nice and square. Now here's the deal with me for that, I really wanna know how the saw is cutting not how is it when it's just sitting here. So if I can avoid it, I'm not a big fan of putting a square up against the blade, checking it against the table of the saw, because that tells me what's cooking when it's standing still doesn't tell me what's cooking when it's actually under power.

Here's how we're gonna make this happen. I have in my hands two boards. Really important thing to notice is that there's an X on one edge of each board that was jointed and I know that it's nice and straight next thing I'm gonna do is make a cut with the X down on the table and the board on edge then I'll explain to you what the heck I'm doing here. As soon as I cut the ends, I mark the ends cause we wanna know which end was just cut. Now the key to this working is that that nice straight edge is gonna stay down on the saw table, we put the two cut ends together and see what we've got.

What we're looking for is do those two cuts meet? Here's what's really cool about this, if that saw blade is off by just a tiny bit out of square from the table, this really amplifies the mistake because let's say it's off by half a degree this board would be tilted a little bit that way, this one a little bit that way, which would make for a really wide gap at the top or at the bottom depending on which way it was off. So it doubles the error makes it really easy to see that you're off then, follow the owner's manual, make the correction. Typically under the saw there's gonna be a spot where as you're changing the angle of the blade a bolt meets the bottom of the cast iron in someplace, that bolt can be adjusted in or out to allow the side to travel further or less far so do that test. That's the way to check for the blade being square, use the widest board that you can for the capacity of your saw.

And our second verse kind of same as the first here, I have in my hands two boards with jointed edges. This time we're gonna check the miter gauge. Now as a down and dirty way to see to get your miter gauge pretty darn close to square take it out of the table, loosen the head, flip it downside up and then push it so that the head of the miter gauge goes right against the beam of the saw and then tighten the head back up. Nicely just a little there, there we go. That'll get us close.

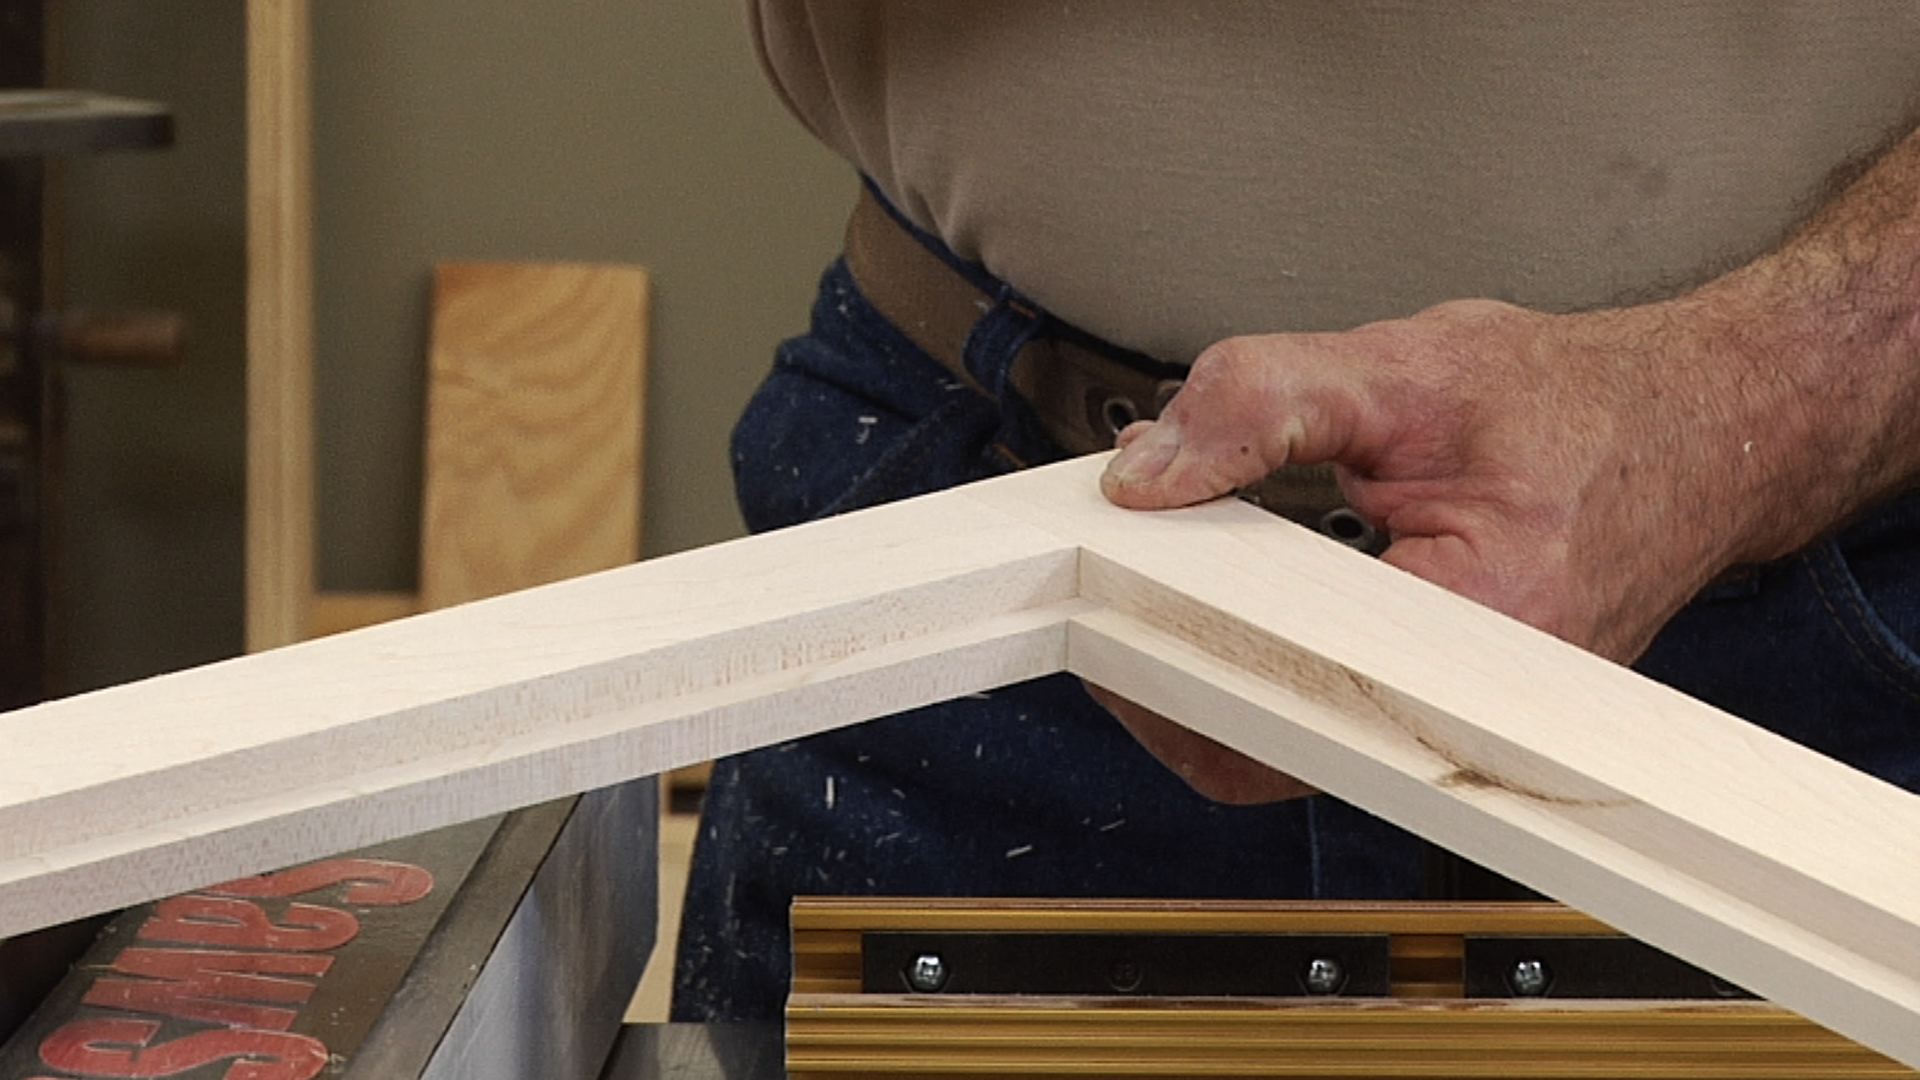
Now X, my reference edge goes against the face of the miter gauge. X down on the table. Now that's gonna be my X down on the table, X to X for a little optical comparison here, there you can see what we're gaining here. They touch at the bottom, they're off at the top, that tells me my miter gauge is currently out of square, make a correction, do another test cut until these touch all the way down. Once again, the widest boards that you have the widest boards you can use to easily and safely make this cross cut the wider they are, the more accuracy this will give you.

Great way to check your miter gauge for square and your blade for square to make sure the saw is cutting as well as it can. Rip fences have really come a long way since I started doing woodworking and what I love about them is the way that you can direct read the setting on the rip fence, which tells you the distance between the fence and the blade but that's only as good as your calibration of said device. So we need to make sure that when we use the pointer on the fence, it's given us an accurate reading. Here's the way I make this happen. I'm gonna set the fence to some number.

In this case, I'm gonna use four inches and I like it to be something under six inches, which I'll explain in just a second then I'm gonna make a cut. Now where the rubber really meets the road is I set it for four, did I produce a four-inch piece? One of the things I've talked about is my preferences for setting up a tool in the manner in which it's going to be used in other words, when we squared the blade earlier we did that by making a test cut not just putting a square against the blade rather than just measuring between the blade and the fence, I'm gonna measure the resulting board. Now, the reason I wanted to stay under six inches is because I wanna do this cut with what's called a digital caliper. So if I turn that on, it'll make more sense.

That's gonna tell me the exact number in fractions of an inch that I'm measuring here. So when I measure across the width of this board, I set it for four and I got four and three sixty fourths. What do I do with that information? What's really important right now is that we don't change the fence position, we change the pointer. So I come to the cursor loosen that up, set it to whatever that measurement is.

Four and three sixty fourths which is just a tiny bit under a 16th. Lock that back in place now I'd recommend we keep on keeping on. Let's do another test cut. I'm gonna set it four again, got the same board, see what we get. Showing me as a 64th over I'm gonna make one more adjustment here.

So the key to this is to just keep doing test cuts and measurements until we get this just right. And what's nice is that when you take the time to do this you're gonna have the confidence that the cuts we're making here are accurate and they're accurately reflected by the position of that cursor. Now before we leave here, I'm a 64th under so I'm gonna make another adjustment and just keep fine tuning this until you get it just right but I wanna talk about the curve of the blade. So what I'm gonna do here is I'm gonna make a little stopped cut because this is all good until something happens. And I wanna talk about what that something is gonna make a little stop cut and then we'll go from there.

All right I'm gonna change blades, make a similar cut and we're gonna come back and talk about the lesson I'm trying to give you in this portion of the class. Here's where I'm going with this I changed blades to what is a thin curve blade. So look at the curve made by the blade I had in there initially that 40 tooth alternate top pebble, the curve made by the blade I have in there now, what's the lesson out of this? The lesson is that I took the time to calibrate my fence, it's dialed in perfectly for this blade. If I change blades and there's a significant change in the curve size you're gonna have to take the time to recalibrate if you plan on using the cursor on the fence.

Now in the dose of reality here, what I find with most of my blades now not when I go from a standard plate to a thin curve but most of my blades are standard plates and when I go from a rip to a cross cut the change is not such that I need to recalibrate very often. But if we go from a standard plate to a thin curve and you wanna use the cursor you're definitely gonna have to do a recalibration so wonderful to do this makes the saw so much more user-friendly but keep in mind with blade changes you may have to do a recalibration. One of the things that can be really handy when you're using the dado ahead is knowing exactly how much the blade goes up or down when you're raising the blade or lowering the blade. Now here's what I'm talking about let's say you set up a dado and you want it to be a certain depth. Once you do a test cut you find it's just a little bit off, turning the handle on the front of the saw, what changes that effect even more so when I'm cutting tenants, I find that I have to sometimes dial them in just right knowing how much I can increase the height using the handle on the saw, it's a great thing to know.

Here's how we're gonna make this happen. I've got a dado in the saw, doesn't matter what width we have built it up to. On the front of the saw, what I wanna do is get the handle on the hand wheel in a o'clock position that I can easily remember so here it's positioned at six o'clock it's straight down. I don't care too much how high the blade is above the table, it just needs to be a little bit above the table. Next step, cut a dado.

Then we can do this work with a ruler but you're gonna have a lot more accuracy if we can measure this digitally measure this meaning I wanna know exactly how deep the dado is that I just cut and the digital calipers are gonna give us a really good accurate read on that. Right now we are at five sixteenths of an inch. I'm gonna do that again just to make sure perfect. Now here's the deal with the o'clock, here on the front of the saw I'm gonna turn that handle from six o'clock all the way around raising the blade until it's at six o'clock again. It's important that we're raising the blade, you're gonna see why in just a second.

I bet you can see where we're going with this lesson. Measure this again. Remember before we were at five sixteenths of an inch, now we are at 15,30 seconds, we can do a little bit of rounding here to make life easy, let's say that 16, 30 seconds, eight sixteenths we were at five sixteens. So a full revolution of the hand wheel creates a change of about three sixteenths of an inch. How am I gonna use that?

Well, what's great about this is that let's say I come down here and do only a quarter of a turn. Full turn is three sixteens, quarter of a turn three sixty fourths of an inch. So that's gonna give me very, very, very fine control of setting the height of that play to my new dimension. We do wanna make sure whenever you're doing this that we take the slack out of the system. What I mean by that is when I'm going for a real finite height, I wanna go too low and then turn the hand wheel in a direction that brings it back up.

So we're always dialing the blade up to that setting rather than lowering it to a setting. It's gonna give you more accuracy. Once I've got this information, three sixteenths per revolution, gonna grab a piece of masking tape and write my information on here. Three sixteenths per revolution, put that on the front of the saw so that from here on out, when I have to make a blade change gonna have that information right there at my fingertips. Very handy information to have to make using your table saw a lot more accurately.

Hopefully as part of this class that you're doing at home you've now taken the time to set up your table saw, make sure everything on it is working just right in order to cut wood I do wanna make sure that you're using the right blade for doing the cut. So let's go through some blade information here. First let's separate blades into two distinct categories ripping blades and cross cut blades. Ripping is an operation where we're cutting in the same direction as the grain, cross cutting, cutting across the grain. One thing I'm gonna do is put cross cutting blades and sheet stock blades in the same category.

So the blade that I'll talk about as being good for cross cuts would also be good for cutting plywood, melamine, that kind of stuff. Let's do ripping first. Here's a ripping blade. General rule of thumb ripping blades have 24 to 40 teeth around their rim. Talking about 10 inch blades.

This particular one is a 30 tooth blade. Here's the deal with ripping, ripping blades need to have few teeth relative to other blades we're gonna talk about because ripping creates really big chips. So we have to have big gullets, valleys between the teeth to carry those chips away from the cut if we don't, then the cut's gonna get too hot and you'll overheat the blade that gets hot enough it can warp, I used to say like an LP record that sat in the sun but people don't seem to know what LP records are anymore. Once it warps, there's no bringing it back. So ripping blades 24 to 40 teeth in order to aggressively make those rip cuts.

Cross cut/sheet stock blades very different here, 60 to 80 teeth around the rim and a little more accurate to say 60 or 80 teeth. So we get a much finer tooth pattern. That does a couple things for us. It leads to a smoother cut on end grain or in sheet goods and that's a good thing because in our woodworking we generally are not able to follow cross cuts or sheet stock cuts with a cleanup operation such as a jointer. With ripping cuts, we cut more aggressively we get not quite as clean a cut, but that's okay cause we can clean it up on the joint or so that's the difference in applications.

Now, in addition to talking about the number of teeth around the rim so much finer tooth count, we also have a tooth geometry to talk about. One is the hook angle of the teeth. So if up here at the top of the blade have a look at the teeth here and where they are relative to an imaginary center line on the blade. and these teeth are leaning forward just a little bit maybe five degrees or so. Compared to the ripping blade that we had before, imaginary center line really leaning aggressively into the cut.

So another tooth geometry difference between the two is that here we've got that real aggressive tooth on our ripping blade, a less aggressive tooth on our cross cut sheet stock blade. One of the benefits we get from that less aggressive hook angle is that when we cut sheet stack especially a veneered sheet stack, we'll get less chipping on the surface. That's part of our tooth geometry. Now there's another real important part of the tooth geometry and that's what the tooth itself actually looks like. First thing let's look at is what's called an ATB or Alternate Top Bevel tooth pattern.

On an ATB, this is the kind of tooth set or pattern that we're really used to looking at one tooth points to the left, one tooth points to the right and that application ATBs give us really, really smooth edges on our cut. Now let's compare that to another very common tooth pattern which is called a triple chip grind. On a triple chip grind, we've got a tooth that looks kind of like an old fashioned tombstone. The teeth have been taken off of the two or the corners have been taken off of one of the teeth. That's the triple chip part of the grind.

Here's what we've got going there. Remember I said the ATB, the Alternate Top Bevel, it's gonna give you a really nice smooth edge. But what's the downside to something that comes to a really distinct point, it dulls more quickly. So if I'm using that blade in abrasive material like MDF that sharp point is gonna dull a little bit more quickly than a triple chip would. So here's where we're at with this.

If what you're cutting on your saw is primarily solid wood, you could get an alternate top bevel rip blade and alternate top level cross-cut blade in order to really optimize the surface finish you're gonna get on those cuts. If however you're sometimes gonna cut more abrasive sheet goods then I'd like to see it in a triple chip grind like I have here. Now, a good question would be, well I don't really wanna buy a dedicated rip blade and a dedicated cross cut blade what can I do? And there is an answer to this and that's kind of today's combination blade. This is a 40 tooth blade.

It's got an alternate top bevel grind, a reasonably aggressive hook angle on it, 40 tooth blades like this are pretty darn good at ripping and cross cutting and cutting sheet good. So really, if you wanted to hang one blade on your saw and do a lot of different cuts with it this would be the way to go, this would be a good choice. My best advice is dedicated rip, dedicated cross cut even though it's a little bit more money out of pocket each of those blades does a really good job at what it's supposed to do. One of the things I really want you to notice, and I want you to start practicing in your own shop is notice that I never laid the blades one on top of the other, nor did I ever lay the blades on the cast iron table saw table. Reason for that is that incidental contact can be enough to knock corners off of the teeth.

Now the good news is you can get them re-toothed, doesn't cost too much money but if we can avoid that, why do it? So I'm willing to lay them on the wood, willing to bridge them on the fence but I never lay them one on top of the other never lay them right on the table saw. So this information in this class is really important, it's buying advice to make sure that you're using the right blade for the cut and the material that you're about to cut. Part of making sure that your saw works right is making sure your blades work right. Question I get all the time is how am I gonna know when my table saw blades are dull?

First answer is real subjective. The more you use your table saw the more you're gonna be able to tell by pure performance or lack thereof. If the blade is no longer doing what you expect it to do. However, something that's more objective that you can do is the fingernail test. And this will work with any cutting tool.

Table saw blades, router bits, lays chisels. Here's the fingernail test. I'm looking for a corner on my ATB blade that's going this way and then what I'm gonna do is take that corner and drag it across my thumbnail and I'm not pushing down on the saw blade. I'm really just letting the weight of the blade rest on my thumbnail and drag it across and look at that little curly shaving that's coming up. That's telling me that this blade is still very sharp good to go.

Like I said, any cutting tool you have you should be able to do this test where you can do a little scrape, get that curl to come up that tells you you've got sharpicity. Now, you might say, "Well, I did that "and the blade seems like it's sharp "but it's not cutting worth a darn." What can happen is that you can get pitch and sap built up on the side of the saw blade. That's what's going on with this blade. Now think about the dynamic here. These saw blade teeth are gonna cut wood and the sides of the teeth are to some extent rubbing on the curve that the saw blade makes.

If I get a lot of sap or resin buildup on the side of the teeth, then instead of the blade or tooth clearing through the cut that sap or pitch starts to rub that can affect the feed rate, it can create burns, it can really adversely affect the cut quality. So the first thing I would do, if I have a blade that seems like I haven't used it that much it should still be okay, clean it. There's all sorts of commercially available blade cleaners out there and a lot of times it takes just a little bit of patience because your best bet is to spritz it on there, let it sit for just a little bit and then start seeing if that's ready to come off yet. And what'll happen is the solvent which is a pretty gentle solvent is gonna start working on that junk. Let's see if we're ready, look at that how quickly it's already taken that off.

Now, what woods are most prevalent for this? Anything that's sappy? So I guess my jokes would be bad for this. Anything that's sappy like pine is a real obvious candidate. Cherry creates a pretty good buildup on saw blades.

The other downside to leaving that buildup on there is that that pitch or resin can be just a little bit acidic. And if you allow the pitch to stay on there and the blade heats up, the acid from that pitch can start to deteriorate the carbide. And once that starts to happen then it can really adversely affect the carbide of the teeth. So one good reason for cleaning it is just plain cut quality, another good reason for keeping it clean is making sure you're protecting your investment in the blade so that the carbide lasts a good long time for you. I'm gonna get the rest of the sap off of this one so it's ready to go back to work.

Get out there in the shop, have a look at your blades, if they need to be cleaned, give them a good cleaning. You'll be surprised at what a difference that makes in their performance. I wanna talk about riving knives, got the saw on plug and I just want you to understand splitters, riving knives, anti-kickback pawls this whole safety security thing that should be part of your table. So, first thing I'm gonna say is I want you to use your guard all the time. If the guard that you have with your saw is awkward to use, get an aftermarket guard, so you can use that instead.

I want you to have the guard on the saw. Here's what happens with a guard. We've got a couple of things going on here of course, the guard itself, the basket shields the blade so that you're less likely to make contact with it. The guard is supported by some kind of a splitter. The importance of that is that you've probably experienced that sometimes material isn't dried as well as it could be and when we make a cut, the material can react.

What we have here is what's called case hardening. The outside of the material was dried differently than the inside of the material. So once we start to cut into it it might open up or it might start to pinch. If we don't have this splitter this wedge behind the blade, the material can pinch in, I've got the saw on plug for all this pinch in, get on the back of the blade, that's gonna cause it to climb, that's gonna cause a kickback. So the splitter fills the curve and prevents that from happening as the board continues to move forward it goes under these anti-kickback pawls, which have very very sharp points on them so that the board can't kick back at you.

Now, what about a riving knife? What's the deal with that? Well, watch what happens when I raise my blade and I lower the blade and my question for you would be, what do you observe about this relationship between the splitter and the blade. We go through it again. And the answer is that the relationship the distance from blade to splitter never changes.

If we have a conventional splitter on the saw what happens is that when we're at the top of our cut and in order to handle a really thick cut, the splitter would be up this high. As we lower the blade, the splitter stays in place and only the blade goes down. And the distance then between blade and splitter gets bigger and bigger and bigger. The danger in that is that as you're making a cut it's possible for the cut to start to go a little bit kerflooey get in between the splitter in the back of the blade and what happens when they get on the back of the blade it climbs, there's an opportunity for kickback. So the difference between a conventional splitter and a riving knife is as we raise or lower the blade the distance between blade and riving knife is always the same.

Now full blown guard here. Sometimes we only wanna make a slot. We only wanna do a curving cut. So then, you might see someone use something like this, just kind of a shark fin. The thing to notice here is the relationship between the top of the fin and the top of the blade.

This surface is just a little bit below this circumference. So if all I need to do is make a slot, I can pass right over this, I still have the safety that comes from having a splitter/riving knife in my saw but not have the entire overarm basket which would prevent me from doing that curve or slot cut. So big lesson out of this is use your guard, follow the owner's manual and get it set up just right so that it's in line, the splitter is in line with the saw blade. Keep it on the soft for your cuts. Riving knife has been mandated to be on new saws that are sold in this country now, when you can't use the basket make sure you've got the riving knife on to make sure that the saw is set up as safely as it possibly can.

Really wanna make sure that once you've got your saw set up and you've learned how to use it it's gonna last you a really, really long time. What I'm talking about here is making sure you take care of this lovely cast iron top or aluminum top either way, here's the step you should take and that is lubricating the surface. Now the stuff I'm spritzing on here have this sourced for you, it's really important this is a tool specific lubricant. What does it not have in it? Silicone, hopefully you all already knew that answer.

If silicone is in the spray it can migrate into your material. and when do you find that out? When you put finish on what'll happen is you might get a fisheye, you end up with splash where finish won't stick cause basically the silicone has already pre-finished the wood for you it's sealed it up. With this stuff, there's a liquid that's flashing off while I'm talking see how hazy the tabletop is now, it's getting dry. Once it's completely dry, just very gently wiped that off, the haze comes out and here's what's gonna benefit us here.

One, if you have never done this before and you do it now the next time you use your saw, you'll be amazed at how you can tell how more readily the material slides across that cast iron. Makes a huge difference. The other place that you'll gain is that if you do have any kind of moisture in your shop, even just ambient humidity that can make this cast iron rust this is leaving behind a coating that helps prevent that. So this is a great maintenance thing to do. Now I keep harping about the cast iron top but any ware surface should get this.

So I routinely do the rail and I'll flip over, do your square style fence, which is very heavy. And there's pads here, pads here, pad way down there. All of that stuff gets a shot. The bar on the miter gauge gets a shot. Like I said, any wear surface, needs to get this same treatment.

Makes a huge difference in how easily these parts move. Now, inside your saw you gotta do some work in there too. Even if you've got dust collection on the saw, get in there every once in a while, run a vacuum get excessive dust out of there. If you get dust build up on the worm screws, those are the screws that drive the trunnion that controls the height of the blade and the angle of the blade. You can clean that off with a little bit of solvent, like a WD 40 sometimes you have to use a toothbrush, then we can put this same lubricant under those worms screws that'll help prevent dust from sticking to them as readily.

Never put any kind of wet lube on those screws like grease cause they'll just attract sawdust like a magnet and you're really gonna make the problem worse. So this is a very easy way to take care of the investment you're making in your table saw. And it just makes the tools so much more pleasant to use.

Get exclusive premium content! Sign up for a membership now!