
Gluing Up Panels
George VondriskaGluing up panels is a must-have skill in woodworking. From tabletops to raised panels, there are plenty of times you’ll need to glue boards edge to edge. Here’s the recipe for making that happen in your shop.
1. Rough Cut to Length
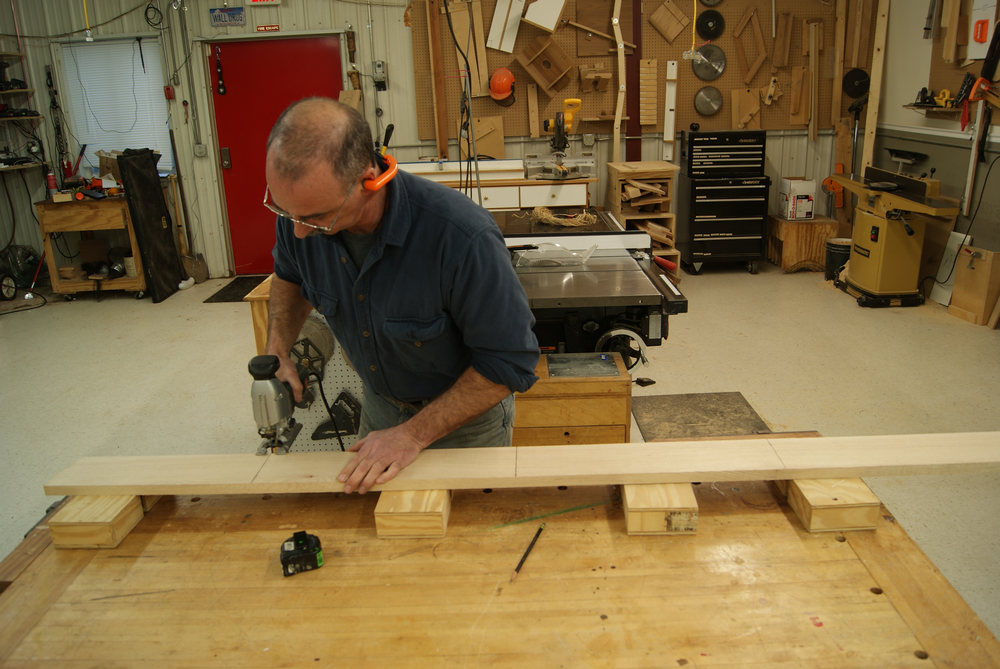 As you crosscut material for the panel leave it 1” – 2” longer than the finished panel needs to be. When cutting up long boards it’s often easiest to cut them with a jig saw. It’s much easier to accurately joint short boards than long boards, so it pays to get them close to their finished length.
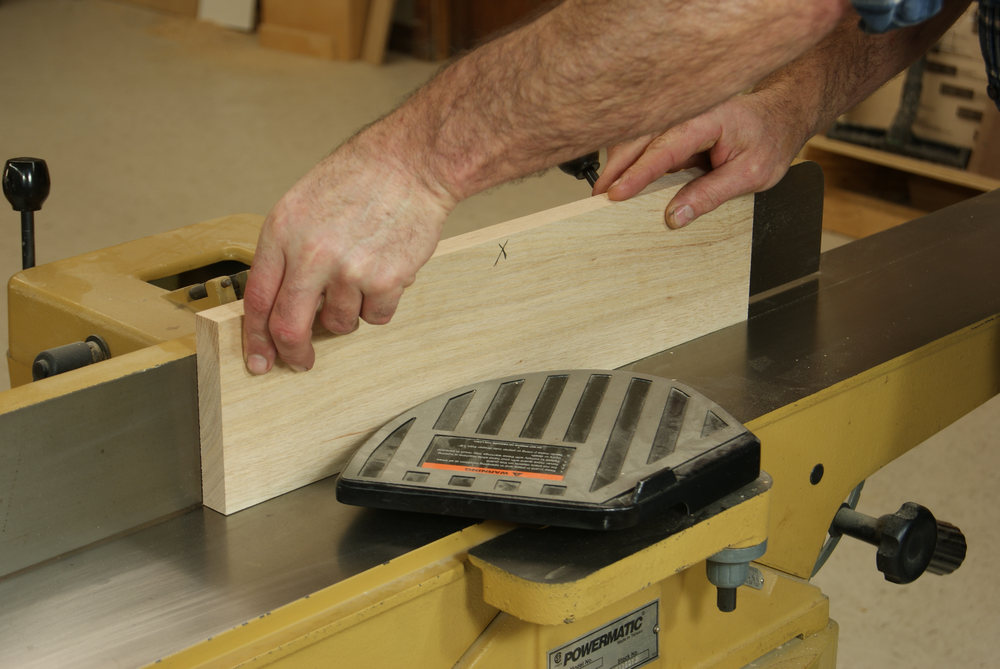
2. Joint One Edge of Each Board
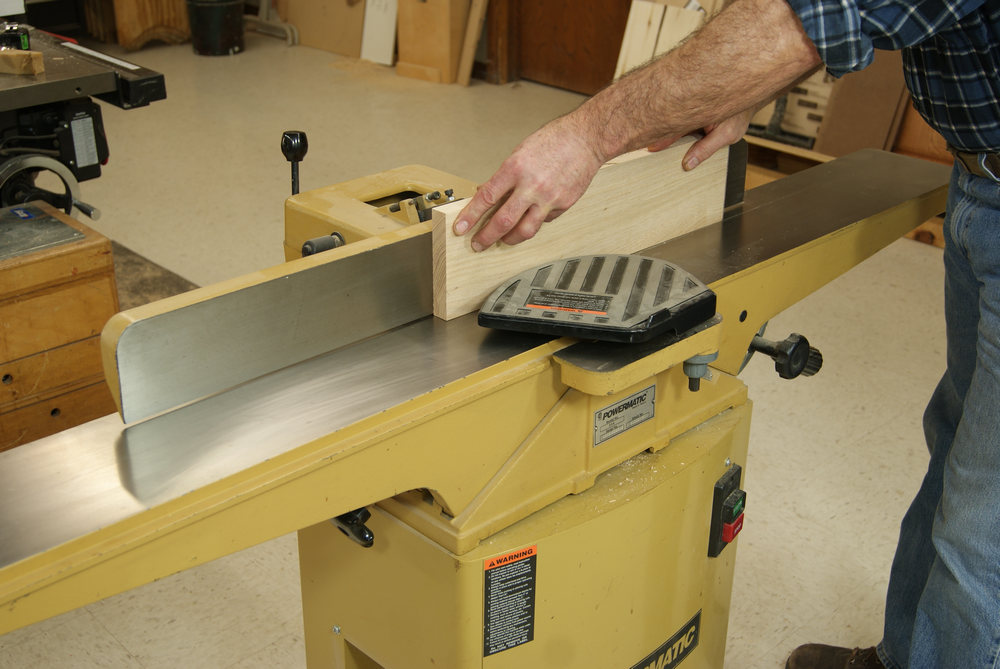 The edges must be smooth, straight and square before gluing boards together. If you don’t own a jointer, or need more info on using a jointer, be sure to check out these related articles:
3. Mark the Cut
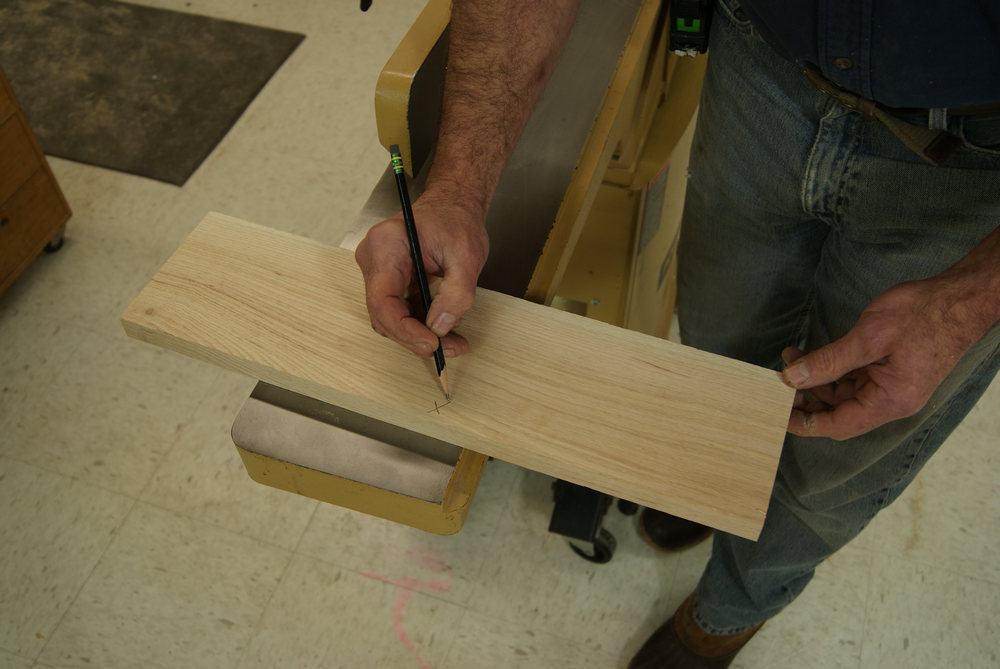 Make a mark near the edge you jointed on the face of the board that was against the fence.
4. Rip to Width
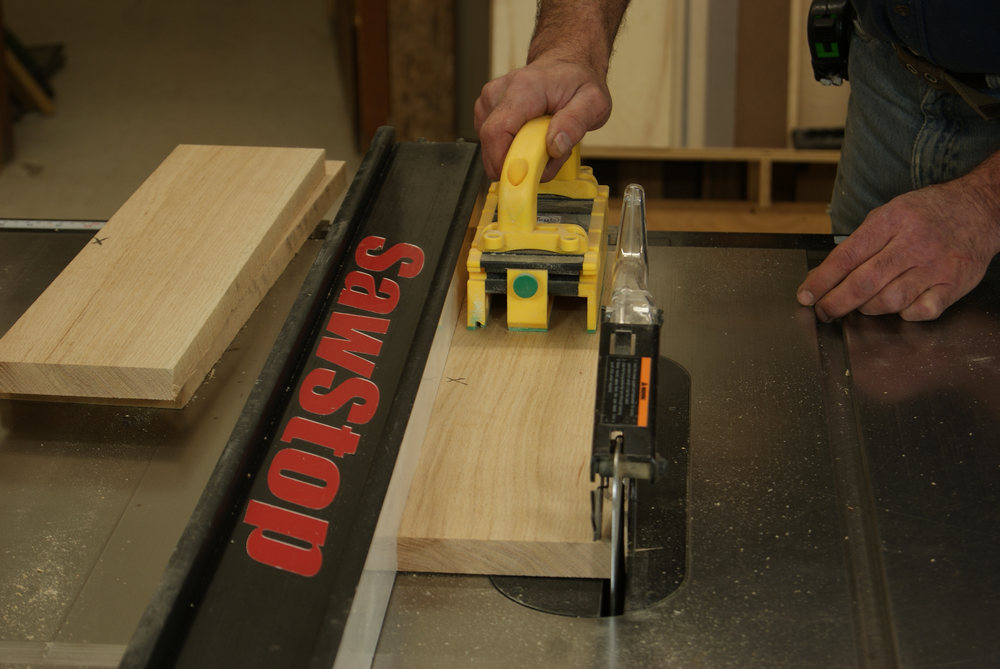 Note that the jointed edge is against the rip fence. A ripping cut accomplishes a few things for you.
It makes the two edges parallel, which makes clamping easier. If the boards you’re clamping are wedge-shaped they tend to slide past each other when you apply clamp pressure. Wedge-shaped boards also result in a funky shaped panel that can be hard to square up later.
Ripping makes the next round of jointing go faster. If the board has a rough edge it’s faster to straighten it on the table saw than on the jointer.
I shoot for boards that are 4” – 6” wide in my glue ups. The wider a board is, the more prone it is to cupping. That’ll sure mess up making a flat panel. If you want to use a 12” wide board it may seem counter intuitive but what you need to do is cut it down the middle, and then incorporate the two narrower pieces in the glue up.
Your edge to edge glue up should be 1”-2” wider than what is required for the finished panel.
5. Joint the Sawn Edge
 Note the position of the pencil mark from the first jointer pass. The face that was against the fence on the first cut is away from the fence on the second cut. Mark the second edge, making the mark near the jointed edge and on the face that was against the fence.
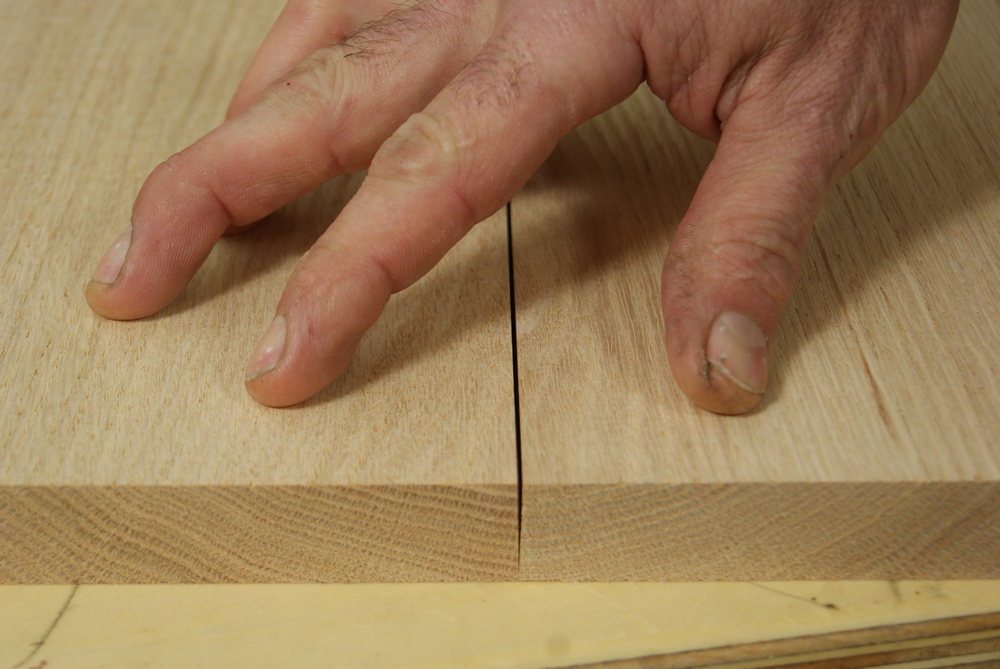
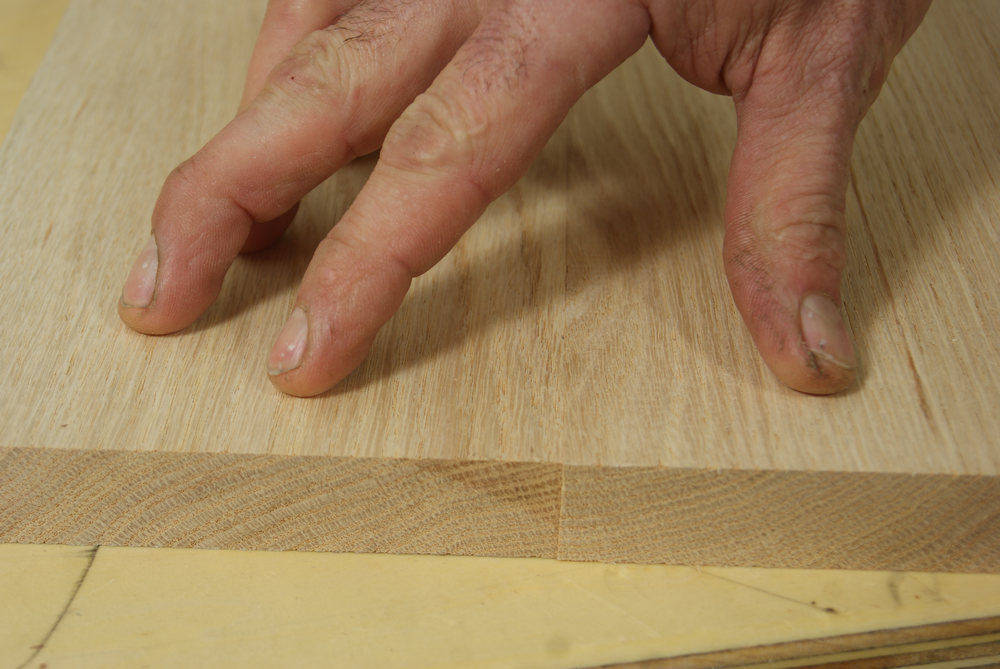
6. Check Your Joints
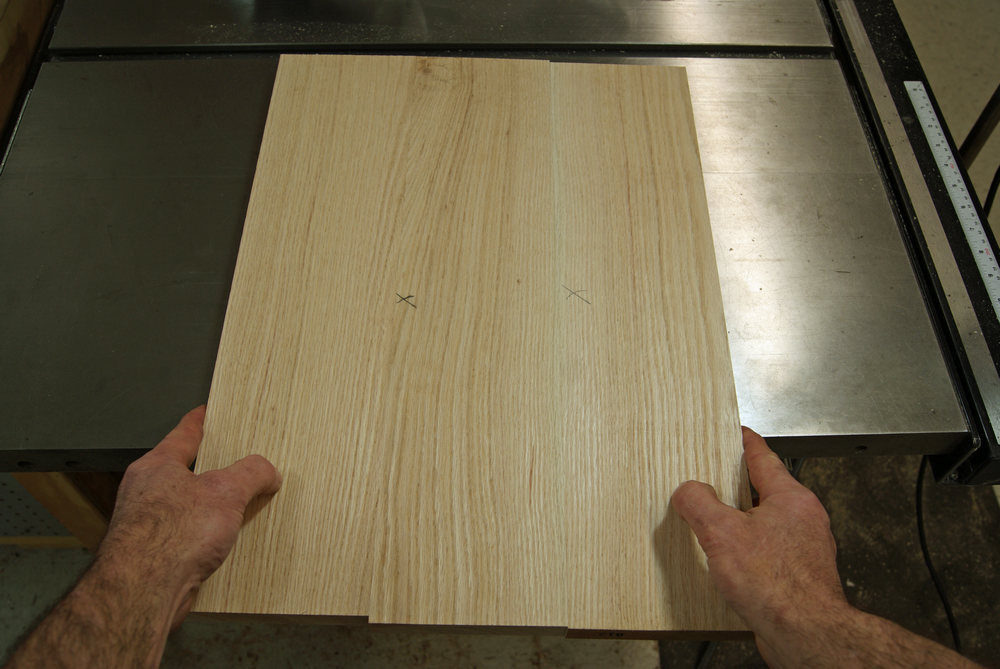 Lay the boards on a flat surface and slide them together to check the joints. If you’re alternating faces each joint will have an X up on one edge and down on the mating edge.
The joints should easily close with hand pressure. If you have any gaps go back to the jointer for another pass. Excessive glue and clamp pressure do not compensate for lousy joinery.
7. Mark the Faces
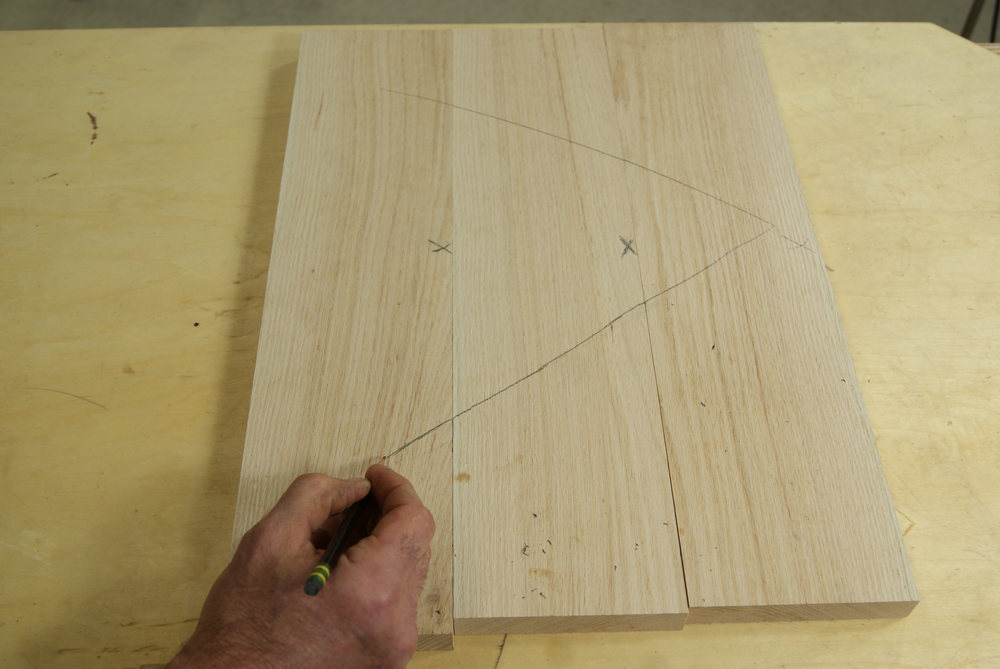 Once you’ve worked out the joints and orientation of the boards, make a face mark. A big triangle will show you how the boards go together. You shouldn’t be guessing at this while you’re working with glue and clamps. The bigger the glue up, and the more pieces you’re working with, the more important a face mark becomes.
As I’m working with the boards I go for the best looking face, a function of grain and color. You do not need to alternate growth rings, provided your material has been properly dried.
8. Prep Your Clamps
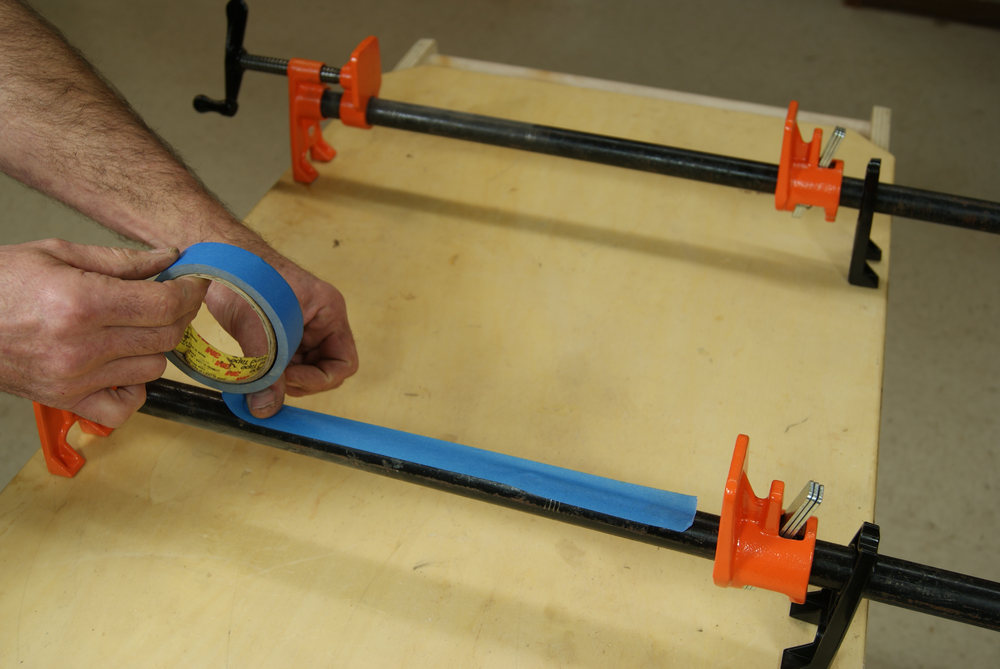 If you’re using pipe clamps made up with black pipe, put masking tape on the pipe. If you don’t, glue squeeze out can loosen up the black coating and allow it to migrate into your panel. It can take A LOT of sanding or planing to remove those black marks.
9. Apply Glue
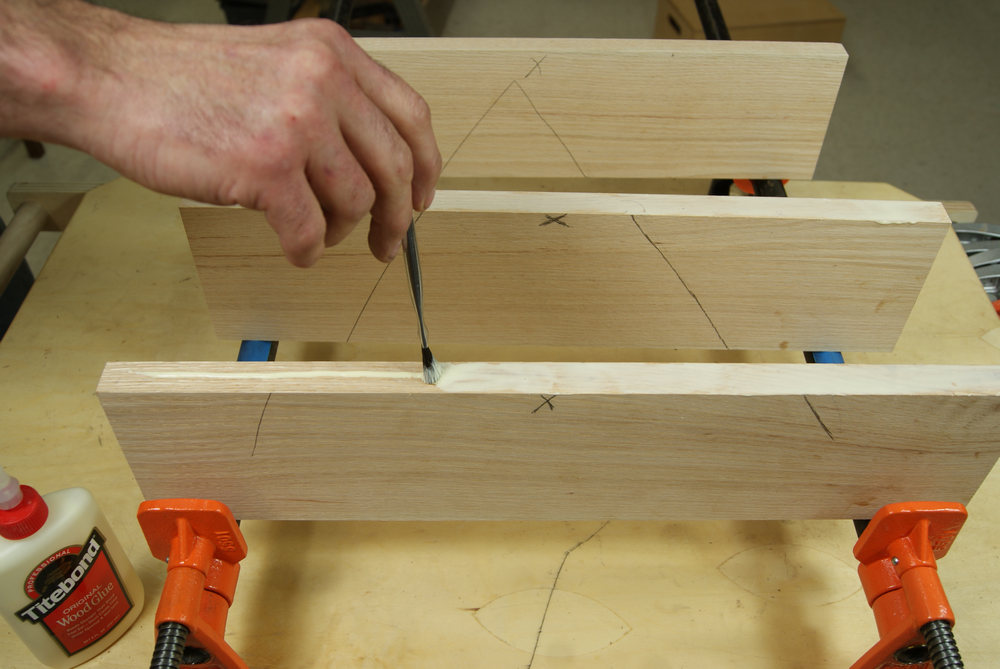 Using a glue brush spread a uniform film of glue. You only need to apply glue to one edge in each joint.
What about biscuits, dowels or some other joiner? No need, as far as strength goes. With good joinery, the joint will be stronger than the surrounding wood. Need proof? Check out this video. On large glue ups you may want to add biscuits, or something similar, simply to help keep the faces aligned so you don’t have to work so hard to level the panel as you’re clamping it up.
10. How Much Glue?
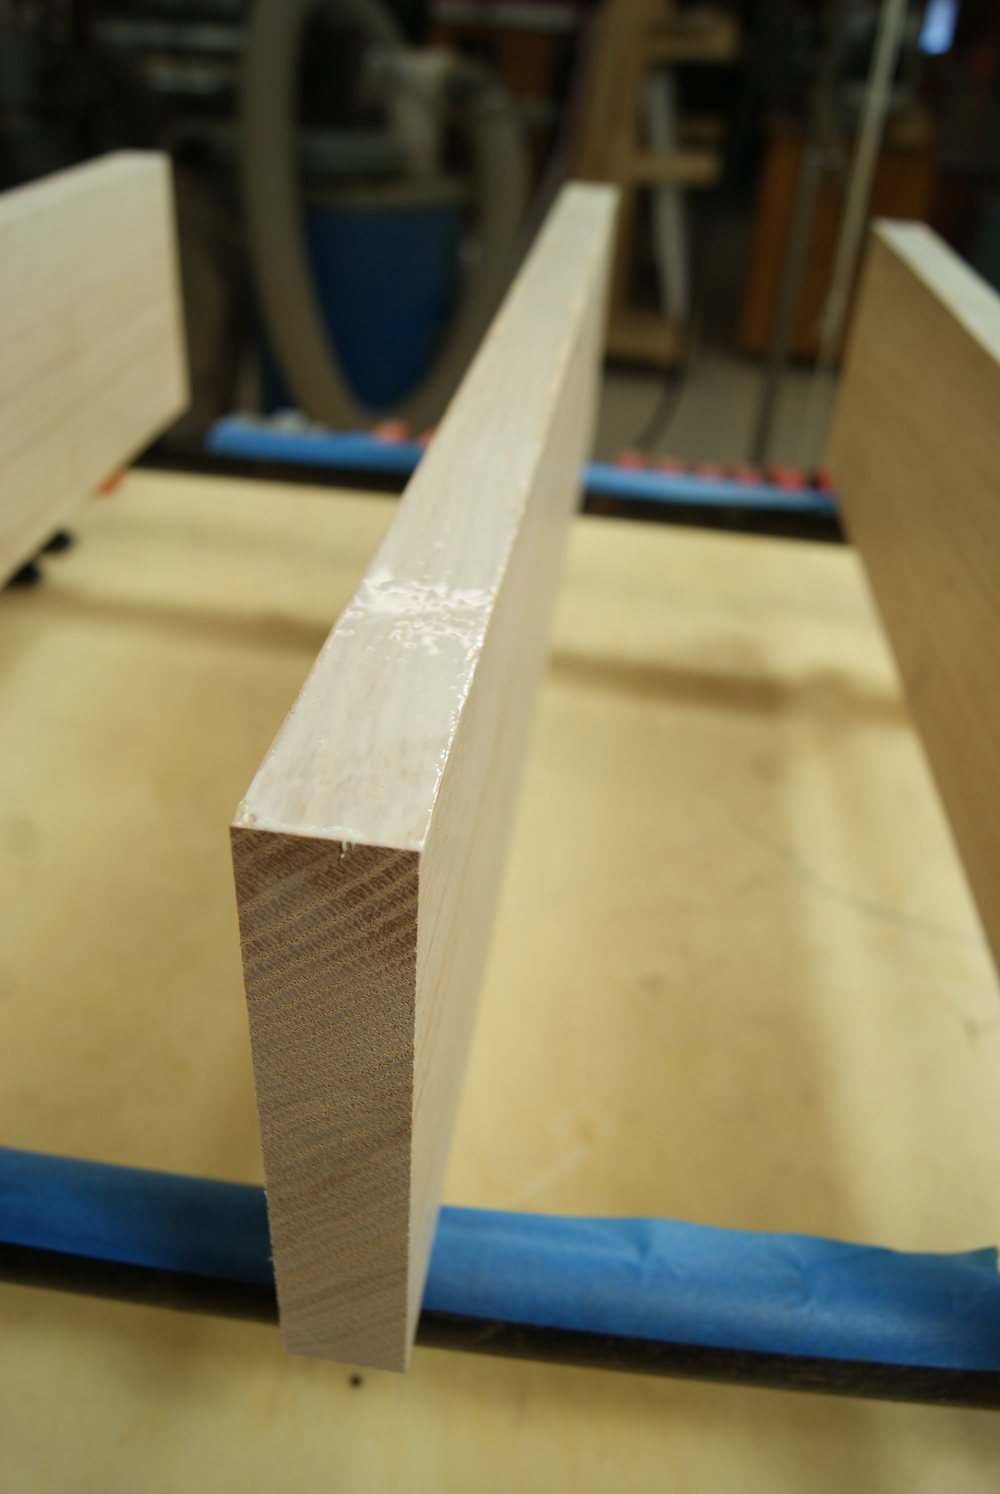 Put on glue like you’d put on paint. Go for a uniform coating that is opaque enough that you can barely see through it to the wood below.
11. Clamp the Panel
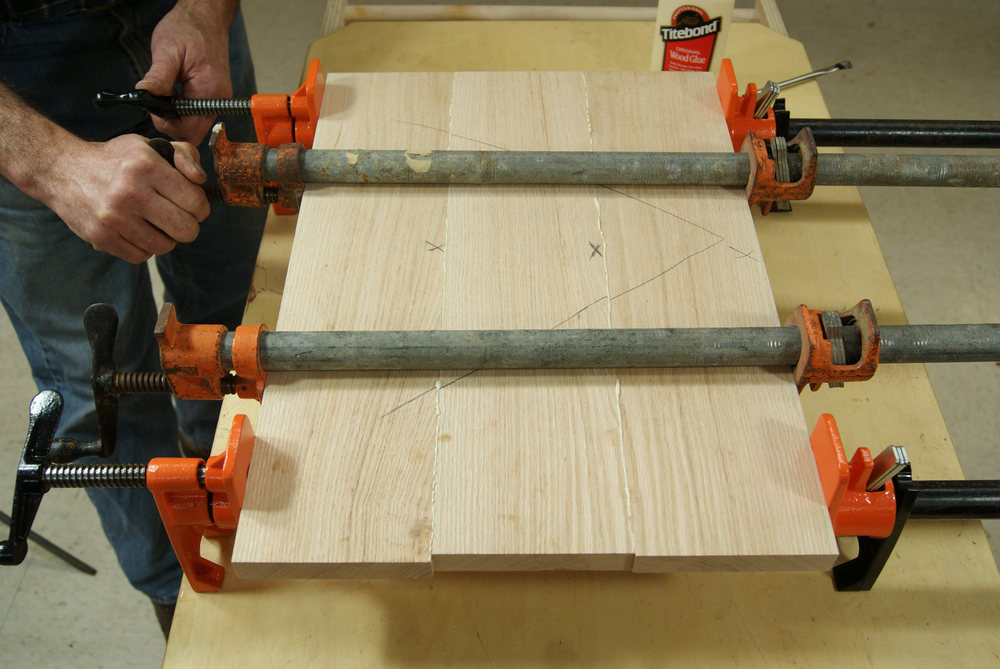 Use an equal number of pipe clamps above and below the panel. Having clamps above and below the panel, with equal pressure on all the clamps, helps keep the panel flat. The pipe clamps on top were made using galvanized pipe, instead of black, so masking tape isn’t required.
Don’t over tighten. As soon as you see the joint close, you’re done with clamp pressure. No need for clamp pads because the panel is oversized and the edges will get cut off later.
12. Check Alignment
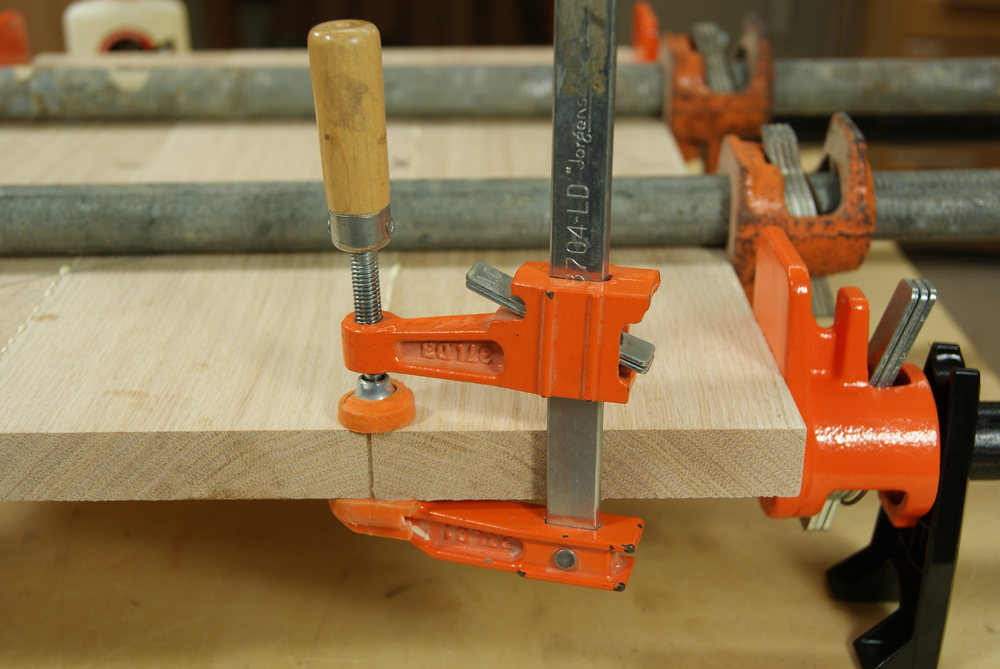 As you tighten the clamps you’ll need to manipulate the boards to make sure the faces are aligned. Near the end of the panel you can bridge the seam with a small clamp. As you tighten this clamp it will pull the faces into alignment.
13. Don’t Wipe the Squeeze Out
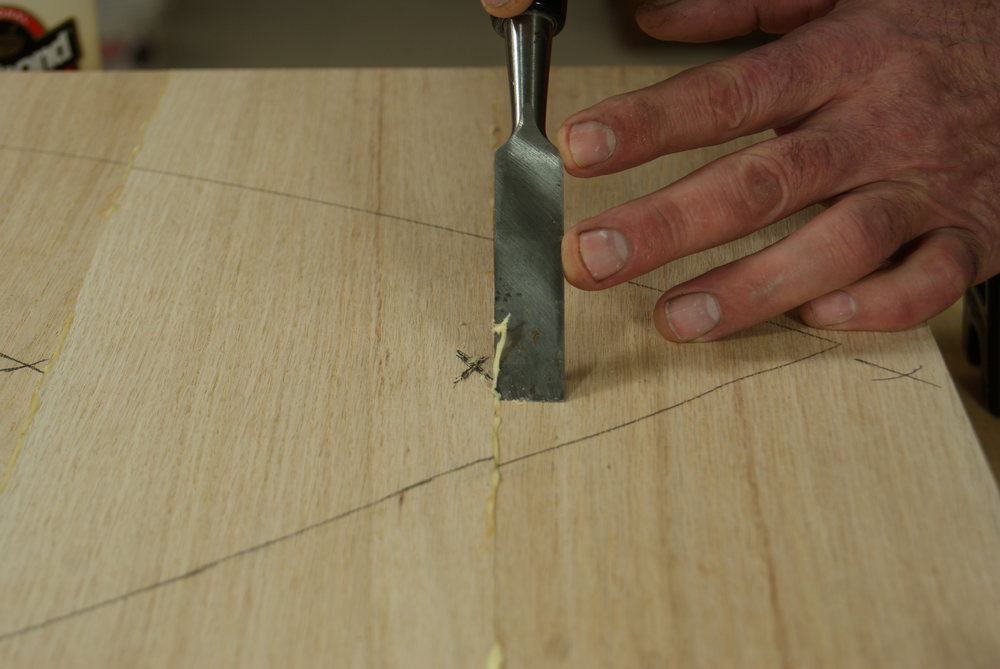 Wiping wet glue with a damp rag just pushes the glue around and makes an even bigger mess. Allow the glue to dry until it’s rubbery, about 10-15 minutes, and slice it off with a chisel. If you don’t wait long enough it’ll be too wet and make a big mess. If you wait too long it’ll get too hard and you won’t be able to cut it off. Check the squeeze out frequently to see if it’s hit the right consistency yet. When it’s ready it’ll peel easily.
14. Make Glue Ups Easier
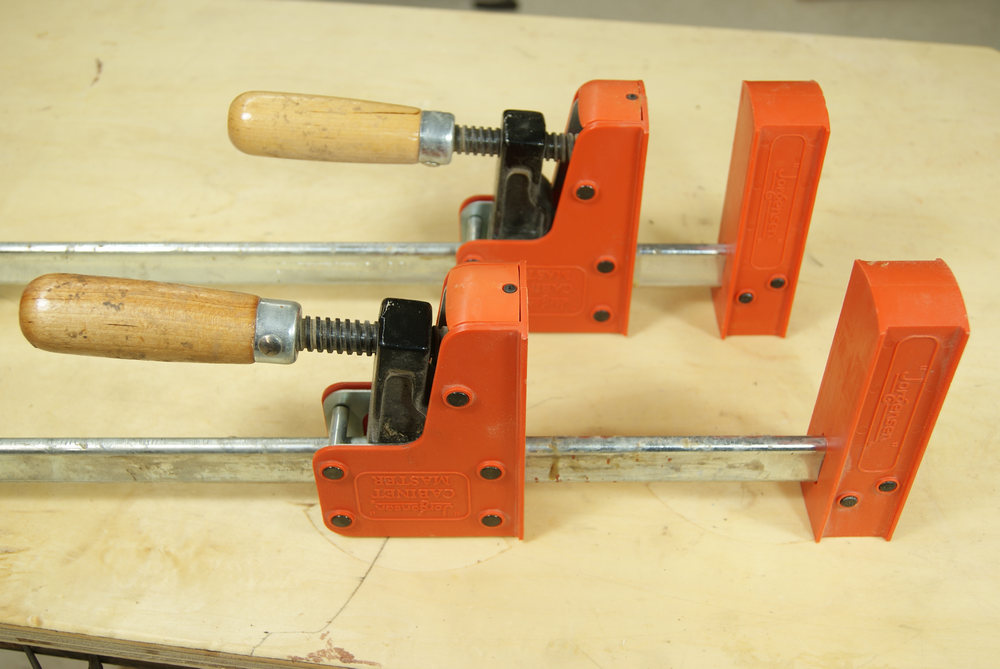 If you want to simplify gluing up panels, consider upgrading to parallel jaw clamps. There’s no need to put masking tape on the beam and, because the jaws are parallel to each other, there’s no need to clamp from below and above. You’ll find parallel jaw clamps at woodworking specialty stores, from a variety of manufacturers. A warning, these clamps aren’t inexpensive, but they make clamping panels (and doors) so much easier, they’re worth the price.
Why Alternate Faces on the Jointer?
When setting up the jointer your goal is to make the fence perfectly perpendicular to the table. That’s a great goal, but it doesn’t always happen. If the fence is off a little you’ll joint a slight angle onto the edges of your pieces.
 In this picture the jointed boards are lying on a table with the face that was against the fence down on both boards. You can see that because of the angled edge the joint won’t close unless I rock one of the boards up off the table. That’s fine if you’re making a barrel, but no good for panels.
 These are the same two boards, with one board flipped over. Now the angled edges produced by the jointer complement each other, allowing the glue up to be flat.
If you know that your jointer fence is perfectly perpendicular you can ignore this aspect of the panel sequence.
Photos by Author
Share tips, start a discussion or ask other students a question. If you have a question for an expert, please click here.
Already a member?
One Response to “Gluing Up Panels”
I want to talk about what it takes to get a panel glued up and put together. And here's the reason why. This kind of drives me nuts, in all honesty. I see a lot of misinformation out there. I get a lot of questions from people about how they should do this.
And they're proposing methods for this that I think are just not necessary. So, let's have a look at stuff like how you compose the panel? How much glue do you use? Do you need biscuits in the joints? Just the general mechanics of making this work and work well.
So first thing, I've got boards here that are ready to go. Ready to go means I've already joined to the edges. Now I know that they're good because when I slide edges together and I hold them together with hand pressure, like this seam right here, it should be completely gap free. If there are gaps in here now, don't trick yourself into thinking that if I put enough glue and clamp pressure on this, I can squeeze it closed. You don't want to do that.
You should be able to close it with hand pressure and it's gonna be fine. If it's gappy now, you gotta go back to the jointer or hand plane or whatever you used, and rework that joint. You gotta get it until they close by themselves. Next thing, I've got three boards here. What am I after?
Well, you're always gonna glue up a slab that's larger than what you need. Don't try to hit your final dimension with the glue up. Glue it up oversize, cut it to final size when you're done. It's a good idea on a real big glue up, like if I'm doing something like a big table, I'm gonna have more boards ready than what I really need to use for this. And the reason for that is that my next step is to start manipulating these and looking for what kind of match do I want to make this look as seamless as possible?
And it's possible these three boards won't give me that match. So I might need a fourth or fifth to swap in here so I can get the look I want. Look I want, here's what I'm after. Look at the grain on this edge. It runs pretty straight.
And look at the grain on this edge and how wild that is. If I take those two and put them together, guess what? There's a seam right there where I glued those boards together. If I take these two and I put them together, look at how nice a match that grain is for that grain. So when I do that, the grain is naturally flowing from this board to this board.
So I'm matching straight grain to straight grain, wild grain to wild grain, in order to make this look like it isn't three boards that were glued together, to try to get it to look where it's one big board. The other thing is color match. This is red oak. Color match with these boards is naturally pretty good. I'm happy with that seam.
Let's look at this one where the grain is a little wilder. That's not bad. Look at how nicely these come together here. Or should I do this? That's, I like that a little better maybe.
Or should I do this? Or should I do this? So you're just gonna keep manipulating the boards until you get what you want. And I think of those, I think I like this one the best. Now, this has only three boards so it's easy to figure out, remember what's going on here.
On a more extensive glue up with more pieces, make sure you mark them. Marking is easy. That seam gets a one. That seam gets a two, three, four, all the way down. So once I start handling these boards, I know I'm gonna put them back together the way that I want them to go.
Next thing is, do I need biscuits in here? Absolutely not. If we have good joints, which we do, when we get glue in here and we close this, that joint is gonna be stronger than the surrounding wood. And the reason for putting biscuits or dominoes or something in here would be, if you want to use those to help keep the top faces registered, to help keep them even, that's the only reason to add them. But from a strength perspective, you absolutely do not need to put biscuits or dominoes or anything in here.
Keeping them aligned. That's gonna buy us some, or save you maybe, some sanding or planing time later, because the better they're aligned at glue up, the easier it's gonna be to get this flat. If you do use biscuits or dominoes, watch where you locate them out toward the end of the board because what we don't want is to cut this to length and suddenly we're exposing one of those fastening devices, one of those loose tenons. All right, how much glue? Let's look at an edge.
You only need to glue one edge, of the two, of the pair. What we're looking for is an opaque coating of glue. So think of it like painting a wall. When you're painting a wall, you want to cover the wall, you want to cover the previous color. See right here, how I can't see the wood grain through that glue anymore.
That's what I want. I'm actually a little heavy down here. So I'm gonna take some of that and go there. And if you're heavy on this one, which I am a little, I'm just gonna put it on my paper. Bloop.
Bloop For this size glue up, two clamps are gonna work great. Plenty of pressure. Starting on one clamp, I'm gonna feel these boards for level, just check the faces. Work my way down to the next one. And we're done.
Now, squeeze out. Here's my idea with this squeeze out. I'm gonna leave that sit for 15 or 20 minutes. In 15 or 20 minutes it's gonna get rubbery and I'm gonna be able to slice it right off the surface with a chisel or a putty knife. If you go too soon, it's gonna be too liquidy, and instead of slicing it off, you're gonna smear it.
If you go too late, then it's gonna get too hard. So you gotta watch it pretty closely. The time is gonna change based on conditions in your shop, how dry it is. Yellow glue dries by evaporation. So if it's real hot, real dry, 20 minutes might be too long.
Another thing, maybe I need this bench for something else while this glue is drying. Don't do this with this panel. Do this with this panel. In this configuration, that squeeze out, you can already see it doing it, is gonna run down the seam. And that makes it easy to deal with.
If I turn it the other way, the squeeze out starts running across the face and I have way more squeeze out to deal with. So there are some good tips for gluing up panels. Pay attention to that recipe and it's gonna help you get good panels every time you do an edge to edge.

It is mentionned in the Description tab : "You do not need to alternate growth rings, provided your material has been properly dried". The thing I do not get is this : in my mind, even if the material has been properly dried, the fact that my shop is not climate controlled (temperature, %RH), the material will gain in humidity if the humidity rate in my shop is higher than the one of the material (provided the material stays longer enough in the shop, that is almost always the case). So the orientation of the growth rings would make a difference. Thank you explaining me why it not as I think of it!