George Vondriska

Build a Tool Chest Session 4: Trays and Trimming

George Vondriska
Duration:   51  mins

Description

A single point fence makes short work of resawing the thin parts for the tray cleats. Making the trays involves getting the parts accurately cut to size, measuring directly from the chest. Then we’ll lay out a through dovetail that will be cut using the bandsaw, along with hand tools.

While glue is drying on the assembled trays we can clean up the dovetails on the chest. We’ll show you how to do this a flush trim router bit, and with a block plane.

Share tips, start a discussion or ask other students a question. If you have a question for the instructor, please click here.

Make a comment:
characters remaining

No Responses to “Build a Tool Chest Session 4: Trays and Trimming”

No Comments

When they're ready to install into the tool chest, the cleats for the trays are going to look like this. We need a lower ledge that the larger tray sits on. And then the top of the cleat itself creates an upper ledge for the smaller tray. Comes out of this is, we need some thin stack in order to make this. One approach would be we could take our three-quarter inch stack, send it through the planer until we end up with a quarter inch material we need for our cleats.

Kind of wasteful, half an inch of wood is going to go into my dust collector. Alternatively, we can do a re-saw, and we can re-saw this down to about three eights of an inch, then plane it. And from one board, we can get both cleats. When you get your board ready, your rough blank for this, it should be wide enough that we can get the main body of the cleat, plus the lower ledge all out of one board. Then we'll rip the narrow part we need out later.

So here's where we're going. Bandsaw is a great way to do this. Bandsaws have really thin blades, so there's going to be very little kerf, very little waste from this. It's a great way to send a board through vertically, like we're about to do. Doing a board this wide in the absence of any kind of fence, not so great.

Because this is going to have a tendency to be tippy. Because we're only cutting one board, I'm going to show you a really easy way to do this really fast. It involves what's called a single point contact re-saw fence, very simple to make for yourself. What we've got is a base and a vertical. They have to be 90 degrees to each other.

Then there's a cleat here, a gusset that keeps them at 90 degrees. On the front, the single point contact part is a half round. So the way I did this was I used a three-eighths router bit on three quarter inch stock, a three-eighths round over, rounded over and rounded over on a nice wide board. Then I went back and sawed it off, just this edge, to give me this bullnose piece that creates the single point contact for my jig, and now for my band side. What this is going to do is give us something that we can lean on as we're making the cut to make sure that we stay straight, that we don't get tippy.

In order to do this, we need a line to follow. So kind of the downside to the single point re-saw operation is that we have to mark every piece we're going to cut. Because we're only doing one, that's not too big a deal. The way I do my marking is use my pencil and finger like a marking gauge, and I'm trying to get the tip out here into approximately the center. Doesn't have to be perfect.

Make a line, keep your finger and pencil oriented the same, make a line. And what this tells me, because I'm equal distance from face to line and face to line, is that this area is the center of my board. If you're not comfortable doing that with your finger, you could use a combination square. You could use a marking gauge. There are a variety of other ways to do this.

Bottom line is, we need a line. Now I'm going to use the layout I just did to locate my fence. By contacting the fence, bringing my board up to the bandsaw blade, and what I'm eyeballing here is I'm allowing the bandsaw blade to come in right into this center area between those two lines, right on the center on my board. We've got a little bit of extra wood here. So if you miss middle by just a little bit, that's going to be okay.

One thing that's real important about your single point fence, notice that I'm touching the fence before I contact the blade. That means the single point is in front of the teeth, not behind them. So this way I can get on the fence before I start the cut, that's my position. Next thing to do is to clamp this to a bandsaw table. Here's a tip for you, clamping stuff to bandsaw tables and drill press tables can be really difficult to do, because there's all these webs under the cast iron.

What I did here is I measured to produce a short cleat that will fit under the webs. And I use double face tape to fasten it to the pad on the clamp. So now that can go under the table, it's spanning from web top to web top underneath. I'm just going to get snug initially, so that I can come back and check my work. Shifted just a little bit.

That's much better. We can tighten this down. Now when you make this cut, you'll probably find that you have to steer just a little bit, meaning you might have to guide this. What I'm doing with my right fingers here is I'm holding that against that fence. That's its purpose in life while I make the cut.

Blade selection is important. I've got a half inch, four tooth per inch bandsaw blade and the saw, nice and wide, so it's rigid so it can do the re-saw. Very few teeth, four teeth per inch. So it can clear the dust out of the cut, and effectively do what we're asking it to do. Notice with my hand position that as I got toward the end of the cut, I switched both hands.

So I was pulling instead of pushing. That keeps me out of the line of cut of the saw blade. I sure don't want my hands here where the blade is going to exit the cut on the backside. Throughout the cut, keeping lateral pressure against that single point contact. That gives us our two boards.

Now just an interesting thing that it doesn't affect what we're doing today, but we should talk about it while we're here. Is that when we cut two boards from a single board like this, we get what's called a bookmatch, meaning that I take these two, open them up like this. Bookmatch meaning the grain is perfectly centered around the seams. So if I glued these together, I have a mirror image grain pattern left and right. Really, really cool.

From here, off to the planer. I'm going to plane them down to a quarter inch thickness. That's my final dimension. Then we'll be ready to continue to process them to make the cleats out of them. I'm really not too concerned about exactly how thick they are.

I am concerned about getting all the bandsaw marks off. So if you find all the saw marks are gone, but they're a little bit over a quarter inch, that's just fine. We'll compensate for that when we make the trays. That takes care of the re-saw step of getting our tray cleats ready. After your re-saw and planer work is done on these parts for the tray cleats, take that wide piece to the table saw and rip a one inch piece that's going to go back on here.

Remember we're starting with stuff that's too wide, because that's easier to deal with than a bunch of little parts. Then we're going to do this. At this step of the game here, this overall width should still be more than what the cut list calls for. We'll cut this to final size further down the road when we actually have a tray ready. This step is very simple.

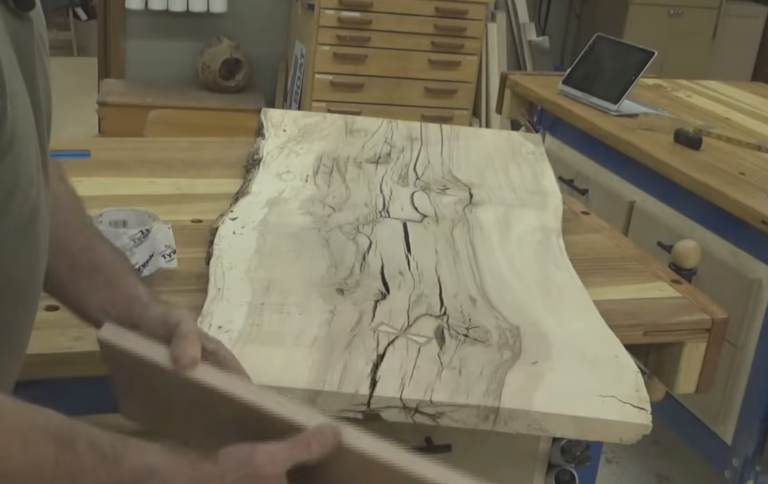
I already did it to that tray cleat assembly. All we need is a little bit of glue, and this cleat for the large tray is going to get glued on even with the bottom. Now, if you look at this piece that I'm about to glue to, it's got a little bit of a split knit. It's one of the things I've run into with the reclaimed wood every once in a while. We've talked about it being brittle, and I'm not worried about that because I'm going to bridge that split with this piece.

And I'm intentionally gluing this here so that I do that. I wouldn't want that up here. And then if I do this right, make contact with the inside corner first and then roll it this way, that tends to push the squeeze out toward the bottom. Spring clamps are plenty to hold this in place, flush with the bottom edge. Now what's nice about that contacting the inside corner and then rolling it down.

You can see it on this one even more is my squeeze out ends up down in the bottom edge instead of up in the inside corner, where I'd have to go back and clean it up later. So that takes care of assembly on those. Leave them wide for now, like I said. We'll cut them to final width right before they, and length right before they go into the toolbox. Now one way to get narrow parts is re-sawing, and that's a part, an aspect of woodworking that you learn when we make the tray cleats.

In this case, what I'm after is half inch thick material for the trays. One approach would be take our three-quarter inch stock to the planer, simply plane it down to half inch. Another approach would be re-saw on the bandsaw, slightly oversize, then plane it. What I wanted to show you here is just another method, which is to cut this to size across its thickness using the table saw. Most table saws will go up to a three inch maximum height capacity, so even our wider tray rails can be cut this way.

Either way, this is unlike the cleats for the trays where we're getting two for one out of one piece. With that re-saw operation, we're still turning much of this piece into sawdust. But what I find is that it's faster if I can come here and make this cut and then go to the planer, I'm only skinning off a sixteenth of an inch of wood instead of a quarter inch of wood to turn this from three quarter to half. In other words, I'm ripping this to nine sixteenths. These two parts are done, I'm going to do this one next.

Now when you make up your tray parts, here's the easiest way to do this. Rip them so that they're a sixteenth of an inch oversize, and this applies to the long rails and the ends. Then send all of those parts on edge through the planer to bring them down to their final size. That's a very easy and safe way to get them all uniform in width, which is really important, and remove all the saw marks. Another application where consistency is more important than accuracy, really want to make sure the two long rails and the two ends are identical in width, and that treatment of cutting oversize, sending them on edge through the planer is a great way to do that.

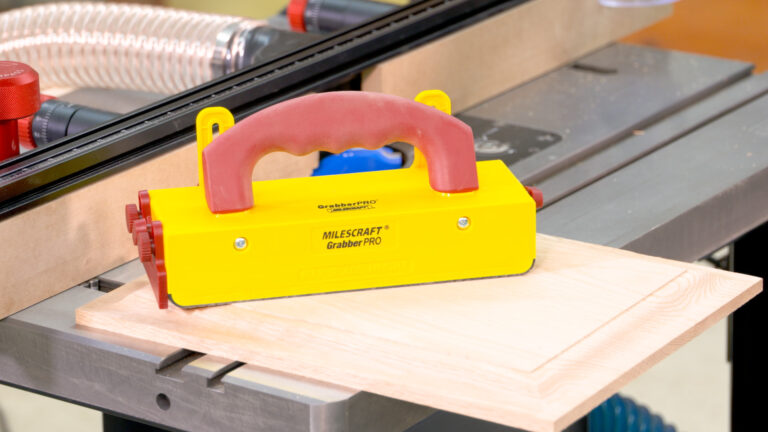
I'm going to raise my saw blade, cut that last one. And we're pretty far along on our prep. Notice that I'm using my magnetic feather board again. And what we want to do with that is pay attention to placement. Notice that the feather board is in front of the blade, not next to the blade.

If it's next to the blade, then the off cut is going to get pushed against the blade, and that's not safe. Notice too that because of the proximity between the fence and the blade, the overarm basket came off. The guard came off, but we still have the riving knife in place. If you don't have a riving knife for your table saw, you should not do this approach without the basket on. We either have the guard on or the riving knife.

If you can't have one of those two, you should be doing all of this work at the planer or the bandsaw. Check my height, that looks good. One more of those wide rails to cut, And I've got my tray rails narrowed down here at the table saw. Moving forward with our trays, we're going to do some more dovetailing, but we're not going to do it with a router and a jig. We're going to do it on the bandsaw.

Now, couple things with this, you could do the rabbit joint I've already taught you. You could do the locking joint I've already taught you. You could do the dovetail I'm about to teach you. Variety of ways that you can put this corner together, so you've got options. What's cool about the bandsaw on dovetail is it's got a real hand cut look to it, but once you master the process, pretty simple to do.

Does add a nice touch to the tool chest if you've dovetailed the outside corners to also dovetail the tray corners. First thing we have to do is get parts cut to size. Now, this is a great example in your woodworking where it makes a lot more sense to extract the dimensions rather than follow a cut list. So turning the clock way back, we've got a cut list for the project. What I don't want you to do is start out by just cutting everything on that cut list to the size we've provided.

Because all it takes is one little mistake along the way, and those parts aren't going to play nice together. This is a great example. What we're asking these lower tray components to do is to fit, once our cleats are cut to size, from the face of that tray cleat to the face of that tray cleat. Now a couple of things could happen here. That dimension is going to depend on the thickness of your box parts.

It's going to depend on how long you cut your front and your back. It's going to depend on how thick you made your cleats. Lots of variation there. So like I said, any little mistake along the way, and things could go South. So what makes the most sense here is to gang up your cleats back to back, clamp them in.

What I'm after here is the inside dimension of the box, minus two of these. So there's two of those. There's an end on my cleat. That's already been cut square, I know that because I marked it with an X. Then once I find my pencil, I mark the other end so it's just inside the side of the box.

Now a good way to get good accuracy for that is to add a square to this equation. When I come up off the side of the box, if I mark it right there, that's the edge of the box. I want to be inside that by a sixteenth to an eighth of an inch. So there's some wiggle room between the tray and the cleats that we're going to put in there. When you cut these parts, it's very important that they're identical in length.

So make sure that you cut them in a pad, cut them together. And that these ends are perfectly aligned when you make that cut. I'm going to cut mine, then we'll come back and look at a couple more steps here, including getting our work started on the bandsaw. Your upper tray, do the exact same thing. The difference is your upper tray goes just from inside of the box to inside of the box.

So we don't have to have the cleat hanging in there in order to make that happen. In order to do our layout, here's the way this is going to work. We're going to cut pins and sockets into the ends of the trays. That's going to result in tails in the rails of the trays. So what we need to do, first step, is get the thickness of our rail transferred to that end.

Easy way to do that is simply by holding them flush. Plus a little bit, remember how I keep over and over and over again, I talk about allowing the end grain of the mating component to project past the face grain. So we're going to mark that, square it off. Repeat for this end. I've already got my mark on there.

And then repeat for your other end. Next thing is layout. Now what's neat about this is that our layout isn't controlled by a router jig, a template, it's controlled by us so we can create the layout that we like. Here's what I'm going to do on mine. Going to mark one quarter inch in.

This would be a half pin on the outside. Going to repeat that. Now notice that I'm not measuring over and over again. I'm using an adjustable square set at a quarter inch. This makes sure that if I miss that quarter inch a little bit, it doesn't really matter because the layout is exactly the same on every corner.

I'm going to reset to an inch and an eighth. Second verse, same as the first. Next thing we need is to use those layout lines, and square down the face like this. And this. What we've got going here is half pin, socket, that's waste wood.

Full pin, socket, half pin, repeat. Same process to the other end. Now we're ready to move toward the bandsaw. So a couple of things here, we need to cut an angle. We need to have a slope on our dovetail, otherwise it's not a slope, it's a finger joint.

That's going to come from using this very simple jig. The way this is made, it's a ramp. There's a wedge in here that's seven inches long, one inch high. That gives me the angle I need to put my piece at in order to make the cuts for the dovetails. This comes from lots and lots and lots of years, not on my part, but on many peoples' part of making dovetails.

Two common slopes are used. One in six, one in eight. I split the difference because I'm lazy and didn't want to make two jigs, so I did one in seven. We've got a ledge here with a stop on it, so the material can sit up against that. The benefit to this is that now when I have it positioned this way, and I make a cut, I'm going to get that angle, make a cut, get this angle.

Then we're going to turn the jig around that angles it in the opposite direction. Cut the other two sides of the socket. Blade selection is important. I'm using an eighth inch, 14 tooth per inch blade. Very fine cut, we're not expecting to do any chisel work, any corrective work after we cut the joint.

So if we use too aggressive a blade, the surface finish inside there won't be good. And we'd have to clean that up with a chisel or something that could affect our fit. Eighth inch, we want a small blade because in just a little bit, you'll see I have to be able to get in turn in order to complete the cut. If it's too big a blade, it's not going to make the turn. So the key for you at this stage is once we start cutting that socket line, stay nice and straight.

Use your fingers, not your arms, to guide this. It's a lot like using the router on the dovetail jig. Cut as straight as you can, stop at the baseline. When I'm angled down to the right, I'm going to cut the line on the right, meaning the right side of the socket. Then we're going to angle down to the left, cut the line on the left side of the socket.

Ready? It's pretty cool. Next thing, we've got to get some more waste out of there. So here's the way this will work. We're done with the sled, we're done with our bandsaw ramp.

Now what we need to do is come in. I'm going to come to this inside corner. And when I do, I have to lift just a little bit in order to finish the cut, because the blade is square to the table. The cut is at an angle. Then I'm gonna have to turn this around, come back from the other way, and do the same thing.

Can lower my guard a little bit for this step. Come to the inside corner, roll it up a little. Out it pops. Back the other way, same thing. This is a race that goes to the slow and steady, not the swift.

I am going to cut my other end. It's going to look exactly like this when it's done. Then I'll show you how to get tails that are a perfect fit for those pins and sockets. Here's where the rubber meets the road on this process. Cutting the pins and sockets is a critical step.

We want to make sure that that's right, but getting the tails to fit in those sockets is where it really is going to all come together. So here's what I've got happening already on my rail. I marked out the thickness of the mating piece, just like we did earlier. On my pencil, I sharpened that as much as I could on a pencil sharpener. Next thing I'm going to do is roll that pencil across some sandpaper.

I want that to just be needle sharp so it makes a very distinct line, and laying out all the dovetails that are required for our two trays. I'm going to do this a bunch of times. I want to make sure that pencil stays nice and sharp. The sockets are going to become location specific. In other words, the manner in which I cut this end may not be exactly the same as this end.

So notice that there's already an "A" here, because I've already done this work to another end of another rail. When I mark this out, I want to make sure I put a letter on here so it goes together. On the back, I'm making the back of the end even with my pencil line, then hold that in place so that the edges are even. I'm going to reconfirm my back position, and then very carefully trace the pins onto the face of the rail. That's better.

This is our waste. Here's our tail, waste, tail, waste. When I cut this line, what I'm going to try to do is take away half the pencil line. Sounds crazy, but that's what's going to give you a good fit between the tails and the sockets. It takes a little bit of practice.

The very first time you're doing this technique, I'd recommend you do it on scrap, not on the parts for your tool chest. Then when you get comfortable with it, you can come back and do the tool chest. Here we go. I want to make sure I have a complete line here. If you're using this technique on short pieces, you could do everything on the bandsaw.

At this step we could cut that waste out. We could come in and curve and get this waste out, and turn this way to finish it. With the length of these rails, no can do, that's okay. Gives me the opportunity to teach you another technique. That's going to happen at the work bench.

So I'm going to wrap up cutting the rest of my tails. Then we're going to head for the bench and do some handsaw and chisel work. Let's wrap up our tails here at the bench. We're going to do things a little bit differently than the work we were doing on the bandsaw earlier. We're going to finish this off with hand tools, handsaw and a bench chisel.

So let's start with the saw. Take your time doing this work. It's like the cuts we've done on the bandsaw. Goes to the slow and steady, not the fast. First step is we want to take the baseline that's here on the face of our material and transfer that across the edge.

This is a really cool part of this project, because it gives you a little bit of feel for using hand tools. Just like if we were doing the whole dovetail by hand. Now when I make this cut, I'm using a Japanese pull saw. Very, very fine tooth. It's going to cut on the pull stroke.

What I'll be doing is following the line on the face, and the line on the edge at the same time, cutting on the waste side of the line. I find having my finger up here on top of the saw acts like a pointer, helps me stay nice and straight. I'm watching both of these lines, cutting on an angle until I hit the bandsaw cut down here, and the corner of the board back here. And then I'll level out, let the saw follow that kerf until that happens. Flip.

This is an occasion where I don't know, I guess we could rig something up on some other power tool to do this, but honestly it's just easier and faster to pull out the hand tools for this than it is to try to rig something on a power tool. Okay, once I've hit the bandsaw cut and the corner, start leveling the saw out, follow the kerf. Now the hand saw doesn't help us at all with the waste area in between the tails. That's where we're going to use a chisel. And we want the work over the bench, not over space, cause it'll bounce too much out here.

Going to use two different size chisels. I'm going to use a wider chisel in order to do a down cut on the baseline, a narrower chisel to come in this way. Notice that the bevel of the chisel is facing the waste side of the cut. That's the way you'll always use a chisel. Just a very light tap down.

A very light tap horizontally. We're not looking to go all the way through from this face. We're only going to go halfway. I need the narrow chisel here, because it has to fit between those tails. Make sure that you're not prying with a chisel.

We're not treating this like a paint can opener, because that's a good way to break your chisel. We want to just let the material pop out. Now what happened is when I started, I was holding the chisel perpendicular to the face. Now that I've got a little bit of penetration in that direction, I'm going to pull the handle of the chisel toward the end grain. I'm undercutting the area in the center of that socket.

A little more aggressive with my tap, because I'm past the first part of the baseline. We're about halfway, so we'll flip. Gentle tap on the baseline just to get started. Still perpendicular for cut number two. So this does mean, and it's very faint here, but I can see it transferring that baseline onto the back face of your tailboard as well.

Now that I've got a shoulder established I can get a little more aggressive, and I'm angling the chisel to produce the undercut. That might've finished us, let's see. Not quite. Okay. Now that's a, let's see how I did.

Okay. It gives us a through dovetail, similar to what we did on the router jig. Now here's the deal, got to finish all the tails. When you assemble this joint, it's going to be the same assembly process that we used on the box. Glue in the sockets, glue up the pins, clamp everything together.

I've got one of these trays already done. I'm going to bring that over here, and talk about putting the bottom on it. Next step is gluing the bottoms on the trays. From what you already know about re-sawing, that's a great way, re-sawing, to make these tray bottoms, because we need quarter inch pieces. So why send all that material up the dust shoot if we can re-saw them from three quarter inch stack?

So here's what I've done. Glued together the small tray, let the glue dry on the dovetails, cut the bottom to size. And then I'm very close to flipping it over and gluing everything together here up on these blocks, because that'll allow me to just leave it sitting here whilst I do this. Keeping my outside corners aligned. First clamps are the hardest, because it's kind of slip sliding around in the glue.

Then once I've got the corners fixed, I get some additional clamps out here. And here. And that's going to take care of this. Same thing to your other tray. Now, once we have this done, prior to what we gain is now we know exactly how deep the trays are.

We're going to come back to that when we start working with the cleats in a little bit to get those installed. So glue on the inside corner here, remember our trick for letting it get rubbery? When that glue that's forming around the inside is just a little bit caulk like, going to slice it out of there with a chisel. That's going to take care of our tray assembly. Next step is cleaning up corners inside and out.

So on the outside, what I'm talking about are the projections we have where the end grain is past the face grain. Going to give you two ways to deal with this. One would be a low angle block plane. Low angle is important here, because we don't want to tear this up as we go. Very, very light setting on the block plane.

What I'm going to do is just scooch along here, working on the end grain of that pin. From a technique perspective, that one's done. Notice that I'm not coming straight in, notice that I'm not working out because we don't want this to chip on the outside. So I am cutting toward the inside of the box, but I'm skirting across the end grain with a skewing cut. That makes it easier for me to make the cut and it results in a better job as well.

Now while we're on this side, I'm going to take advantage of some gapicity here. And one of the things that people say about woodworking is a difference between the pros and the amateurs, is the pros knowing how to cover their mistakes. And I don't completely disagree with that. Here's an example. I've got a couple of gaps in my joint.

So right here on this pin, let's actually work on this one here, because it's a little gappier. So we look at that and say, oh, there's a gap there. I'm not too happy with that. Couple things. A lot of that's going to get covered with my base mold in just a bit, but let's say it's not.

What if that's up here? What are we going to do? Here's a trick that works just great for cleaning this up. Standard, yellow glue, same stuff we put the box together with. And I'm going to squirt it into that gap, and get a little before and after picture going in your head here.

This is before. And I want to push it down in there with my finger and then get the excess off the surface. Going to put the excess over here, because I got another gap there. Now while the glue is still wet, 120 grit sandpaper on my sanding block. You ready for the after?

Okay, now you come back and look at those same pins. And what happens is the sawdust we're making from the sanding process mixes with the glue that we left in the joint. Does a great job of filling those tiny, tiny, tiny little spots just to make them invisible. Dovetails especially, this is something I find I have to do every once in a while. It's a great trick to have in your back pocket.

Now let's say you're not a hand plane kind of a person, and you're looking for another way to do this, and I've got one for you. So we're going to do this over here, because I want to work on a side where I haven't cleaned up the end grain yet. So in this corner I've done nothing. We've got end grain proud this way and this way. We're going to fix everything with a router in this case.

One of the things I had to do was make this guy. If I just allow the router base to ride along here, it's going to seesaw over all of those pins that are sticking out, that's no good. So this simple thing bridges those, gives me a flat surface for the router to ride on so I can cut on the other surface. All we have to do is fasten that down, going to do that with double face tape, very handy thing to have in your shop. Lots of applications for this stuff.

What's nice about this, the double faced tape, is then I don't have to worry about clamping this to my work. Plenty of holding power. My biggest problem with my guitar playing fingers is I never have nails. So it's hard for me to there we go, hard for me to get the paper started. Make sure I've got my teeth in between the pins.

And I'm set back just a little bit from the end grain, and then stick that down, because we're about to trim end grain off. Then we're going to use our friend, the flush trim bit, same bit that we used when we did our squaring cuts earlier. The trim is set deeply enough that it's going to go beyond the end grain that's sticking out, allowing us to flush trim these tails back to the side of the case. Now with my glue that I've got sticking out here that the flush trim didn't take off, I'll take that off with sanding. Then this can come off, turn this all 90 degrees.

When I flush trim the other side, I don't need this anymore. I only need to use this once, because now this side is nice and flat. The router will be able to just ride along this edge. When you do this side, when you do the sockets or the pins, I'm sorry. And you get to the last one, you're going to want to provide some support here.

You're going to want to clamp another board to it so that when the router bit comes along, it doesn't chip that out on you. Especially important on the top when you're cutting in that direction. So two approaches for your outside corners. One, hand plane. Two, router.

And then in either case, maybe a little glue and sanding to clean that up when you're all done and fill any tiny gaps you have. Now let's look at the masking tape on the inside. If you can, try to peel the two of these off together, and that gives you, I think, your best chance of getting the most glue out of there. Let's see how it goes. I'm going to help that one a little bit with a chisel.

Kind of walking it off of both walls at the same time. Little bit of glue residue in there, but it's so much better than it would have been without that tape. So next step will just be some gentle work with a chisel in order to cut out any of that remaining residue. And repeat the process on the three other corners. So get those corners taken care of.

It's nice to have those done before we get onto the subsequent steps in the project so that we can get exact dimensions off the outside of the box. I'm going to keep plugging away at mine here. You do the same with yours.

Get exclusive premium content! Sign up for a membership now!