 In the previous installment of this project, we constructed the horizontal stretchers complete with tenons. Now we will focus on building the drawer bank using plywood joined with biscuits. We will also assemble the cabinet in two stages to simplify this otherwise complex glue-up.
Drawer Bank
The bottom portion of the unit will house the drawers and serve as the bottom shelf for electronics gear. The perimeter of the box will be formed by pieces that were milled in previous steps (plywood rails on sides and rear, and hardwood face frame rails on the front). Now mill the top and bottom plywood panels which will be attached to the rails around the perimeter using biscuit joinery. (If you don’t have a biscuit joiner you can use a router for this as described in this article.)
Cut Top, Bottom and Drawer Divider Components
Use good veneer plywood for the top, but you can get away with lower quality material for the bottom if you would prefer since it won’t be visible. The drawer dividers are made by sandwiching two pieces of 1/2″ Baltic birch plywood together to make a single 1″ thick panel. This additional thickness enables the panel to support drawers and drawer hardware on each side of the panel.

Put a Great Edge on Your Plywood
To get a great edge on your plywood, follow Bruce Kieffer’s instructions on this video.
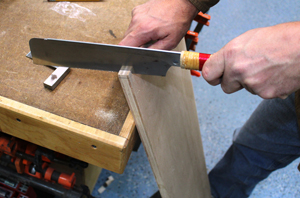
Cut Notches to Wrap Around Legs
Using a hand saw or band saw, cut 3/8″ x 3/8″ notches in each of the four corners of the top and bottom panels for the drawer bank. This will allow the panels to wrap around each leg.
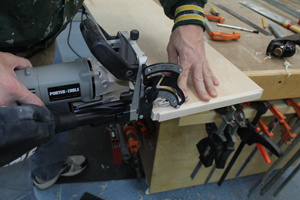
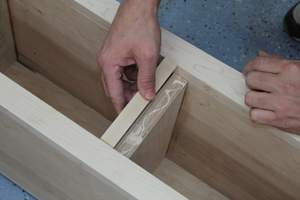
Mill Biscuit Slots
Position slots on sides and ends of the panels in the lower box, which will be used to attach these components to the lower side stretchers, face frame and lower rear stretcher. Biscuits are also used to attach the drawer dividers to the top and bottom panels of the lower carcase. Biscuit slots should also be milled on all edges of both the upper and lower panels of this assembly and their mating pieces, as we will use biscuits to attach this sub-assembly to the face frame, lower rear stretcher and lower side stretchers in the next assembly step. See the diagram for visual biscuit placement.
Assembly Time
I like to glue up projects in stages wherever possible, and this is a great example as it is a complex glue-up.
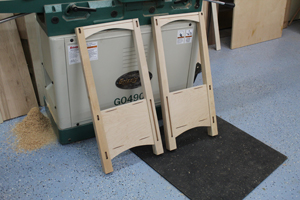
Sub-Assembly #1
Start by attaching side rails to the legs, and let the glue cure sufficiently before moving on to the next stage.

Use Your Scrap as Clamping Cauls
Use the tapered cutoffs to squarely clamp the sub-assembly. Place the tapered leg cutoffs between the clamp and the tapered leg to ensure even clamping pressure along the surface and enable you to get a good square sub-assembly.
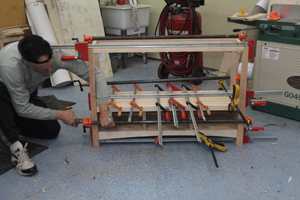
Assembly #2
This step brings the entire base assembly together. Attach the front and rear rails to the side assemblies constructed in sub-assembly #1, and also attach the box in sub-assembly #2 using biscuits. Be sure to use a glue with plenty of open time such as Titebond III for this assembly because there are many joints involved.
Vertical Face Frame Members
Measure the area of the exposed plywood portions of the drawer dividers and mill a small piece of your face frame material to cover this. Glue in place. You could use a pin nailer to hold this in position, or simply hold it in place until the glue grabs. I use Titebond I glue for this type of procedure as it grabs very quickly and then I can let go and let the glue cure.
Photos By Author

Share tips, start a discussion or ask other students a question. If you have a question for an expert, please click here.
Already a member?
No Responses to “Modern Media Cabinet Part 4: Drawer Bank Construction and Assembly”