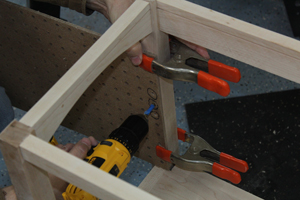
In the previous installment of this project, we completed the cabinet body. Now we will construct the top using edge joined solid wood, and the adjustable shelf using edge banded plywood.
Cut plywood as specified in cut list.
Be sure you get a good clean cut on each edge.

Edge band.
Using 1-1/2″ x 3/4″ hardwood, glue a strip on each exposed edge of plywood. No biscuits or brads are necessary; just glue and clamp the edging in place taking your time to position the strips flush with the top of the plywood.
Notch corners.
Using a band saw or hand saw, cut a 1-1/4 x 1-1/4″ notch from each corner of the shelf. This will allow it to wrap around the leg.
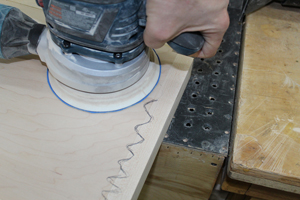
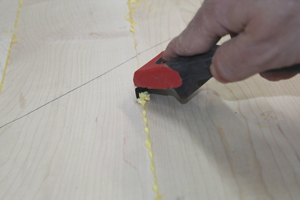
Sand or use a cabinet scraper to flush the surfaces.
In this picture I have drawn a squiggly line covering the glue joint, and when the line is gone the joint is perfectly flush.
Dado the bottom of the shelf.
Mill rabbets in the edge banding so that the bottom of the edge banding is flush with the bottom of the shelf, leaving only a 1/2″ thick portion of the edge banding remaining in its full 1-1/2″ height. This creates a channel in which the shelf pins can hide. I used my saw blade for this operation but a dado blade could be used as well.
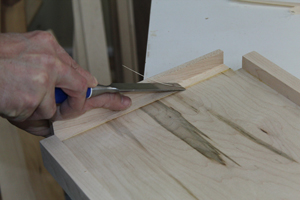
Clean up saw marks.
I used a chisel here but an aggressive grit sand paper would work as well.
Drill holes for adjustable shelf.
I used pegboard as a pattern and drilled 3 holes positioned in the approximate vertical center. I positioned the holes 3/8″ from the inside edges of the legs. I did this rather than centering the pins so that I could conceal the shelf pins underneath dados milled in the edge banding of the adjustable shelf.
Construct the top.
The top is a straightforward edge joined slab construction with a chamfered edge to lighten the appearance.
Rip boards to desired width.
For edge joined table tops I like to keep the individual board widths to a maximum of 4″ to 5″. With stable stock you can go wider, but any lumber distortion problem that you might experience will be magnified if wider stock is used. Mill enough boards so that you have an extra 1/2″ in length, and 3/4″ in width for your panel size.
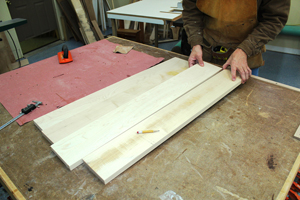
Layout boards to get best grain pattern.
Try flipping boards around until you find a sequence that provides the best overall grain pattern. Once you have finalized the sequence, mark the top of the boards with a V pattern that makes it easy to re-assemble in that order. Then, if necessary, run the boards through the jointer or use Dave Munkittrick’s technique for jointing with a router: Edge Joint on a Router Table. If your table saw is capable of producing gap free glue line joints then you can skip the additional jointing step, but if there are gaps that not be pulled out with just the slightest hand pressure then it is crucial that you joint the edges to avoid splitting in the future.
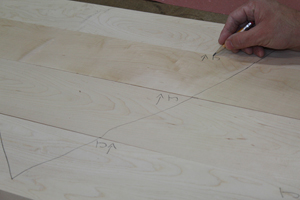
Mark for jointer fence.
If a jointer will be used, make a mark on each board in your panel to indicate which face will be placed next to the jointer’s fence. By alternating top and bottom faces in the process you will offset any unintended angle that the jointer’s fence might be positioned at, and your top will be flat even if your fence is not perfectly square.
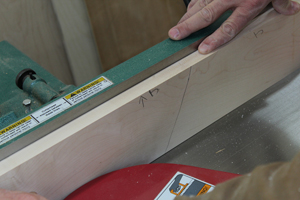
Joint boards.
Take care to ensure that the faces that you marked are placed against the jointer fence.
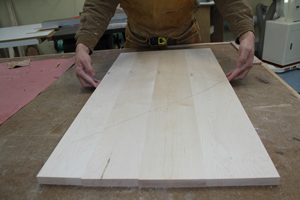
Test fit.
Light hand pressure should be all that’s required to pull boards together with gap free mating surfaces. If gaps persist, return offending pieces to the jointer.
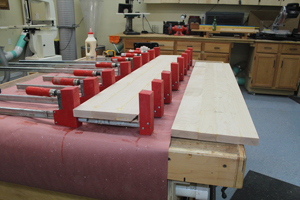
Glue up in stages.
I like to glue up table tops in multiple stages for two reasons. First, I can get better alignment of the board surfaces if I am focused on fewer joints, and second, if I keep the glue-up to less than 13″ wide it will fit through my planer which makes for much faster surfacing than sanding or hand planning alone. See Dave Munkittrick’s story for this and other neat tricks to stretch your planer’s capacity - Workaround: My Planer Isn’t Big Enough.
Scrape glue after 45 minutes or so.
After glue has set up sufficiently scrape off excess with a paint scraper or putty knife. This will make it easier to sand or plane the panel later. After scraping, you can cut the panel to its final dimensions of 18″ x 49″.

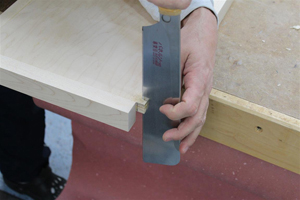
Chamfer the bottom edge of the table top.
I used a hand plane to mill a chamfer in the top, bringing the thickness to 1/2″ at the outside edge, and extend the taper back 2-1/2″ toward the center of the panel. I was surprised at how quickly the hand plane performed this task. Mark the lines indicating both dimensions, and use a hand plane (something in the #2 – #5 range will work best for this; I used a Bedrock #2 shown here). Plane the end grain first, then the long sides, as the end grain might tear out a bit on the sides and you can clean this up as you mill the chamfer on the long grain edge.
Photos By Author

Do you have plans for a table that will rise to a desired height for use? It could start as a fully collapsed table or the height of a coffee table and then rise to the max height of 30 inches? It would be especially useful to allow the top to tilt.