Applying veneer to your projects is a great and easy way to dress them up. But the real fun begins when you start book matching. Interesting and beautiful panels can be created by different book matched configurations.
So, what is book matching? Book matching is when two identical sheets of veneer are placed alongside each other and each is a mirror image of the other. There are lots of different ways to book match veneer, and in this article, I am going to show you how to get started with a simple two-way book match. I will also show you that you don't need any special tools to get started with veneering!
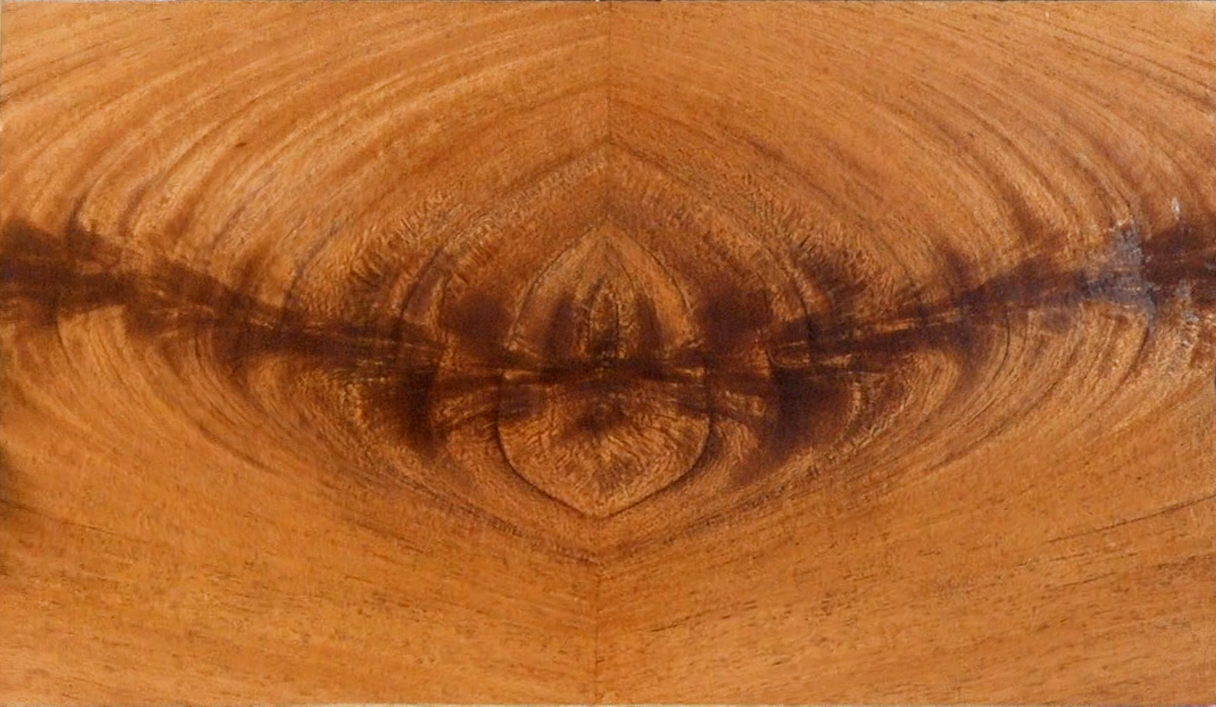
Book matching can be used for dramatic effect (such as in the photo above) or...
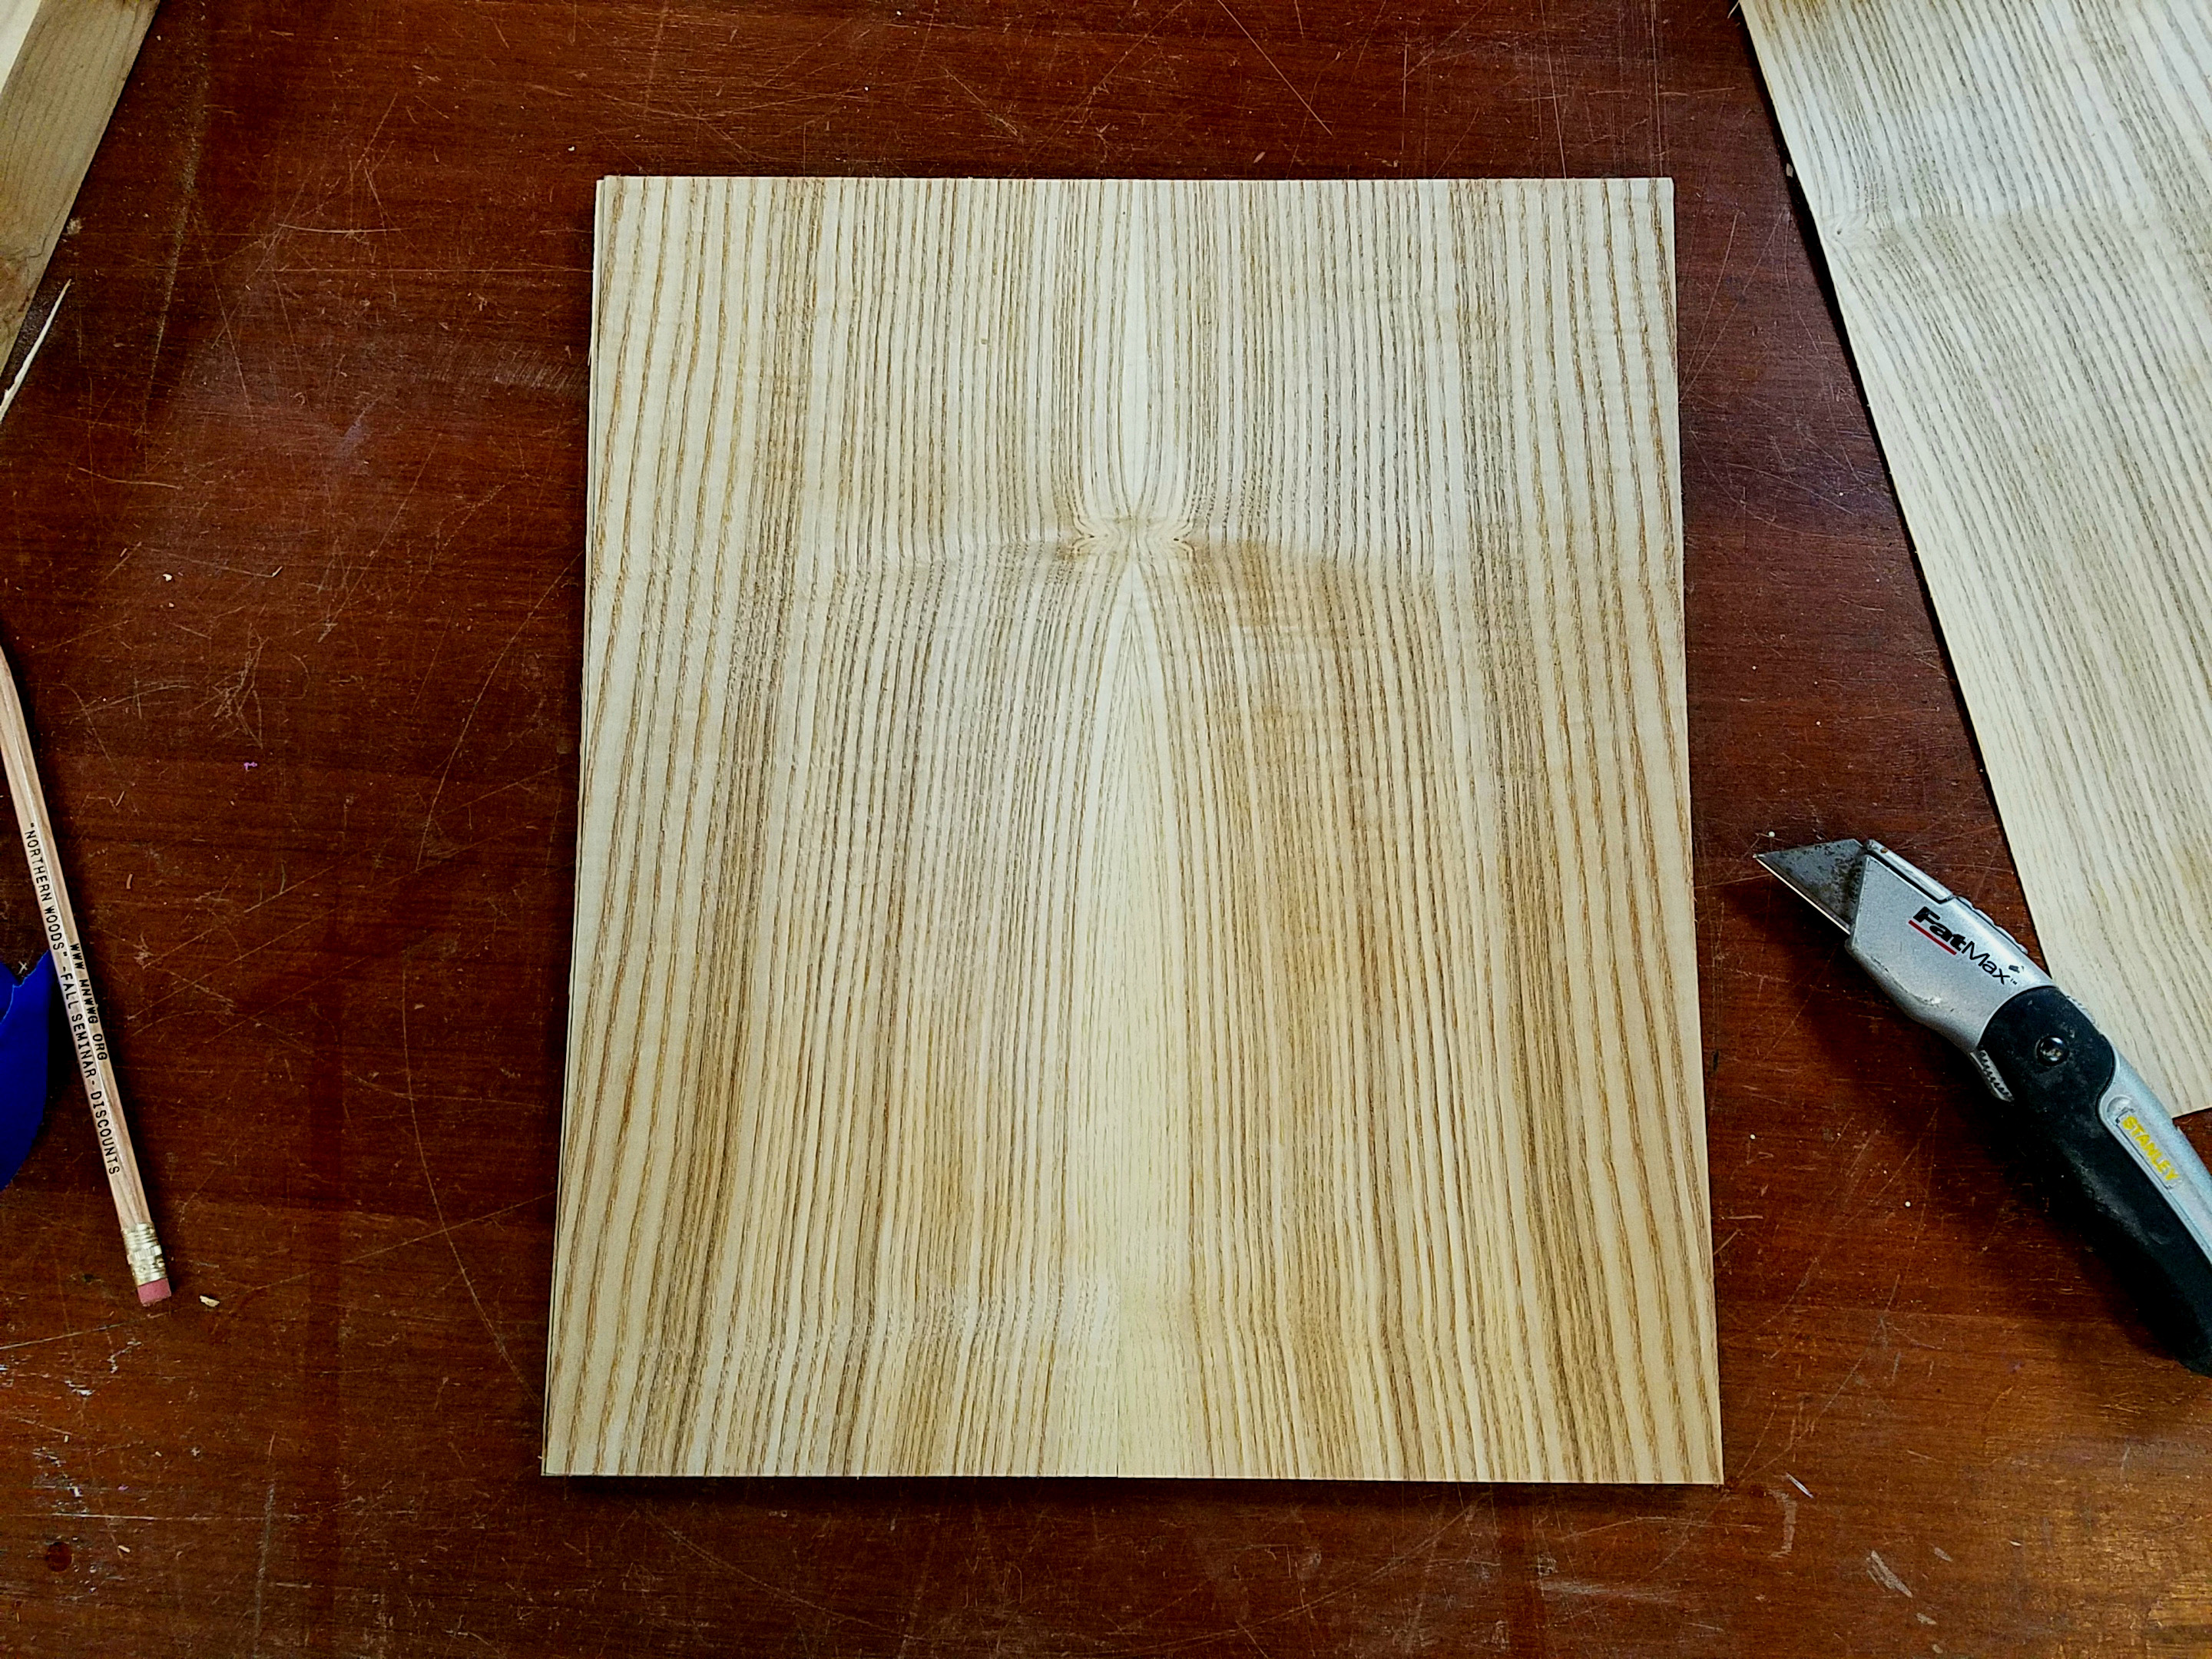
...to create a harmonious grain pattern like this book matched oak (above).
Choose your veneer
For this project I have selected some bold crotch mahogany veneer.
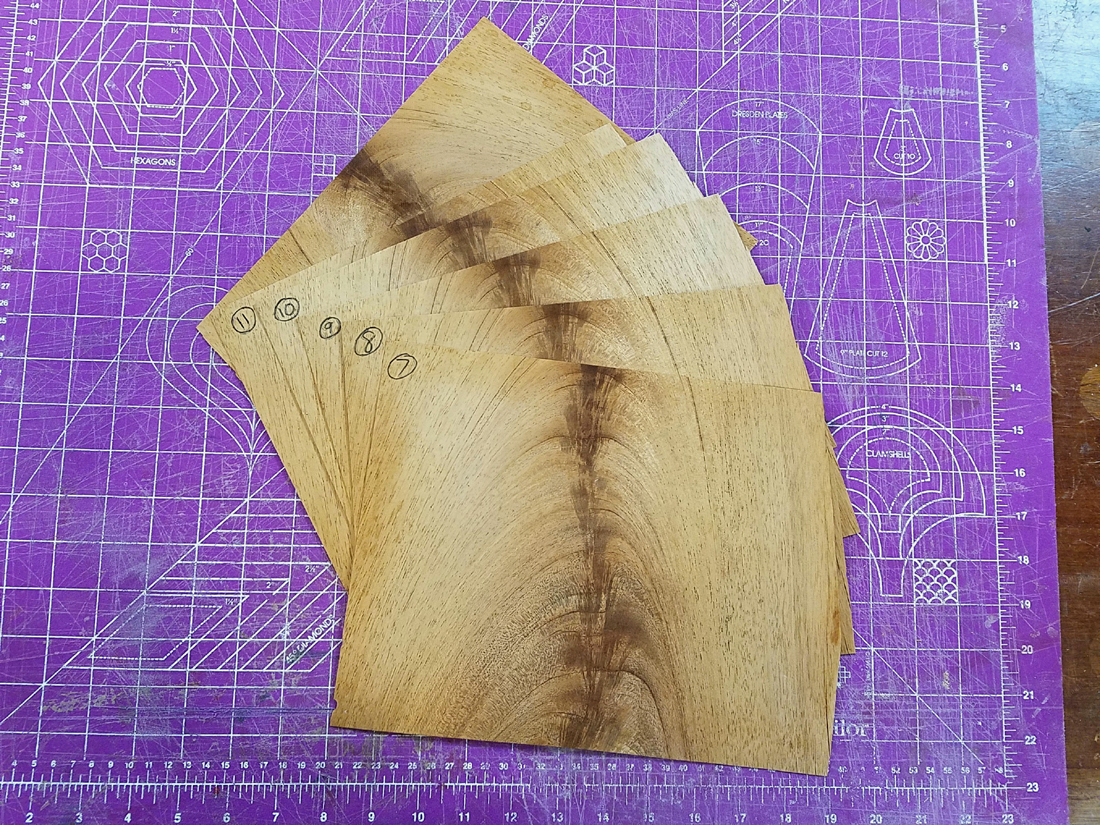
Tip: All reputable retailers (like Certainly Wood) sell veneer in the same sequence as it was cut from the log. It is a good idea to immediately number the sheets when you unpack a fresh bundle of veneer. This will make it easier to get a perfect match when you begin to work with it.
I plan to use this veneer in the top of a box, and I want the finished piece to be 8"x 14". Once the size is determined and the veneer has been selected, I will work with the veneer for a few minutes to decide exactly where I want these two sheets of veneer to match up.
See What You’re Getting
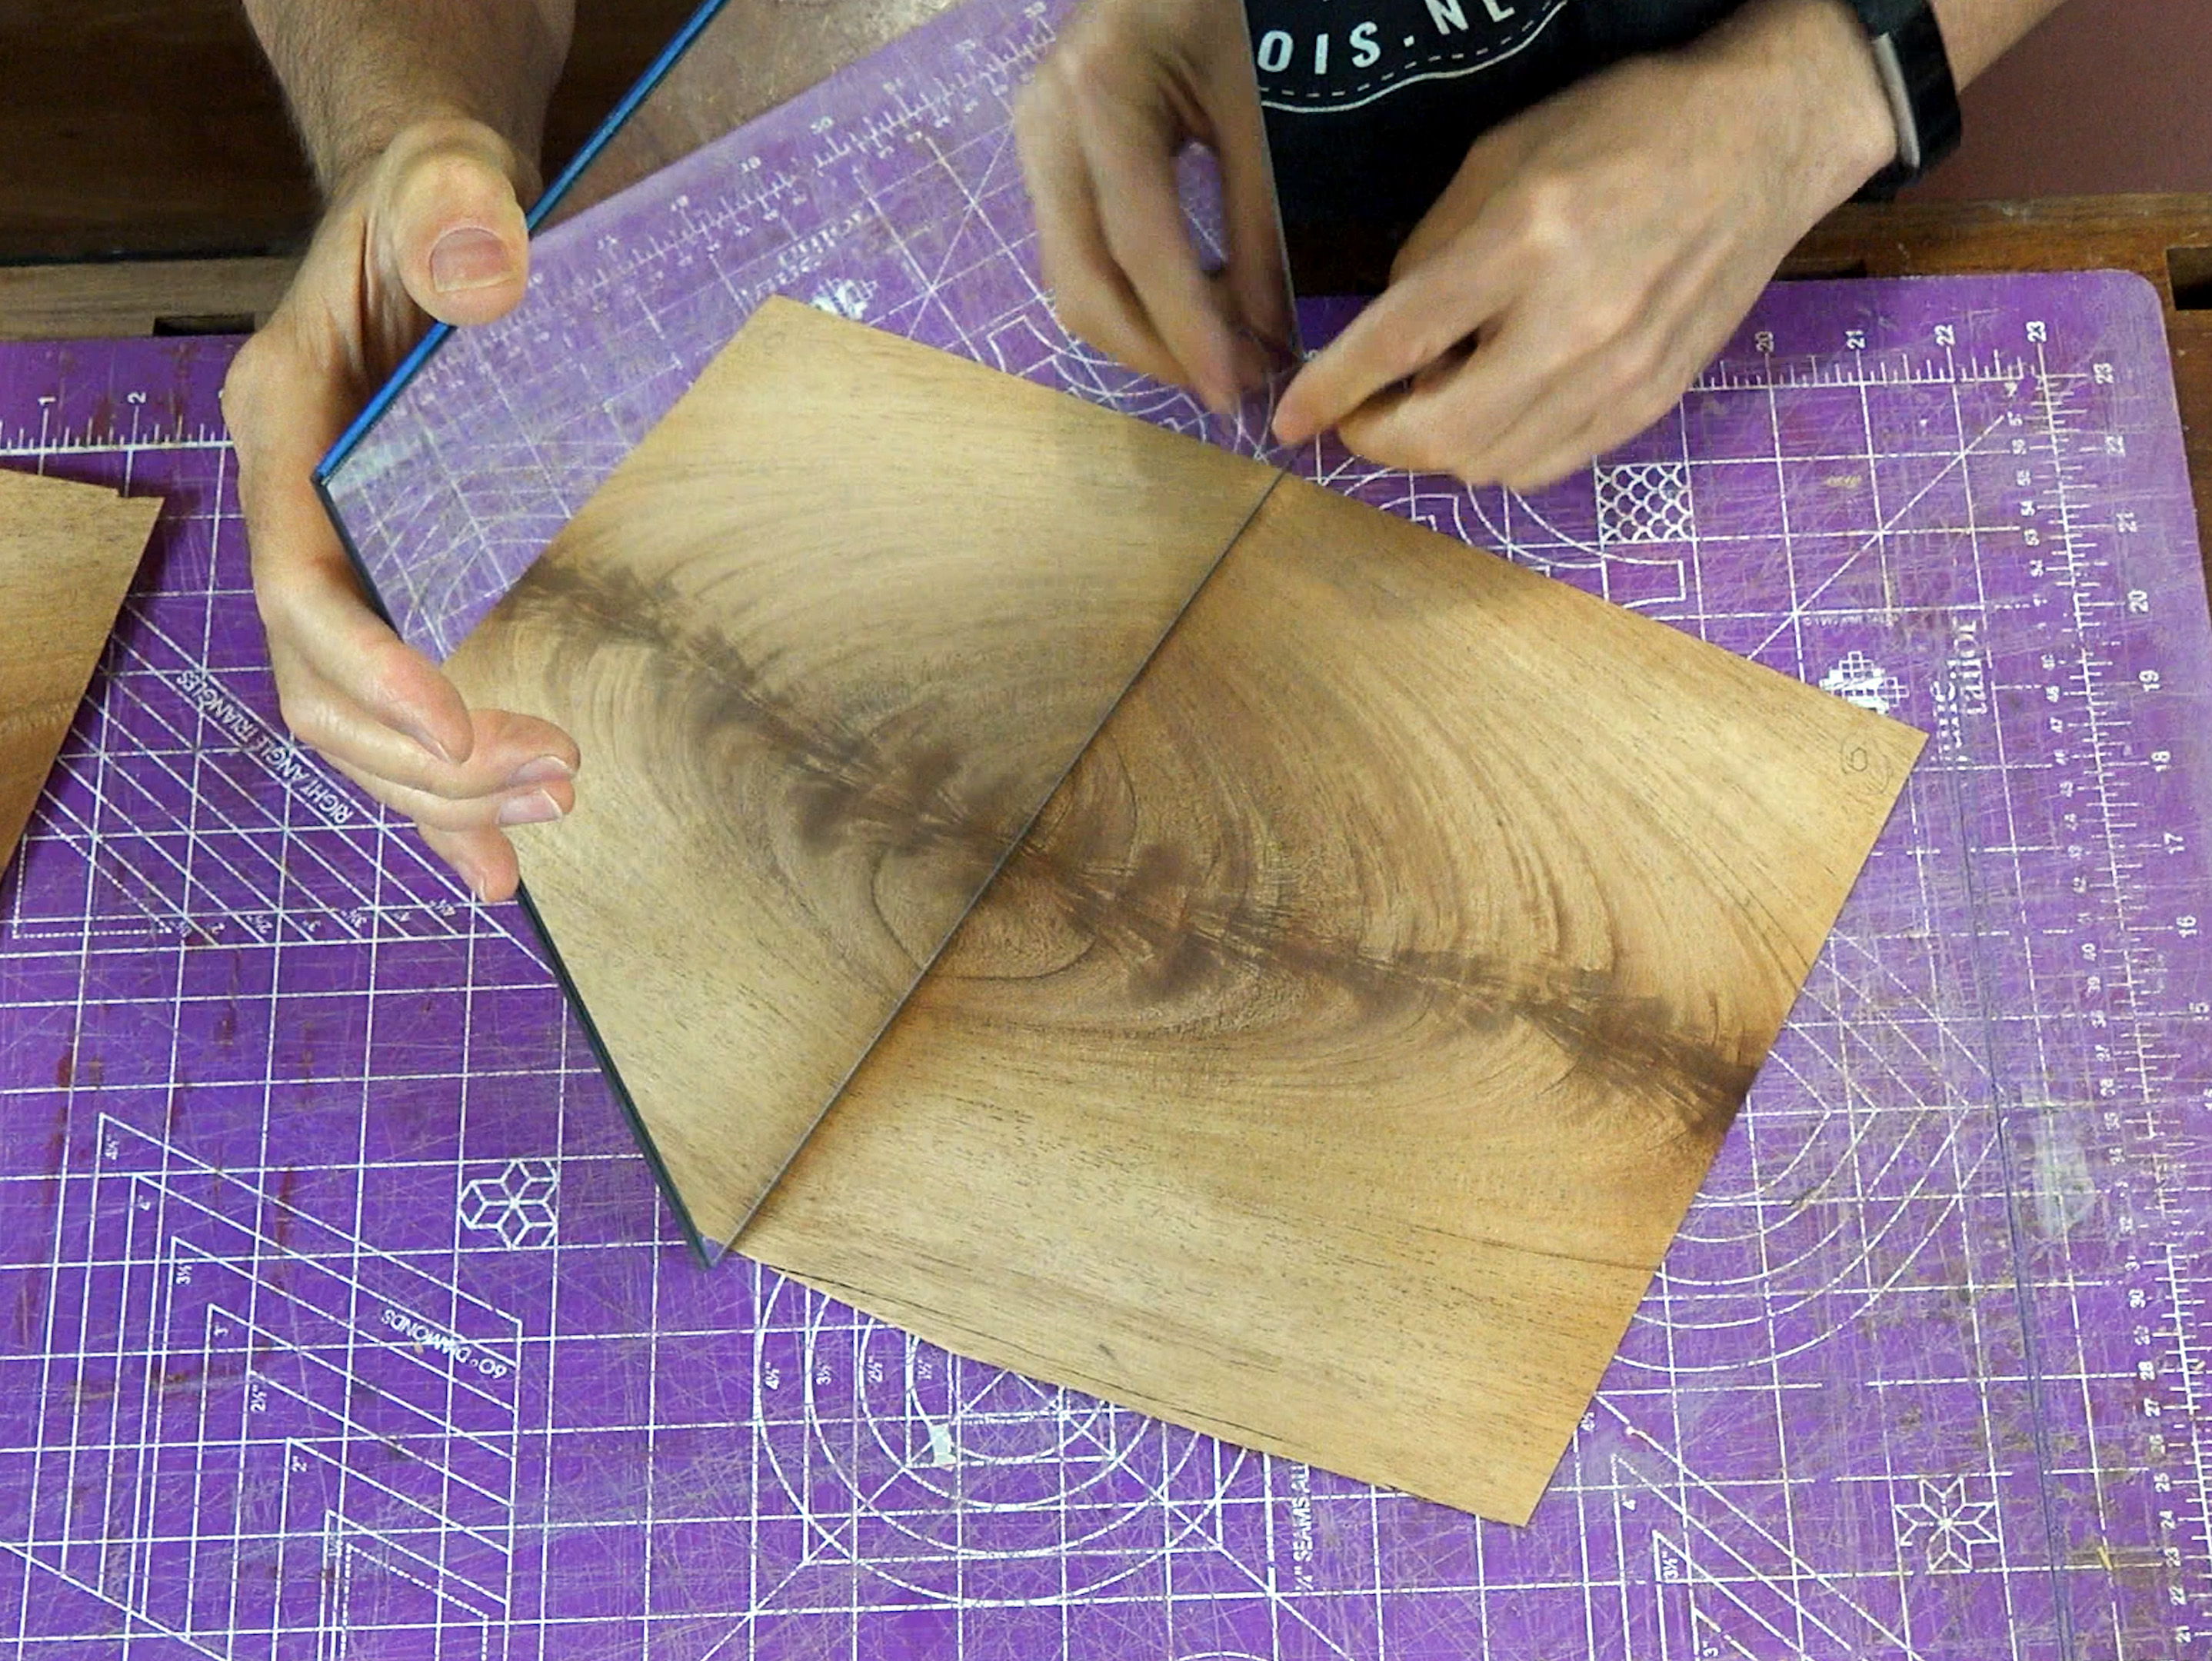
A great way to preview the mirror image at any particular cut line is with, you guessed it, a mirror! I simply place a mirror vertically on to the veneer and move it around until I find the most pleasing pattern. When you’ve found the pattern you like, trace along the base of the mirror with a pencil to establish the cut line.
Cut the Veneer
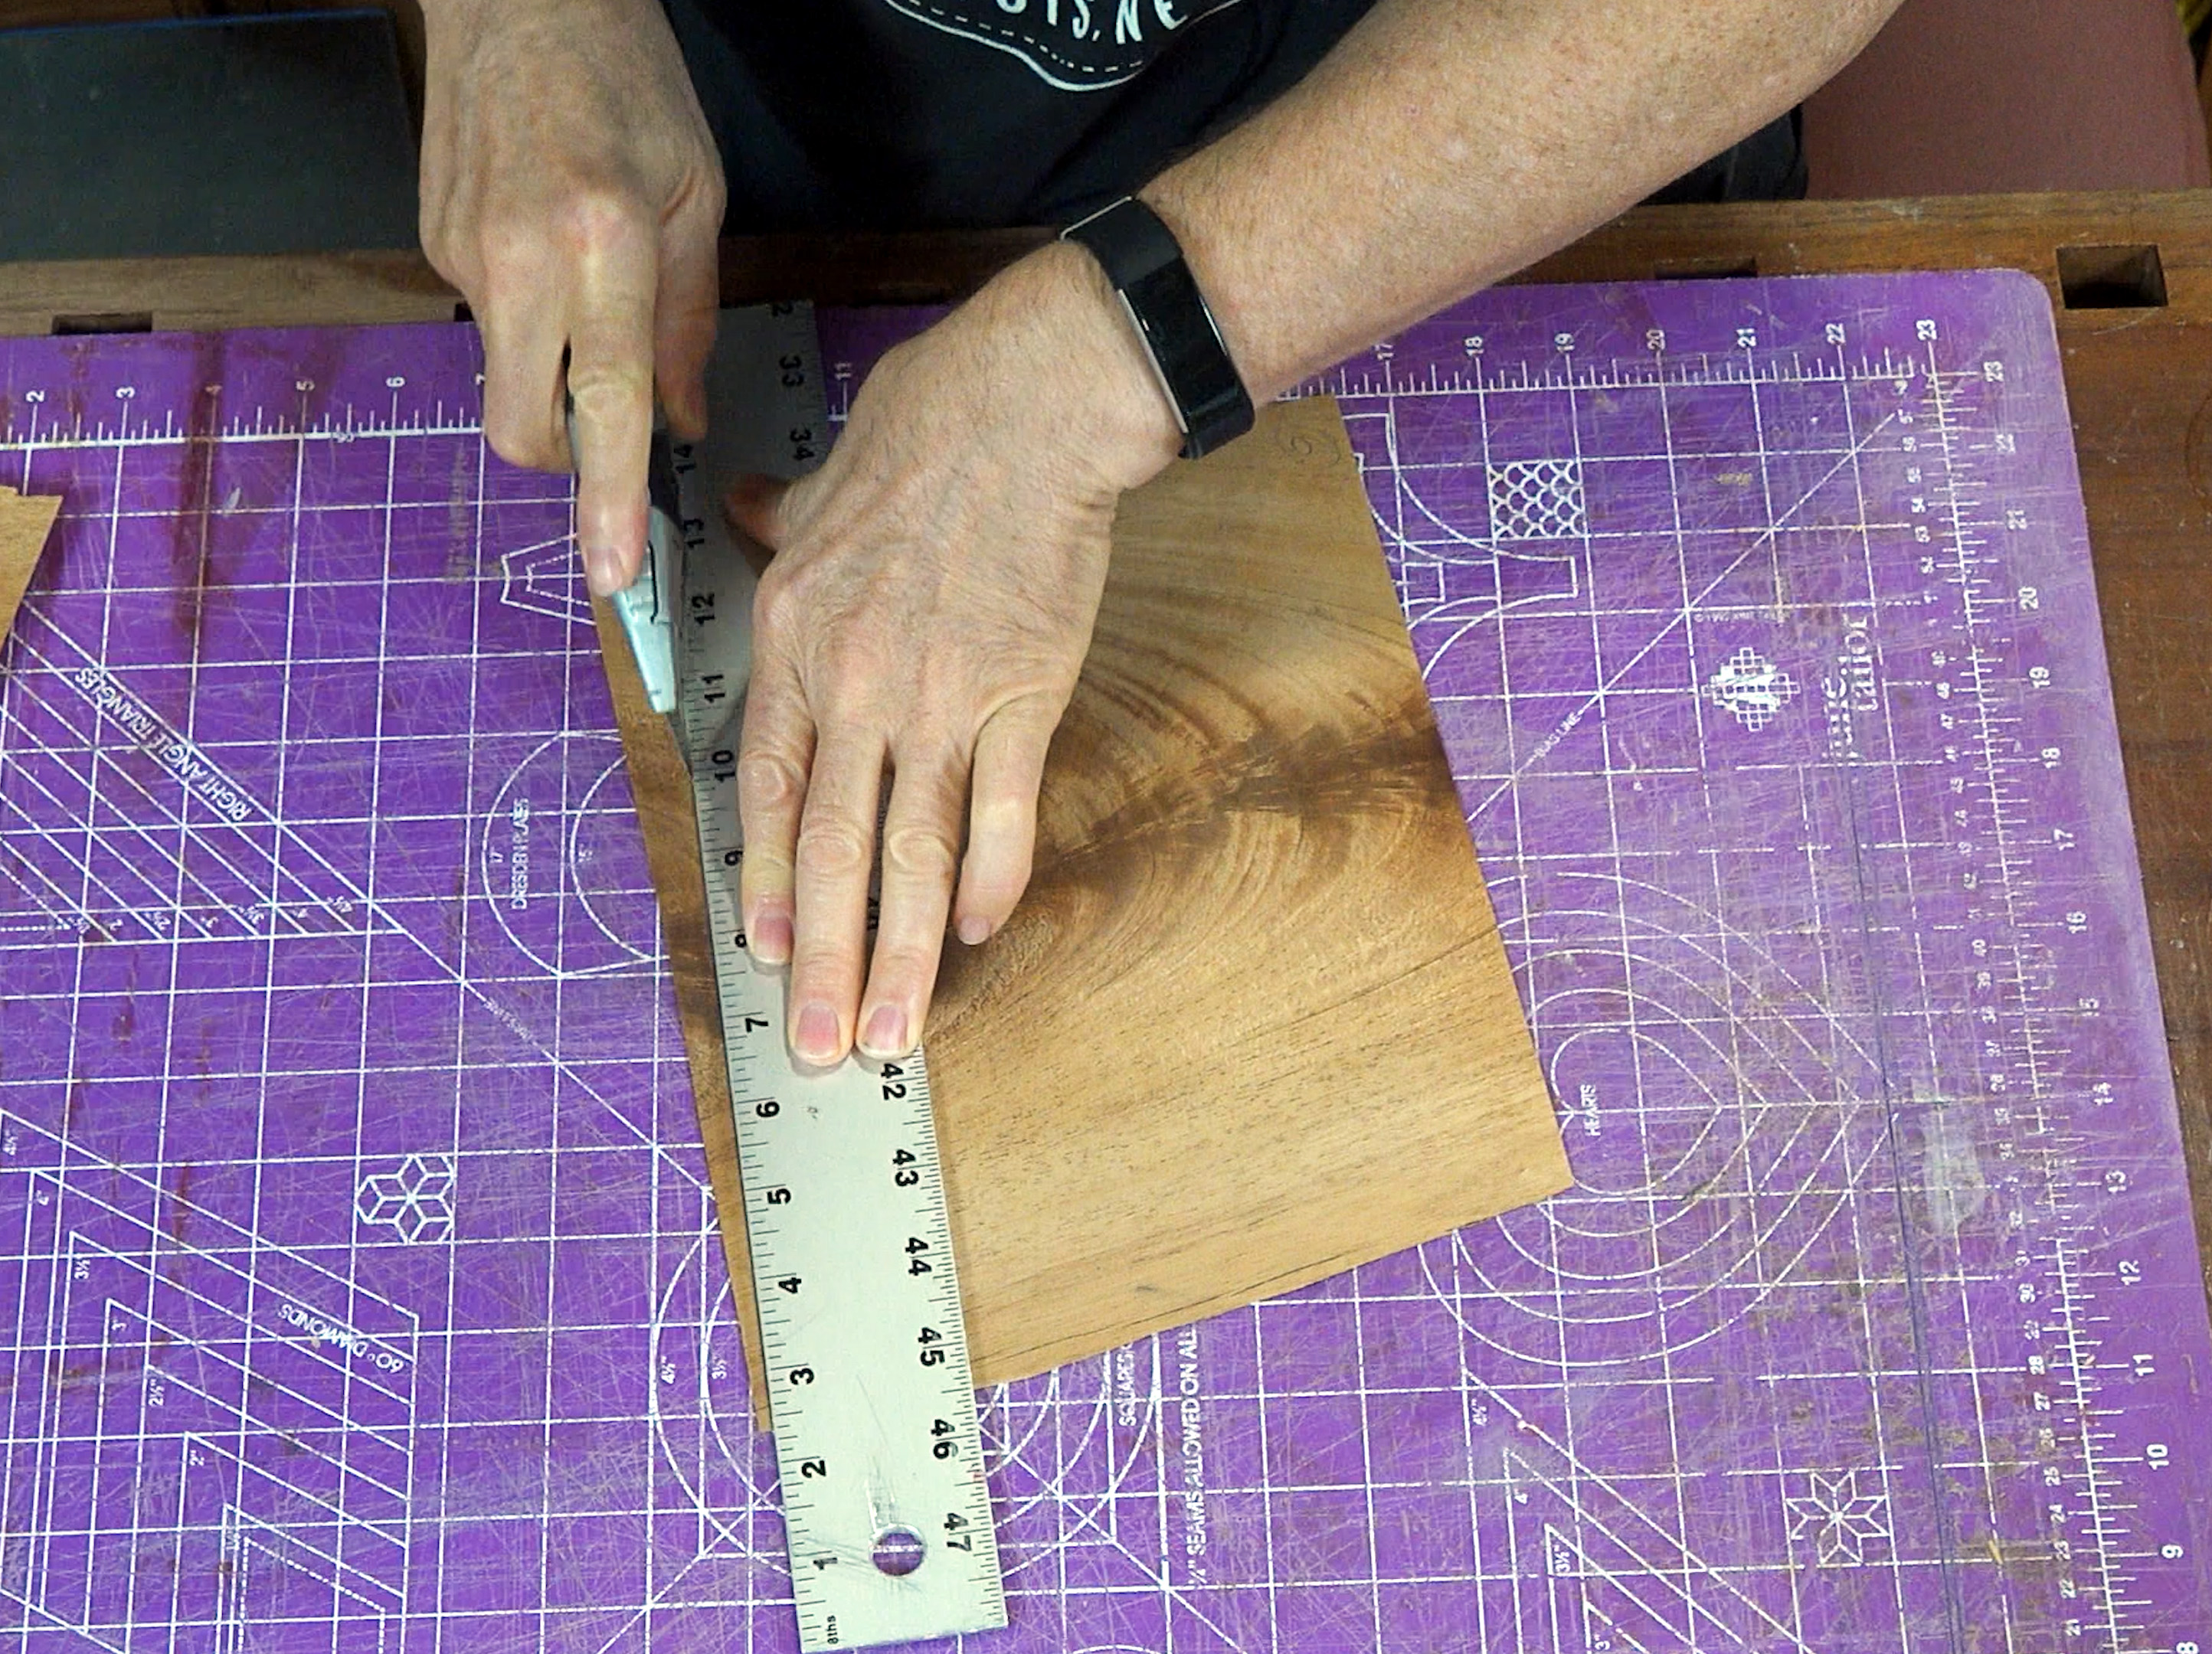
Cut the veneer along the pencil line. I usually use a straightedge and a sharp utility knife to cut my veneer. Occasionally I will use a veneer saw, but only when the veneer is particularly difficult to cut.
Tip: A veneer saw is not absolutely necessary, but if you purchase one then you should know that they usually are not sharp or ready to use when you first buy them. However, pre-sharpened veneer saws are available at Veneer Supplies.com
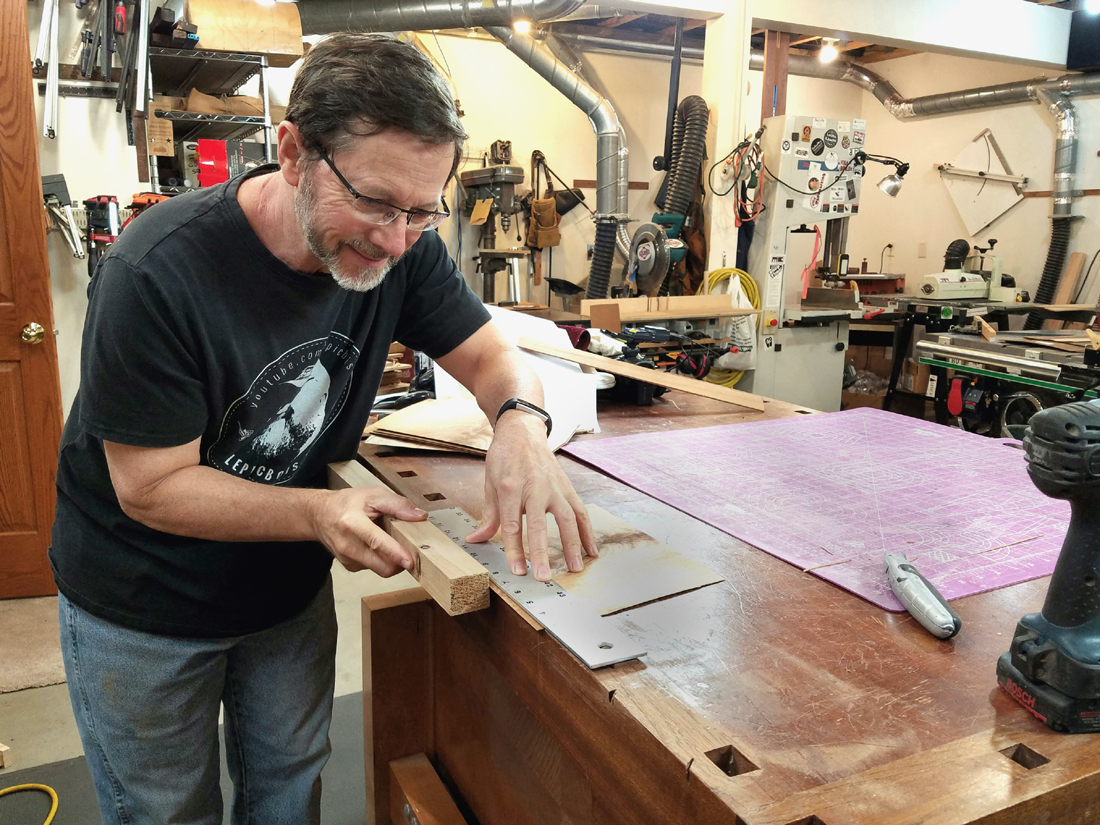
I run my finger along the cut line to ensure that I have a nice smooth cut. If there's any amount of roughness, then I will "joint" the edge using a 2x2 with a piece of sandpaper attached to one side.
Make a Match
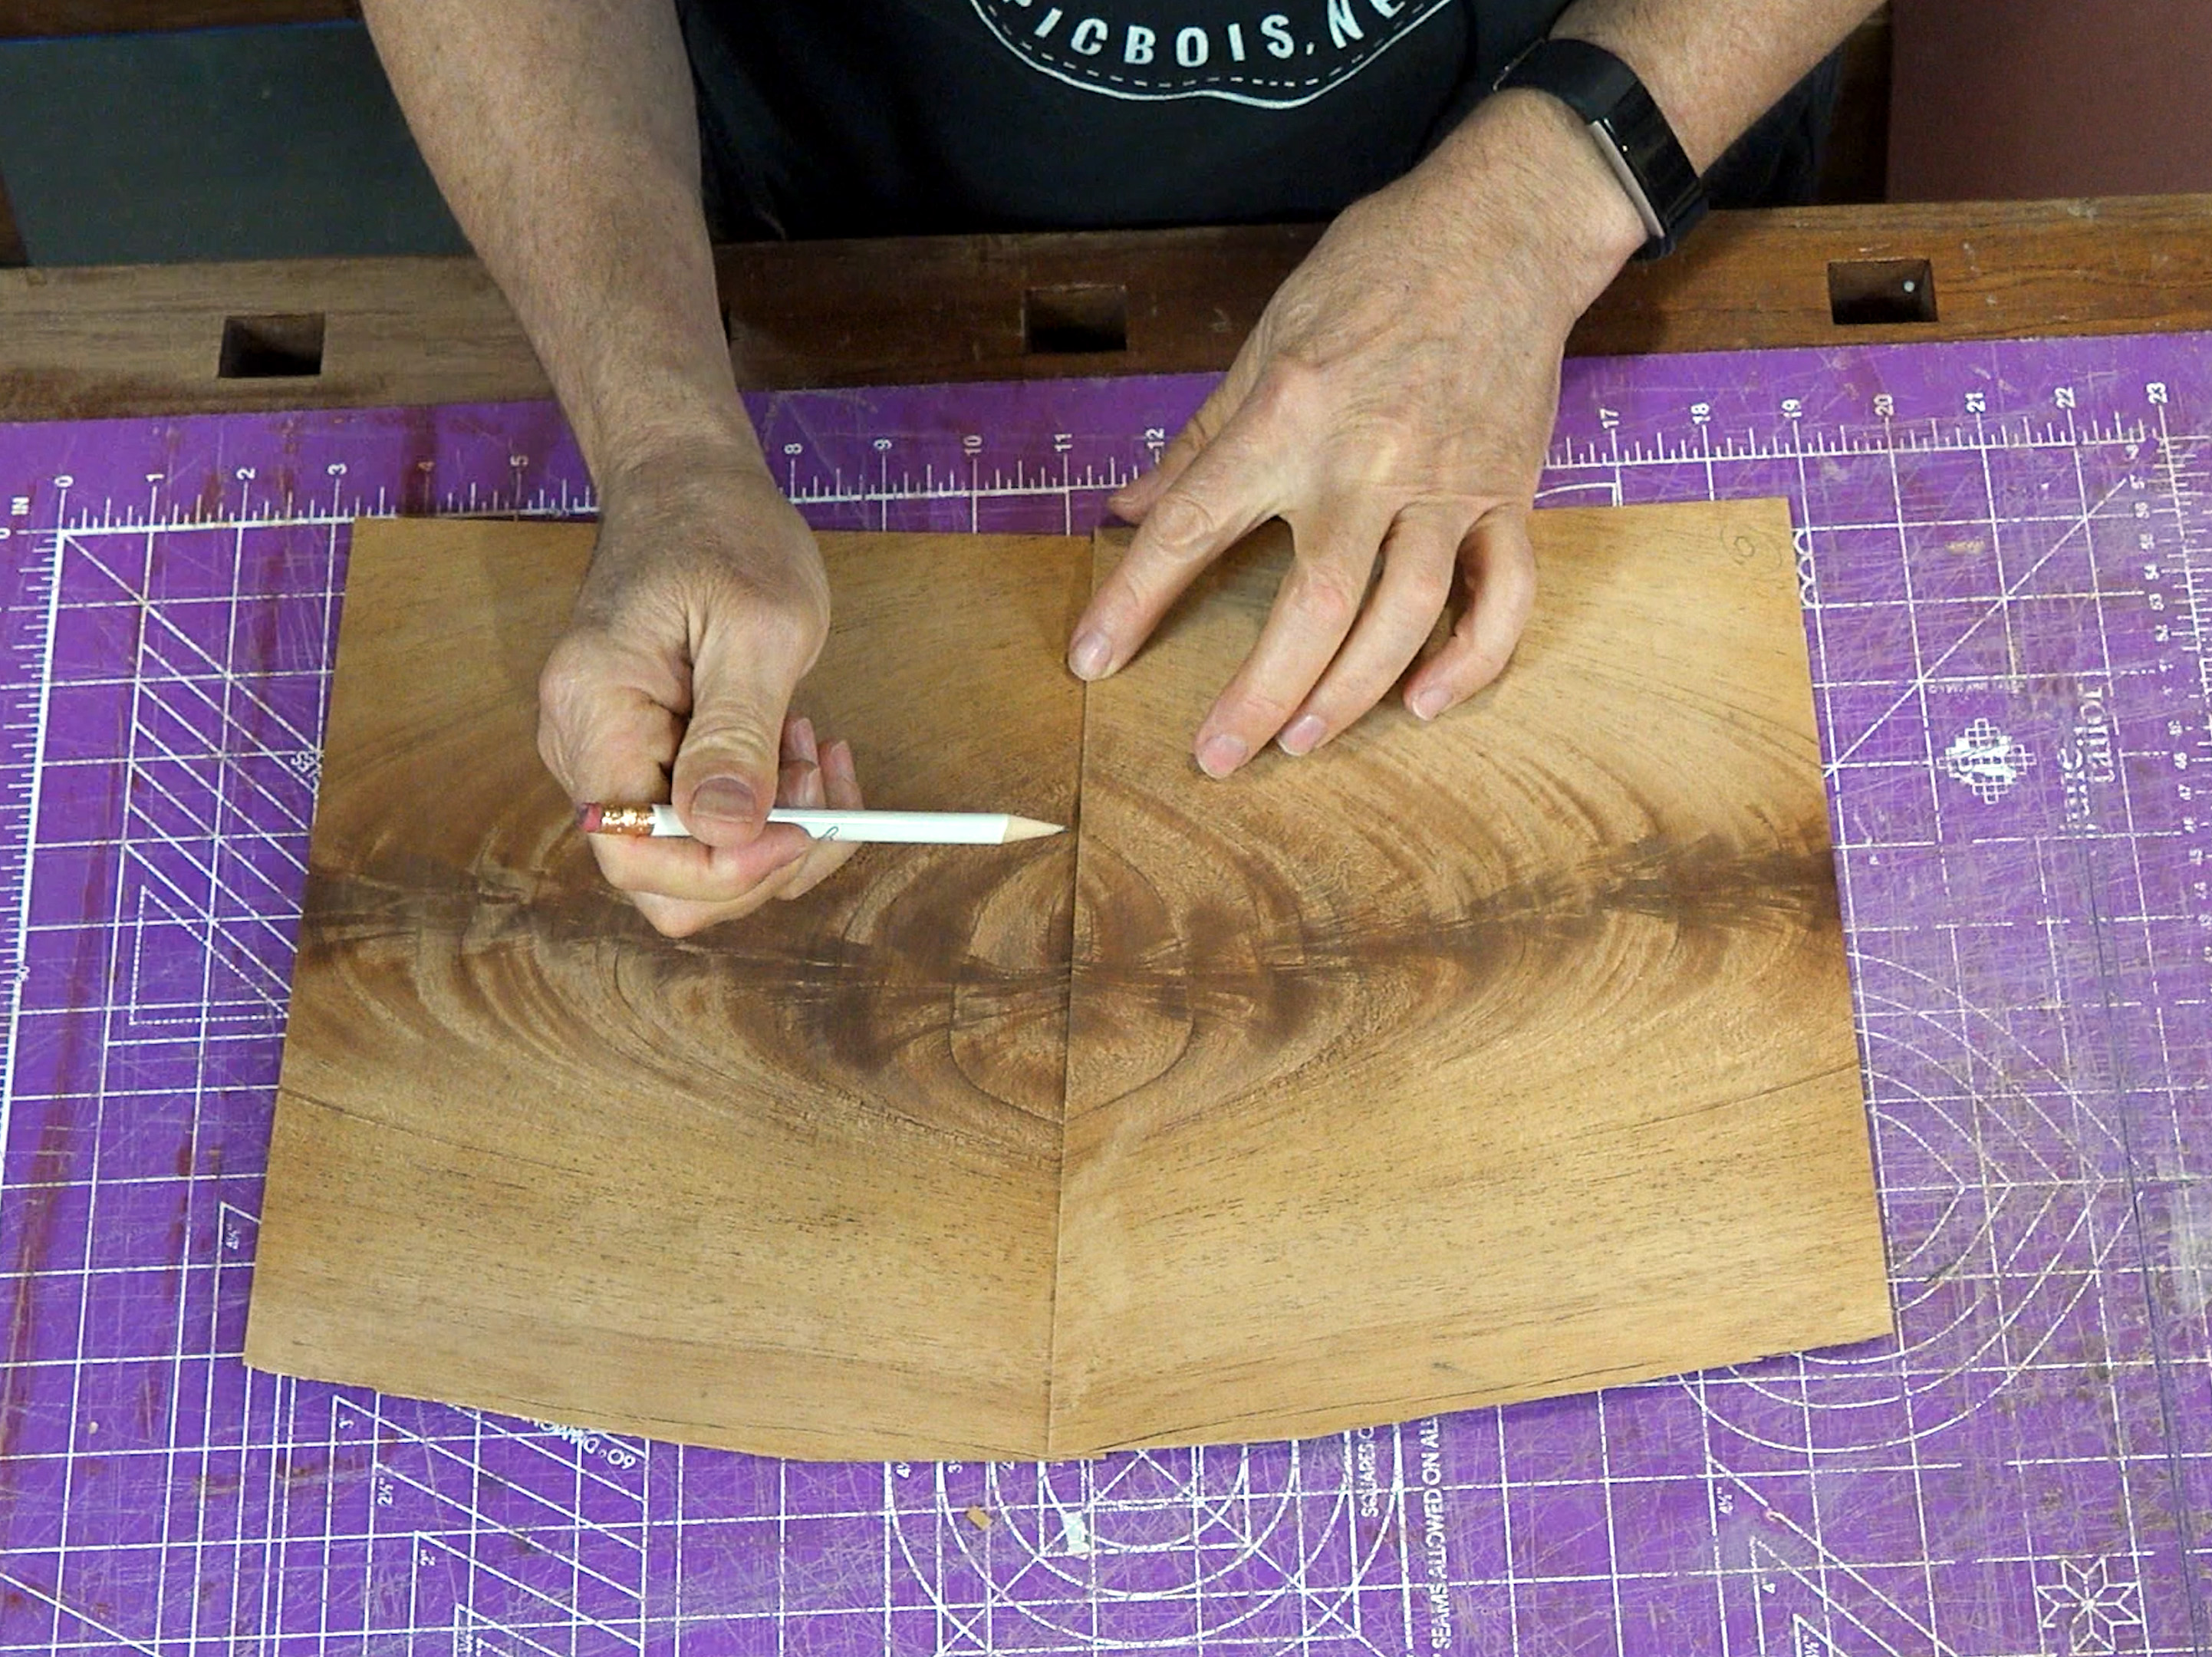
Next, I will look for a distinctive feature near the end of the cutline on the piece that I just cut. Then I will lay that piece of veneer on to the second piece and move it around until I can align it with that same feature on the second piece. While holding the two pieces together at that spot, I then move the opposite end around until I have the best possible match along the entire length of the two sheets of veneer. Without moving either piece of veneer, I draw a line on to the second piece so that I know where to cut. Then I cut along that line exactly as I did on the first sheet.
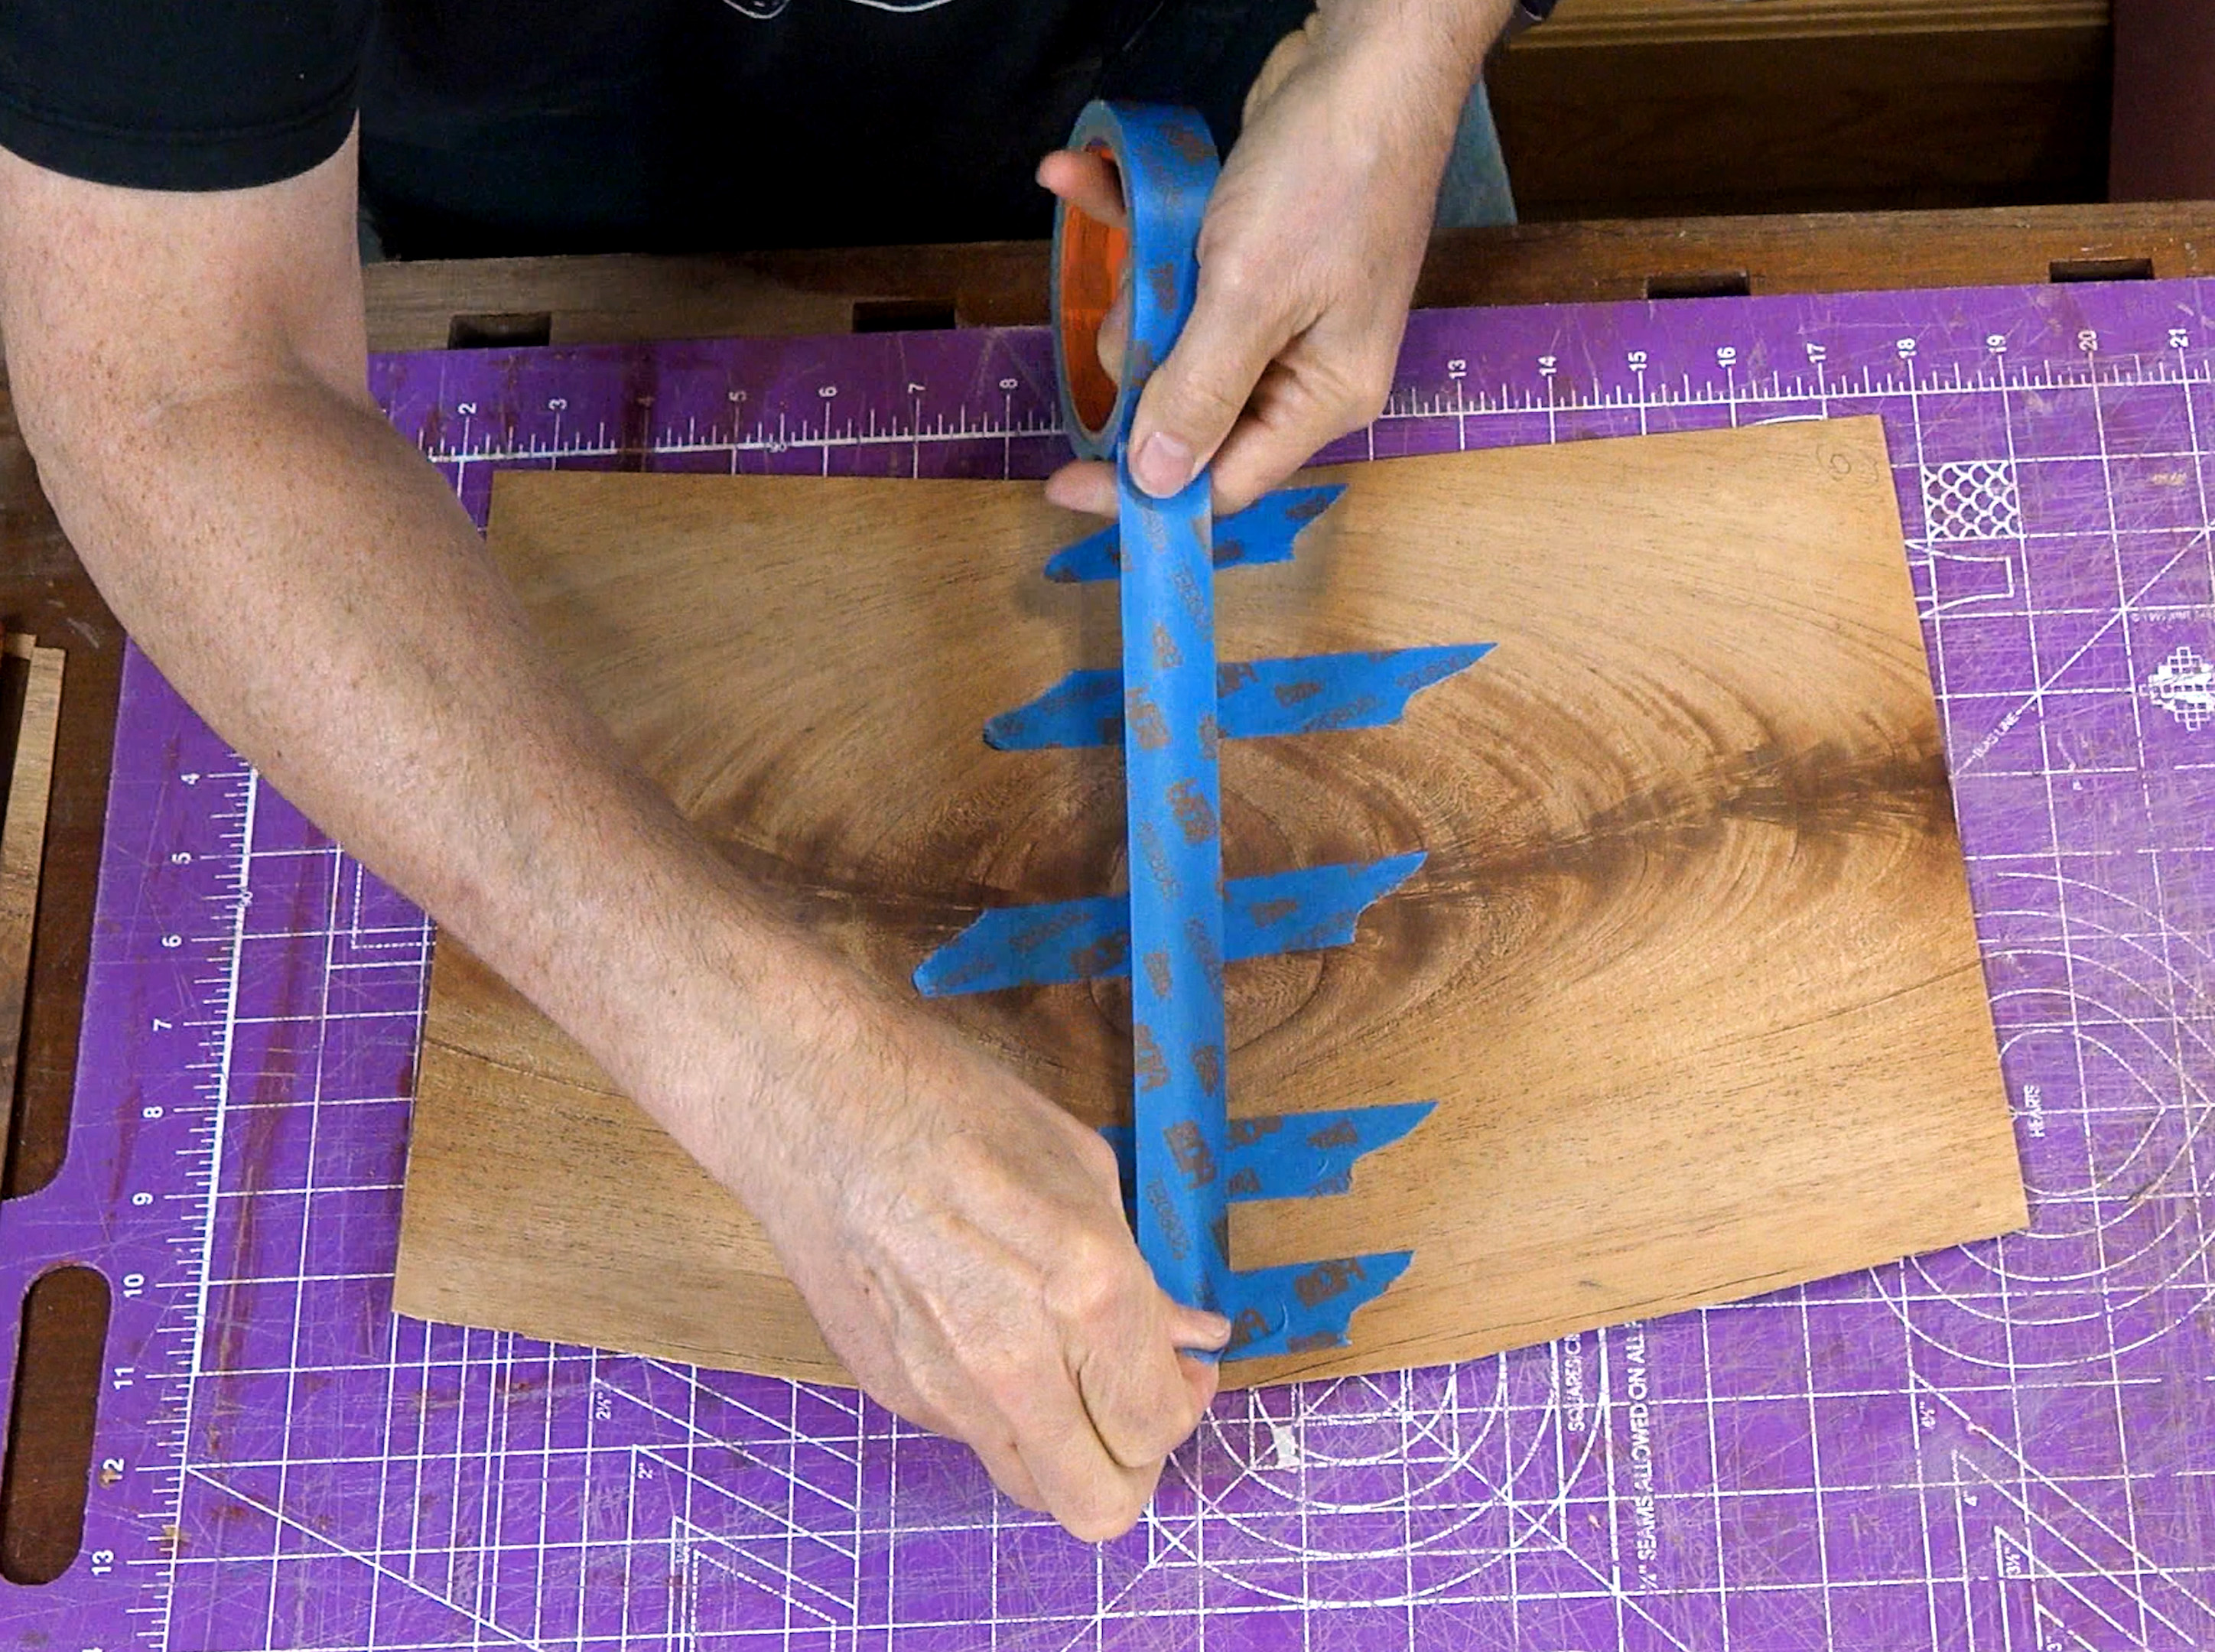
Tape the pieces together with masking tape.
Tip: Masking tape will stretch if pulled tightly and we can use this to gently pull two pieces of veneer together. With the two sheets in place, press the tape down firmly on one piece of veneer and then pull the tape over to the opposite side and press it down while it is still taut. You don't have to pull very hard, just enough to bring the two sheets together.
Note: Normally, I would add paper veneer tape to the opposite side and then remove the masking tape. That is because I usually use a vacuum bag to press the veneer and sometimes it is difficult to remove the masking tape afterward. I've discovered that I can use regular blue masking tape when using clamps on a small panel like this one. Also, you can loosen masking tape by gently heating it with a hairdryer.
Finalize Your Layout

I cut a "window" that is the same size as my panel out of a piece of paper and lay that on the veneer. Then I move the window around to see how the veneer will line up on to the panel. Once I position it where I want it then I mark the corners with a pencil.
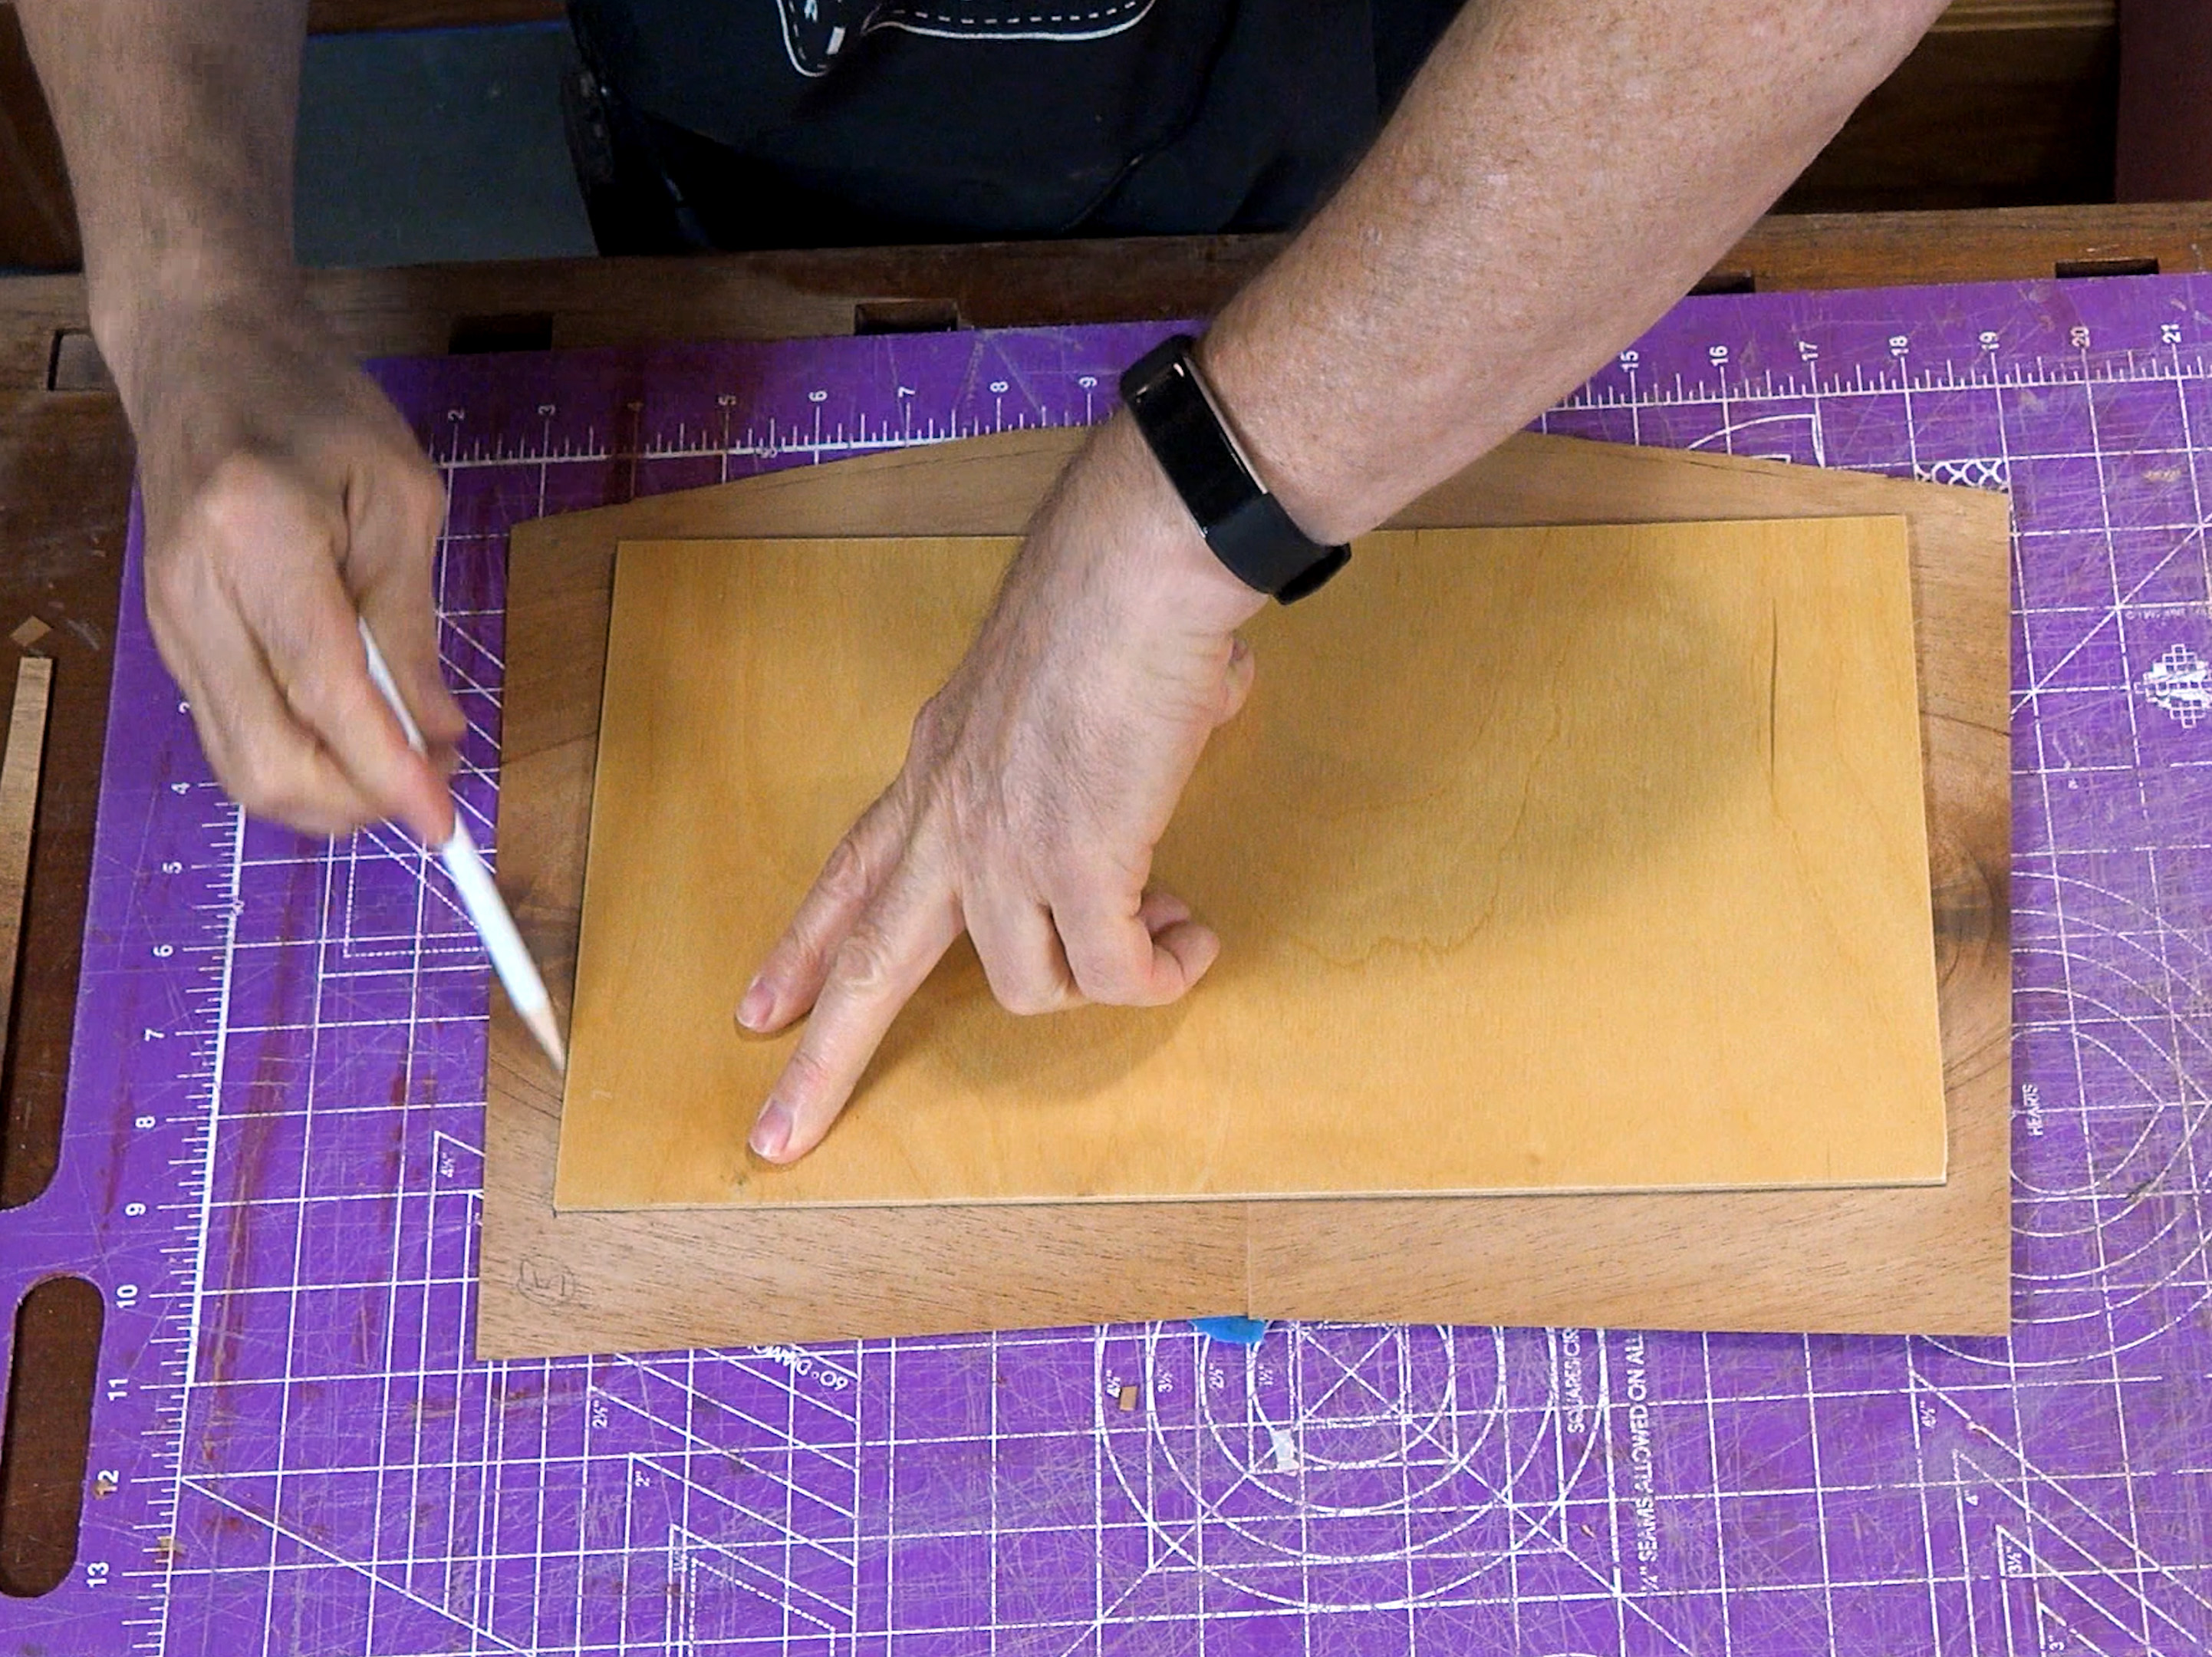
I then position the plywood core of the project on the veneer at those corner marks. Now I can use the plywood as a guide to draw my final cut lines on the veneer.
Always glue veneer to both sides of a panel. Gluing another sheet of veneer to the opposite side will help to prevent warping. It is not necessary to use the same type of veneer on the backside. In this case, I am going to put some regular mahogany veneer on the back.
There are lots of different glues on the market that are suitable for veneer work and there are pros and cons for each one. I usually use Elmer’s Glue All for my veneer work because it is translucent when it dries and it is inexpensive, too! You can also use Titebond, or any of the specialty veneer glues for your project. One type of glue that is specifically not recommended for raw veneer is contact cement.
Always apply the glue to the substrate and not to the veneer. I use a foam roller that I got at Joe Woodworker to apply the glue. I like this one because it is especially dense, but regular foam paint rollers will work, too.
Glue Up
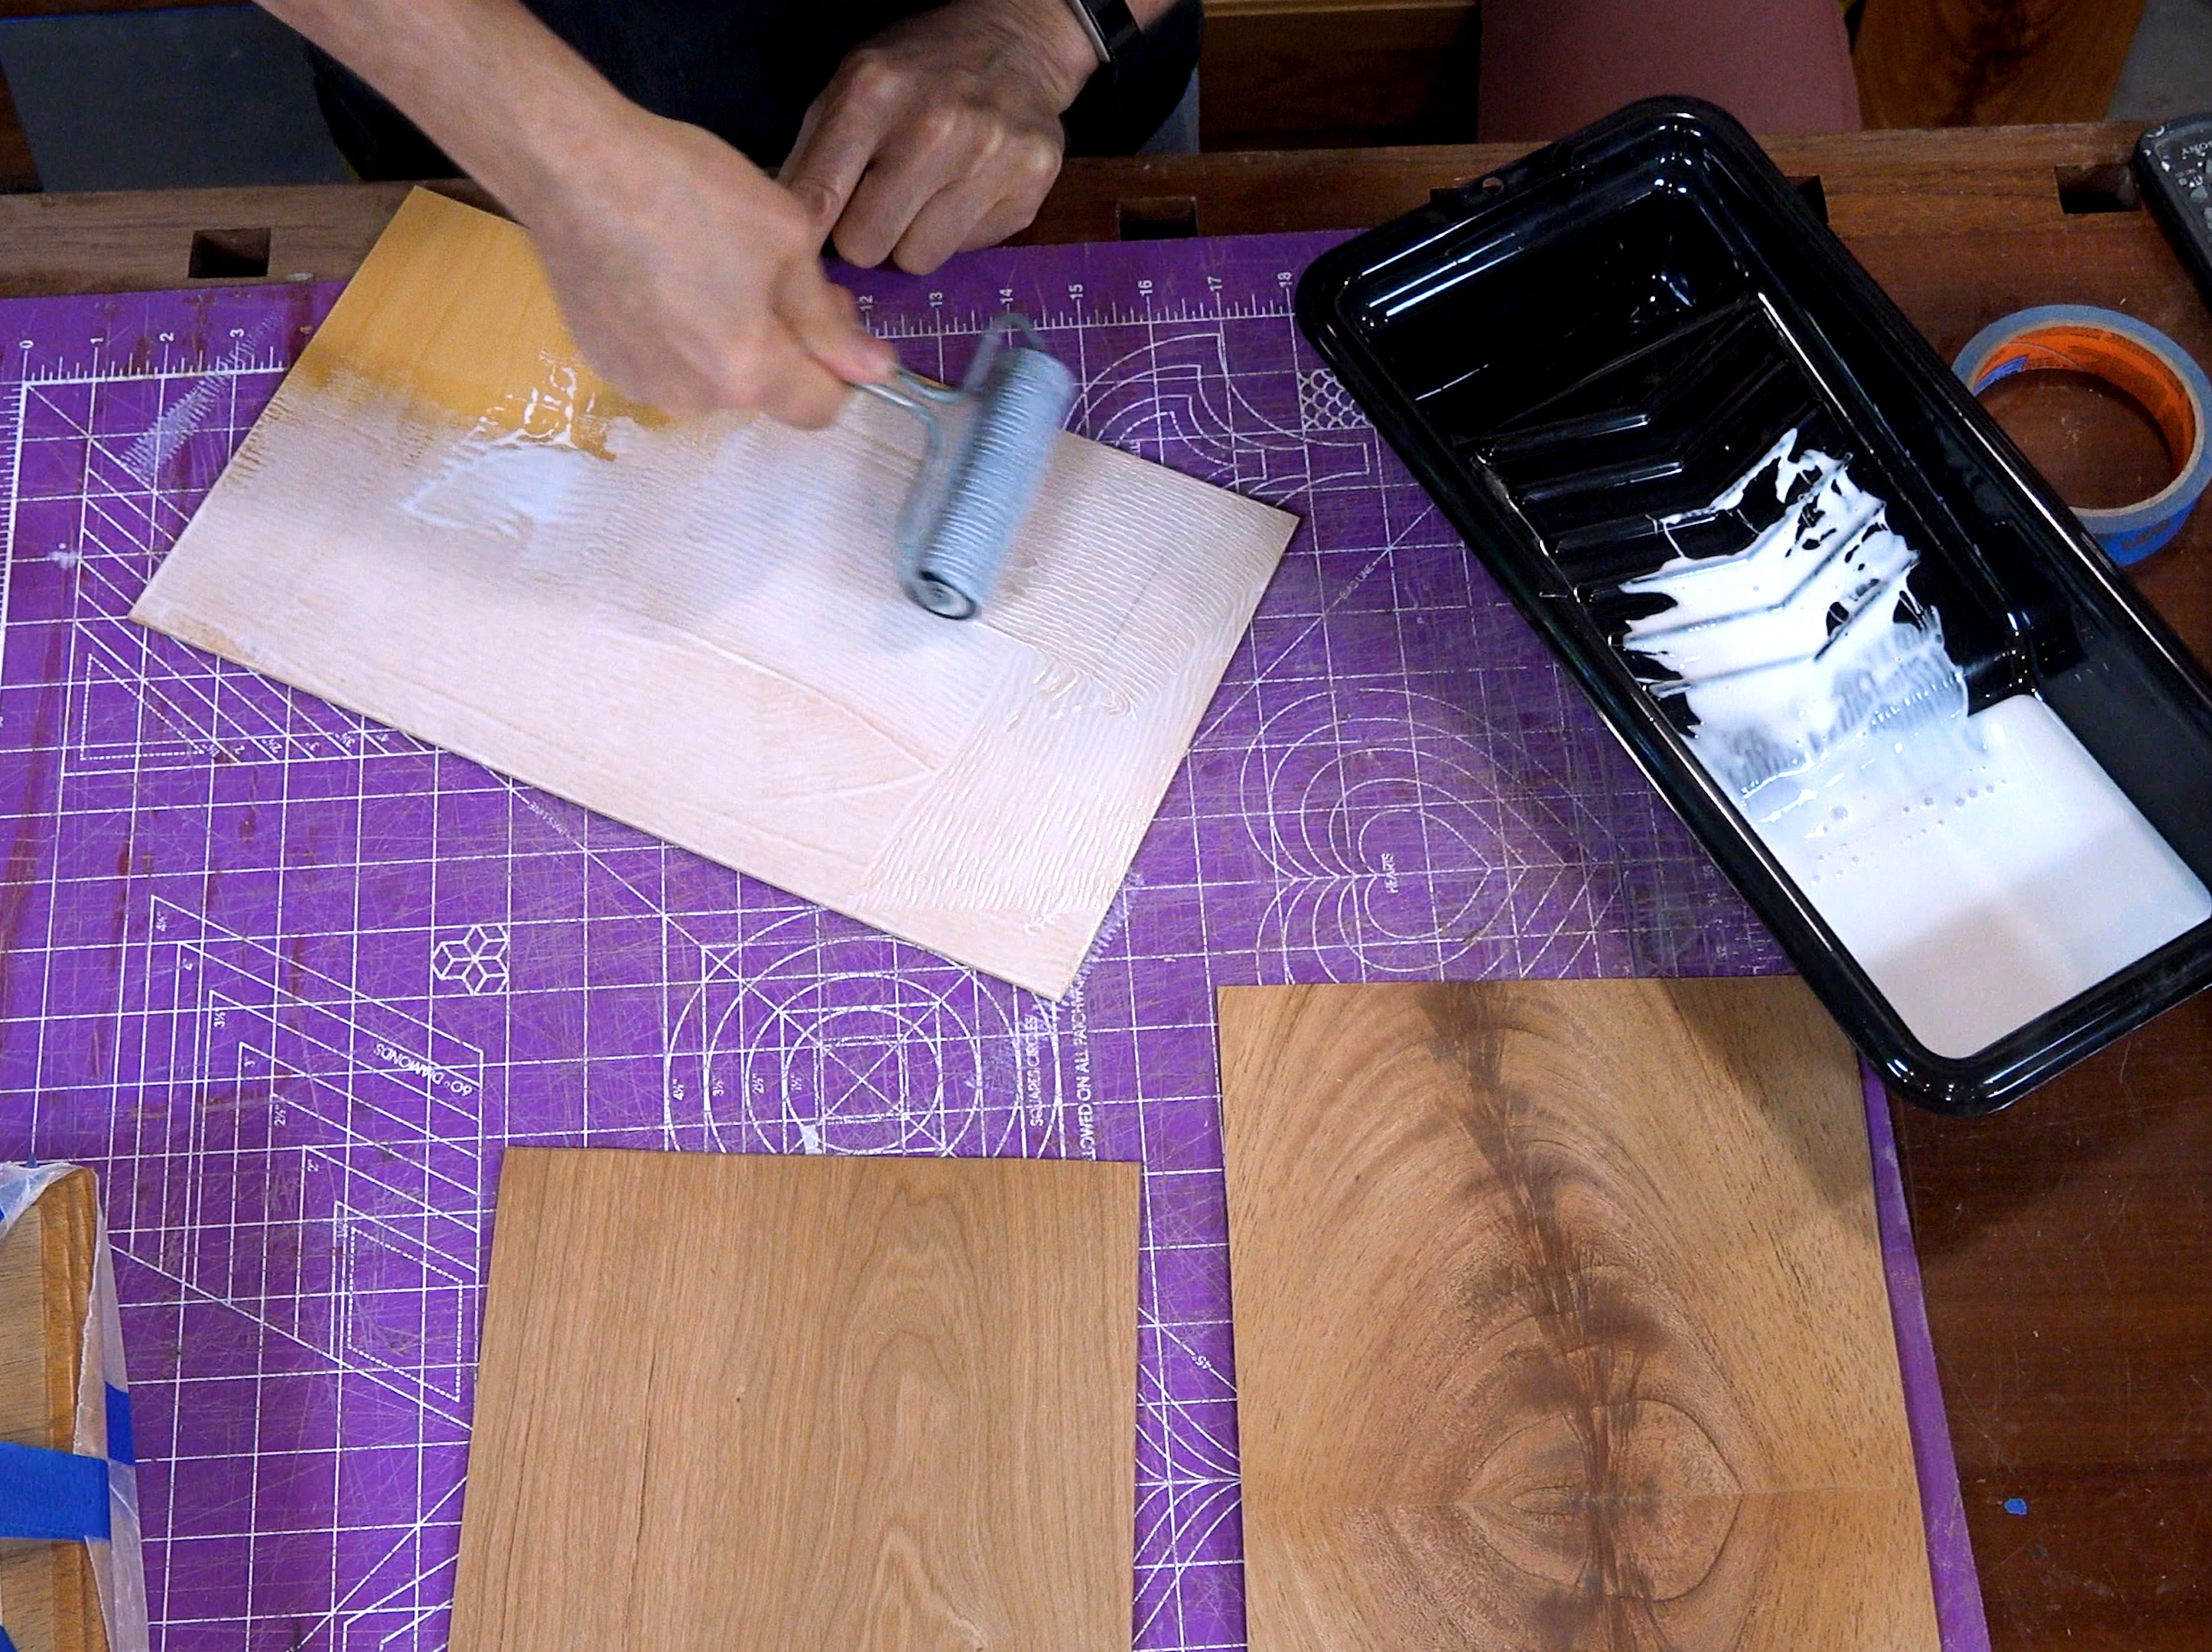
I roll a thin film of glue on to the substrate. The glue should be thick enough that you can just barely see the substrate through the glue. Once the glue is spread, I immediately place the veneer on the panel. Then I add glue and veneer to the opposite side as fast as I can. I also put a few pieces of tape around the edges to hold the veneer in place.
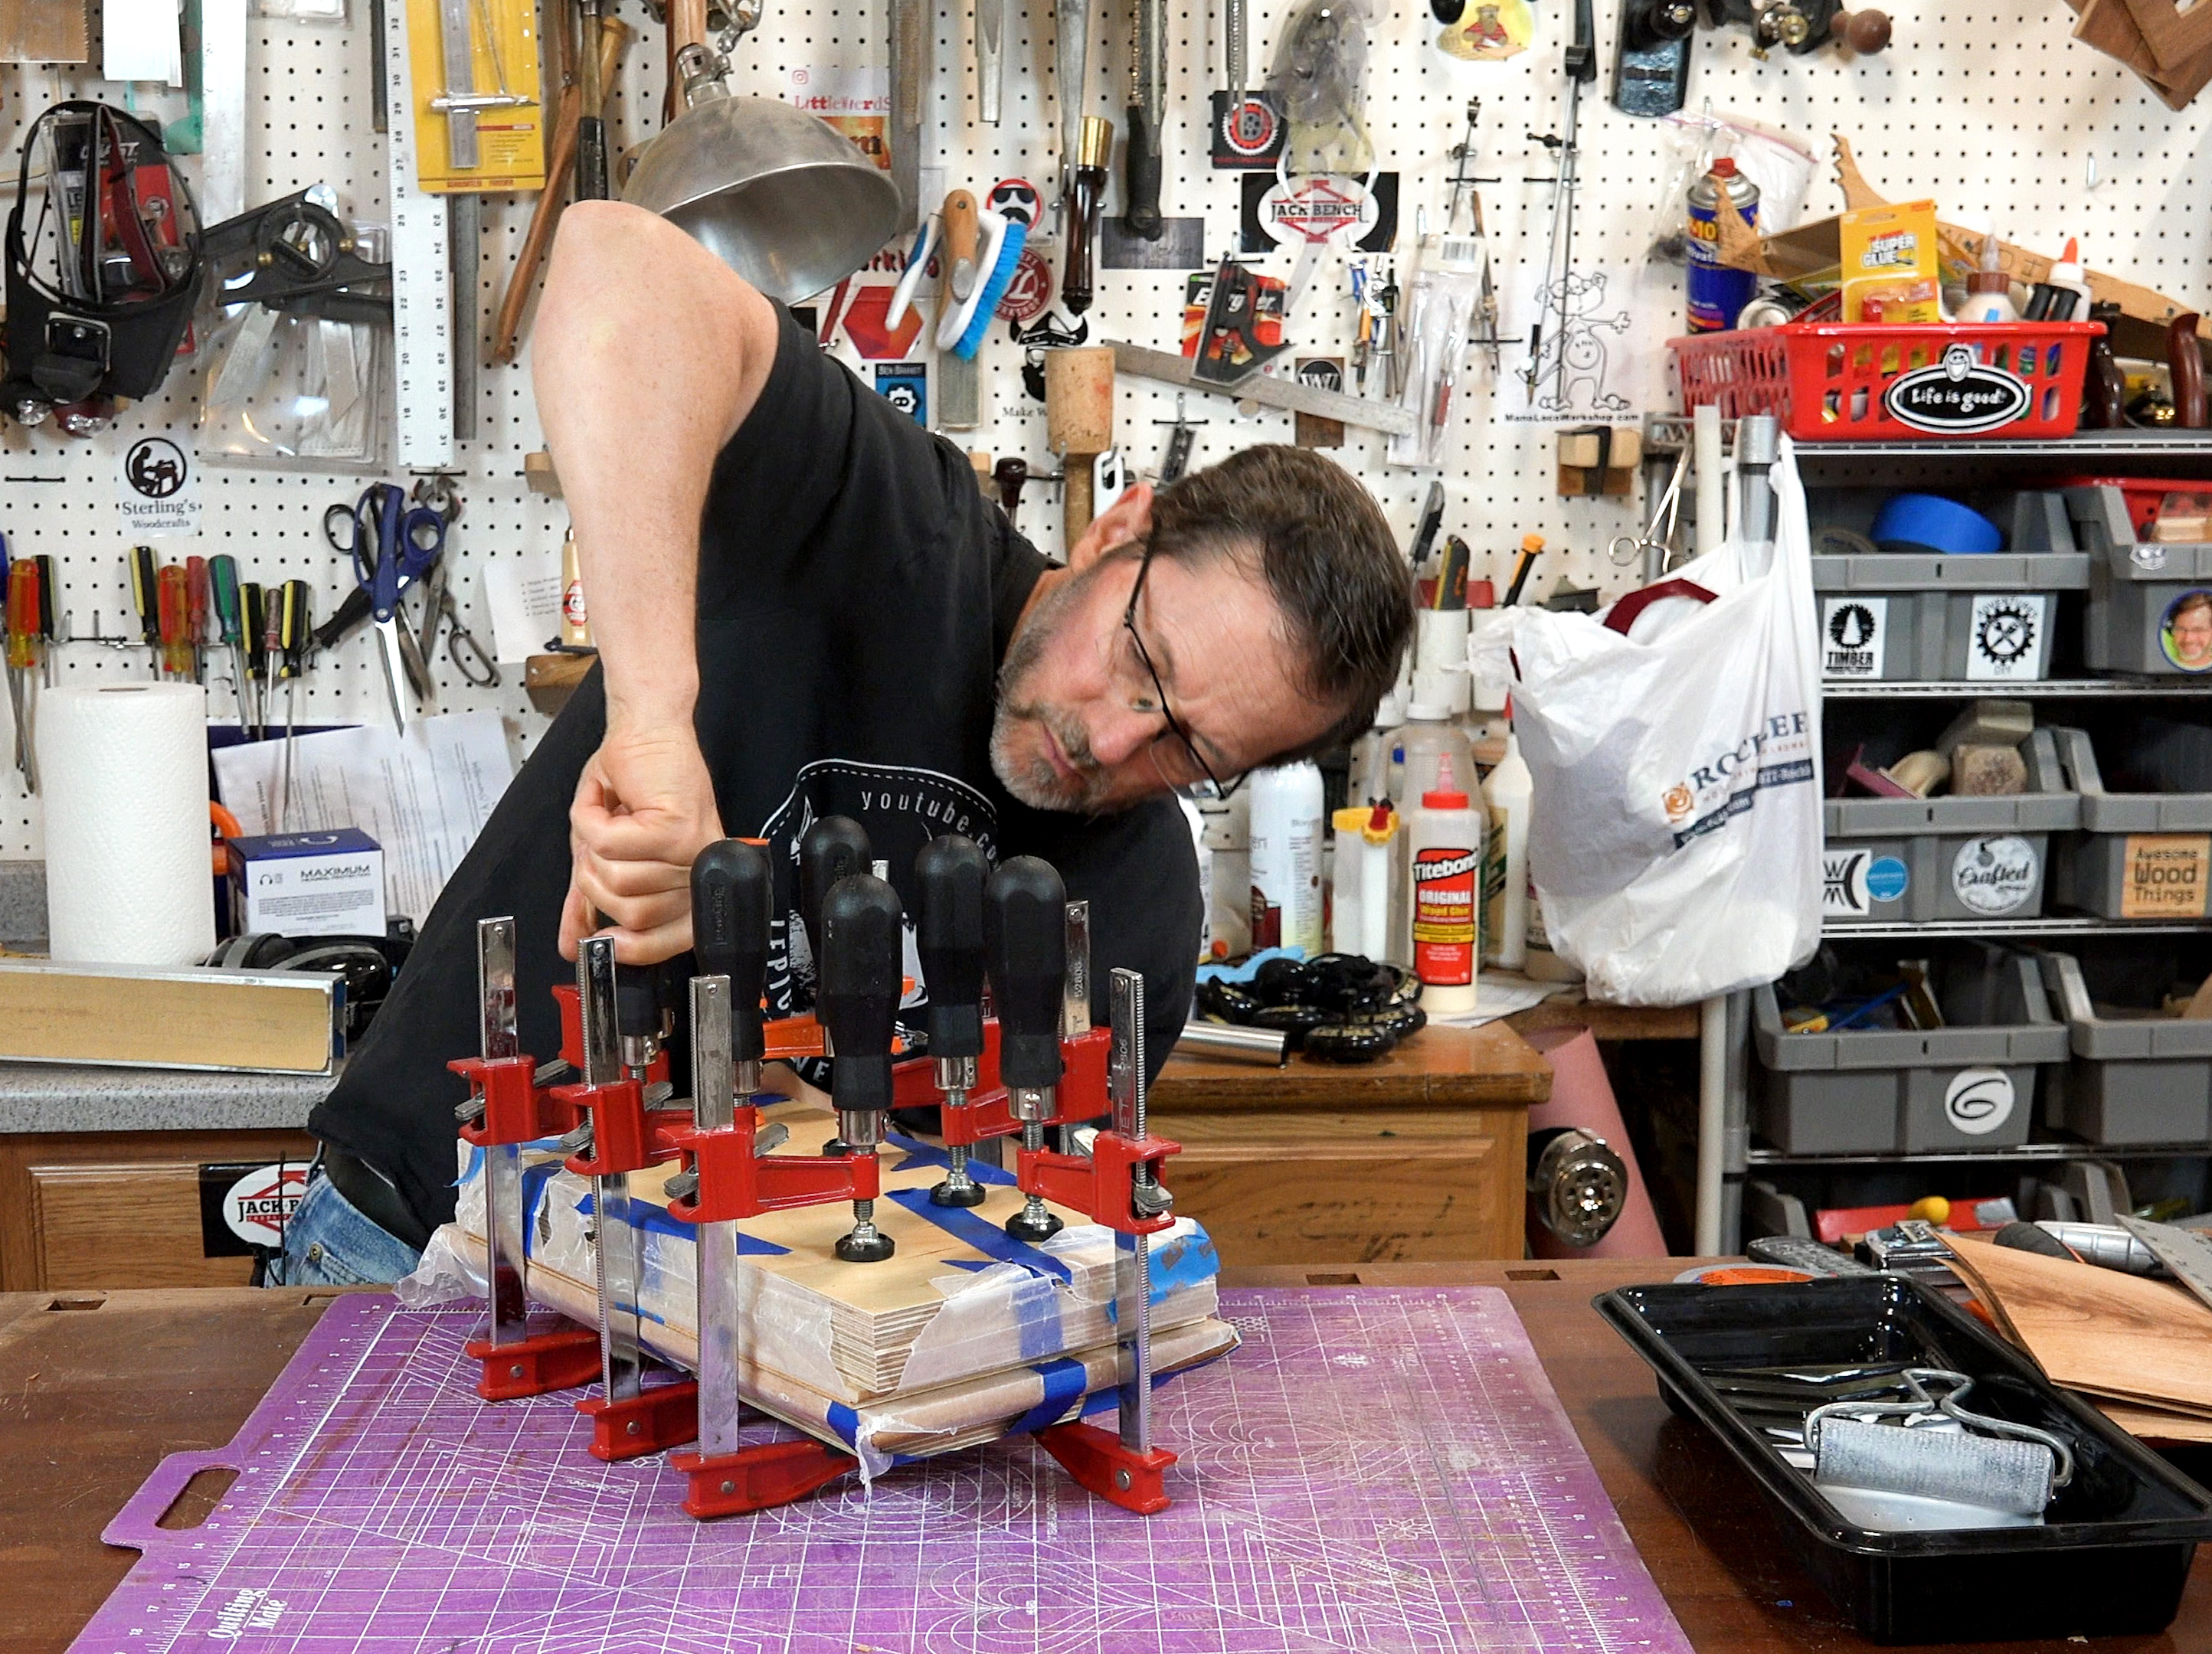
For this project I used 1-1/2" thick clamping cauls that I made by taping two scraps of 3/4" material together. The cauls ensured that I had even pressure across the entire panel. I also taped a piece of wax paper on to each of the cauls to make sure that I didn't accidentally glue the panel to the cauls. The panel should stay in the clamps for at least an hour, but I usually leave it for several hours.
Sand and Finish
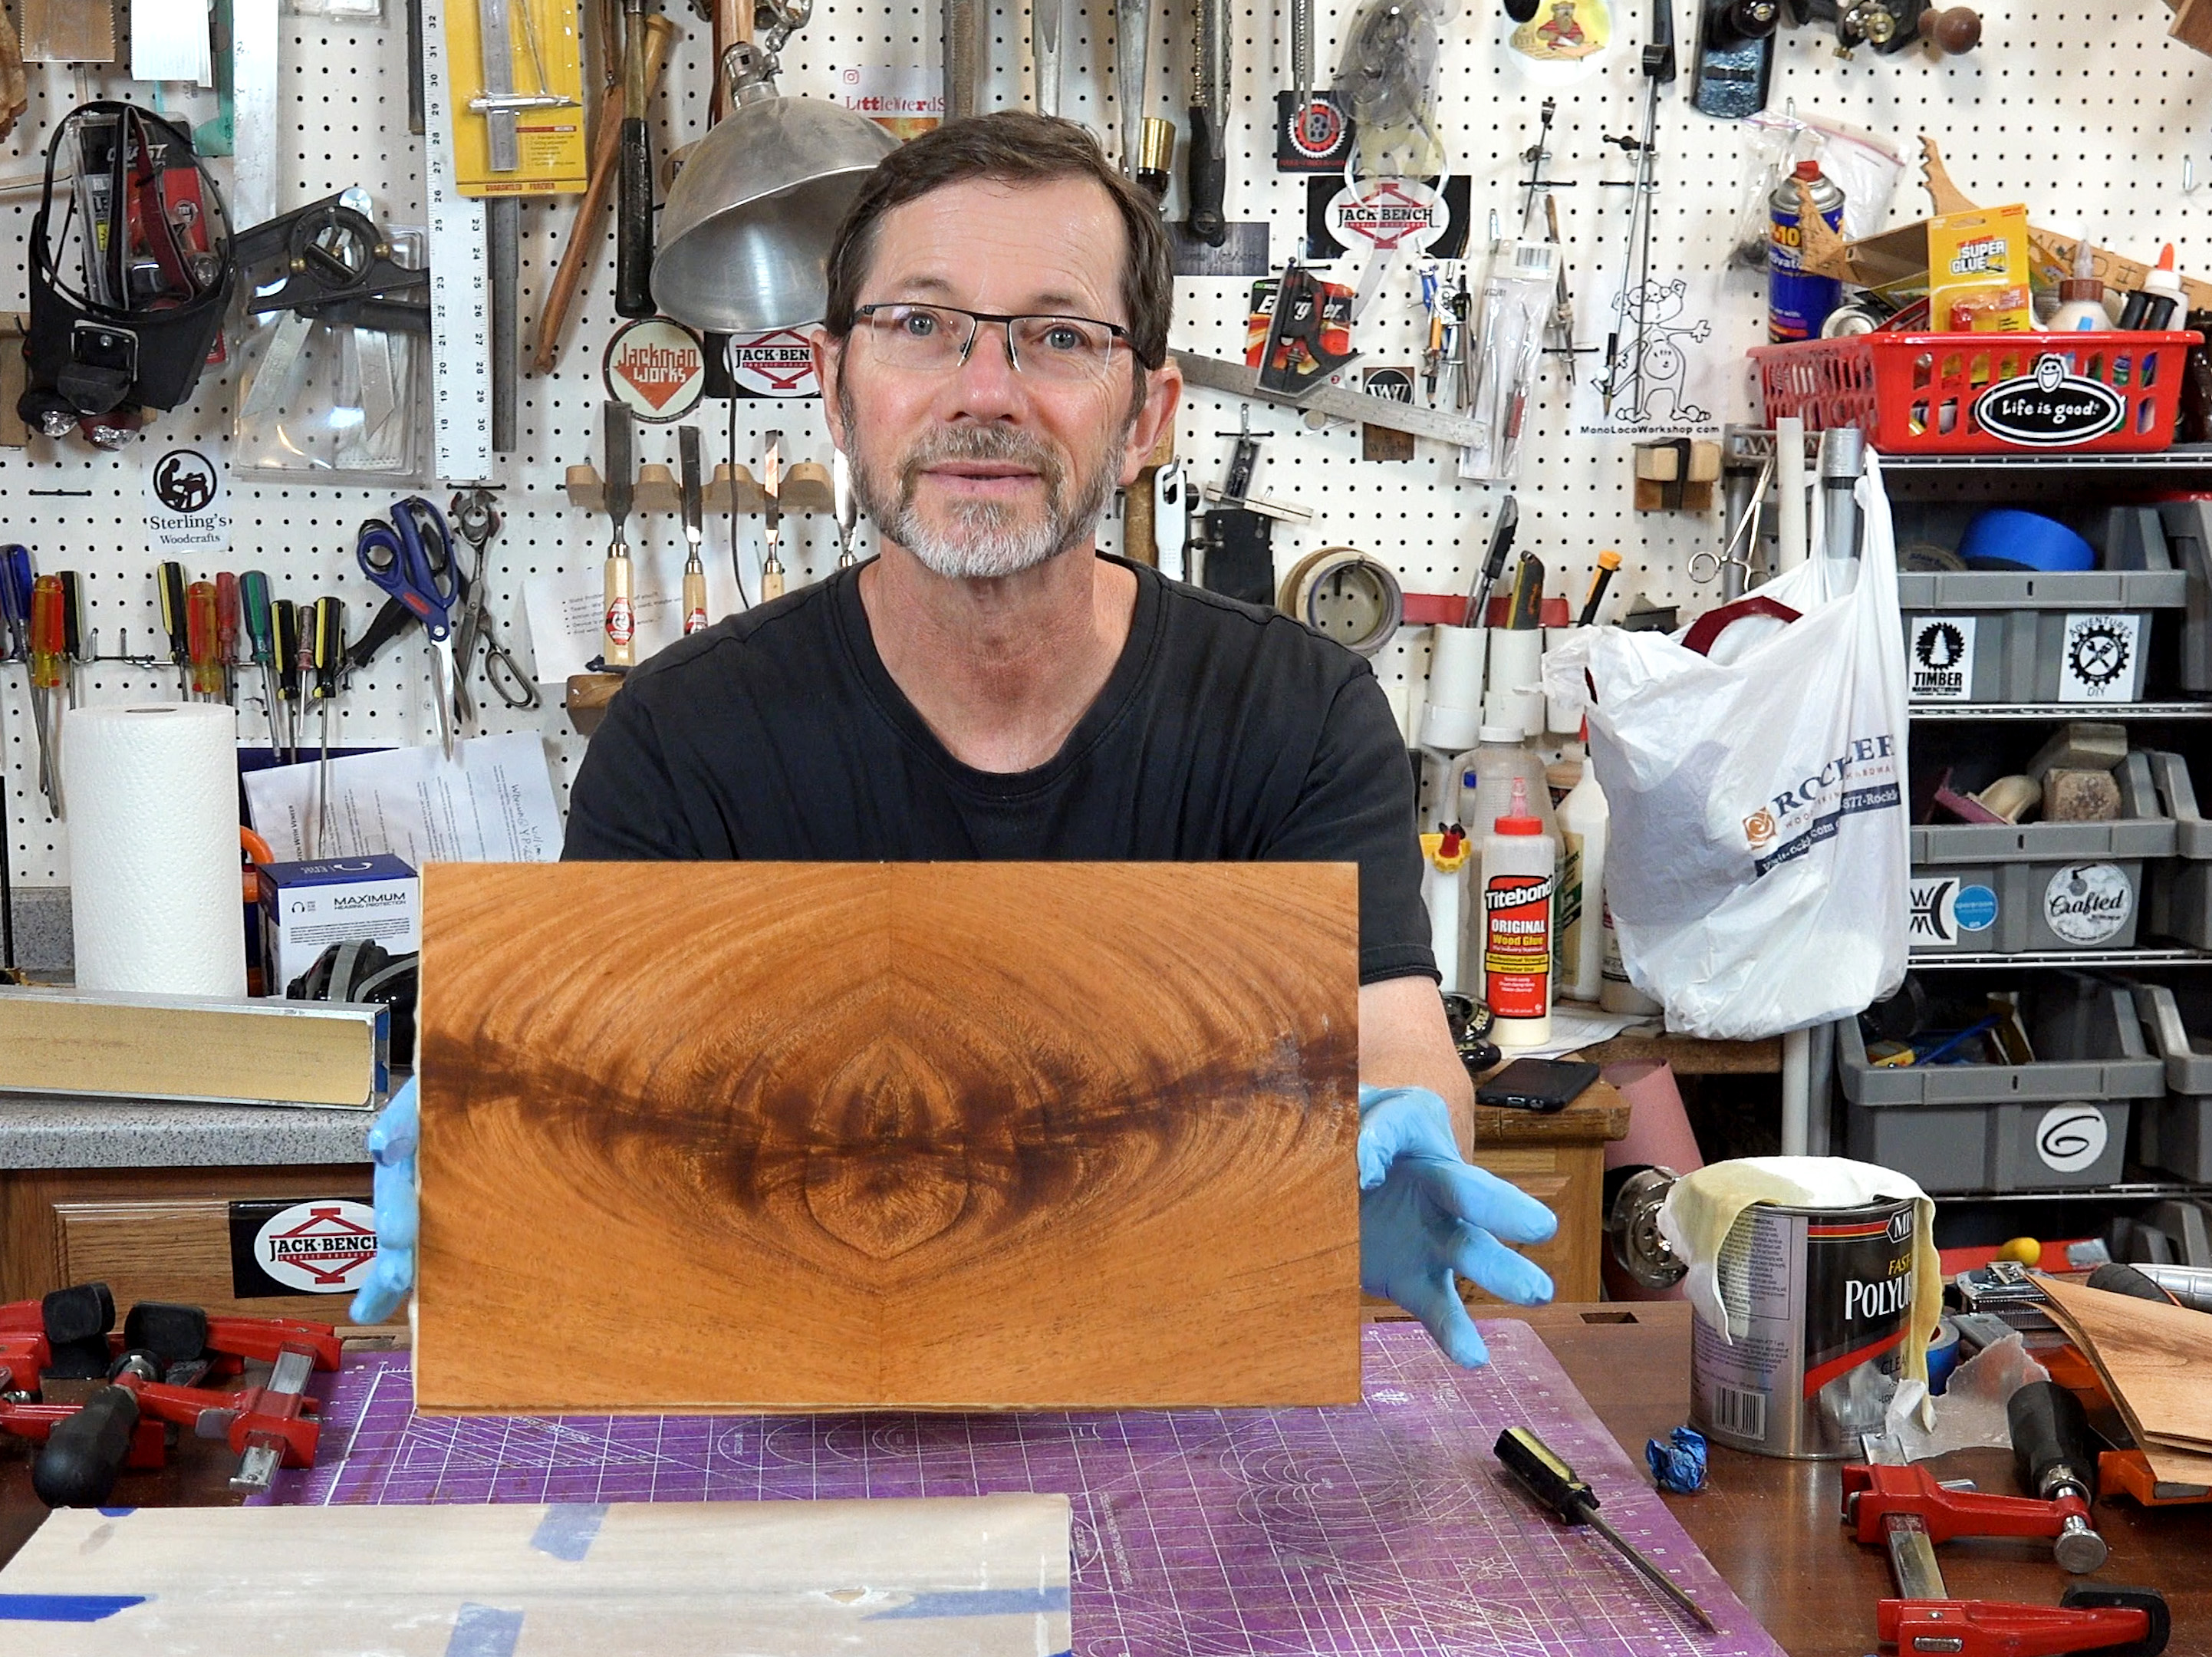
Here's how my mahogany book matched panel looked after I removed the clamps and applied a coat of polyurethane.
Veneering is fun, easy, and a great way to add a little pizzazz to your projects. The nice thing about this method of veneering is that you can do it using ordinary tools that you've probably already have in your shop. So, give it a try!
Also, if you're making something heavier like a table then check out my video on how to add solid wood edge banding to a veneered panel: Trick for Mitered Edgebanding on a Veneered Panel
In addition to this article, here’s a video that lays out the process for you:
You might also be interested in:
- A Guide to Veneering Wood: Part 1
- A Guide to Veneering Wood: Part 2
- A Guide to Veneering Wood: Part 3
- Repair Veneer on an Antique
- Applying Veneer with a Vacuum Bag
- Applying Veneer
- Gluing Veneer: No Paper Back


Great video and instructions. One thing not mentioned in the article is that some veneers, especially figured veneers, require flattening. This is a process that can take up to a week to accomplish.
Which side of the veneer are you taping, the face side or the glue side? Do you remove the masking tape, or just glue down and clamp the two book-matched pieces with them still taped together?
I'm confused by one thing. I think I understand the advice about balancing veneer when you are applying it to a solid core. But plywood is already nothing but layers of veneer alternating with layers of adhesive, and is much more stable than solid wood is. Is it _really_ necessary to apply yet another layer to the back side of ply, and if so why? Or is this just a habit that got carried over because we had always done it that way?
I love what you do with wood,