This year, my wife Ann suggested I make holiday gifts for several of our family and friends. She often produces fabric art quilts that are consistently well received. I contribute too, but not as many gifts as she does. Where does she find the time?
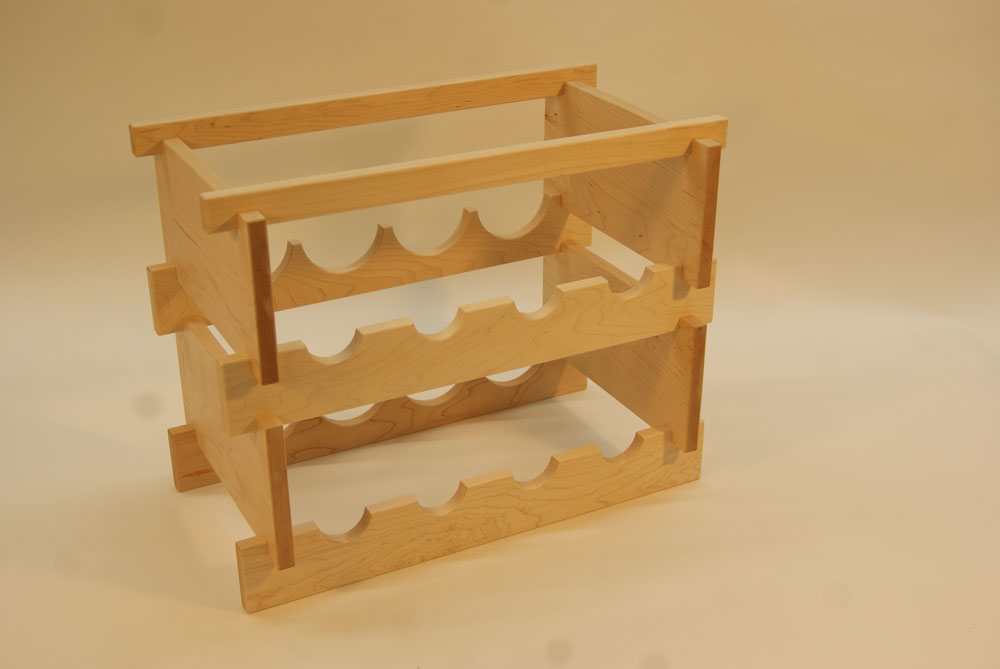
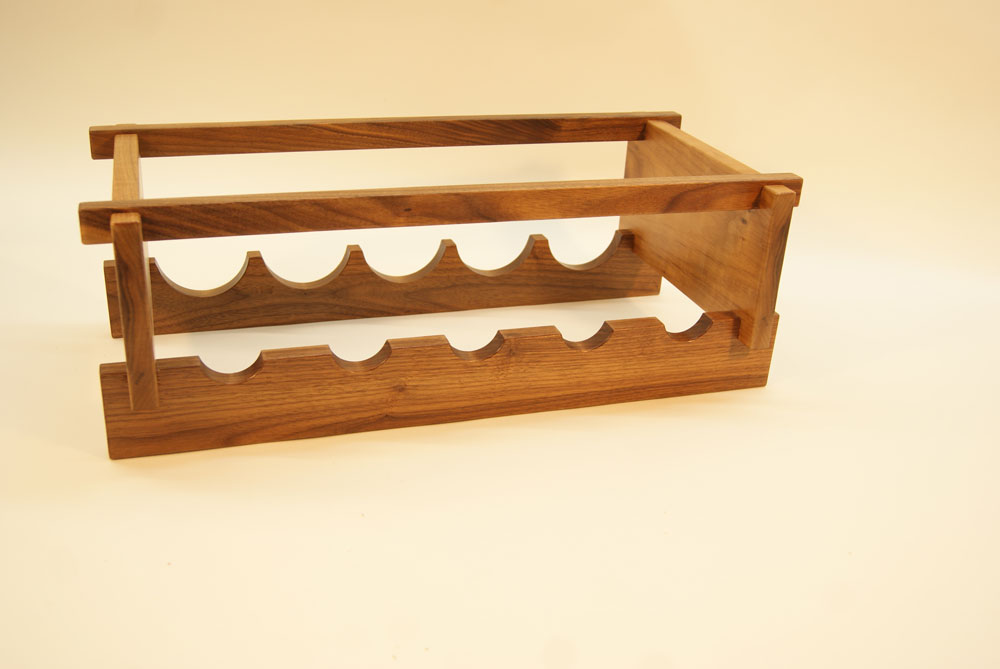
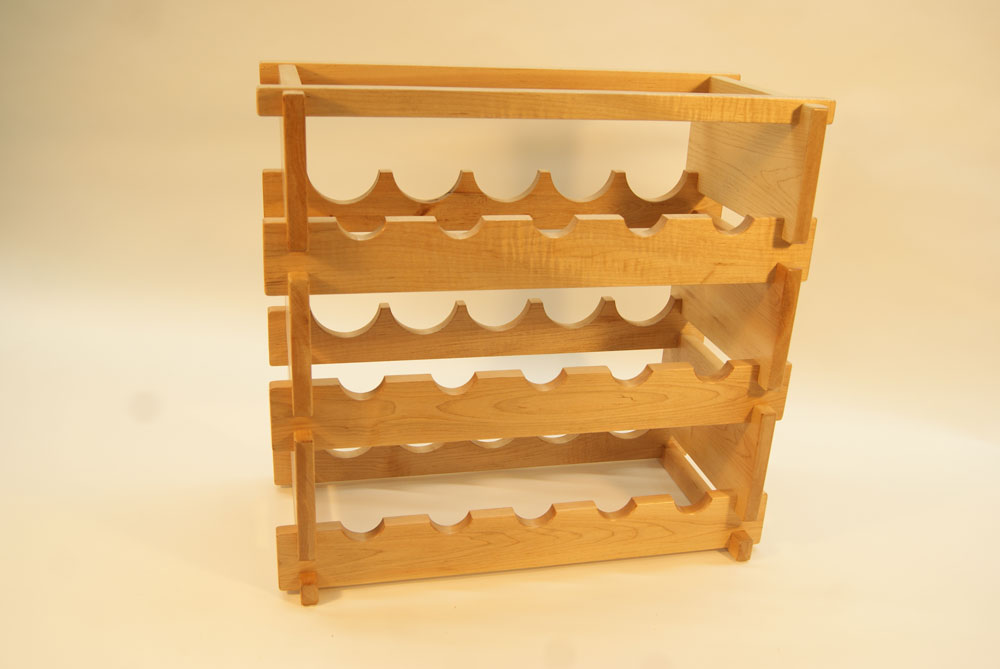
I looked through a couple hundred images of wine racks made from any number of materials, and constructed a half dozen or so before settling on a plan that would work for a very nice gift. My final plan holds 4 bottles per layer. I limited the height to 3 layers just to keep the size and weight of the piece reasonable. An alternate plan includes 5 bottles per layer.

I always start with good quality hardwood. Make sure it’s flat and of uniform thickness. The joinery in this project, though not terribly complex, requires fair precision. Specialized tools required: a dado set and 2 hole saws, (3-1/4” and 1-1/4” diameter). You’ll need a drill press to run the hole saws.
Because of the joinery the stock must be uniform thickness. Your best bet is to run the parts through a planer and mill them to 3/4” thickness. Cut pieces according to the cut list, and make sure to cut a few test pieces from the same material for adjusting your dado blades.
For your order of operations I suggest you do the bottle cut-outs then the dado joint cuts. The reason is this: the bottle cuts are where things might go wrong. Simply put, the piece could slip during the drilling process. If you mess up a bottle cut-out you can replace the piece and you don’t have too much of a labor investment.
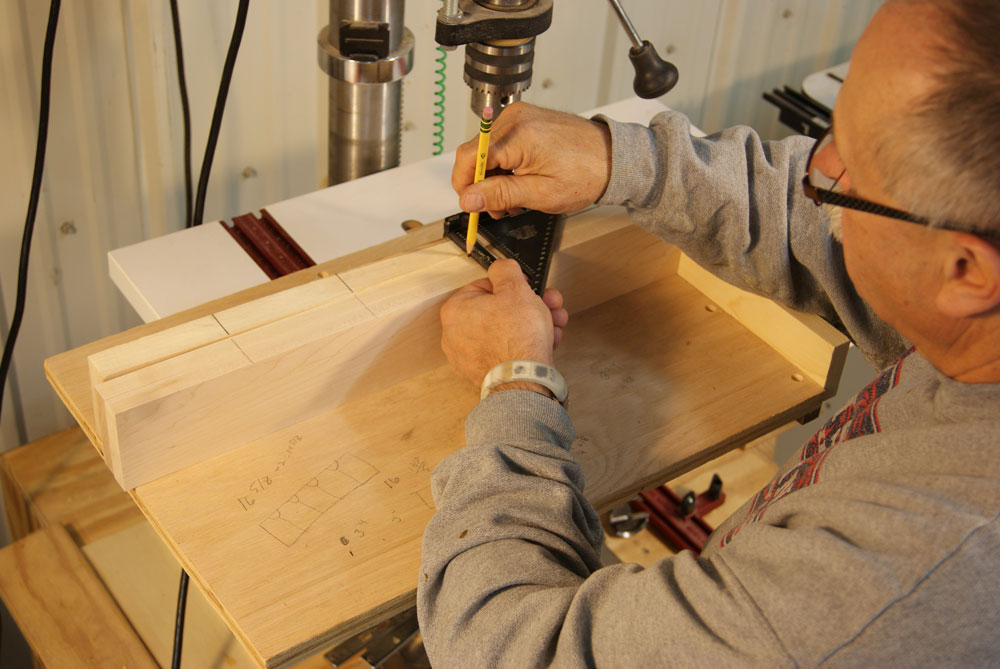
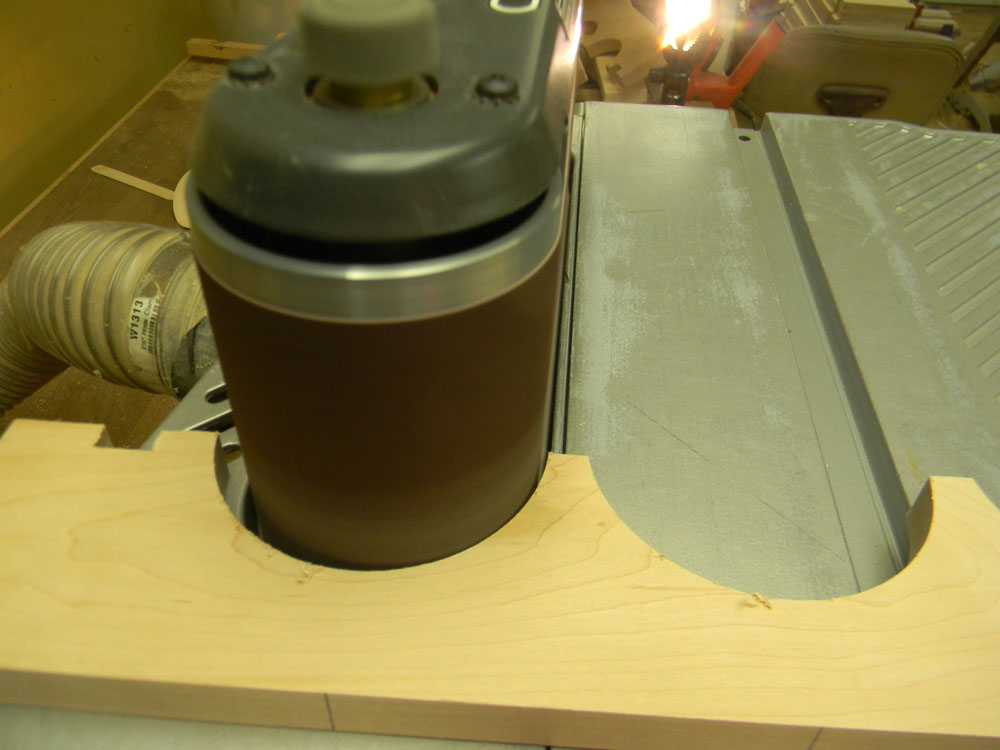
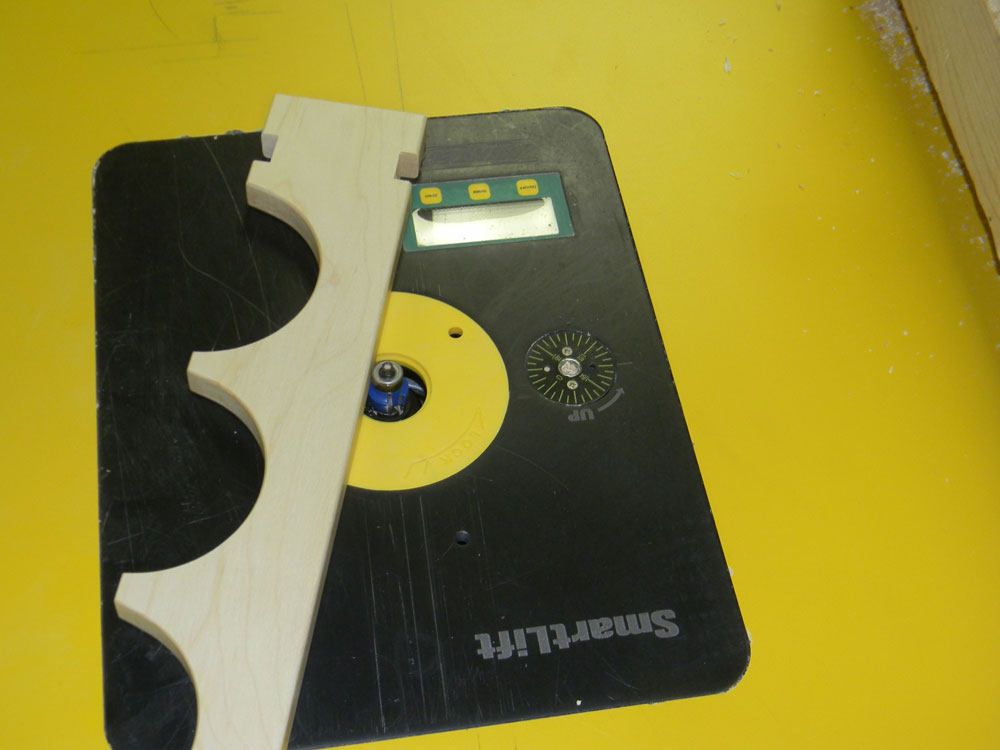
Set up the drill press for making the bottle cut-outs
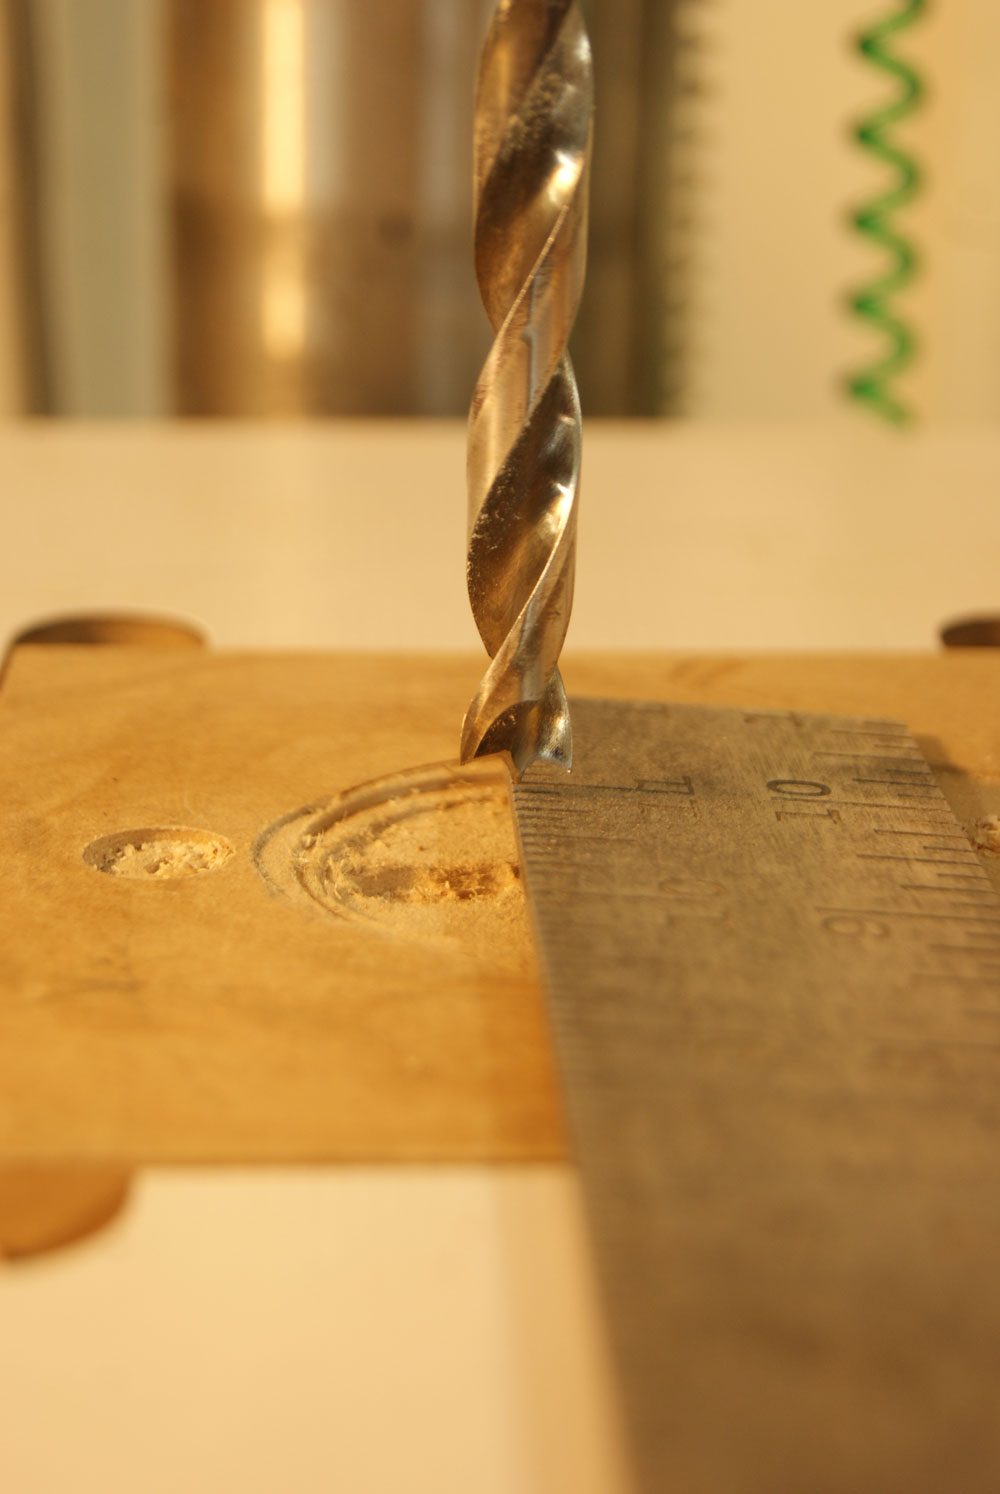
With the head of a square against the front edge of the drill press table align the edge of the square with the center of a drill bit.
Hold the square in this position and draw a line along the edge. This line is used as an index mark for positioning bottle rails.
Clamp a fence to the drill press table. It’s best if the fence is thicker than the project material. That way the hole saw is already riding against the fence before it contacts the wine rack material.
Position the front edge of the fence 1/4” beyond the center of the drill bit. You will be drilling out slightly more than half a circle from the waste block. Make sure the waste block is perpendicular to the index line for best results.
Drill the bottle cut-outs
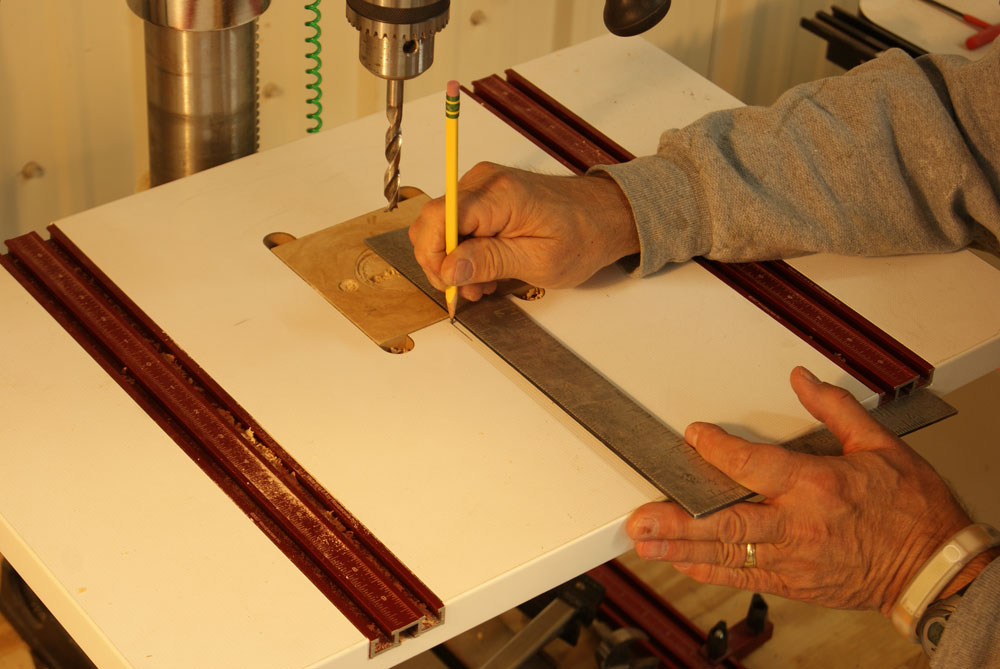
Draw index lines on the bottle rails at 4” increments.
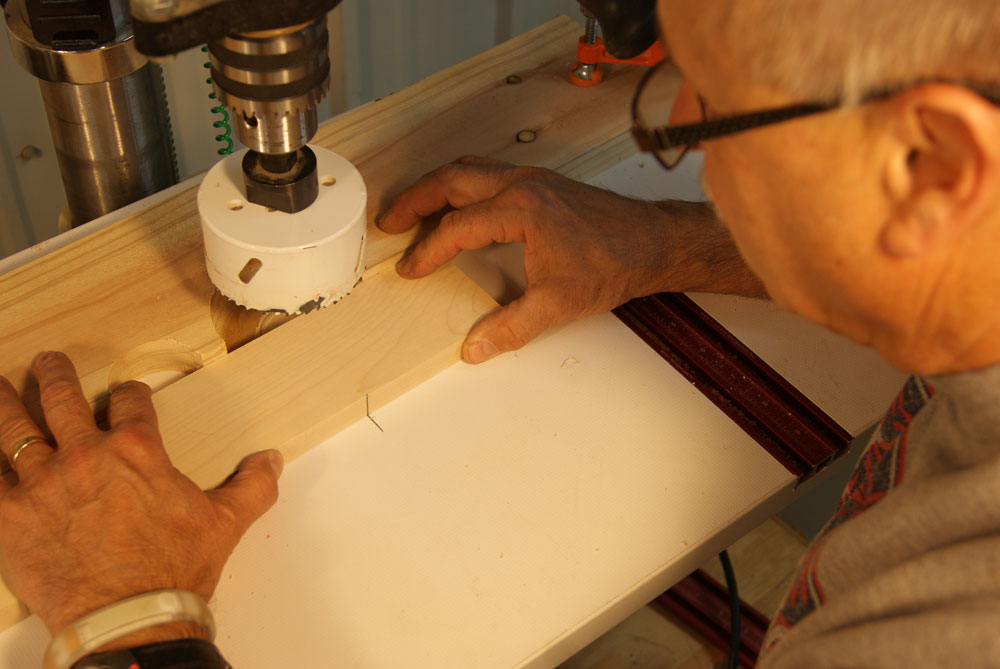
With the 3-1/4” hole saw in the drill press, align the first index mark on one bottle rail with the index mark on the table and clamp the rail securely in place.
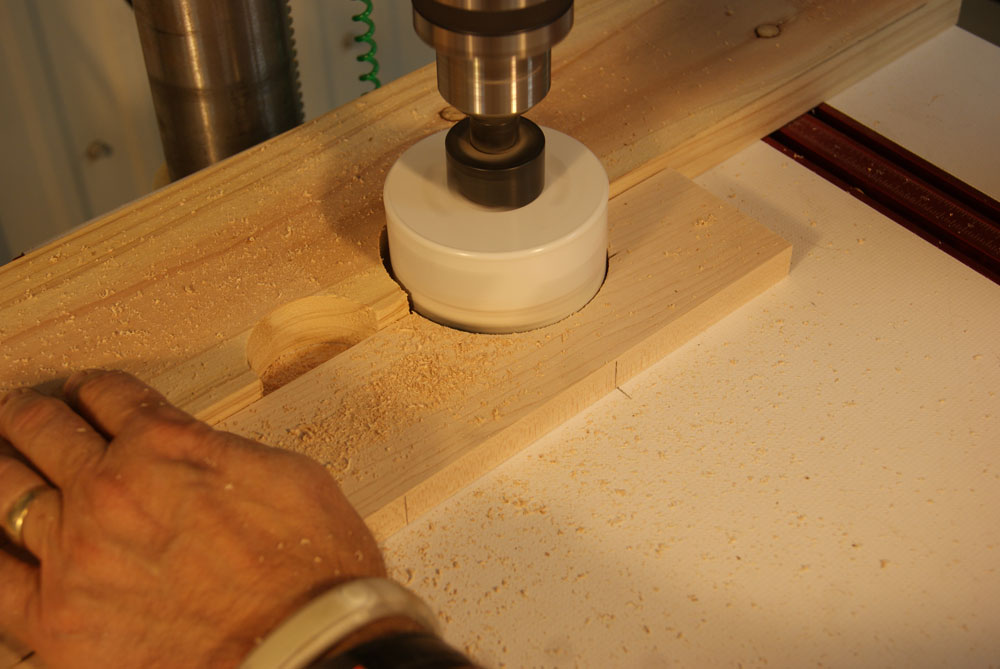
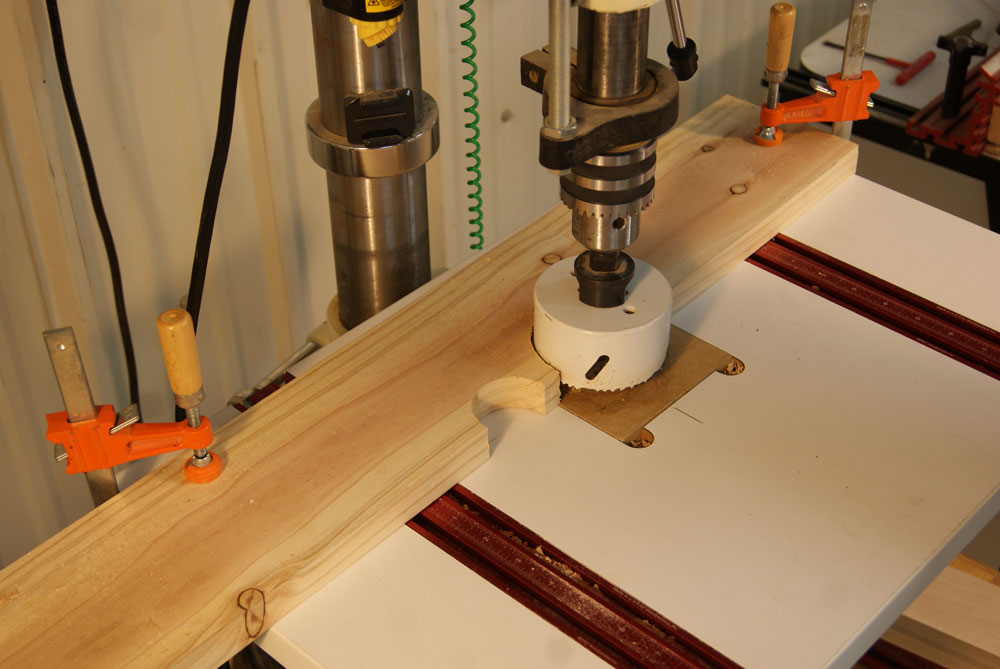
Gently feed the hole saw into the rail. Note that the rail is tightly clamped to the drill press table, but the clamp is out of the frame of the photo.
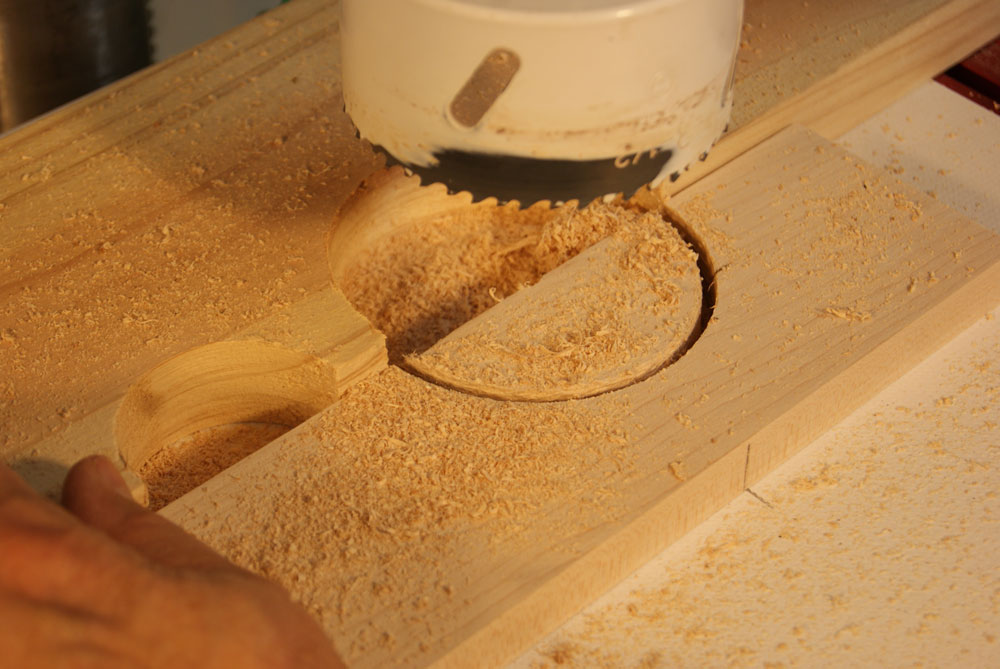
If the cut-out remains inside the hole saw be sure to remove it before making subsequent cuts.
Move to the next index mark. Continue until half your rails are done. Then change to the 1-1/4” hole saw. Position the fence by nesting it against the hole saw. Again, keep the front edge of the fence perpendicular to the lay out line you made on the drill press table.
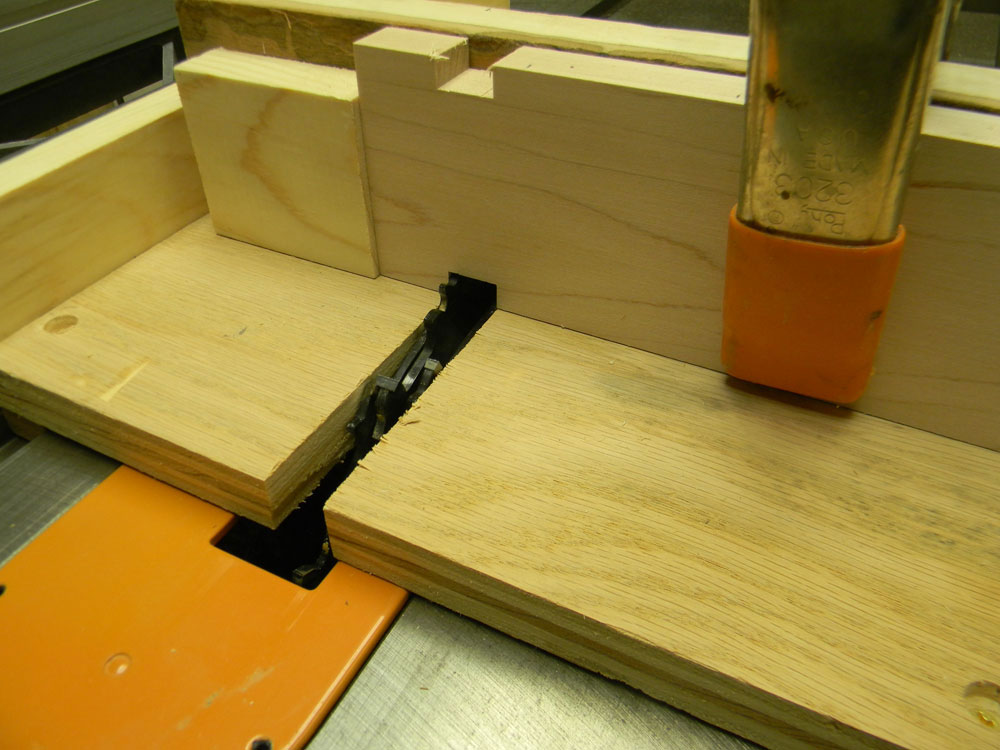
Cut the dados
Set your dado head to the thickness of material and test it carefully. You’ll want a snug fit. Test, test, test. Just make sure the dado cut is the same thickness as the material! If the dado cuts are too large, your joints will be sloppy. If they are too small, you might chip edges during assembly. If you’re using softer or more porous woods, consider the possibility of swelling when applying finish. You might want to experiment with your chosen finish on a couple test pieces.
I use a shop-made sled to cut my dados. You could use a miter gauge with a stop block, but the sled is simple to make and goes a long way to ensuring consistent dado cuts on your material.

The sled is made up of a base 12” x 20” with 2 slides arranged to match the miter slots on your table saw, a fence perpendicular to the cut, and a stop placed to ensure the data starts 1” from the end of each piece.
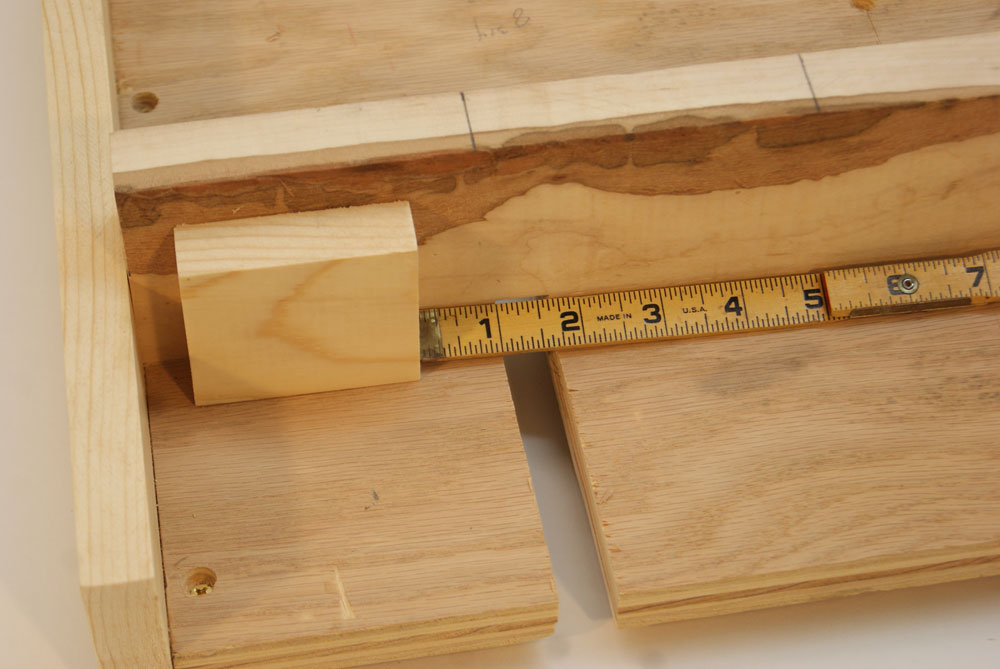
Note: The end piece along the left edge of the sled as shown in this photo acts as a guide. I place the bottle rails against that end piece and use index marks drawn on the sled fence at 4” increments for making index marks on my bottle rails. (See earlier photo)
Here’s a sketch of the sled to add clarity.
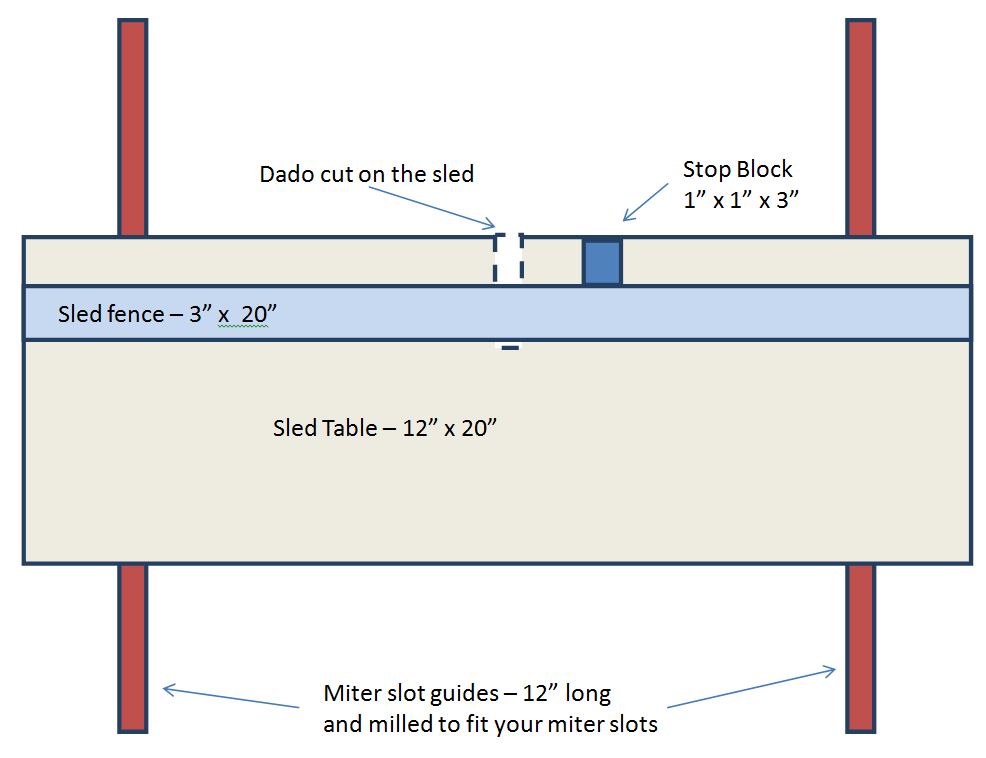
Tech note: In this illustration we show the slot guides extended beyond the body of the sled. This is not necessary, it’s just to give you a better idea of how the sled is built.
Note that the dados are cut on both ends of each piece, and on the top and bottom edges, EXCEPT, the bottom edge of the lowest rails. These are base pieces and don’t require a dado on the bottom.
The sides, 6” x 12” pieces, need dado cuts on both top and bottom edges. For the top rail designed to trim the last layer, (1-1/4” x 20” pieces), cut dados in only one edge.
Sand and rout
Sand the bottle cut-outs using a spindle sander. These cuts can be sanded out by hand, too.
Gently finish and the faces of all the pieces. Keep in mind it’s important to keep everything the same thickness.
Use a router table to round-over each edge – except inside the dado cuts. You can do the same thing with a sanding block and some 220 or 320 grit paper.
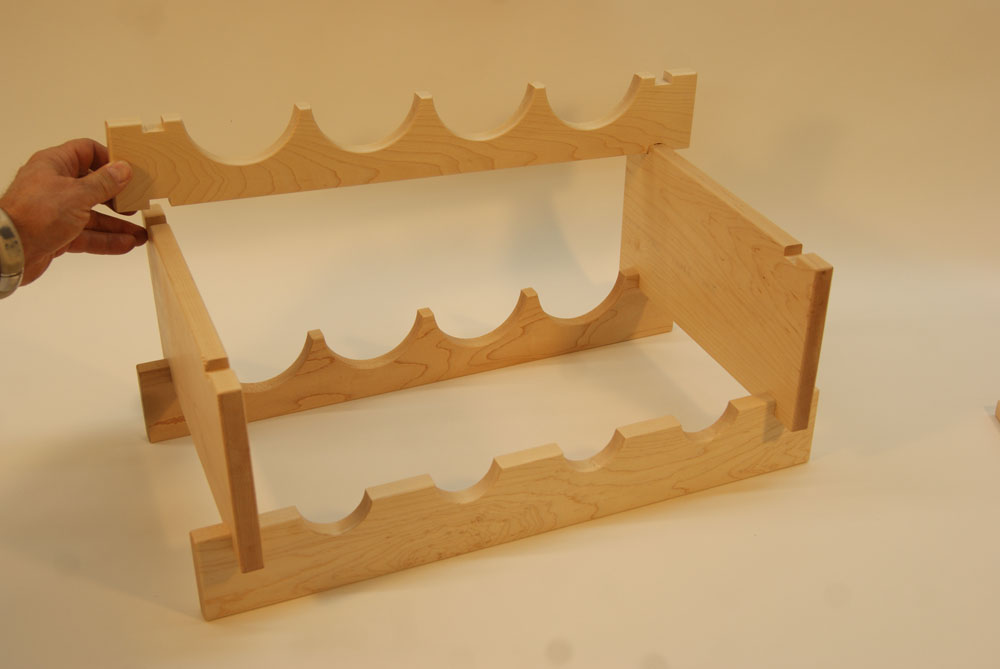
Dry assemble your project and make any necessary adjustments.
Final sand and mask off the dado joint surfaces. Apply 3 coats of lacquer or polyurethane. Sand with 400 or 600 grit paper between coats for the best finish. Let the coats cure completely.
Assemble finished pieces using good quality wood glue with a generous open time – 10 or more minutes. It’s a good idea to assemble all the layers at one time to ensure perfect alignment. Clamp firmly and let the glue cure thoroughly.
Cut List for 4 bottles wide

Cut List for 5 bottles wide

Several Projects – 1, 2, and 3 layer racks
Single Level
Two Level

Three Level

How come I can't see the build of this project or the cut list only shoes me the finished picture
Up to how many levels do you believe this project could handle? Would six or seven levels be dangerous? If so, how would you reinforce it? Thanks.
I'm in favor to save time and cut the holes in à six (6) inches boards and split them in half !
Two questions, materials list for 12 bottle rack shows 6 pcs of 6" x 20" & 15 bottle rack shows 6 pcs of 6" x 24", shouldn't that be 3" in both cases for the bottle racks ?? Also if the front & rear bottle racks are made of the same height material will that allow the bottle to sit in a position that keeps the cork wet as recommended by a lot of wine producers ? Thanks, I like the idea.
Is cut list for three layer racks correct? I would have thought 6 pieces of 3 x 20 or 3 x 24 rather than 6 x 20/24
How many levels can you go?
Looks like fun. I'll make it with my Shopsmith
There actually is no substitute for experience, because that's how your Realtor is able to zero in on properties that be practical and steer clear of wasting time on properties that don't. If you are buying a flat in Mumbai initially it's preferable to seek assistance of an agent which will show you through the entire process. If you have a pal or neighbor that's very happy to have their own number provided as a possible emergency contact that can be a great benefit.
If you have a spare few minutes use a walk around the neighbourhood and discover what exactly is where and what distance it's towards the nearest bus stop or a local shop. Bulgaria has among Europe's most varied landscapes, in the immense lowlands of the Danube Plains inside north, the highlands inside south along with the beaches, with miles of marine grandeur in the Black Sea coast. Fast forward 10 years, perhaps even just five, and we'll be traversing to a unique side to Perth.
Like this build ,need it soon