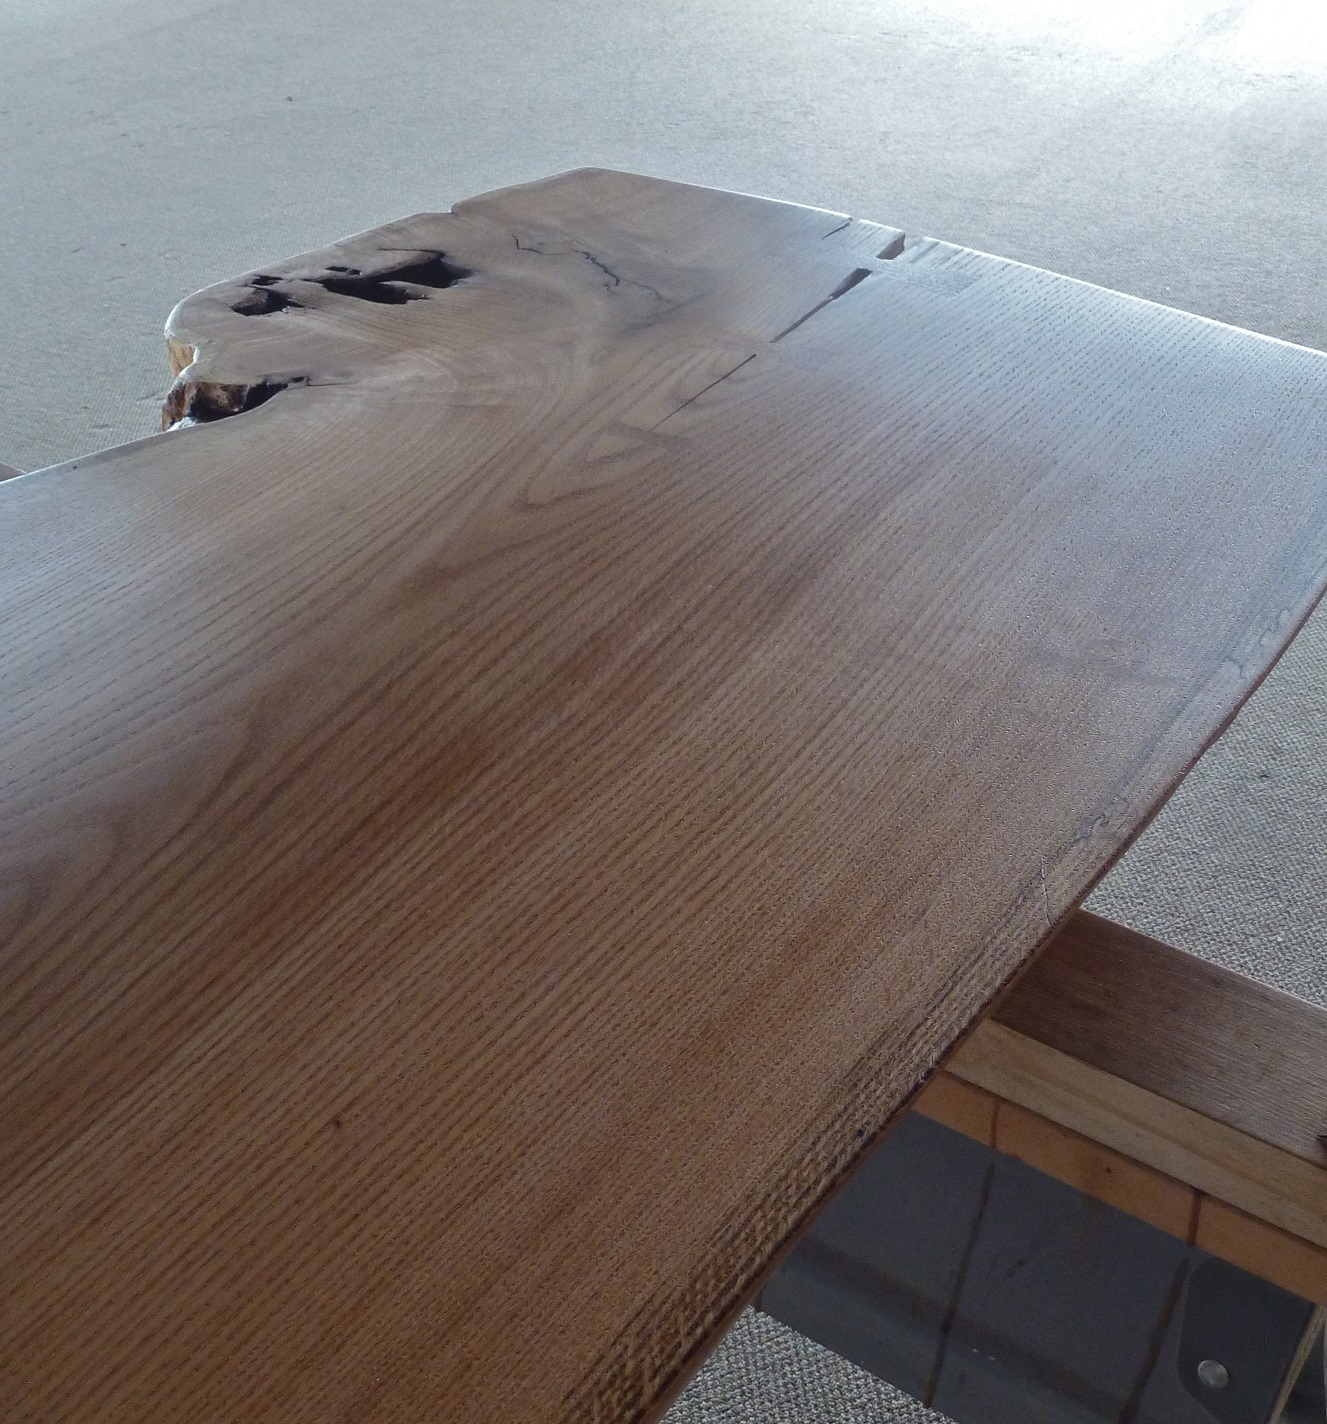
Much of the work I do utilizes beautiful, live-edge hardwood slabs like this 34” wide piece of red oak. Because my sources are often different, I rarely know how long the wood has been drying, what the conditions were, and if the wood will move much when I get it back to my shop. I finished this tabletop, including five coats of hand-wiped varnish, and it was ready for delivery the following day.
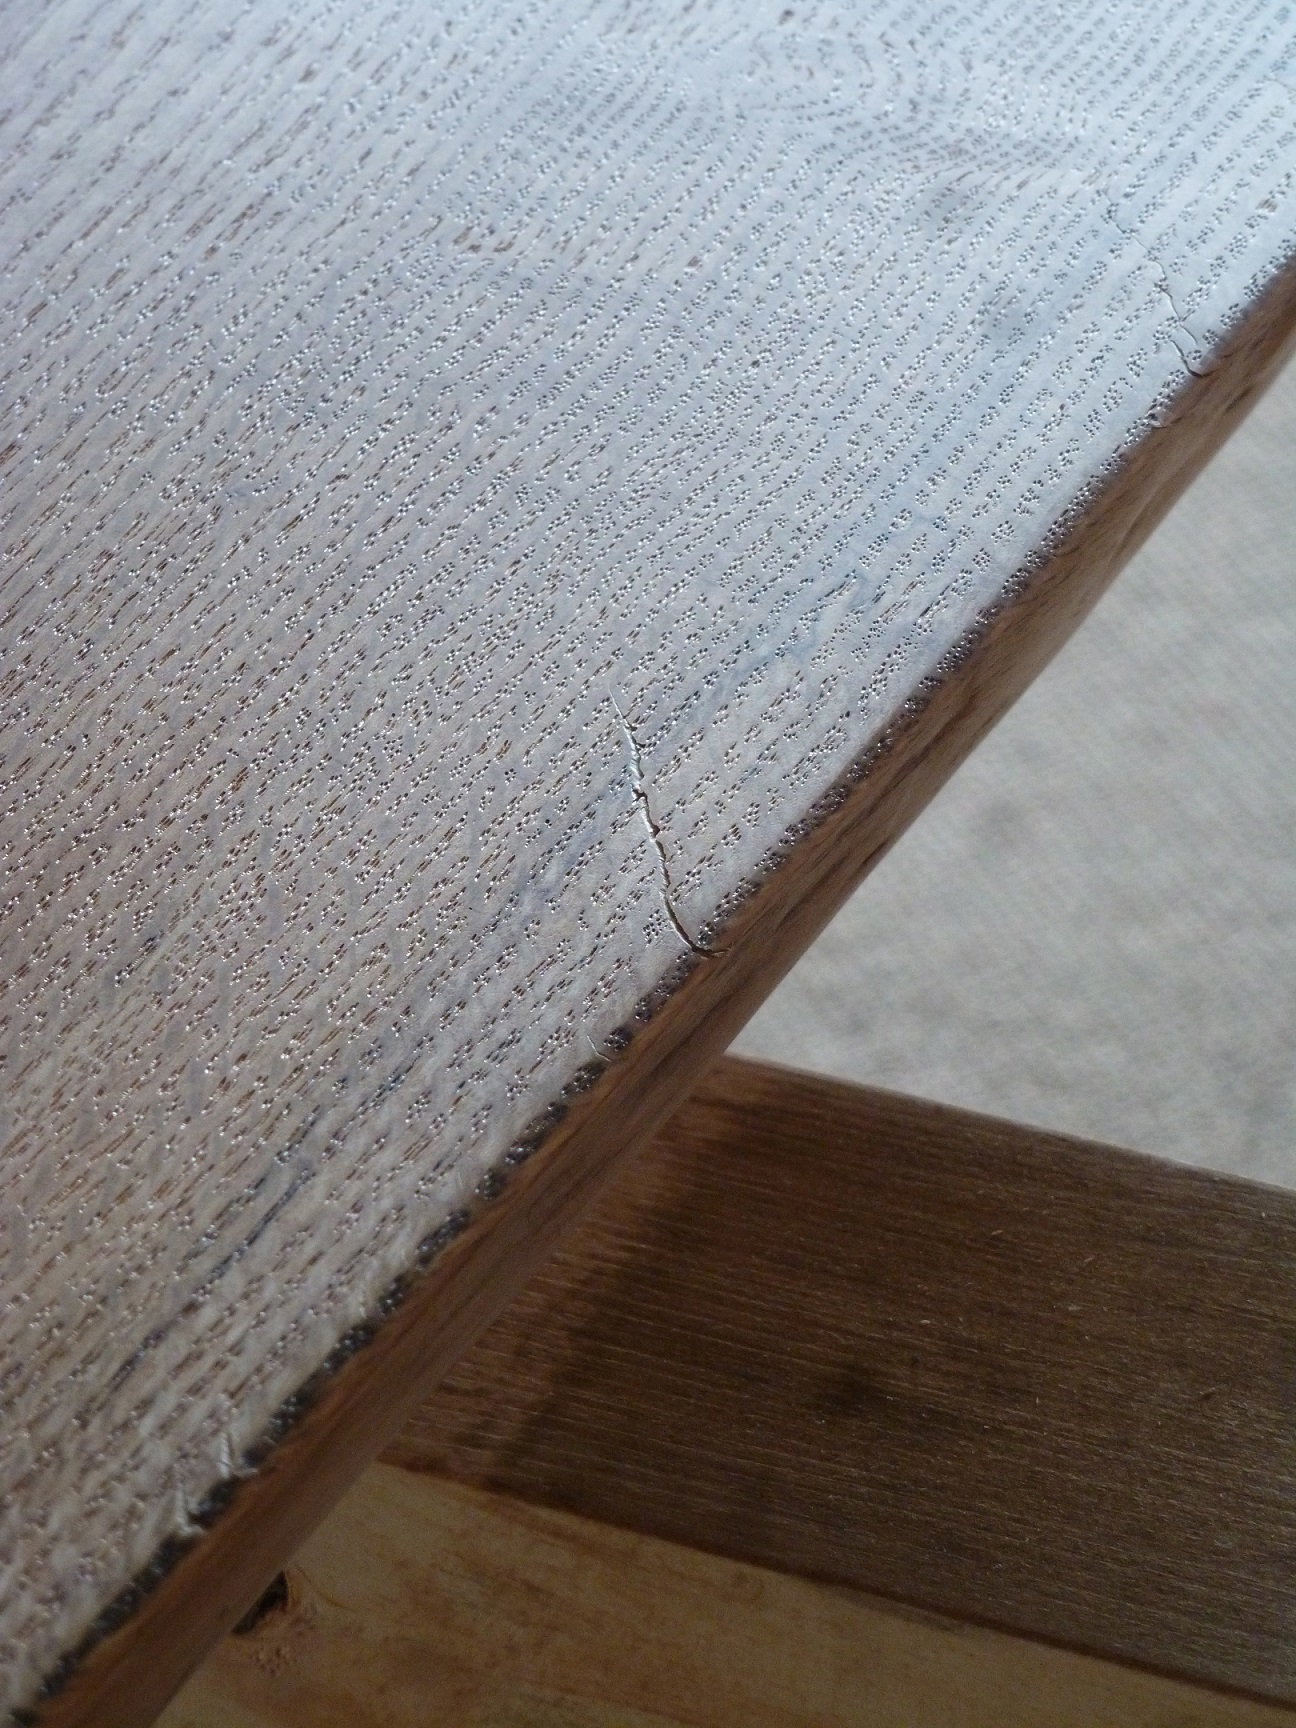
Whoops, I was wrong! Before I wrapped it for delivery, I inspected the surface and found an odd fracture which followed some of the quarter-sawn ray flake on the edge of the slab. This was a disaster waiting to happen, as a piece of clothing or wayward thread was sure to catch it, tearing out wood and possibly damaging a shirt or jacket. It needed to be fixed, and right away.
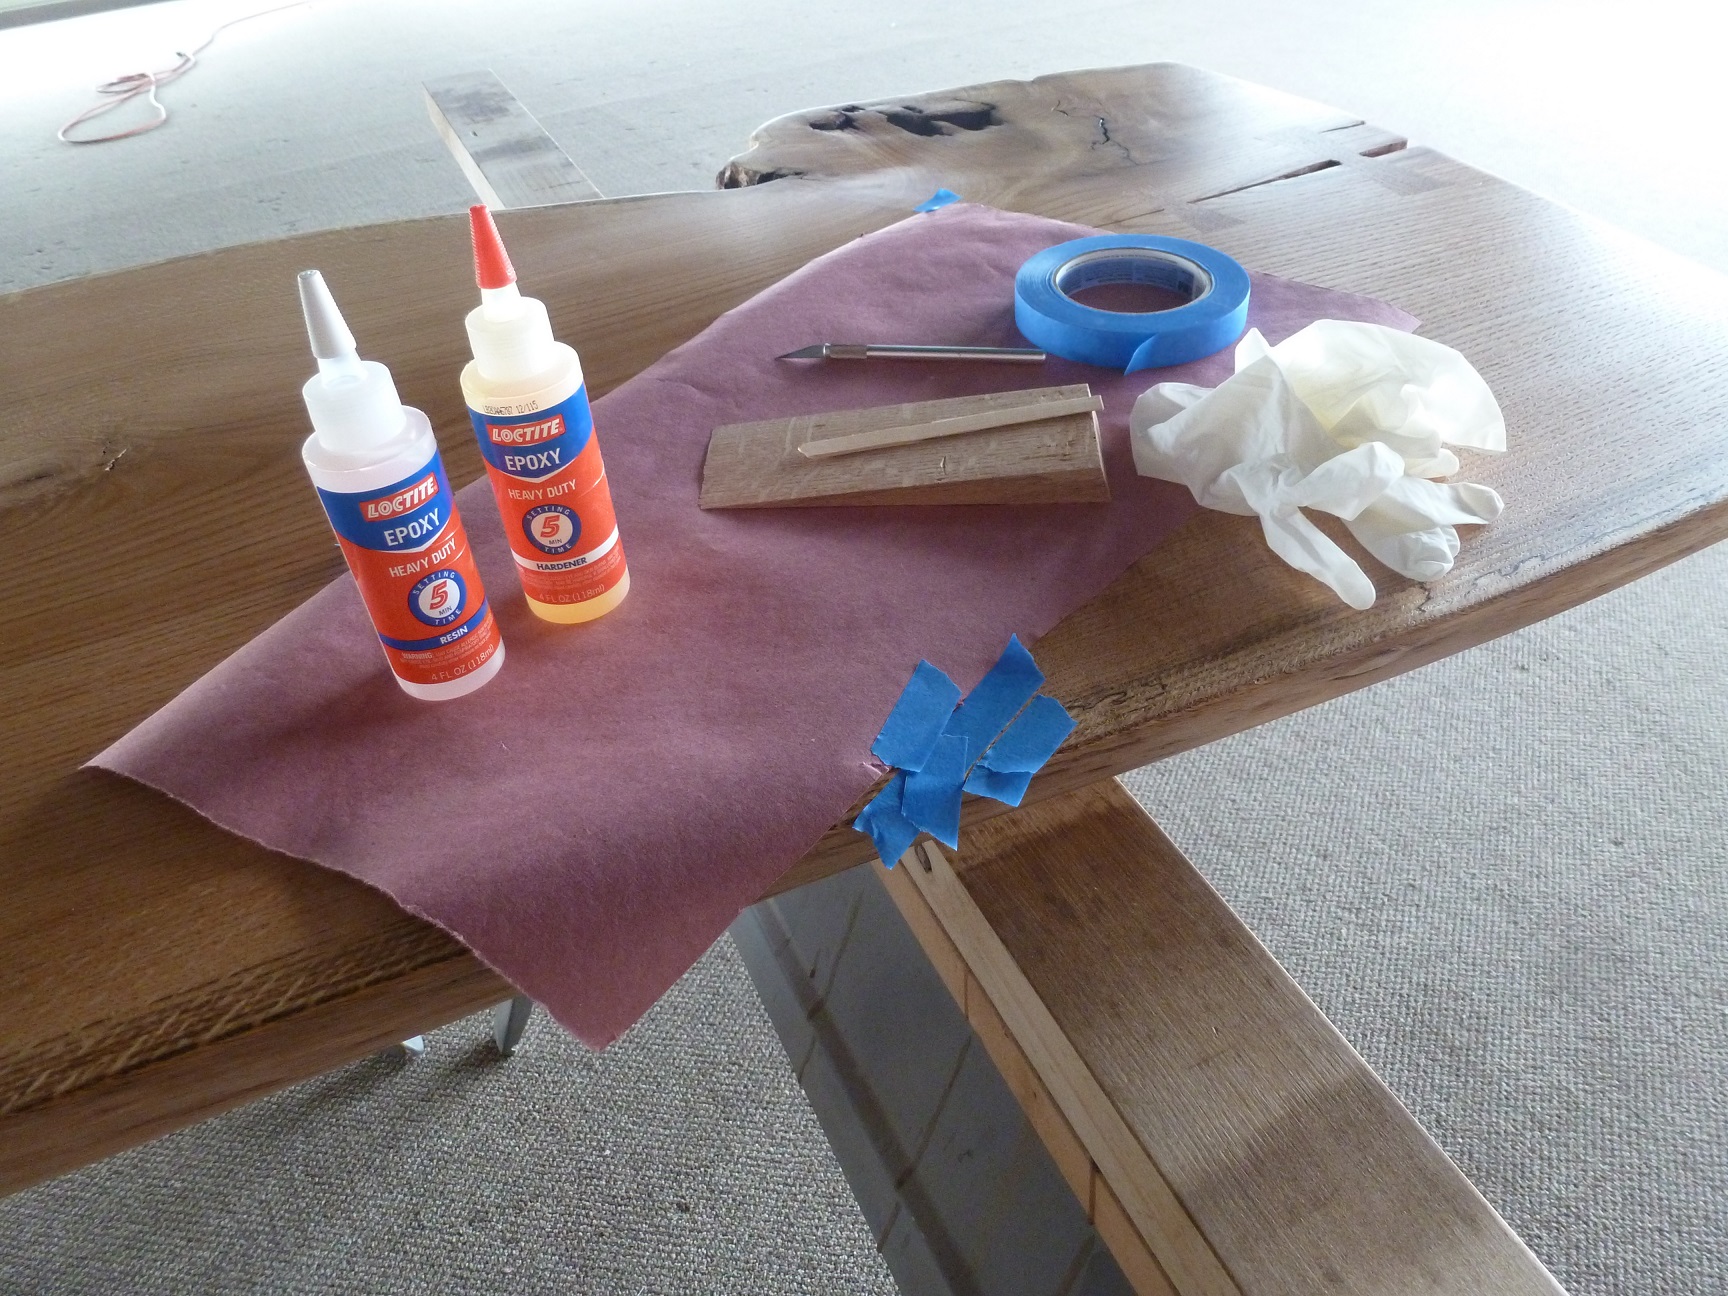
I gathered all of the parts essential to repairing a thin fracture like this. My list includes 5-minute epoxy, latex gloves, masking tape, an X-Acto knife, a mixing stick and a small block of waste wood where I mix my epoxy. The most important thing to do in preparation is masking off the area around the fracture. Because red oak is so porous, I made sure to mask each and every pore near the crack; if I even filled just one of these pores with epoxy, the repair would look bad.

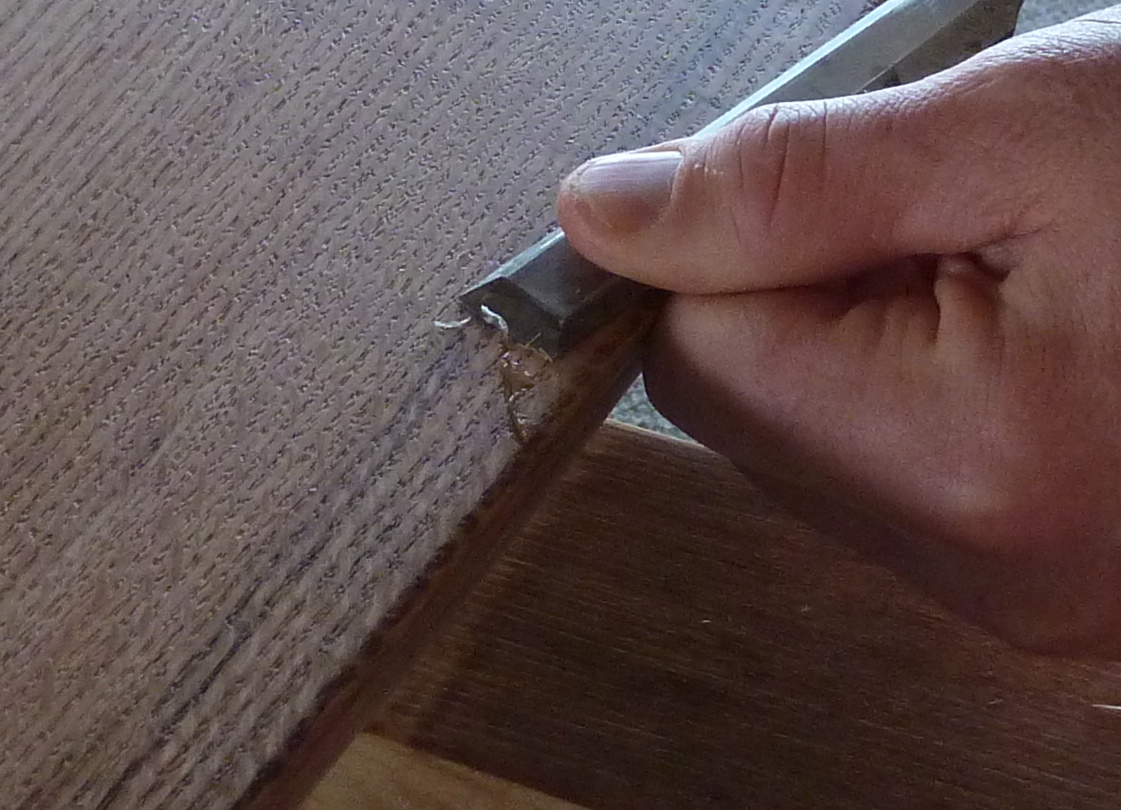
The process is a bit like surgery, with a lot less at stake of course! After mixing thoroughly, I load the stir stick with epoxy. Using the X-Acto knife to pry open the fracture, I force in the liquid epoxy. Of course, I take care to not spill, and quickly work to fill the whole crack… and I don’t worry about getting epoxy on the disposable blade.
Twenty minutes later, I remove the tape. The epoxy isn’t in any of the pores, but sits proud of the surface a bit. I use a sharp chisel to pare the epoxy flush with the top. The clear epoxy repair will disappear. Since I had 12 hours before my delivery, I lightly sanded the surface with 320-grit sandpaper, and wiped on another coat of varnish. Disaster averted!


I have a 50 year old wooden high chair (for babies to eat at). The wooden tray has split. Would it be relatively safe to repair this with epoxy?
Without a final result photo, there is less credibility to this procedure.
I would also like to see results photo
Trying to make a stable top out of a single slab seems risky. Traditionally tops are made from narrower boards doweled together with alternating curves, but who can say what someone wants that must be truly "natural"
Would like to see the final repair picture.<strong>
These photos don't load
Would like to see a real after picture
I "wood" have very much liked to have seen the final result up close. I've tried this before without good results. Now I know how to do it right. Thanks!