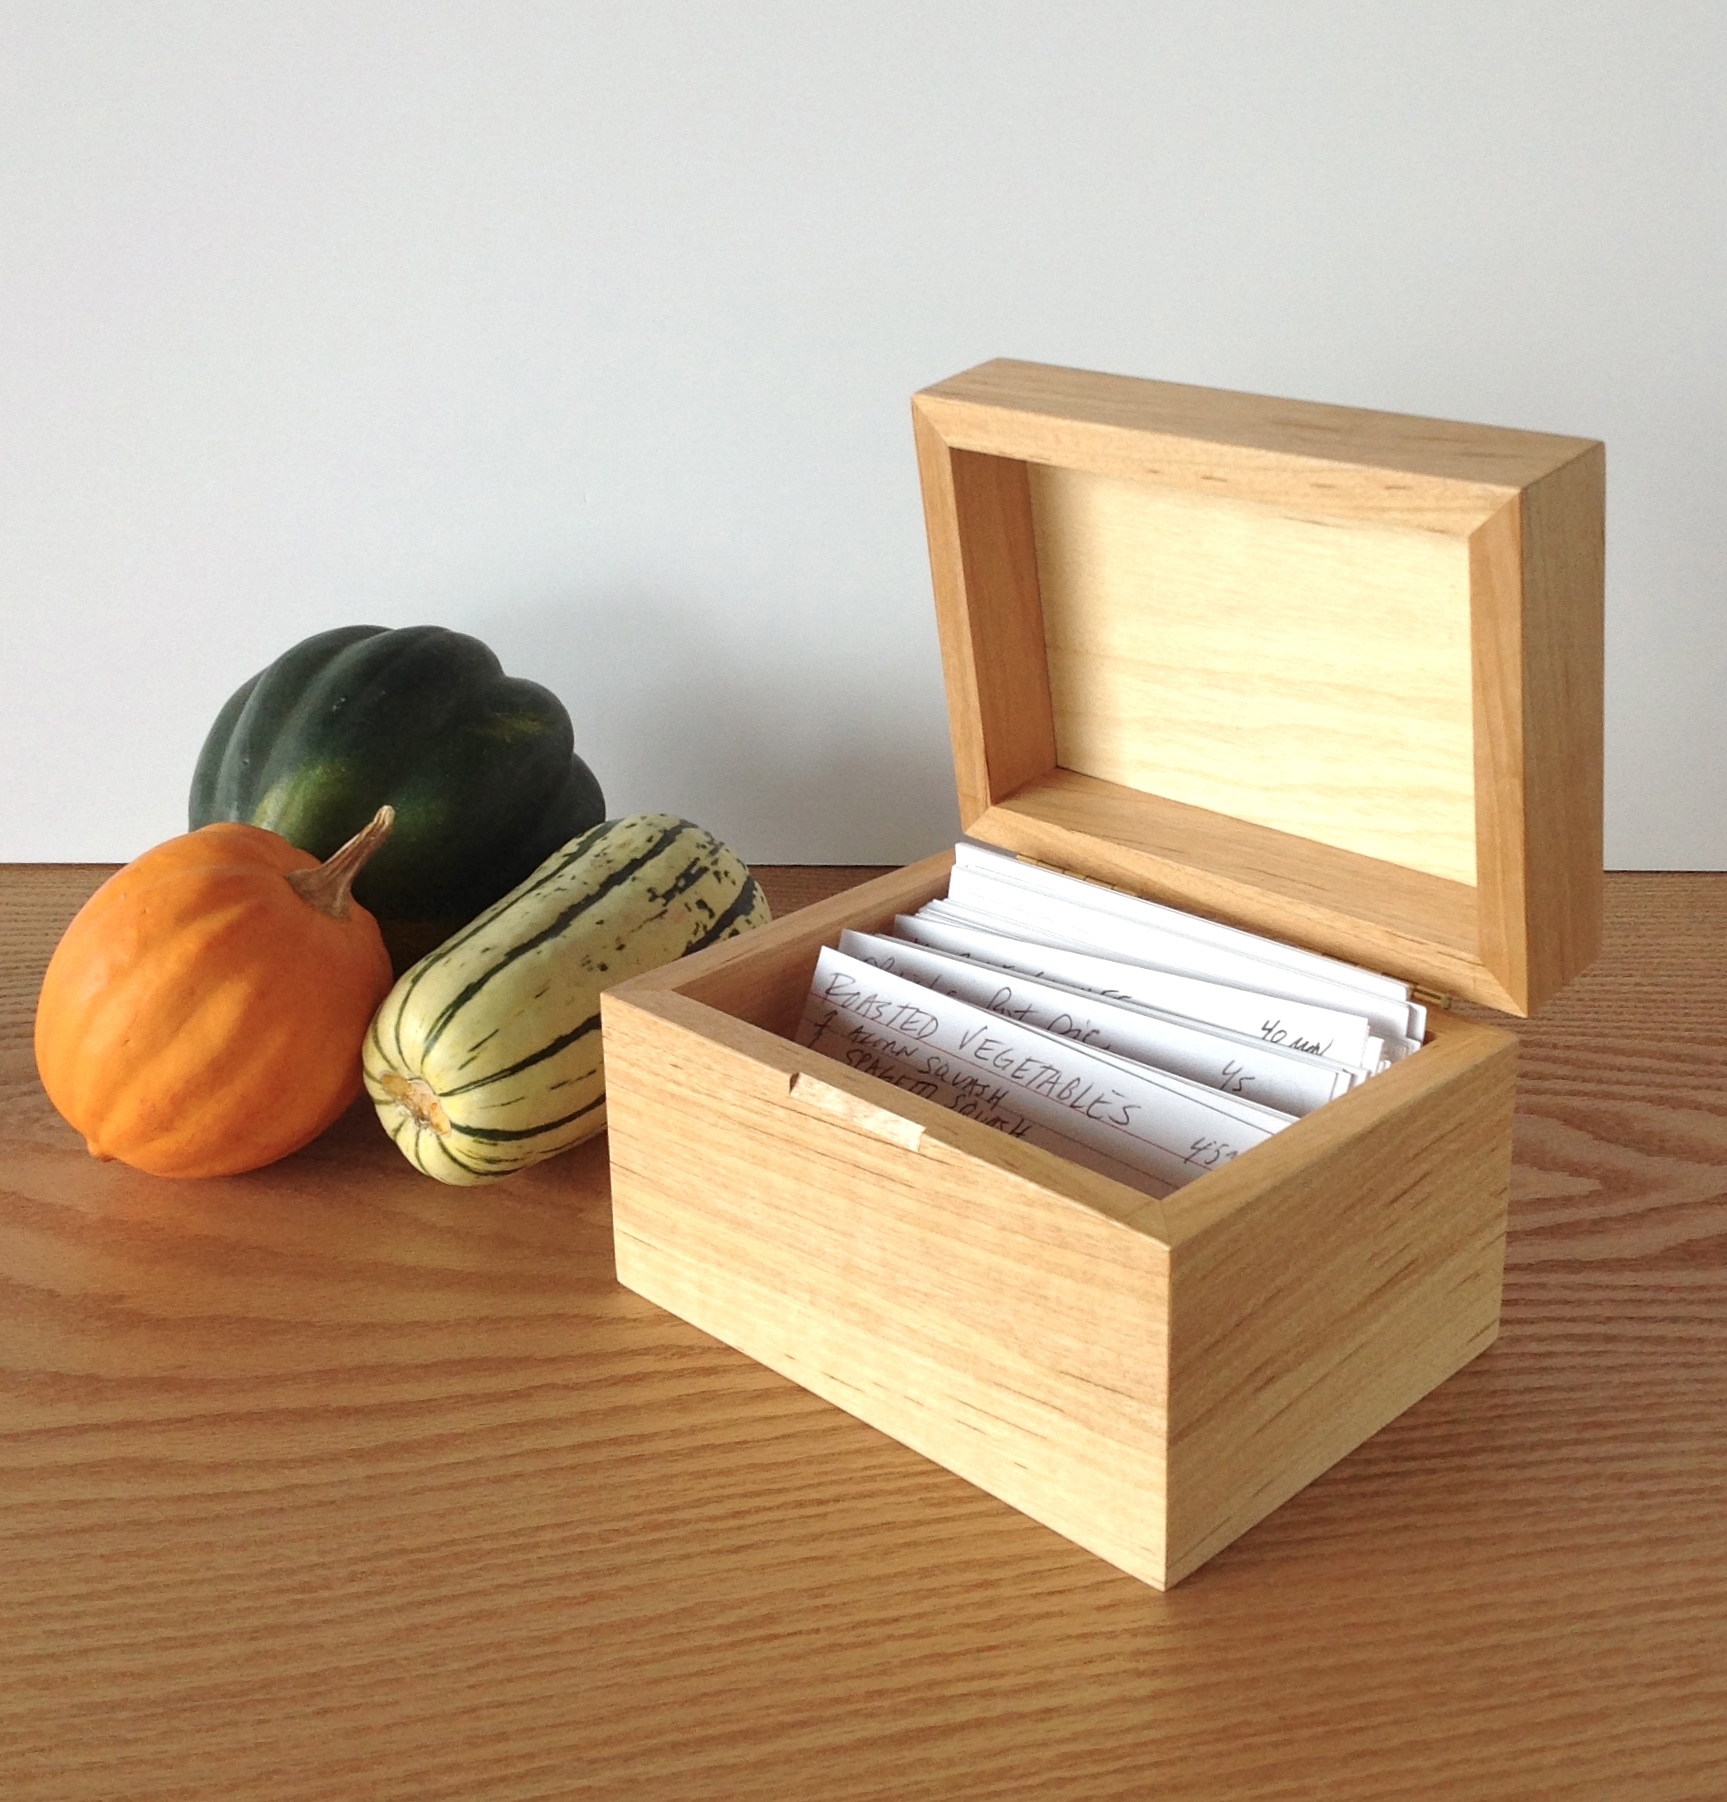
Let the Feast Begin!
At our house, we use an iPad search for much of our cooking, but we also have a slew of recipes passed down from grandparents or culled from the Food & Wine section of the local newspaper. I’ll never throw away these pre-internet culinary gems, and I’ve designed a simple, beautiful recipe box in which to store them. This project not only uses up all those beautiful little wood scrapes lying around the shop, but it also features a hand carved thumb tab, making it an economical and unique holiday gift. I made this recipe box for 3” x 5” index cards, but feel free to scale up for larger recipe cards. I use 1/8” thick birch plywood for the top and bottom, and a beautiful piece of 3/8” thick, 4” wide blond hardwood that I salvaged from a shipping pallet. I’m guessing it’s pearwood, but any stable wood will do!

Rip a Groove in the Blank
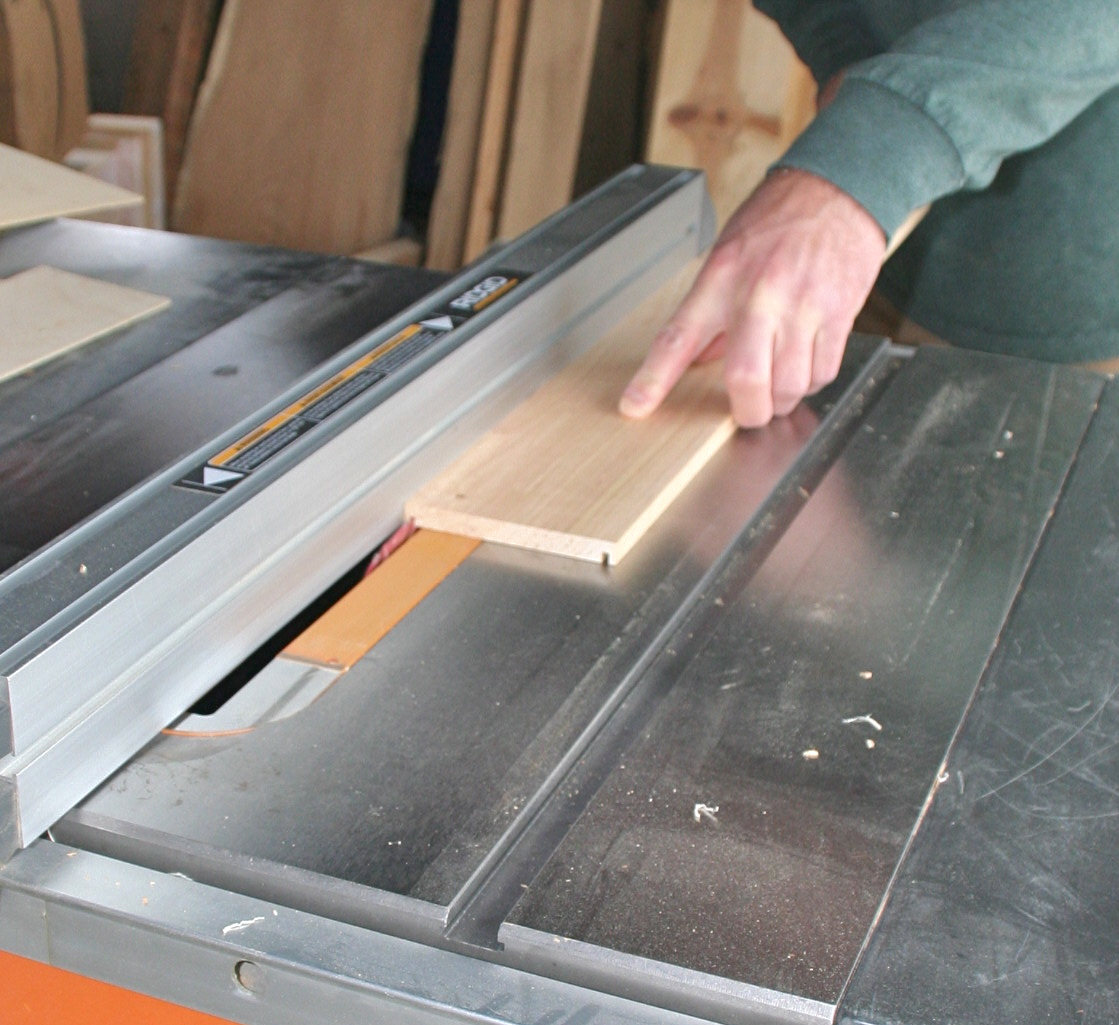 The sides, front and back of the box are cut from one piece of wood 3/8” thick, 20” long and 4” wide. Rip a groove into both long sides of the blank that is the same width as the thickness of the top and bottom plywood. Don’t bother with a dado set, as one pass may be enough, or just tap the fence a hair for a second pass to make the groove wider.
Miter the Box
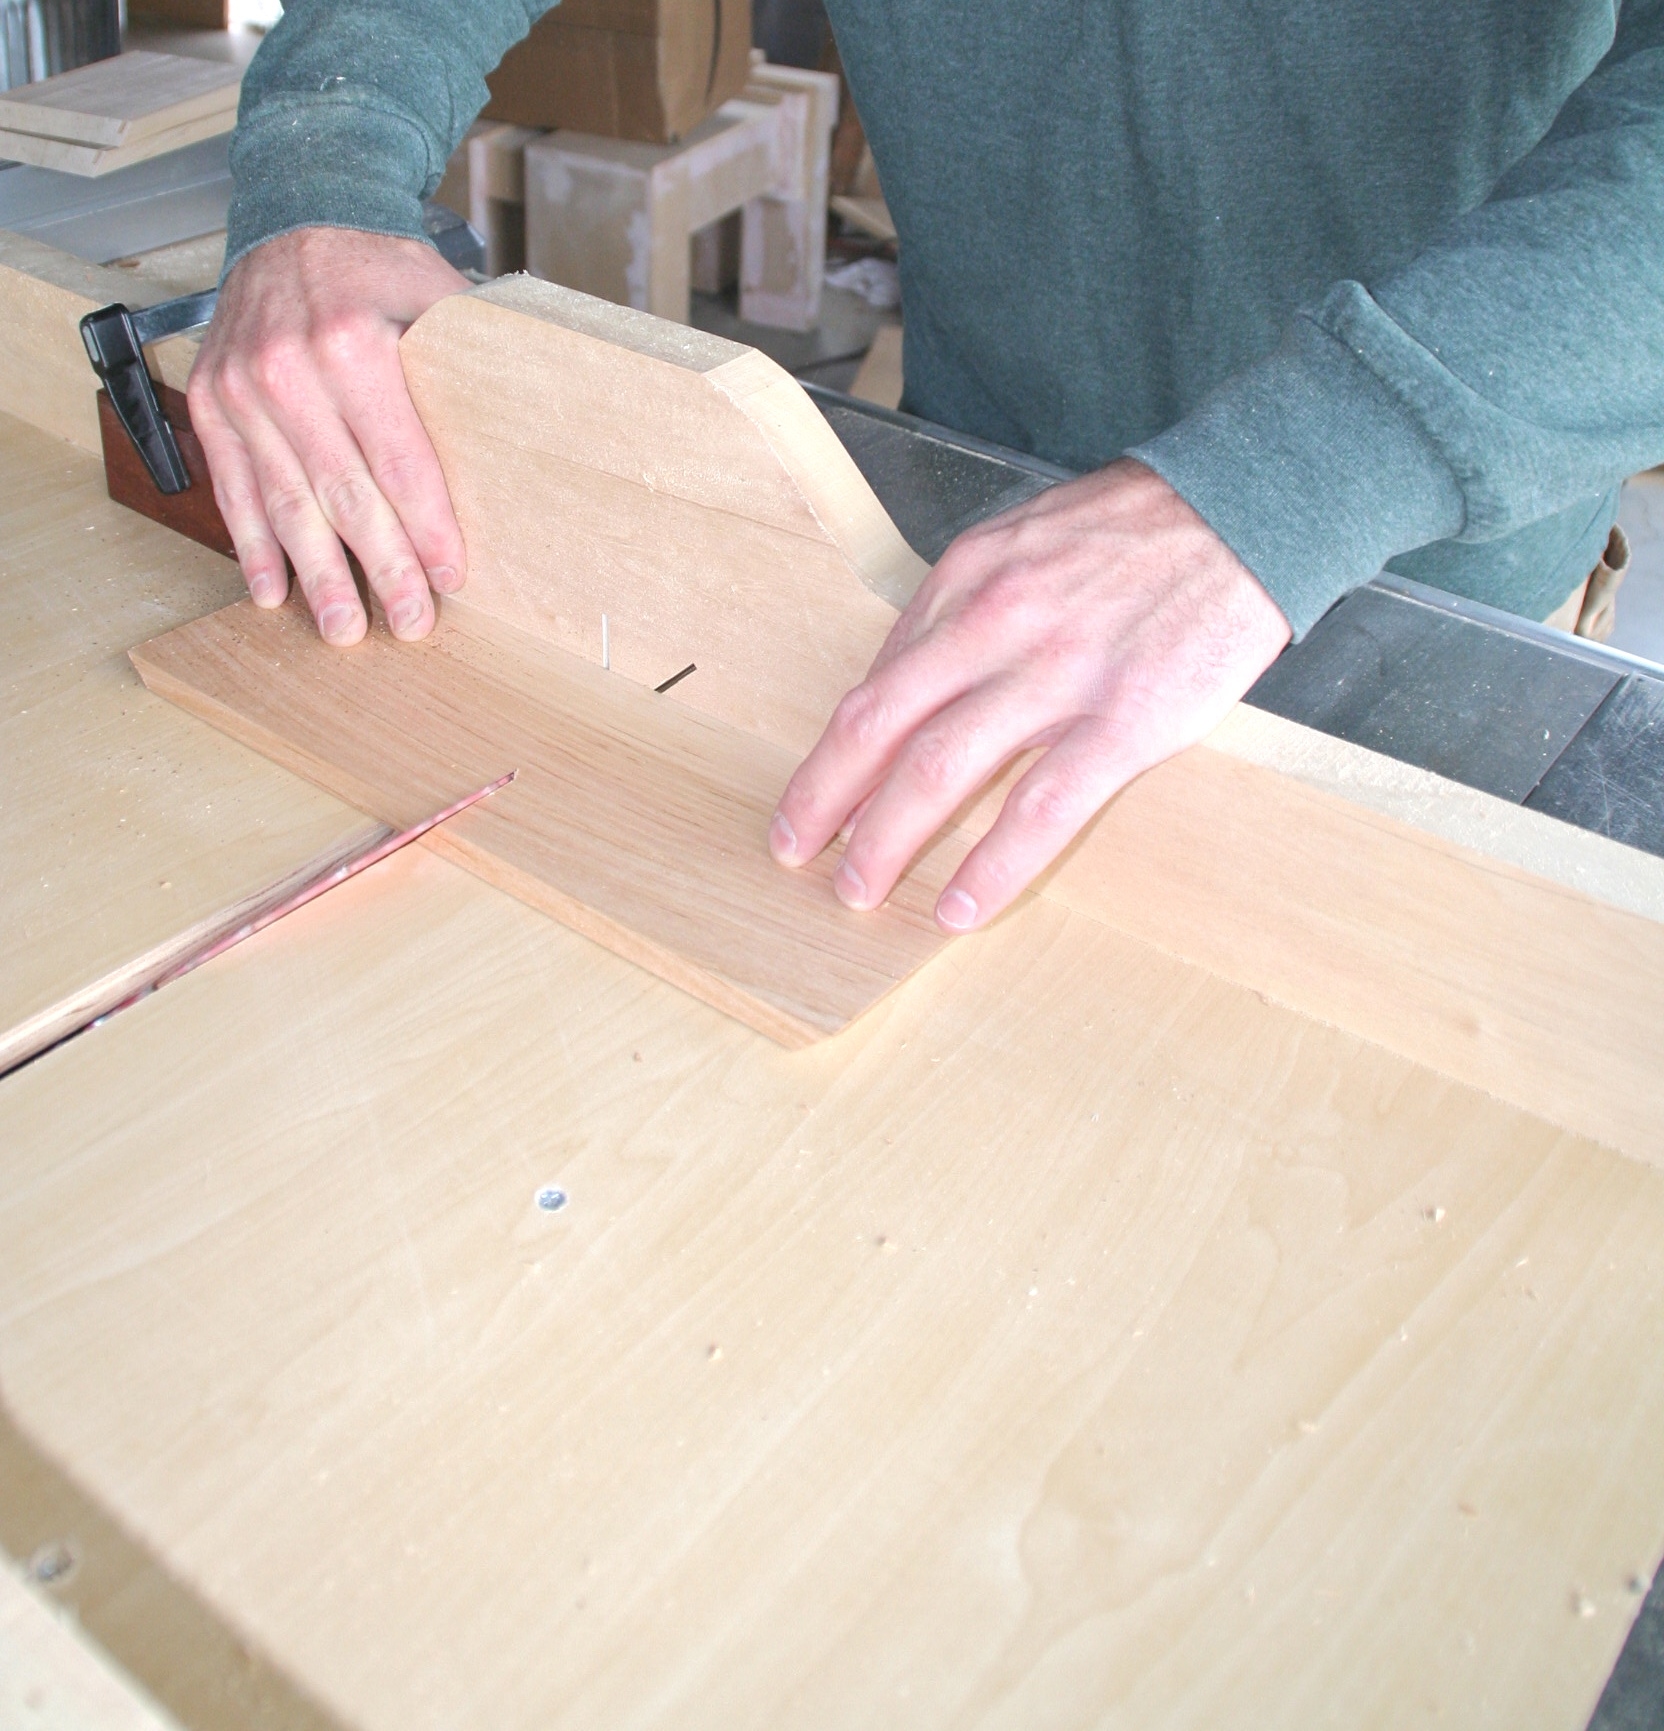 As long as the box is big enough for the selected index cards, the exact dimensions for the sides, front and back don’t really matter. What really matters is that the front and back measure exactly the same, and the two sides are exactly the same. I use a sled on my table saw, and employ a stop block to make the parts identical. With the blade set at 45-degrees I cut both sides first, and then the front and back. Of course, this process can be done using a miter saw just as easily, but I like the safety and accuracy of a dedicated miter sled.
Clamp with Tape
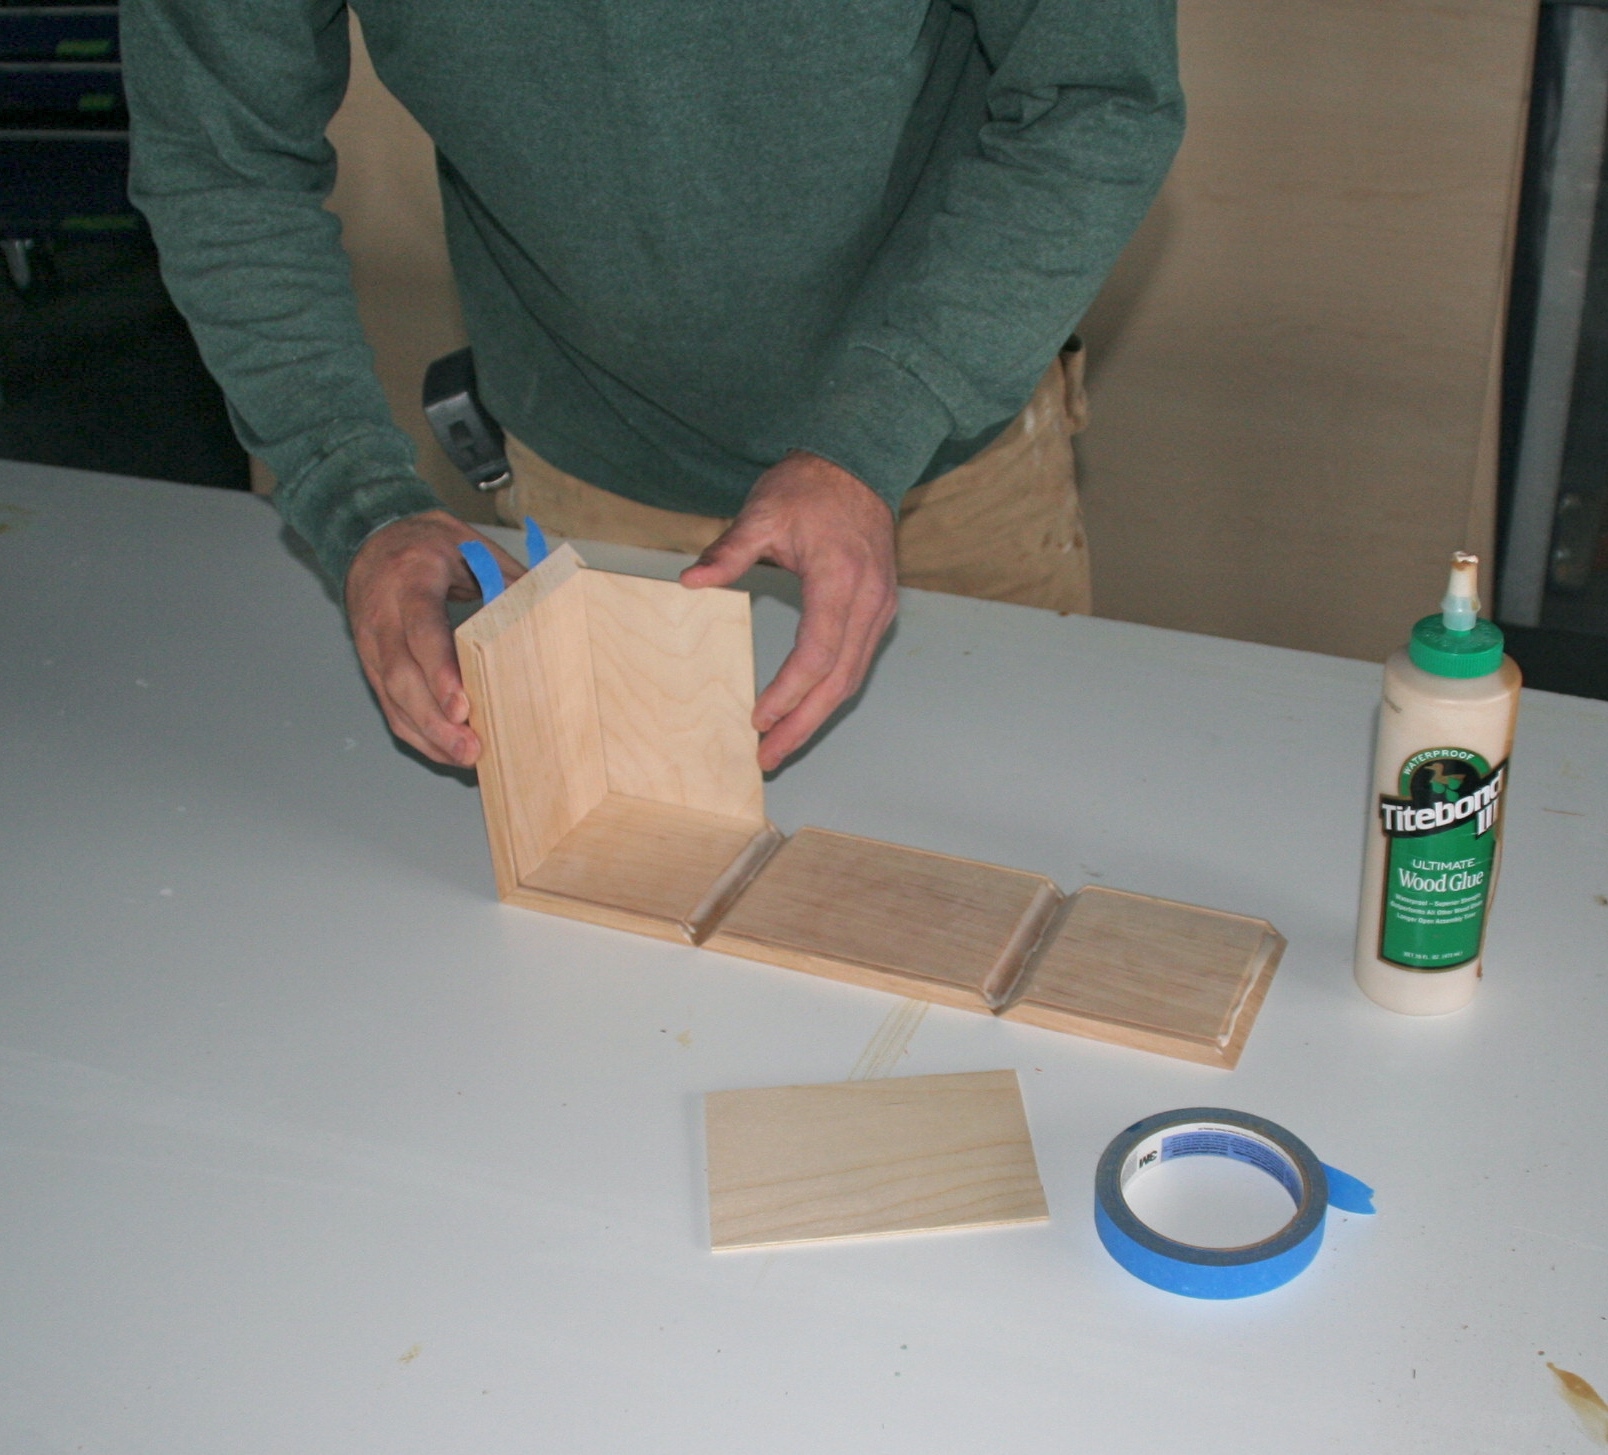 I love assembling mitered boxes with tape instead of clamps. The parts don’t slide, and there is no glue squeeze out on the outside of the box. The 1/8” thick plywood top and bottom are the same size. I find the dimension by measuring the entire length of the groove once the miter has been cut. Apply glue to the miters and spread it to lightly coat the surface. I put a small drop of glue in the center of each groove to secure the plywood and avoid rattling. While this is a definite no-no with a solid top, it is safe with plywood. Set the top and bottom in place and fold the assembly until the box closes. Fasten with tape and let sit for at least an hour.
Bandsaw the Top Off the Box
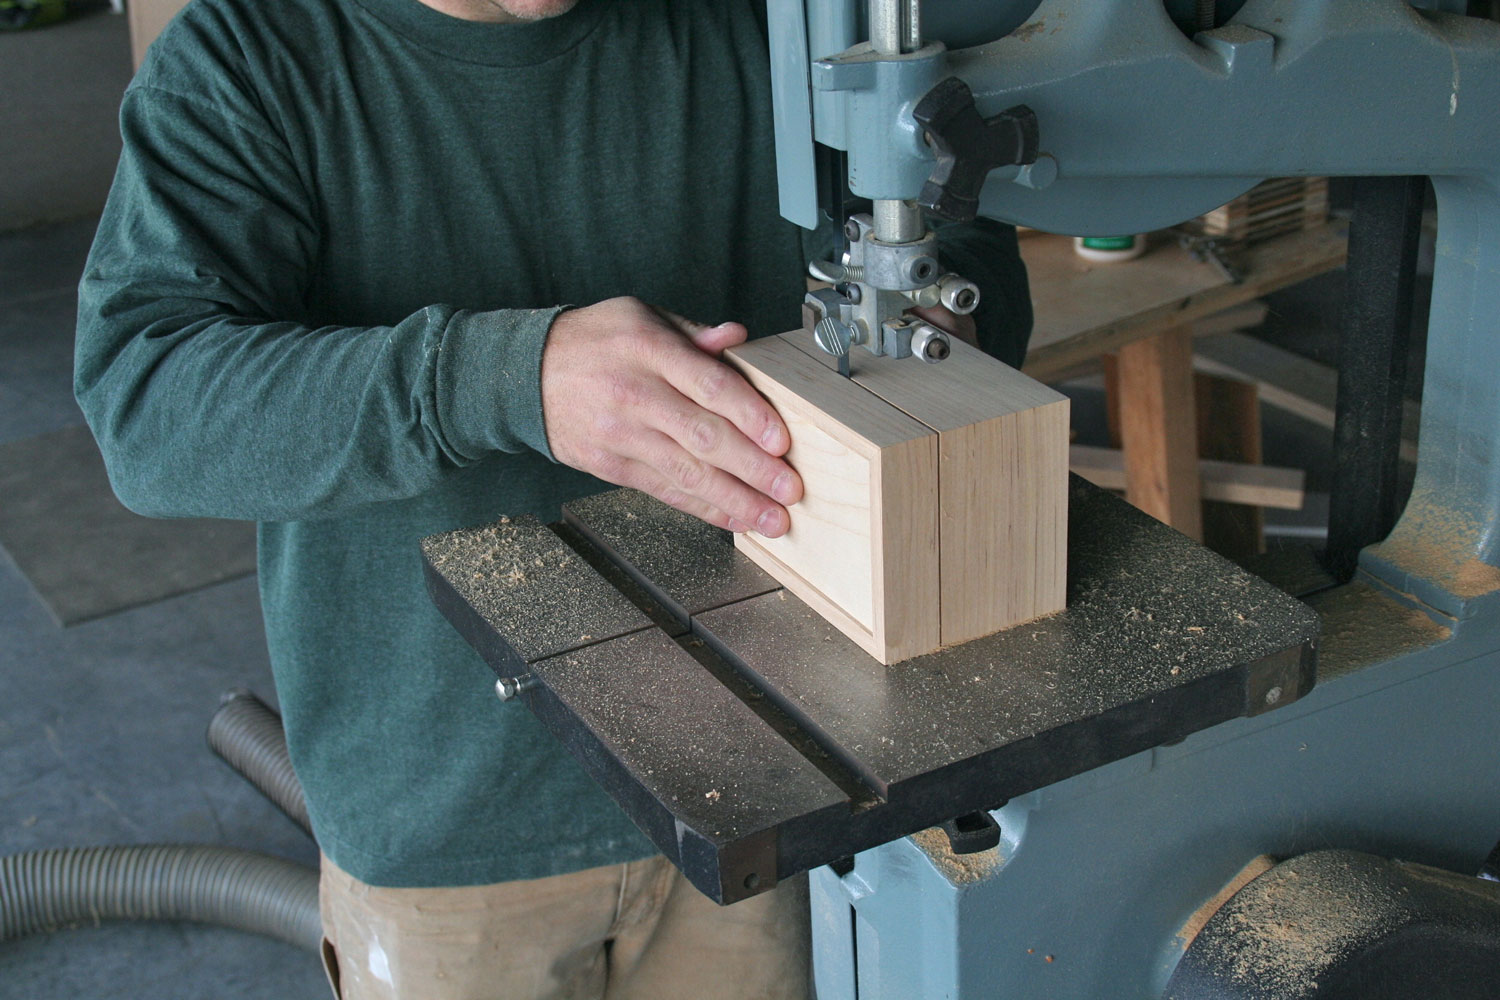 There are many ways to remove the top from the box, but I feel the safest is using the bandsaw. I use a ½” wide re-saw blade for good tracking and am sure to check that the table is perfectly square to the blade. The cut is a touch rough, so I sand it with 120-grit sandpaper wrapped around a hard sanding block.
Face Mount the Hinges
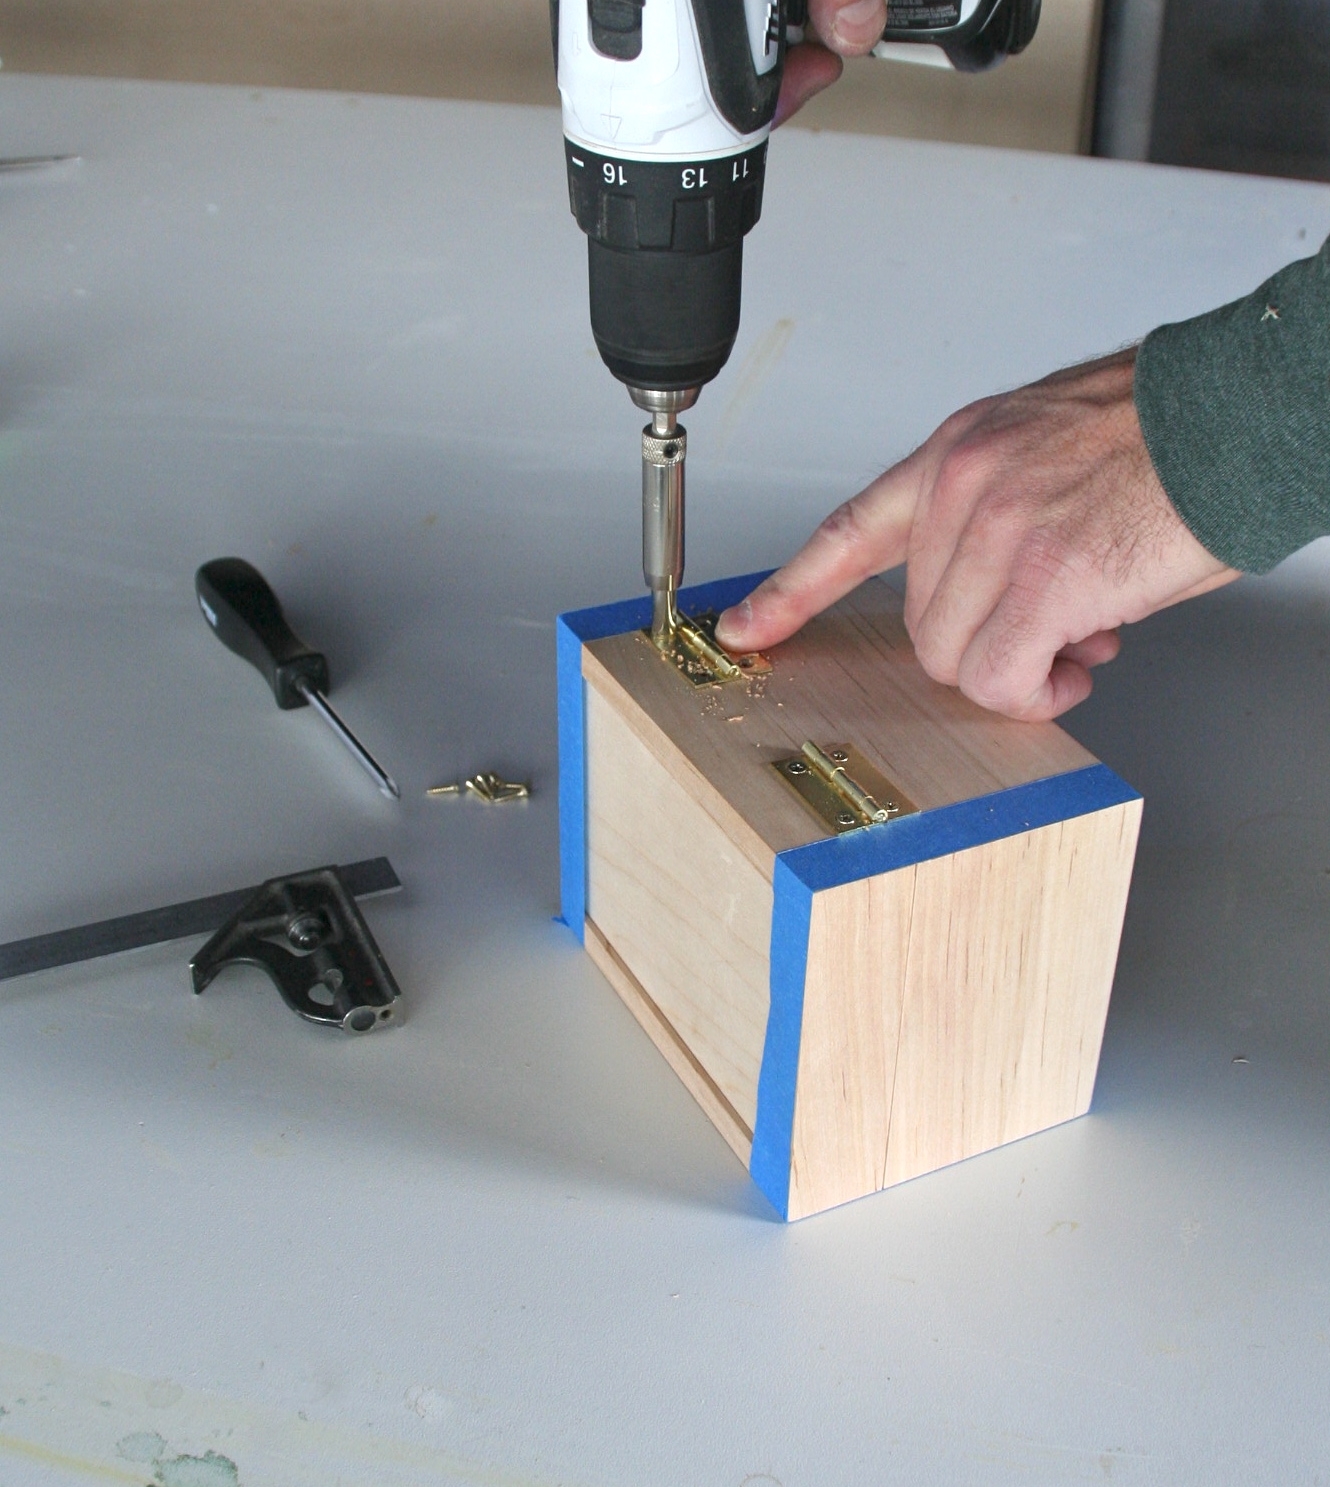 Face mounting the hinges, instead of mortising, allows for a quick project and the possibility of multiple gifts. Mortising would double the project length.
First, I tape the box closed. Keep the tape flush with the outside of the box and the tape doubles as a spacer for the hinge. I use a sliding square to space the hinge from the top and predrill using a vix-bit. My brass hinges come with brass screws. Be aware of two things: First, brass screws are soft! Use a hand screwdriver instead of battery driver to avoid stripping the screws. Second, these screws were the right length, but the screws that come packaged with hinges are often the wrong length, and the correct length must be purchased separately.
Face mounting the hinges, instead of mortising, allows for a quick project and the possibility of multiple gifts. Mortising would double the project length.
First, I tape the box closed. Keep the tape flush with the outside of the box and the tape doubles as a spacer for the hinge. I use a sliding square to space the hinge from the top and predrill using a vix-bit. My brass hinges come with brass screws. Be aware of two things: First, brass screws are soft! Use a hand screwdriver instead of battery driver to avoid stripping the screws. Second, these screws were the right length, but the screws that come packaged with hinges are often the wrong length, and the correct length must be purchased separately.
Carve the Thumb Tab
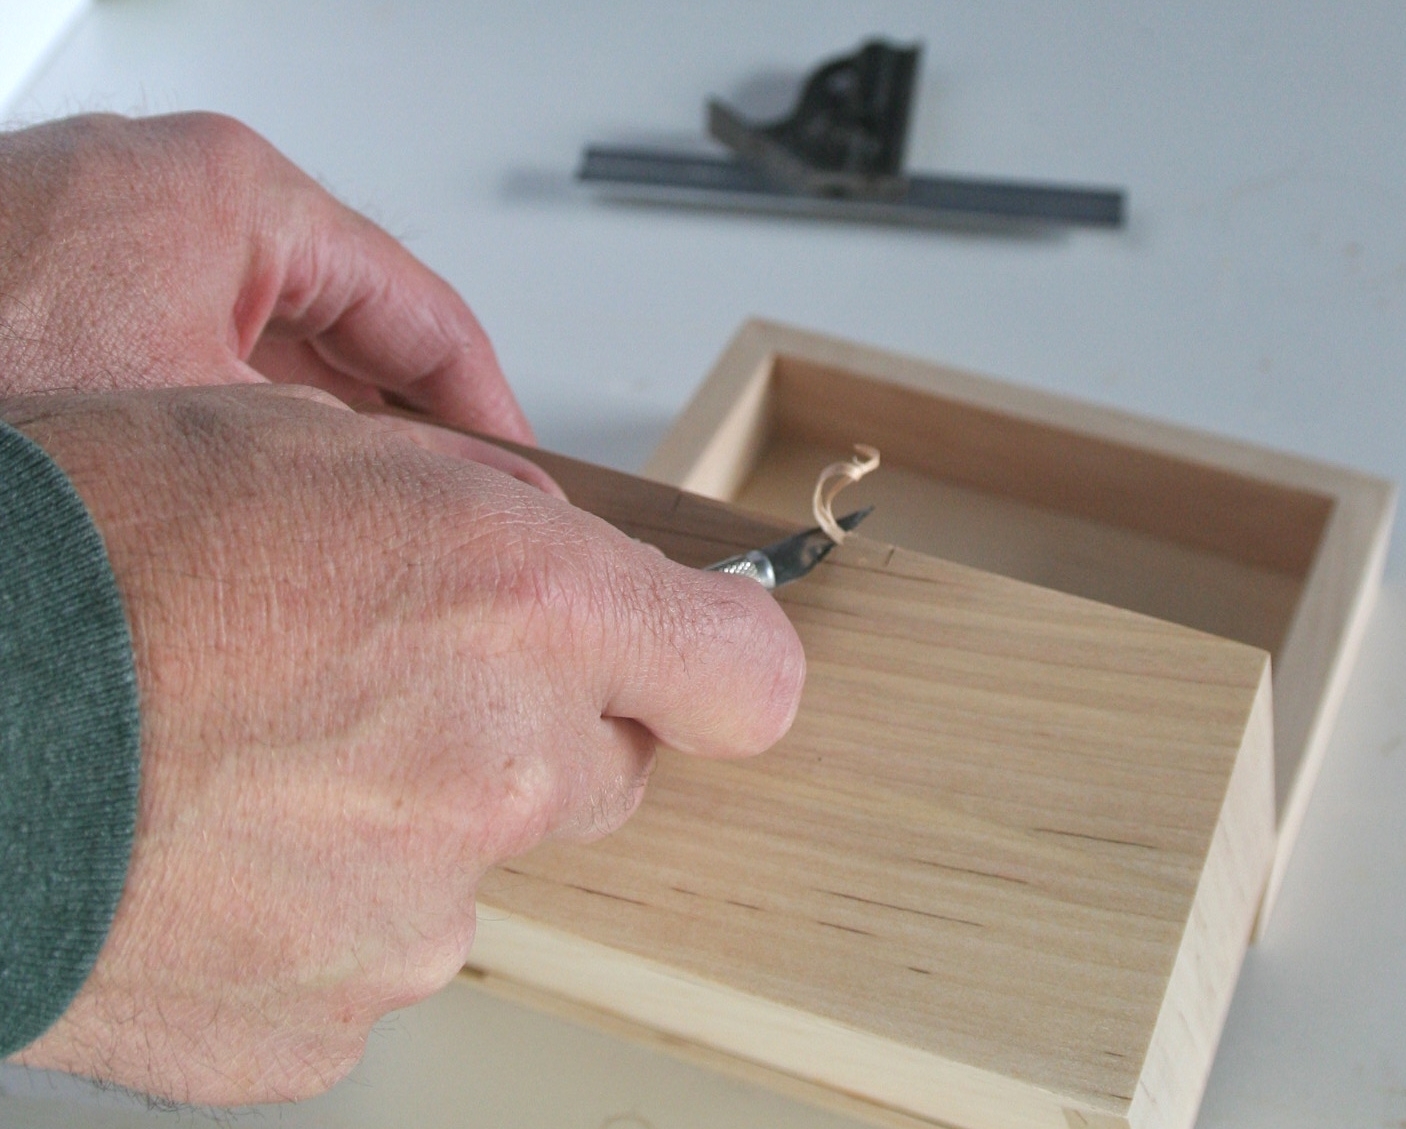
The lightly faceted thumb tab is proof that this box is handmade. Determine the width of the tab; slightly less than 1/3 the length works well. Using a sliding square, deeply mark the edges with a utility knife or X-Acto knife. Then gently carve away a 45-degree facet between the marks to make the finger tab. Sand the box up to 220-grit and gently ease all of the edges. Complete the project by finishing with your preferred clear coat. If you plan to give this as a present, please wait 24 hours before wrapping!

I'm a rookie here so little experience with a bandsaw; the only thing that surprises me is that a fence wasn't used on the bandsaw. Seems like that adds a lot of risk to keeping it clean and square?
Thank you for your way of doing and explaining things. I didn’t think I could learn at 68 but you’ve helped tremendously. Thanks again and have a blessed holiday. Larry
Already a member. how do I download the videos? Speaking specifically the 10 gift ideas
John needs a board Streicher to bend the box
If use 3/8 piece of wood what thickness do you use for the top and the bottom, maybe I missed that. Enjoyed this want to try it soon. Have you heard of the ew Dao set. I think it is called a Dao Folding Miter Set. It does just what you have shown to do with a saw. Rockler is selling the set I believe. Thank you for your demo.
This one's really well made! Thank you for sharing this. I think this can also serve as a small storage or a simple jewelry box, with just the right adjustments of wood. Thank you for sharing the tip about the screws. Very helpful.
Love it would like more ideas
Is there any way to get a PDF of these instructions?
I want this plan to build please
I understand how to cut the miter cuts but how do I bend the wood without breaking it?