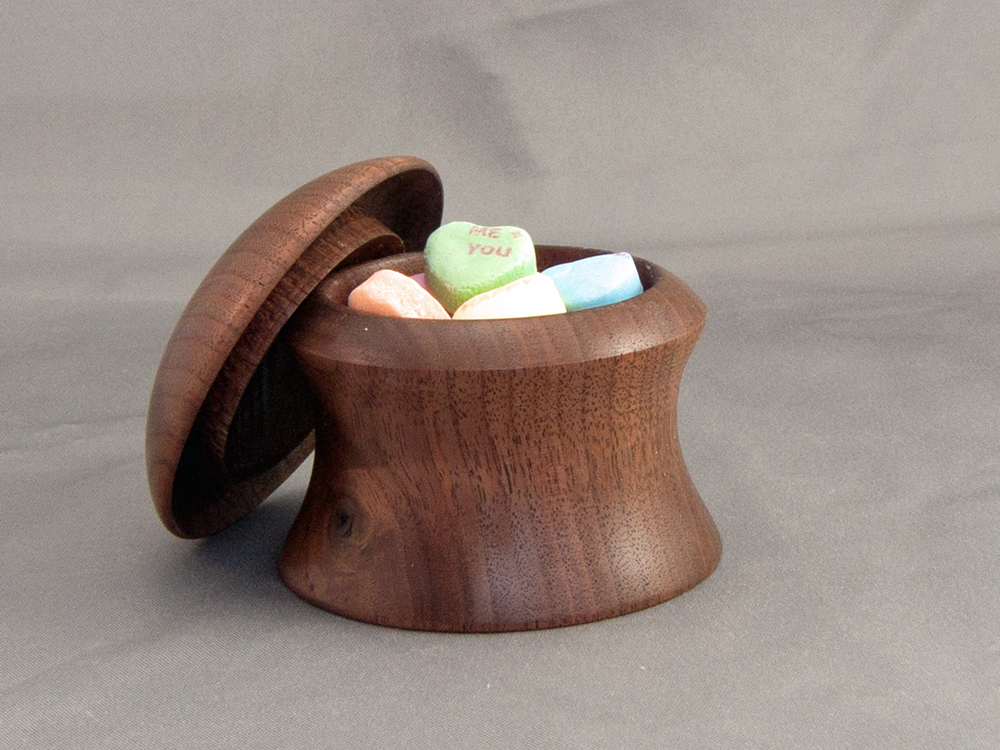
This turned lidded box has the power to make your sweetheart smile on Valentine’s Day, or any other day for that matter. Small is beautiful. That’s because this intermediate-level turning project can be done in an afternoon at a cost that can be next to nothing.
If you have some rescued firewood or off-cuts from thick stock around your shop, your materials cost will be zero. Turning a lidded vessel is sure to boost your turning skills, especially if you’ve never done a lidded vessel before. There are lots of meaty tips presented in this project that can easily be applied to larger vessels. So, let’s get started.

TOOLS
You will need a 4-jaw chuck to complete this project. You'll also need a half round scraper, 1/4” parting tool, 1/16” parting tool, and a detail/spindle gouge.
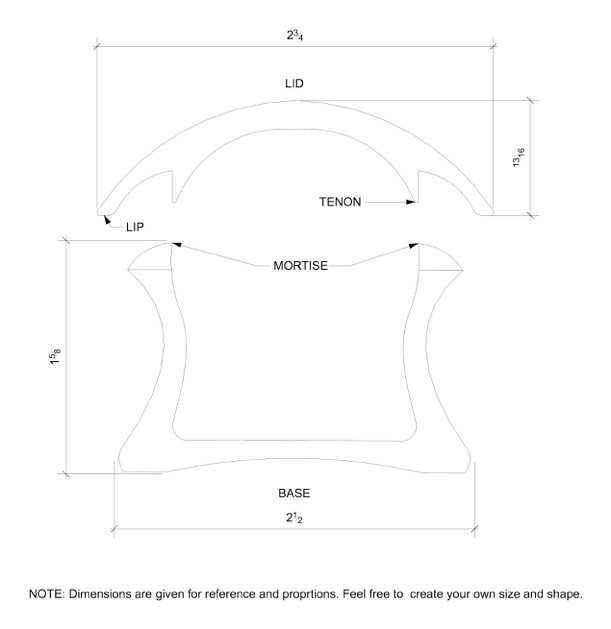
A lidded box is best done as an end grain turning—in other words, with the grain running parallel to the bed of the lathe, just like turning a spindle. Unlike spindle turning, however, you will be working as much on the end of the stock, shaping and hollowing, as on the sides. For this box I used stock 2-3/4” x 2-3/4” x 4” long. Dimensions are approximate. Anywhere from 2-1/2” to 3” square will do.
Mark the centers on either end of the blank by drawing two diagonal lines from corner to corner. Mount the blank between centers on the lathe. If you need a refresher on lathe techniques, check the links to other turning-related articles and videos at the end of this article.
PREPARE THE BLANK
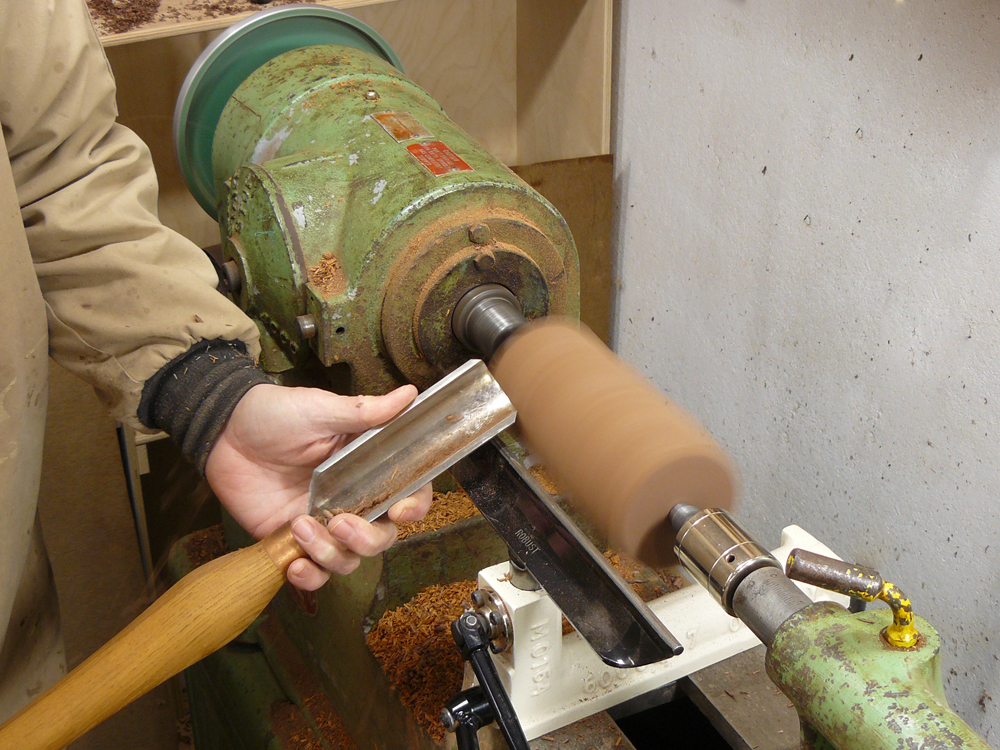
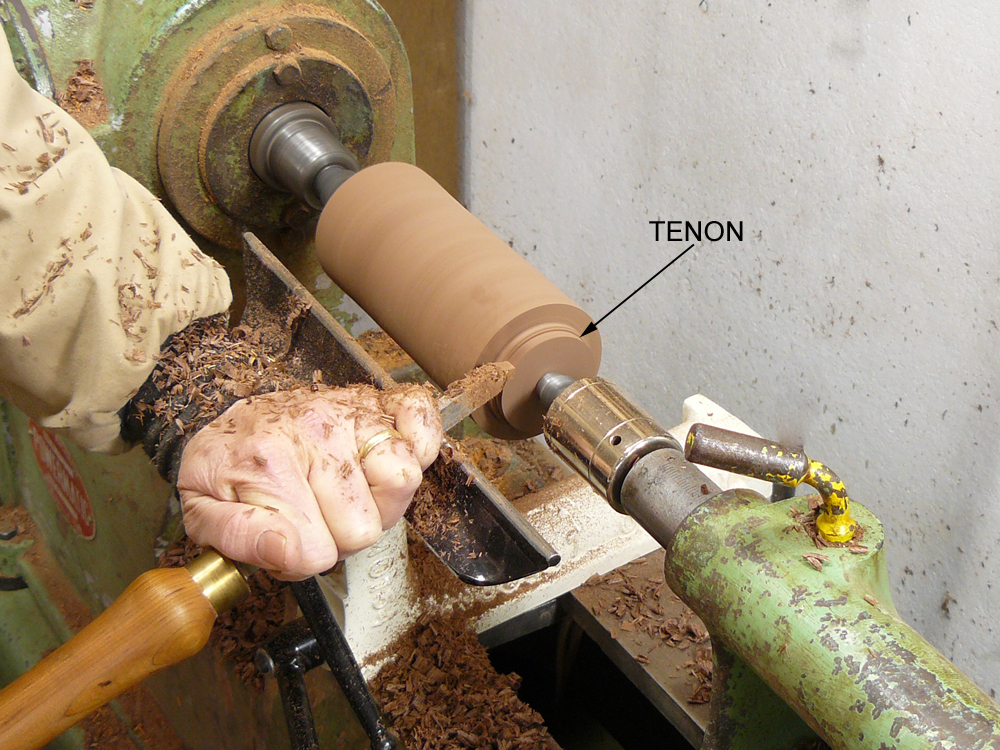
Cut a tenon on both ends of the cylinder with a 1/4” parting tool. Size the tenons to fit your 4-jaw chuck. One tenon will be used to hold the lid in the chuck; the other tenon will hold the base.
TIP: I always taper these tenons just a hair, creating a dovetail shape. This provides a better gripping surface for the 4-jaw chuck.
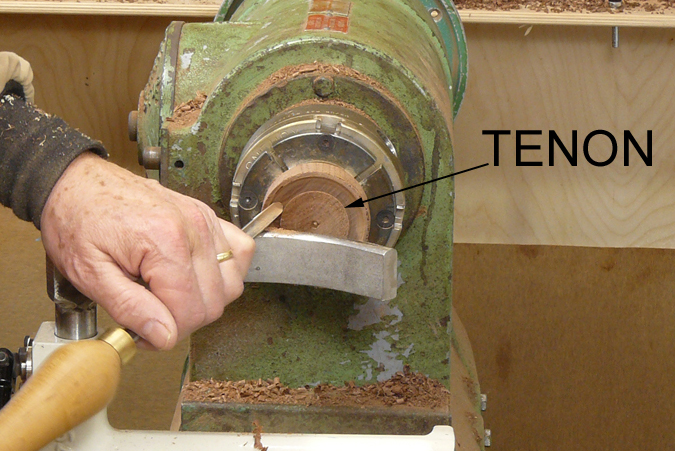
Remove the blank from the lathe and replace the drive center with a 4-jaw chuck. Mount the stock in the chuck. Even though the 4-jaw chuck can support the piece by itself, I always bring the tailstock up for extra support whenever possible.

Separate the top (lid) from the bottom (base) with a narrow, 1/16” parting tool. The narrow kerf helps maintain grain continuity on the piece. As you get close to the end, slow the lathe down and lightly hold the base in place as it separates from the top. You don’t want it to spin off the lathe and get damaged. Turn the lathe off, keeping the base in place with your hand until it stops. Remove the base.
TURN THE INSIDE OF THE LID
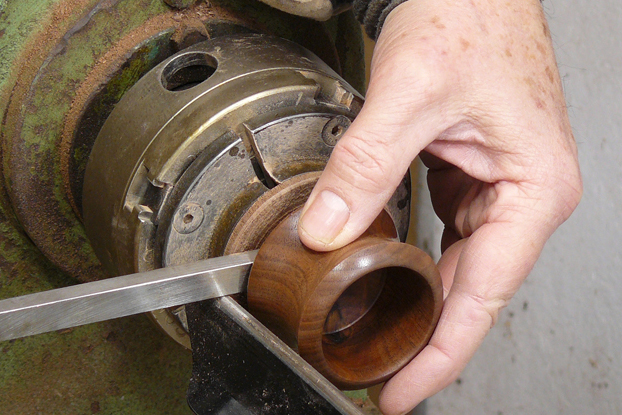
Cut the tenon on the underside of the lid with a detail/spindle gouge. Start about 1/8” inside the outer edge to form the lip that overhangs the base. End the cut where you want the tenon to start. The tenon defines the opening size in the base.
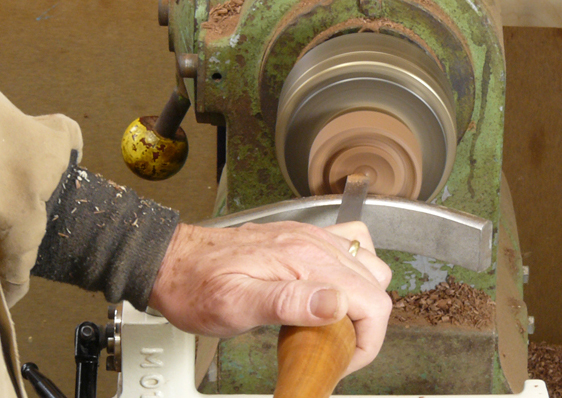
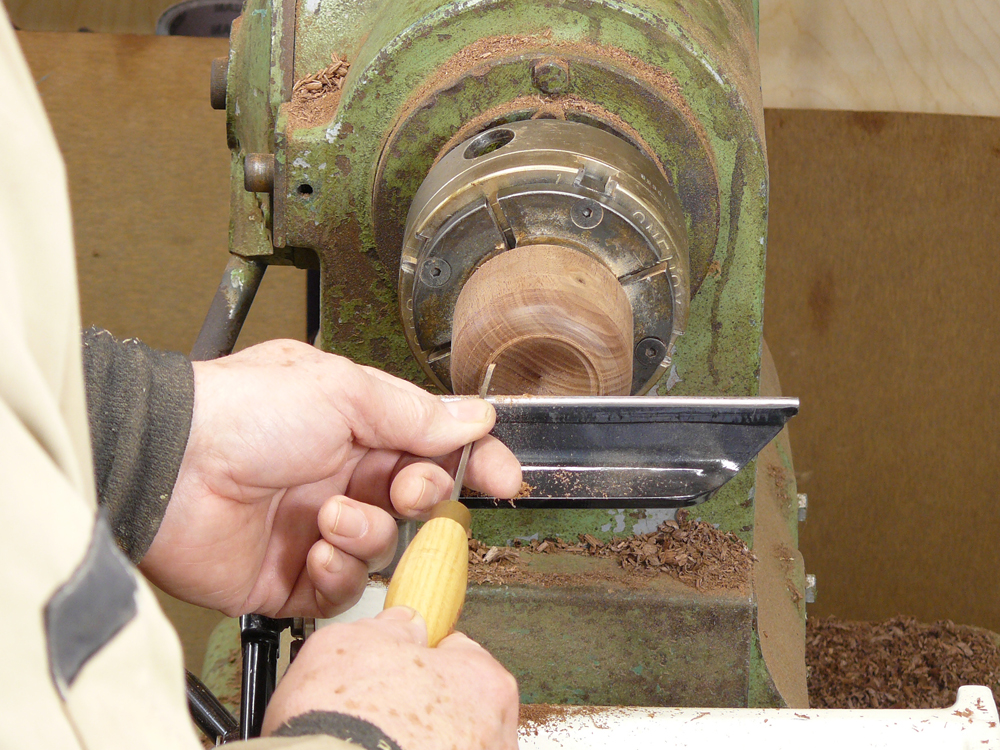
Use a round nose scraper to cut a dome shape in the center of the lid. Start your cuts at the center and sweep outward towards the tenon. Sand the inside of the lid to 320-grit or higher.
FIT THE LID TO THE BASE
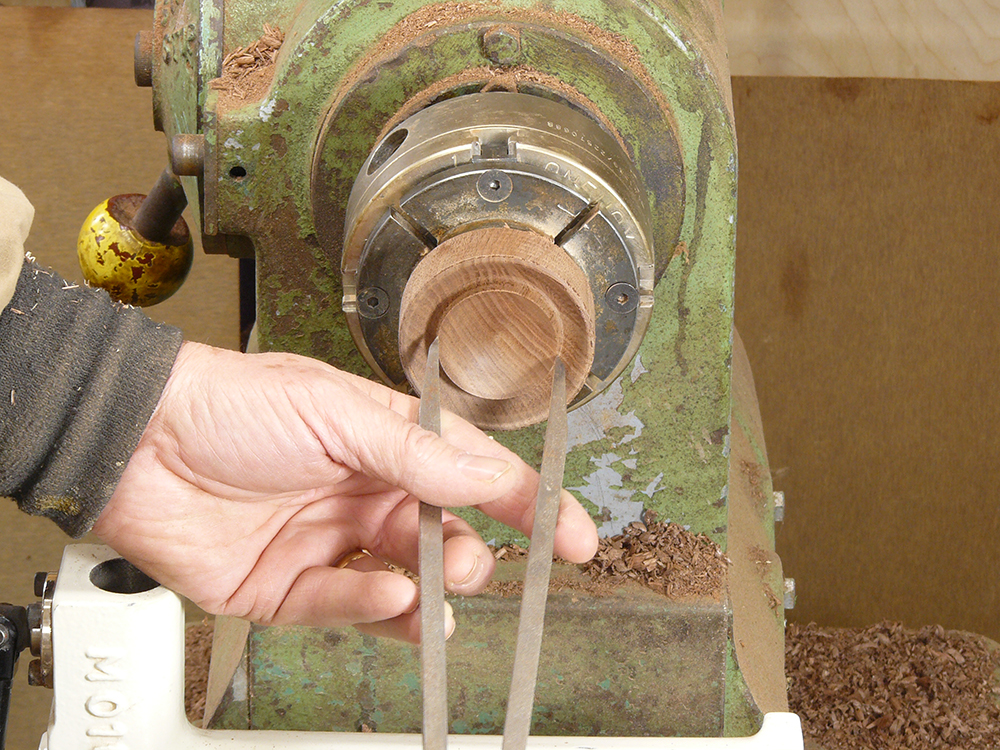
Measure the tenon diameter on the lid with a divider. Remove the lid and mount the base in your chuck. Narrow the divider by 1/8”. This will give you some wiggle room when you cut the opening in the base.
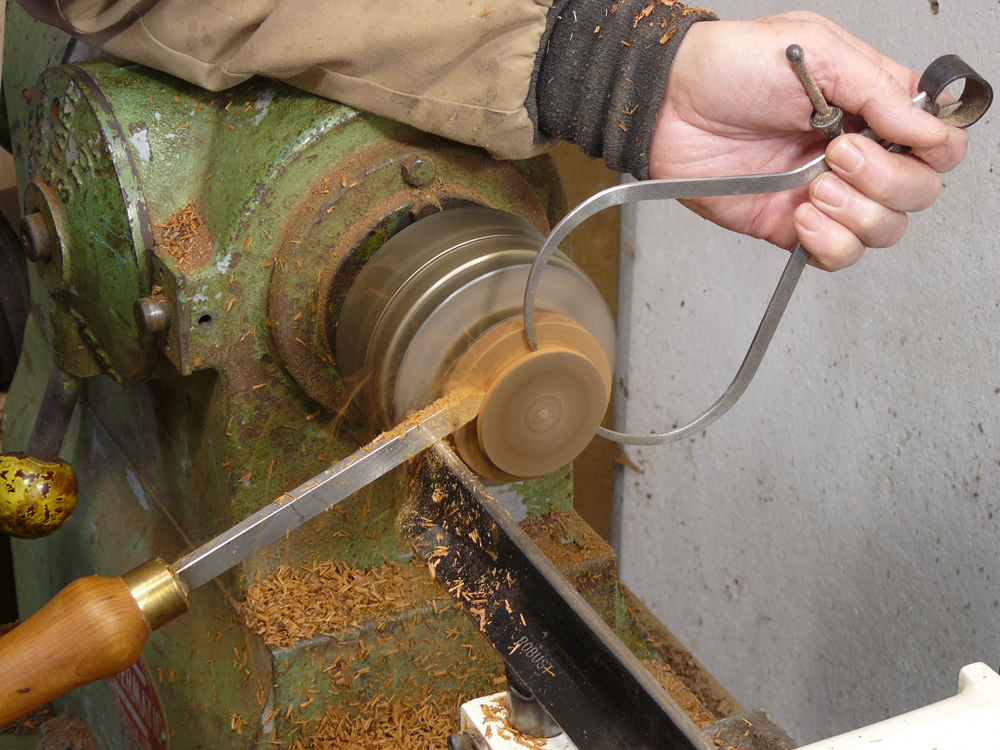
With the lathe on its slowest speed, center the calipers on the base without touching it. Use the caliper leg closest to you to very lightly score the base. The opposite leg should line up with the score if you have it centered. Deepen the score when you get the mark centered. It doesn’t need to be perfect. That’s one reason why I built in the 1/8” wiggle room.
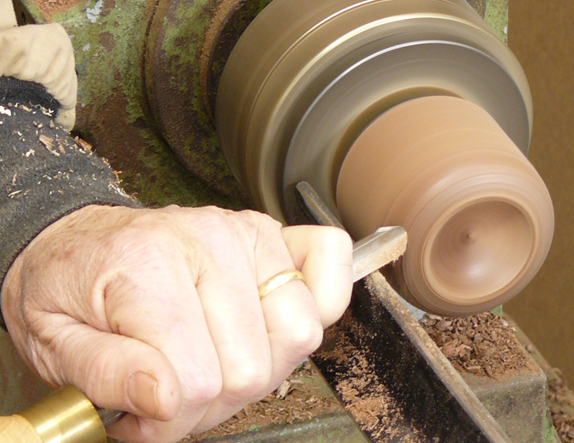
Shape the top of the base with a spindle gouge. You want the top of the positive base profile to match the negative profile inside the lip of the top. Use a round nose scraper to hollow out the center of the base to about 1/2” deep. The hollow should extend out to the scribe made with the dividers.
FIT THE LID
Widen the mortise with a narrow parting tool. Make light cuts that taper in toward the center. Fitting the lid to the base will require a healthy dose of patience. You must stop the lathe repeatedly to see how the fit is going. Take very light cuts to start and whisper-thin cuts when the fit gets close. Once you get the mortise sized to where the tenon just starts to fit the mortise, straighten out the taper. You will have to adjust the profile on the top of the base to fit the underside of the lid as well. Take your time!
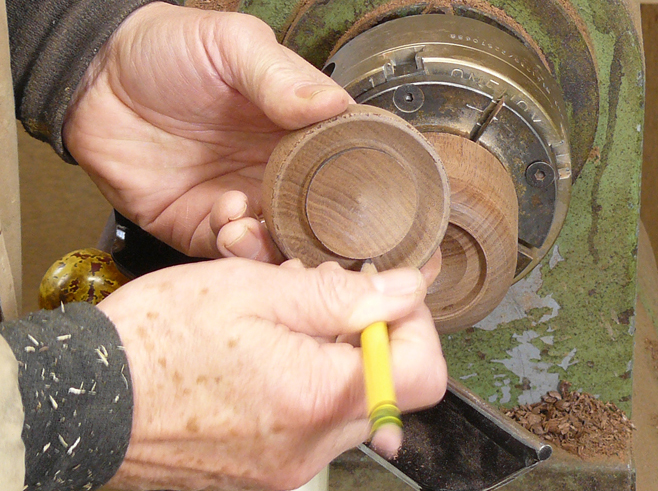
Once the fit starts getting close, you can rub a pencil around the tenon and the cove cut on the underside of the lid before test-fitting. The pencil marks will transfer to the base where the mortise needs to be widened. Remember, super light cuts. Shoot for a snug fit that requires a little pounding with the palm of your hand to get the lid to seat. At the same time, you don’t want to get the fit so tight that you have to pry the top off and risk damage to the piece. You can remove the pencil marks with denatured alcohol (assuming your pencil lead is graphite) or a pencil eraser and some light sanding.
SHAPE THE WHOLE BOX
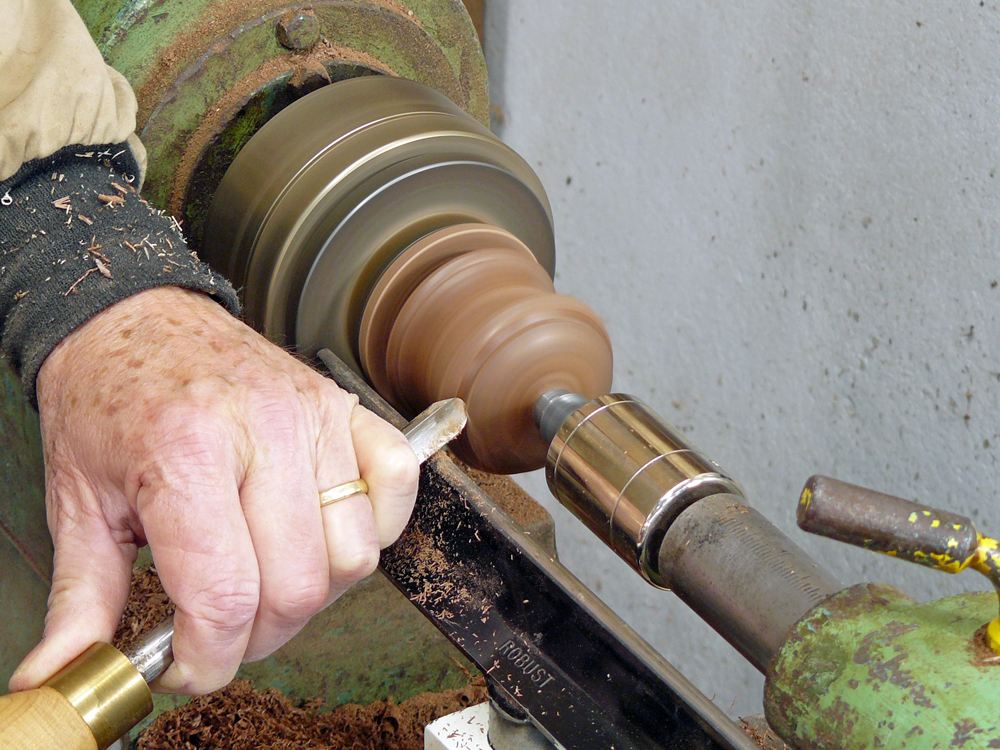
With the box profile complete, finish turning the lid with the tailstock removed. Take light cuts. Keep the bevel in contact with the lid at all times. A catch here would be no fun at all. When the overall shape is complete, sand the box to 320-grit.
Remove the lid and measure the box diameter at its narrowest point. Subtract 1/4” to determine the size bit to use for drilling out the base.
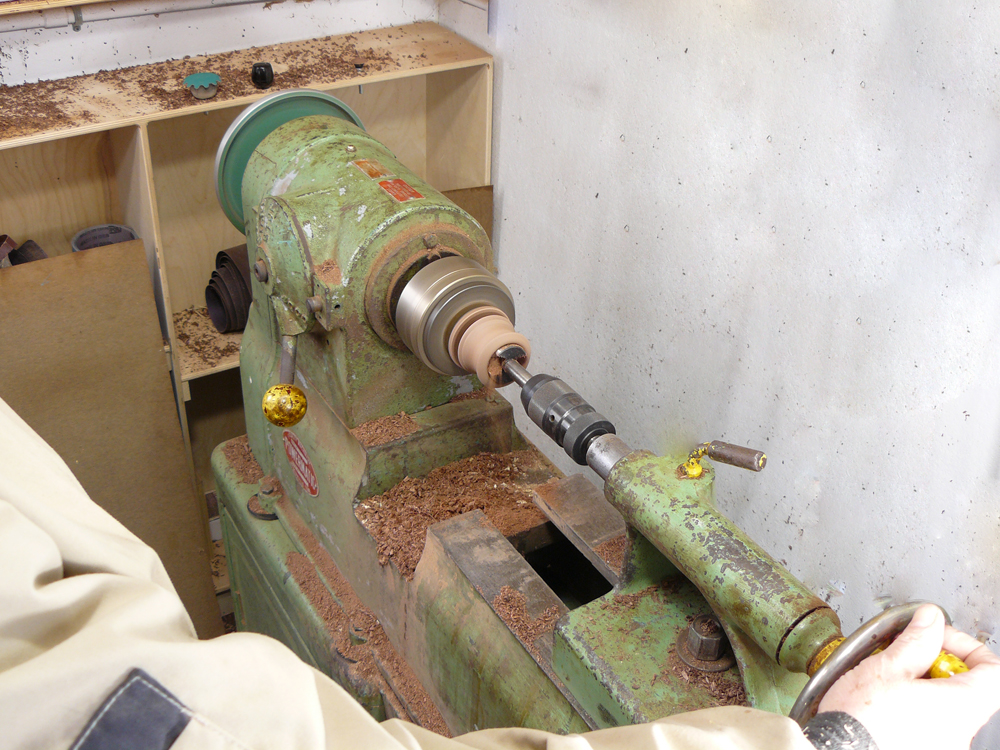
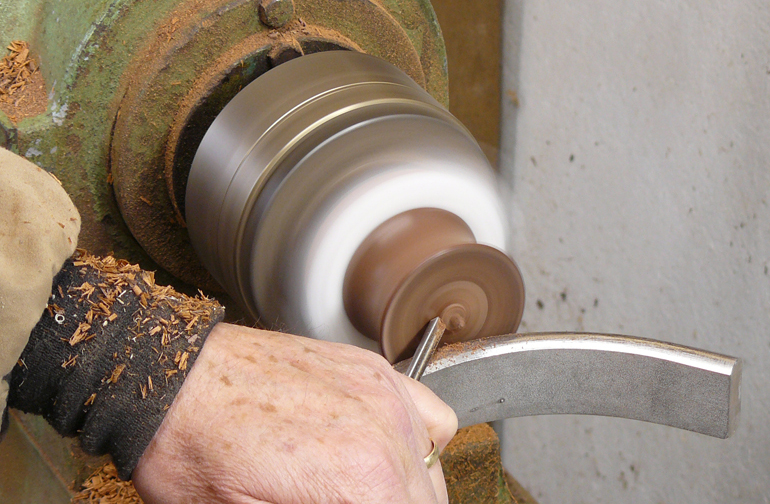
Bore out the base interior with a Forstner bit mounted to the tailstock. Remember—you’re drilling into end grain, so go slow with the quill feed. If the opening gets a little clogged with shavings, back the bit out to clear the debris. Use a small ruler to check the depth of your bore. You’ll want to leave about 1/4” of thickness at the bottom to leave room for finishing the underside of the base.

Smooth the walls and bottom of the box with a bowl scraper. Be sure to take very light cuts. Easy does it at this stage of the game.
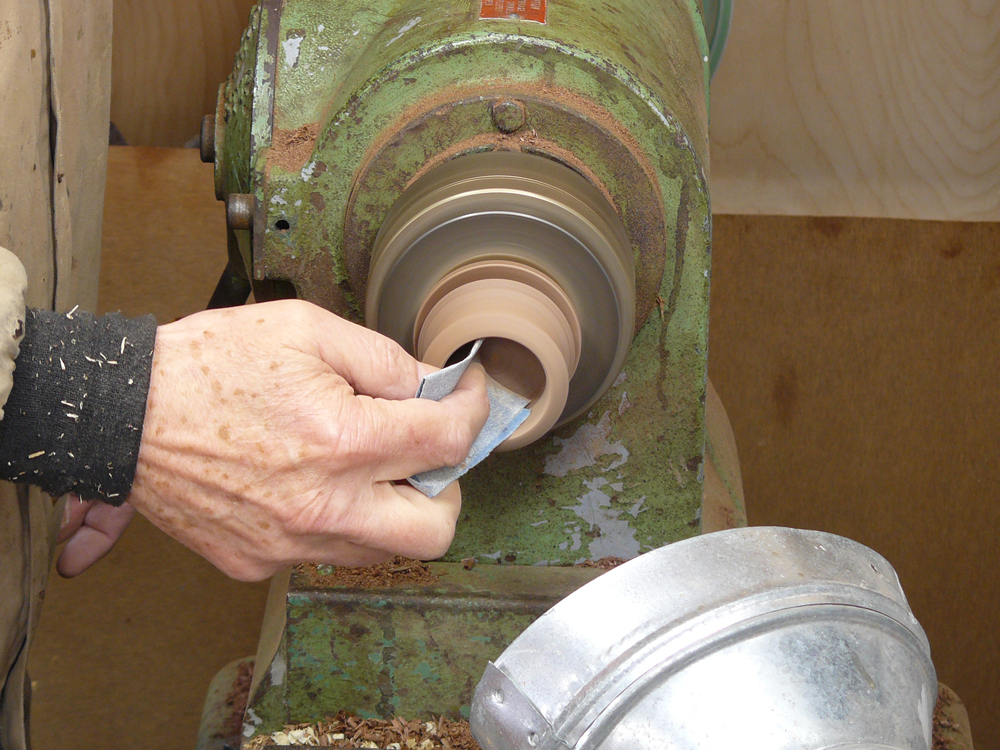
Lightly sand the interior for finishing to 220-grit. The sanding will produce a looser, more user-friendly fit on the lid.
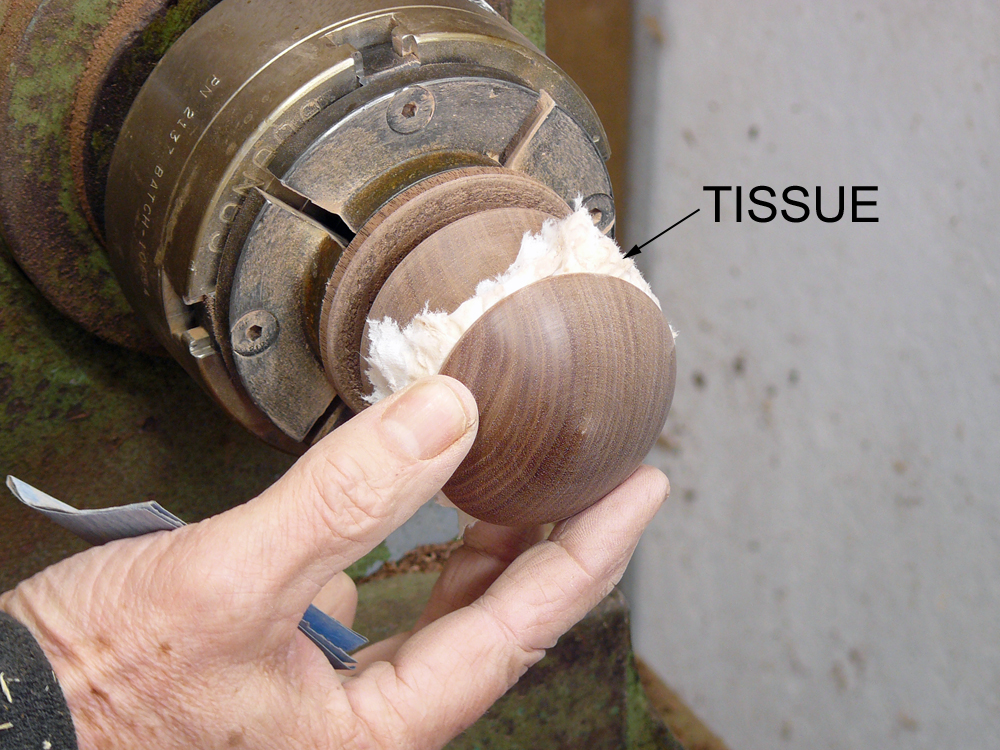
I like to finish my pieces on the lathe. But with the finish sanding, the lid is now too loose to stay on by itself. I use doubled-up tissue as a shim to create a tighter fit so I can do a final sand with 600-grit, and apply finish.
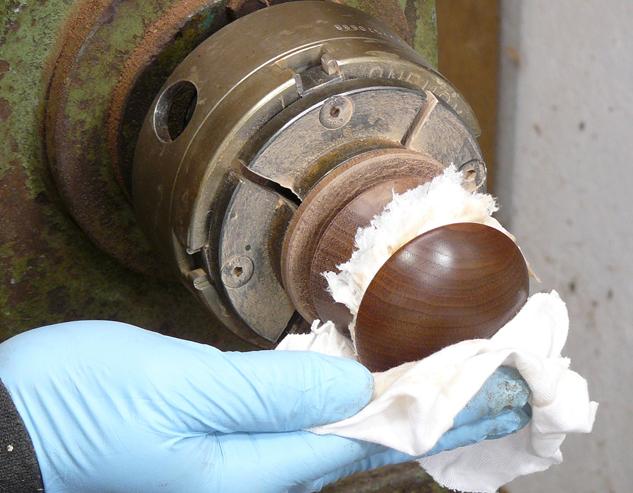
After sanding, apply finish to the lid first. I liberally applied an oil/varnish blend. Wipe the excess with a rag, then turn on the lathe for a final polish. Remove the lid and tissue shim to finish the rest of the box.
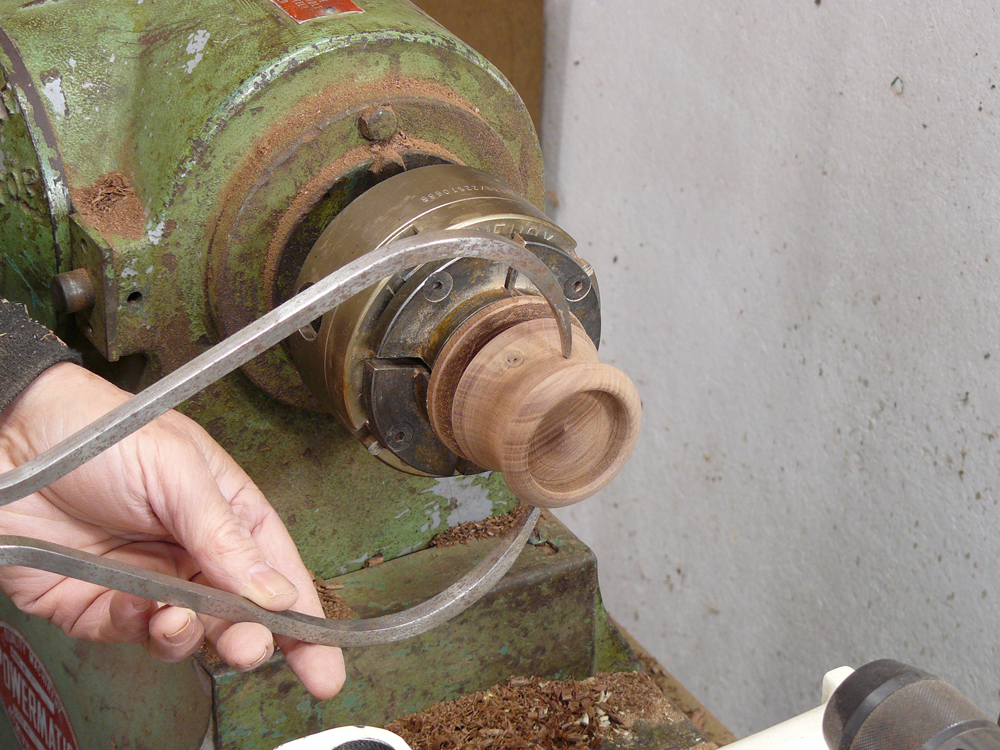
Part the finished base off the block.
CREATE A JAM CHUCK TO FINISH THE BOTTOM
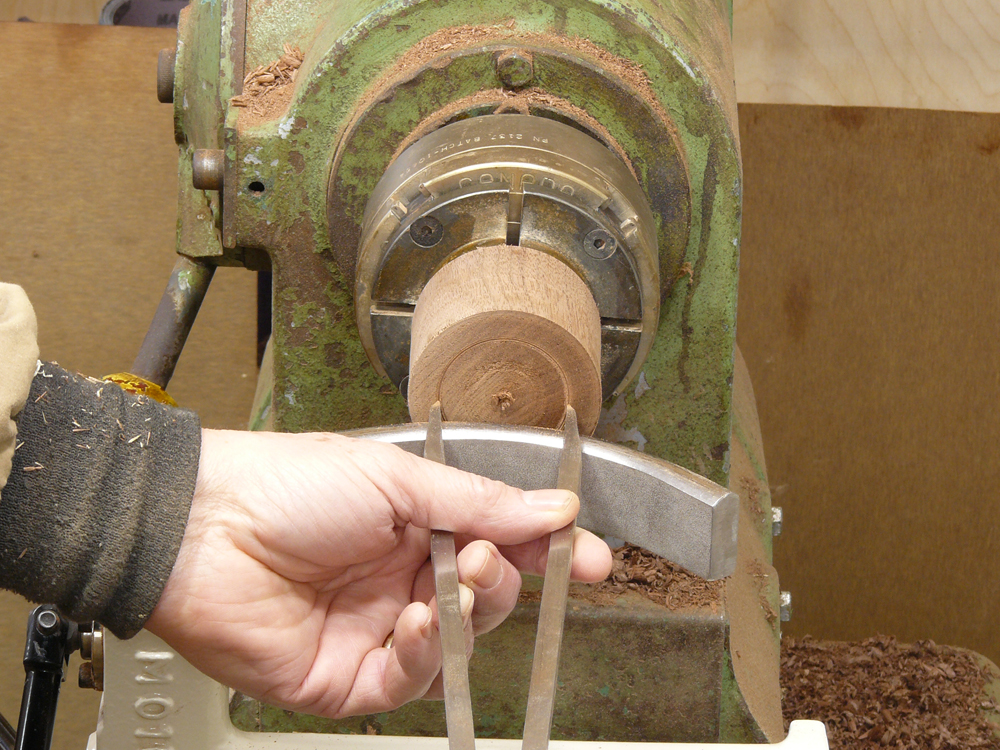
Make a jam chuck out of what’s left of the base block. Turn a tenon on with a 1/4” parting tool to fit the base opening. Use a pair of calipers to measure the opening in the base, then add about 1/16”. I hold the calipers in the cut being made by the parting tool. Be sure the caliper ends are well rounded so they can’t catch on the spinning stock. When you cut to the right diameter, the calipers will slip over the tenon. Stop cutting. Test fit the base on the tenon (jam chuck). Continue to take light cuts until you get that tight fit you originally had on the lid.
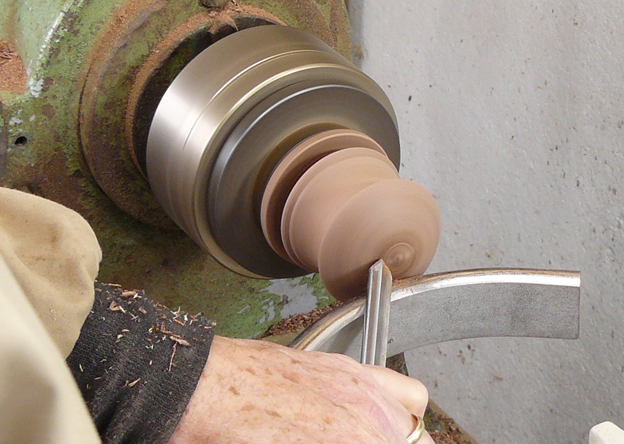
Finish the bottom with a detail gouge. Go for a slight hollowing so the base will sit on its rim. Notice the tissue shim on the jam chuck. Often, the base opening will deform a bit after it gets hollowed out. The tissue shim is the perfect solution.
Finish the base bottom on the lathe and your box is ready for gifting. Lidded boxes can be used for all sorts of small storage needs. They’re as fun to make as they are to give away.

I need some help. When using the forstner bit to do these I get a lot of smoke. Am I going to fast, not fast enough, need to sharpen the bit? Any advice would be helpful.
Good instructions as I am second year turner. Thank you...l
na
A very nice overall shape. I really like the radius on the bottom's tenon. Thanks for the great tutorial
Very nice.
Hello. Thanks for your work in putting out these informative pieces. I have a question about jam chucks. Do the outside walls of the jam chuck and the inside walls of the work piece need to be as parallel as possible in order to have more contact surface for maximum friction? Or is it okay for the inside walls that contact the jam chuck to be curved or tapered so the work piece will "wedge" onto the jam chuck. Which is the most secure? I am asking because sometimes the work piece base may be hollowed out such that there or no parallel sides. Can it still be jam chucked? Thanks James
What is the recommended lathe speed? Is this important?
Like the turned wood liddwd box
The process was interesting to watch. I ever new it took so many steps. Ralph
looks like the perfect thing for my grandson and I to make for his Teacher.