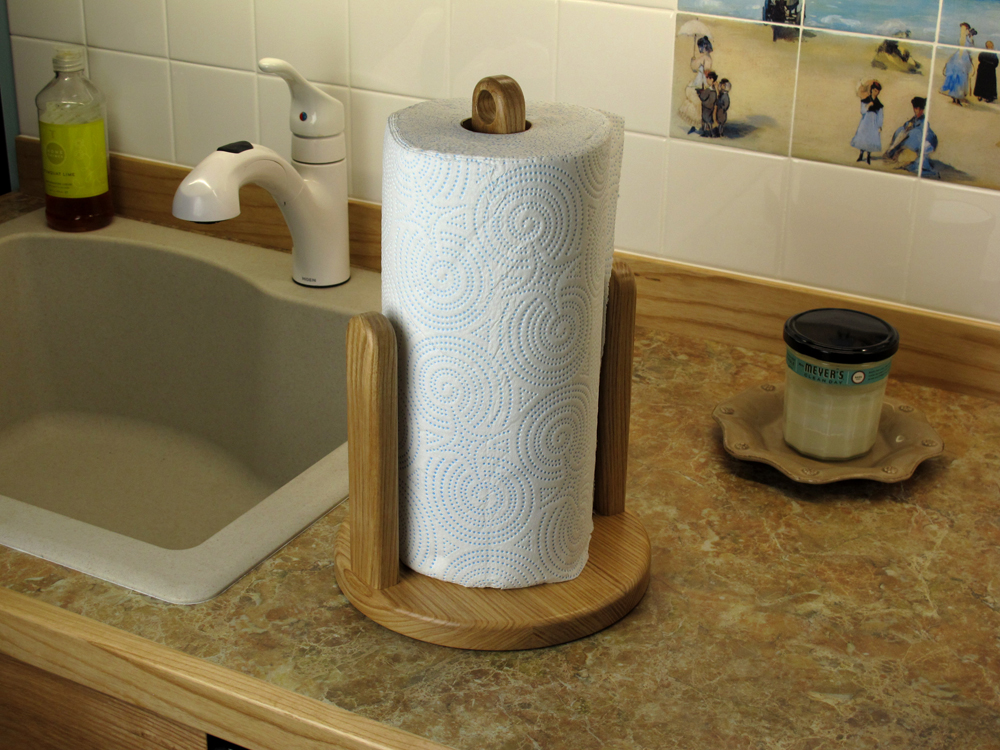
Time is a-wasting. The holidays are upon us. If you’re struggling to figure out one more something to build for a gift, then here you go; learn how to make a paper towel holder. This is a versatile piece since it is not permanently mounted to a wall or cabinet. It can be moved and used where it's needed, and then stored out of site.

I’ve gifted a few of these over the years, and they are always well received. I’ve used different woods, sometimes expensive and figured wood, sometimes simple straight grained domestic wood, and sometimes a mix of both. It just depends on the recipient and where the piece will be used. This one is made with straight grained ash because I’m giving it as a gift to my wife to be used as an accessory to our kitchenette that I recently completed, and that is ash.
Tools required:
Construction notes:
If you’re struggling to figure out one more something to build for a gift, then here you go; learn how to make a paper towel holder. The only thing to watch for is drill bits drifting when you drill the holes. The best precaution to avoid this is to use an awl to carefully punch center points to help guide the bits as you start drilling the holes. Even so, drill slowly and watch carefully to be sure the bits don't wander as you drill. Also, it's essential to drill screw pilot holes in the ends of the center post (B) and stay bars (C) to avoid splitting the end grain when the screws are inserted.
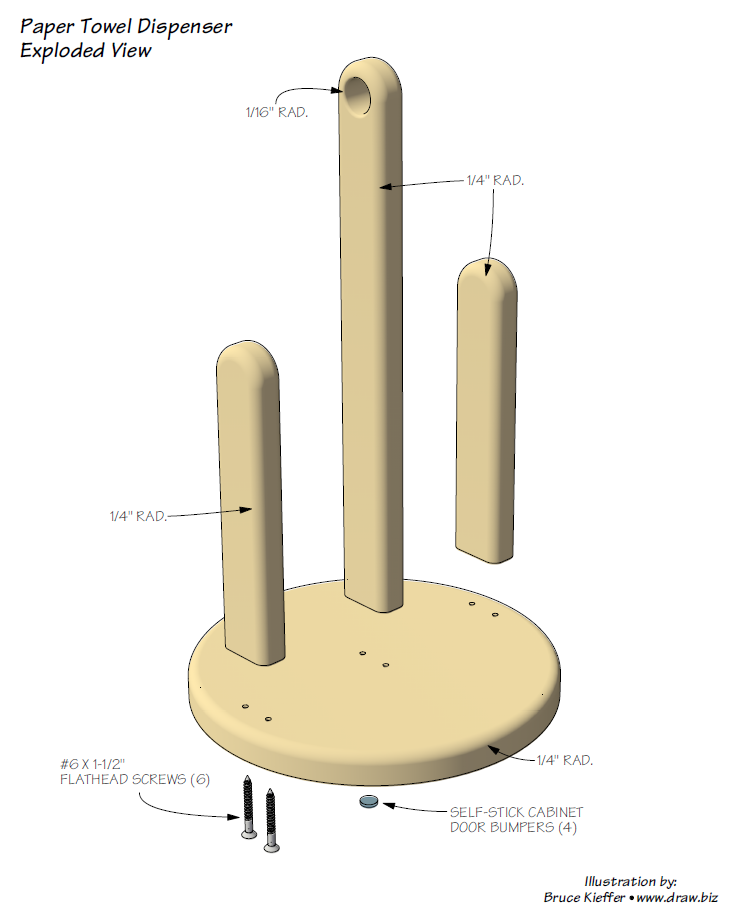
Step 1. Review this exploded view illustration to get a feel for the dispenser's design and construction.
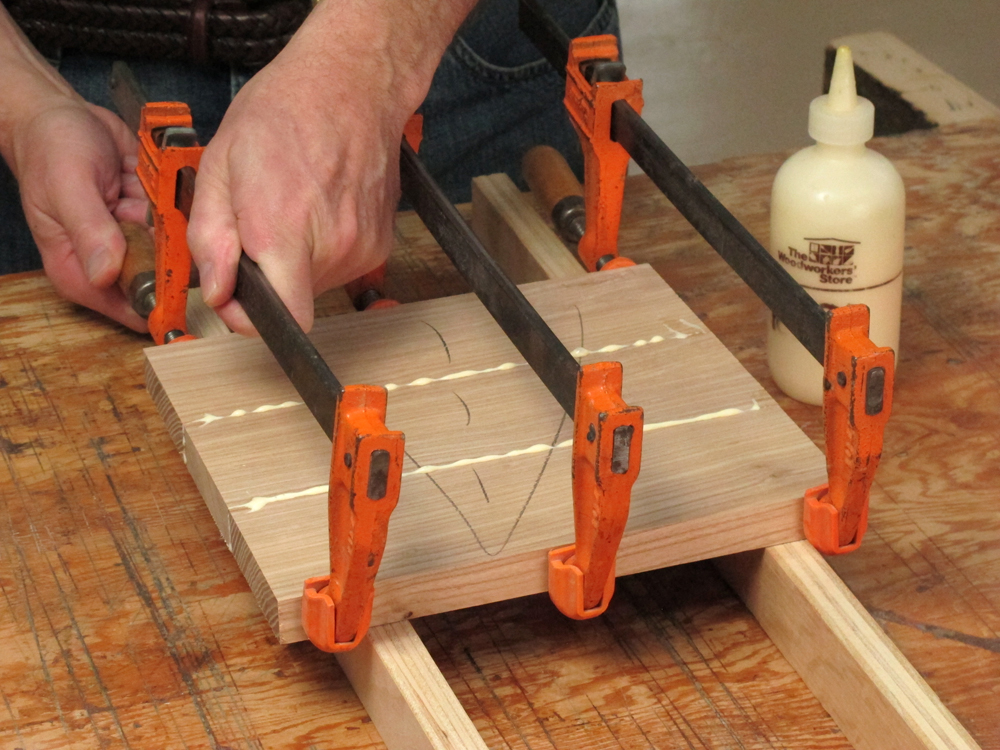
Step 2. Glue together 3 pieces to create a blank for the base (A). Doing this will make the base a more stable piece that is less likely to warp than if it were a one-piece construction.
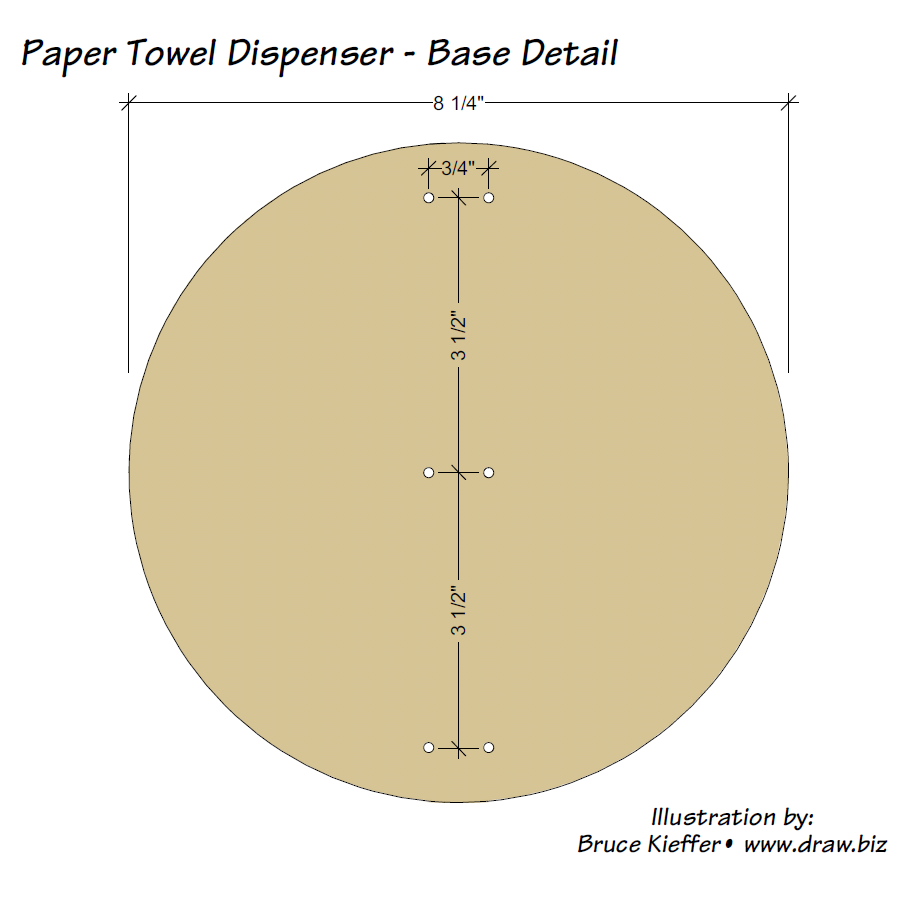
Step 3. Layout the holes and circle shape on the base blank. Countersink and drill the screw holes, cut the circle shape, smooth the sawn edges, and then rout the 1/4" rad. roundover edge.
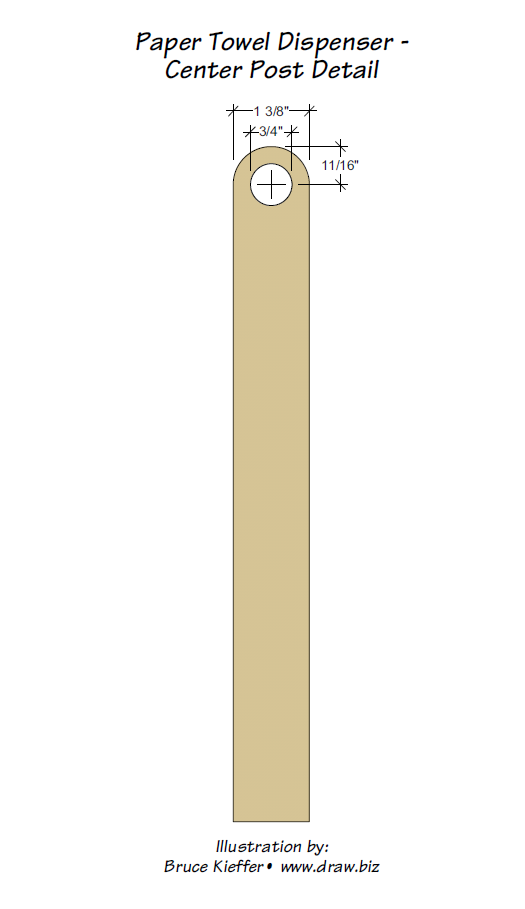
Step 4. Cut the center post (B) and stay bar (C) pieces to size. Lay out the center post finger hole and draw the radiused tops of all three pieces. Drill the center post finger hole.
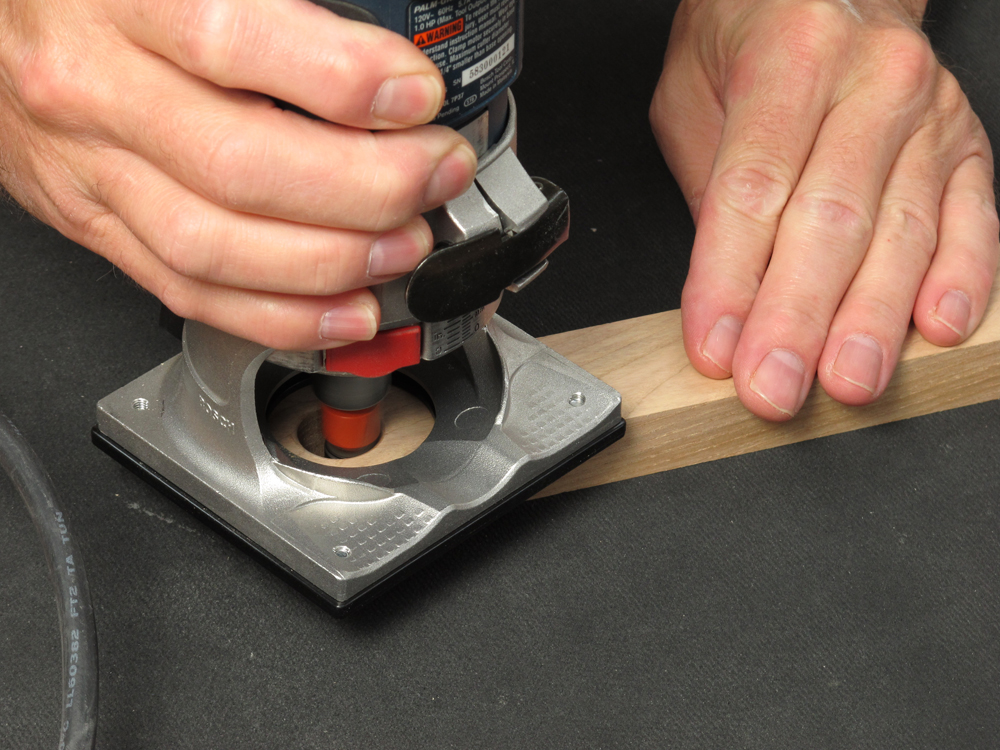
Step 5. Use a 1/16" rad. roundover bit to round over the the edges of the finger hole. This bit may seem unnecessary, but once you have it, you will use it often. It does a super nice job of creating a precise tiny consistent eased-edge looking roundover.
Alternatively, you can hand sand the edges of the finger hole to make them more finger friendly.
Cut the rounded top ends of the center post and stay bars. Layout and drill screw pilot holes in the bottom ends of those pieces. Rout the 1/4" rad. round over edges. Finish sand all the parts.
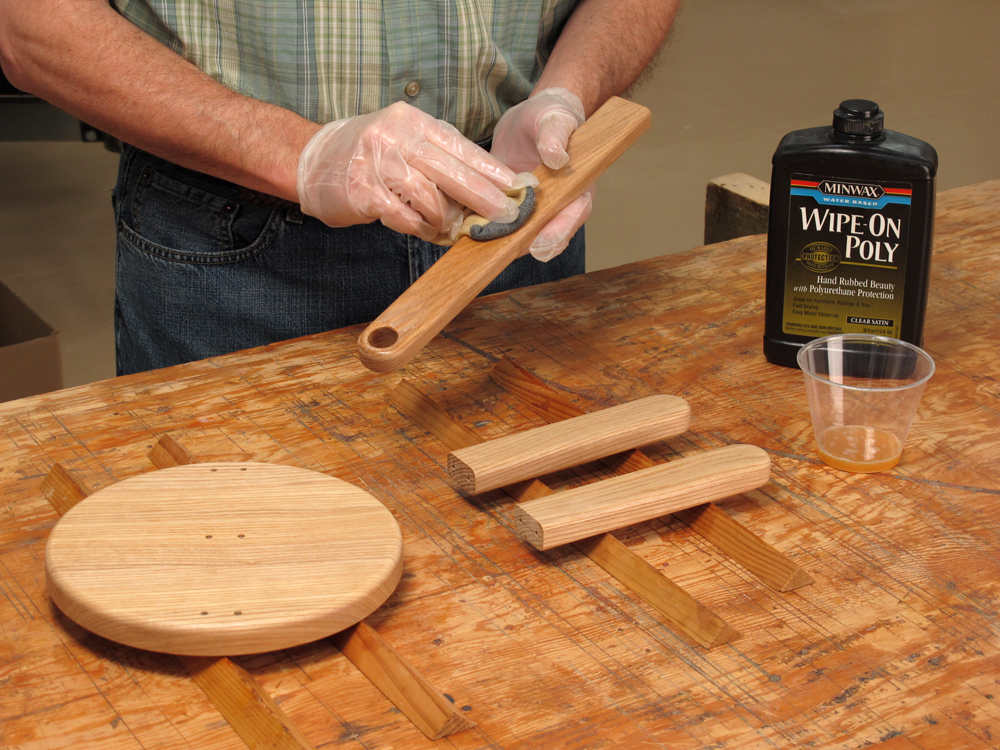
Step 6. Apply your favorite finish. I used wipe-on water based polyurethane. It's fast and durable. Assemble the dispenser and adhere 4 door bumpers to the underside of the base. You're done, with plenty of time left for gift-wrapping!
If you’re looking for more ideas we have a wide variety of woodworking projects to choose from. We’ll keep you busy in the shop all year long so make sure to browse the options.

I am new to woodworking but progressing nicely. I just got a router with table and I would like to know if you use a hand router or a router table to do the quarter round edges on the uprights and base. Thank you.
Wonderful Gift idea! Many thanks as I struggle what to make for gifts! I will make one soon. Thanks again!
Thank you very much, good idea
Really I like your woodworking and all methods are very great, also I will read your post on Facebook and watch your videos. you have very great experience in woodworking.
Such a great post, I love your woodworking, and the paper holder so amazing. but let me know can we use a hand saw instead of a table saw.
You have descirbed quite easy method for this kind of activity.
OOH man. what a creative idea you have shared. keep sharing such things.
Very cool, will look great in my kitchen!
this idea is too incredible. this is a need of every home. your tutorial is super easy. and illustrations made it more easy. love the results. pinning to try this at free time.. thanks for sharing and keep on sharing.
neet projects