This fuming tent design provides the best of all worlds: easy to assemble, easy to break down and, since it is composed of flat panels, it stores reasonably well. When I made my first one, I dutifully screwed the whole thing together and placed duct tape across all edges. I soon realized that was overkill and found that solid clamping sealed the fuming tent sufficiently. Once assembled (and left to stand for a minute or two so the adjacent ammonia could dissipate), I could remove my safety equipment and not smell any ammonia.
To make a fuming tent you need 1” x 2” (3/4” x 1-1/2” actual) of select pine, poplar, whatever (don’t use plywood), pocket hole jig, pocket hole screws, glue, some plastic tarping, and a staple gun.
I have three fuming tents; one is my benchtop tent where I can fume boxes, frames, and other small items. I also have a 4’ x 4’ x 4’ unit that I can place a chair, small tables, or other larger items. Lastly, by swapping out the front, top, and back, my largest fuming tent is 4’ x 4’ x 8’. I can (and have) fumed couches in this large one.
If you are making a small tent, consider making the size of the fuming hood bigger than you need by half (if possible). This is both for ease of placing the hood on and off your piece and for your next project — it’s likely to be bigger, not smaller. All you need to construct are four sides and a top. However, plan on having this sit on a table (or your bench) or the larger ones on the floor, so keep that size dynamic in mind.
Constructing the Frame Sections
I use pocket screws to construct my frame sections. There are a total of 5 sections for each frame. The top of a work surface is the bottom of a completed tent, as is the floor of your shop for the larger tents. Here are links to plans for the bench top tent and the larger floor tents as well.
If you’ve not done pocket hole joinery, here is a video showing you the pocket hole joinery process. I strongly recommend that you use glue in addition to the pocket screw.
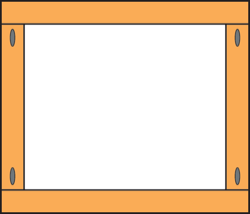
The basic frame component pieces are very easy to construct, and pocket holes are perfect for the joinery.
Attaching the Plastic Sheeting to the Frame Sections
Once the frame component pieces are made, you need to cover each section individually with plastic sheeting. Although 1 mil plastic sheeting could be used, I strongly recommend using the thickest (6-mil) available in a big box store. The reason is simple; you want/need something that is robust and will survive both use and storage. See Sources. The larger roll is a better buy if you think about using this stuff on your bench for painting, gluing, and other messy operations. It stands up to repeated use very well.
My lovely wife is helping me here. This can be done by yourself, but it’s nice to have some extra hands for the folding and stapling process.
To start out, cut your plastic so that it extends about 4” past all sides (about 8” longer and wider than your frame).
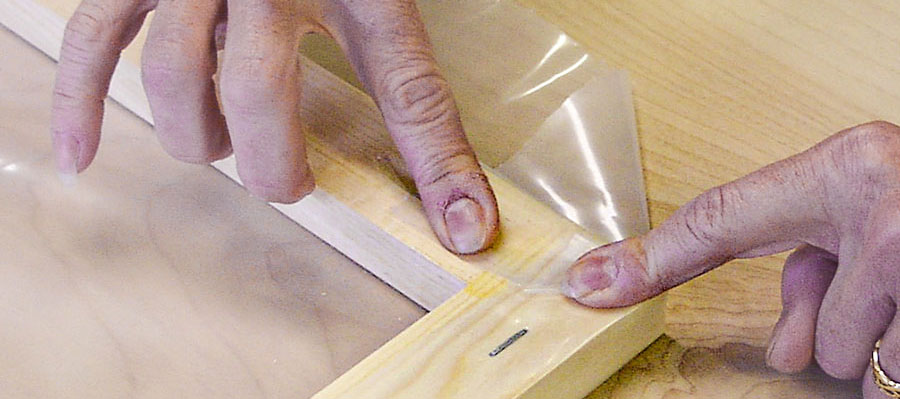
Next, pick one side, fold the plastic over that side and place staples about every 4” – 5” along the face of the frame.
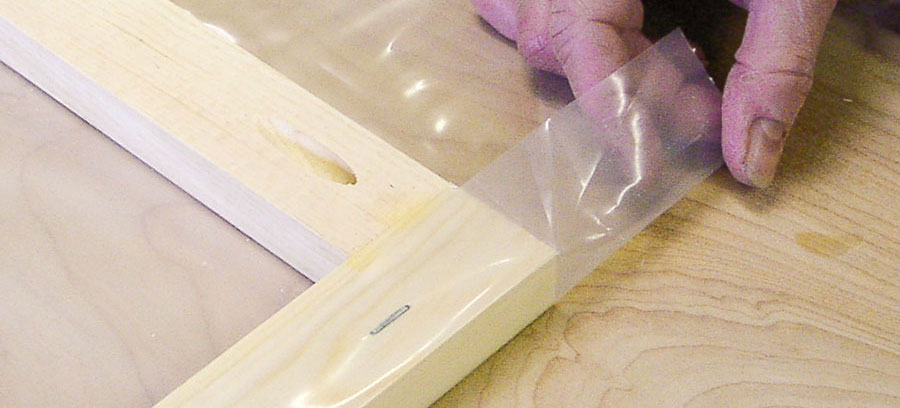
Now, adjacent to a side that has been stapled, flatten the plastic to the edge. There are two billowed sections to the plastic here, one above and one below your thumb.
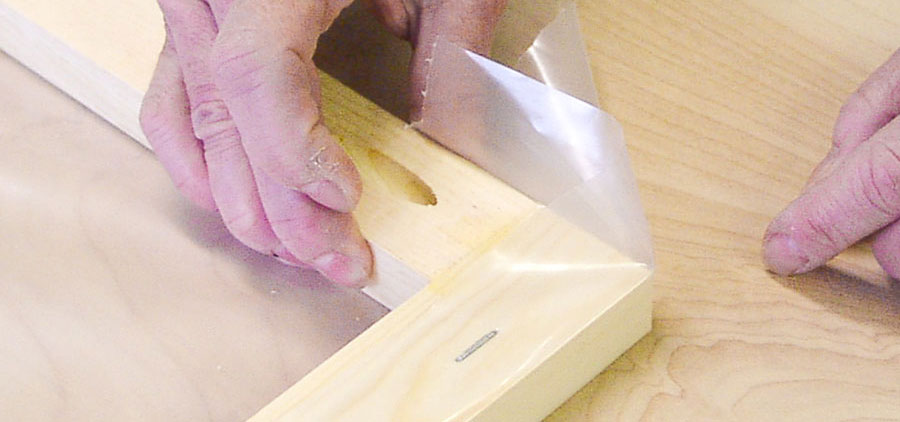
Take the billowed section along the top edge and fold it over the top edge of the frame and over the face’s corner.
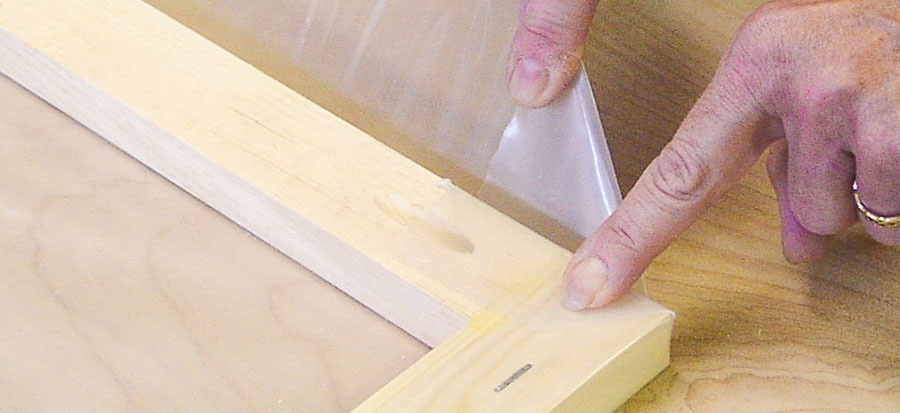
Next, take the bottom billowed section and fold it over the top as well, keep the plastic along the edge as flat and tight as possible.
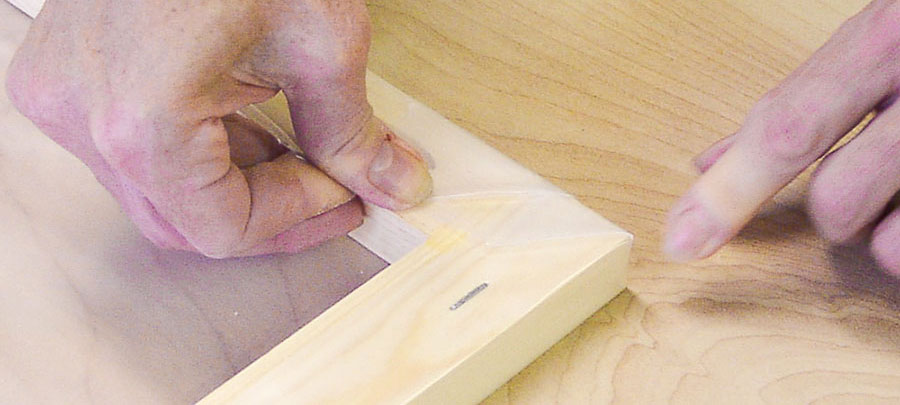
At this point, again be sure that the plastic against the edge of the frame is very flat as you pull the plastic covering very tight.
Now staple everything in the corner tight.
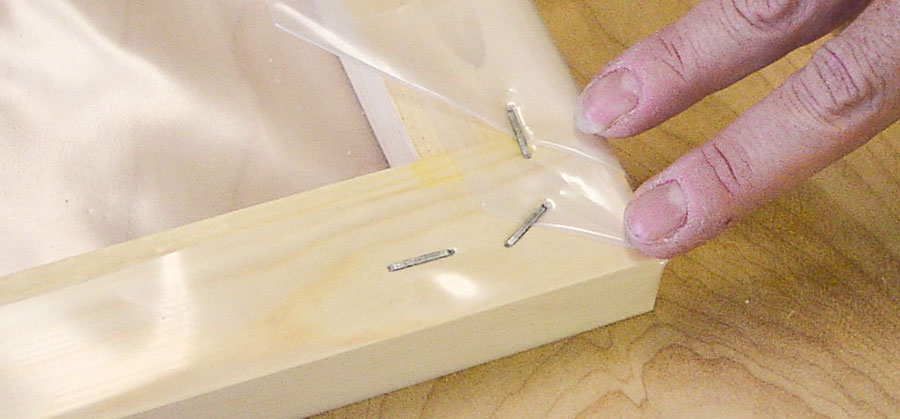
At this point, you have one side with staples and one corner completed. Go to the opposite side that has been stapled and staple that side about every 4” – 5”. As you come up to the next corner, process that corner as before.
Now complete the frame by doing the other two sides and corners.
Lastly, use scissors and cut any plastic that lies past the inside edge of the frame, being careful to not poke through the plastic sheet on the other side.
Attach the plastic sheeting to the remaining frame sections.
Important note: you’ll notice on the plans for the 4’ x 8’ sides there is a cross beam for structural support. DO NOT STAPLE THE PLASTIC TO THIS CROSS PIECE. If you do you will be punching holes in the plastic that is supposed to contain the ammonia. It’s OK to have the plastic sheeting hang around this cross piece and limit stapling around the outside of the frames as shown above. Part of what makes this system effective is that there are no staples in the ammonia facing side of the tent.
Assembling the Frame for Fuming
When assembling the fuming tent, first put a layer of 6-mil plastic on the surface where you’ll be setting up the tent. This acts as the floor of your tent.
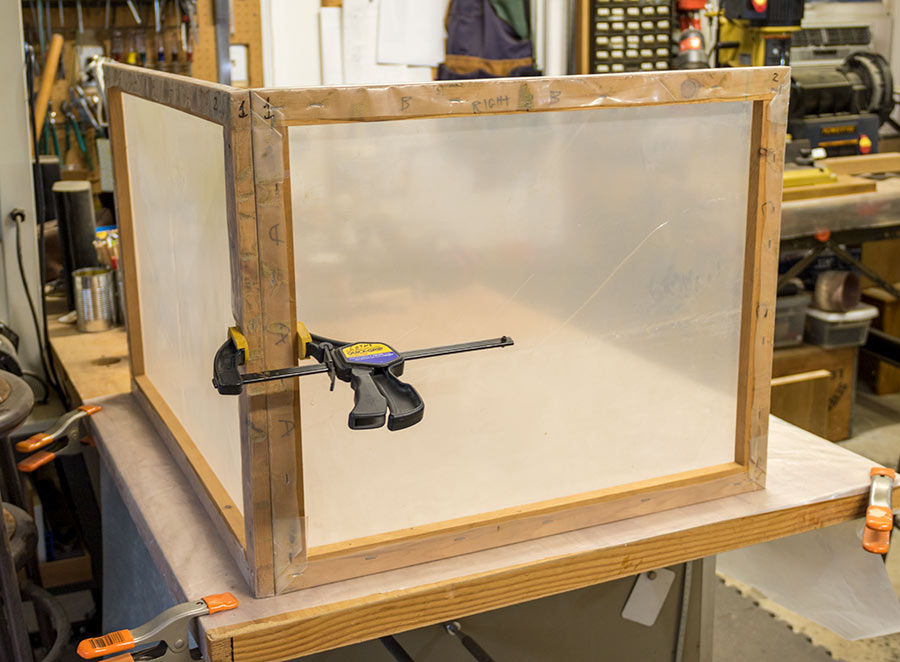
With the “all plastic sheet side” facing in, place one of the sides against the back and use a hand quick clamp to hold it in place as you gather the other pieces.
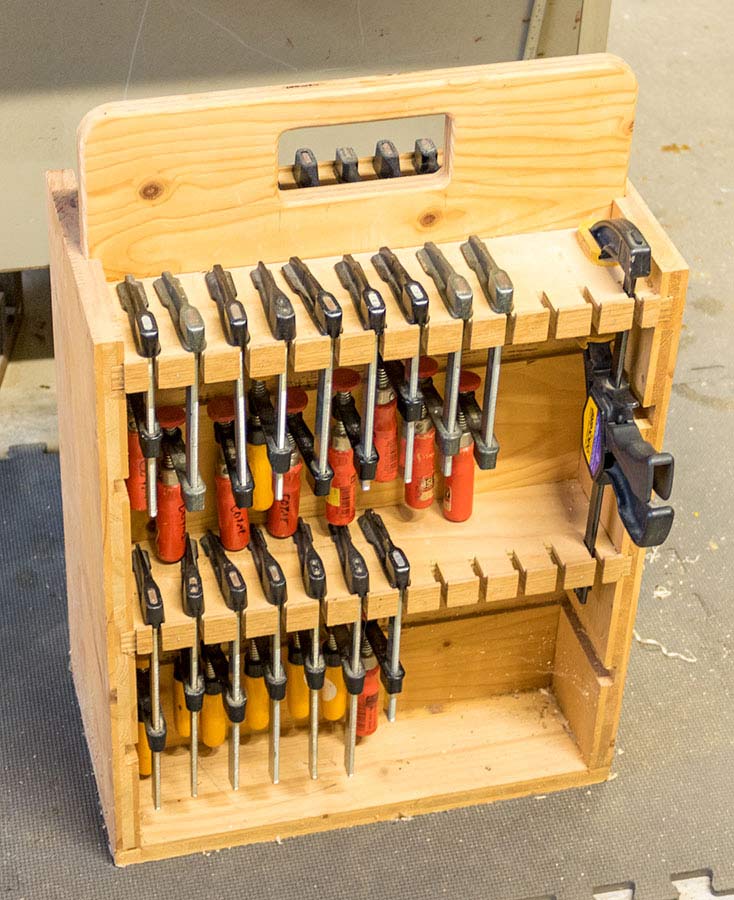
For projects like this, a small hand clamp storage facility as shown in the image below is very handy.
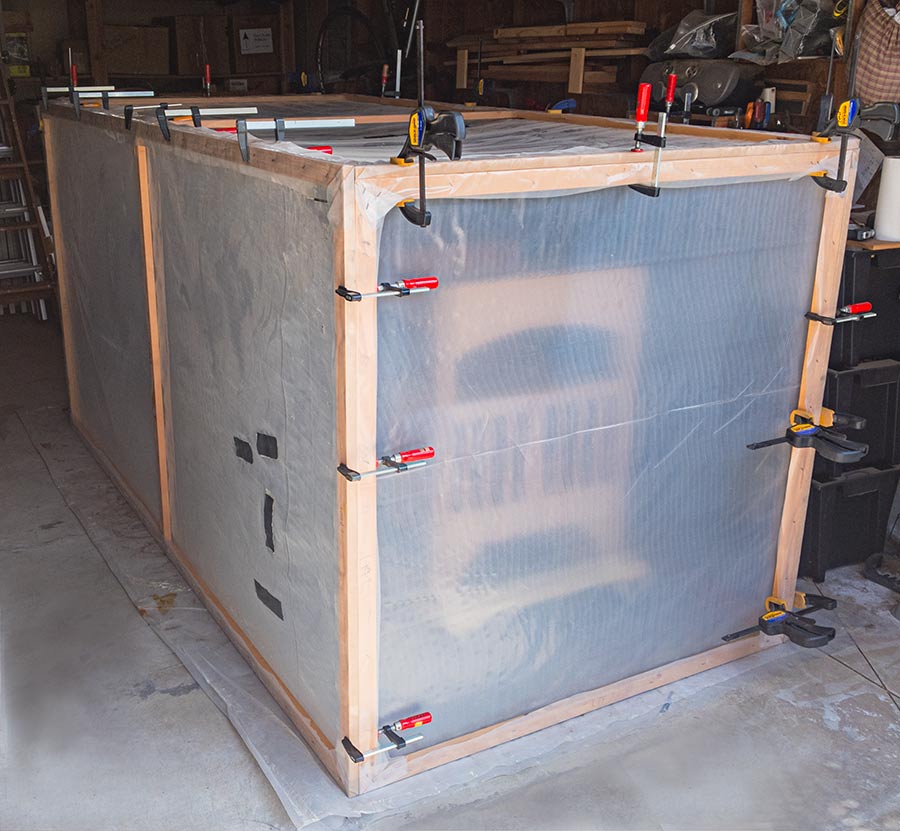
As an example of how many small clamps might be necessary, see the image below showing all clamps on the fuming tent ready to go.
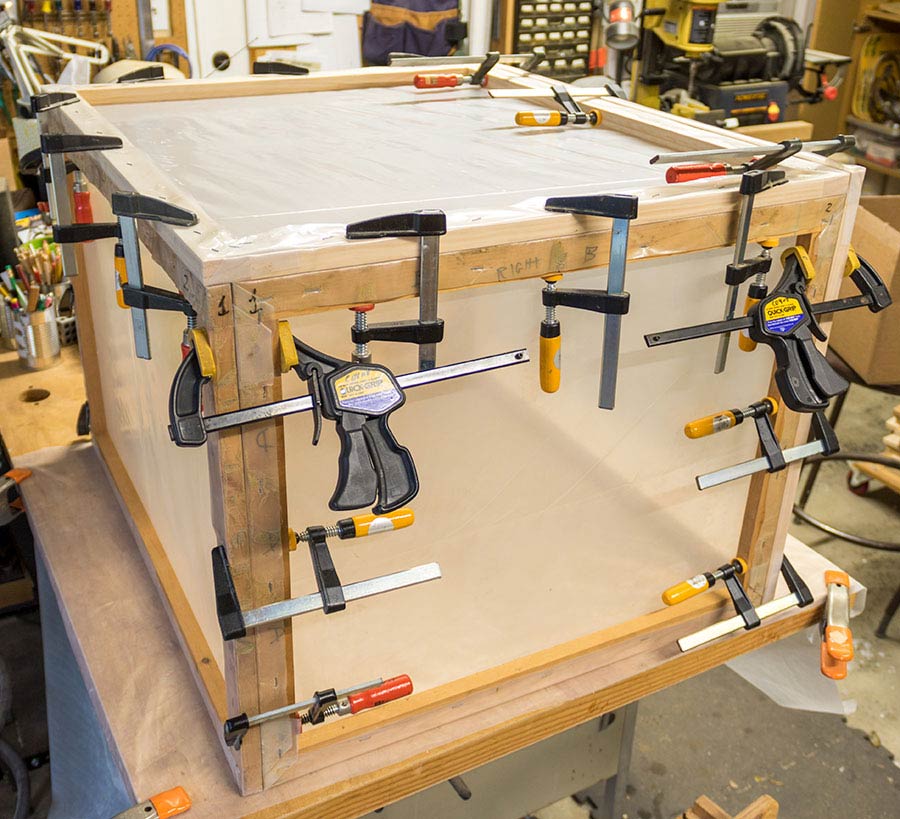
Note how I use the Quick-Grip type clamps with their deeper reach to overlap the small clamps on the corners.
Also note how the handles point in, not out. This is very critical when you happen to walk by the fuming tent. (Don’t ask me how I know this to be true.)
Additional Ideas and Thoughts
I’m supplying the plans for two different designs for the benchtop design: one where the front is the last piece to assemble, the other has the top as the last piece. For years I lifted the fuming tent off of the item(s) I was fuming until one day as I lifted the tent up, I noticed a clear spot on my ceiling and added a block and tackle to do the heavy lifting. There are advantages to both depending on what you are doing.

This block and tackle proved to be a big asset for my bench top fuming tent, and other tasks. For example, dust-collection hoses that can attach to many sizes of dust ports on your power tools are known to be rather heavy. Hanging the hose from this block and tackle with a loop of rope has completely solved the hose’s weight problem.
As a one-man shop, moving larger pieces of furniture can be a challenge. What I’ve done to move and/or rotate large items is to have a set of four swiveling 3” wheels that I add to the bottom of a simple frame that I make for each project as necessary. The wheel’s location is based on where the feet would be so that all pressure in on the wheels. My furniture remains on these “carts” during construction, fuming, finishing, as well as moving to the front side of the house where they are carried into the front door. You can sort of see this cart under the kitchen island in the very first photo on the top of this article.
Let me finish with one other use of the fuming tent; they make great tents/barriers for finish spraying after you remove one facing side. You may wish to make a lazy Susan for your piece to sit on so you can rotate the item during spraying. If your project is on one of the carts just mentioned, simply spin the project (via the cart) around. Alternatively, if you have your fuming tent attached to a block and tackle, raise the tent up, rotate as necessary, let it back down, and continue to spray.
Lastly, as robust as is the 6-mil plastic sheeting, as well as strong, tears or holes, can happen. If they do, duct tape is your friend (and I’d use it on both sides of a hole).
Here is an article for more information on the fuming process and how to do it safely.
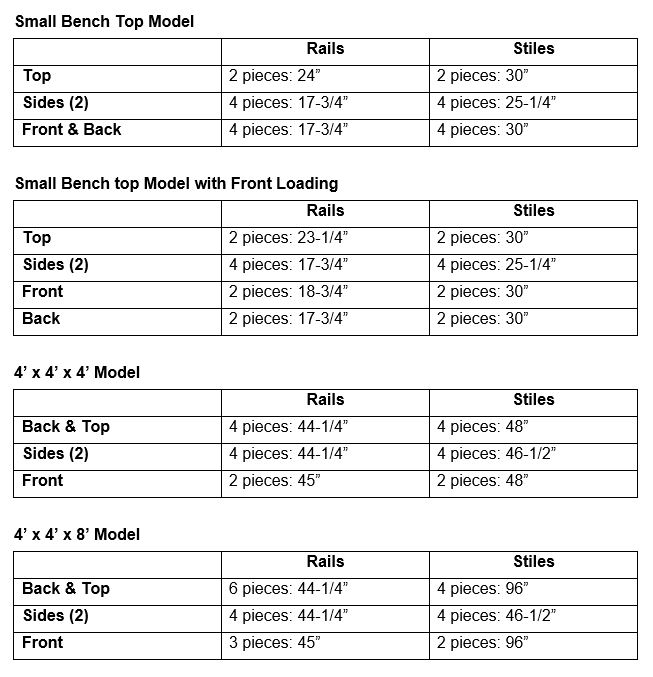
Cut List For Fuming Tents
Use select pine, or the wood of your choice. Do not use plywood. Dimensions are based on butt joints and screw pockets.
The small tents require six pieces 1” x 2”-8’ each.
If you only make the 4’ x 4’ x 4’ tent you’ll need ten pieces 1” x 2”-8’.
If you only make the 4’ x 4’ x 8’ tent you’ll need fifteen pieces 1” x 2”-8’.
If you make both large tents (sharing sides between the two) you’ll need twenty-one pieces 1” x 2”-8’.
Material
Use select pine or the wood of your choice. Do not use plywood strips.
Sources

What is “fuming”? I’ve never heard of it before, other than “fuming” for bugs.
What is fuming?
where can i get deep reach bar clamps?Thanks,Will