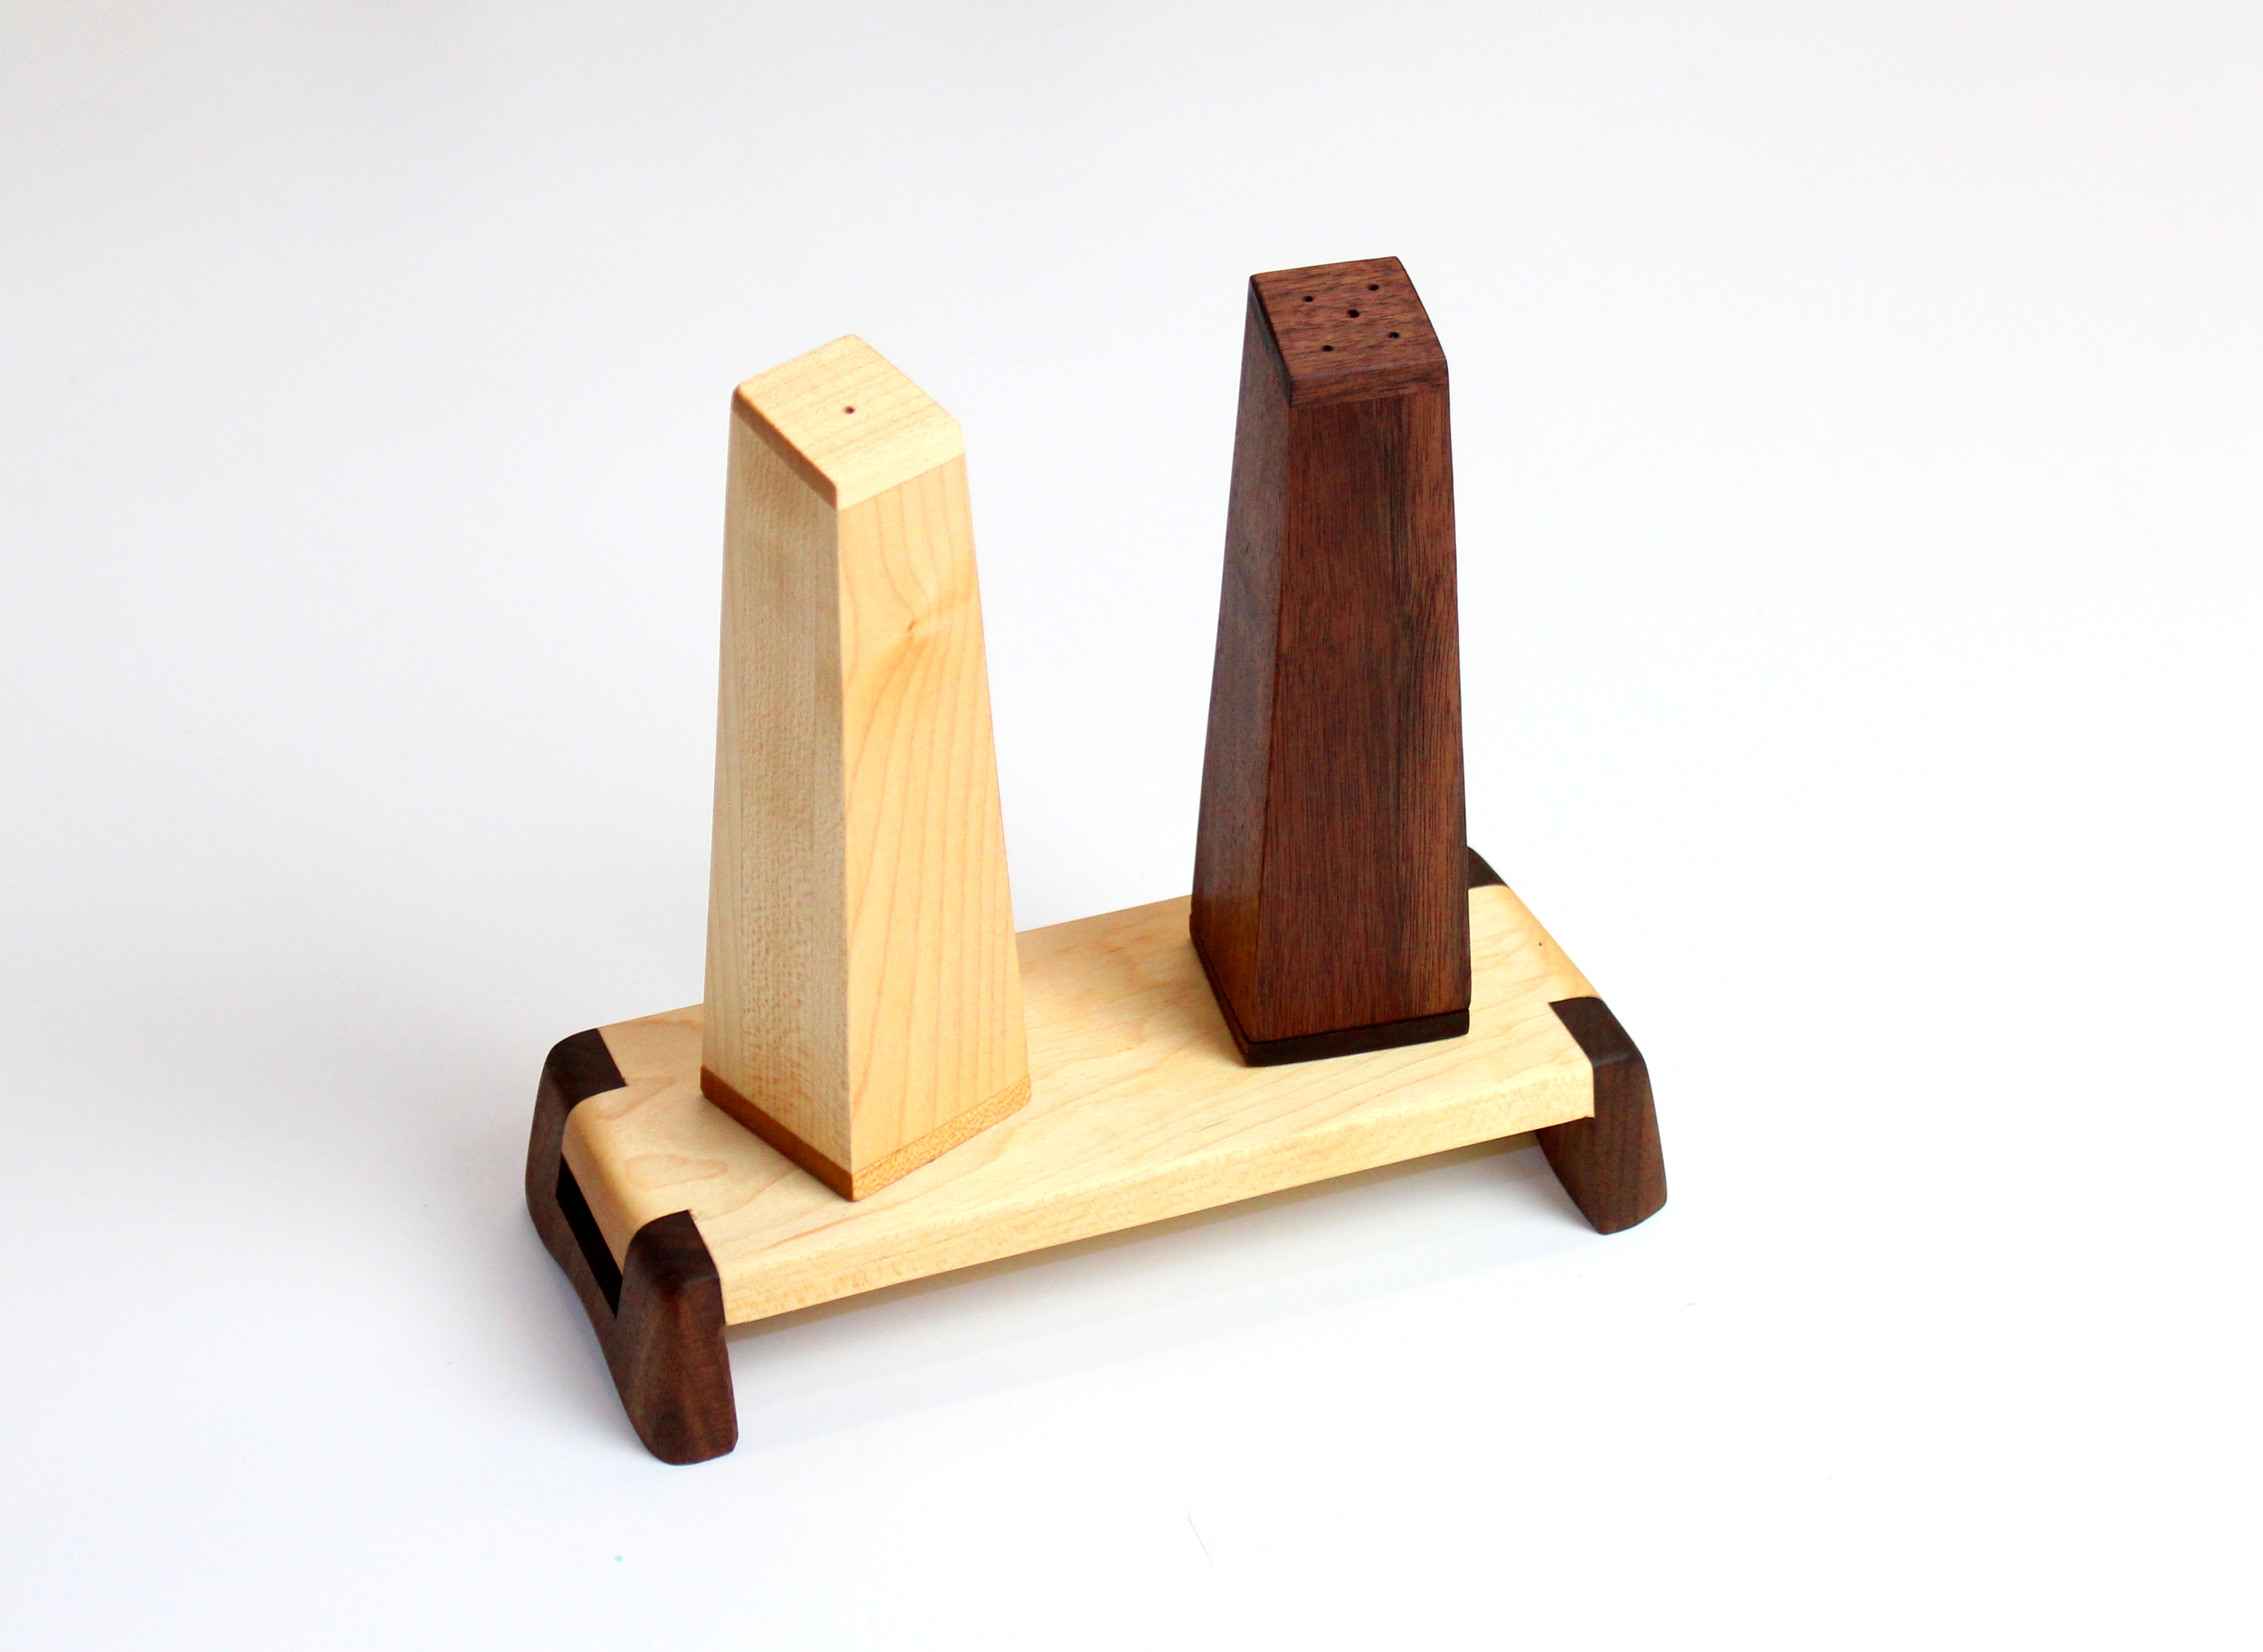
Looking for a quick “mass production” gift project? These tapered wooden salt and pepper shakers make a stylish addition to any table setting, and they can be made in a jiffy in a modestly equipped woodshop. You can make just the shakers, or if you have time, add the platform that is pictured here, which is actually the butter tray from another quick gift project: a butter board and spreader set.

I chose walnut for the pepper shaker and maple for the salt, hoping that each wood tone would provide a nice visual clue as to the contents: dark for pepper, light for salt. I experimented with hole sizes and patterns on top until I found an approach that dispenses salt and pepper at an appropriate rate.
Your gift recipient will delight in the intuitive mechanism for refilling these shakers, as the bottom is held securely by rare earth magnets, but can be removed easily for adding salt or pepper.
Tools required:
- Table saw
- Tapering jig
- Random orbital sander
- Miter saw
- Drill
First, cut the parts
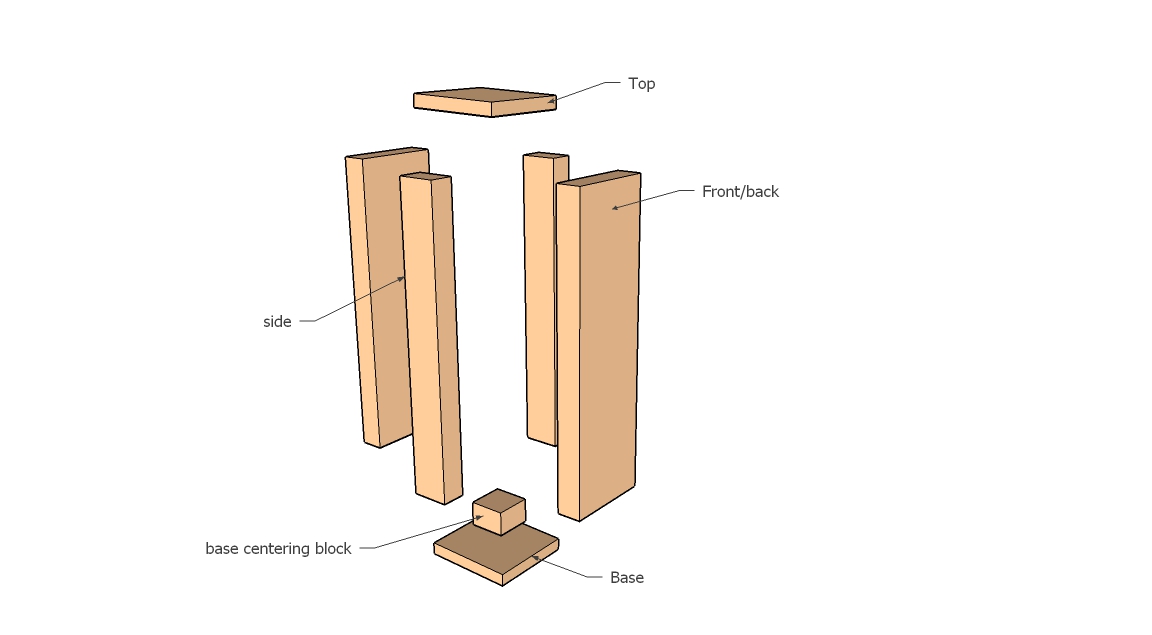
Cut the parts to size following the cut list. I’ve included the components necessary to make a single shaker. The salt and pepper shakers are identical except for the wood species and the hole pattern at the top.

Glue the body
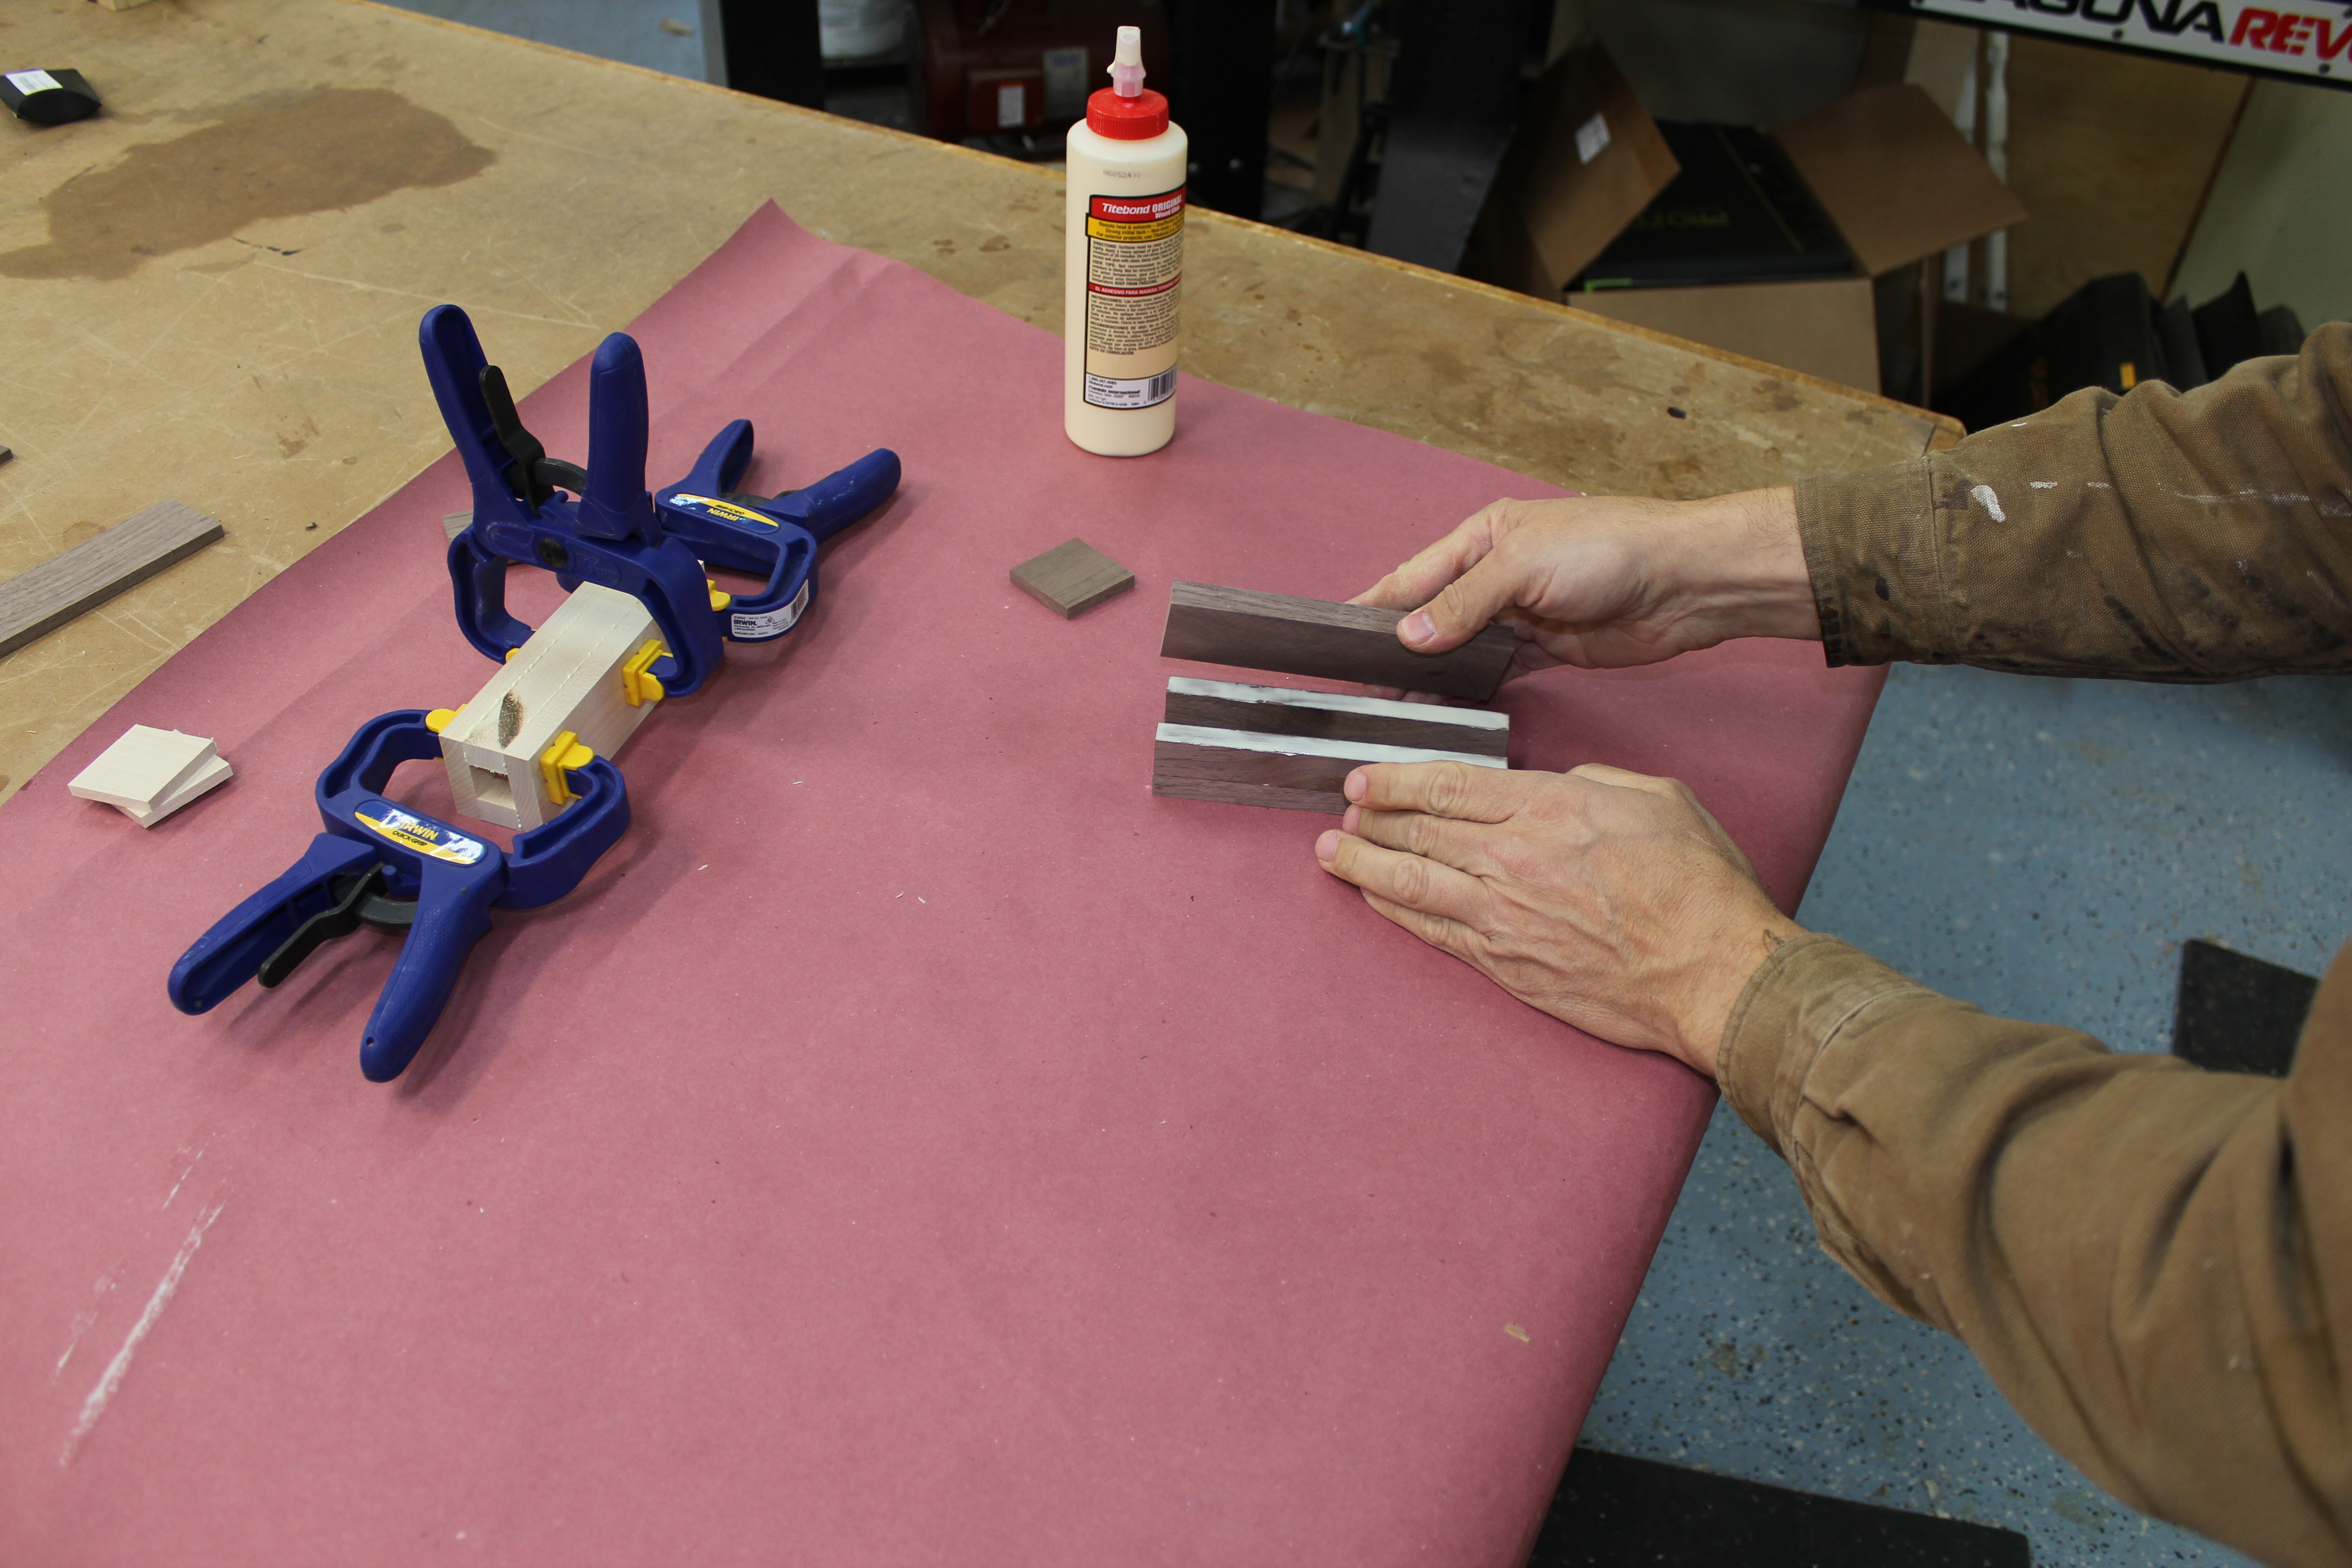
Use a modest amount of glue as you assemble the body pieces so that it is easier to clean up the inside of the body.
Cut ends

Trim one end square; cut the other end at 15 degrees.
Assemble the base; Step 1
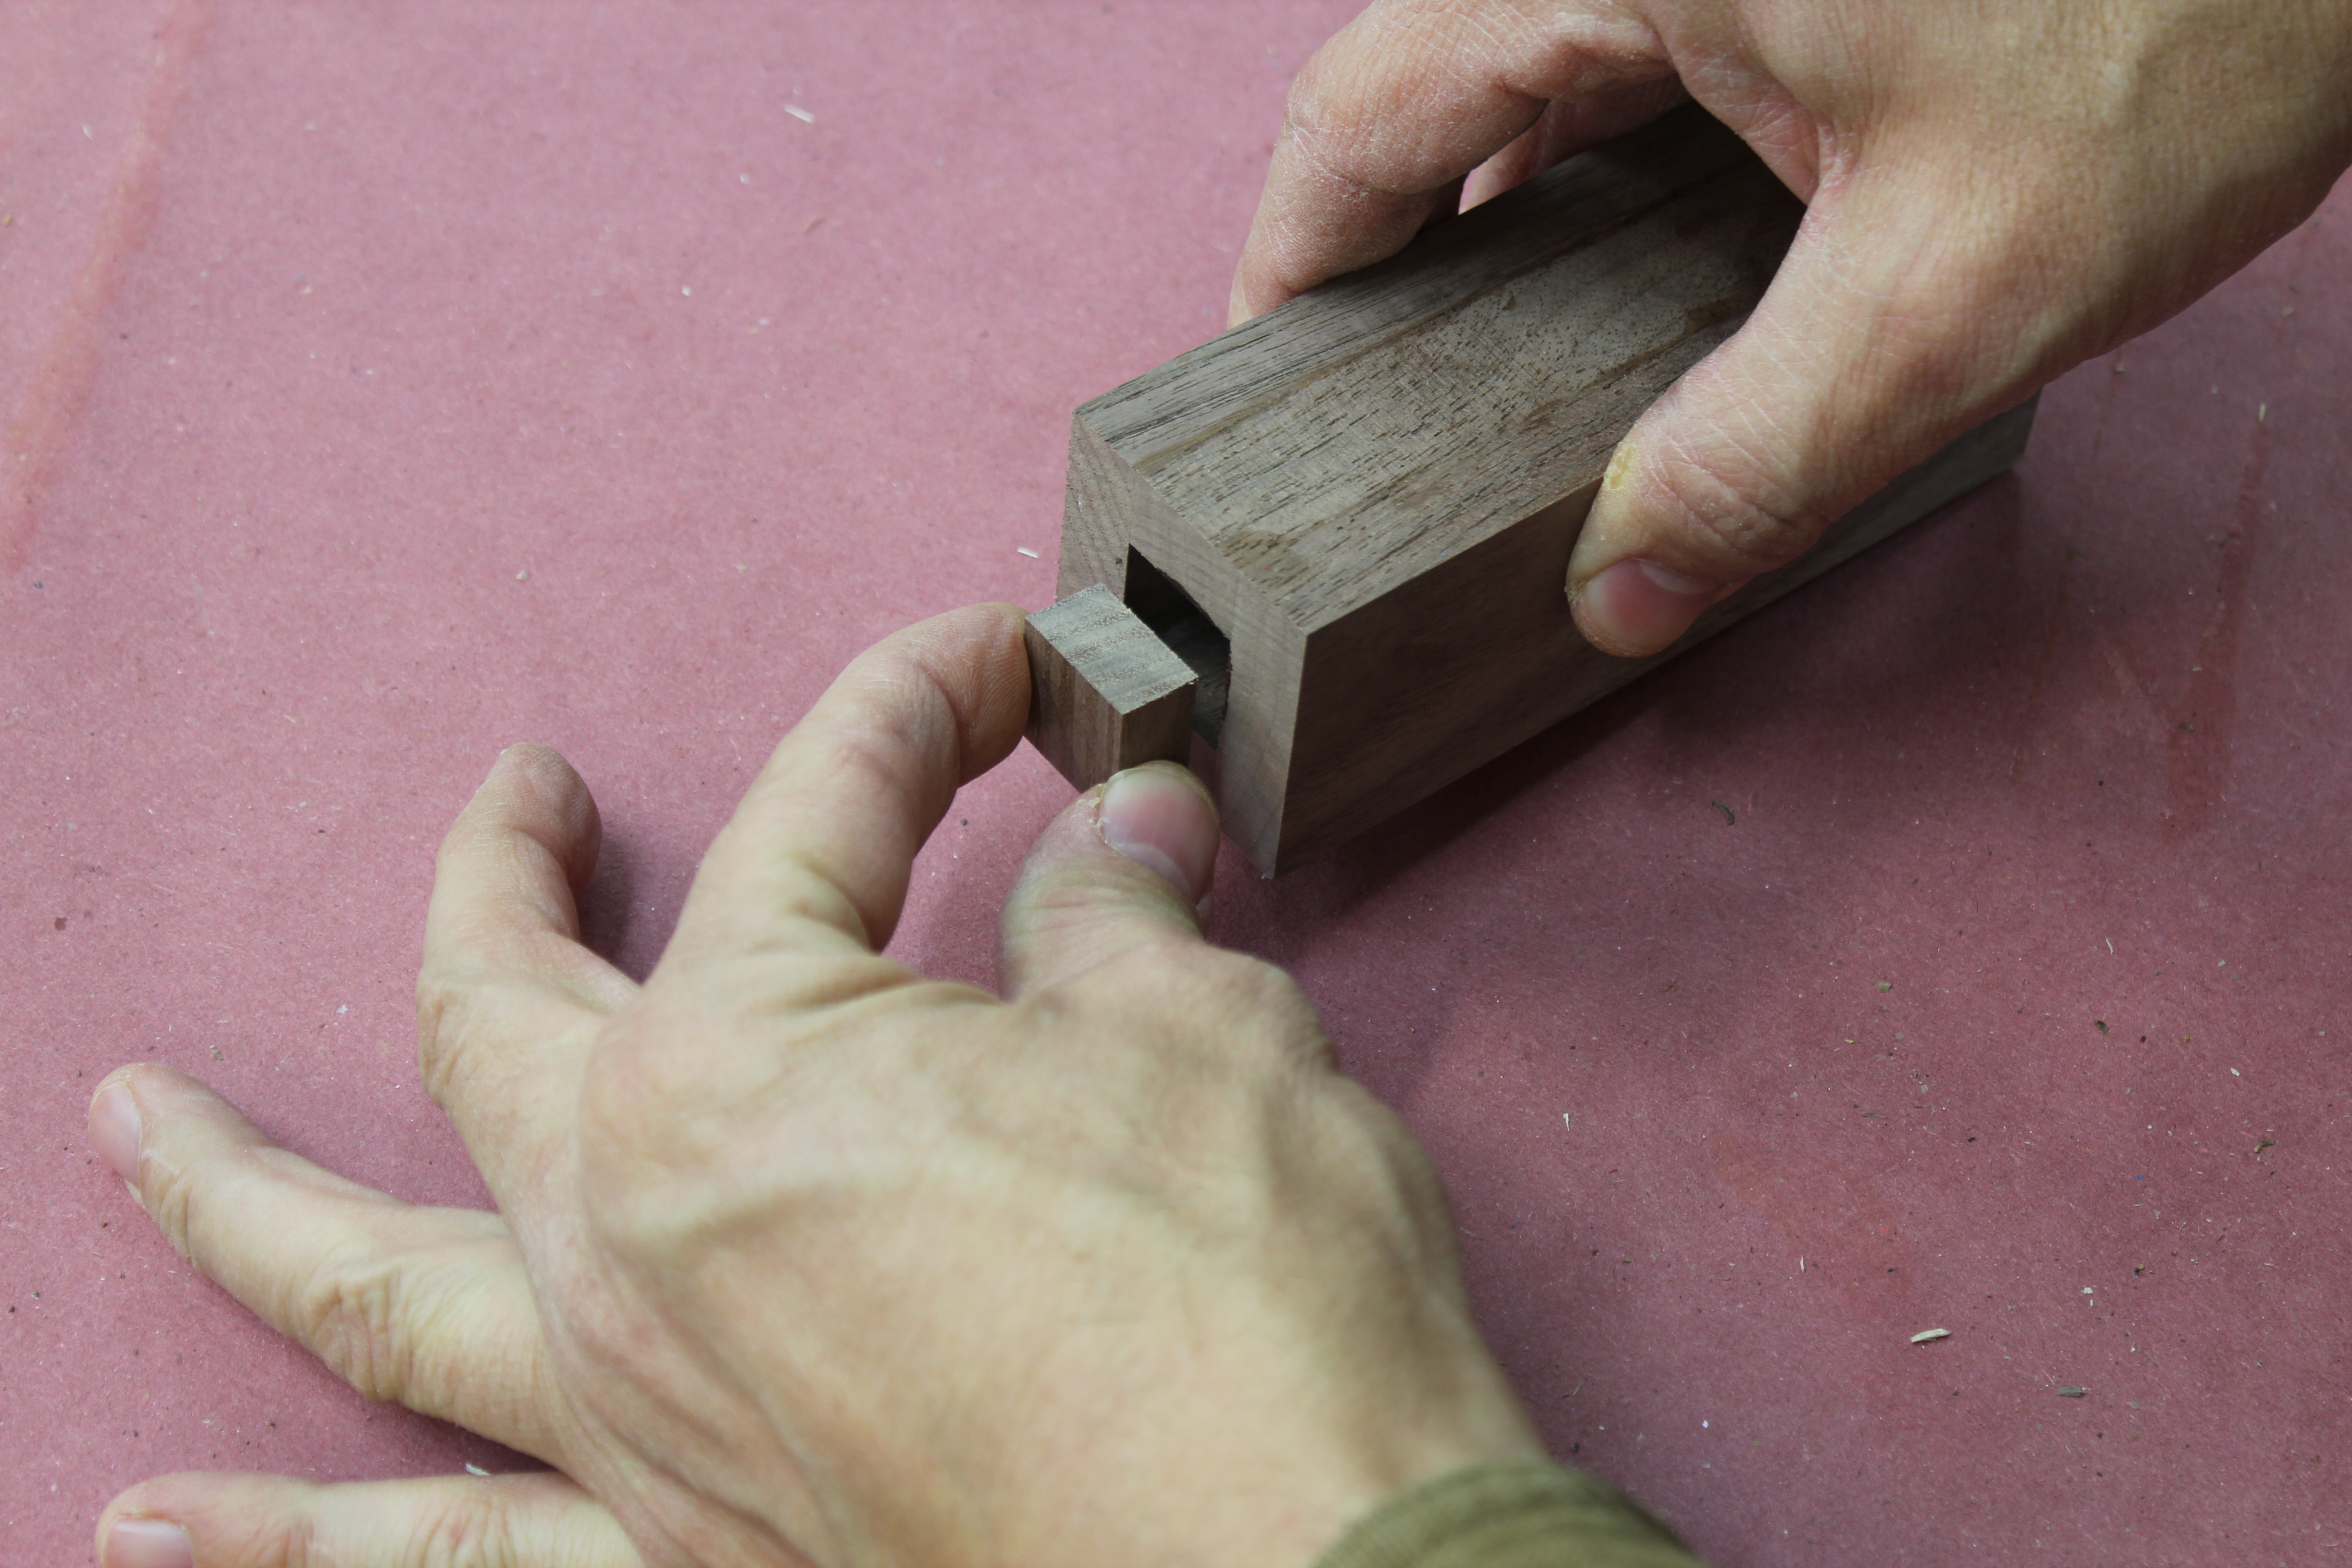
Follow a simple three-step process to assemble and perfectly align the base to the walls of the body. First step: insert the base centering block into the body. It should slide in easily; if it is too tight, trim with a chisel.
Assemble the base; Step 2
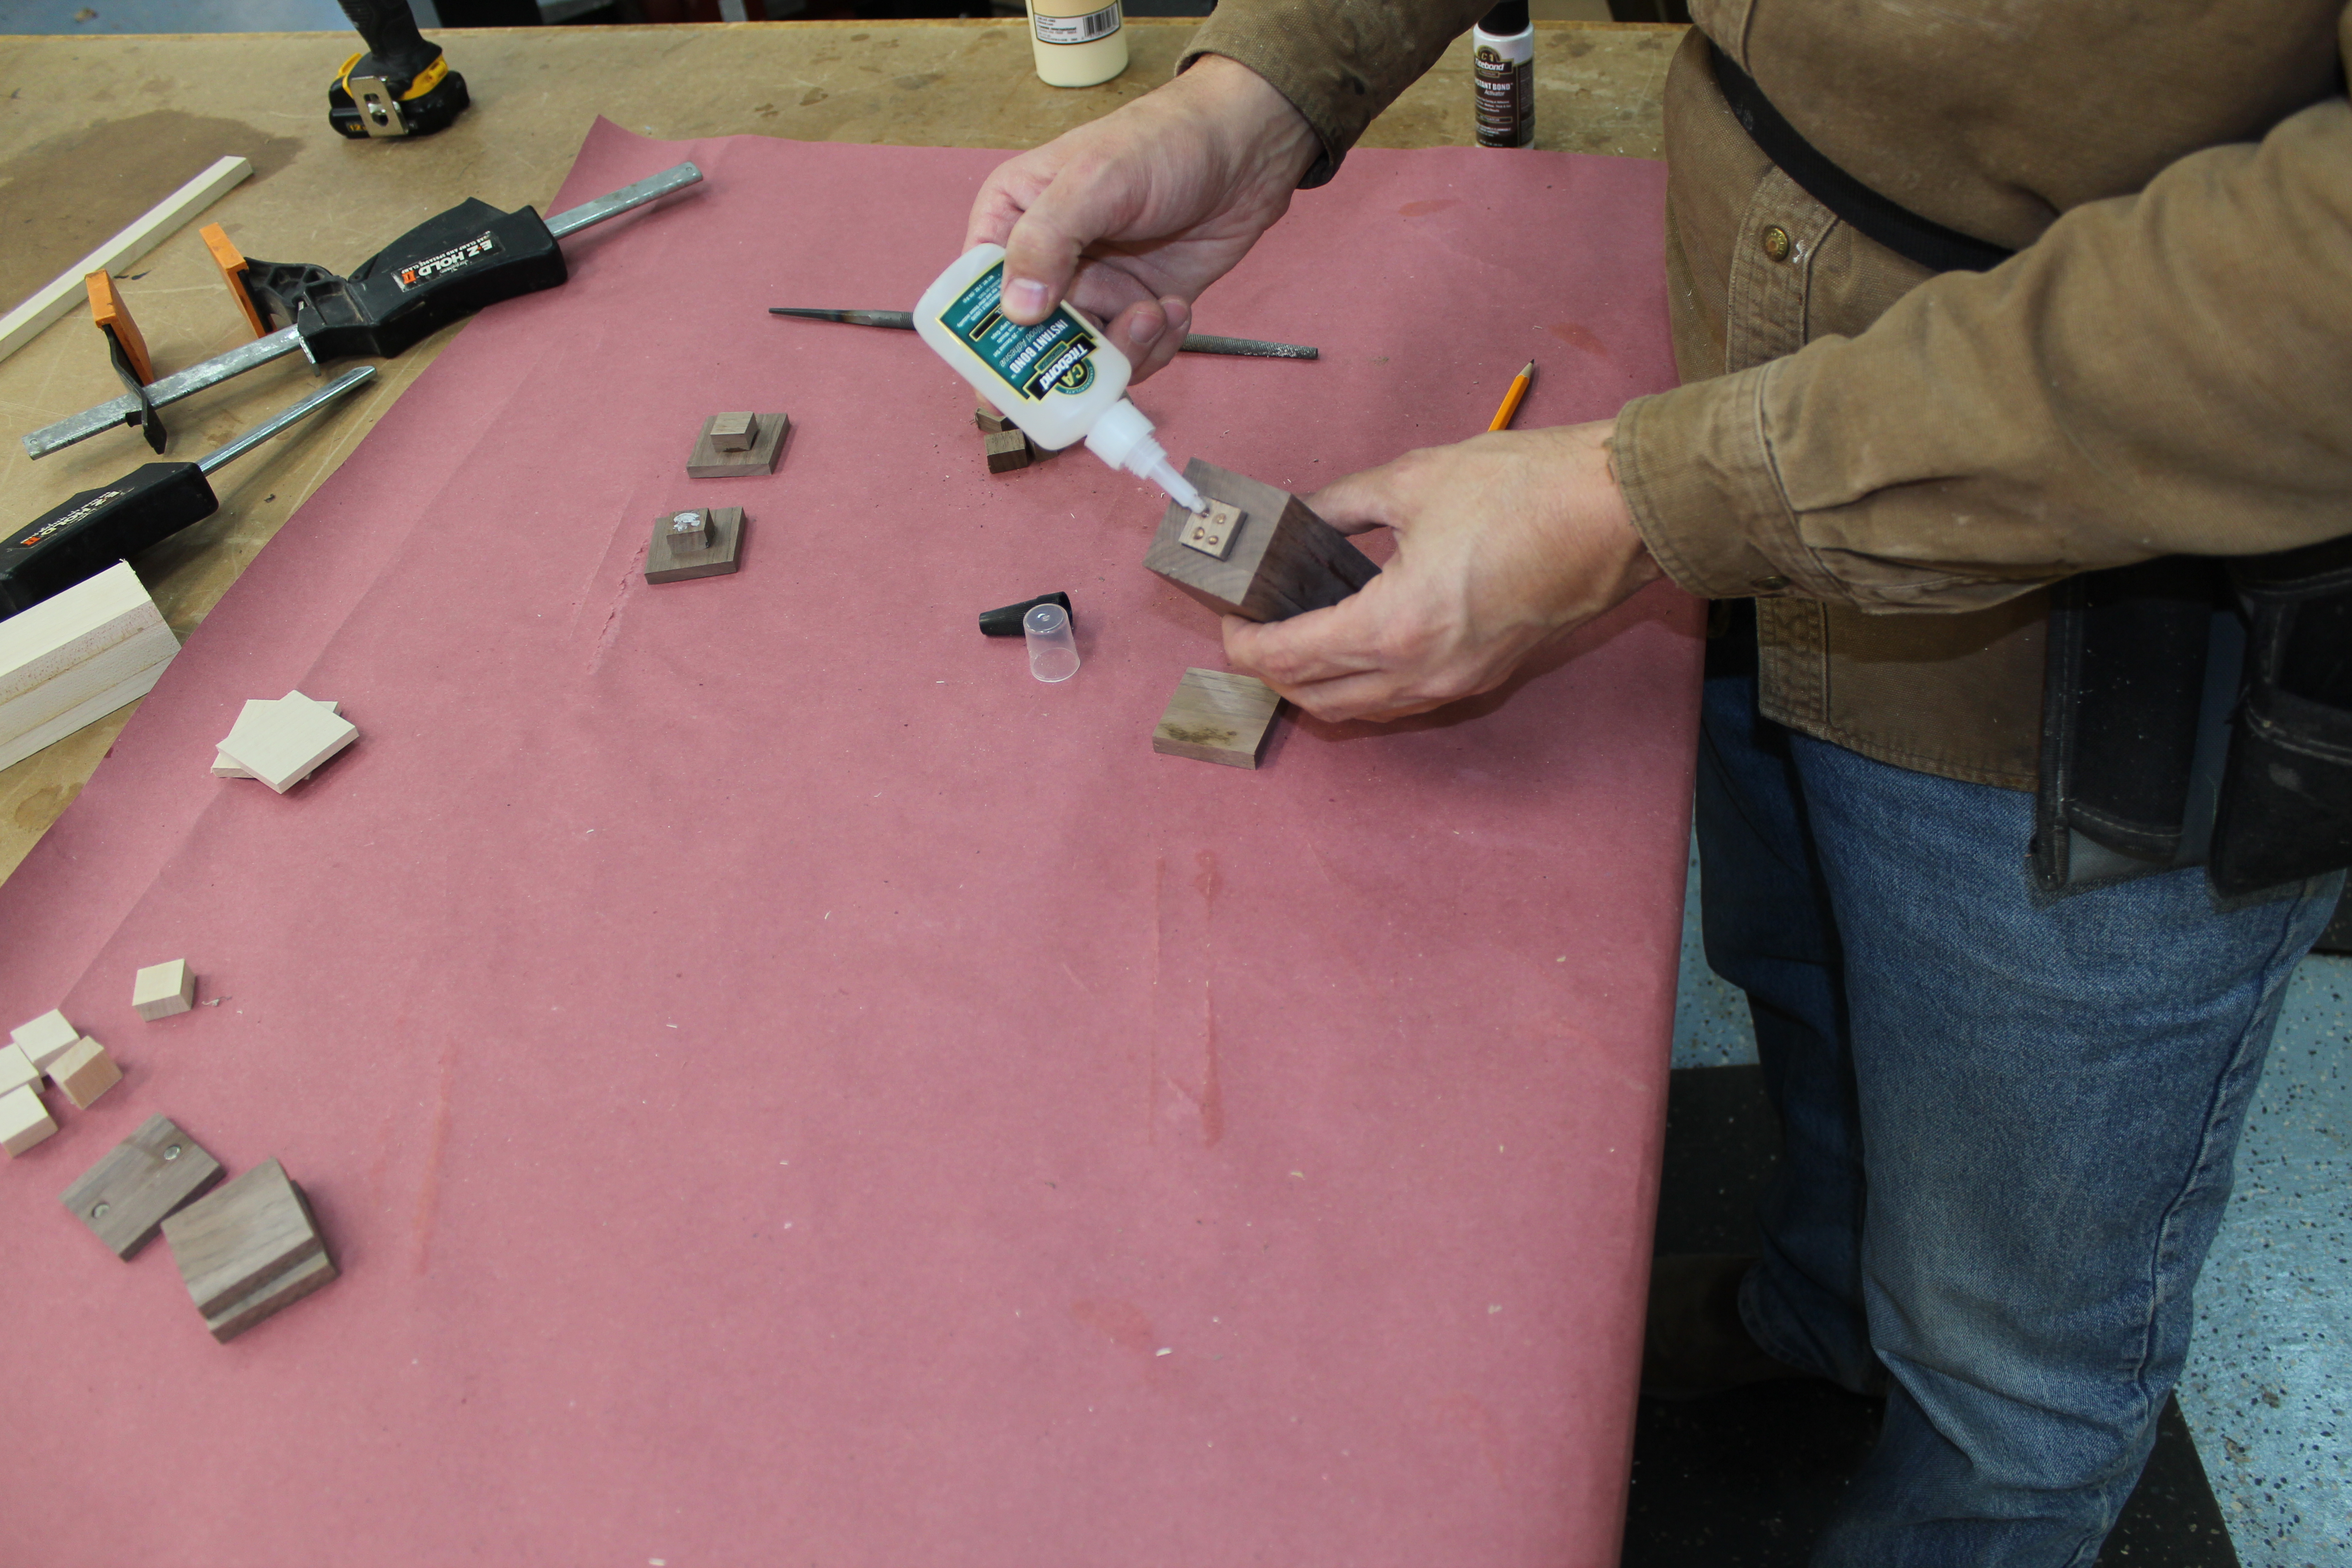
Apply glue. I used quick-setting CA glue, but you could use wood glue if you prefer.
Assemble the base; Step 3
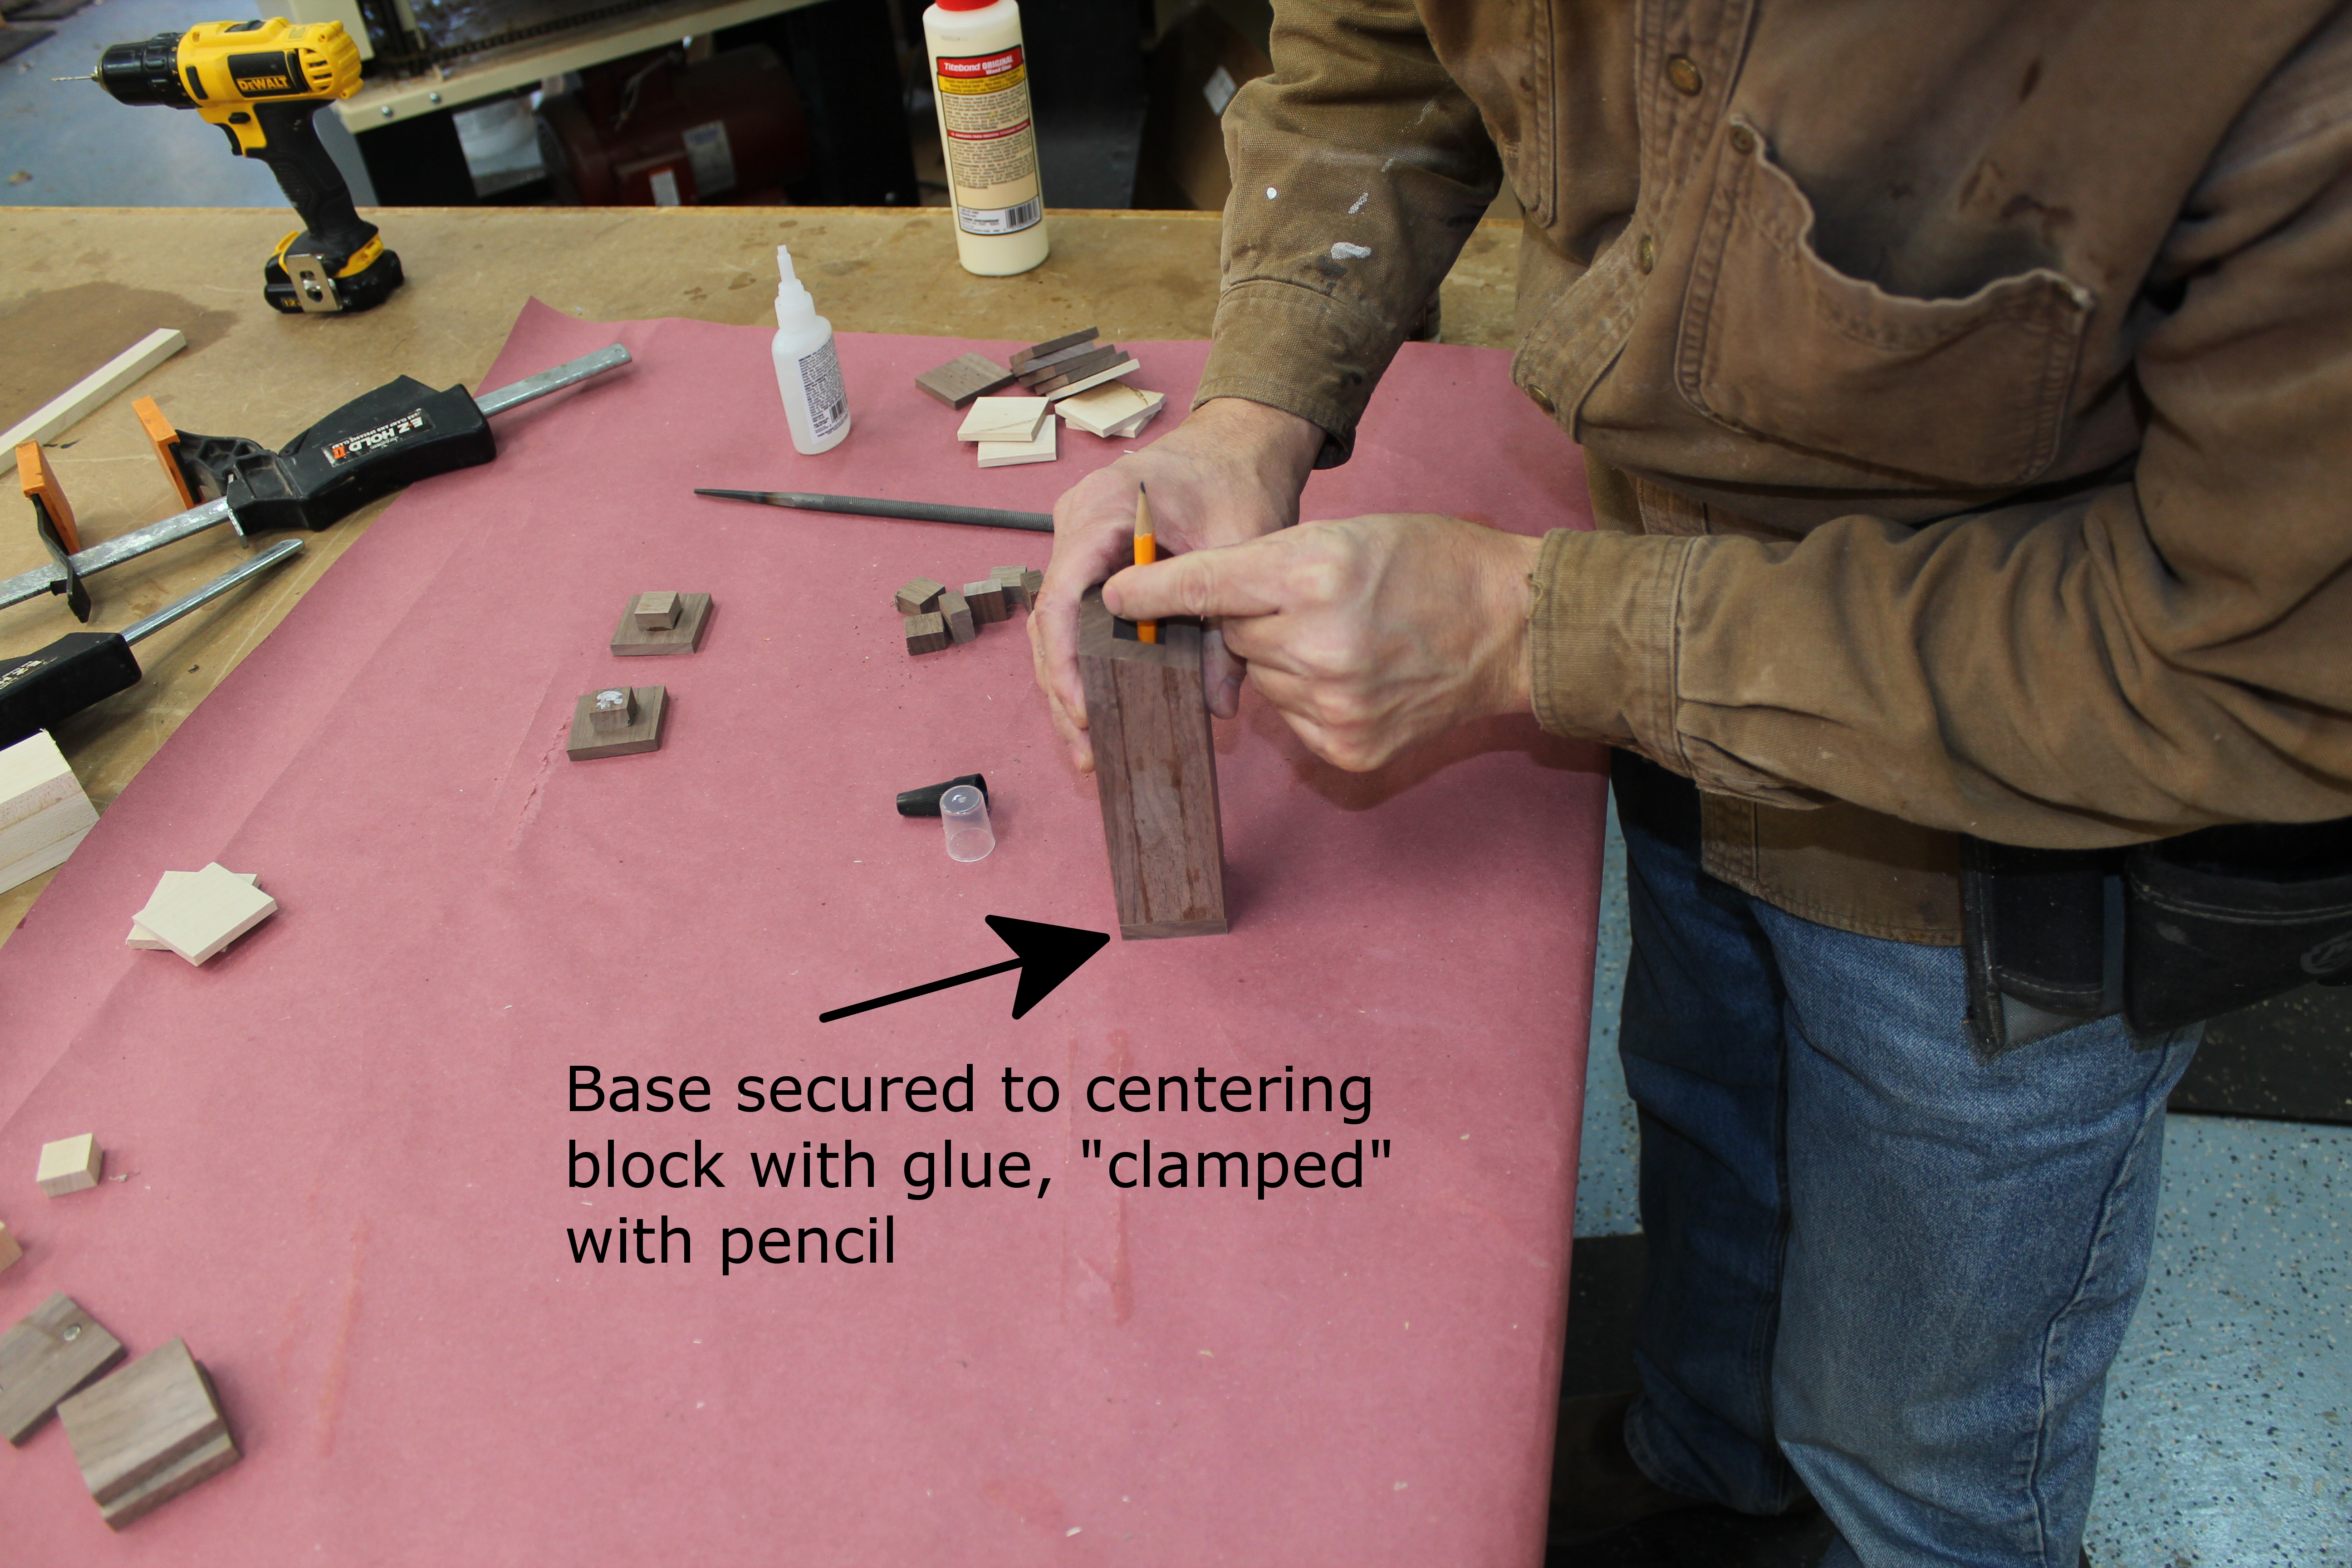
Use a pencil to press the pieces together. Insert a pencil (eraser pointed down) through the body of the shaker, and use the eraser to press the pieces together. Hold for a minute to allow the glue to tack (longer for traditional wood glue), then hold the base down with the pencil while you slide the body straight up and off the base. Let the base sit without disturbing it until the glue sets up fully.
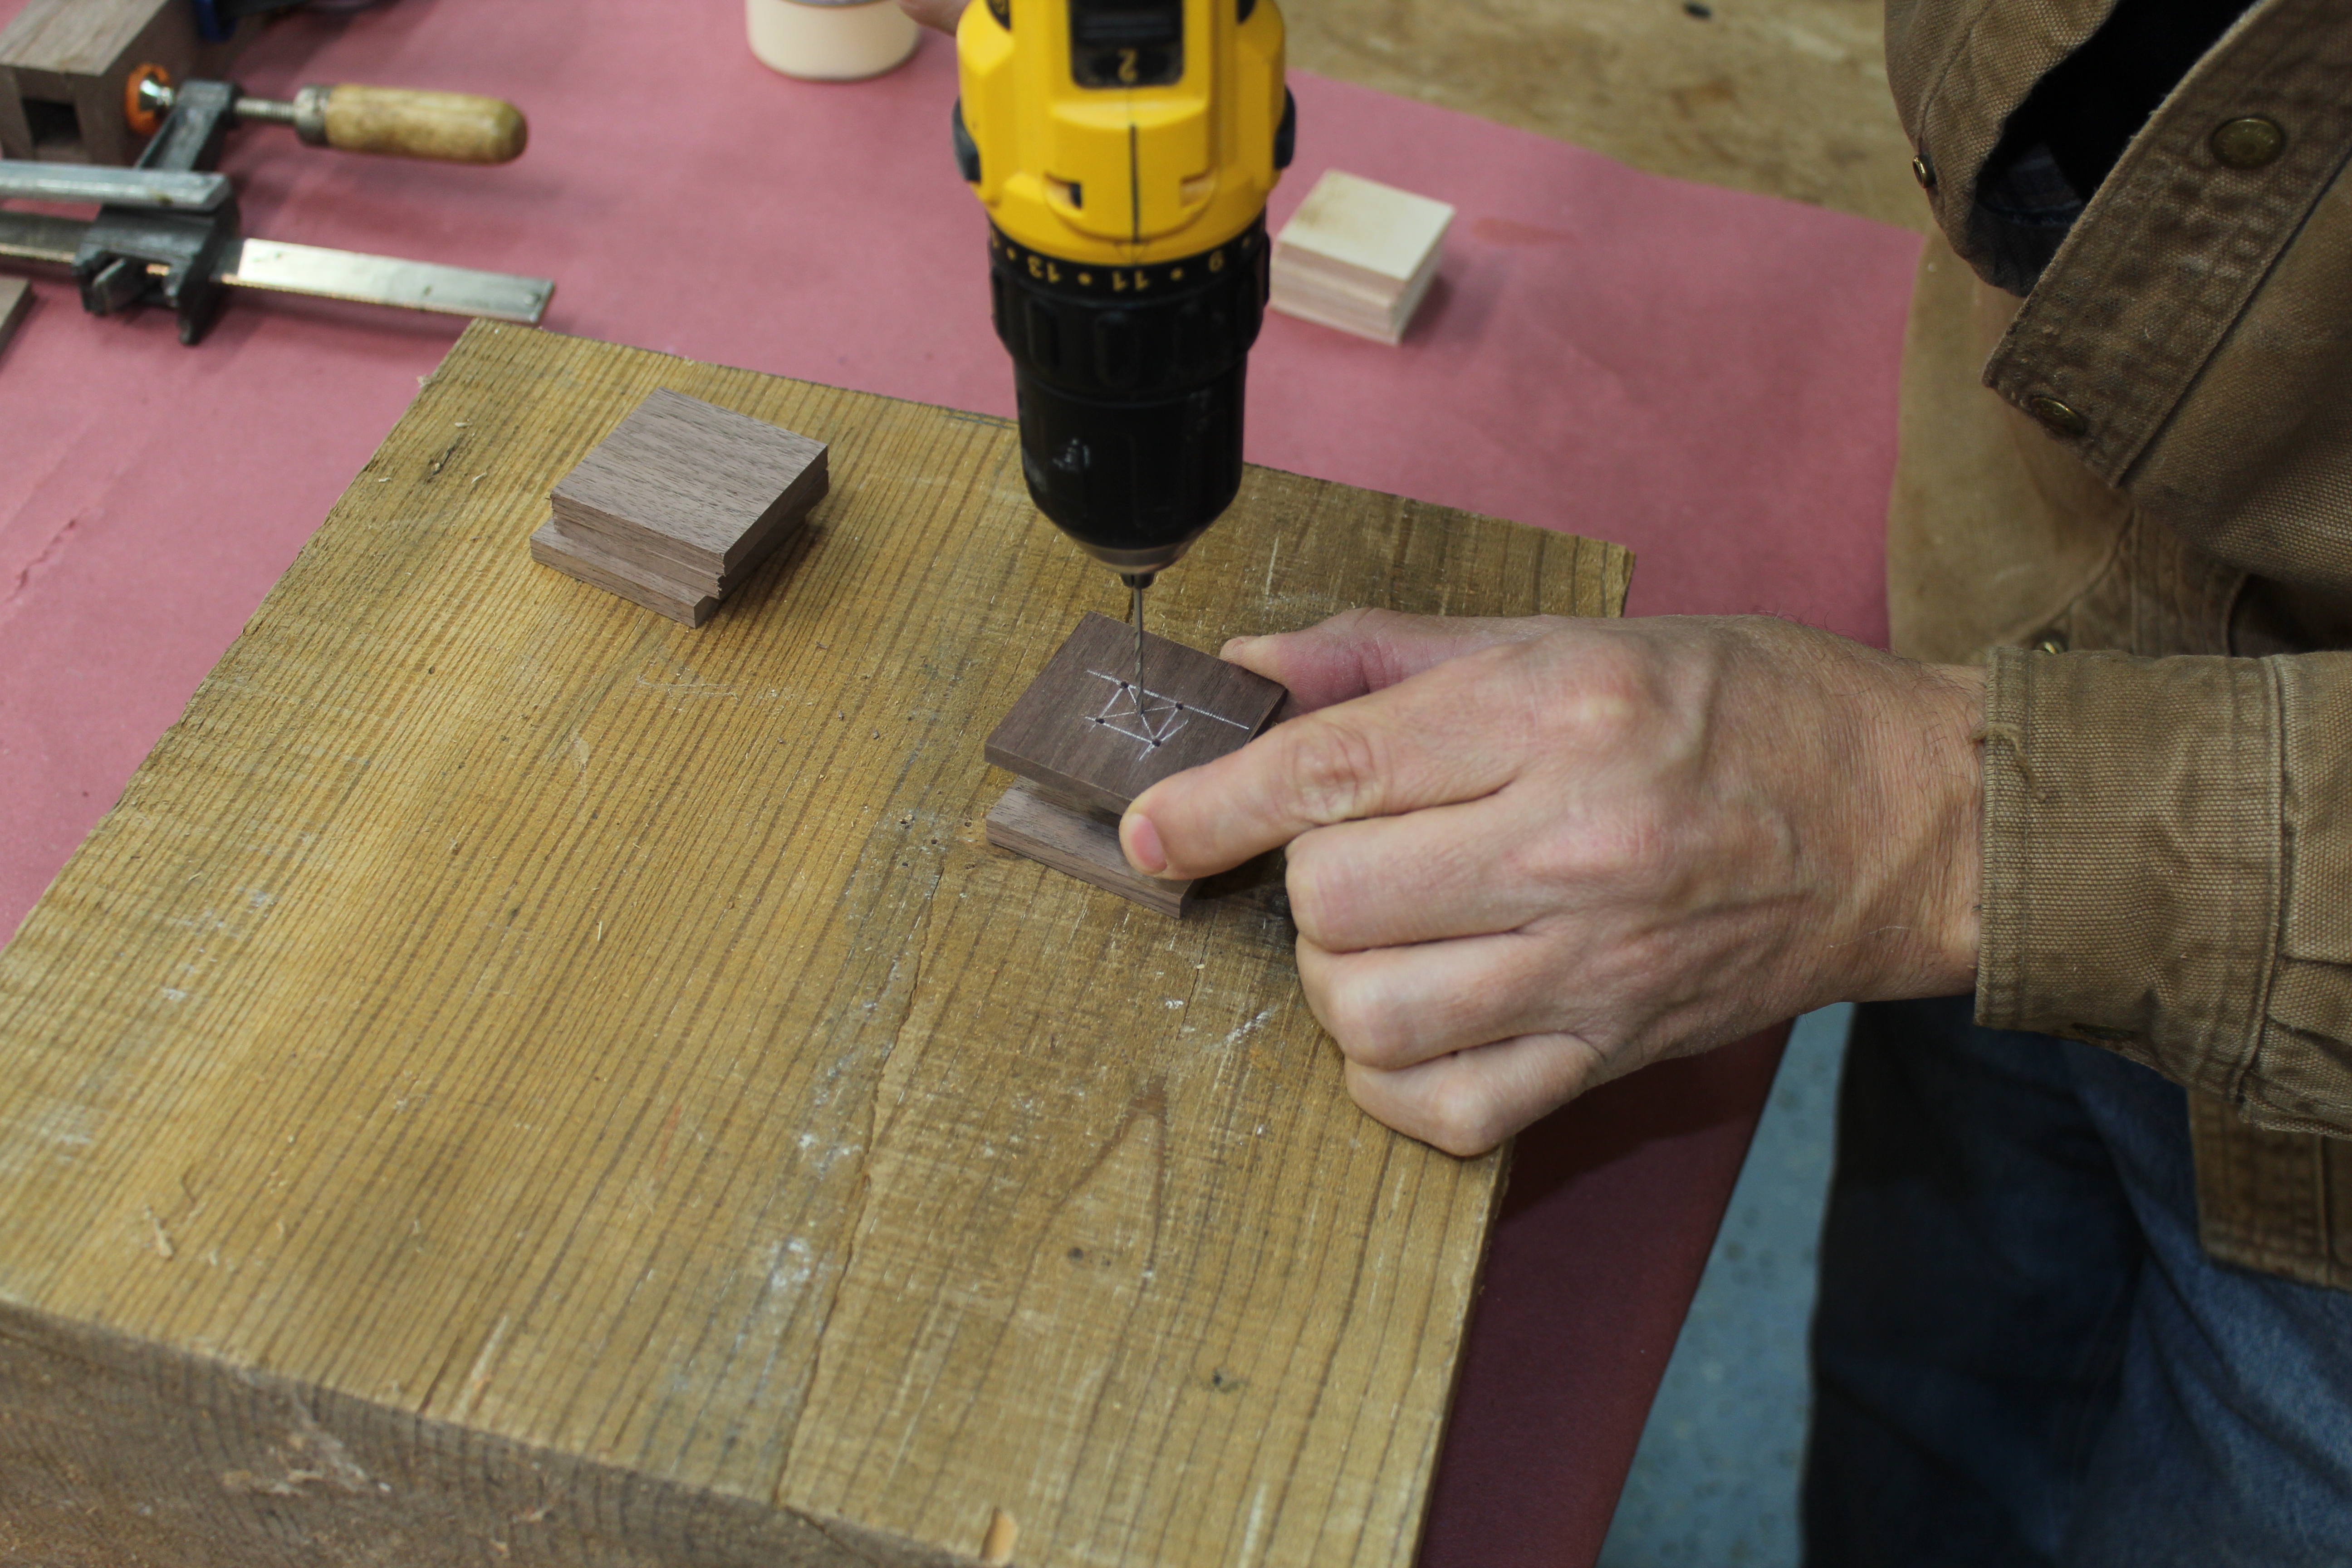
Drill holes in top
Drill the holes before attaching the top so that you can sand off any chip-out from the bottom of the top piece before gluing it on. Use a 5⁄64” drill bit for a nice, even dispense of salt and pepper. For the salt shaker, drill a single hole in the middle, and for the pepper shaker a pattern of five holes works well. If you are making a bunch of these, it is helpful to make a template as shown in the picture.
Attach top
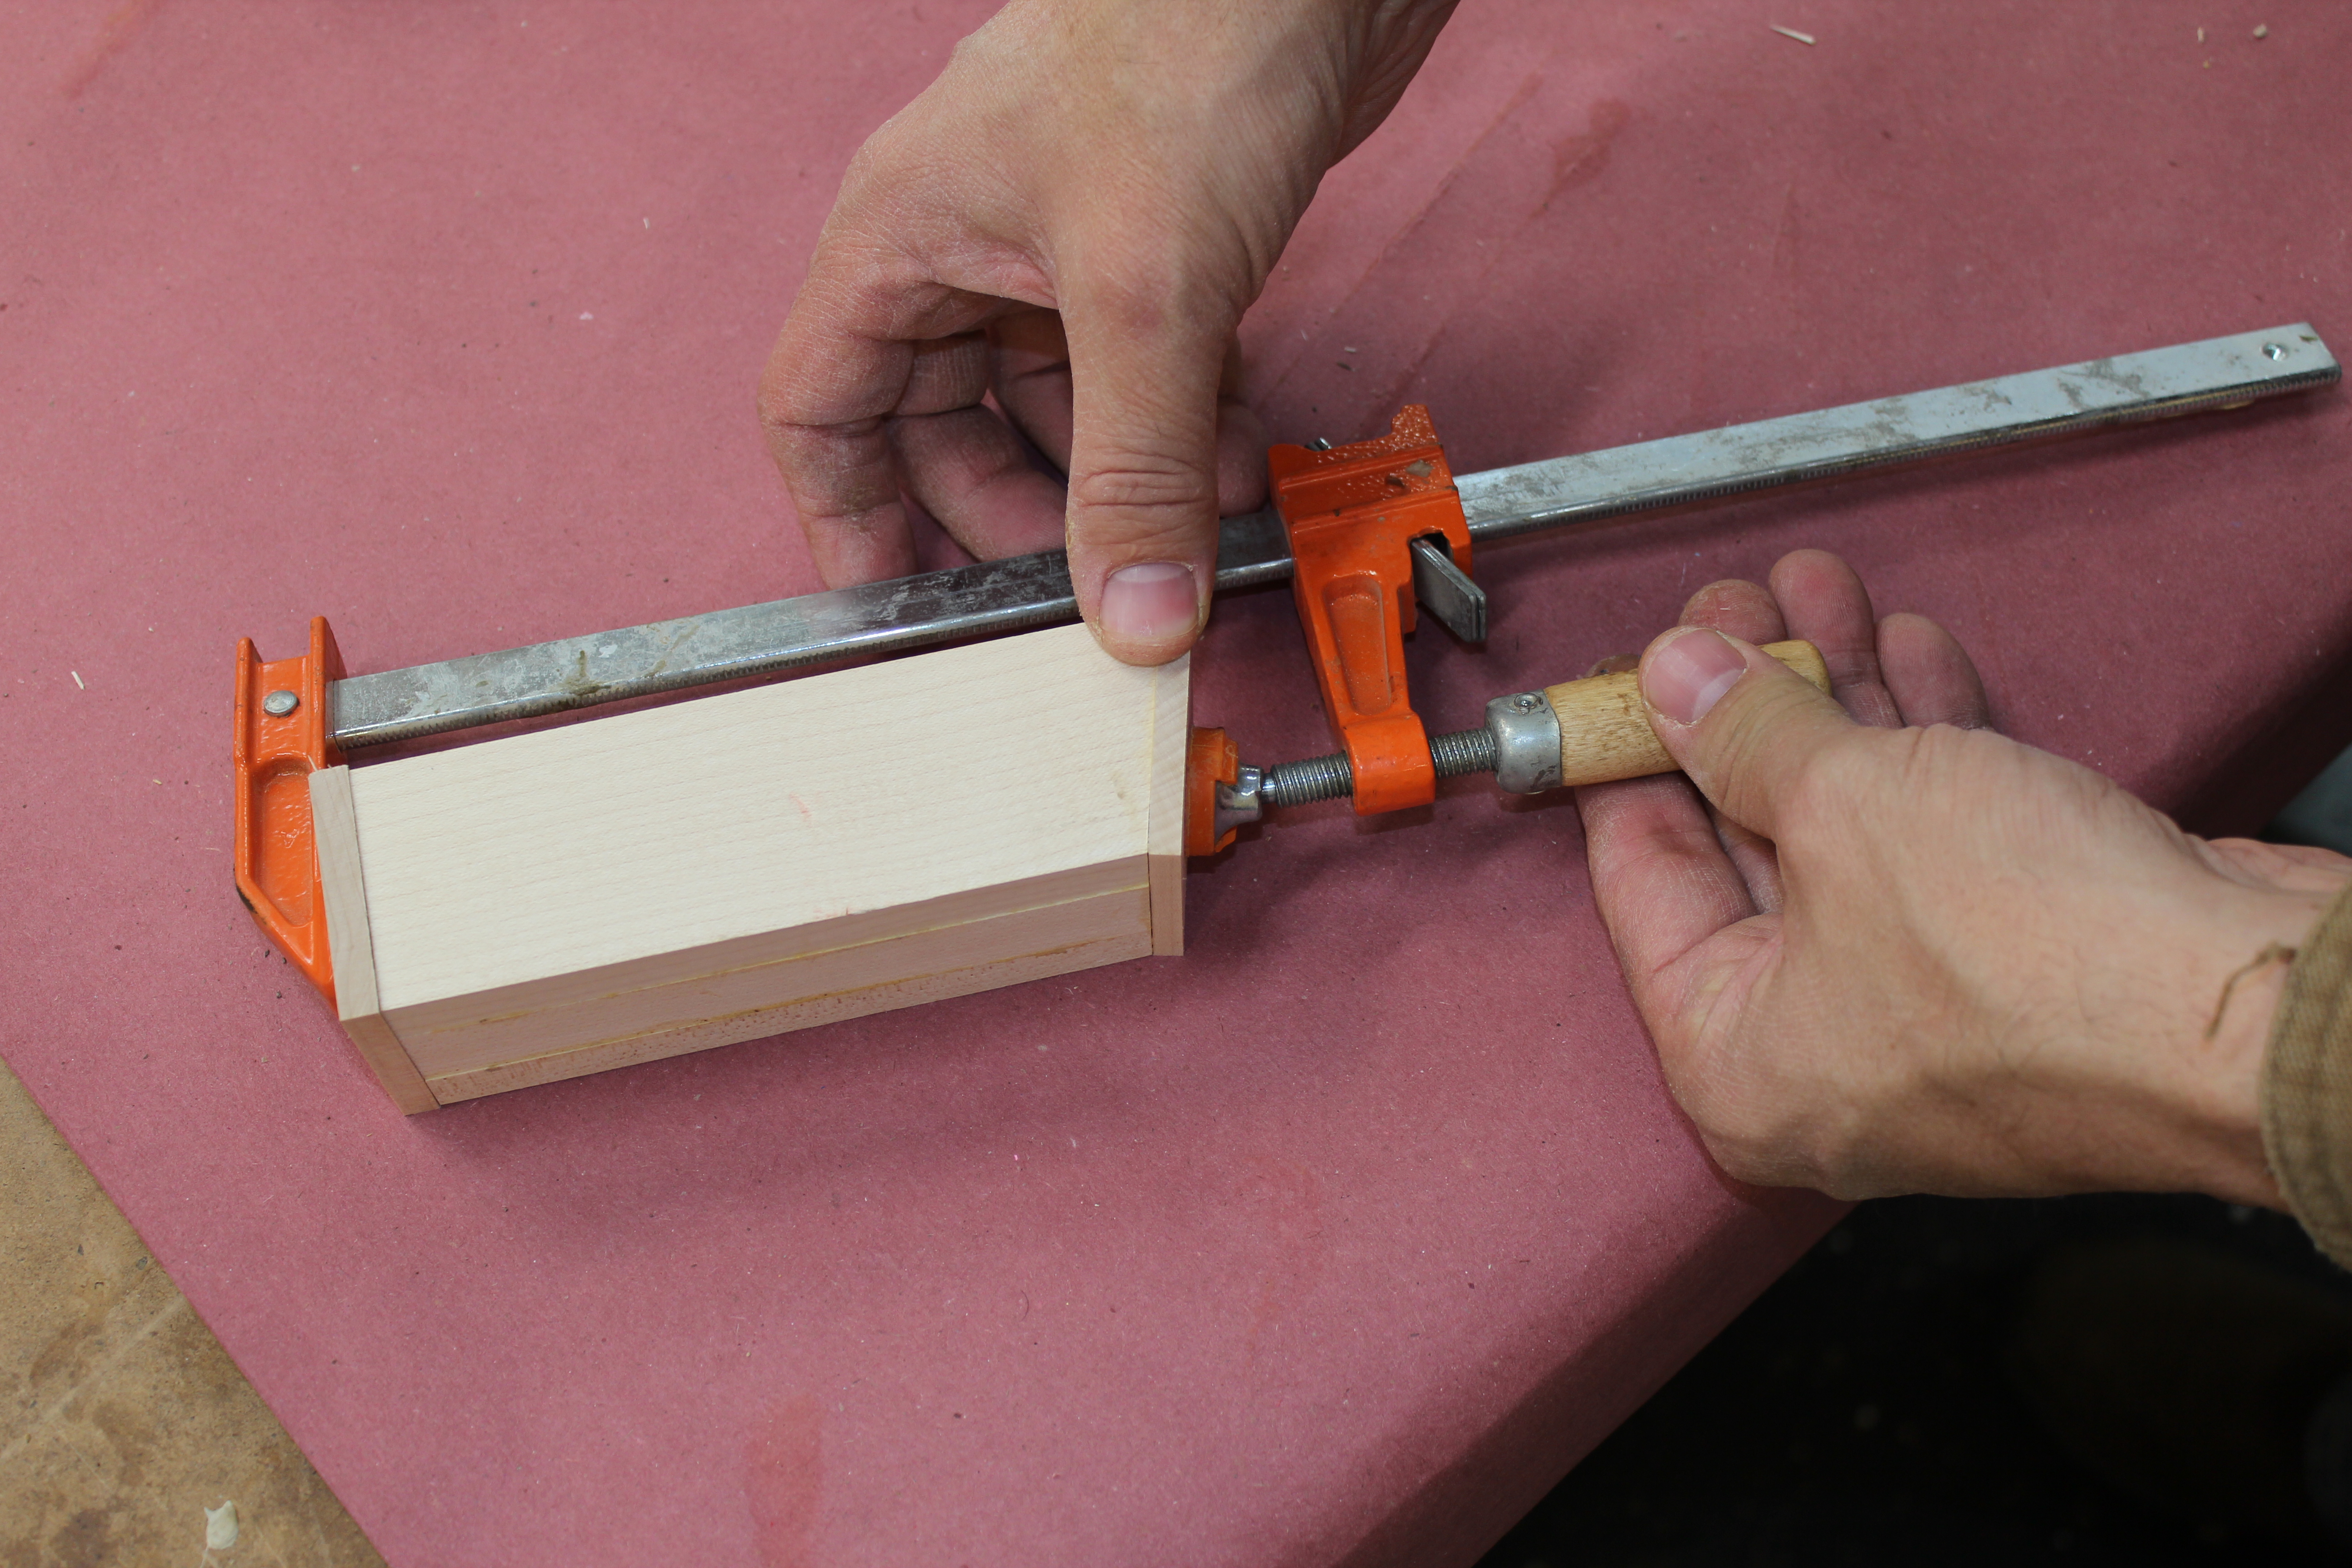
Coat the top of the base with wood glue. Let the glue soak into the end grain for a minute so, then lightly recoat with glue and press the top into place. Light clamp pressure is all that is needed. The base is inserted simply to assist with clamp positioning.
Draw the tapers

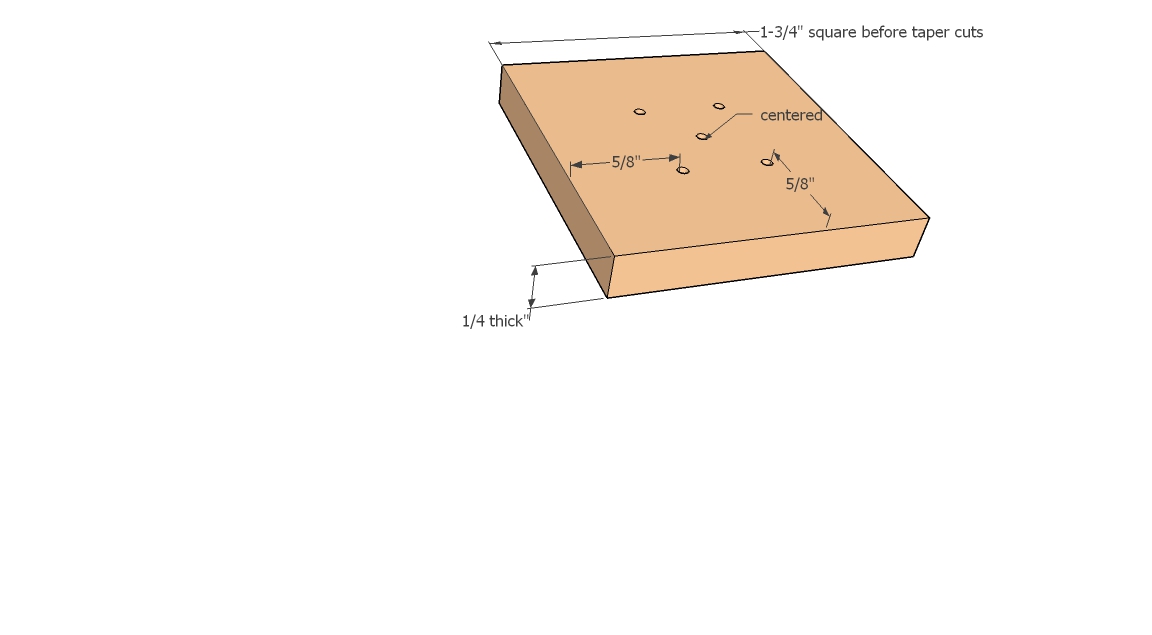
All four sides taper in toward the top, starting at the existing corner at the bottom and removing 1⁄4” of material at the top.
Cut the tapers
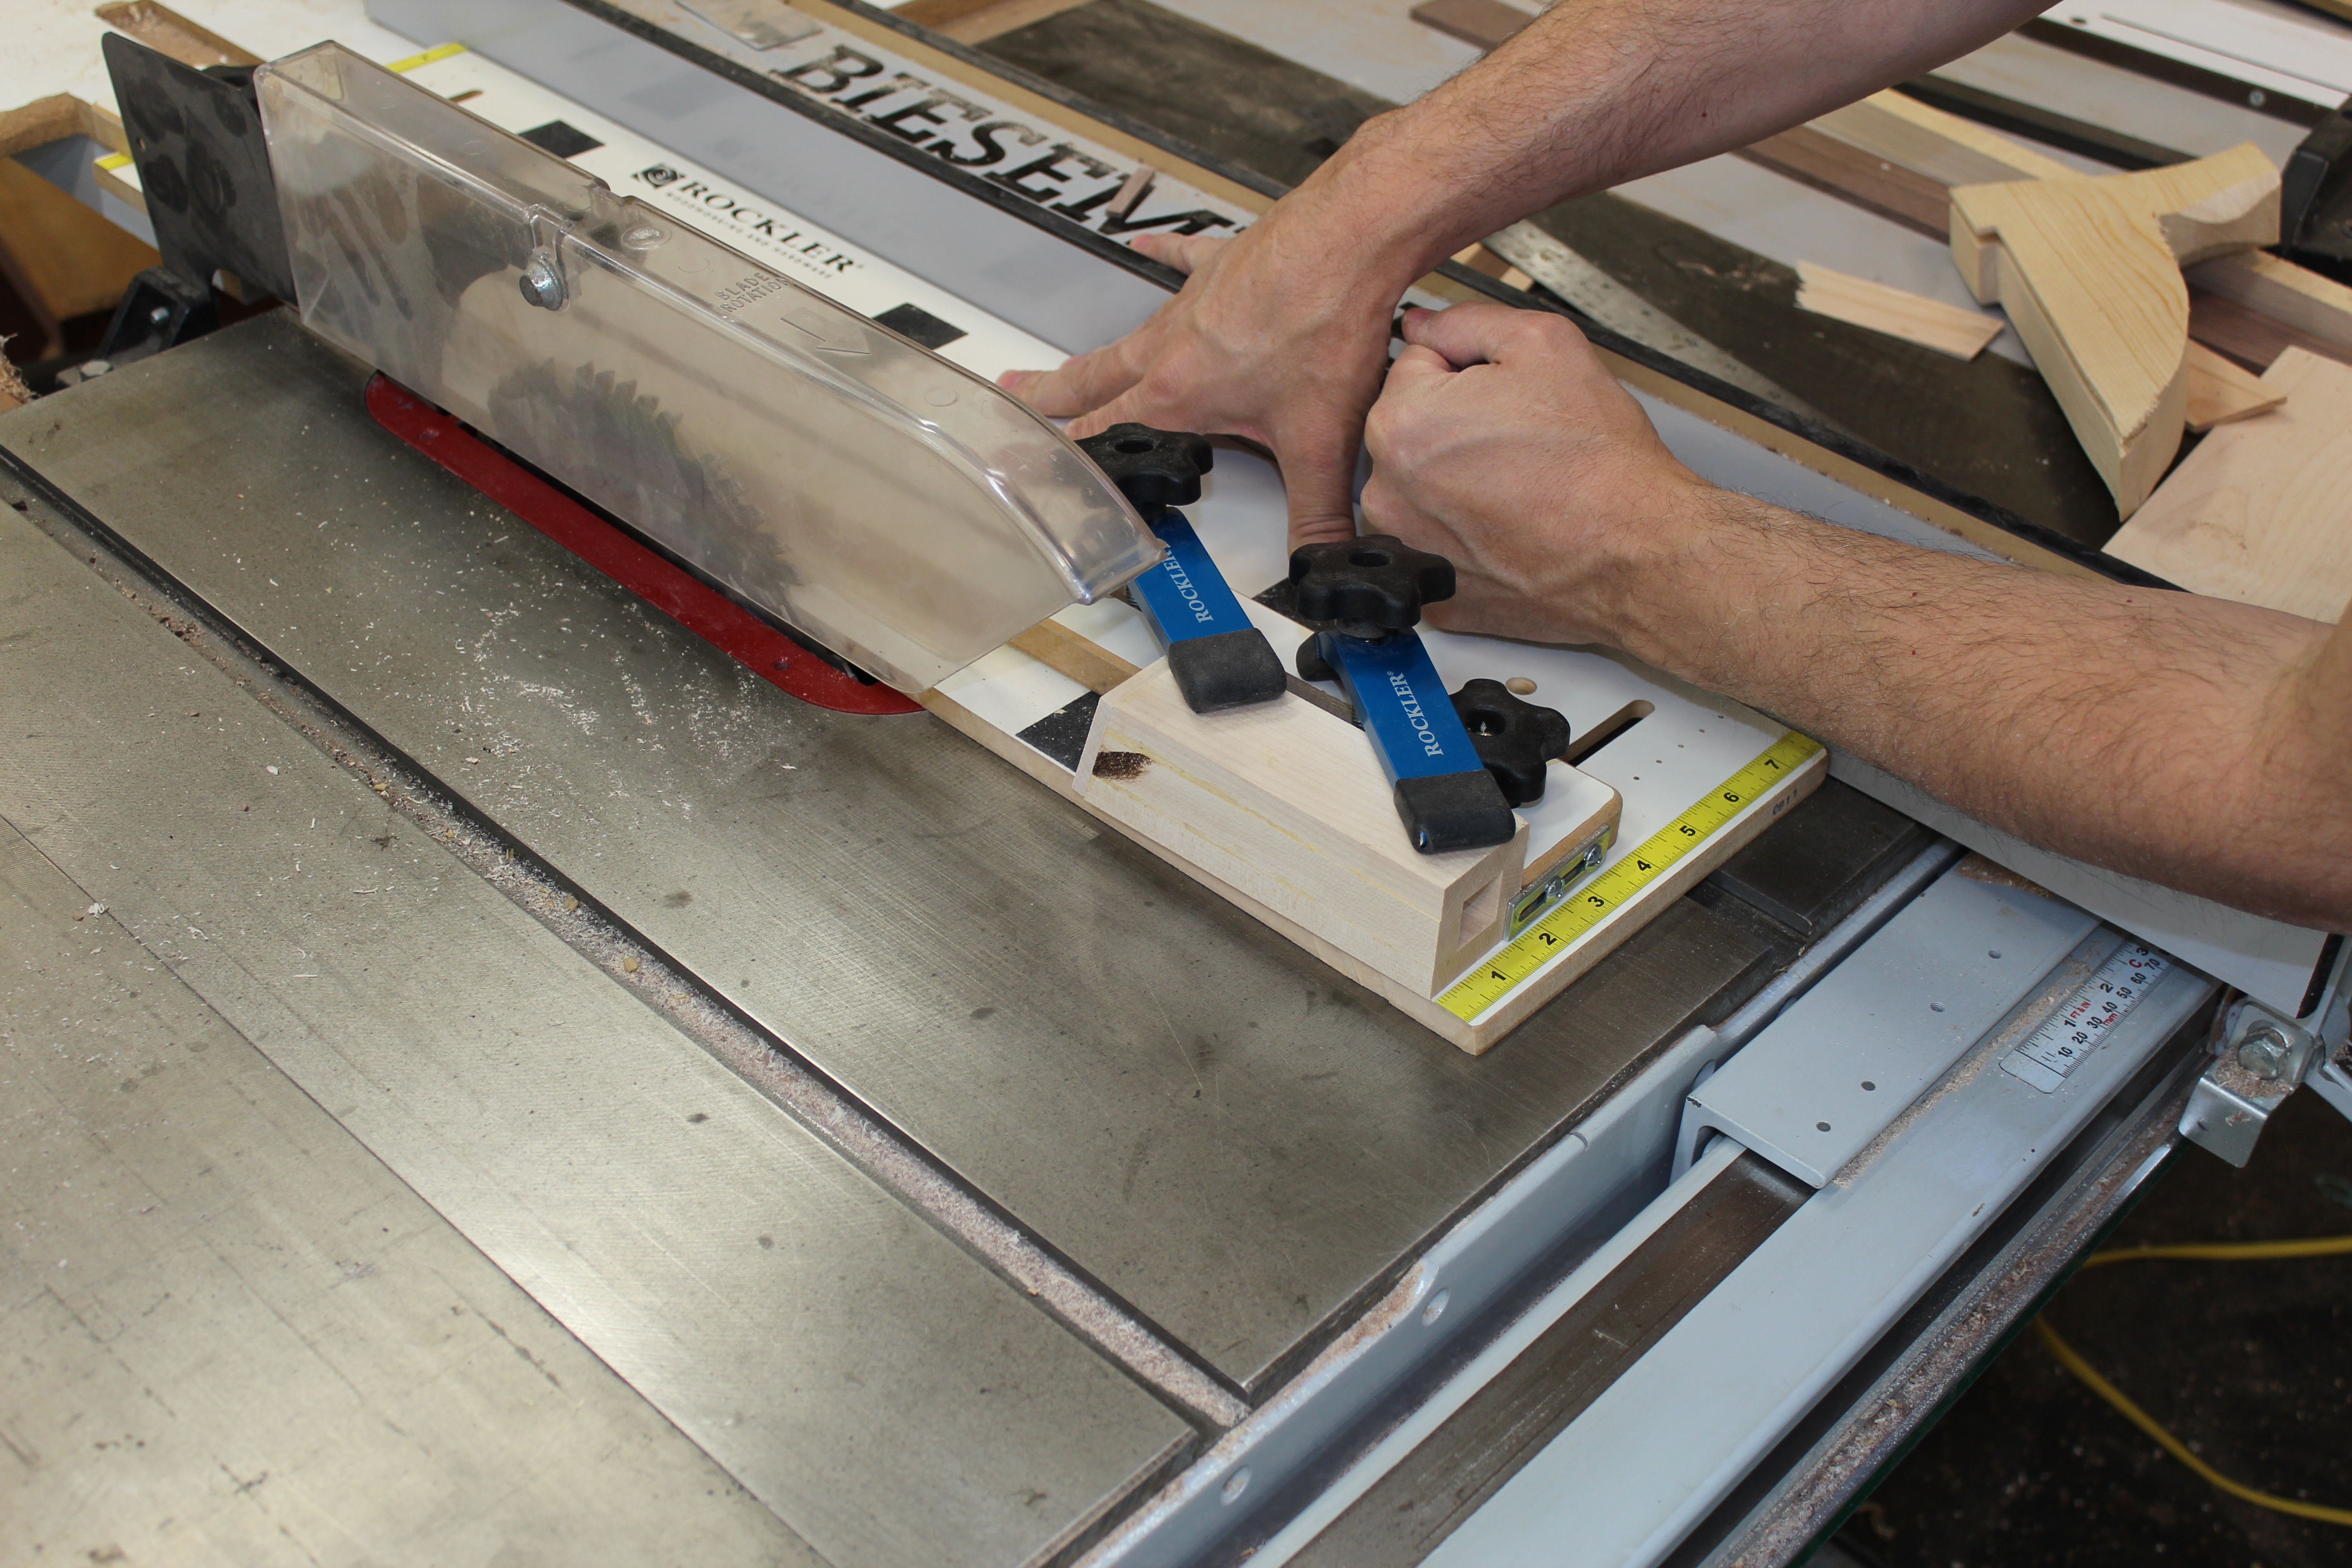
Remove the base that was inserted for clamping in the previous step and use a tapering jig on the table saw to make cuts that taper in toward the top of the shakers. If you do not have a tapering jig, draw lines on the shakers and cut on a bandsaw. Sand all surfaces smooth.
Install the magnetic catch mechanism
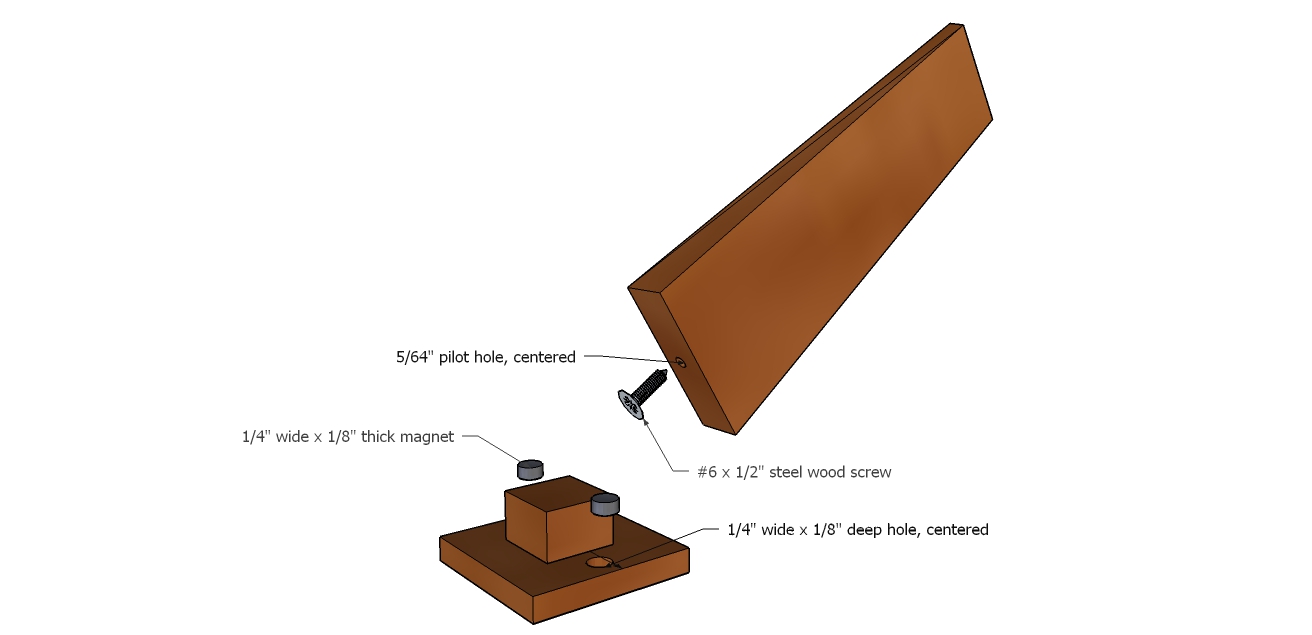
Using a 1⁄4” forstner bit, drill recesses 1⁄8” deep x ¼” wide into the base to receive the magnets. Pre-drill holes centered on the bottom of the base using a 5⁄64” drill bit into corresponding locations in the shaker body, use a countersink to open up the top of the hole to make room for the screw head, and install #6 x ½” wood screws deep enough so that the screw head sits flush or completely below the wood surface.
Finish
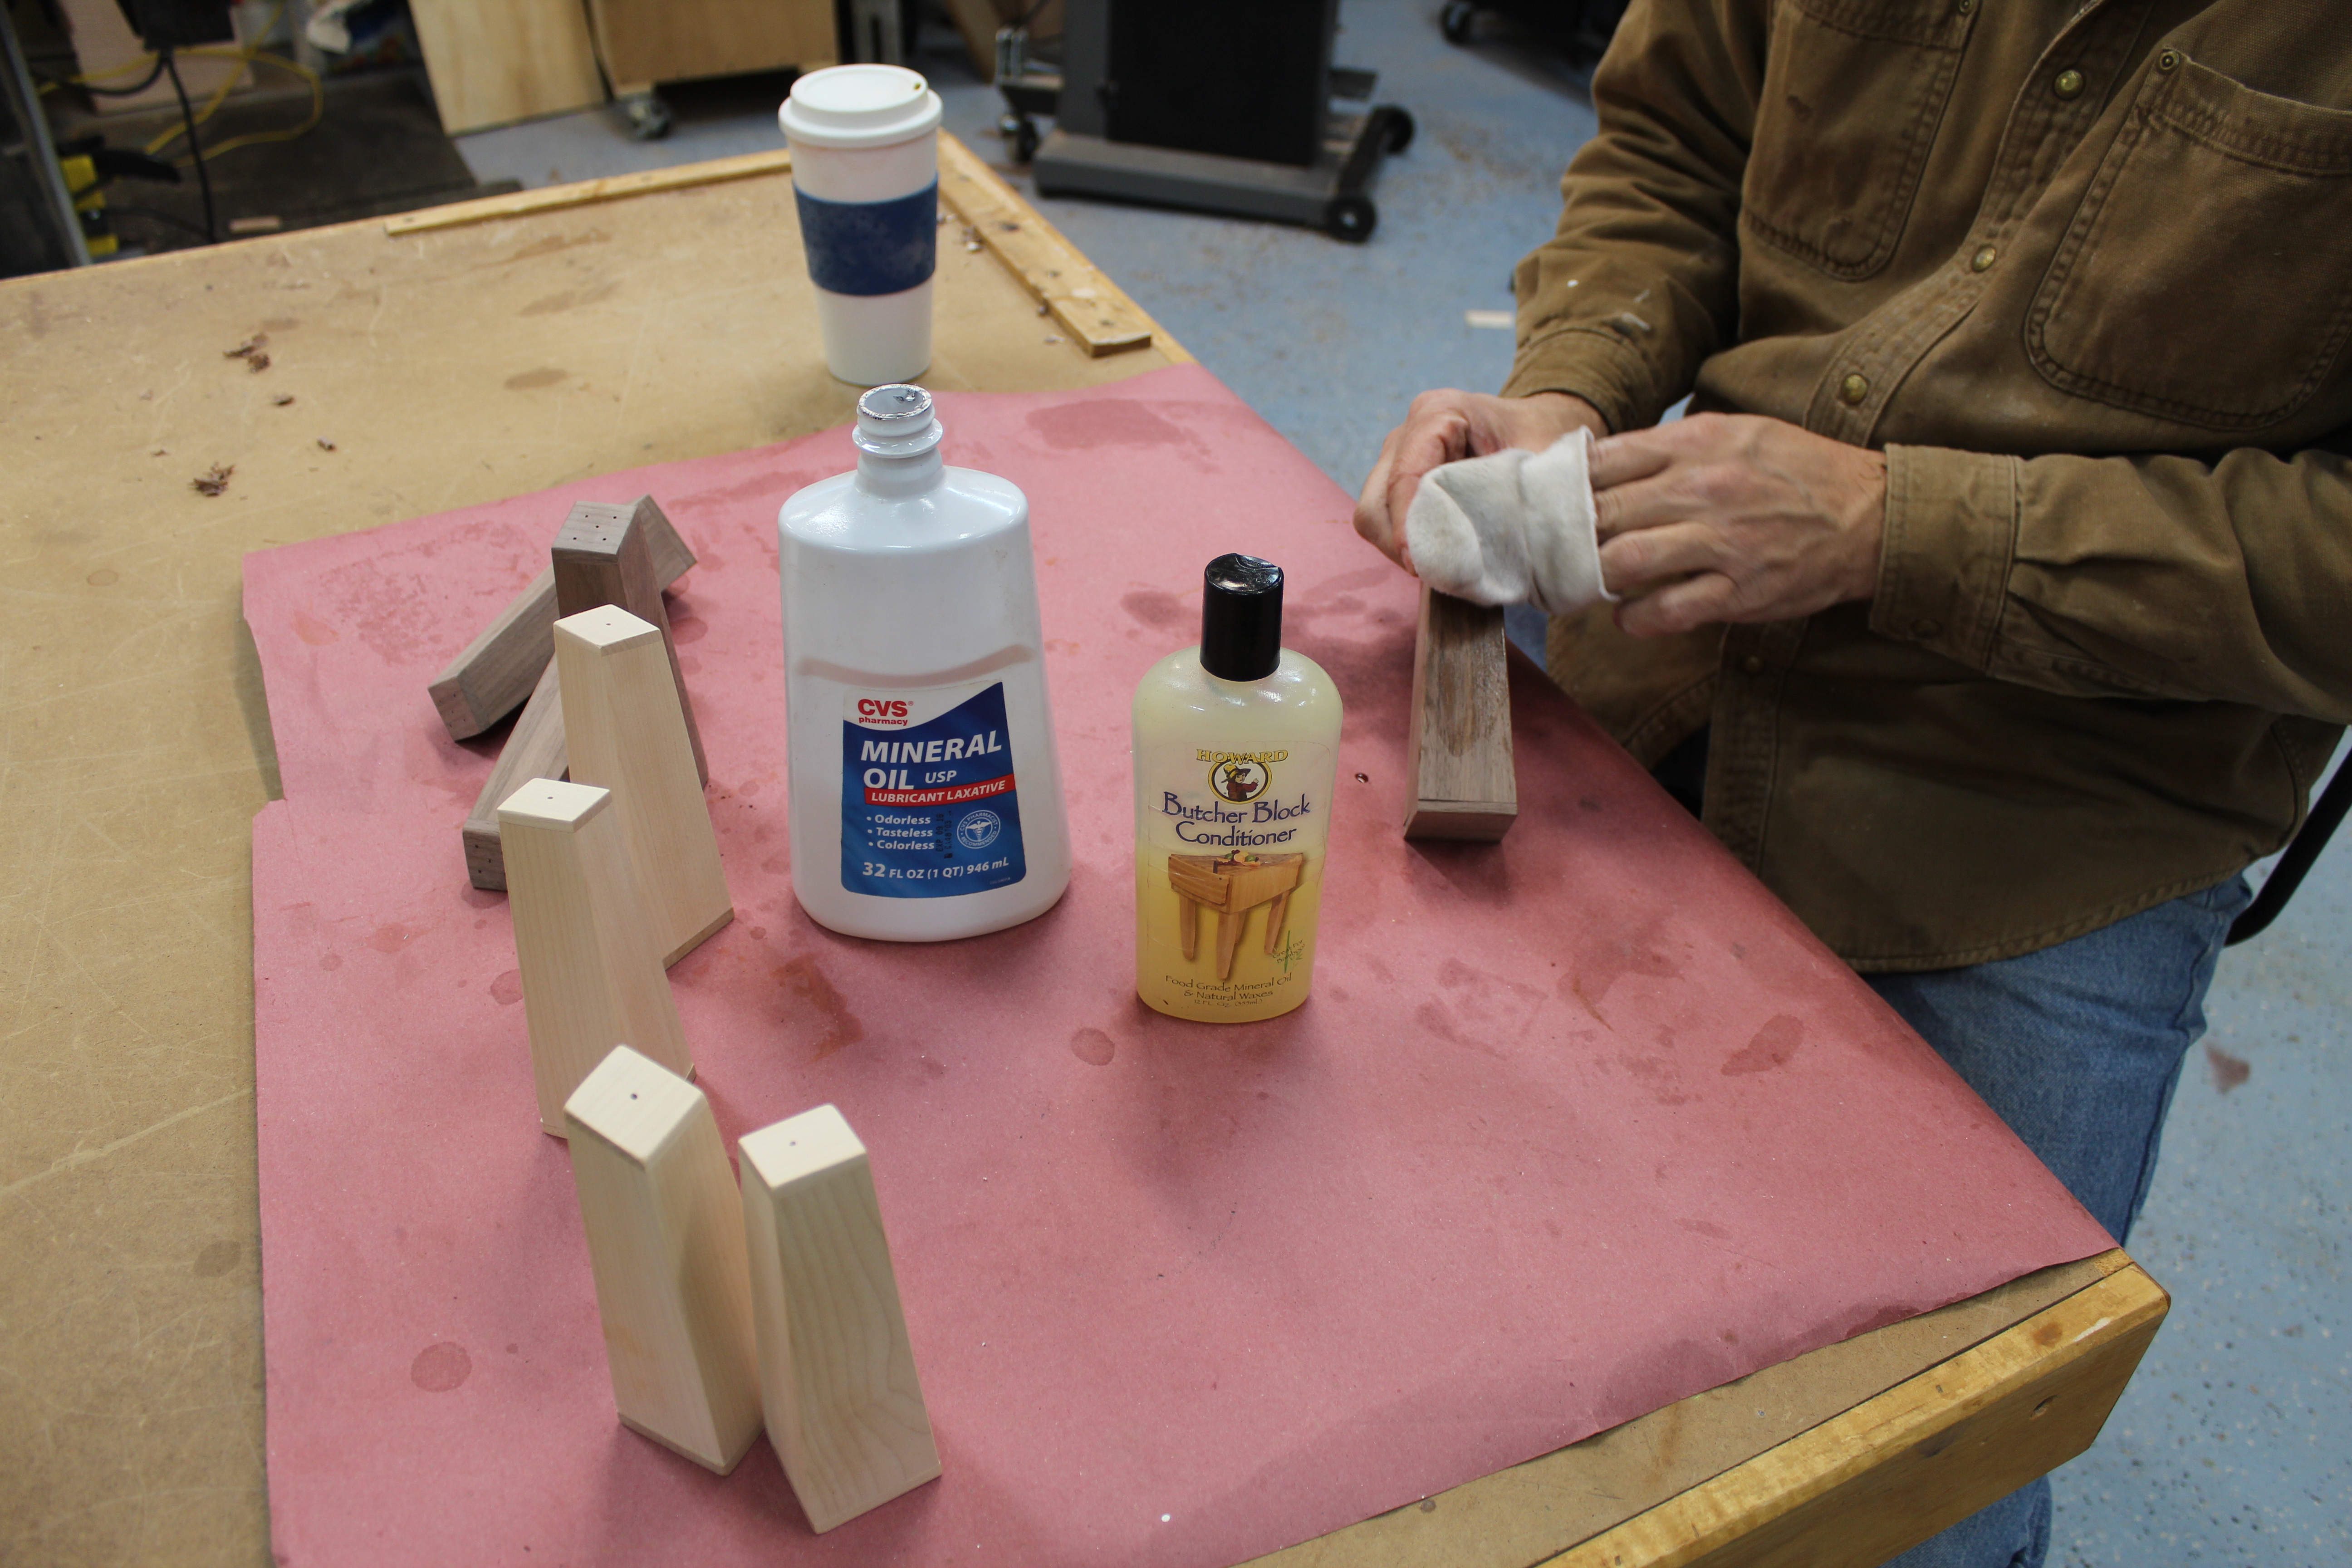
Apply 2–3 coats of your favorite food-safe finish such as salad bowl finish or butcher block finish. I apply one coat of pharmaceutical grade mineral oil along with one coat of a blend of mineral oil and beeswax.
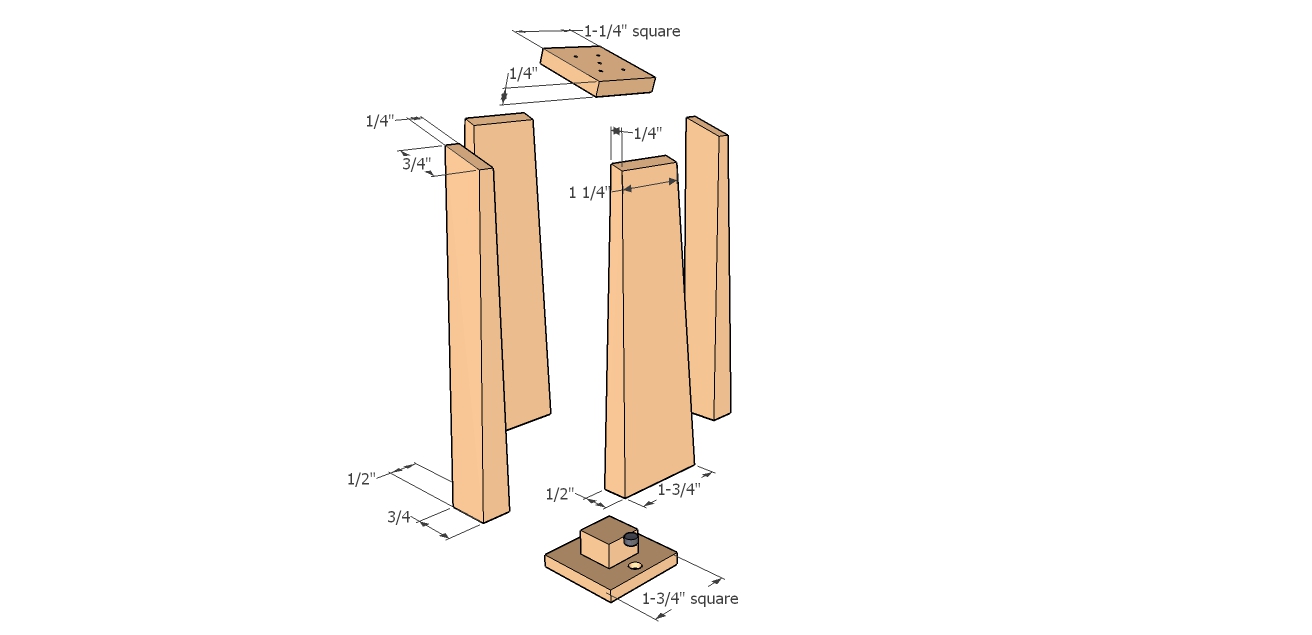
Exploded view following all taper cuts:
Source
1/8” x 1/4"rare earth magnets https://amzn.to/2mNXKN5
Photos by author
Share tips, start a discussion or ask other students a question. If you have a question for an expert, please click here.
Already a member?

Any plan for the salt and Pepper stand?
Very cute and it was fun to make
Ceci est très jolie j’ Aime ce que vous présentez est-ce que vous avez un site en français? Même si je me débrouille dans votre langue cela serait plus facile pour moi, merci à l’avance
Where are printable plans?
It would be REAL nice to have a print option for these projects. Printing from a browser doesn't work very well.
A question. Do you coat the inside of the shakers with mineral oil and bees wax?
Do you have paper plans for salt shakers
Interesting and seems easy to put together
I cut a 1/2" slot, 1/4" deep in a long 1-3/4" wide x 1/2" thick boards for the sides. Then cut to length. Eliminates the problem of gluing the 4-parts together. Much faster and easier assembly.
How do you fill it up with salt and pepper? Would have liked to have seen a video on this. I would like to see more video's on the projects you make.