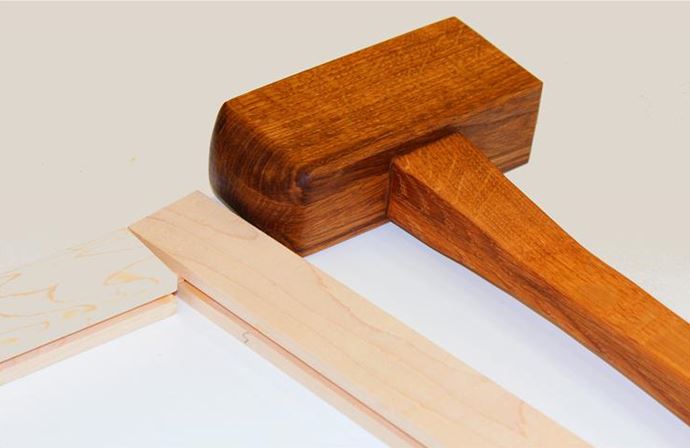
One of the most frequently used tools in my shop is a joiner's mallet. I use one for finesse work such as tapping chisels and carving tools, as well as more blunt force actions like banging a carcase together or forcing a panel flat during glue-up. I have made a half dozen or so joiner's mallets over the years, each time attempting to improve upon my previous attempt, and also striving to achieve the “perfect mallet”. I won’t say that this one is perfect, as I reserve the right to continue the evolution of the design, but for now I am quite pleased with this design and I find that it works extremely well for a variety of tasks.

The joinery on this project involves a semi-traditional wedged tenon joint, with a slight modification that makes the mortise work much simpler. This is a non-intimidating way to explore a useful joint.
Mallet head is a “wood sandwich”
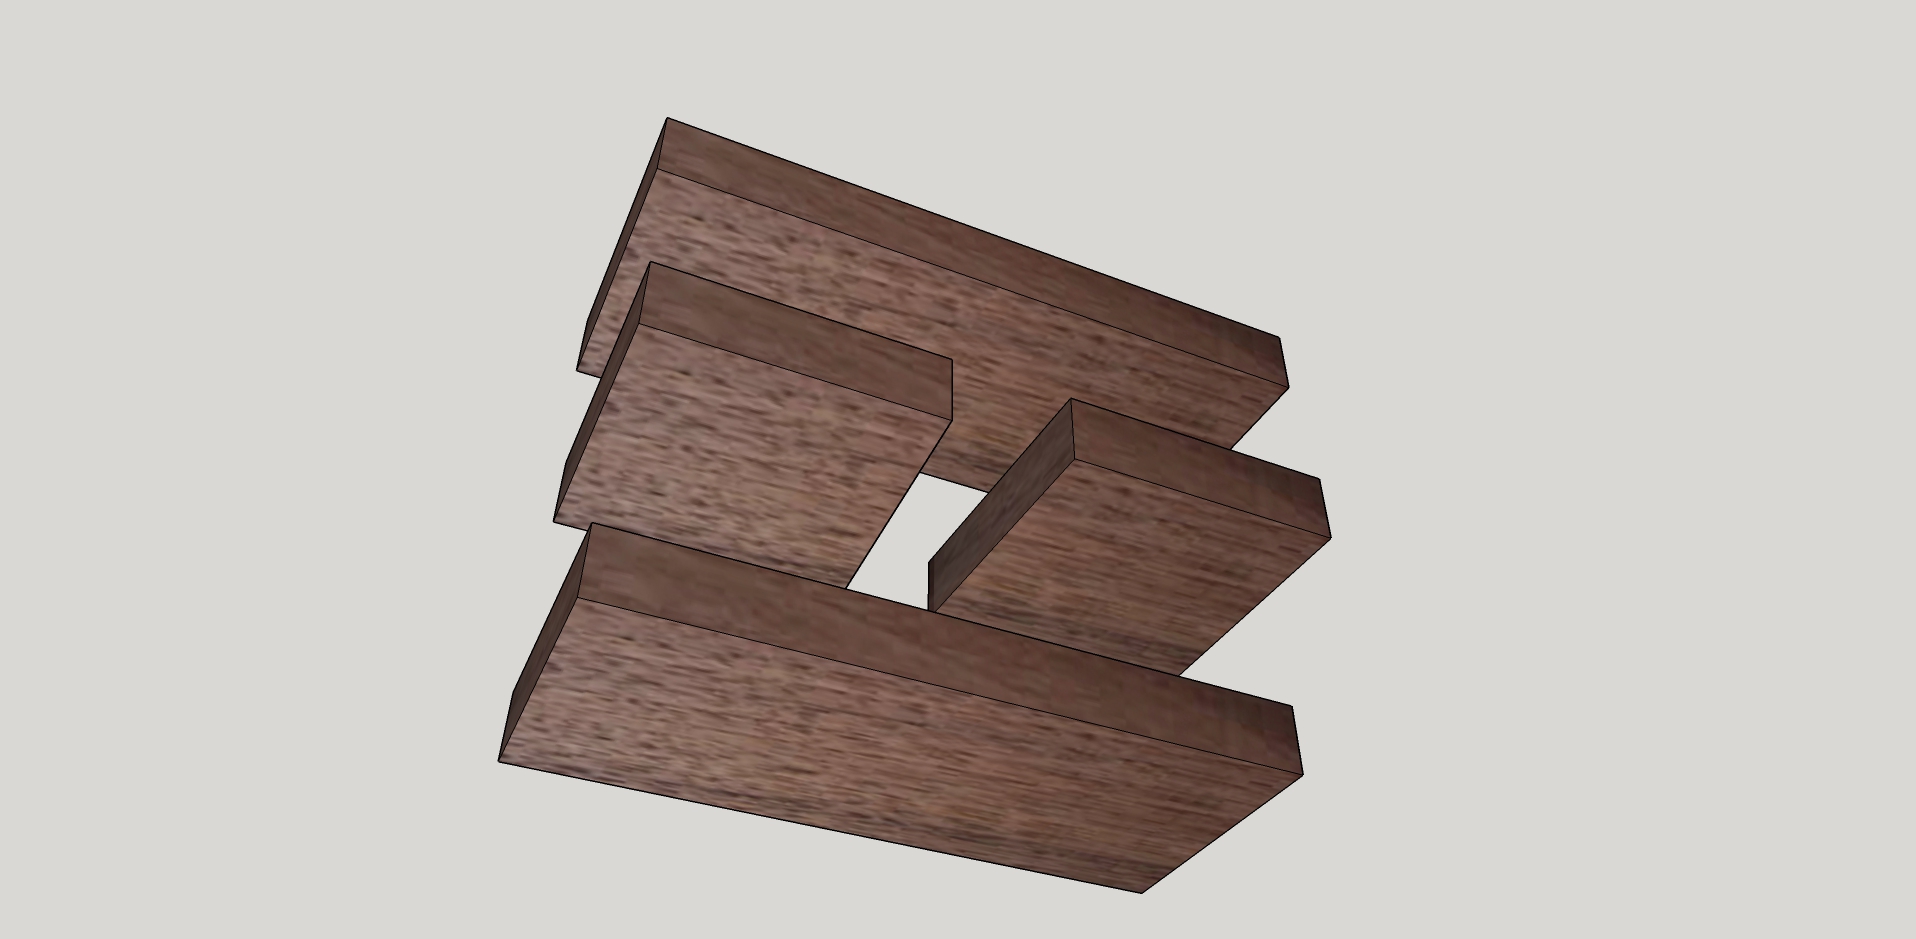
The head is glued up from four pieces of wood. The two outside pieces are cut to the full height and length of the mallet head. The two center pieces leave the center open to form a tapered mortise, allowing the handle to be locked into position. This is an easy way to construct a mortise and tenon joint that doesn’t require a super thick piece of wood, and allows the joint to be constructed without the heavy chisel work of traditional mortise and tenon joinery.
Cut outside faces
Cut the left and right faces first, each to a size of ¾” x 3” x 7”.
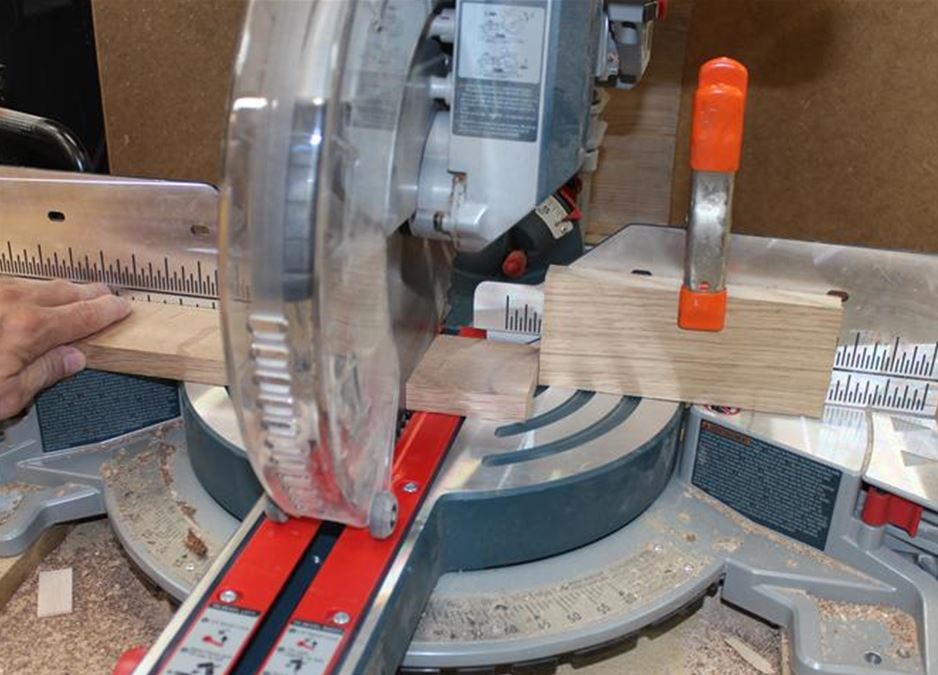
Cut the middle pieces
Each piece will be ¾” x 3” x 3”, with one end of each piece cut at a 2 degree angle. To achieve this safely, start with a board that is at least ¾” x 3” x 14”. Set your miter saw (or miter gauge on a table saw) to a 2-degree angle and cut each end of the board. Return the saw to 90-degrees, set a stop block, and cut a 3” length off each end of board. When using a stop block in this way, on the offcut side of the blade, be sure to allow the blade to come to a complete stop before lifting the saw.
Glue up the mallet head
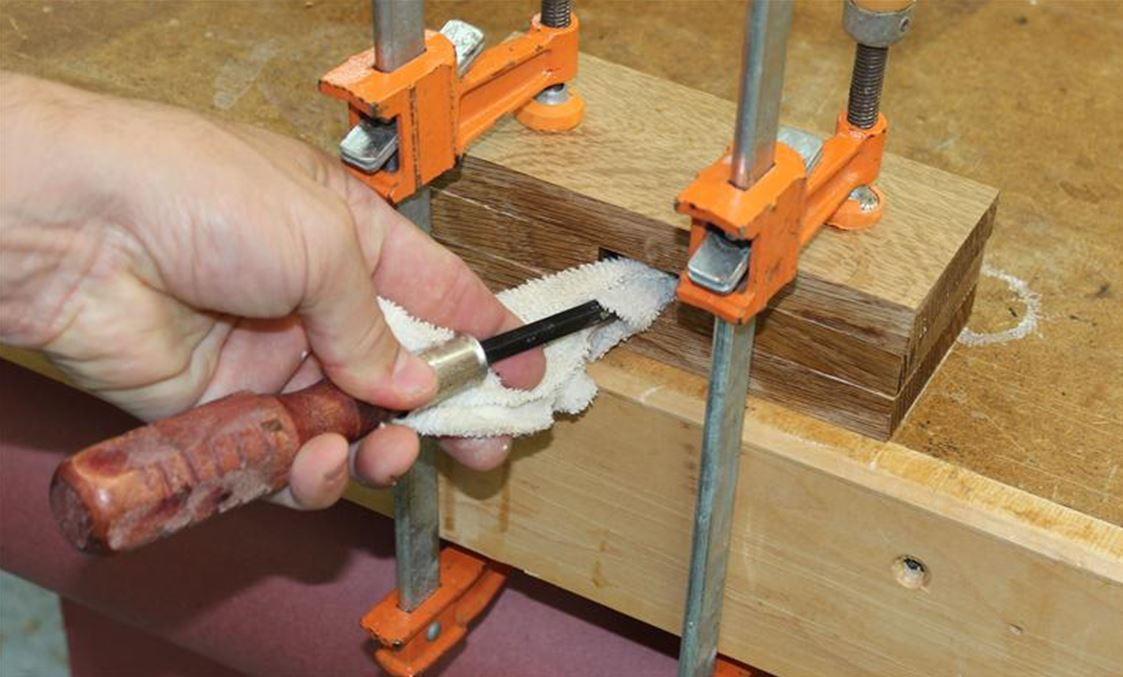
Apply glue to all mating surfaces and clamp the mallet head together. Position the middle boards to create the tapered mortise. The angle is subtle, so be sure you’re positioning the boards correctly.
I found it easier to clamp the glue-up to my work bench surface as it helped to stabilize the pieces and avoid a lot of sliding around. Use a screw driver and damp rag to clean glue out of the mortise that is created in the mallet head. This area will need to be free of obstruction so that the handle can be easily inserted later.
Flush joints on mallet head
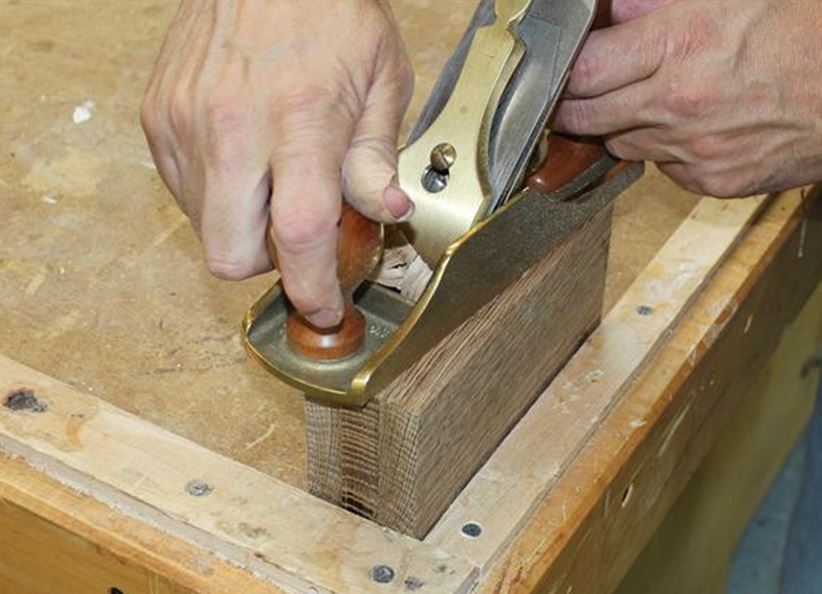 Scrape any remaining glue with a paint scraper (here’s a neat video that shows how to tune a paint scraper) and flush the surfaces using a hand plane or belt sander.
Angle cut one end of mallet head
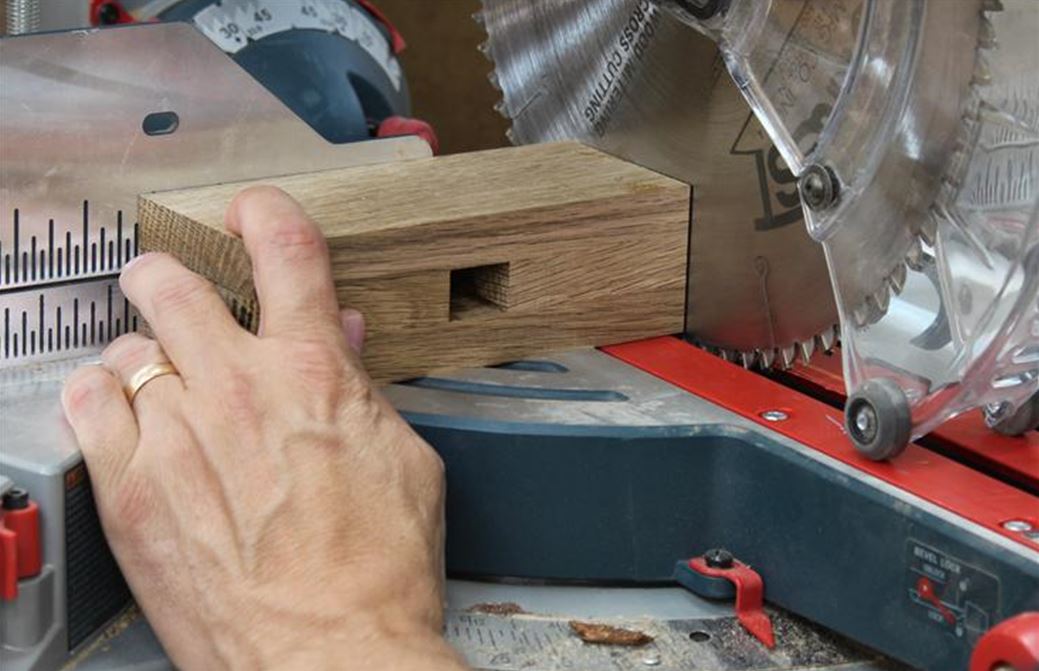 With the blade angled 2-degrees left of 90-degrees and the small side of the tapered mortise facing you, trim one end of mallet head to a 2-degree angle.
Begin shaping the dome on other end
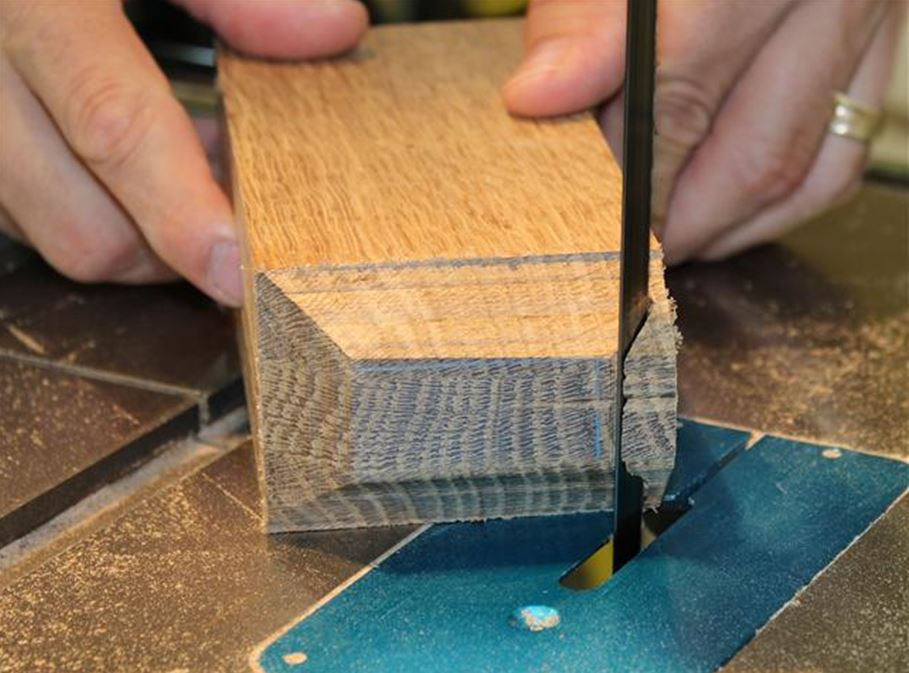
On the other end of the mallet head, use a band saw to cut 45-degree angles on each of the four edges, starting 5/8” from each side of each edge.
Round edges of dome
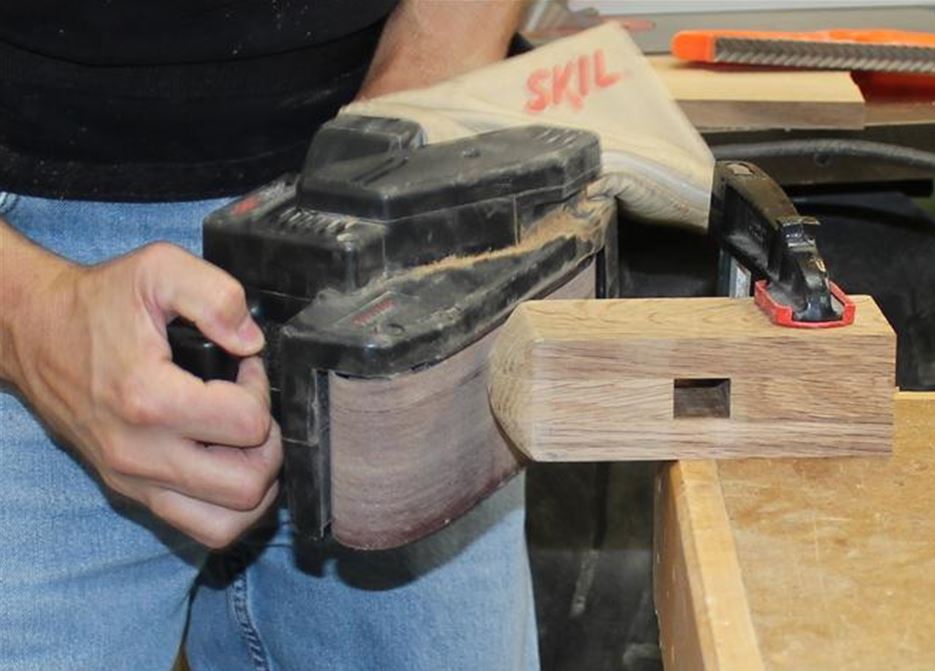
Using a stationary or hand held belt sander, carefully work to smooth over all corners of the dome head, leaving a smooth hemispherical surface.
Chamfer all remaining corners on the mallet head
Use a block plane to put a 1/8” chamfer on all remaining corners of the head.
Now, let’s move to the handle
Start with a handle blank that is 1-1/2” x 1-1/2” x 14”. If you only have ¾” stock available, simply glue two pieces together to form the handle blank.

Tenon time
The next steps will guide you through the process of building a tenon that will slip into the mortise that you created in the mallet head, and be locked into place by two wedges.
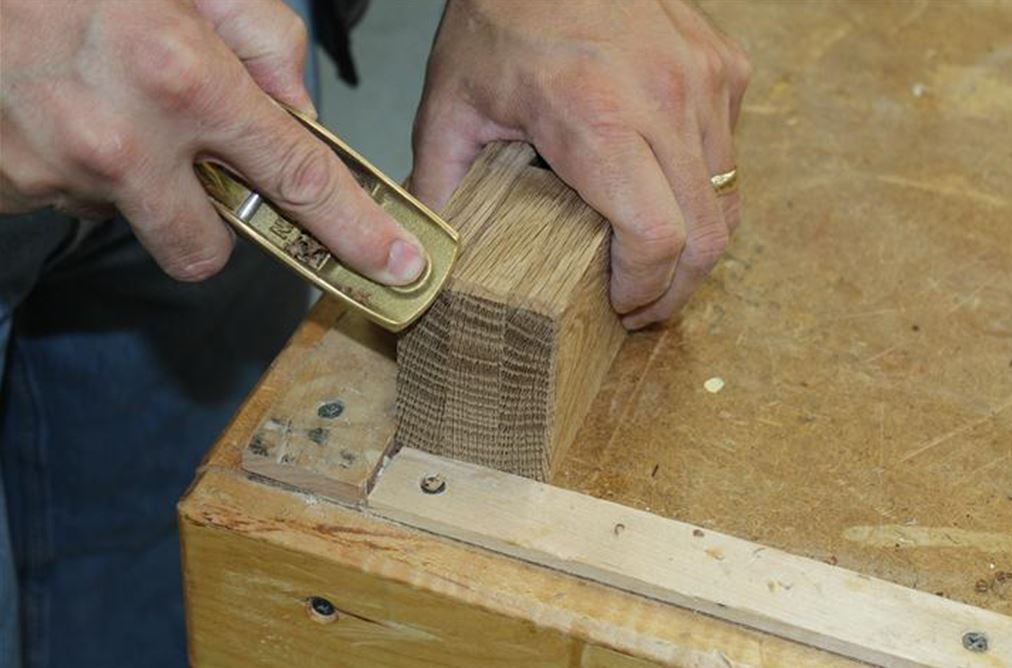
Establish a shoulder line
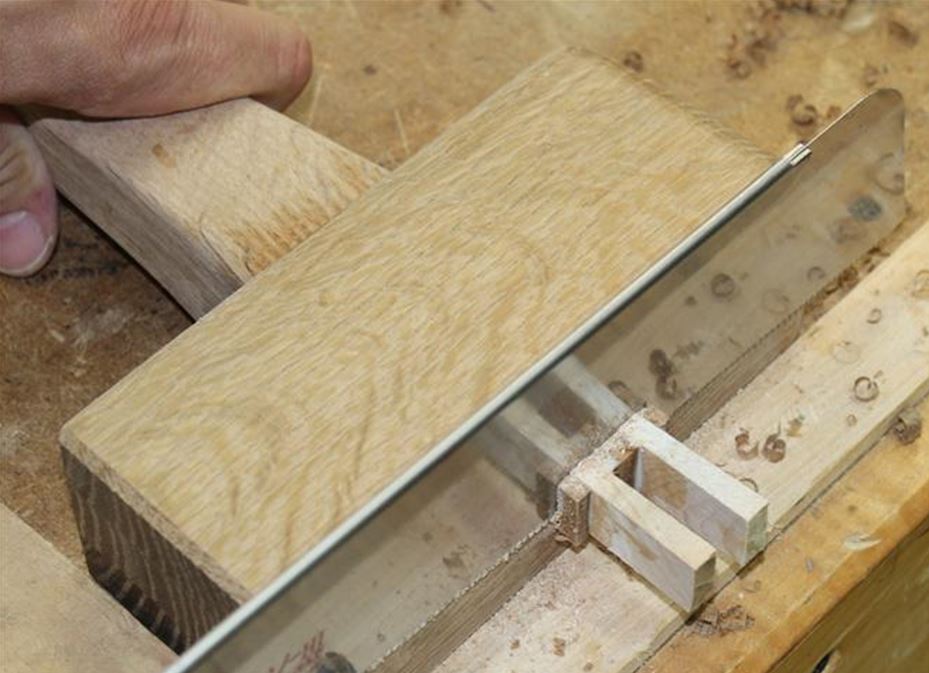
Use the bandsaw to establish a clean shoulder line for your tenon, locating these cuts 3-1/4” from the end of the handle blank. Use the mallet head itself as a guide to draw this line, leaving ¼” to protrude through the mallet head. Placing the end of the handle blank against the bandsaw fence, cut ¼” into each side of the handle blank. You will need to deepen these cuts later, but it is important to establish a clean shoulder line now so that the handle seats cleanly on the mallet head.
Remove material from each side to achieve a good fit
You will need to remove ¼” from each cheek to achieve the 1” tenon width, but start by removing slightly less, and sneak up on it with progressive cuts to achieve a perfect fit. A sharp bandsaw blade can handle this task, or alternatively you can use a shoulder plane here as well, removing material evenly from each cheek of the tenon. Once you have the fit tuned for the tenon’s width, perform the same tasks to fit to the ¾” thickness. Test the fit by inserting the tenon into the small end of the tapered mortise.
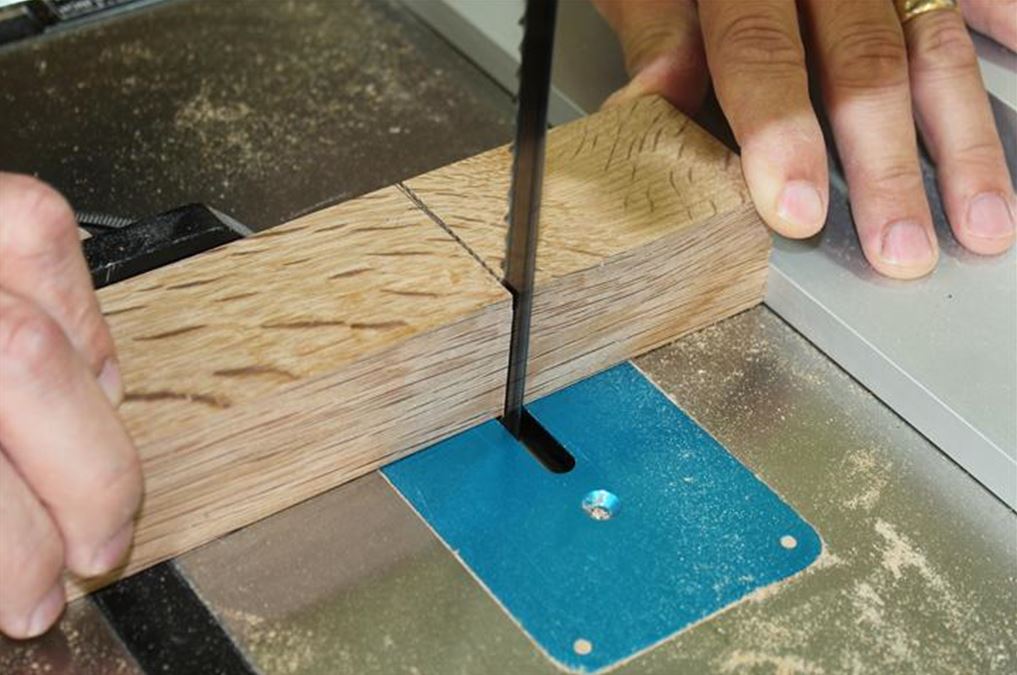
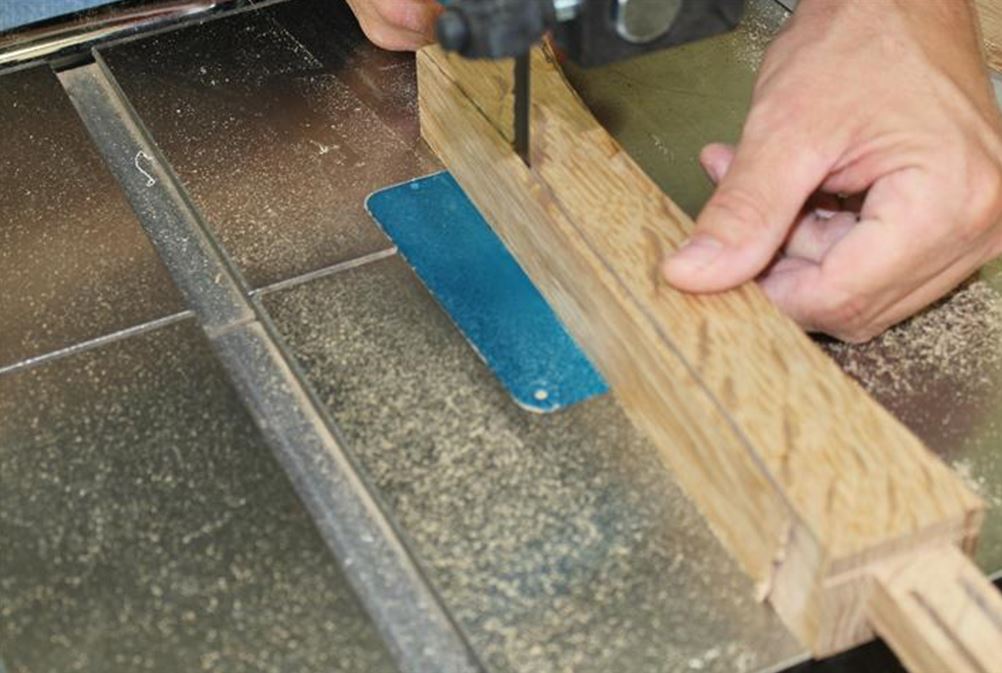
Cut slots in tenon
Using a bandsaw, cut a two1/8” wide slots through the ¾” thickness of the tenon, each positioned roughly 3/16” from its side of the tenon. Do not cut the slot all the way to the tenon’s shoulder, but rather leave ¼” of continuous wood remaining at the base of the tenon.
Shape the handle
 Make a curved cut on each of the handle’s four sides to make it a comfortable fit in your hand. Leave the bottom of the handle at the full thickness so that it serves to keep the mallet from slipping out of your hand as you swing it. Smooth over all sharp edges of the handle using a belt and/or random orbital sander.
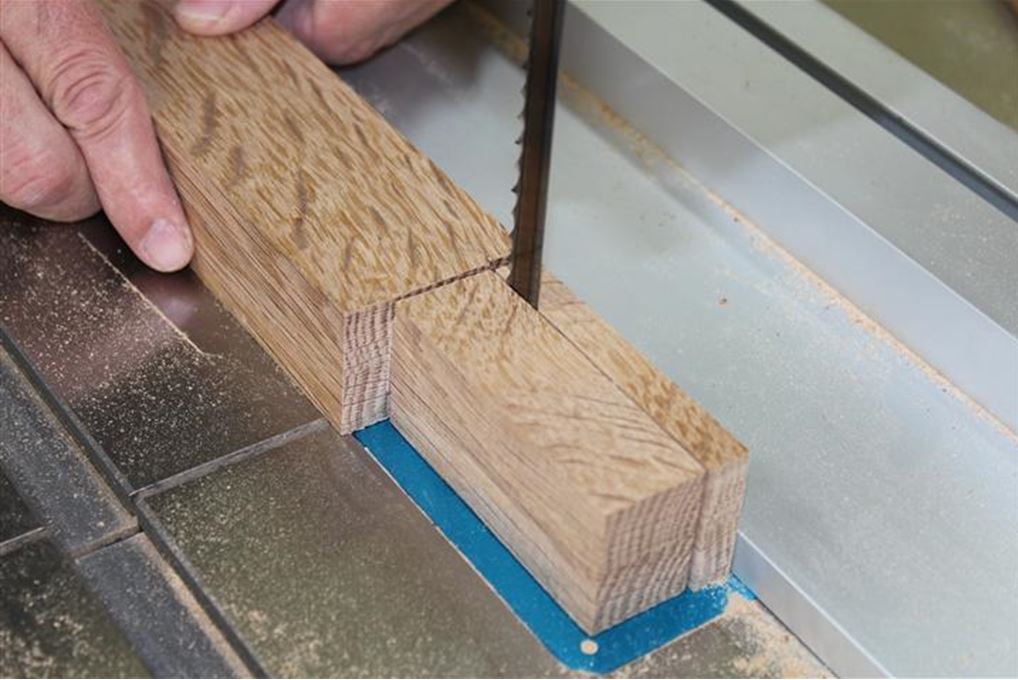
Cut wedge angle
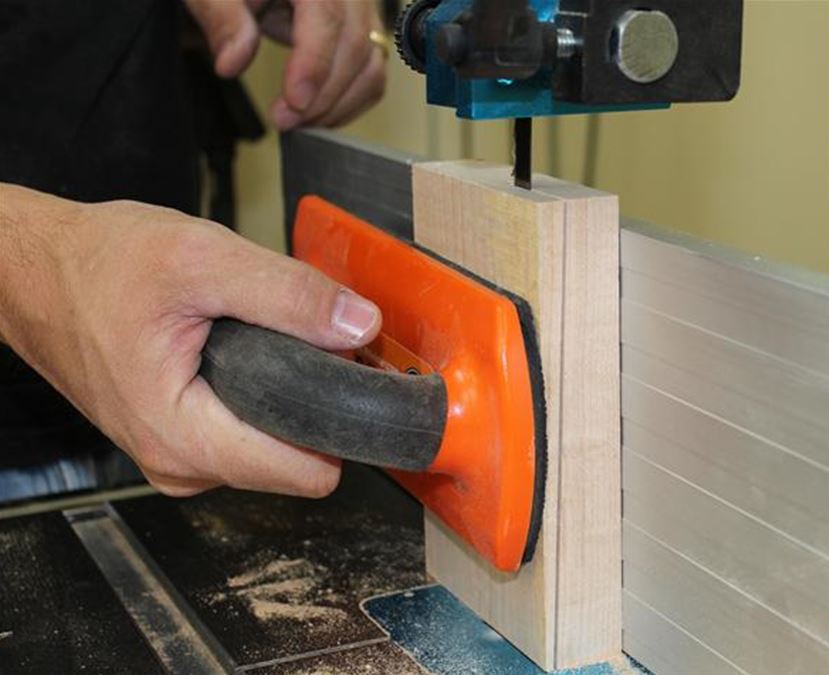 I suggest using a contrasting wood for the wedges that you will use to lock in your tenon because the contrast looks interesting and makes the joint look more precise and complicated than it really is. In this project I used maple wedges with an oak tenon, which brings reasonable contrast. Start with a block of wood that is at least ¾” x 4” x 4”. Set up your bandsaw by tilting the table to 2 degrees. Position the fence so that the wedge piece will be roughly 1/8” at its thinnest part (wedge is positioned to the left of blade in the picture, and the 1/8” portion is at the bottom).
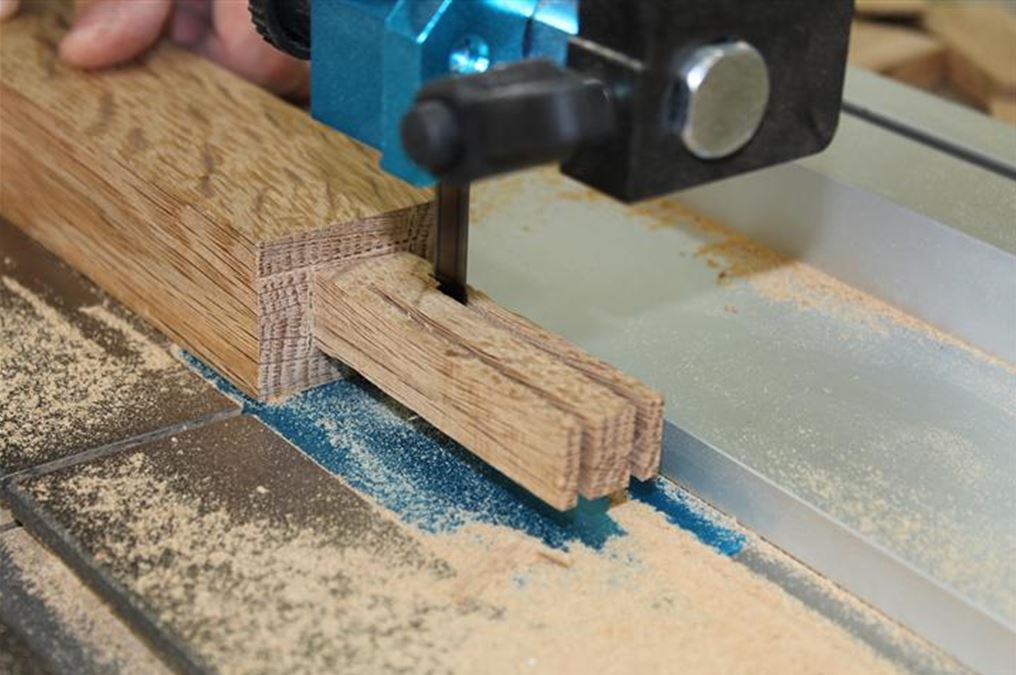
Rip wedge to width
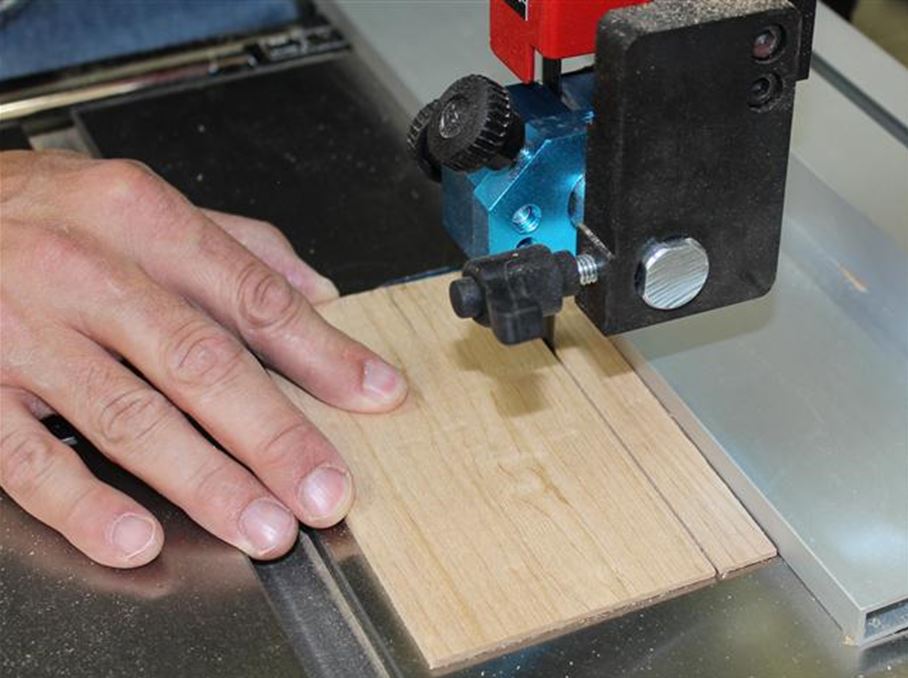 Set up bandsaw to rip strips the same width as the thickness of your tenon, or ¾” if you are using the same size stock as I have used here. Rip two wedges from your blank. You should have enough material to rip another two or three wedges for another mallet, and perhaps a spare wedge.
Assembly time
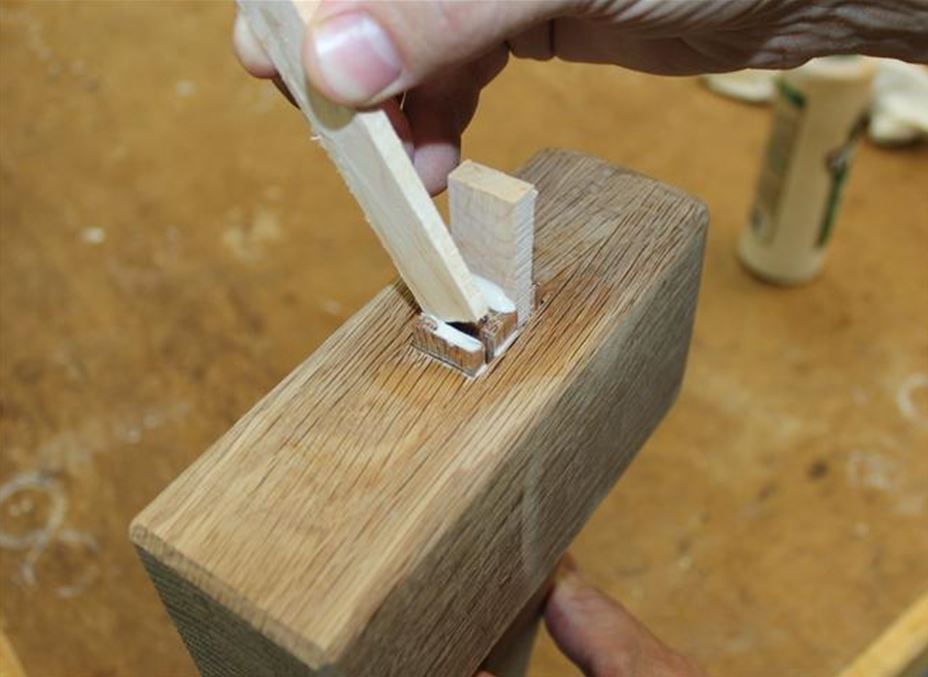 Apply glue liberally to all surfaces of the tenon. Slide the tenon through the mallet head. Apply glue to each surface of each wedge, and tap them evenly into the slots that you cut into the tenon. With alternating taps, ensure that the wedges are inserted to approximately equal depths. It’s important that you don’t drive one tenon all the way home before inserting the other tenon, as it might be difficult to drive the second one home. Let the assembly sit for a bit while the glue sets up.
Cut the handle flush
 Using a sharp hand saw cut the tenon and wedges flush with the top of the mallet head. Sand any blemishes.
Finish
 I suggest finishing these mallets with a penetrating oil such as tung or boiled linseed oil, as these finishes will be absorbed into the wood and provide modest protection without building up at the surface and being prone to scratching.
Next comes the fun part; use it!

Sláinte
If I have a big dried piece of oak, why not cut a one-piece mallet using a bandsaw? Then fine tune...
I made this, and it was a great, affordable way to learn by making mistakes. All the mistakes. And somehow it still came out beautifully and ready to whack stuff. Thank you for sharing! This project forced me to learn more about and adjust my bandsaw, and it was my first wedged tenon. Thank you, too, for the very detailed instructions.
Hi I'm going to have a try at this with a very hard wood grown in here in Western Australia (jarra) has a good fine grain and very good for turning only problem it is a bit hard on the turning tools might even try your oval turning technique for the handle
Looks great. Will give it a try.
What about making the whole thing out of pine or fir with some 1" thick walnut faces dovetailed onto the mallet. I guess I'm just trying to cheapout.
never use a hammer to hit a wood chisel ..look at a woodworker chisel ends to see if he is a craftsman or botcher my malletts are turned and the head is ovalved ..take care stay safe john WALES UK
Will Apple wood work for mallet?
Was wondering if shortleaf pine would be ok for the wedges. I only have one hardwood on hand, but I wanted to have a contrast.
[…] Once I figured out how to actually cut straight with my hand saw (I just needed to a few more practice cuts), I then started on the joiner’s mallet. […]