Titebond: Magnetic Knife Strip
George VondriskaThis is a fun project that's easy to make, and is a great addition to your kitchen. These magnetic knife strips make a great gift. The curved stripes look complex but are very easy to add to the project.
Dimensions
The final size of the block shown in the video is 3/4"" x 2-1/2"" x 17"". A 17"" length allows screw holes 1/2"" in from each end so the block can be fastened to studs that are on 16"" centers. But, nothing says you have to stick with that size. Change the dimensions to whatever works for you and your kitchen knives.
Make the curved inlays
Create thin strips of wood, about 1/16"" thick, that contrast with the main knife block material. Experiment with how thin they need to be to make the bends in your project work. Titebond Original works well for gluing up the inlay and blank.
Cut the curves
Use a 1/4"" 4 TPI blade to cut the curves on your bandsaw. The cuts won't be sanded, so work on cutting and flowing as smoothly as possible. It's best to have concave curves so the parts readily nest when you glue them back together.
Get groovy
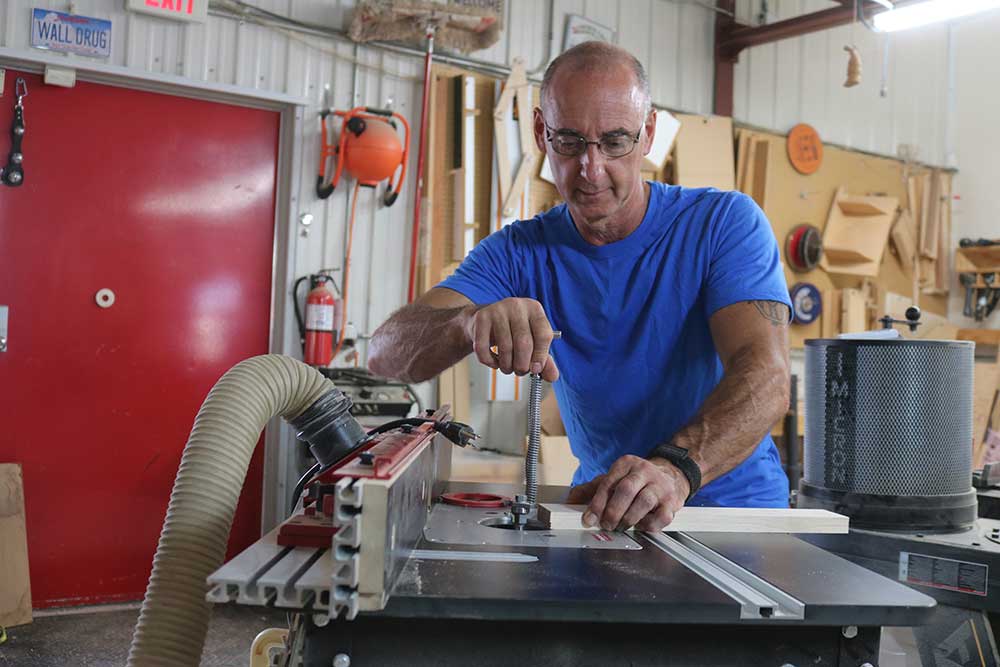
Make the groove for the rare earth magnets by making plunge cuts on the router table in multiple passes. The magnets I'm using are 10 mm wide and a 3/8"" router bit works for a dado they'll fit in. Do test cuts to confirm the width of the dado. Cut the dado to within 1/16"" of the top face.
Install the magnets
Use medium CA (cyanoacrylate) glue to hold the magnets in place. If your knives are heavy and the block isn't grabbing, just add another row of magnets.
Magnets being used
The magnets used in my knife block were purchased on Amazon and are 5 mm x 10 mm x 60 mm.
More info
For more information on Titebond products visit the company's website.
Wouldn't it be cool if in your kitchen there was a piece of wood hanging on the wall, and with that piece of wood you could grab your kitchen knife and have it stick, just like that. That's a magnetic knife block that we're gonna make. Lot of things going on here. The key to this working is it's groovy, and in that groove there are rare earth magnets. Rare earth magnets are incredibly strong.
So we're gonna go through making this, and there's a couple things. The inlay that looks really, really complex is actually very, very easy to do. Getting the rare earth magnets in there is very simple. That's router table work. Let's get started on this project so you can also end up with a cool magnetic knife block.
Step one in making your magnetic knife strip is making a blank, and then our inlay strip. My blank is two and a half by 17. The deal with the length is that if we measure an half inch for a screw hole and a half inch for a screw hole, that puts those holes at 16, which would get you center to center on studs if you wanna screw this directly into wall studs. So, next thing we need is our little inlay strip. This is just a little over a 16th of an inch thick, hard maple, and what we wanna look at here is, what kind of curve is that strip gonna allow, 'cause we're going to the band saw next.
So you just wanna have a feel for what this will let you get away with before we go and cut the curve. Once you know that, let's head to the band saw. First off, blade conversation. I'm using a quarter inch four tooth per inch band saw blade. Where we're going with this is gonna cut the curve, there's not gonna be any sanding, otherwise those two curve components aren't gonna come back together.
So we have to have a good enough blade in there, good enough quality blade, that we can just leave the cut after we're done making it. What I'm looking for in the cut is a curve that has some concave to it. If it looks like this, if it's got a recess, when I squeeze these back together it'll go together, it'll hold its position. If alternatively you just have some kind of a big wedge shape, when I go to clamp these back together they're gonna climb against each other. So I generally just, I don't even bother drawing a line, I just freehand this, looking kinda like this.
We're ready to do a glue-up here, and Titebond Original is gonna work great for what we're doing. Get a feel before you apply glue for what it's gonna take to make this sandwich, and basically that piece of maple, although it's thin, has a big spring in there, so it takes a little bit to close that and make all this work. So it's good to practice a little bit. Other than that, we're ready. As you close the clamps, pay attention to the end grain right there.
That has to stay aligned, 'cause it was aligned originally, and when that's aligned that tells you that the curves are where they're supposed to be and they're gonna nest correctly. And through the magic of getting ready ahead of time, we have one that's ready for the next step. So now with this, two stripes, same process. I cut one, glued it, let that glue dry, then just made another cut, put in a second strip. At this stage the part is still too long.
At this stage it's cut to its final size, two and a half by 17. I've got the screw holes in it that'll be used later to mount it to a wall. Next thing, we need to make a recess that'll accept our rare earth magnets. Easiest way to get groovy for the magnets is here on a router table. What you should do is match the width of the magnets to the diameter of the router bit that you're using, and the way that we'll make all this happen is gonna plunge onto the cutter, move forward, lift off the cutter.
Stops at each end are gonna control the overall length. It's gonna take more than one pass to make all this happen. It's gonna take a number of passes. We wanna get the magnets close to the top surface, but of course not go all the way through. Let's put our magnets in.
What I have done so far is just, they're just magnetically stuck to each other here. And of course, we've got our groove that we just made. If you've got a piece of steel in your shop, it's handy here, otherwise you can also do this on a cast iron table, your table saw, or your joiner. What I'm after here is that with the steel here, when the magnets go in, that's gonna be our clamp. They're gonna draw down and hold themselves tight against the bottom of the groove.
Best glue for this is CA glue, cyanoacrylate, and the reason for that is we have dissimilar surfaces. We've got metal magnets, wood holder, so in order to get a bond between the two, CA glue is gonna do that for us. I'm using thick. And I'm going to not be on the metal when the magnets go in, 'cause I don't want them to grab until they're in the spot I want them to be in. Then switch over.
See, it really works. There. Let that sit. CA glue being CA glue, in a minute or two, that's gonna be dry and ready for the next step. You can see how easy those decorative inlays are to do.
CA glue for the win on holding those dissimilar surfaces together, the magnets and the wood. With this one, quarter inch round over on the corners. The screw holes are 16 inches apart, 17 inch overall length, so if you wanna fasten into studs, you can. And remember, you've got a lot of options. So if you do a single inlay or like I've got there, you can do a double inlay, you could do a triple or quadruple inlay.
It's a fun process to mess with and just take it where you wanna take it. With the knives you have in your kitchen, if when you go to do that, they're not giving you the grip, the bite that you need, maybe your knives are heavier than mine, what one can always do is simply double up the rare earth magnets. So if I add another row to what I have in here, it's gonna give me that much more magnetic power. Great project, great gift for anybody you know who's a homeowner, a new homeowner. What a nice housewarming thing to hand out.
Hope you make a few of these and enjoy the project as much as I did.

Share tips, start a discussion or ask other students a question. If you have a question for an expert, please click here.
Already a member?
No Responses to “Titebond: Magnetic Knife Strip”