David Radtke

Sketchup Session 2: Learning to Navigate the Workspace and Basic Tools

David Radtke
Duration:   24  mins

Description

Here you’ll learn the basics of the SketchUp workspace; the red, blue, and green directions commonly called the xyz axes. You’ll also get familiar with the basic drawing tools so you can draw basic flat shapes and expand them into 3D. Learn why and when it’s best to use Components and Groups, two of SketchUps most powerful tools.

Woodworking axes: 0:05
Basic tool know-how: 1:25
Components and groups: 13:40

Share tips, start a discussion or ask other students a question. If you have a question for the instructor, please click here.

Make a comment:
characters remaining

No Responses to “Sketchup Session 2: Learning to Navigate the Workspace and Basic Tools”

No Comments
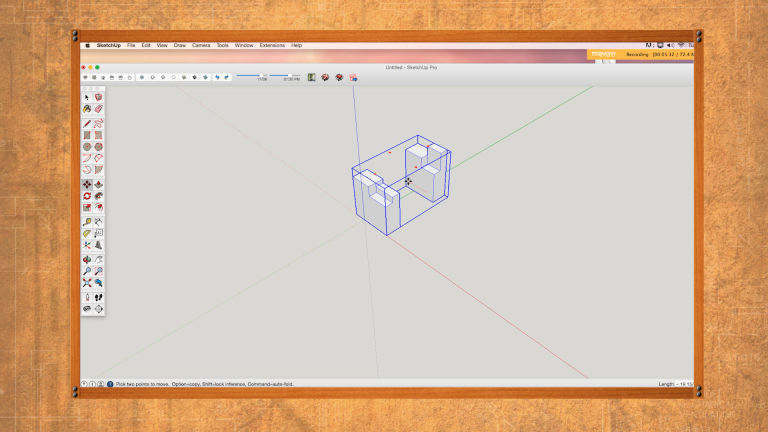
Here's our workspace in SketchUp. Now if we look we see some lines here, there's a green line that goes this way, a red one that goes this way and a blue one. Well, if you go back to high school math, you might remember the Cartesian graph, which had x's and y's. and z's what we're adding here. So if you think of the red as an X and the green is a y, and the blue going up and down here, as the z axis, we're gonna be drawing things in this area. So just to make this a lot more clear, I'm gonna just draw a rectangle and I'm gonna start at the origin, we'll be starting most of our drawings at the origin, it's just a great place to start. It lets you keep track of where you are in space. So if I pull this up, right away you can see... Well this is where our project is gonna be on this x, y axis. So you can see how SketchUp will just keep this going will spin around. I'll show you how to do this more later. But you get an idea of where the axes come together at the origin, and how your workspace works. Last time, we looked at the x, y, z axis, and this time, we're gonna look at tools. But before I do that, as I'm moving my cursor around let me show you the kind of mouse that I'm using. So it's a scroll mouse. And if we pull this down in here, we can take a look, I've got an area for a left click, a right click, and then I've got this center scroll wheel. So when I'm orbiting and panning, I'm pushed... I'm moving the mouse back and forth. And when I orbit, I push this down. And then I can move my mouse while that's depressed, and I can orbit around, the scroll wheel also works for zoom. So if I go forward with it, I can zoom in, if I scroll backwards, I can zoom out. So these are everywhere, they're very inexpensive, it's the type of mouse that you're really get a lot of bang for your buck with SketchUp. It's not that you can't use something else but this scroll mouse is the tool they have. So back in SketchUp, let's get familiar with our tools. So if I go over here, and put my cursor on, you'll see that the tool name will come up, it says rectangle in this case. Well this is the tool that we're gonna start with. Now, we won't get familiar with all these right off the bat, it's gonna take time to introduce each one, the rectangle is what we'll use first. So if I go down here, I'm on the origin. If I pull my mouse and left clicking now, so if I pull my mouse like this, I have the the left clicker depressed. And if I release it, I get this highlighted area. Now, if I go over here to the corner, you'll notice that there's a dimension box. And it says 25 and 1730 seconds, and approximately 13 and 530 seconds, but that's not the size I wanted. So SketchUp is figured this out and let you use your keyboard. So you can type in the actual dimensions. Now as I type them in, you'll probably see something down in this area here that lets which key strokes am making, which key strokes am making. So you won't find this on your program of SketchUp. It's just a feature that we have on this recording that lets you see what I'm typing in. So I'm gonna type in six, comma, three, dash quarter and hit return. And you'll see there we are, we've got a rectangle drawn. Now I scrolled in with that scroll wheel on my mouse. So if I go over here, another tool, it looks like a tape measure, I'm gonna left click on that release and drag it over here. Now you'll see these points inference. That's something we'll keep talking about in SketchUp. So I made a midpoint. I'm just gonna pull over here and I have depressed a left clicker and I'm just holding it and it says three quarter and I'll push left click and pull my mouse over this other end and it says six and I'll release and it goes away. So I've made some lines and that's what the tape measure does is it lays down guidelines. And that'll be very helpful later, right now they're just confusing. So let's get rid of them. The way to do that is go over here at eraser tool, well looks like eraser that we all use. So we'll go over here and right on that line, I can click and those disappear. So the next to a while we've got this rectangle, what do we do? The next tool that I'd like to show you is the push pull tool. So we go over here, it looks kind of like a pizza box with an arrow coming out of it. So I'm gonna left click on that, release and I'm gonna go over here and you'll notice that as soon as I enter that rectangle that we drew, I get this dotted line, which means it's an active area that this tool can then change that area. So I left click, and then I'll just slide my mouse up, you'll notice that it comes up. And if I slide my mouse down, it goes down below the origin line, and here it goes up above. So I'm gonna to just release now. And you'll go over here, and you'll see the distance I did was two and 13 sixteenths, but I'm just gonna type in four and then hit return or enter, and it comes up and it's four inches. Now in SketchUp, what you'd like to do with this right away so that you're not gonna make changes to it. So you're not gonna come in erase it or use this push pull tool, see I've already changed it, I'm gonna go back and hit undo. So it's the way I wanted it. If I go up here to the select key, notice that if I hover over it just says selects while left click and I'll drag that over and place it on my object. Now I'm gonna click fast three times and you'll notice how everything gets highlighted, edges as well as all the faces, then I can right click on my mouse while I'm on that object. And this box opens up with all these choices. And if I go down here, it says make a component, I left click on that, then this box comes down wanting me to name it. So I'm just gonna cancel that for now and show you that you can make components also up in the Edit. So if we come up here and scroll down, we see make a component there. We also have a component maker in our tools so I can left click on that and the same thing comes down. So I'm just gonna type in board and hit my return or enter and there we have it. So now if I go over and grab a tool, like I grabbed the push pull tool, left click on that release and drag it in, it won't respond to anything. But if I with this tool open, I right click, I can open, edit component and then left click on that. Now all of a sudden that tool is acting like it did before. So I can go up here and I can change it, I can go up and down, I can go out like this and change it. Now to get out of this, so say I've made changes to it, we can simply go up to this Select button and click outside of this dotted, highlight anywhere and now, whatever I do, I can't make changes to it. Another tool that I'd like to introduce that we use very often is the line tool. So I come up here, it looks like a pencil. So I left click release and drag it over here. Now you'll notice that whenever I hit an endpoint or a midpoint on any line on an edge, it lets me know. That's pretty useful in woodworking 'cause we're often dealing with centering and midpoints. And there's other tools that I'll show you later that even divided into thirds and fourths and fifths, all that kinda thing. But for right now, let's go ahead and make a pencil line on here. So now, you'll notice sometimes that pencil wants to get stringy and stay with you just go up and type in escape on your keyboard. And then that lets you go. Now if I come over here, and I grab that push pull tool, remember that we could manipulate. It won't let me do anything with it. Even though I've made lines on there, it's because I didn't edit the component first. So let's go back and get our eraser. And we'll come over here. And let's erase those lines. Now, if I want to put those lines and actually do something with them, I'll go up and grab my line to a left click and release and come back. Now if I right click, I can go down here and edit component left click, now it makes highlights. Now, if I go over here, I can make these lines, then if I go over to my push pull tool, I'll just left click on that, release and drag it over. Is that where I made those lines makes a difference and what the push pull tool can select. So I can take each one of those different areas, pull it up, push it down, I can even take these inside phases and pull those away. So you can see how components are nice to have, you can edit them, you can save it as a component. And then the nice thing about this is, if I did something I didn't like to do, you can always go back to undo. So there's 1, 2, 3, then I can even go back and get rid of those lines. And those disappear. And then remember, I can always push my select key and then click out anywhere outside. And that's it. So that's the introduction to the basic tools of SketchUp. There's one other tool that I think we'll introduced at this point to that is very helpful. And that's the move tool. So you'll notice that if I come on here with my move tool, I can take this object and move it around anywhere. I can also go down here to the corner, or midpoints. And you notice how a little data appears I can pull it, and I can snap it back to the origin. You'll also notice these protractors that appear. So if I click on those, it rotates them. Now we don't wanna do that right now. We'll get into a project later will or will actually use that. So let's just go up and hit undo. So now if you want to move things, just don't go on those areas where it's highlighted by a protractor and you can easily move things in space. Now you'll notice that I'm moving around quite a bit with the objects I'm scrolling remember like, with our mouse. And then here's the orbit tool. I can move around like this. The pan tool says hand here lets me move if I have a really big project, I can move back and forth. Or while I have the pan tool open, I can push my scroll wheel in orbit about. So practice these things, you'll use them all the time. Very helpful in SketchUp. Now, there's other tools that we'll get familiar with as we go. And we'll use them when we build our next project. So that's it. This was our introduction to tools. Let's look at components and groups in SketchUp. So I'm gonna go over and grab my rectangle tool, put it at the origin, left click and we're just gonna go ahead and make an object here. Now as I look at this object, you notice that everything is highlighted if I go up and grab the rectangle tool here again. And I put another rectangle on and I come over and get my push pull tool, click on that, drag it over. I've changed my original shape here. If I would have made it a component, it would have stayed. So let's go back and see what happens when we do that. So I'm gonna go undo and undo with that line. I'm gonna go up and grab my Select tool, click three times and right click and then go down and make it a component. So I'll just call it side for right now. And let's go ahead and do that same operation. So now I'll go on here, I'll draw rectangle. I'm gonna go over and get my push pull tool and pull this up. Now if I grab my move tool, you can see, undo that because I've made this a component, it stays independent of this one, I could make this one a component as well. And we'd have two pieces we could move around. So that's the beauty of a component, it's like you cut a board to size, you set it apart, it's part A, it stays part A. So let's go back and look at some of the neat things about components. So I'm just gonna undo that last piece I made. This is a component now. we've made it a component. If I right click on, we can edit it. Now let's go ahead and we'll grab our move tool. And we're gonna push option this time on a Mac or Ctrl on a PC. And you'll notice that when I do that, I get a little plus sign. And if I pull this this way, I'm pulling it in the green direction, you see that green, if I go off size, off side a little bit, it's not green. But if I go in that direction stays green, that means it's going down the green access parallel. So I'm gonna just let go of that. Now, because we've made this a component, let's go ahead and edit this component, I can come in with a line tool. So left click on that, pull it in. And I can make a line on here. Notice that that line appears over here. If I left click here and make another line, that line appears over here. Now if I go over and grab my push pull tool, left click on that, drag it over. And then I can click on these areas. You can see that whatever I'm doing to this component, the same happens over here. So this is really handy. If you're making table legs or drawers, sides, anything we have multiples, you don't have to redraw the piece over and over again. So that's the beauty of components. Now the other cool thing about components is, let's go ahead and close this. So I'll go up and click, select and click outside of this area. Now I've closed the component. You can... This is an exact copy. But sometimes in woodworking, there's a little change like to a leg that has a drawer that comes in next to it or an apron that fits in differently for some reason that components a little different, all you need to do is right click on this, and then scroll down. And you don't want to edit it because that'll change this one too. You just make it unique. Now, whatever I do to this component, so let's go ahead and edit it. And if I come over and grab a push pull tool, and bring it over here. Now if I move around this like I just had to make a small change, or it can even be a big change. But a lot of times you just make it unique to make a different change. So if I go over here and click outside, you can see how they're different. They're very much the same. But they're also very different. Now the other thing we can do is we can grab our Select tool. And if we go over here, we can select this one. And if I hold down my shift key, so I'll just push that down, and I go over and select this one, I've had both of them open. Now I can right click, and I can go down here and I can make a group. So now I have a group of components. So if I grab my move tool, and I go over here now they both move around together. So it's a good way to kind of if you were gonna have a multiple pieces and you wanted your legs all to move on a table all together while you do some other work. That's a neat thing to do to be able to group them. So again, undo those things. And there we are back with our same component. So when I've undone them, what I do to this one will happen to that one again. So that is the beauty of components. Next, let's take a look at groups. So as before, I'm gonna go over here to my rectangle tool, left click on it, release and come over to my origin. I'm just gonna draw a random shape. So I've drawn that, I'm gonna go over and grab my push pull tool now and release. Bring it over the highlighted area and raise it up. Now, last time, we made this a component. So this time, I'm gonna go up, grab my select key, click three times fast. And now if I right click, I can make it a group. So as before, it's a group now, I'm gonna go over and grab the move tool. And I'm gonna do a move copy again. So I can either push the control or the Option on a Mac, and I can pull this over. So like before, I've just pulled it over made an exact copy, and then I'll release. Now, if I wanna edit this group, I right click on it. So let's do that again, I can right click, left click, now I've get this area highlighted. If I come over with my pencil tool, as we did before, and I draw a lines on here, I'm editing this group, nothing happens to this one. In fact, if I come over here and grab my push pull tool, you'll notice that I can do all sorts of things. And whatever I've done to this, even though I made an exact copy of it before, it's completely different. So if I close this, then I grab my move tool. Even when I move it, nothing happens. It's isolated, it's a completely different thing. So let's go back and undo this. And get back to where we were before. Then I'll grab my Select Tool and click outside of the box. So now I have these two things. So they are related, they look exactly the same, but they're in a group. So we can do is select one, then hold the shift key, we can select the other one, then we can go down here, right click, go down to make it a group. Now they're a group together. So if I grab my move tool, it's the best way to sort of illustrate this, they move together. So sometimes you want things to move together that aren't the same. So even though one might be a lag, and the other might be something else. You want them to move together and be part of a group. Or if you're layering them, they can be part of a group and a layer, which we'll get to later. Now you can come in and right click on this, and you can edit your group, then you could go around and move things around or join them up or whatever. Now, if you move them, close the group, then they move together in that way. So you can edit groups, and you can make groups of groups. Now that I have it like this, I could make a copy of that group. And now that group moves independently, or I could hit Shift key, I'll first pick select and then shift again. And then if I right click, I could make a group. And now I have... If I come over and grab my move to a I have a group of groups. And if I wanted to get away from that I could right click and go down and explode. Now I just back to these two groups again. Or if I right click on this one, and they explode that one. Now I'm back. Excuse me. Now I'm back to having them independent of each other. So you can undo it by doing an explode and then that takes it away. So I hope that helps with groups. We'll be using groups a lot in SketchUp
Get exclusive premium content! Sign up for a membership now!