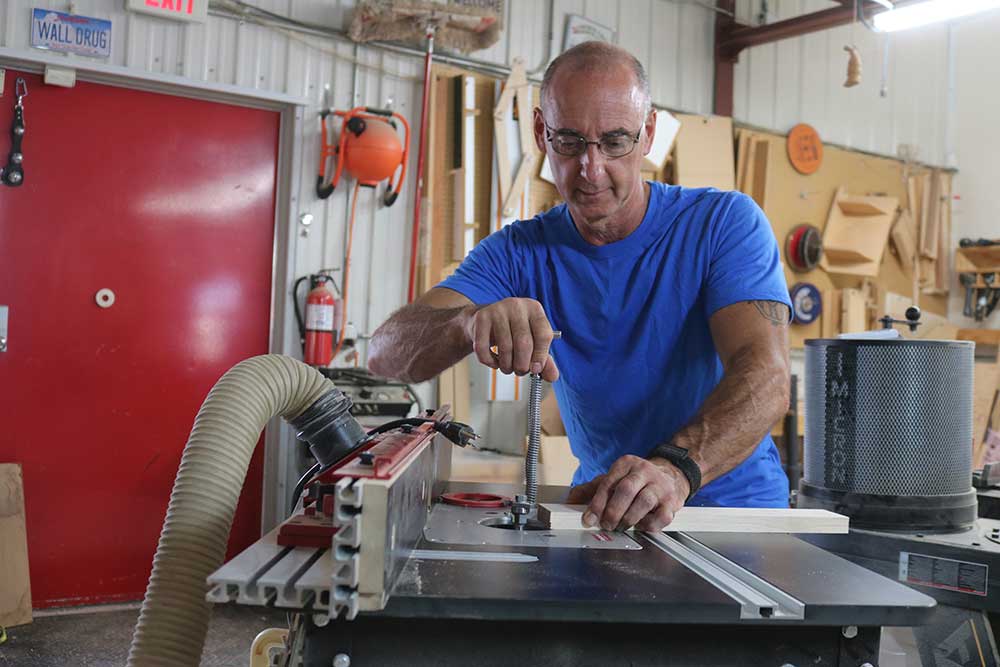
Jet Tools - Lathe Turning Basics
George VondriskaLathe turning is a blast for lots of reasons. From wood selection to the shapes created, turning allows you to be very creative. It's also one of the few woodworking projects that can be completed start to finish in just a few hours. Check out this video to jump start your lathe turning. Be sure to download the PDF so you have all the necessary background information, including the speed charts.
Tools used
The turning in this video is being done on a Jet JWL1221VS lathe. Bandsaws and lathes commonly go hand in hand. It's very handy and practical to use a bandsaw to cut turning blanks round, or close to round, before mounting them on the lathe. The bandsaw being used is a JBS 10 equipped with a 1/4"" 4-TPI blade.
Practice, practice, practice
Turning is a lot of fun but does require some muscle memory. It's a great idea to grab some scrap wood and then practice spindle turning and bowl turning before jumping into your first project.
More info
For more information on Jet Tools visit the company's website.
Share tips, start a discussion or ask other students a question. If you have a question for an expert, please click here.
Already a member?
4 Responses to “Jet Tools - Lathe Turning Basics”
Before I jump in on lathe turning basics, let me tell you, grab the PDF that comes with this video. It's got speed charts in it, and you're gonna need that for spindle turning and bowl turning to make sure you're running at a correct and safe speed. In addition to that, lots of other information about lathe turning. Let's jump in on this. We've got our jet lathe here, headstock on this end, tailstock on the opposite end.
The headstock is the drive end. That's where power is originated. For spindle turning, we're very commonly gonna use what's called a spur center in the headstock. When we do bowl turning in a little bit, we'll put a faceplate onto the headstock. When we're ready to start cutting, we need something for the tools to rest on, so we have a tool rest.
The tool rest is in the banjo, kind of an unusual name, but that's what that part is. One of the things I love about this jet lathe, it is EVS, electronic variable speed. It's just what it sounds like. When I turn it on, we have a digital display that tells us the RPM of the headstock, and kinda like using a dimmer switch on lights, I can use this dial, and I can decrease or increase the RPM of the lathe. This makes it so easy to control your speed and dial it in to exactly where it needs to be for whatever project you're working on.
The other thing we have going here is this switch, R and F, reverse and forward. Being able to run the lathe in both directions is really, really important. You'll see that come into play when I do the bowl. You may sometimes have to do belt changes on this lathe, but that's only to pick the range. So on this step pulley, we have low, medium, and high range.
So you can position the belt here, but then your finite speed control will come from using the dial that I just showed you a second ago. So next what we can do is look at getting a spindle mounted up on the lathe and start some turning. Before I get in too deep, I wanna say, be sure to grab the PDF that comes with this video. A really important part of that, it's gonna give you speed charts for spindle turning and bowl turning, and a lot of this information is included in that PDF, so you can come back and reference it later. Band saws and lathes have a very distinct symbiotic relationship, which is very frequently when we're going to use a lathe, we start over at the band saw, and that'll be roughing stuff to size, roughing stuff to shape.
In this case, that's my spindle blank, and where we're gonna go with this is we wanna get the spur center in that end of the spindle blank. In order to do that, you really wanna start at the band saw. The way I'm gonna make this happen is by setting the band saw table to 45 degrees, and then taking advantage of the fence, I'm gonna bring that right up close to the blade, like that, and that's gonna let our blank come in just like that, so that we can make little relief cuts for that spur center. That's step one of taking advantage of the band saw. Now step two is that if we can start with an octagon on the lathe instead of a squareagon, it's gonna make our turning a lot easier to do.
So in order to make that happen, I'm just gonna use the band saw to take these corners off. Having an octagon makes it a lot easier for what we're gonna do next on the lathe. Our next step is grab the spur center, and using a mallet, not a hammer, we want that spur center engaged in those relief cuts. That gets us ready to go on the lathe. We've got our spindle blank in between the drive center and the tailstock.
The tailstock is also centered on this end. The tool rest is set so that it's as close as it can be without touching, but never more than a half inch away. So the half inch deal is your fingers are about a half inch big. We don't wanna have any chance of that gap being so big you could get a finger caught in there or have the chisel cantilevered way out and take a chance of that tipping on you. The height of the tool rest is slightly below center.
We're just about ready to turn. We should talk about tools. Carbide tools are cool in that they've got a carbide insert in them. You never sharpen these. When it gets dull, you loosen that bolt, turn it just a little bit to a fresh spot, repeat, repeat, repeat.
When the whole thing is dull, you replace that carbide. As your turning goes on and on, you're gonna wanna graduate to high-speed steel chisels, and these are available in a bunch of different profiles. You're gonna see me use them, and Part of the reason we wanna graduate to this is that tools like this will let you move on to shearing your work. Today, we're gonna do everything with scraping, but as you wanna move forward and you wanna learn to shear, you'll be able to do that with these high-speed steel chisels. We can't do that with carbide.
And net-net, they're just gonna give you better results in your turning. So to get going here, here's how this is gonna go. I'm gonna have my left hand on the tool rest, my right hand on the chisel, and the tool perpend- or parallel to the floor like this, and I'm gonna work my way all the way down with this roughing gouge from one end to the other in order to make that round. That's our first step. Throughout our turning, everything is done in three steps.
And look at the speed chart for this and how it correlates to speed. Roughing, shaping, and then sanding and finishing. So this step, the first step we're at here, is a roughing step. Looks like this. Step one, we're just looking to turn this into a cylinder, to get it round.
Now, a fluid aspect of this is that you're gonna constantly adjust the banjo to make sure that the tool rest stays the right distance away from your turning. Once this is round, we can be done with the roughing gouge. And one of the things I wanna point out there is right to left, left to right, they both work. So whatever you're comfortable with, if you're comfortable with going both directions, that's cool. Now I've got a cylinder.
It's not necessarily a true cylinder from end to end, so I'm gonna use my skew with its long, straight edge in order to flatten this out. As I do this, the detail of it is on a skew, that's the toe, that's the heel. I'm leading with the heel, moving that across, working on turning this into a true cylinder. Now, as we get into shaping, what we can do is look at a couple different shapes you can easily add to this. And again, I'll re-mention that we're sticking with the scraping technique here.
So in the case of all of these chisels, we're held just parallel to the floor, allowing that cutting tip to do its thing. So a very simple shape to start with is a cove. A cove is an inside radius that looks like this. Doing that work with a spindle gouge, 'cause it's round, gives us a round bottom cove. If I come back to my skew, I can use the toe and produce a V bottom cove.
When you're doing this, when you're getting into this hobby, what I would recommend is get a spindle on your lathe that you don't care about and just practice all of this stuff. Get a feel for big coves, narrow coves, round coves, V coves, so that you have a handle on it before you start doing the spindle for a rocker. The other thing we can do, that's an inside shape, let's do an outside shape. Let's do a bead. So with a bead, we're gonna do all that work with the skew, and the way to watch this is I'm gonna engage with the toe, come this way, engage with the toe, and come this way.
And there's no reason why we can't combine stuff here. So this would be what we call a full bead. If I come here to the edge of it- We can do a half bead and a half bead rolled into a cove. So by combining stuff here, we can get a lot of different shapes. The other thing that you're likely to run into on a spindle is the need to get something to a very specific diameter.
That work is done using a parting tool and calipers. So the parting tool is gonna cut wood away. The calipers are gonna allow us to measure. Using the parting tool in conjunction with the calipers, we can turn that to a specific diameter, for instance, the tenon on the end of a spindle. Once you're done shaping, we can do all the sanding on the lathe.
You're gonna see that when I get to the bowl, so I'm not gonna do it here. Practice, practice, practice. Get a spindle blank on the lathe, play around with it, work on these shapes. Next thing we're gonna do is get a bowl set up to turn on the lathe. For bowls, we're gonna use a faceplate.
If you simply screw the faceplate to the back of the bowl blank, we're gonna have holes in here, and it limits how deep we can make the bowl, 'cause there's screws going into it. Instead, I like this approach. We have a mounting block, a dummy board, on the back of the bowl blank. It's glued to the bowl blank, but with paper in between. That's just a piece of a grocery bag.
When the turning is completely done, we're gonna be able to separate this paper joint. This technique has been used for a really, really, really long time. It's gonna let us screw the faceplate to the mounting block, do the turning, take them apart later, no evidence of screws in the back of the bowl. That's a great way to make these come together. Before we go to the lathe, you definitely wanna cut this bowl blank, bowl blank round here at the band saw.
So, we need that as a starting point. And you can really see why I said between spindles and bowls, the relationship between a band saw and a lathe is very strong, because we need to do this work here before we do any work over there. Now that we're set, I'll screw that faceplate on, and we're ready to talk bowl turning. Remember with turning, roughing, shaping, sanding, and finishing. With the bowl, we're back to the roughing step.
Look at your speed chart to know where to start with this size bowl. Tool rest slightly below center. Little bit different look to this chisel. This is a scraper, more specifically, a round nose scraper, more specifically, a one-inch round nose scraper. We're gonna use this, again, just parallel to the floor, gonna work on just making this blank round.
When you position the tool rest this way using the banjo, give that bowl blank a turn by hand. Because we cut this freehand on the band saw, maybe it's not perfectly round. Maybe it's got a high spot. So it can happen that you get kinda tricked, where you position the tool rest, then you turn on the lathe, and that high spot clicks against your tool rest. Do a double check, make sure that's not gonna happen, then we're ready to start taking away everything that doesn't look like a bowl.
That's looking good already. And the other thing I'll point out is when we can see shavings like this, that's great, where you have shavings, not dust. If you're getting dust, not shavings, that's an indication that your tool is no longer sharp, and it's time to do some sharpening. Next thing, I wanna finish shape on the outside of the bowl. So the longer tool rest is gonna let me reach around the back a little bit better.
And as a general rule of thumb with bowl turning, what one does is shape the outside, then go back and start hollowing the inside. So I'm gonna just keep working on this back, constantly readjusting the tool rest as I need to, to make sure I say a stafe, stay a safe distance from the bowl blank. I like the shape, I like the cuts. And one of the things to watch for there is I cut into the mounting block, into the dummy board. I wanna clean up that glue joint between the block and the bowl blank so that in a little bit when we come to separate that paper joint, it's easier to do.
Next thing I'll do is come around the front, and now we can start hollowing. First thing I'll do when I get to this side of the bowl is I'm just gonna face it. I'm gonna get this to be a flat face. Then we're gonna start hollowing in the center, and make that hollow bigger, and bigger, and bigger, and bigger. Maintain that same rule by keeping that tool rest close.
And keep hollowing. Good question. How do we know when we're done? Part of the answer will come from bowl calipers. What they'll let me do is squeeze there, and it shows me on this end how much material is left.
Depending on the wood you're working with, we can aim for 3/8 to 1/2 inch across the bottom to keep it plenty strong, and then quarter to 3/8 as we come up the wall. This one is in pretty good shape, which means I can show you how to do some sanding right on the lathe. When it's time to sand your projects, you can do all the sanding, spindle or bowl, on the lathe. Can't beat a Velcro disc with sandpaper on it on a cordless drill to make this go really, really fast. You'll clean up those machine marks in no time.
So what you wanna do is start somewhere around 100 grit, take out the tool marks. When the tool marks are gone, go to 120 grit, take out the 100 grit marks, up, up, up, up, up, till you hit about 220 grit. I'm gonna keep doing some sanding on this, and then, very fun, we'll look at finishing on the lathe. Regarding sanding, I mentioned a while ago forward and reverse on the lathe. So the way I did this is I sanded up to 220 grit, and once I got into that finer grit, I would run the bowl in reverse, do some sanding, stop, forward, do some sanding, 'cause of course wood has fibers.
So by only sanding in one direction, maybe I'm laying those fibers down. I'm not effectively sanding. By sanding in both directions, you're gonna get a much better sanding job on this. So that's one application for reverse. If you do that, there are set screws in the face plate.
You wanna make sure you tighten those so that when you're running in reverse, this can't come unthreaded from the spindle. We're sanded. We're ready for finish. We can do that on the lathe. And again, roughing, shaping, sanding, and finishing.
So we're obviously, we're at sanding and finishing now. You always wanna do this with a paper towel, not a rag, so that if it catches, it's just gonna pair- tear the paper towel. If you do your finishing with a rag and it catches, it might pull your fingers into the turning. Got a little bit of finish on my paper towel. And this is what's called a friction polish, just what it sounds like.
It's gonna take a little bit of friction in order to get this to really give us everything we can get out of it. Look in the PDF to get the name of this specific product. But right there, it's nice and wet. Little bit of friction under power. And typically, you wanna build up two or three good coats on that.
That's already looking pretty good. Can't wait to do the outside. The other thing I'll mention from here is paper towel on the bed of the lathe, that protects the bed from getting drips on it. Watch for dry spots. Sometimes when you put finish on while it's running, it doesn't get everywhere you need it to get.
There we go, that took care of that. It's already looking great. I'll let that dry just a couple of minutes. It dries very, very fast. Build up a few more coats, and then talk about separating that paper joint.
In order to separate that paper joint, find the paper joint. So craft paper, that was just a grocery bag I used in there. Look for that brown line. Grab the widest wood chisel that you have, and we want the flat side of the chisel against the bowl, the bevel side against the mounting block. So I'm gonna seek out that paper joint, and you can kinda feel it.
Right there, I could feel it go in there, 'cause the paper is softer than the wood on each side. So find the paper joint. Give it a little tap. And don't try just from one position to do all the separation, 'cause it's probably not gonna happen. It's better to start in a couple different spots.
Well, that's a great start there. The other thing I've done is put a carpet scrap on the bed of the lathe, so if this gets away from me and just falls off, wouldn't it be a shame if it fell on the lathe and you bruised the rim? Don't get tempted to torque the chisel. We wanna just let the chisel act like a wedge and do its work. So a couple different spots, tap, tap, tap.
That's so ready to go now. And it's gonna leave half the paper on the bowl, half the paper on the mounting block. Little bit of work with a random orbit sander and you'll get all of that paper off of there. Use the same finish to seal that up. And we've got a great-looking bowl there.
All the spindle techniques that we did earlier. So again, I, I love the creativity of lathe turning, and I love the instant reward, the instant gratification we can get from taking projects start to finish in a very short amount of time. The Jet Lathe and Band Saw, great pair for doing this. I really love that electronic variable speed on the lathe. Makes it so easy to get those RPM just right for what you're doing.
Hopefully, you take advantage of this, grab the PDF, and do some lathe turning in your shop.
Check out the Introduction to Spindle Turning video and click on Bonus Materials.
Over two weeks since the first comment by Jon sharing that there is no PDF - still true.
dITTO, no pdf!
No PDF