 I rarely resaw, and when I do, it's usually to maximize the yield of the wood I have rather than to make veneer or book-matched boards. Changing my bandsaw blade just to make a few resaw cuts takes way too much time. The solution is simple -- I use my table saw. The table saw alone is used for boards less than twice as wide as the maximum rise of your table saw blade, and for those wider boards you'll add your bandsaw. I'll show you at the end.
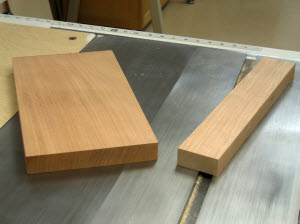 Stock preparation. Plane your boards, leaving them as thick as possible, and rip the edges square. Remember, your boards have to be at least 2 times the thickness of your finished resawn boards, plus the saw blade kerf thickness, plus a bit more to clean up the sawn board faces. I know this will be hard to believe, but some years back a customer brought in a 3/4" thick board and asked me to resaw it into two 3/8" thick boards!
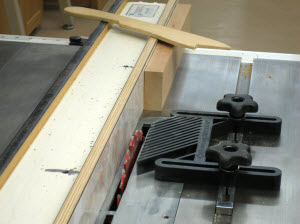 The setup. You'll need a well tuned table saw with a good rip blade (see Sources), a hold-in, and a push stick. Raise the blade slightly higher than half the width of the board you're resawing, but not more than half the maximum height you could raise the blade. For resawing wider boards it's safer to make multiple cuts raising the blade more each time rather than making one deep cut. Set your hold-in so it keeps the board against the fence without applying any pressure.
 First cut. This cut is half the width plus just a tiny bit more, and it's centered in the thickness.
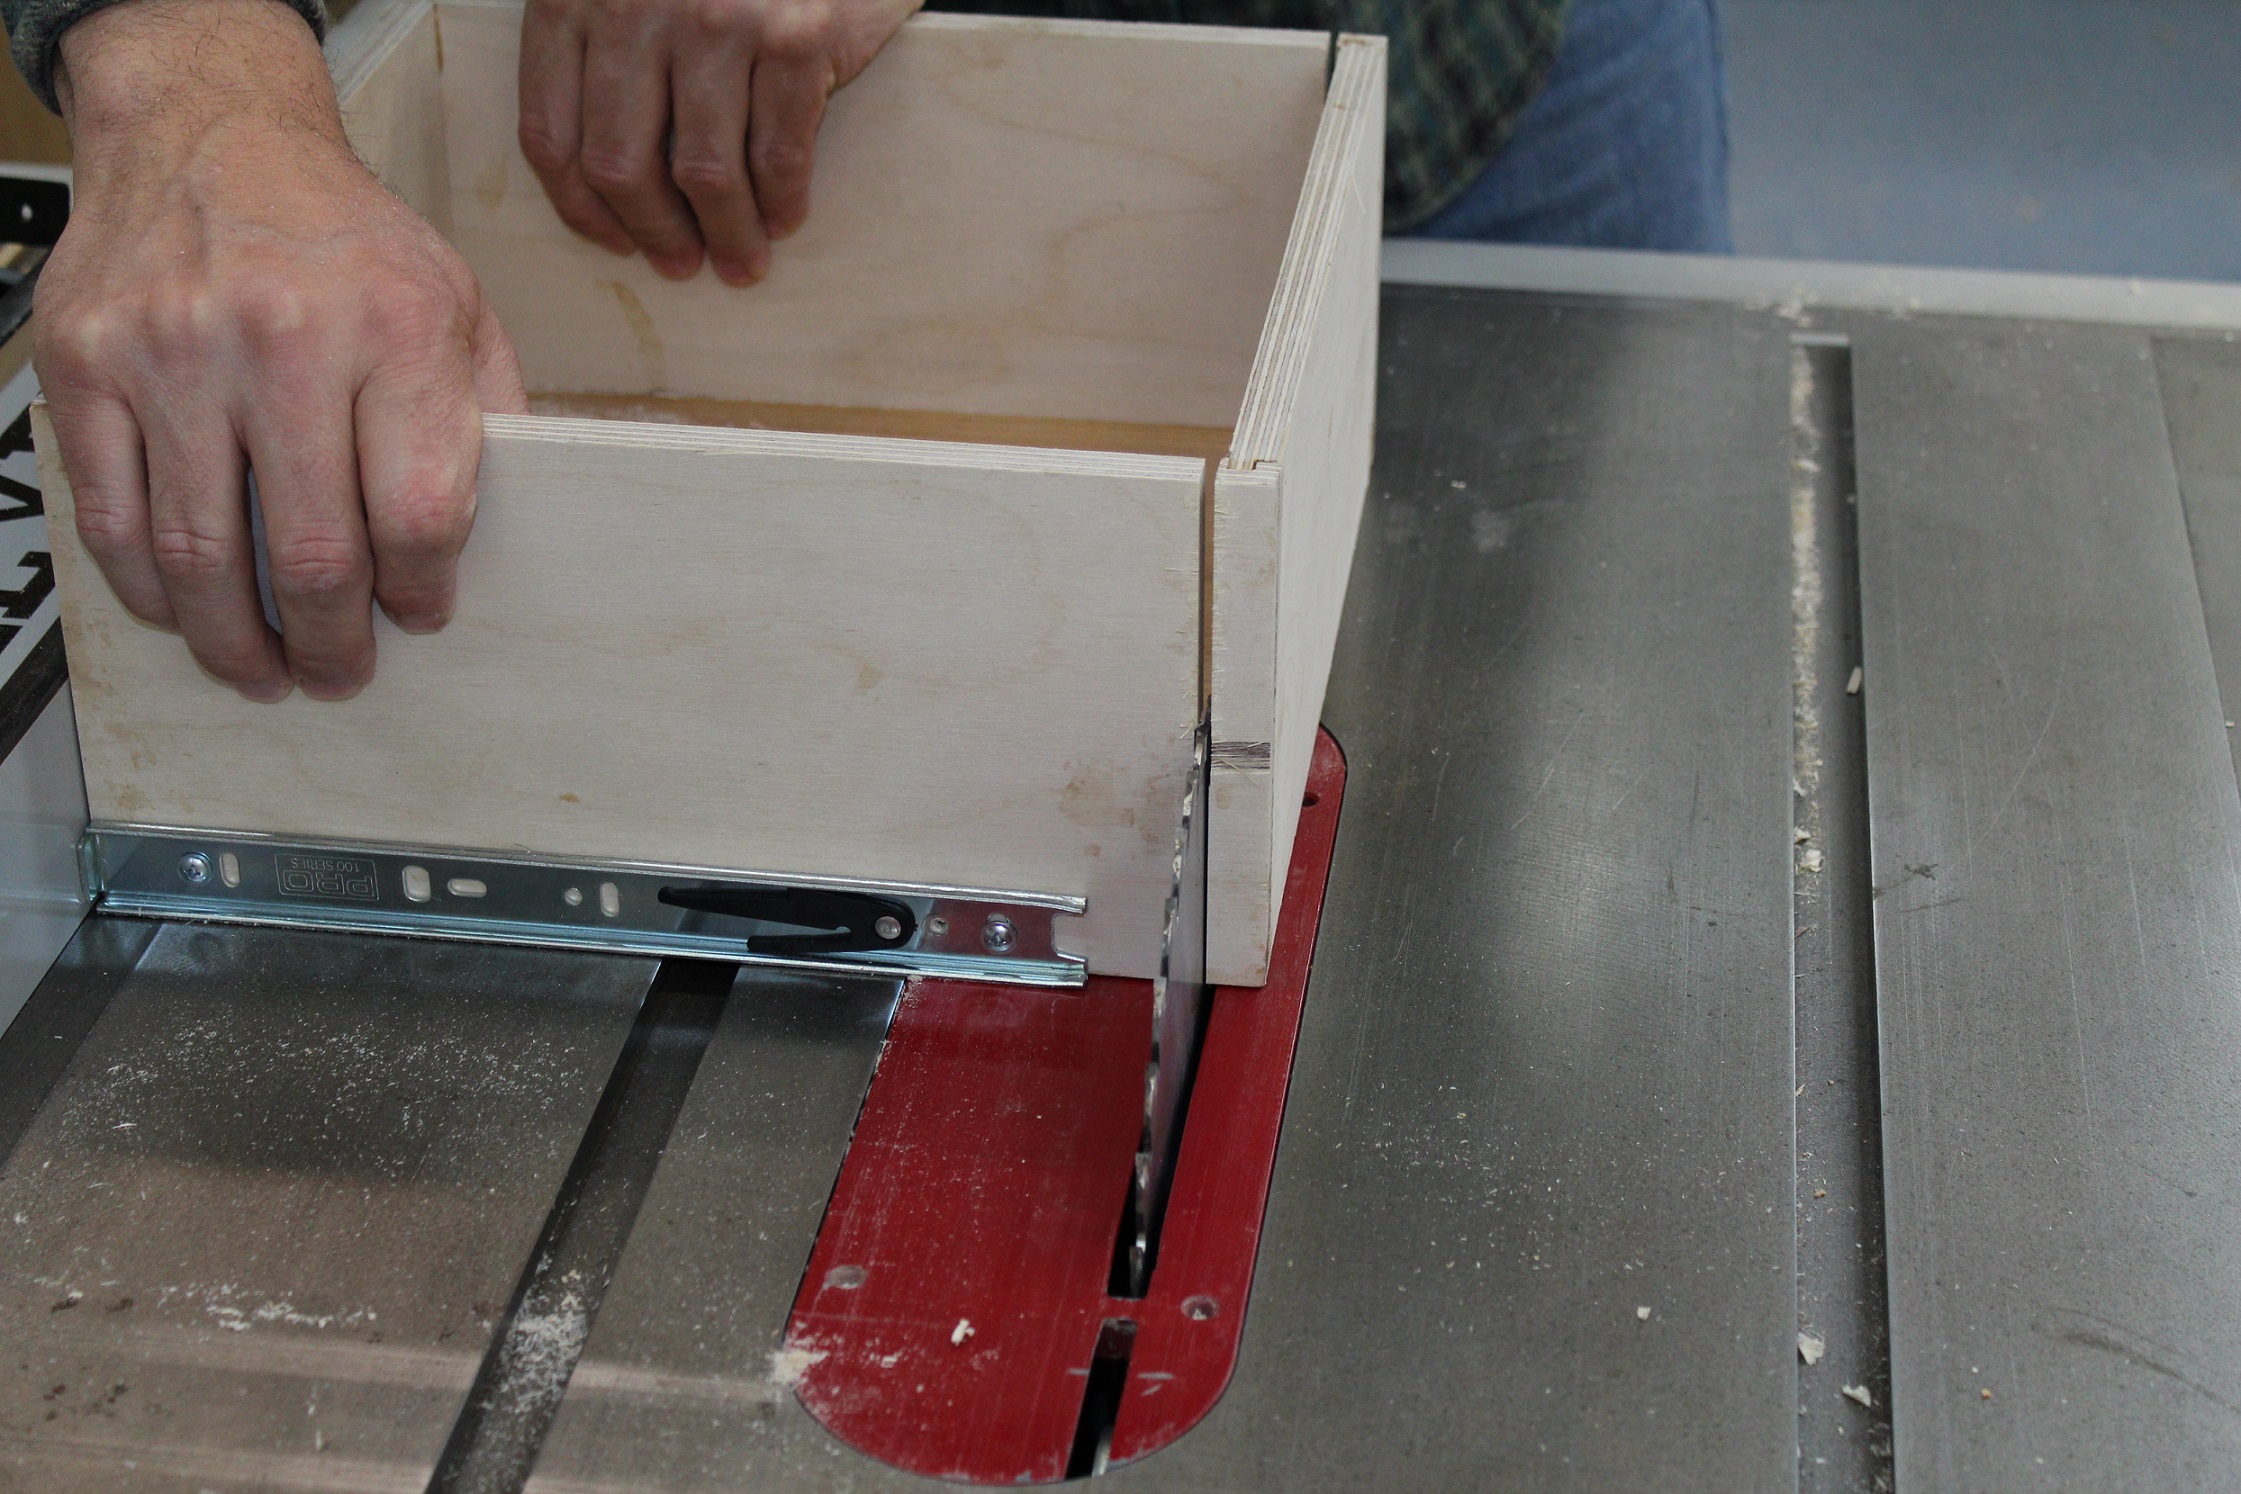 Second cut. Flip the board edge for edge and keep the same face against the fence, then make the second cut to separate the pieces. Be aware that you will have two pieces to push past the blade when the cut is completed. When you're done, plane or sand the pieces to their final thicknesses.
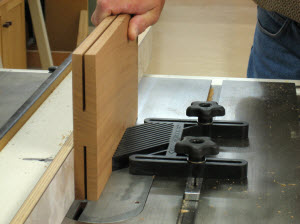 Wider boards. The setup is the same, but there remains an uncut section in the middle. I made these cuts raising the blade three times, in other words I passed the board across the blade six times.
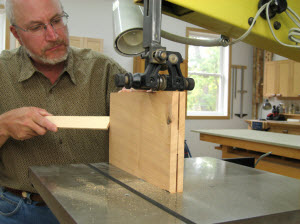 Use the bandsaw now. You don't need a resaw blade to make this final cut to separate the pieces. Whatever blade you have installed in your bandsaw should work fine. Be very careful at the end of the cut because there will be a lot of blade exposed as the wood exists. I use a scrap piece of wood as a push stick.
Photos By Author
Source:
Heavy-Duty Rip Blade #LM72R Freud www.freudtools.com
(800) 334-4107


Great article and advises. Even for an experienced woodworker those are a great reminders of safety, when using table and band saws.
On the table saw, the blade is unlikely to be in the exact center of the work piece. After the first cut, rotate the work piece 180° so that the same side is against the fence. If the slot in your table insert is too wide, the resawed piece could fall into the slot right next to the blade. Don't try to rescue it while the blade is spinning! You may want to make your own zero clearance insert with its slot just wide enough to clear the blade. Using the current, metal insert as a template, you can use a router with a template/flush trim bit to cut the zero clearance insert to perfect size. It will need to be thin enough to be level with the top of the table saw. Drill a 3/4" hole in it so that you can more easily pull it out with a finger. When making the last cut in the table saw in the situation where the 2 pieces will be totally separated, I turn off the saw for the last 1/8" amount of the cut and let the momentum of the motor and blade finish the cut. That way, the probability of kickback is reduced and I have better control of both pieces. The cut surfaces will not be perfect. They will need to be planer and sanded, so you will need to account for the additional loss of thickness of your finished work pieces. Be careful. The table, miter and band saws are the most dangerous tools in your wood shop.
Umm, the featherboard should be positioned before the leading edge of saw blade so that it is pushing the wood against the fence instead of against the blade. The way the photo shows the featherboard positioned will encourage the featherboard to push the kerf closed into the side of the blade, increasing the chance of pinching the blade and kickback. Not smart!
I've used the same method, and for pieces too wide for the bandsaw, I've got two methods. First, I put the piece in a vise and used a hand saw to follow the slot. I also got good results with a 12" blade on the Sawzall. Only recommended with a brand new (veru straight) blade, and moving slowly and carefully. Much easier and less tiring than hand sawing through a few feet of black walnut, though ;) Also, on the bandsaw I used two small spacers to stick in the kerf once I got the cut started, to keep from binding, then I can hold the board between my hands and "pull" it through the bandsaw, seems a bit safer than pushing against all that exposed blade.
Nice article, thanks. I'll try this out. However, I believe the image for "second cut" is not the right one. You might take a look and see if you have posted the wrong one.