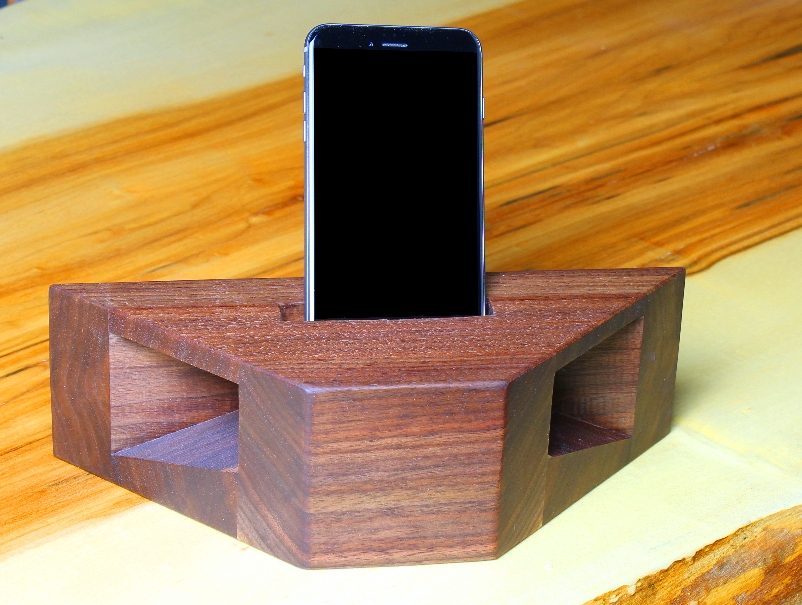
If you like to play music on your cell phone you’ll find lots to love about this wooden phone amplifier. It provides an attractive platform to cradle your phone while playing music, and it boosts the sounds level by 8-10 dB (decibels) while also distributing the sound around the room using a megaphone style sound enhancement.

As an added bonus, the project includes clever cable routing so that the amplifier can also be used as a charging station. I used black walnut to construct this one, but any hardwood would be fine on this project.
This design should work well for any cell phone that is narrower than 3.5” (including the case) and has a speaker located near the bottom of the phone. I’ve tested with four different models of iPhone and one Android, and the design worked well for all of these phones, producing a similar level of amplification. As you build one for your phone be sure to make any adjustments necessary based on the size of the charging cable connection on the phone end, so that it can be easily routed through the body of the amplifier for charging, as well as the size of the phone slot. I sized the phone slot to be wide enough to accommodate the largest phones on the market today, but in the ever-changing world of electronics it is always wise to measure your phone and size the slot accordingly.
Tools required:
First, cut the parts
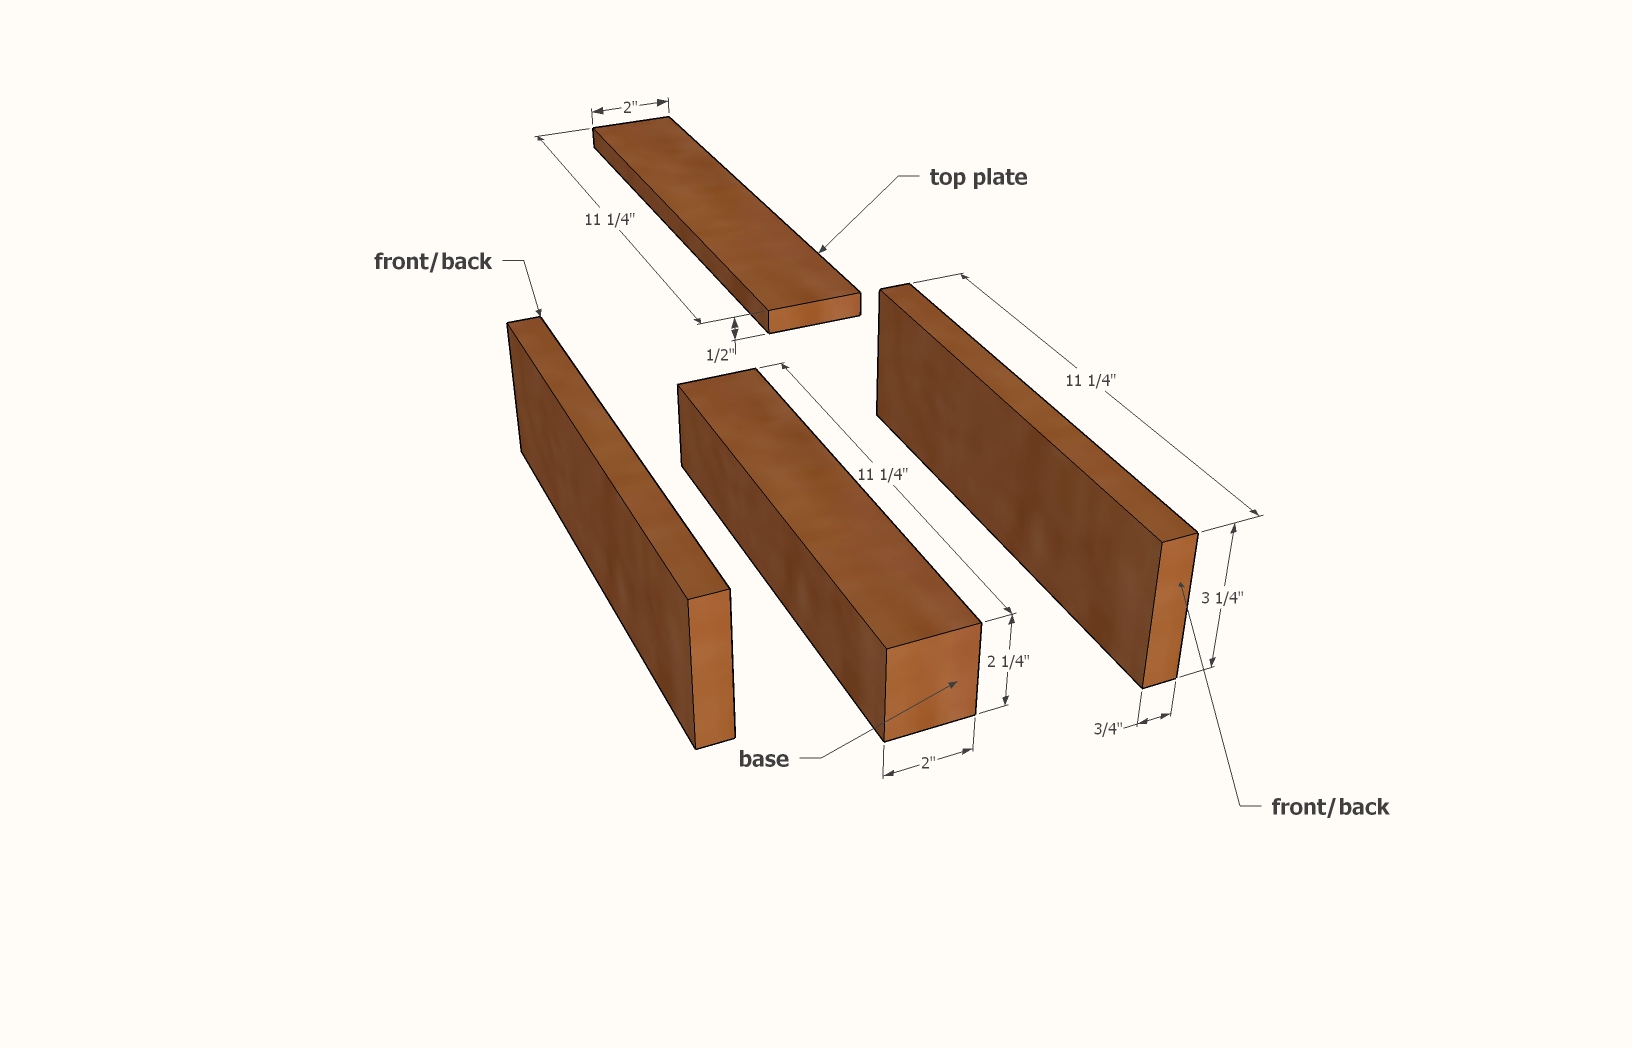
Using a table saw, cut the parts to size following the cut list.


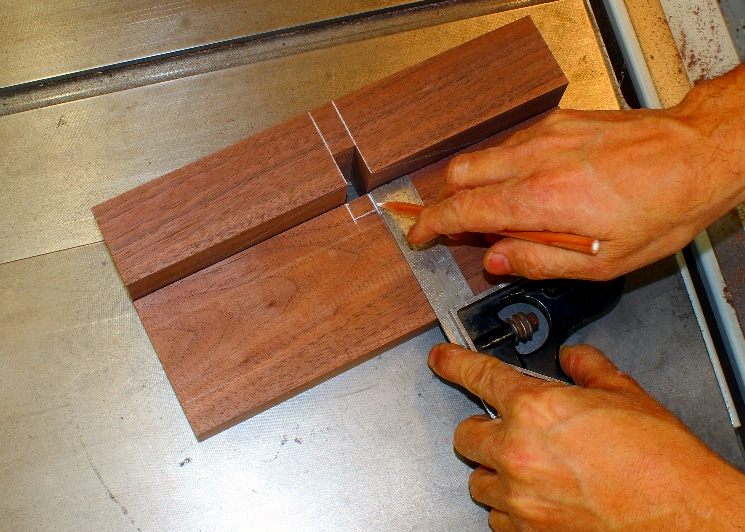
Prepare the Base
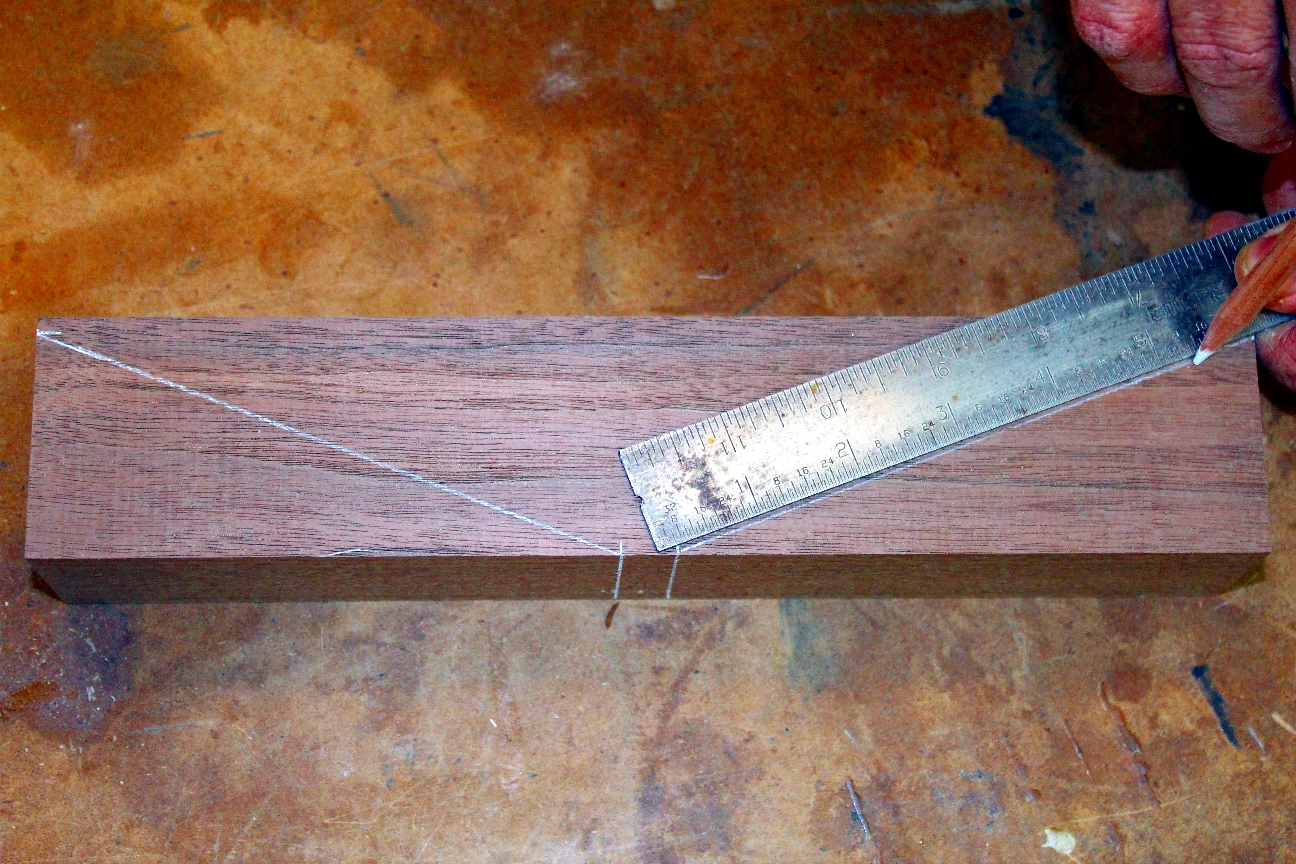
Draw two lines, ½” apart, centered across the top of the base. Then, on one face, draw a line from near each lower corner (1/8” above the base), angling up to an intersection with the lines that you drew in the previous step. This defines the shape of the base. The ½” crown will be the platform that will hold the phone steady, and the angles will form the cone on each side that amplifies the sound.
Cut the Channel for the Charging Cord
Set the blade height to 3/4” and make multiple passes to remove the material on one side of the base (not on the top). Use the two layout lines as your guides. Cleanup any sawblade marks with a chisel.
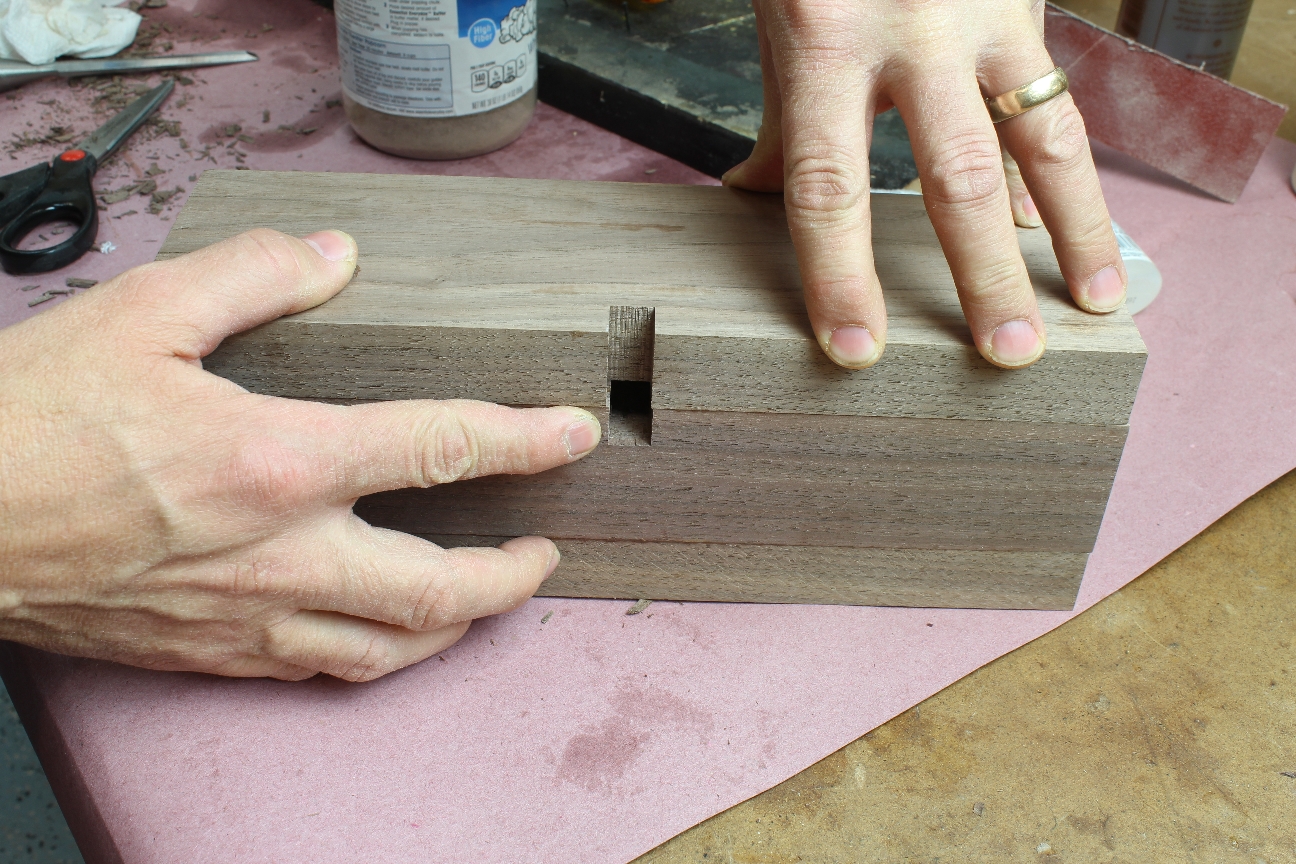
Transfer Notch Lines to Rear Panel
The power cord will be routed through the bottom of the rear panel, so you will cut a notch for this purpose using the same procedure as the previous cut. Transfer the lines from the notch on the base to the back panel. This notch is only ½” deep.
Cut Notch on Back Panel for Cord Clearance
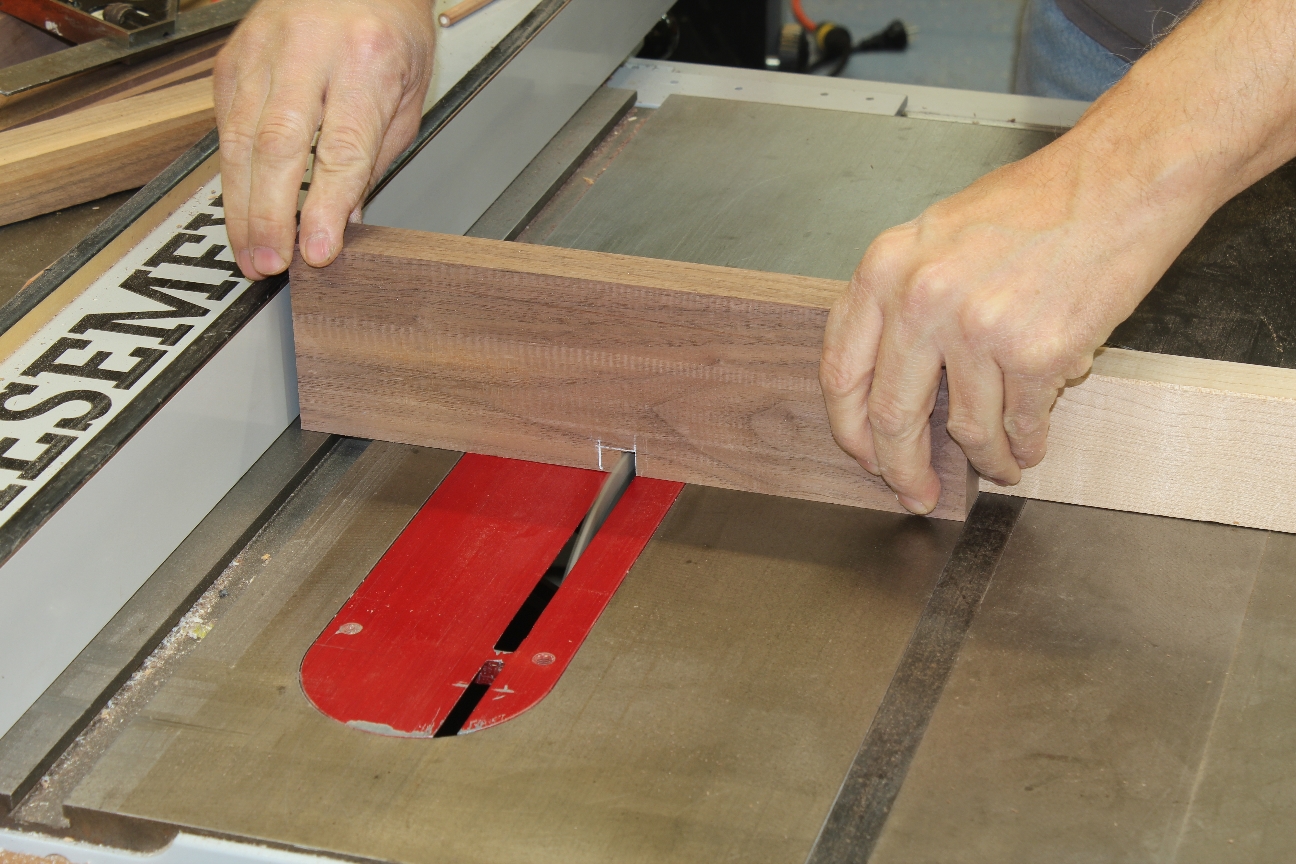
Set the blade height to 1/2” and remove material on the bottom of the back panel (do NOT do this on the front panel) to provide clearance for the cord to exit the amplifier.
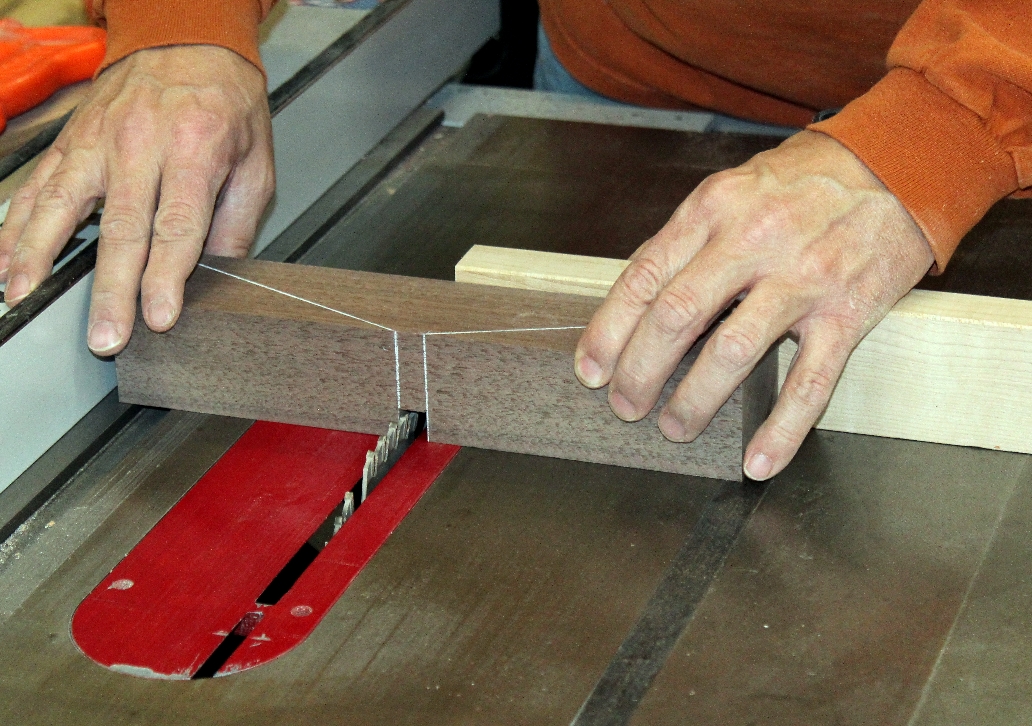
Make Angled Cuts on Base
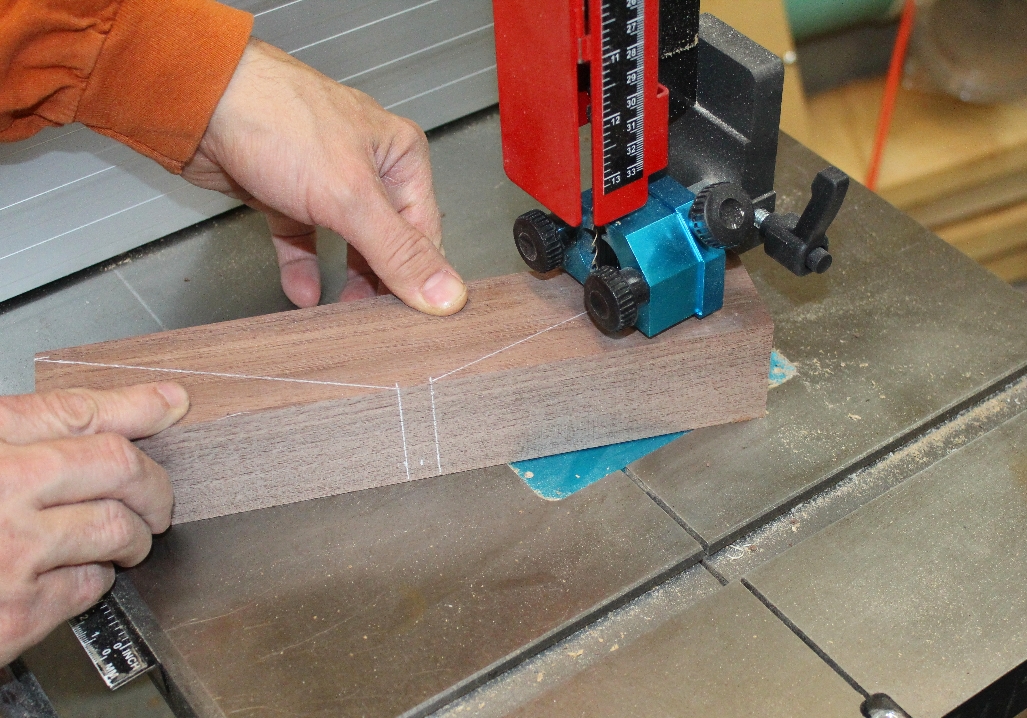
Using a bandsaw, make the angled cuts on the waste side of the angled lines, leaving the lines.
Sand to Lines
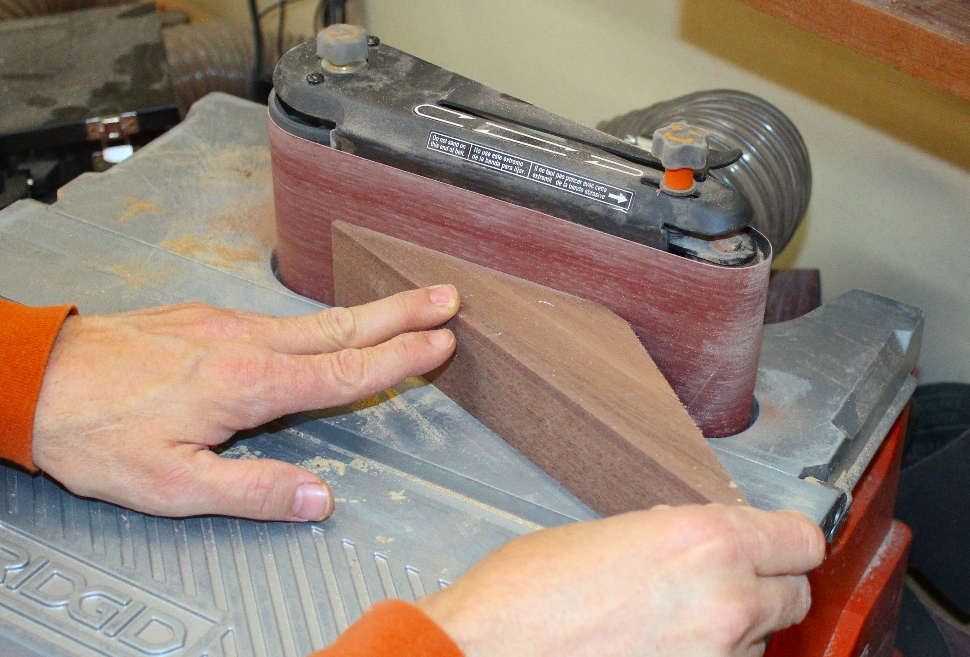
Using a belt sander or random orbital sander, remove the saw marks from the work piece, sanding to the lines.

Cut Slot for Phone in Top Panel

Using a scroll saw or hand-held jig saw cut a 5/8” x 3-1/2” opening in the top panel. The slot should be centered on one edge of the top panel. A width of 3-1/2” should accommodate most cell phones, but you can customize this width to fit the exact size of your cell phone (including the case if you use one).
Alignment for Assembly
Be sure that the back panel is positioned with the notch down, and that the notch on the back panel is aligned with the notch on the base. This will allow smooth travel of the charging cord through the base.
Glue-up
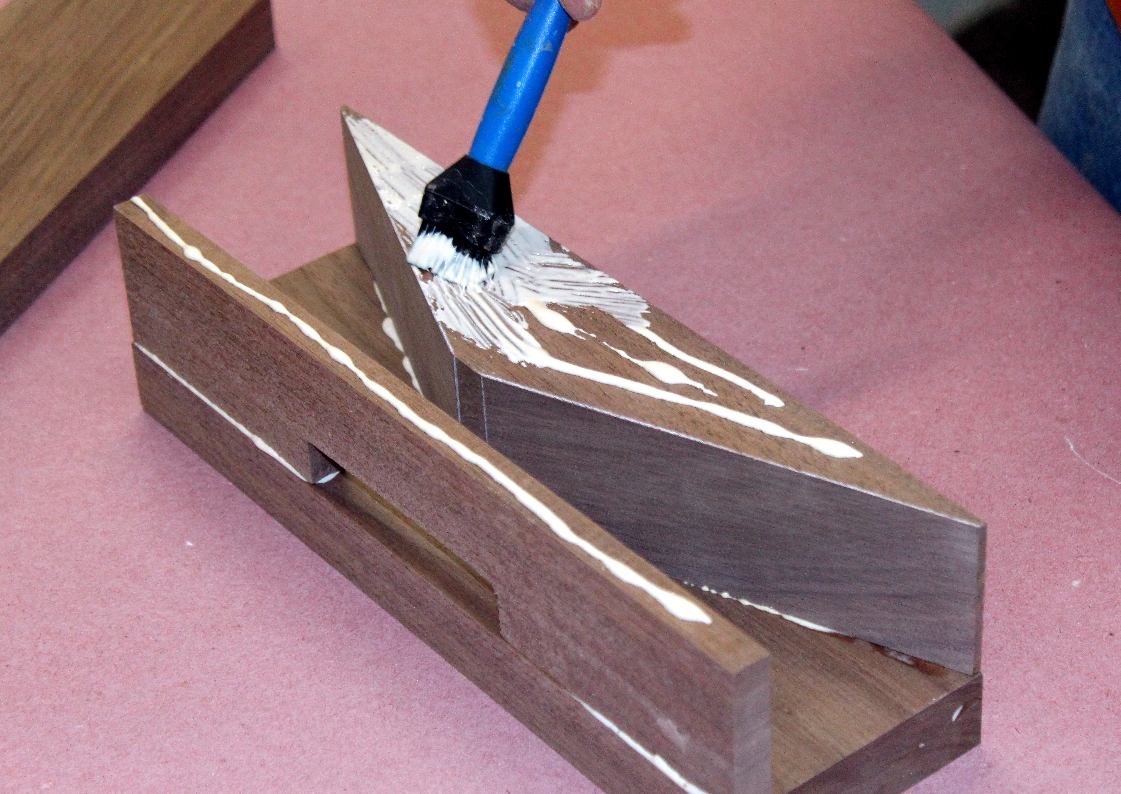
Apply woodworking glue to all joints. With butt joint joinery like this I like to let the glue set up for a few minutes before applying clamps. This allows the glue to start to grab a bit, and the assembly is less likely to slide under clamping pressure. Use a screwdriver and rag to remove glue from corners inside the assembly.
Cut Tapered Ends
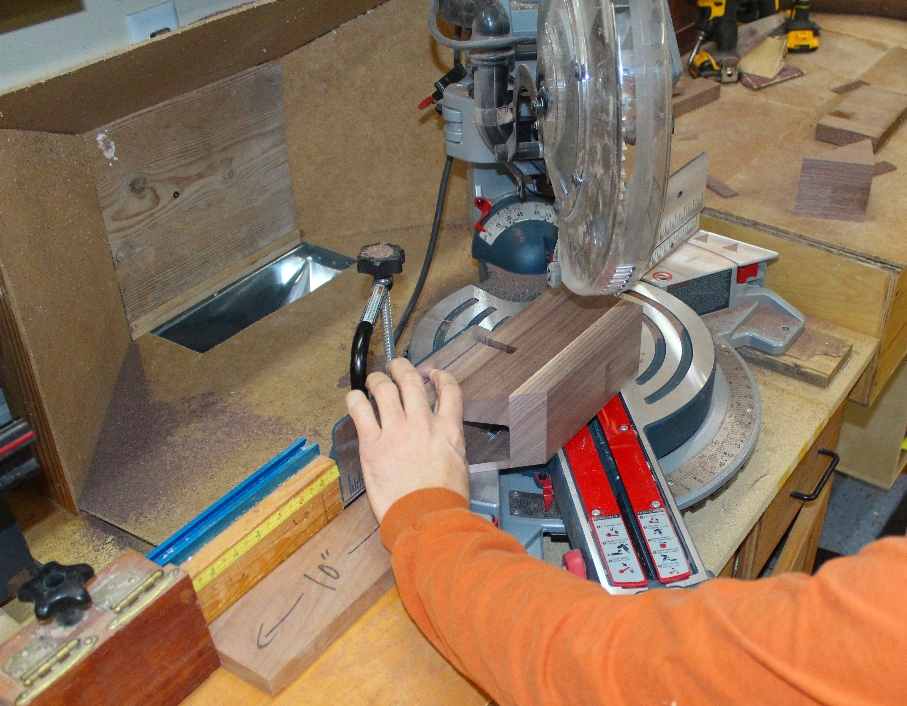
After the glue cures, scrape off excess glue. Then cut each end to a 45-degree angle, starting at the rear outside edge at each end and tapering toward the front of the device. Final length should be about 11”, long point to long point, with the cord and phone slots centered on the length. This cut can be made on a miter saw, table saw or bandsaw. If you do not have a power tool that has enough capacity to cut 3-1/4”, then you can easily make the cuts using a hand saw.
Sand Body

Sand thoroughly, gently rounding over the sharp corners. Do not round over the corners too much, however, as you’ll lose the angular geometry that defines this piece’s appearance. Also, hand sand around the perimeter of the cell phone slot so that it is not sharp.
Finish
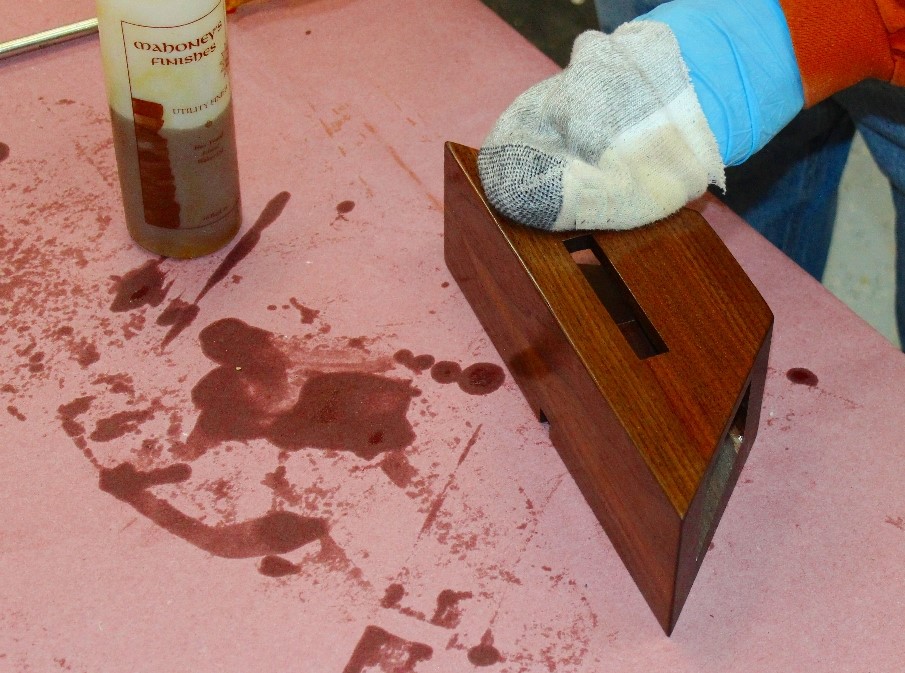
I applied a couple coats of walnut oil, but you can use whatever finish that you prefer.
Using as a Charging Station
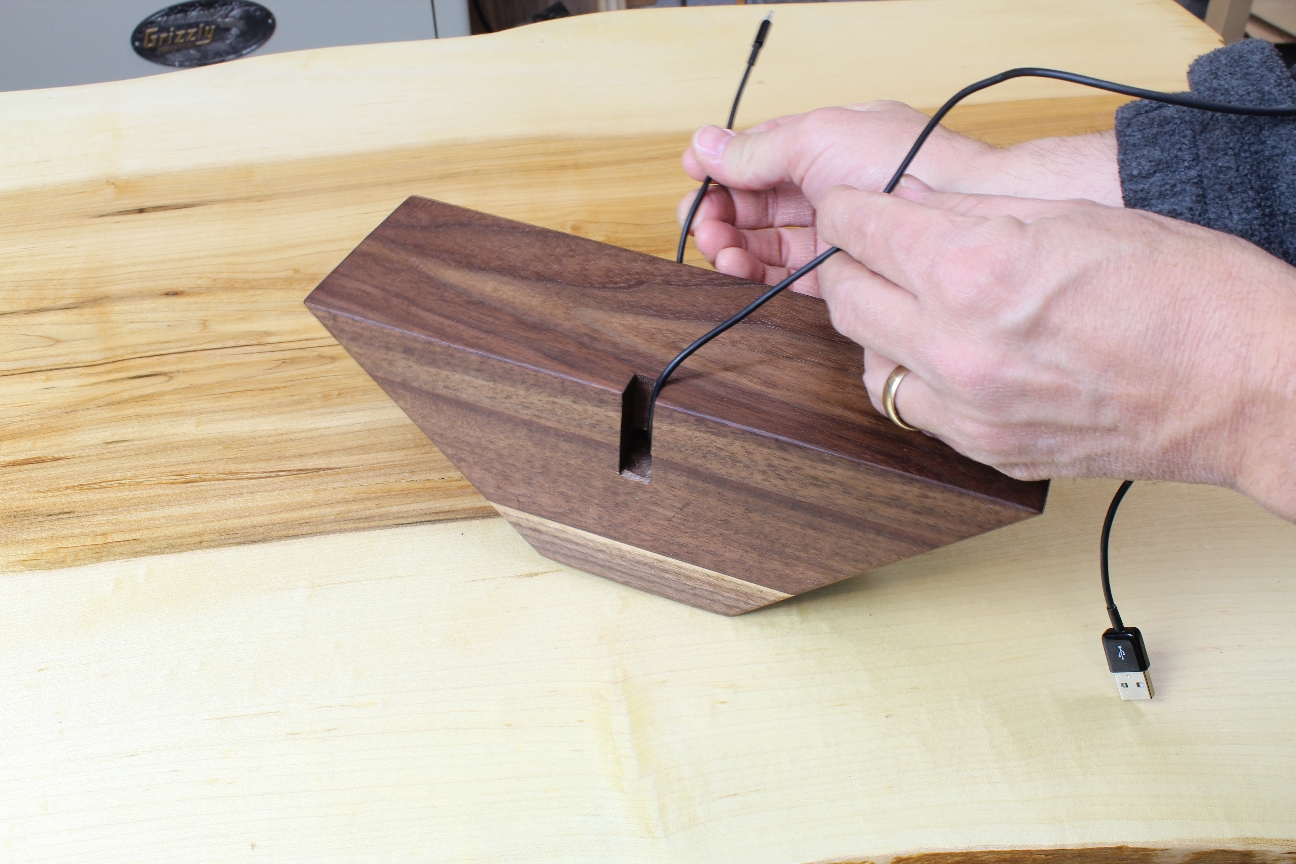
Route charging cable up through the bottom and up through the channel where it connects to the phone. The cord then runs out the slot through the back panel so that it can sit flat without interference from the cord.

I guess my mind is slipping away, because for the life of me I cant follow the assembly direction ( or lack there of) . Am I the only guy that is having problems with this phone holder? As far ad I can tell the picture isnt what the directions are building.
Phone amp project caught my eye looks better than a kitchen bowl probably works better to. Not as much humming from vibrations
I am amateur in this, and I hope to get the proyect finish some day.
Paul, I have built 2 so far and all from scrap wood that I have laying around in the way. I mix the type of wood and they look great and the sound stays about the same. Thanks, Ted
I made 4 of these as Christmas presents for my granddaughters. They were a blast to make, and when the tong oil hit the wood, WOW did the grains pop! The sound from the amplifier was amazing. It's wasn't like a speaker, however, the sound was rich. One of the granddaughters plugged her phone in, set her alarm, and said she was blasted out of bed! The granddaughters love their gift. Mission accomplished! (FYI - I'm a woodworking amateur.) Christmas 2020
</strong> What type of wood and kind of paint would be required to make them white, but lots of wood grain still visible?
There is only one modification I'd make...make it an amplifier charger combo.
I love this idea. As a teacher, we have projects where some of the students have to listen to a video on a small tablet, but not all can hear it well. This would be great for that!!
Is the base cut from a 4x4
It truely looks like fun.