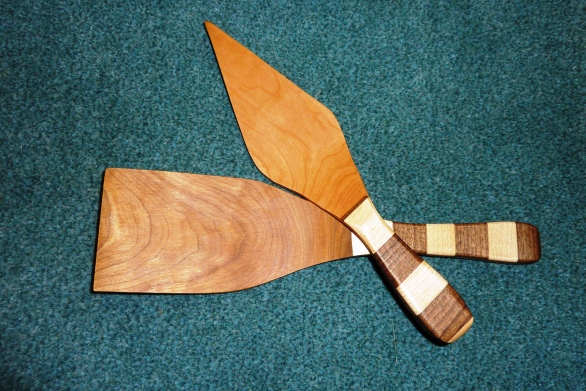
Serve your desserts with style! These artisan serving utensils are the perfect complement to those distinctive desserts and pies we tend to make for special occasions like family gatherings and holidays. We got started making these many years ago because my mother makes an apple pie that is worthy of a special serving utensil and these have proven to be a fair complement.There are several appealing attributes to these utensils. First, they are unique and pleasing to the eye. They offer more depth and refinement than your typical wooden utensils, which are commonly crafted from a single wood species, but they are much simpler to make than their delicate, sculpted form suggests. They have also been tested by numerous customers, and as the design has evolved to its current state, they have been proven to be real ‘working utensils’, rather than just for show. Those attributes make these an ideal gift for the baker or thoughtful party host in your life.

From a woodworking standpoint, this is a relatively simple project, requiring only a few basic woodworking tools. You will build a small panel of contrasting wood strips that are cut into pieces and attached to a solid blank of a hard stock, such as maple. A couple cuts on the band saw and you’re ready for some sanding and finishing. The design allows you to avoid having to buy thick stock, as the contrasting wood effect not only provides a nice contrast, but also serves to build up standard 4/4 stock to achieve a piece with better depth without added expense.
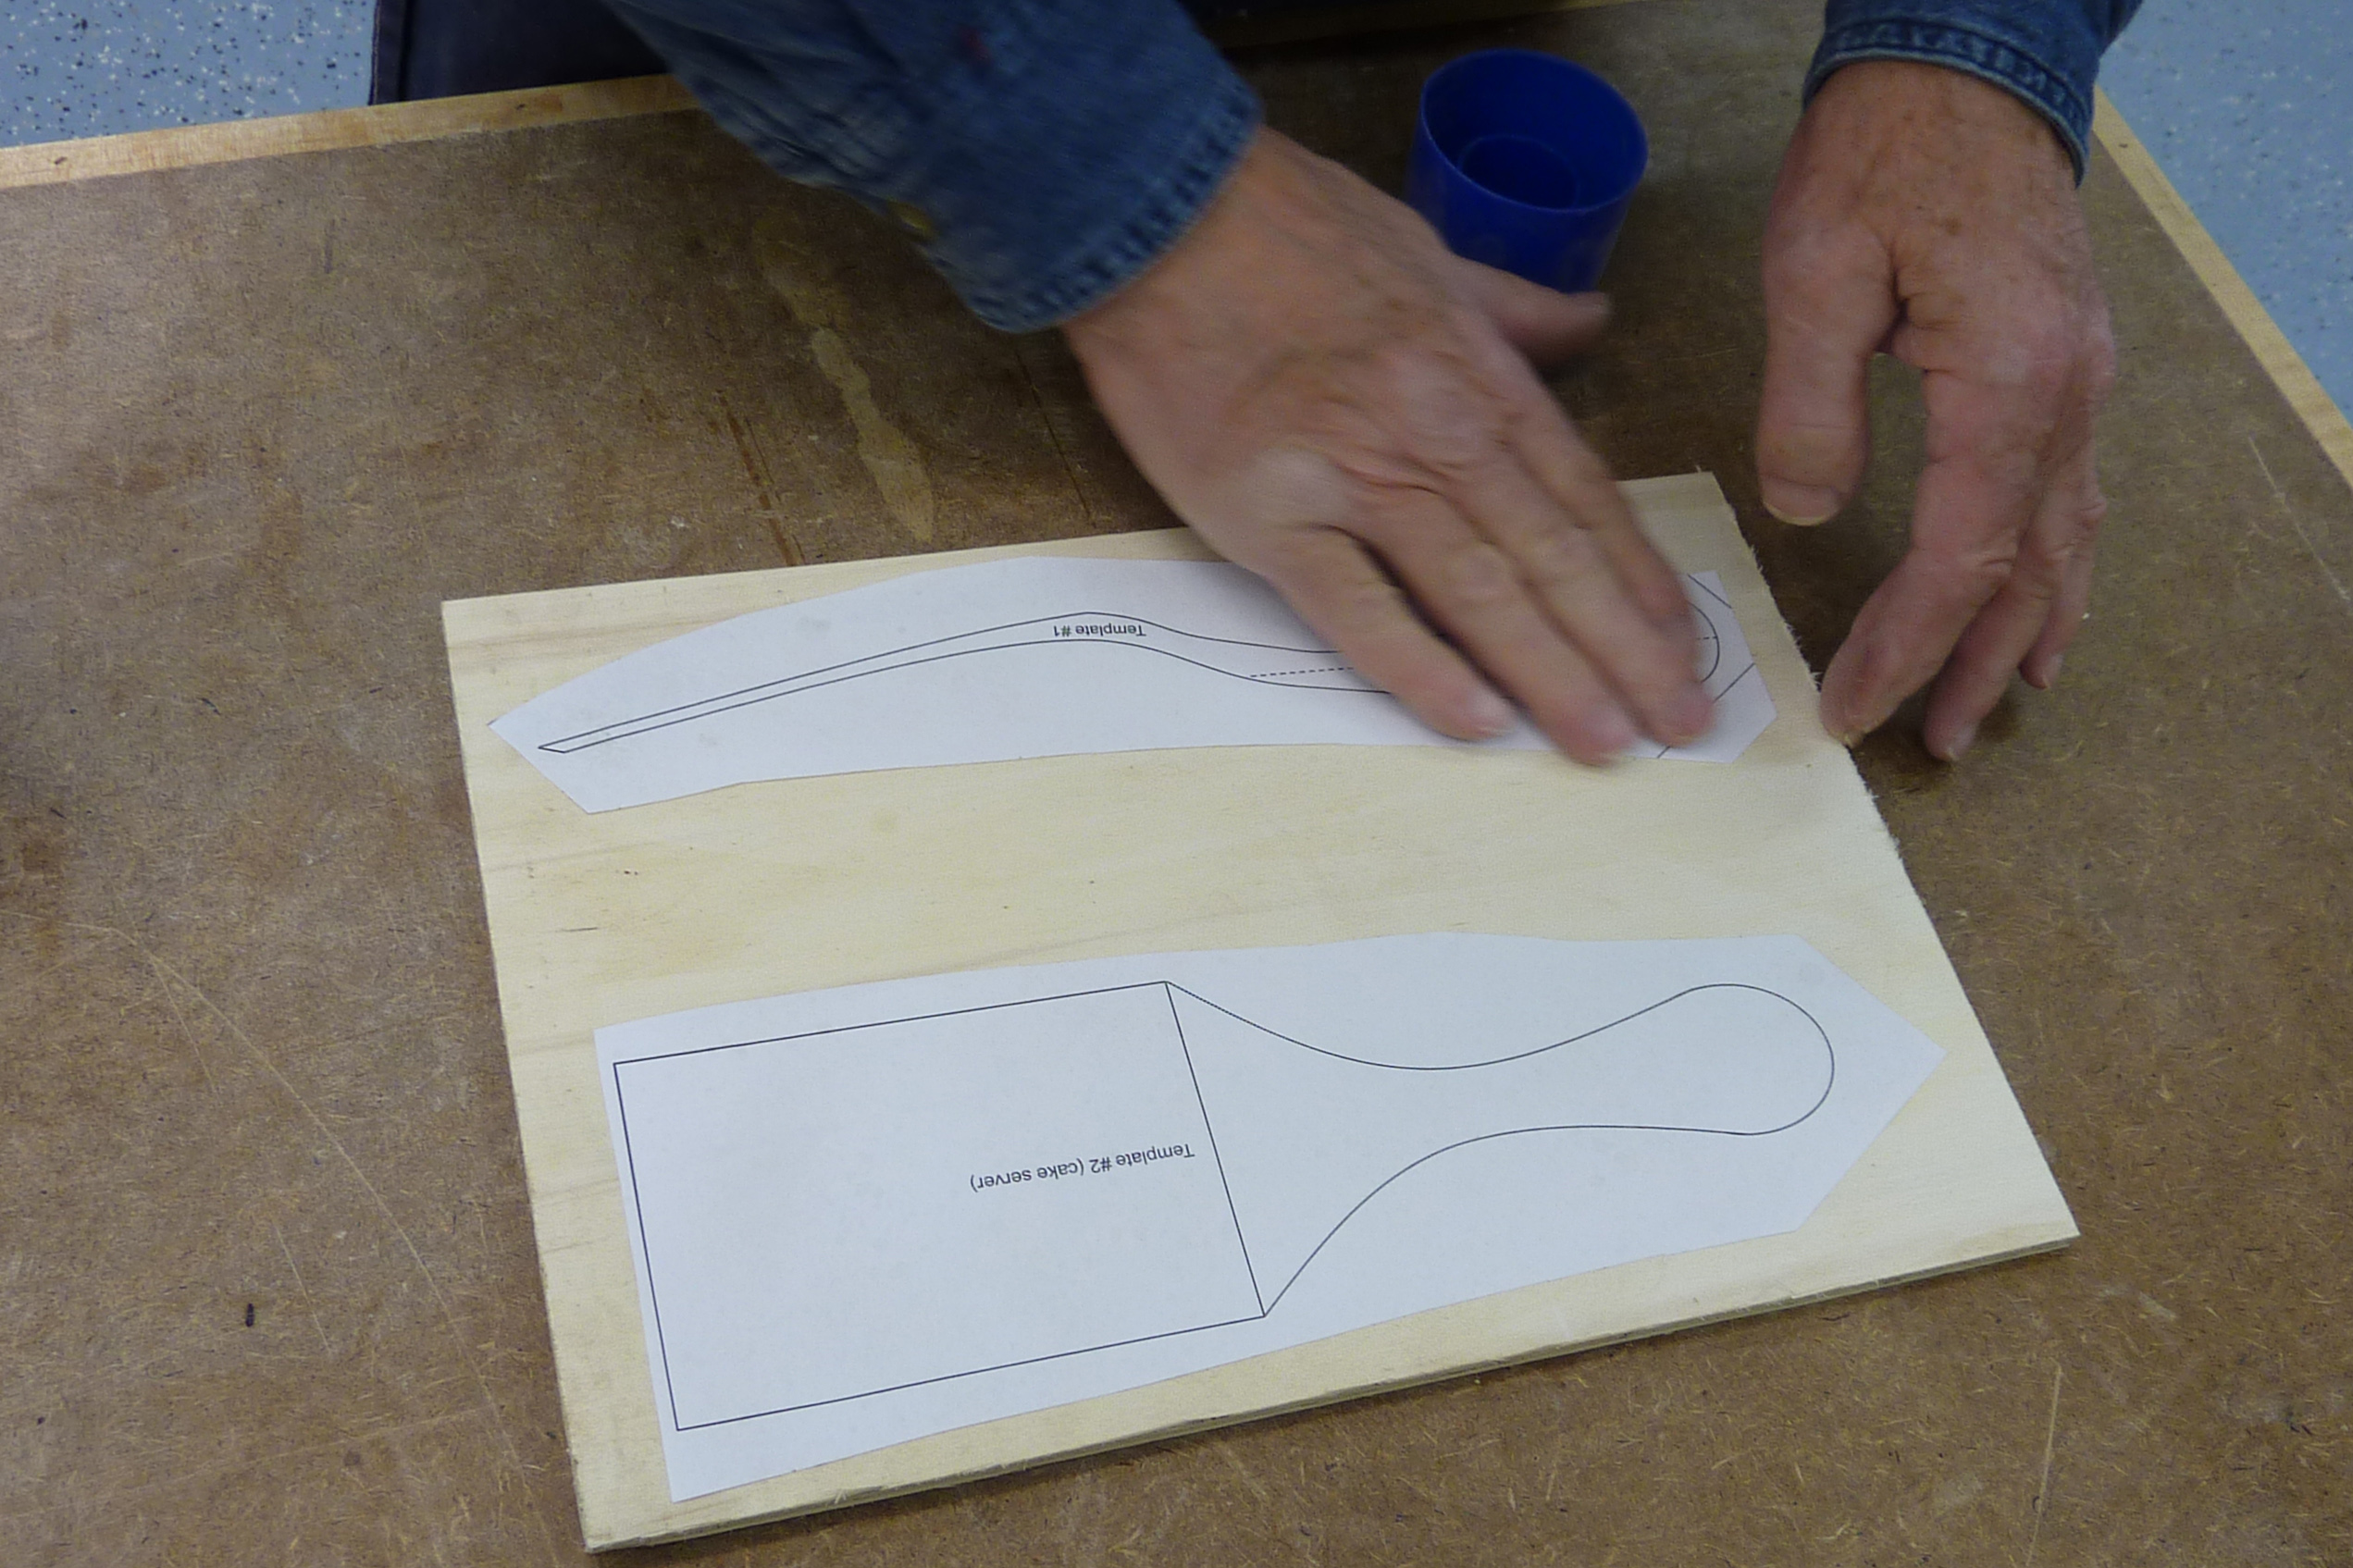
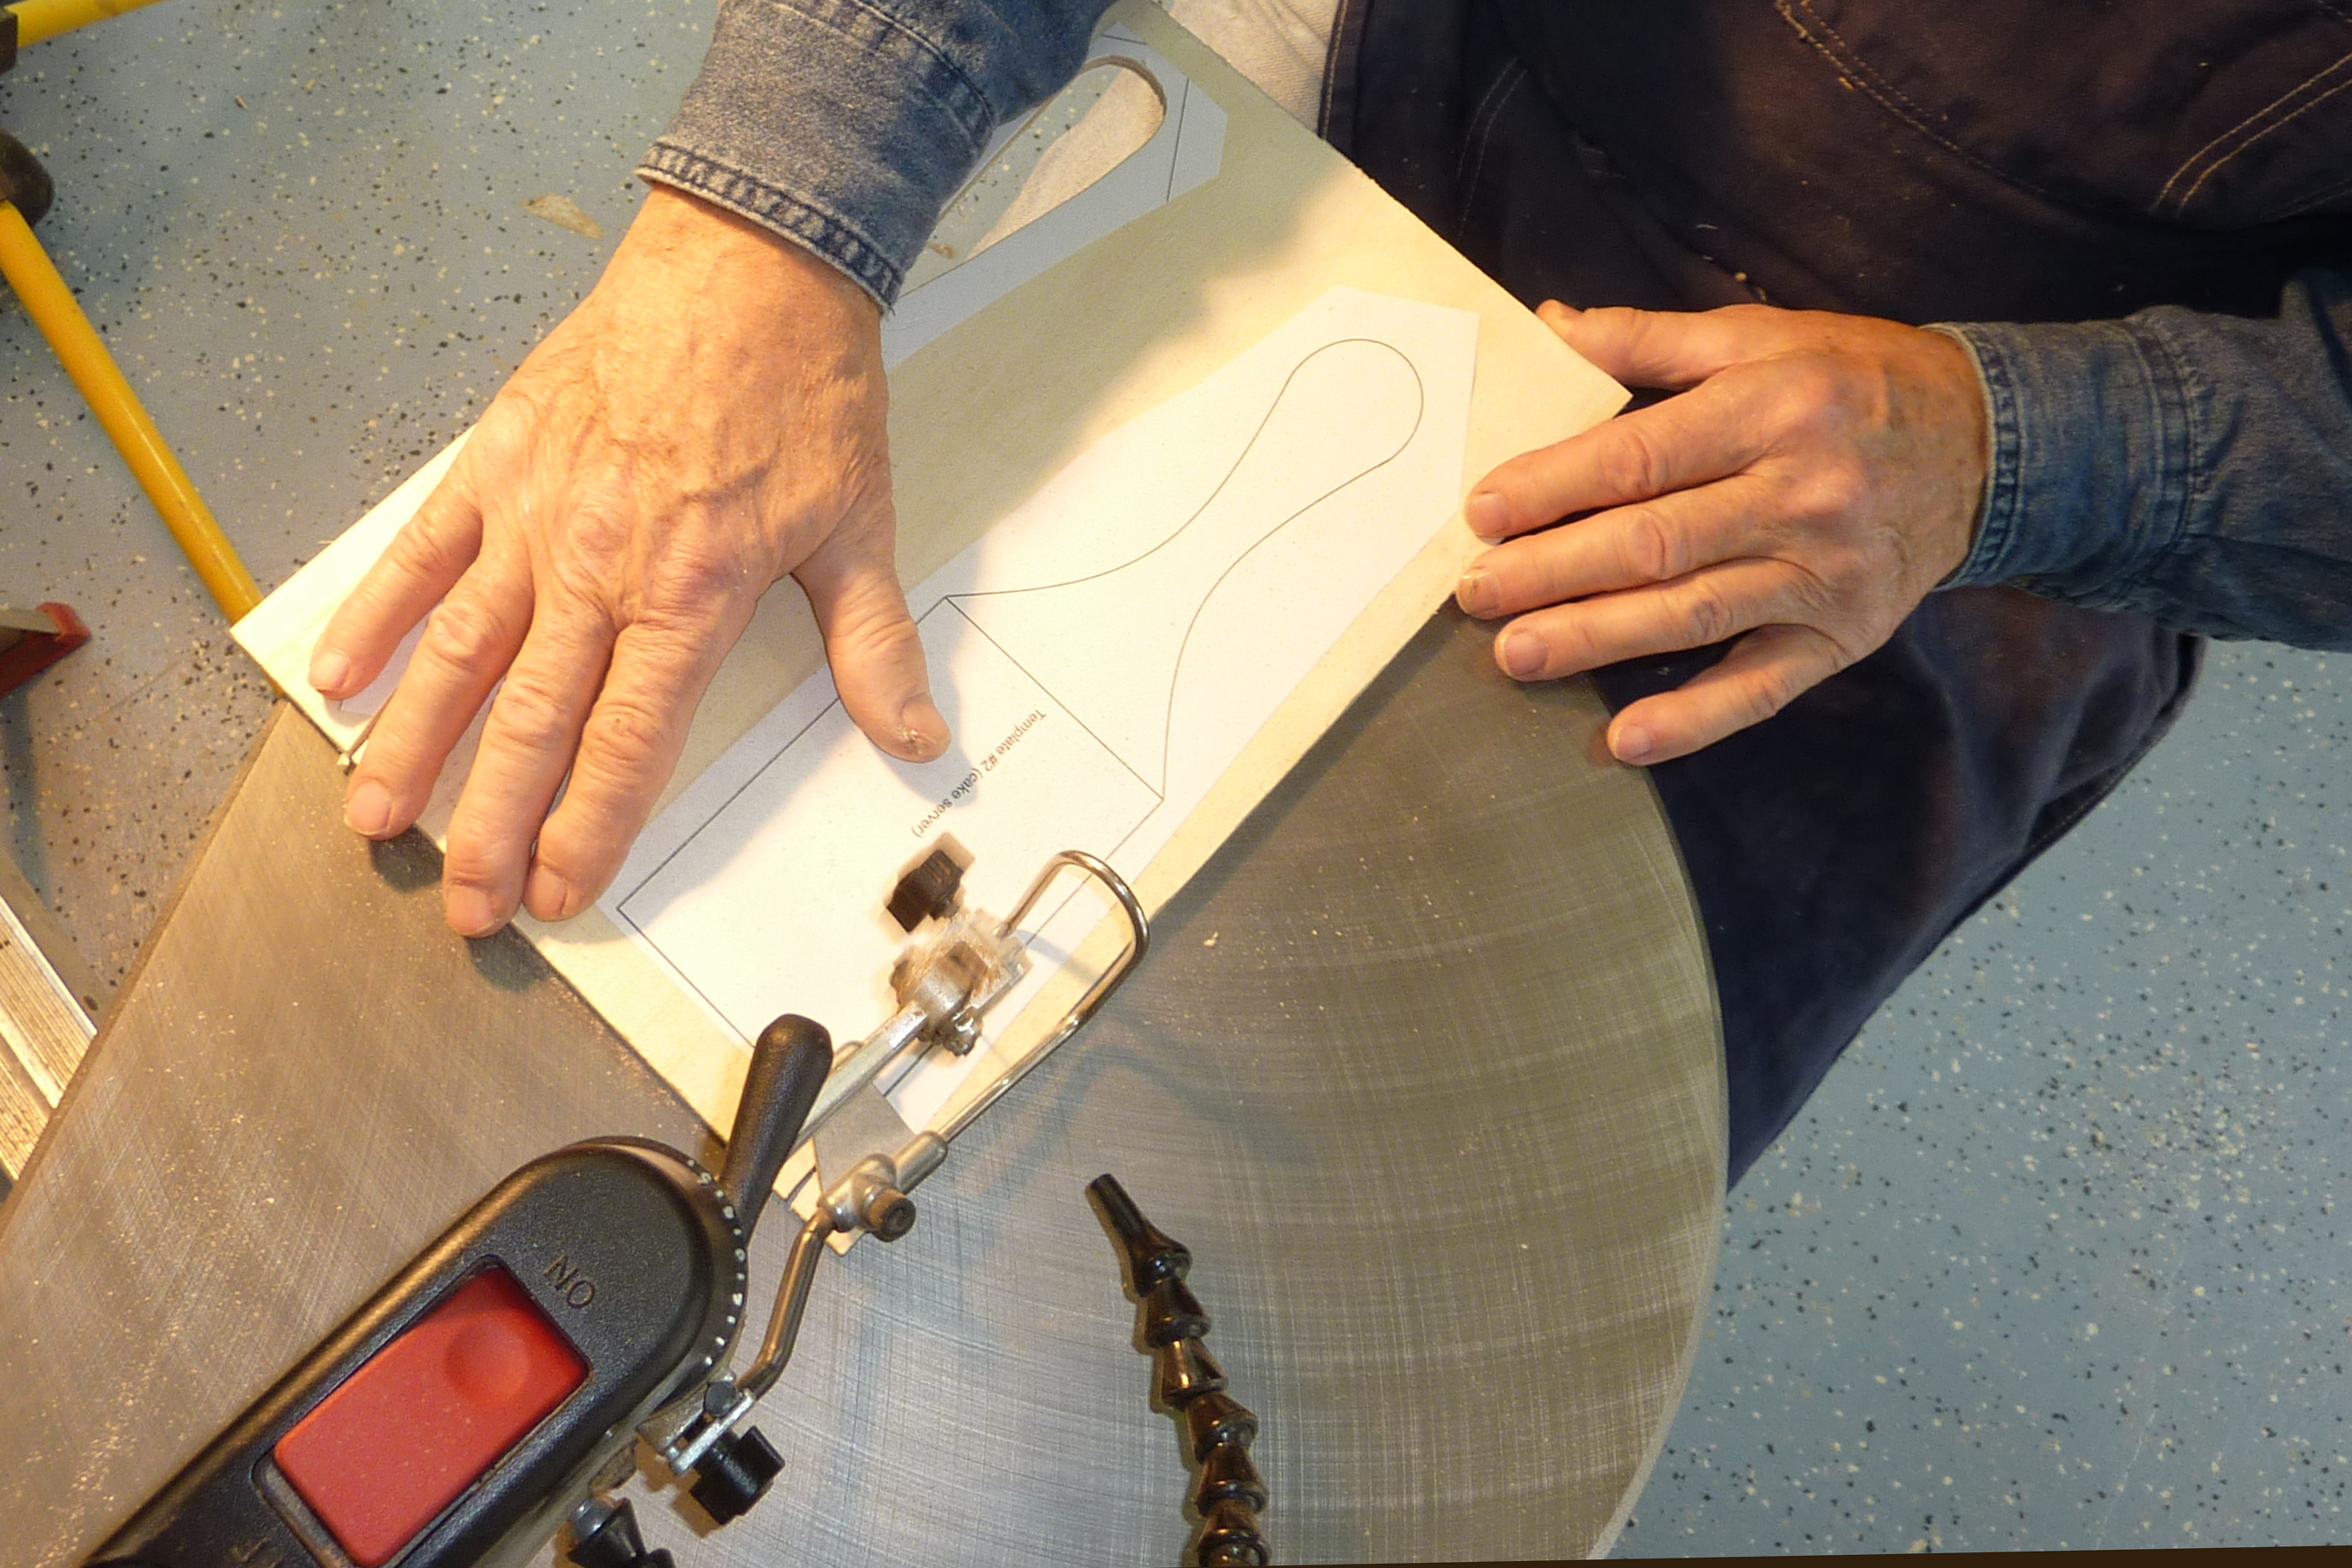
You will be roughing out your blanks on a band saw following a pattern for horizontal cuts through the stock, followed by vertical cuts. To ease this process and make it more consistent, you can make permanent templates that will be used to trace the cutout lines onto your stock. Three templates are provided. Template #1 will be used to make the first cuts (horizontal through the blank), template #2A will be used for the vertical cuts in a pie server, and template #2B will be used to complete the cake server.
Create permanent templates
Download and print the full-scale patterns that accompany this plan and apply them to 1/4″ plywood or tempered hardboard using adhesive spray. Let the spray dry for about a minute before placing on the template material, which will allow the paper pattern to be removed more easily.
Click here to download the templates for this project.
Complete your templates
Cut out the templates using either a band saw or scroll saw and sand the edges smooth.
Select your stock
You will need contrasting woods of two or three different species. The utensils pictured here feature red birch for the body of each utensil and the accent on each handle is made of hard maple and walnut. We use only hardwoods with closed pores for these and other food-contact products and tend to avoid woods such as oak and mahogany, due to their open pores that can trap food particles and collect bacteria. Since these require such a small amount of wood, we commonly build them with scrap from the kindling pile unless we are making a large run (like, for example, holiday gifts).
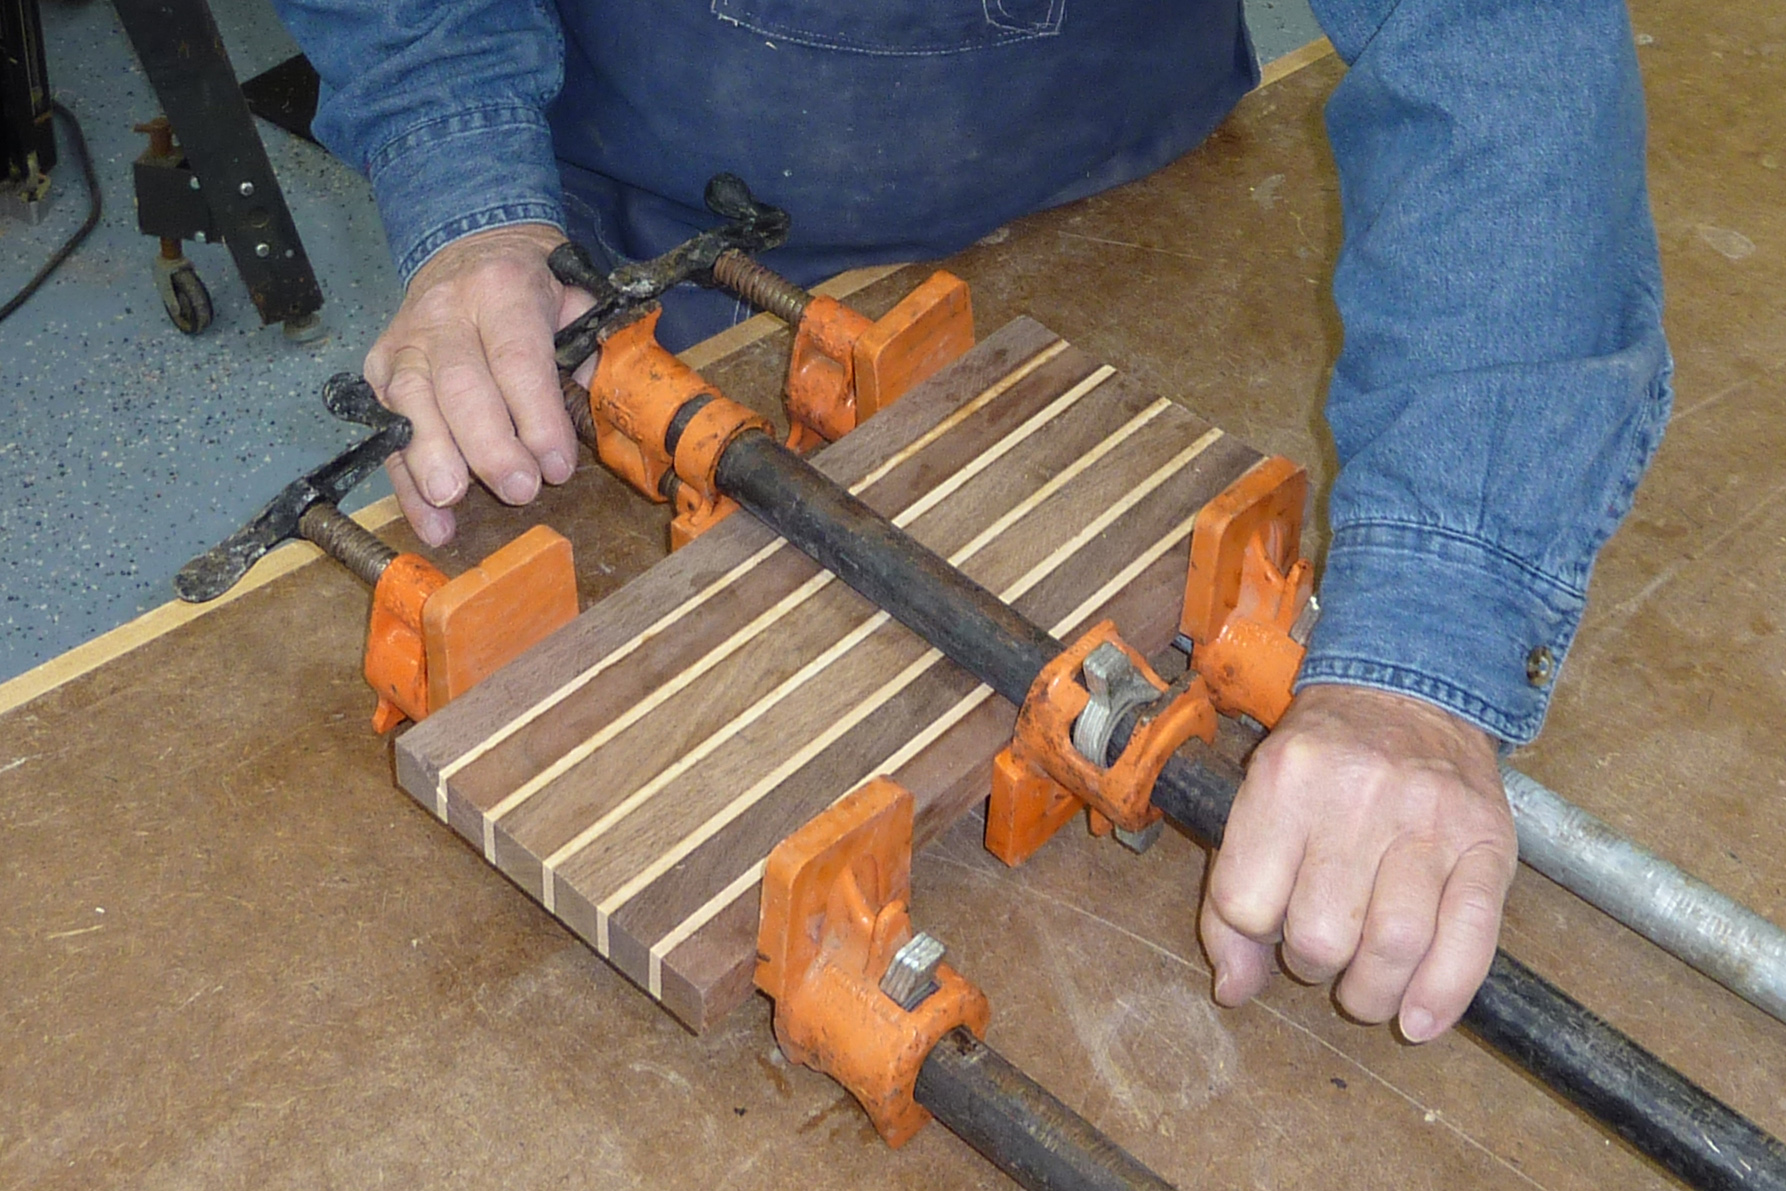
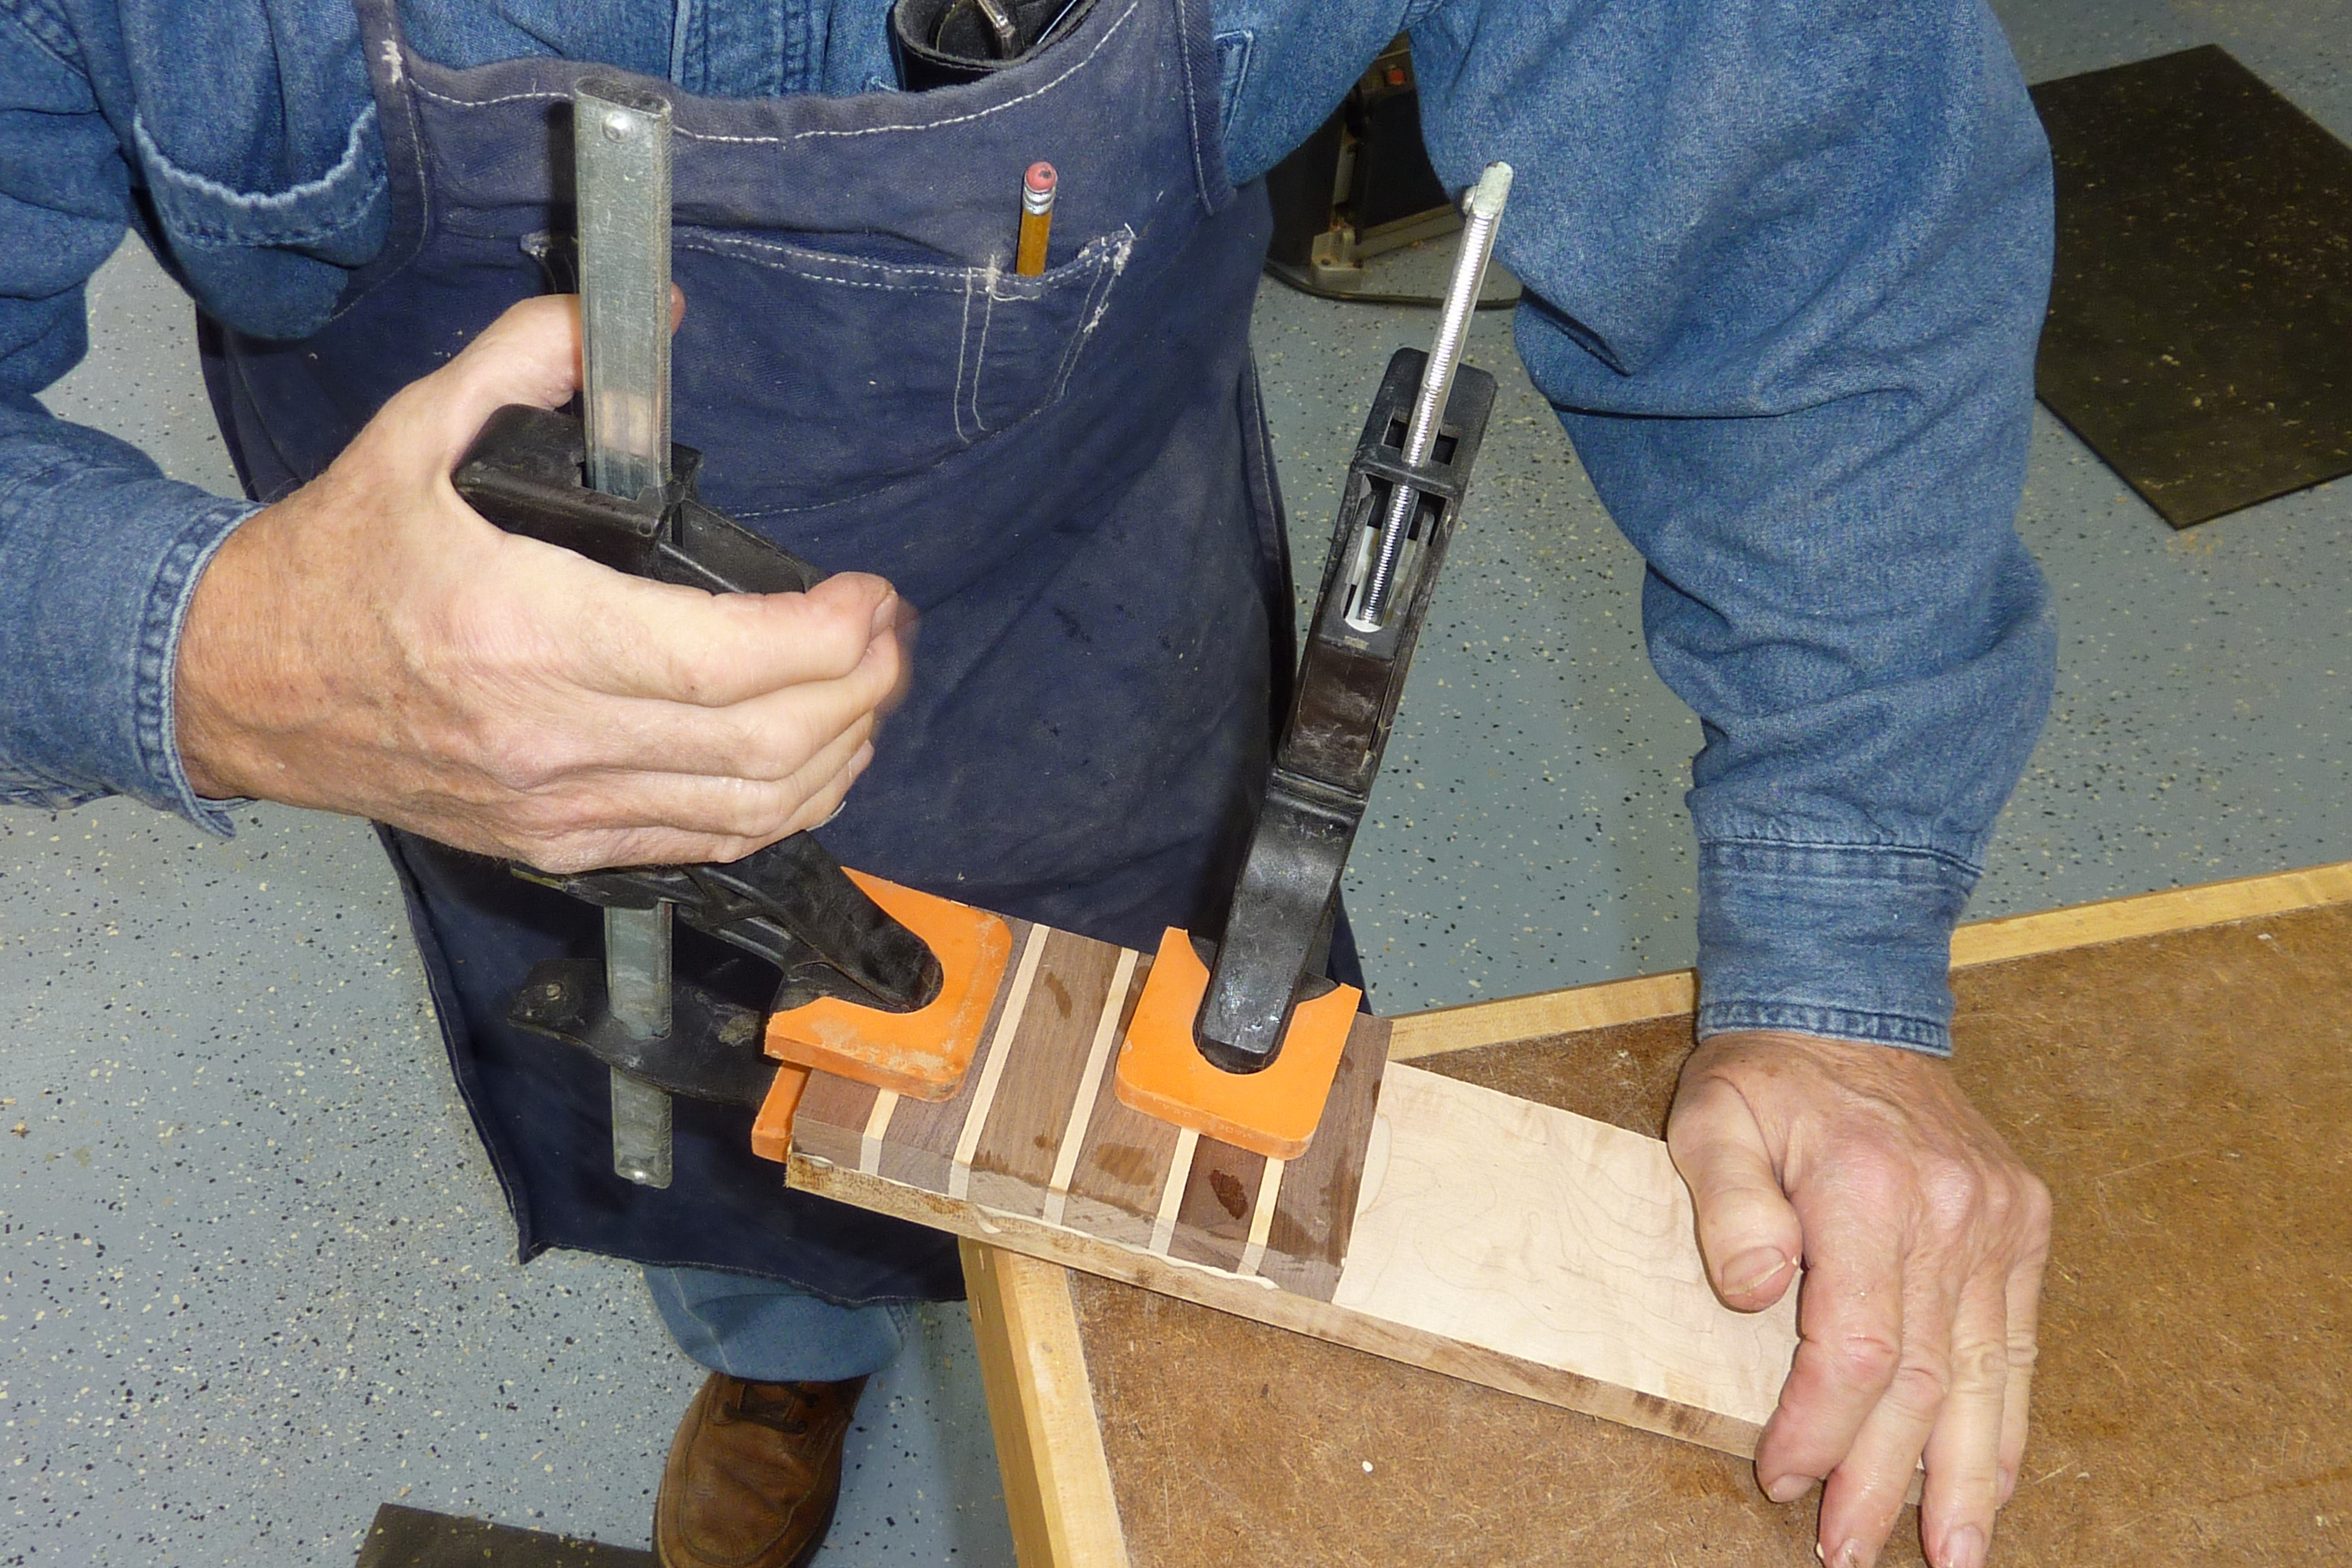
Glue up a small panel of contrasting strips
The panel will later be cut into smaller pieces to be used as the handle accents, so the panel should be large enough to accommodate the number of utensils you plan to build. Generally, we build this panel to be about 6″ x 15″, which will yield four handle accents. Given the relatively small size of the panel, with proper table saw technique and a good blade, you may be able to attain tight glue joints without using a jointer. Be sure to use a glue that is FDA approved for indirect food contact and offers heat and water resistance because the utensils will be washed after use. We use Titebond III, as it meets both of these requirements.
Prep your stock
While the glue is curing, prepare the blanks for the utensil bodies. This consists of cutting your chosen hardwood to a 3-1/2″ x 11-1/2″ size.
Plane one side of panel
After the glue dries on your panel, remove clamps and scrape off excess glue. Run the panel through a planer or flatten one side with a #5 or higher hand plane to achieve a good gluing surface. It is only necessary to plane one side for gluing purposes, as the other side will be removed by the band saw in an upcoming step.
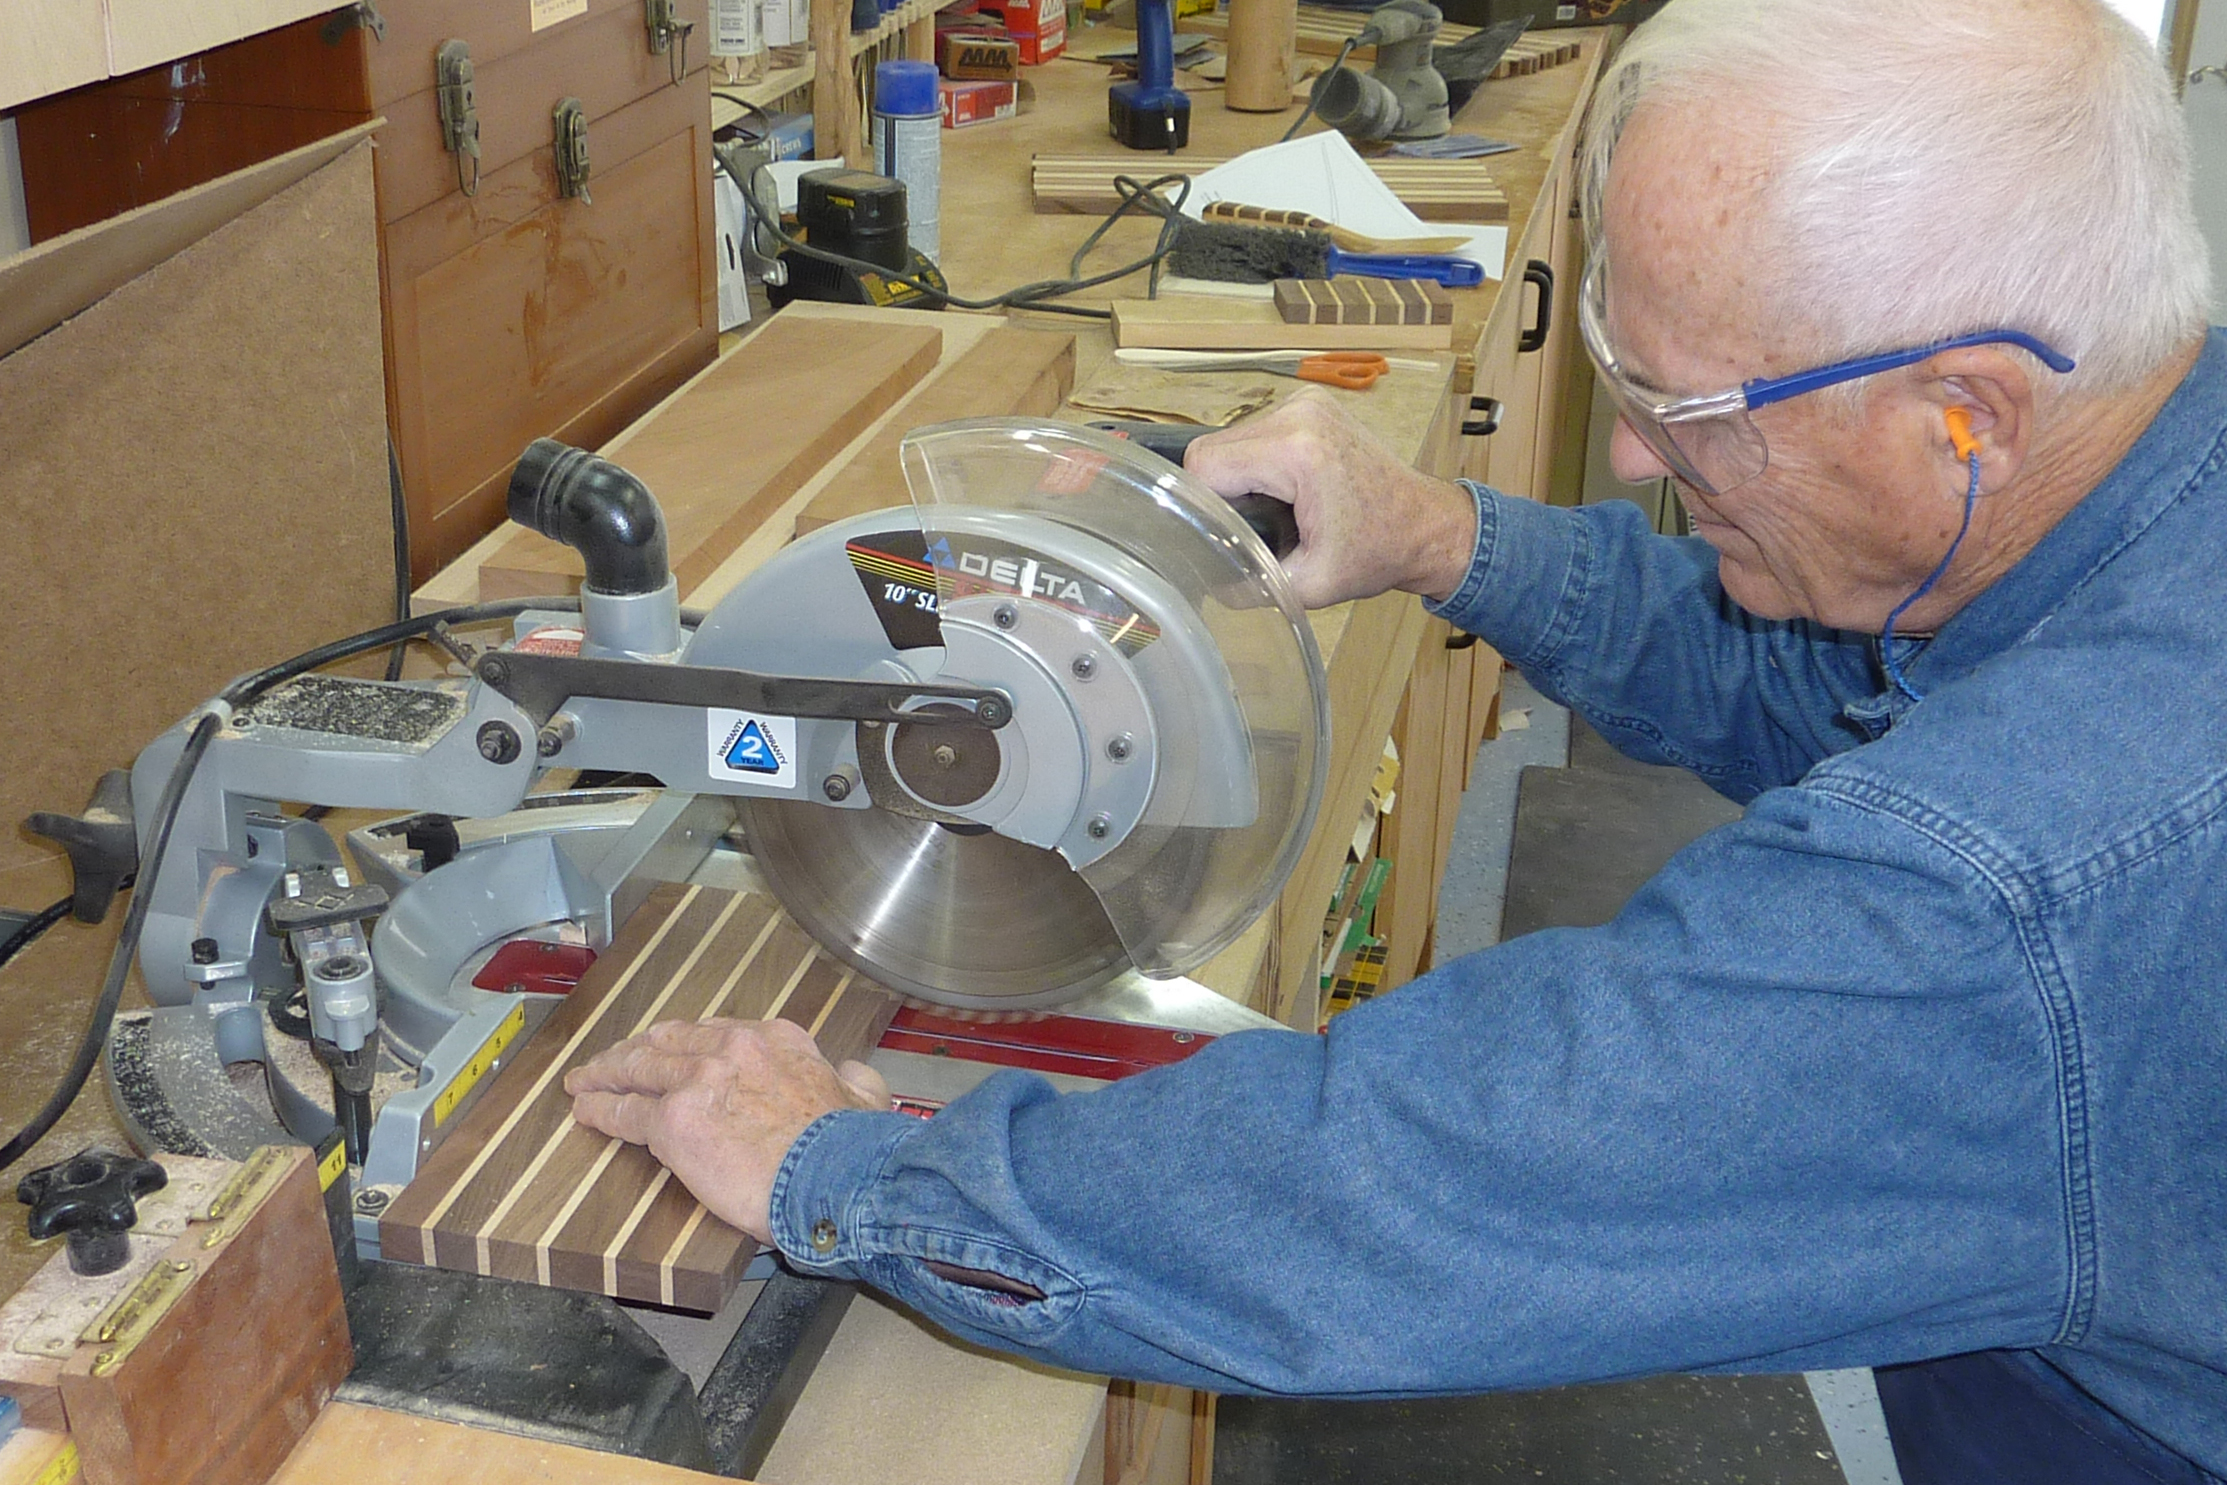
Cut the panel into 3-1/2″ x 6″ sections
This is wider than you might think necessary, as most of this is removed, but we leave a bit wider for added safety and stability when cutting on the band saw.
Attach accent strip
Glue a 3-1/2″ x 6″ section of the contrasting wood panel to a spatula blank.
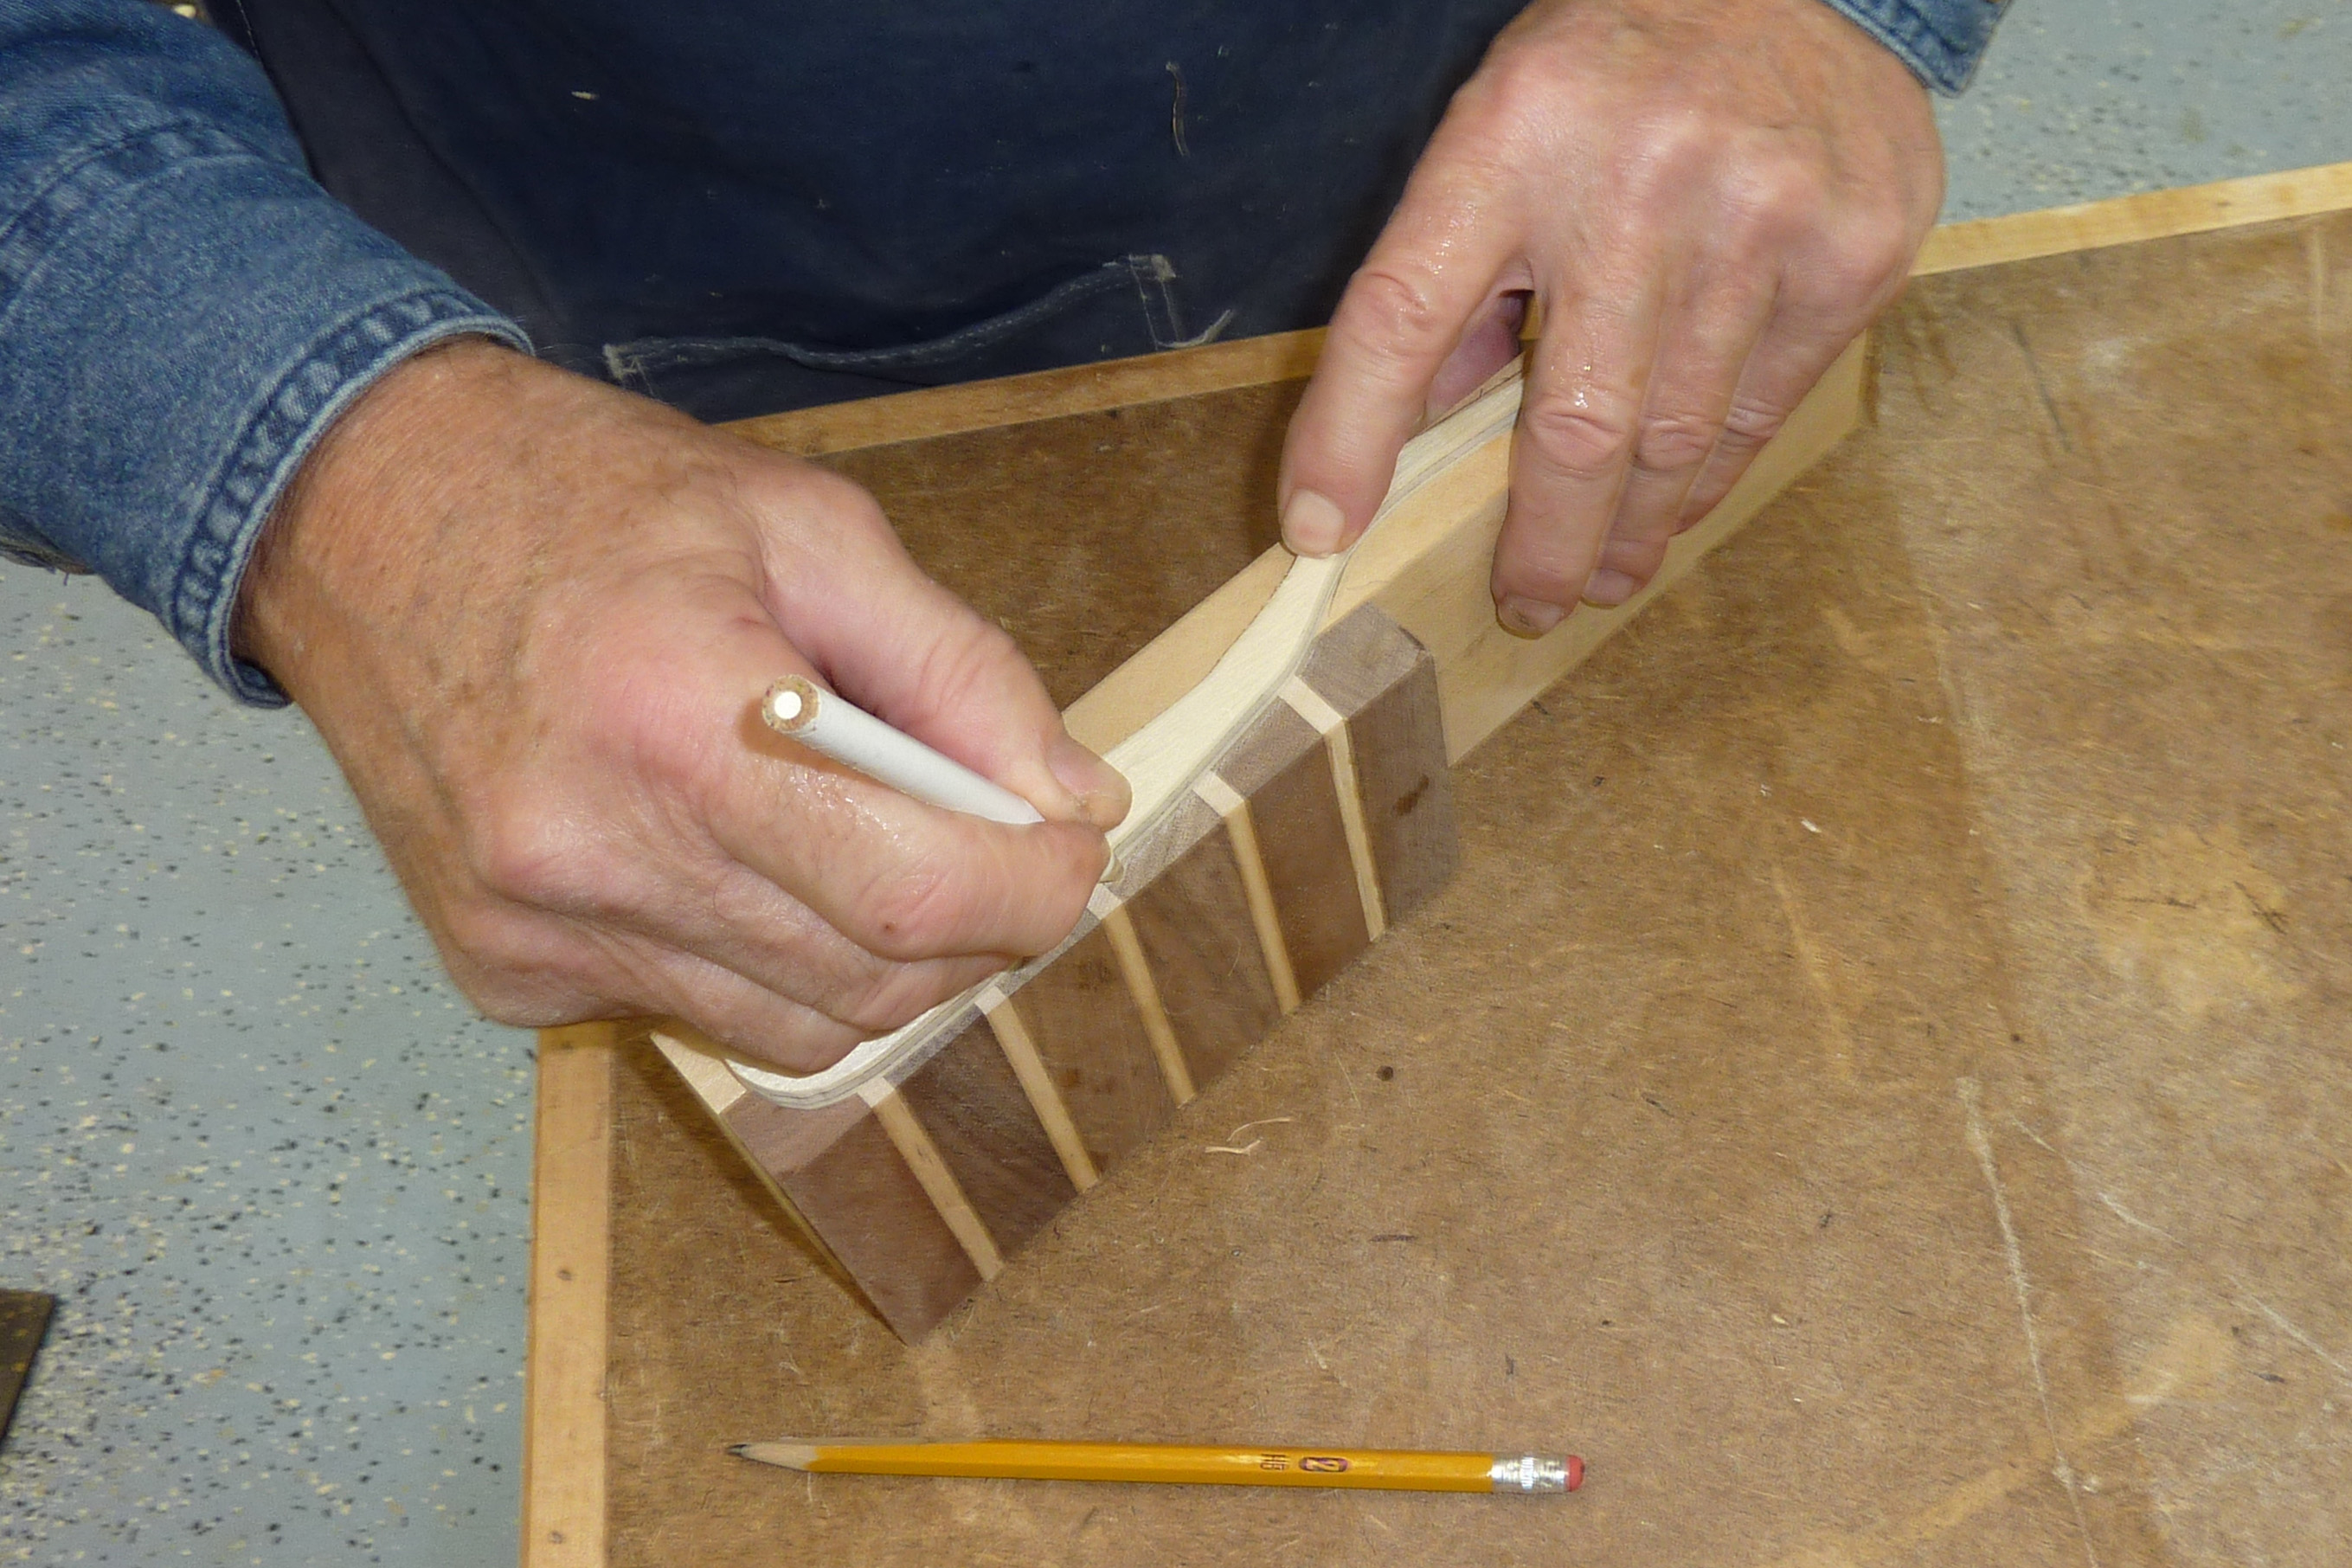
After the glue dries, trace template #1 onto the blank
For added clarity, use a white pencil on areas where tracing onto a dark wood such as walnut.
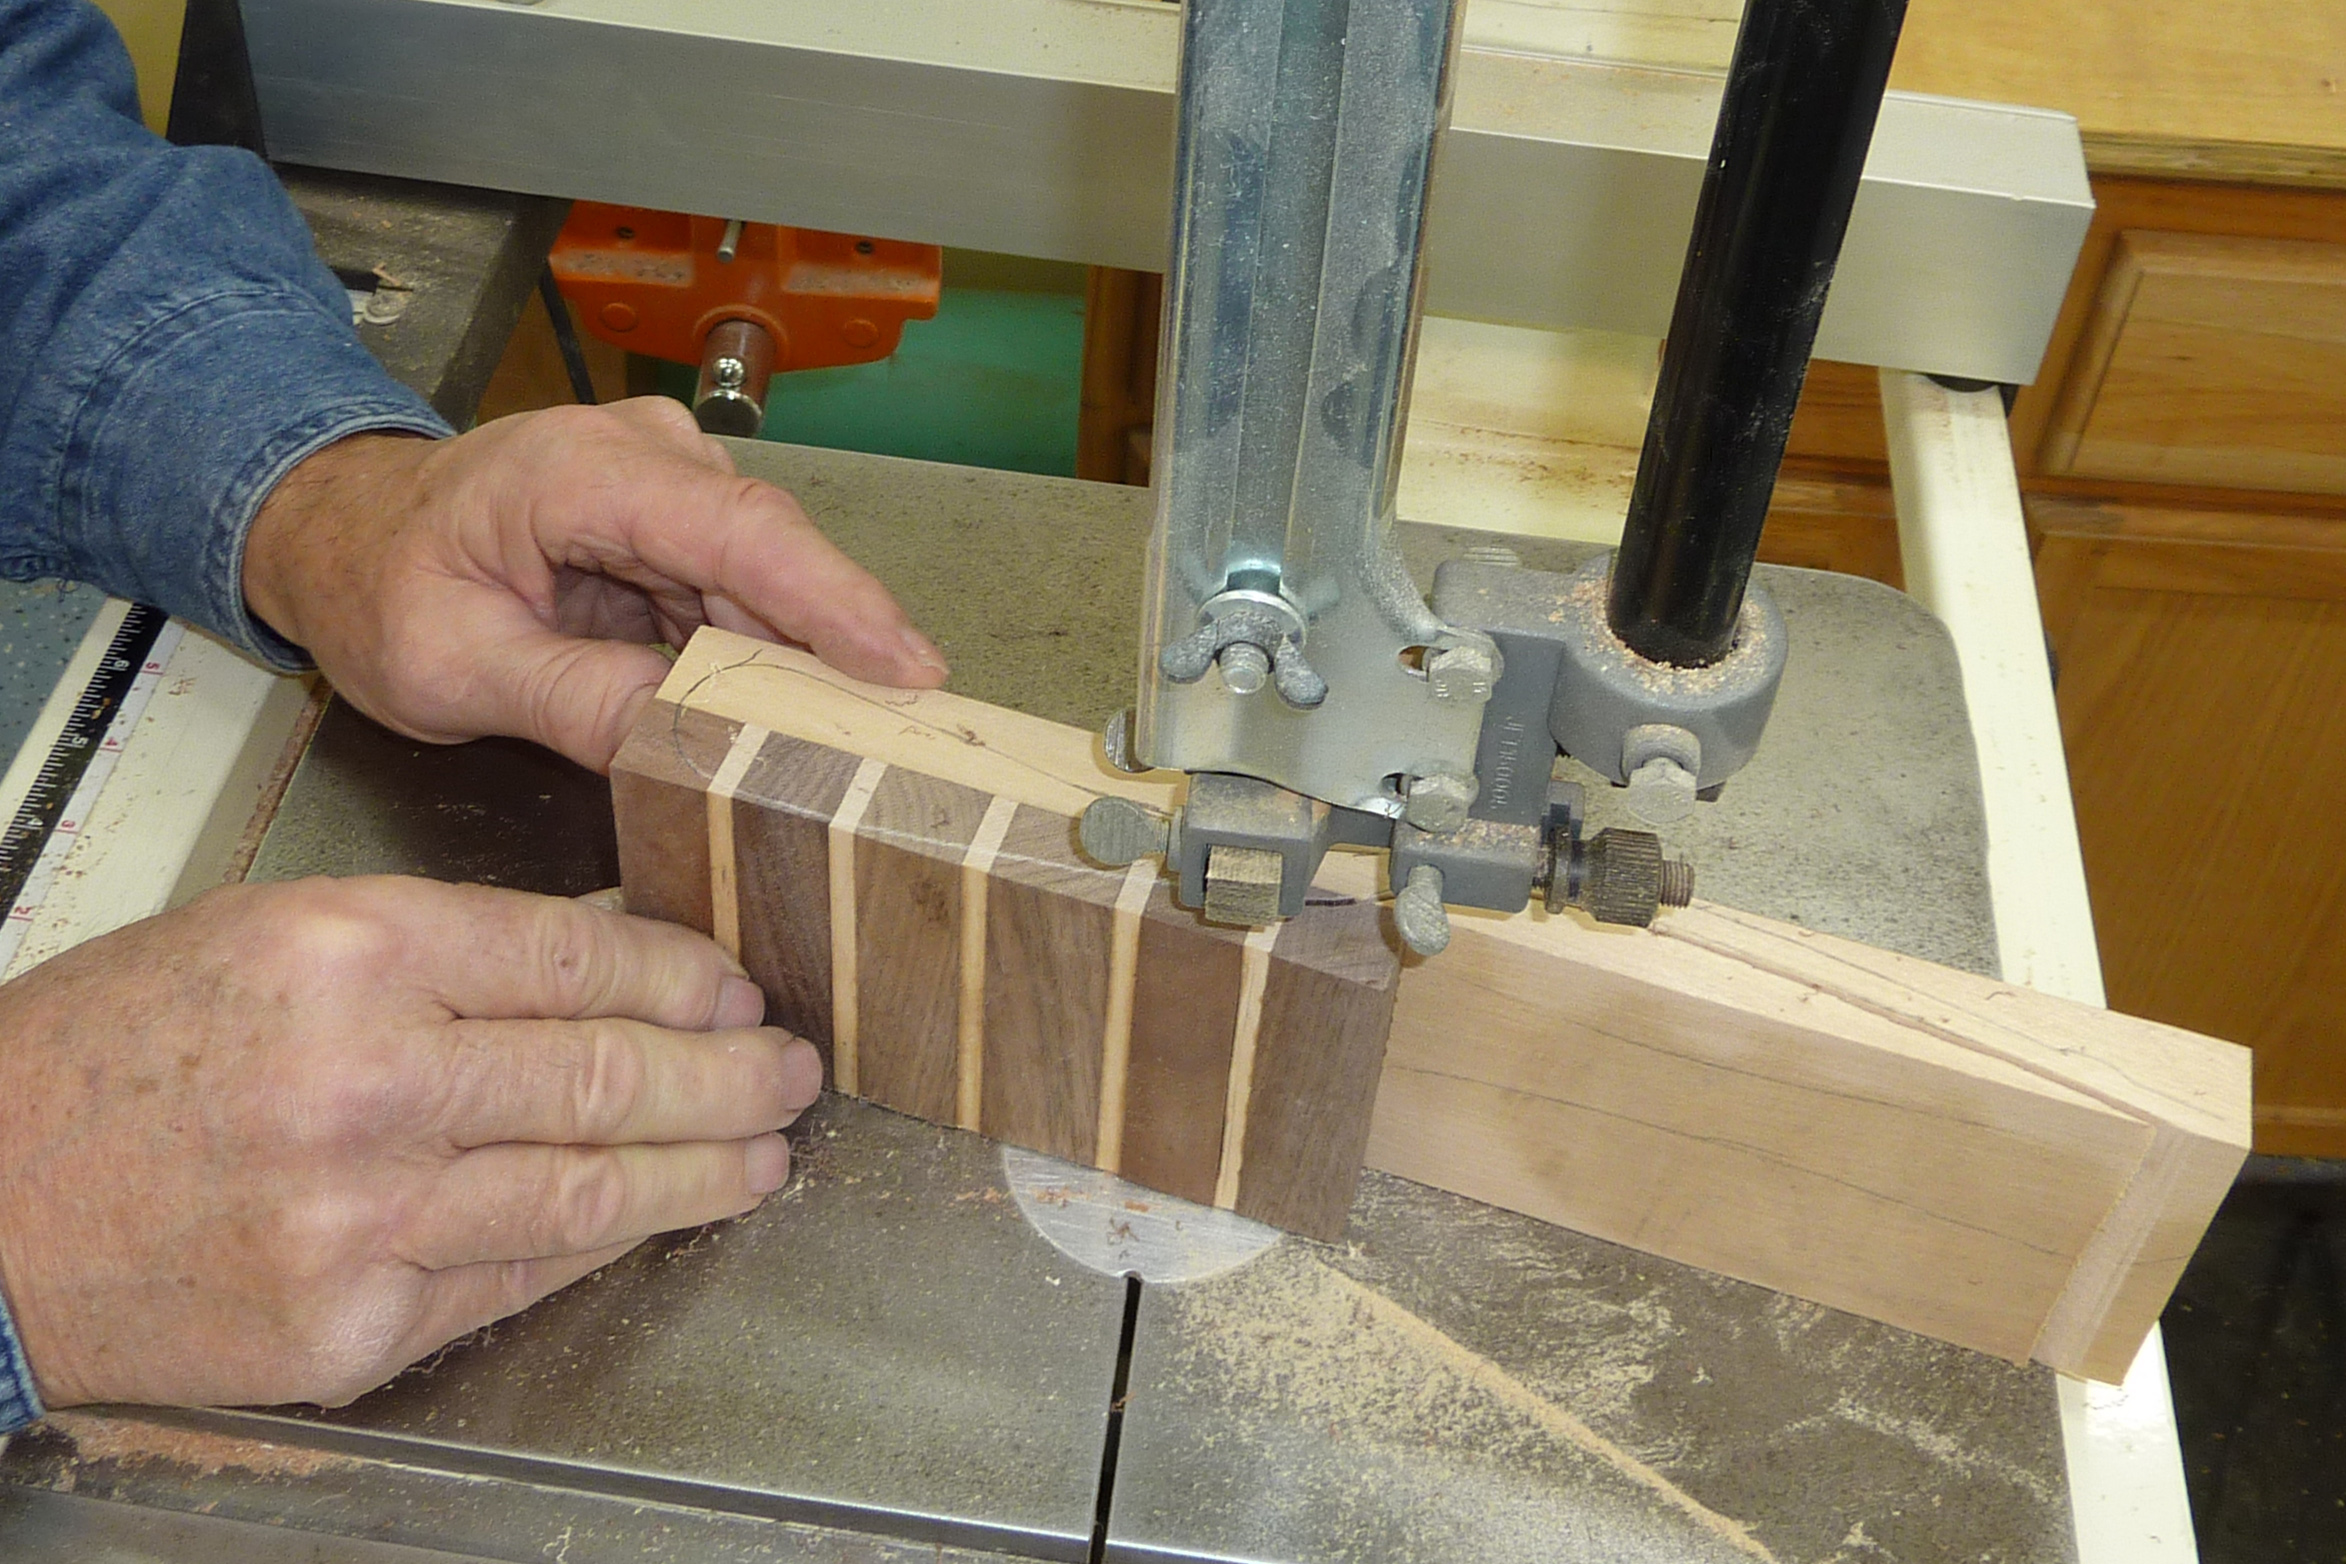
Make the first series of band saw cuts
Take your time on this cut and carefully ‘leave the line’. This operation can give a good workout to a portable band saw if that is your tool of choice. Be careful to not overly burden the tool.
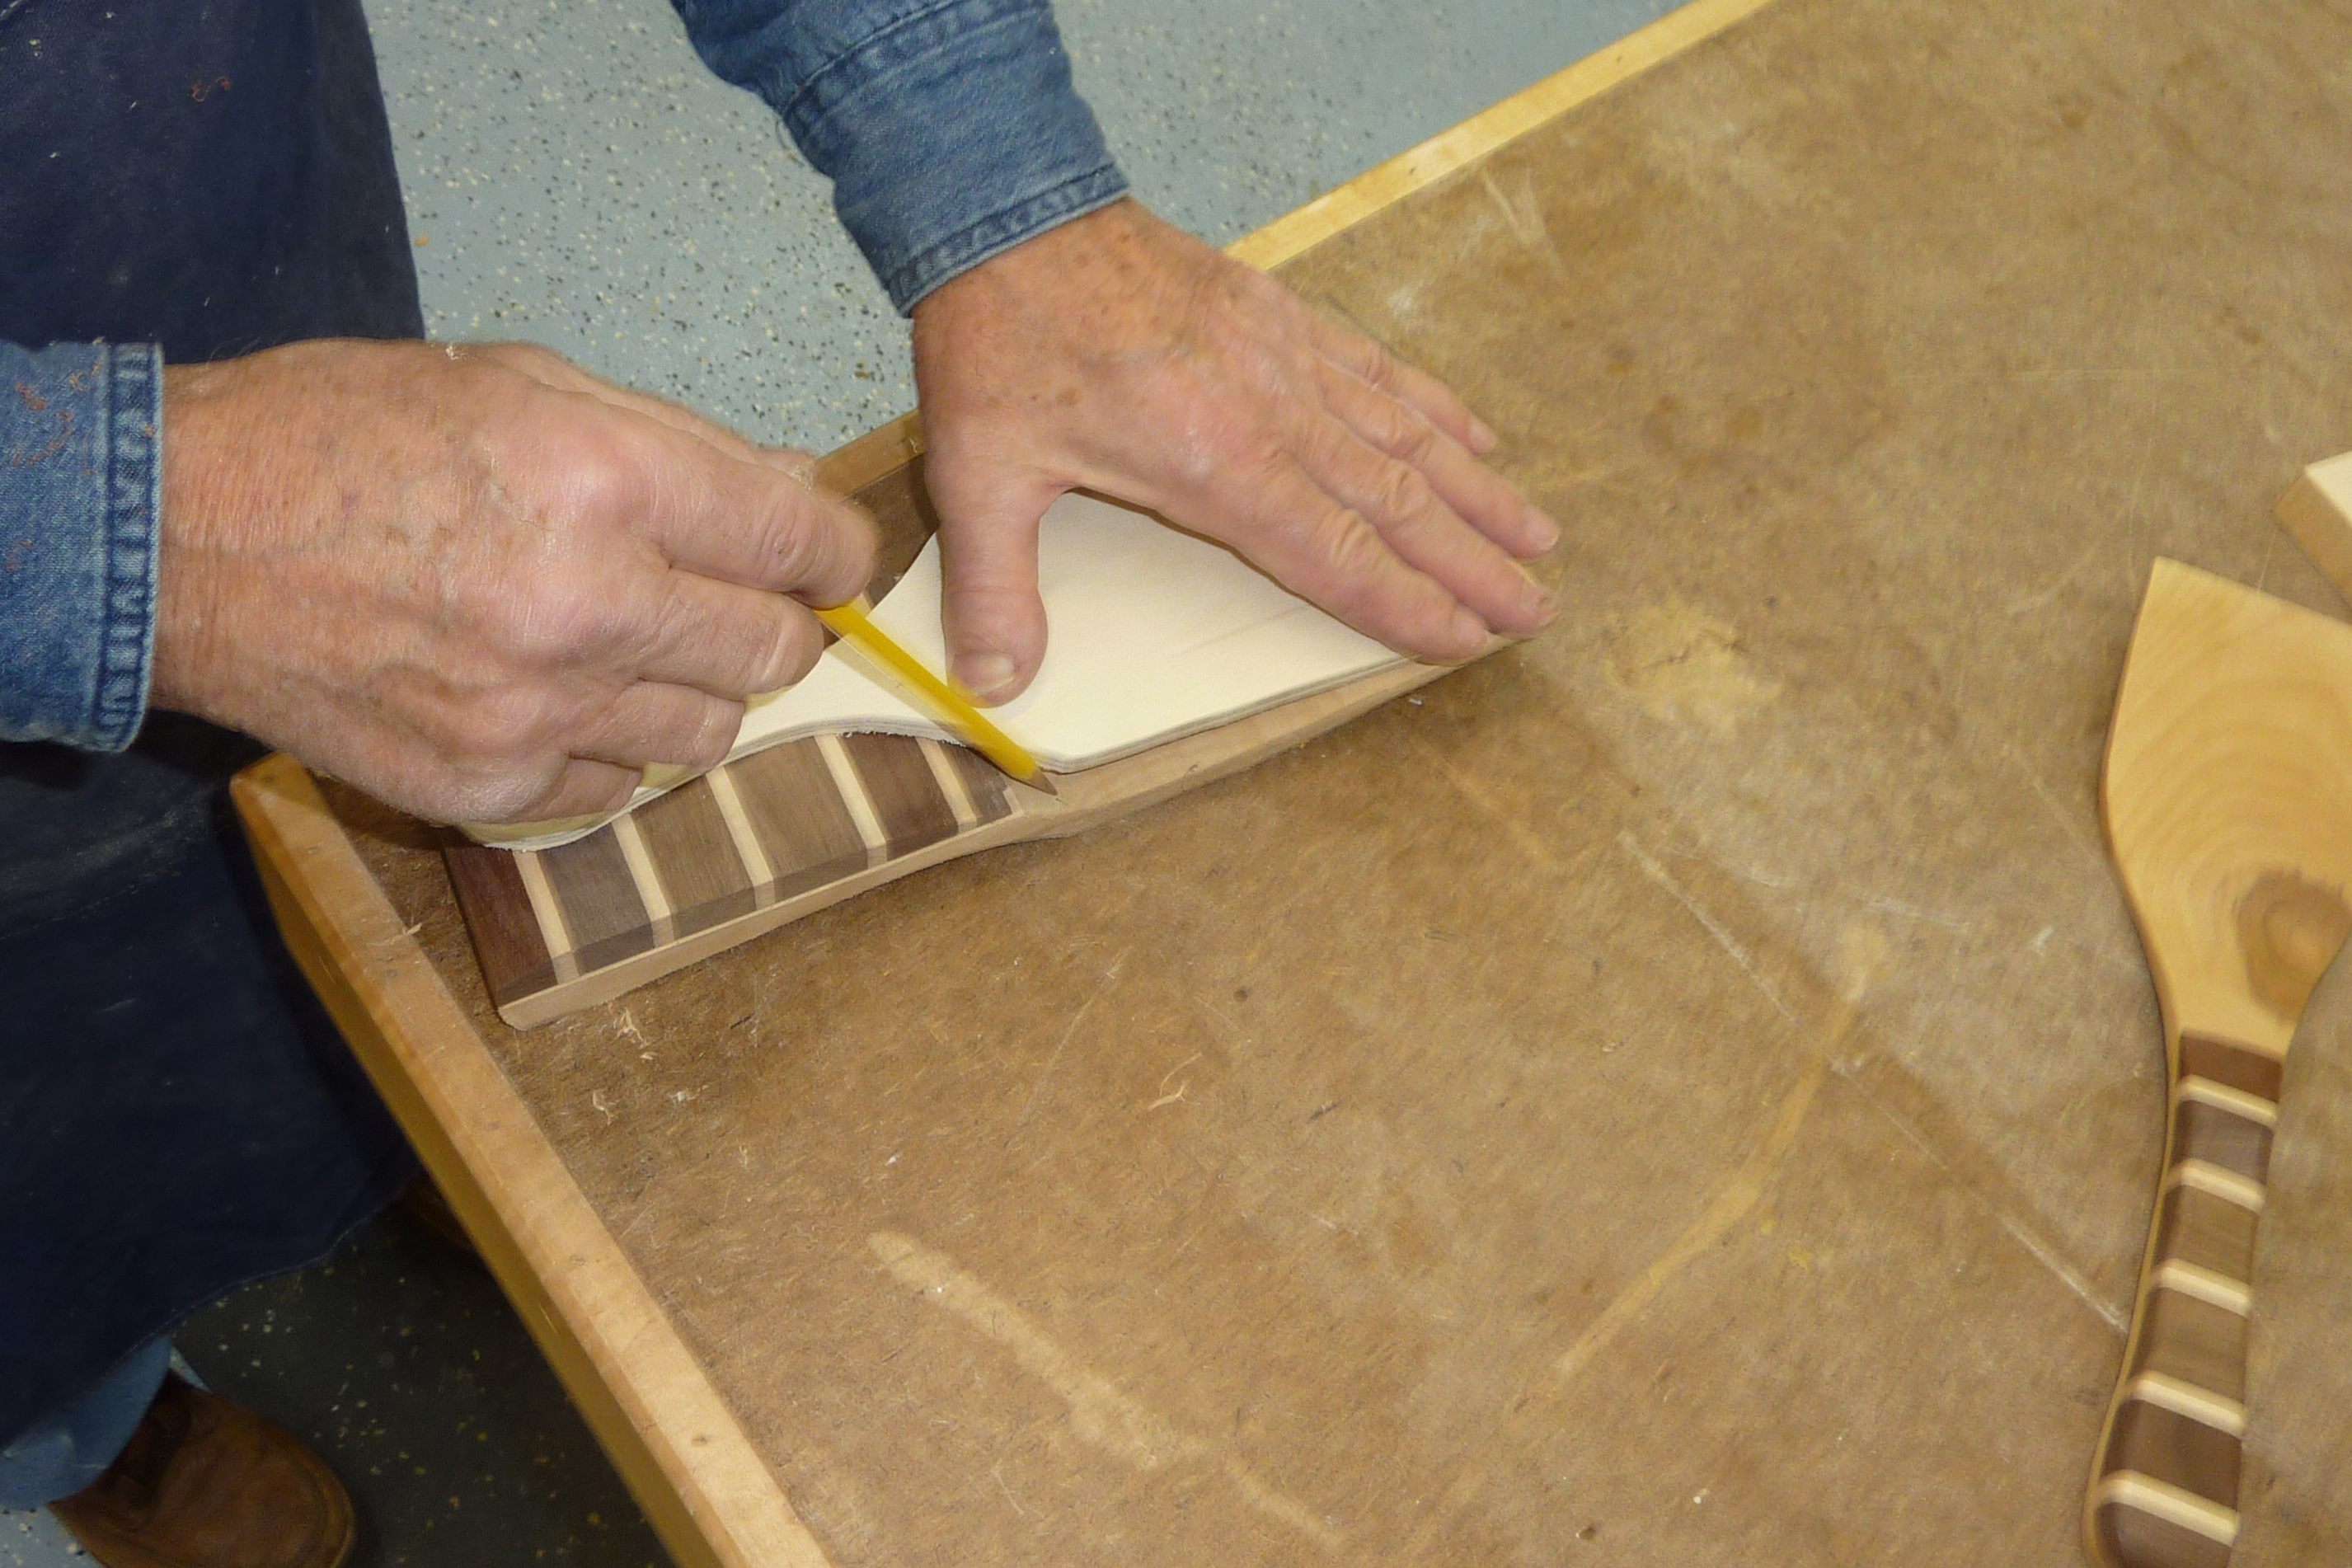
Trace template #2 onto the face of the piece
At this point, you will decide whether your utensil will be a pie server or a cake server, so use the appropriate template (2A or 2B) to determine the design.
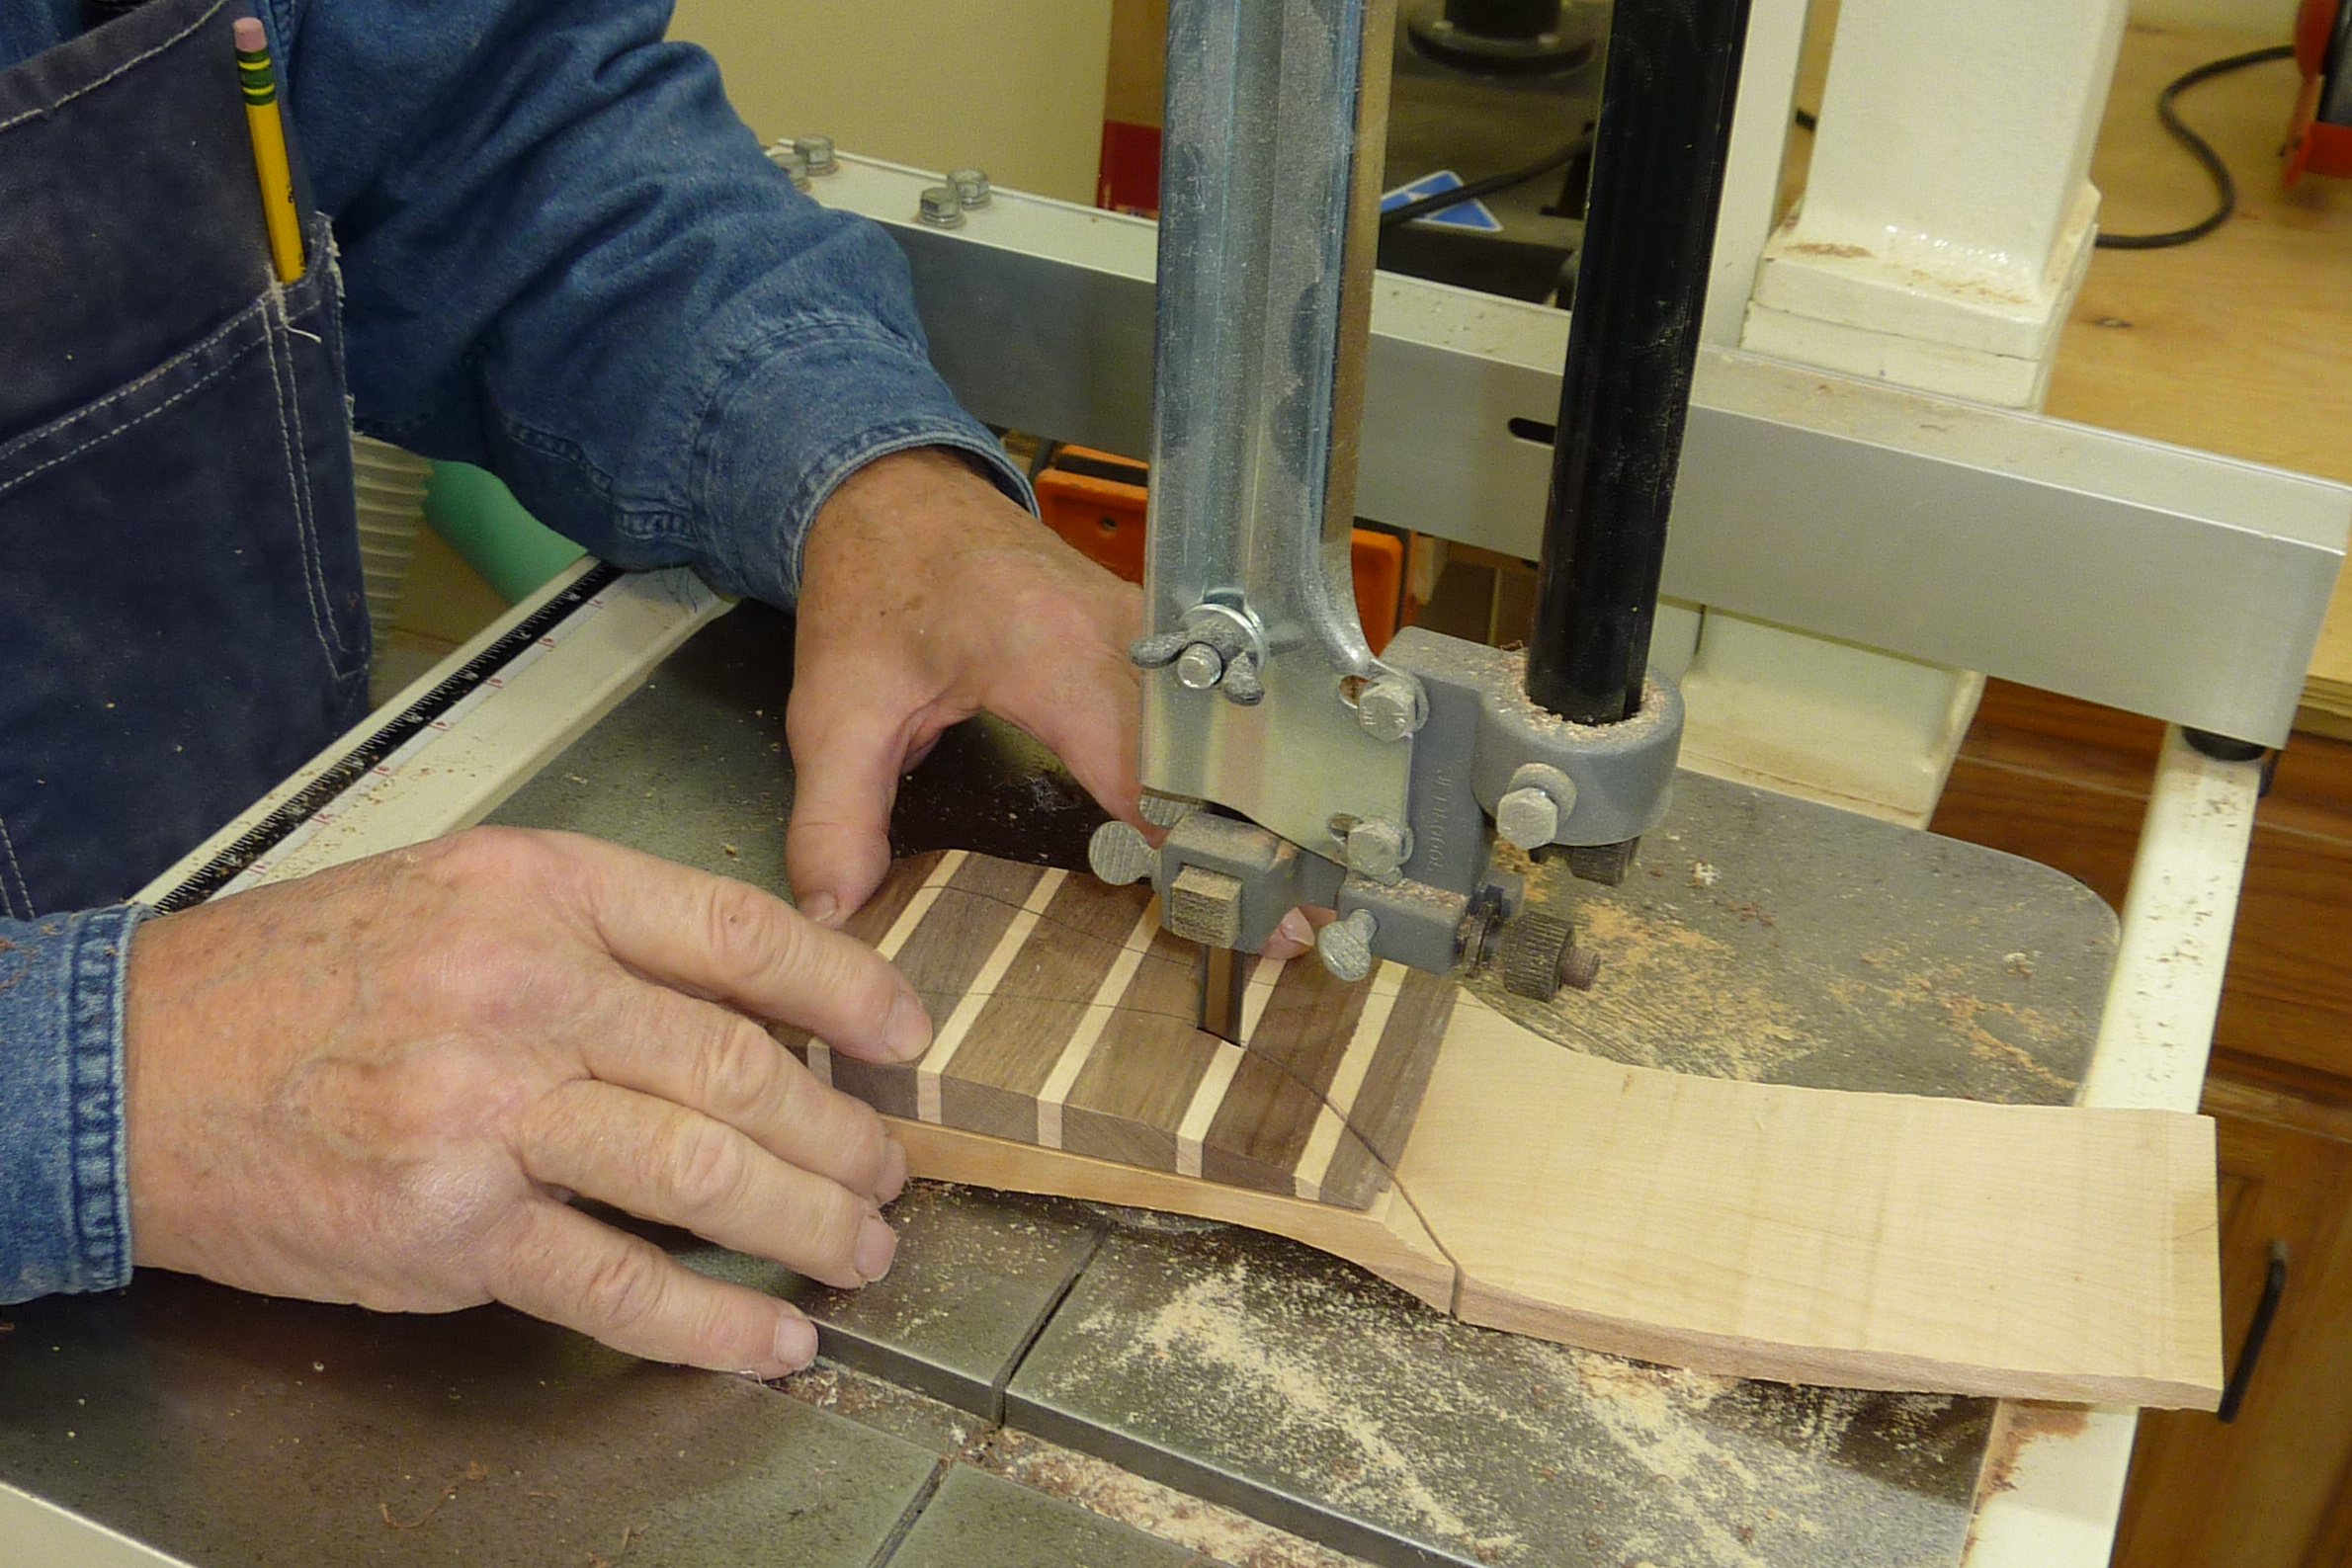
Make the second set of band saw cuts
This procedure will shape the sides of the spatula. Lower the band saw blade guard and again, cut out the pattern, leaving the line. The profile left by the previous (horizontal) cuts is flat enough so that you can safely execute this cutting operation without reattaching the bottom piece to your blank. But if it would increase your confidence in making this cut, use masking tape to reattach the bottom piece, making a perfectly square bottom surface for gliding across the band saw table.
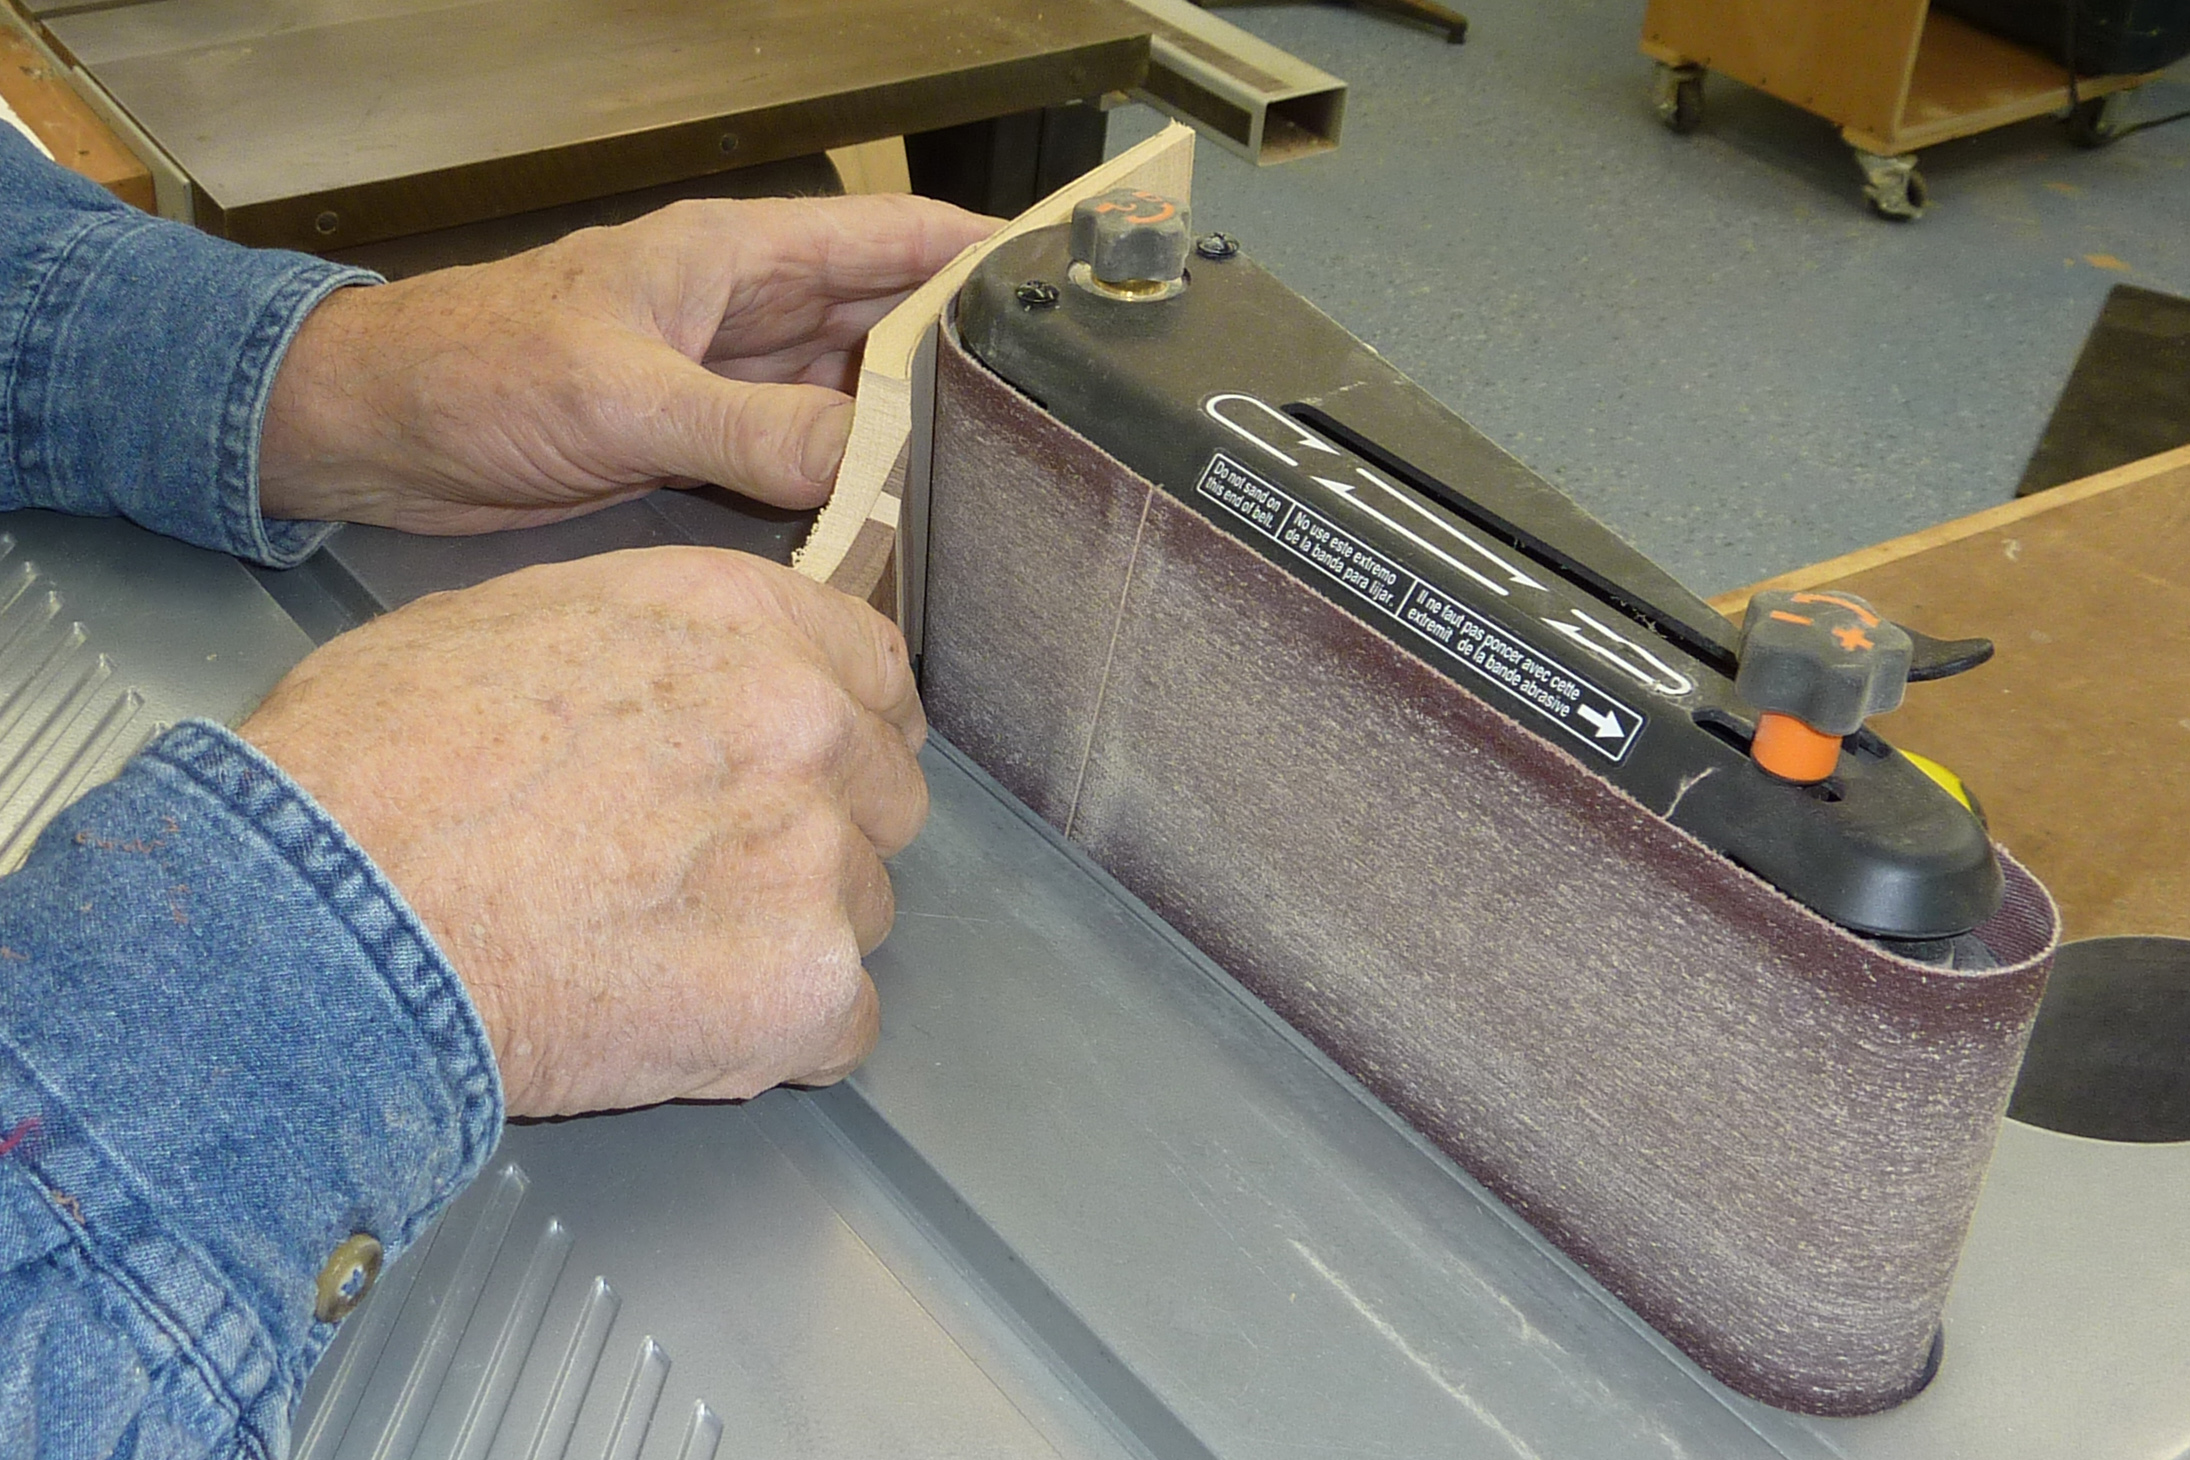
Sand to final shape
After the final cut is made, sand to the line using a belt sander or random orbital sander. Finish by hand, sanding to 400-grit for a silky smooth feel.
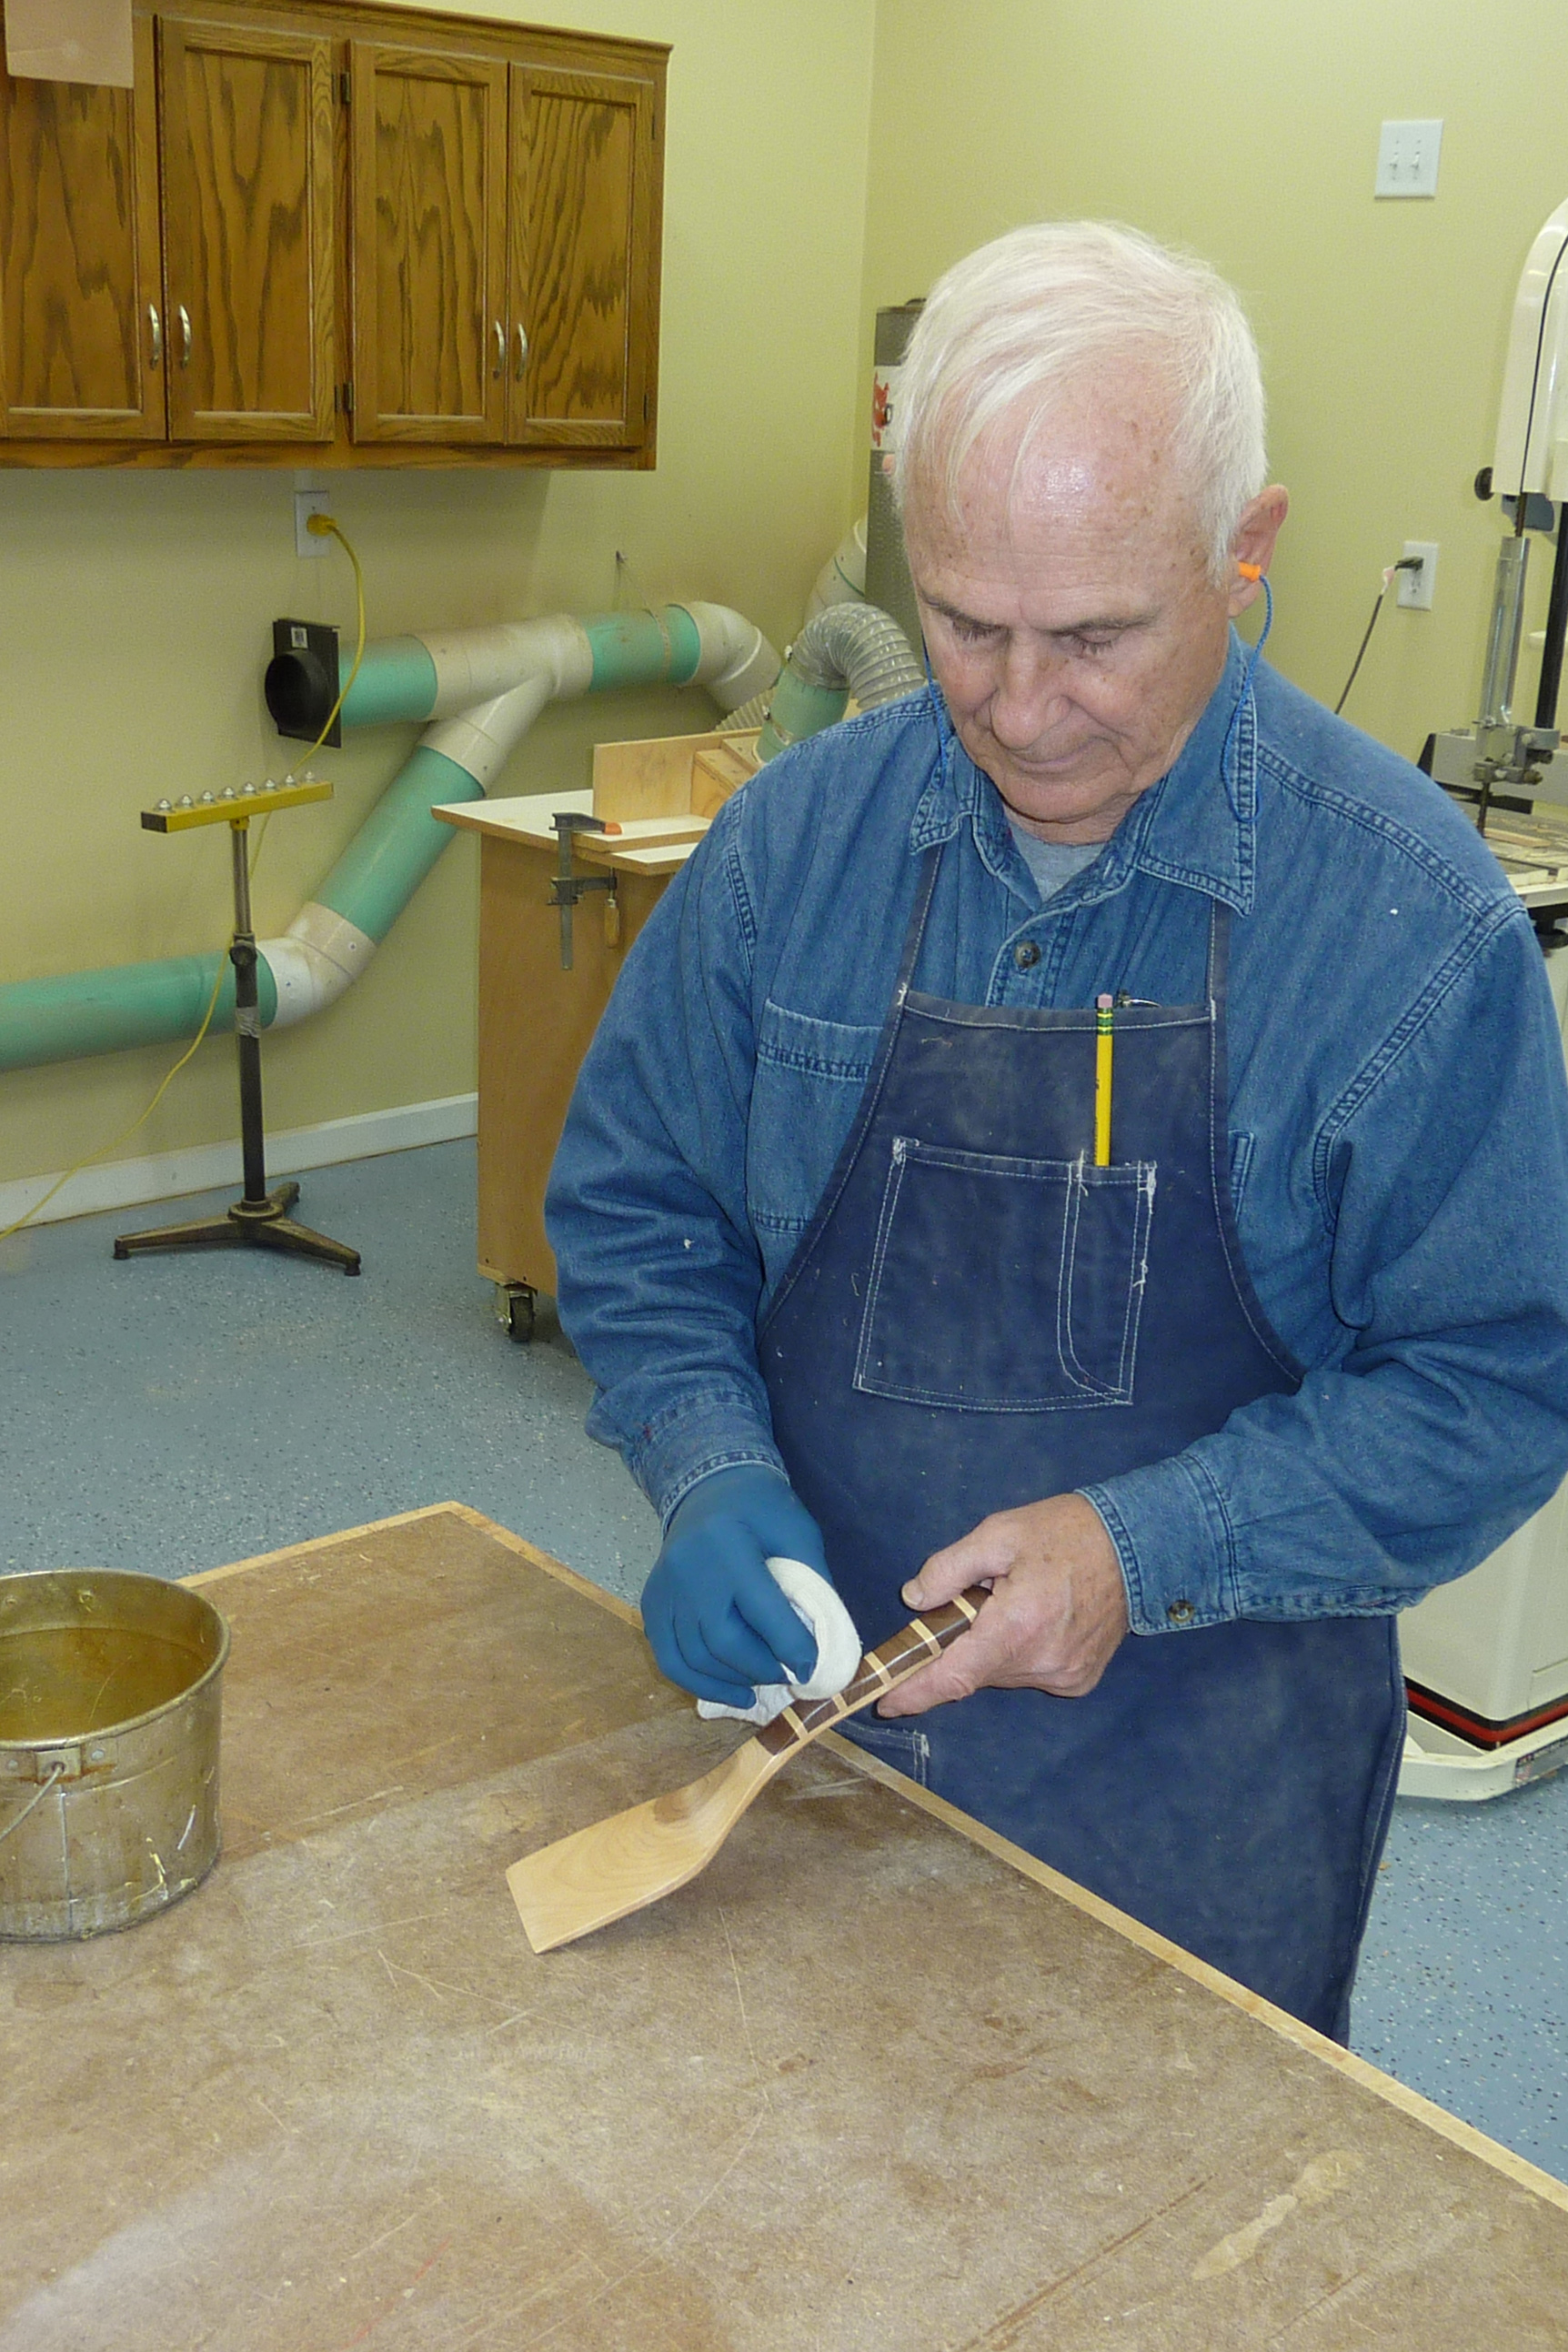
Finish with food safe finish such as salad bowl finish or butcher-block conditioner
Butcher-block finish will need to be refreshed periodically, but is quick and foolproof to apply, while salad bowl finish provides a finish that will last for years.

Are the 3&1/2 x 11&1/2 blanks 3/4 inch thick?
I'm a small home shop & I am in my 70's I am just again try my hand in a wood shop.