 There are plenty of times when you need your boards to have a smooth, straight edge. No jointer? No sweat. With the help of a simple shop-made jig you can be jointing on the table saw.
Even if you own a jointer, jointing on the tables saw is a handy technique to know about. If you ever need to clean up edges on abrasive material like plywood, particle board, plexiglass…the carbide teeth of a saw blade will stand up to it much better than tool steel jointer knives.
You’ll need to build a jig, and then create an offset in the jig to get the same affect as the offset tables on a jointer.
Getting started
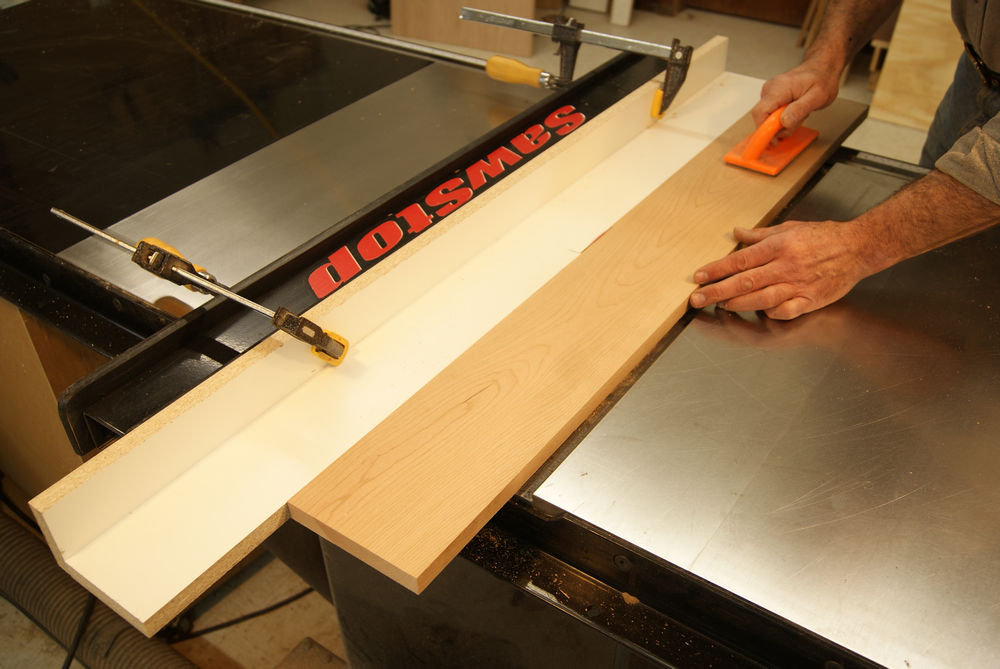
I built my jig from ¾” melamine, but any material will work. Since you’ll be using it for jointing you’ve got to be very careful to rip nice, straight edges onto the parts. The vertical piece is 3” wide, tall enough to easily clamp to my rip fence. The horizontal piece is 4” wide. The length of the jig determines the length of the pieces you can joint. I made mine 6” longer than my rip fence.
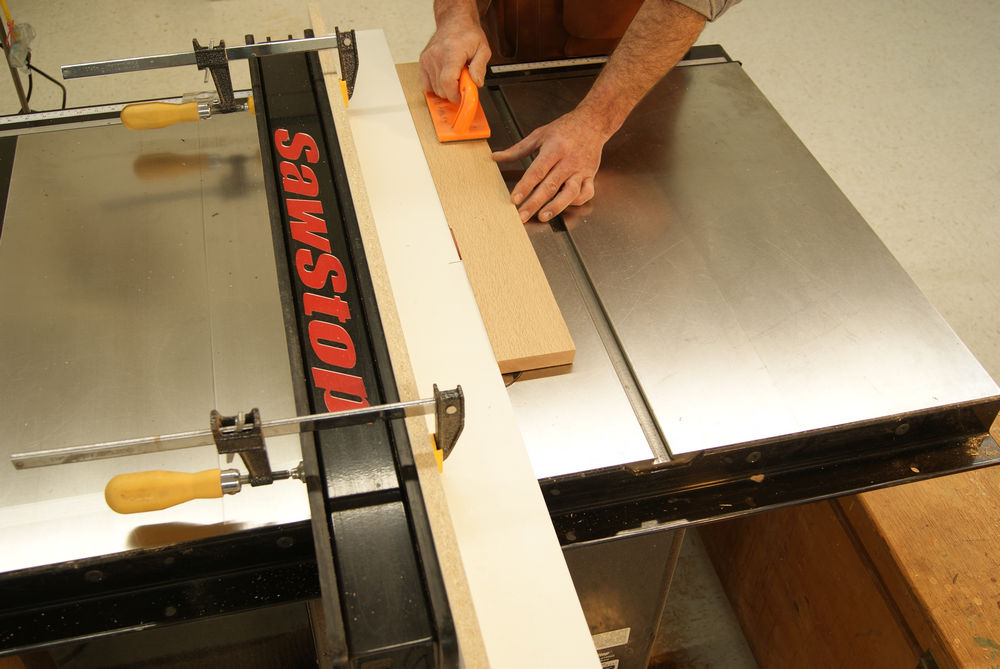
 Clamp the jig to your rip fence so that it’s approximately centered on the length of the fence.
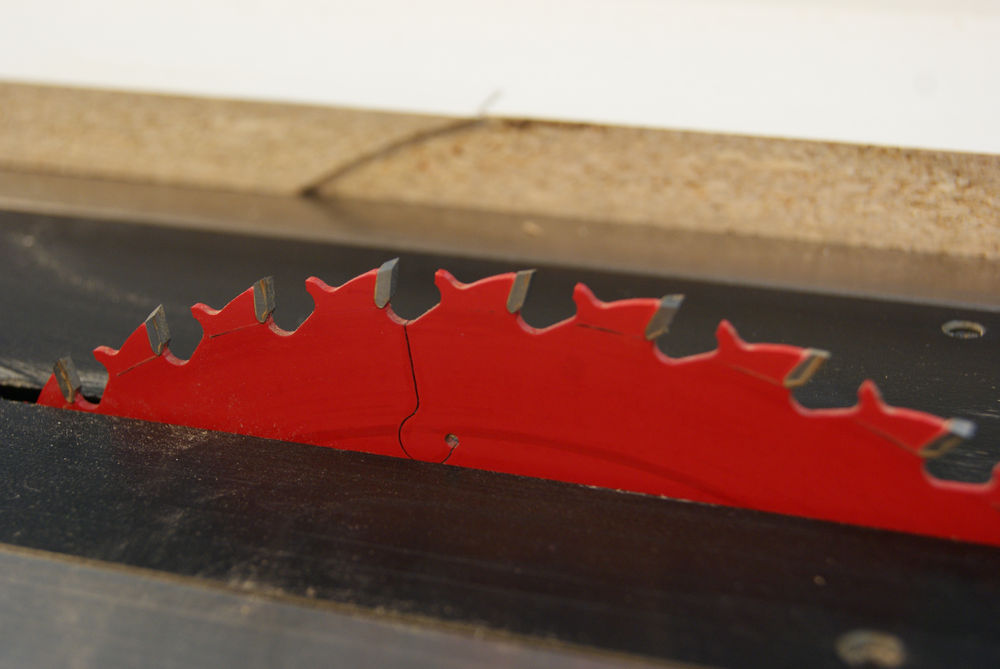 Pick the right blade. A 40-tooth alternate top bevel blade works great. A thin kerf blade is better than a standard blade since the thickness of the blade determines how much material you’re taking off with each pass.
Set the blade to the right height, slightly higher than the thickness of your material.
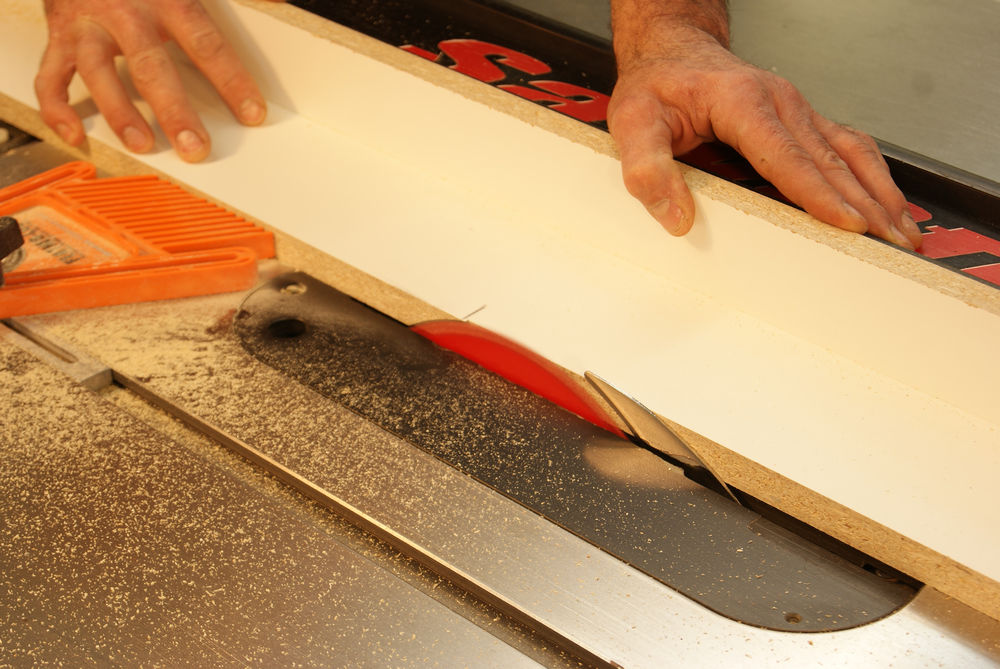
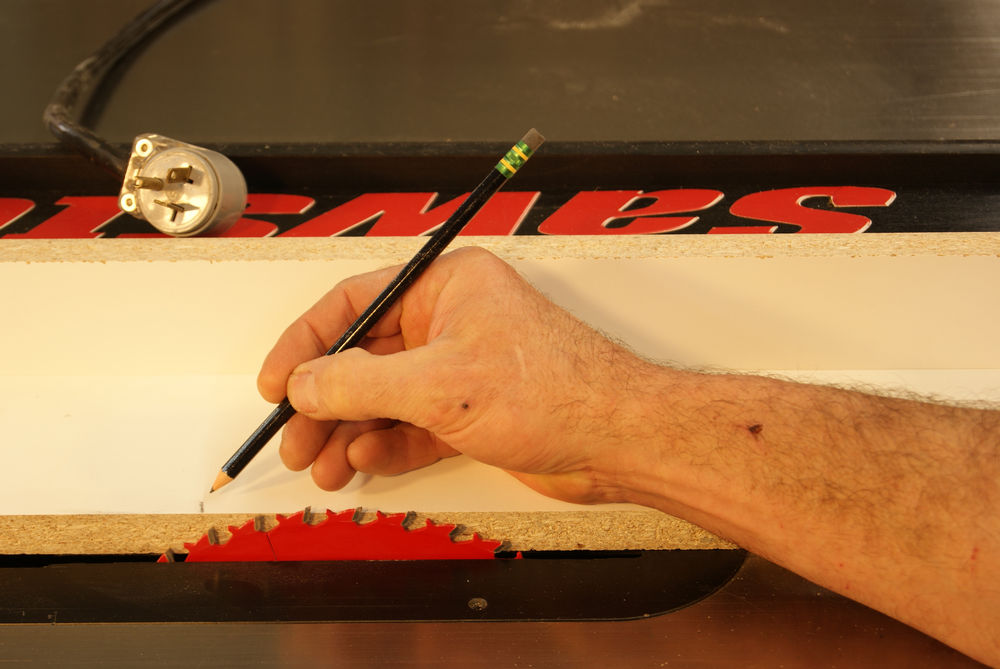 Slide the jig and fence toward the blade. Mark the position of the back of the blade on the jig.
Cutting the offset
 Remove the jig from the rip fence and move the fence to the left side of the blade. You need to VERY carefully position the fence for the cut in the jig that creates the offset. Be sure your saw is unplugged.
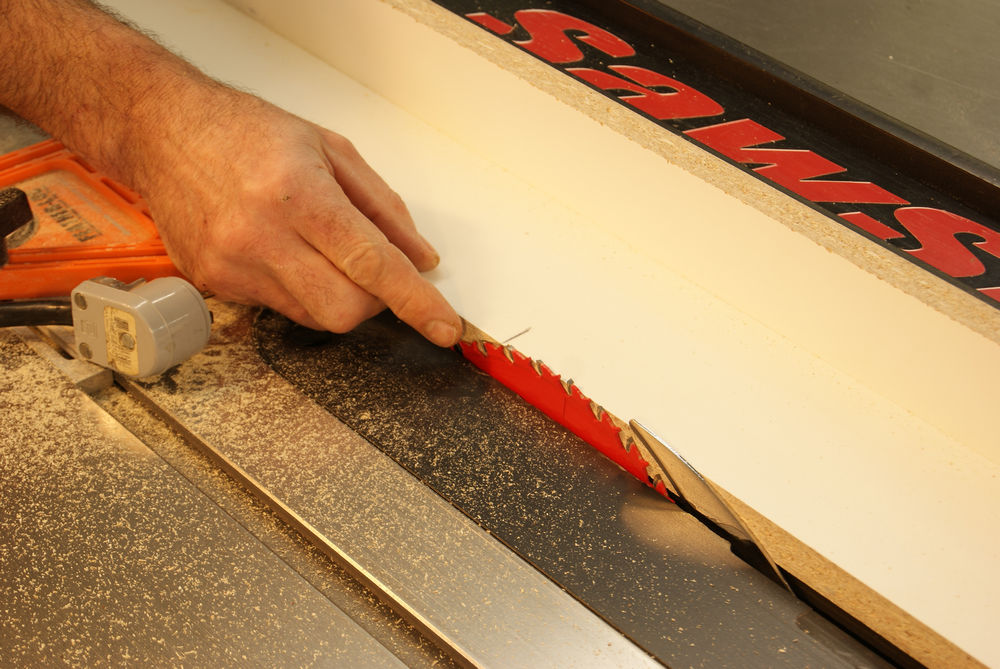
 Align the right side of the saw blade with the right edge of the jig. It’s easier to feel this with your finger than it is to see it. Make small adjustments to the rip fence position until it’s correctly set.
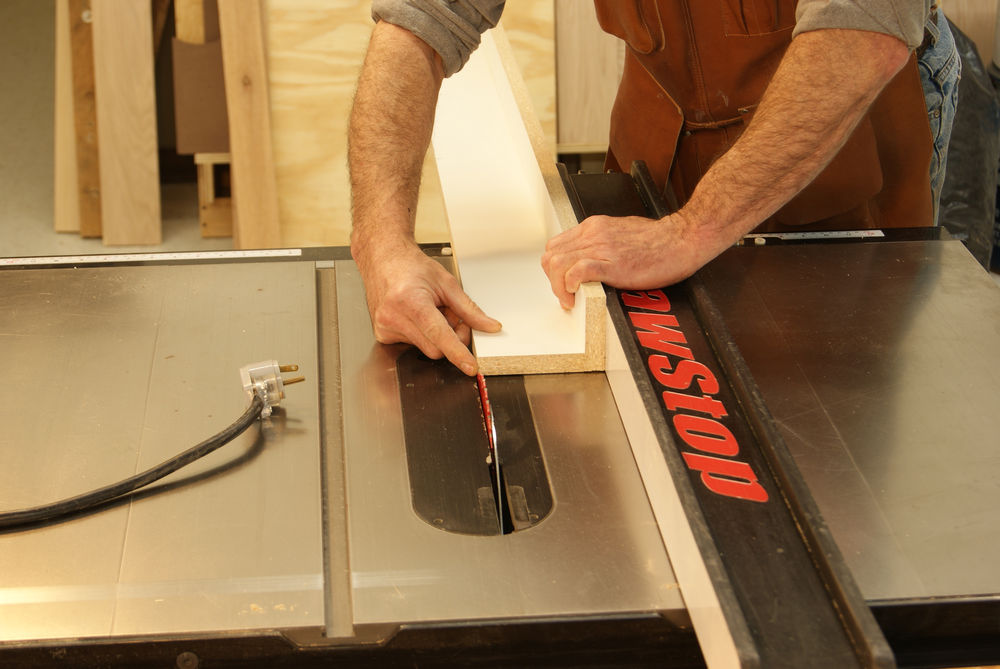
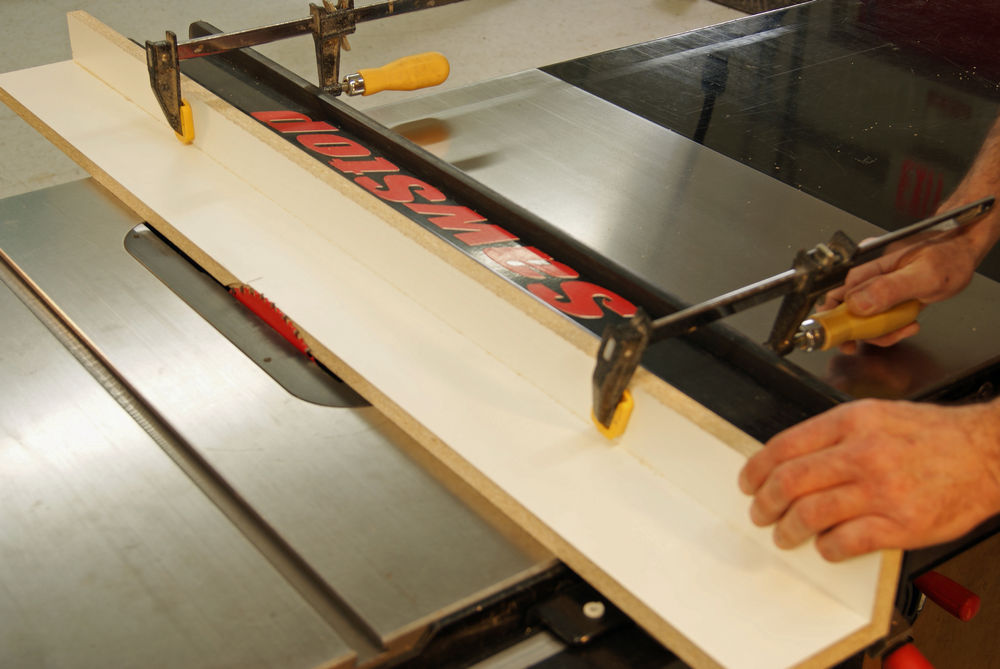
 With the fence correctly positioned, add a feather board and cut the jig. When making this cut, don’t allow the jig to pull off the rip fence. The feather board helps a lot.
 Stop cutting when you get to the pencil mark you made earlier. Turn off the table saw.
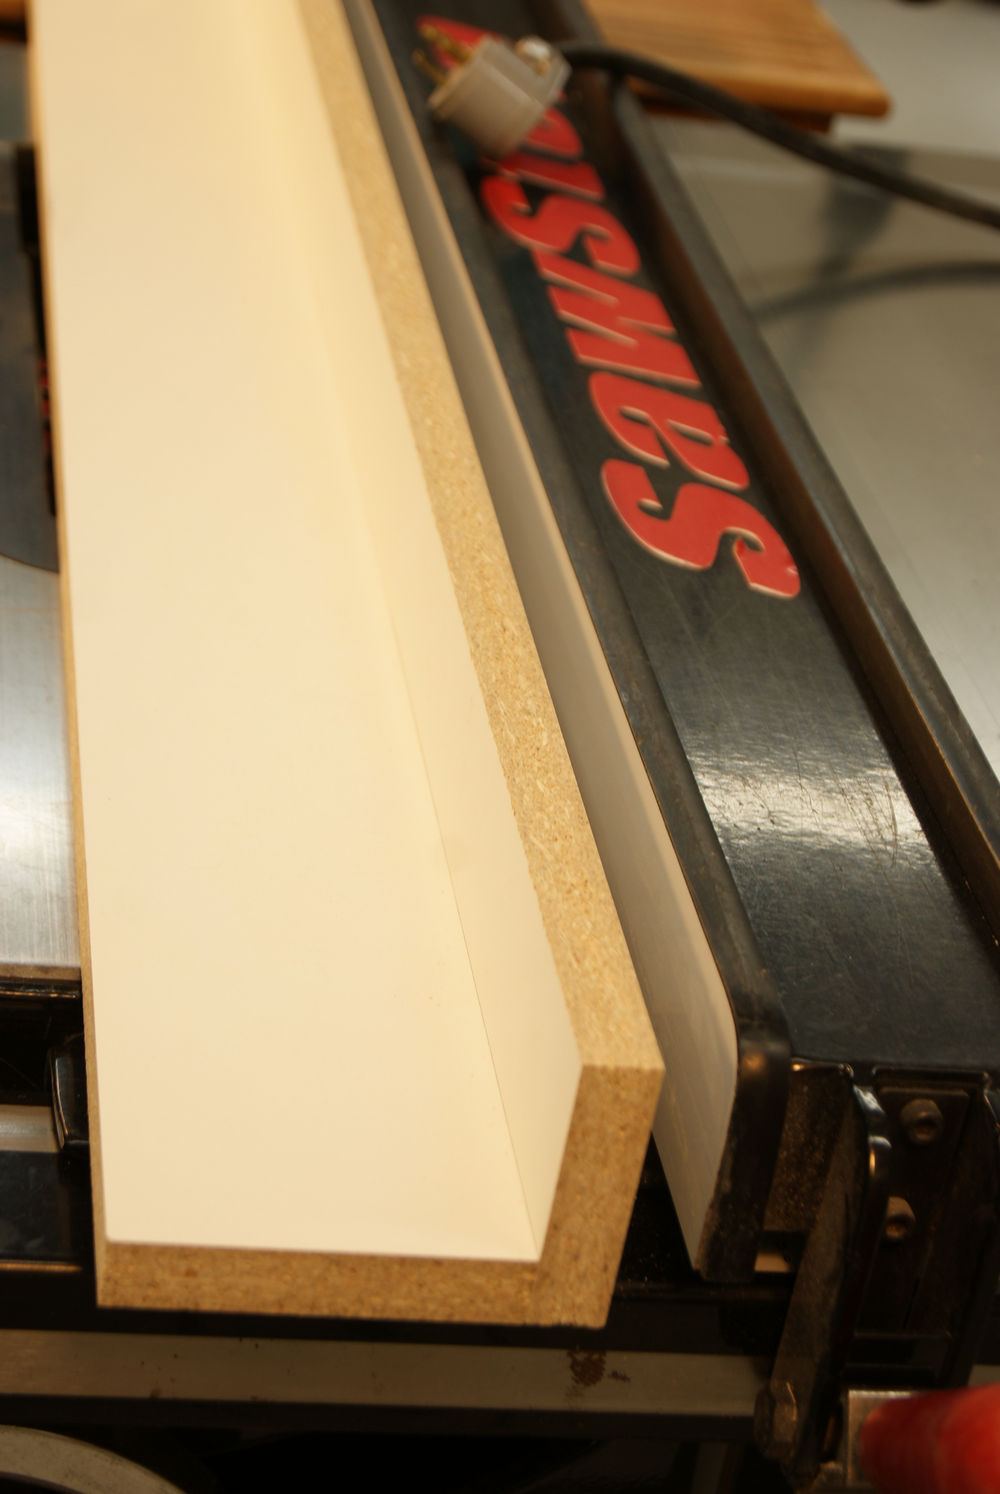
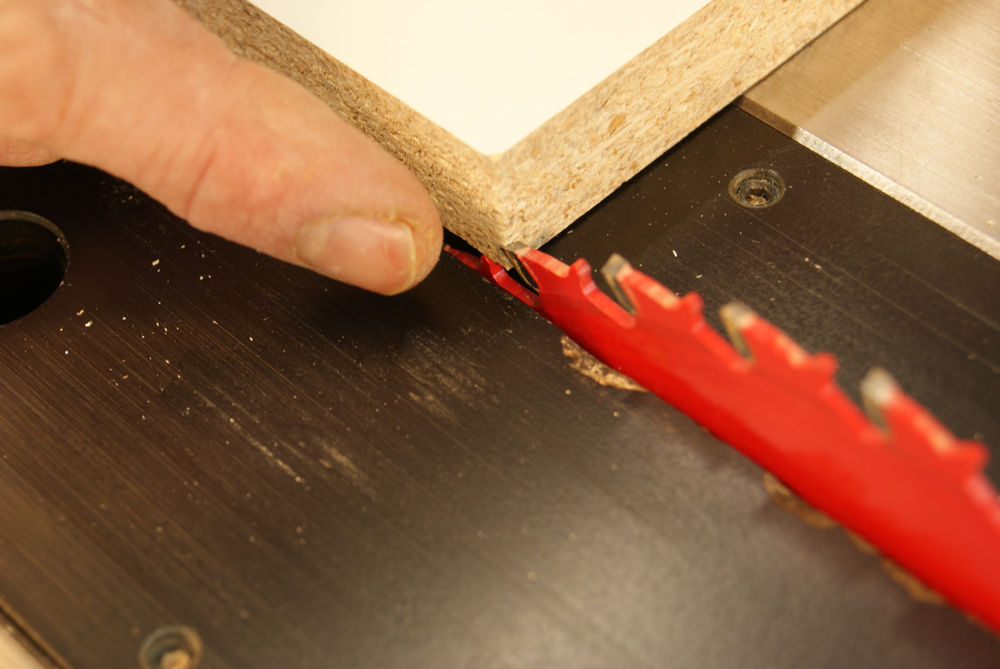
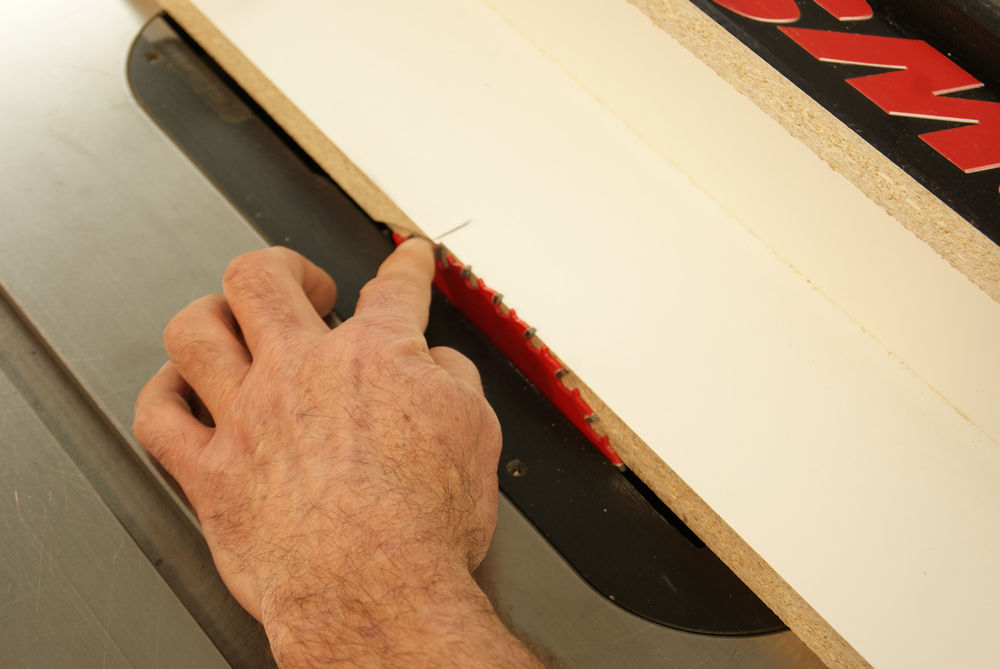
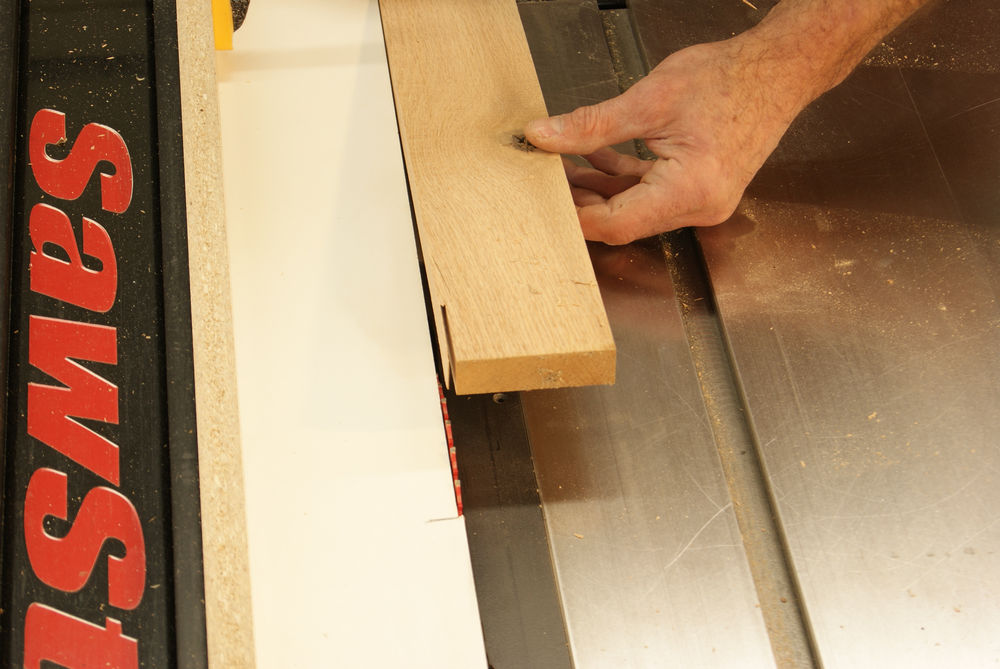
 With the saw unplugged check the offset. With the jig tight to the rip fence the right edge of the saw blade must be perfectly even with the right edge of the jig. If the blade projects past the jig you don’t have enough offset. Move the rip fence to the right, slightly, and make another cut. If the jig projects past the blade you’ve create too large an offset. You’ll need to rip the offset off and go through the positioning steps again to cut a new offset.
Jointing
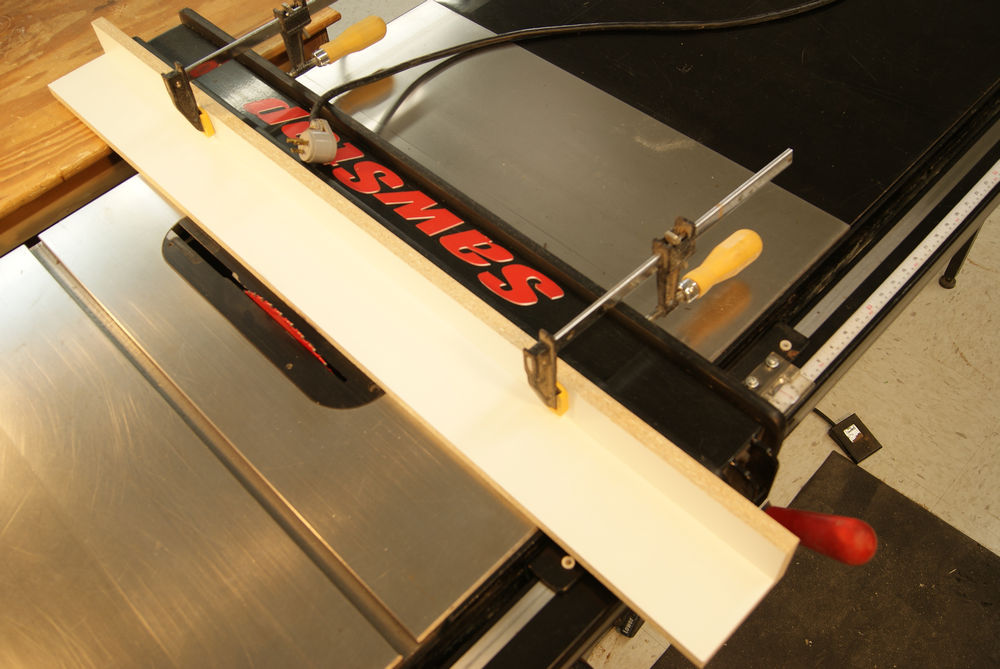
 Move the rip fence to the right side of the saw blade. With your saw unplugged, clamp the jig to your rip fence so that the back of the blade aligns with the offset.
 The left side of the saw blade should align with the left edge of the jig, and the blade should turn freely. Adjust the position of the rip fence until this is correctly set.
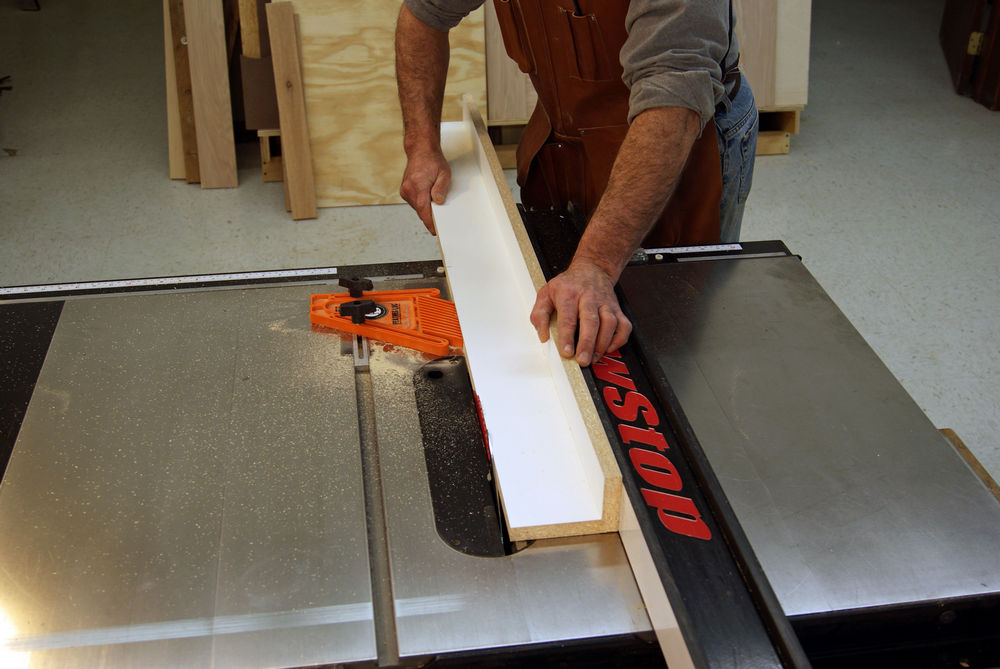
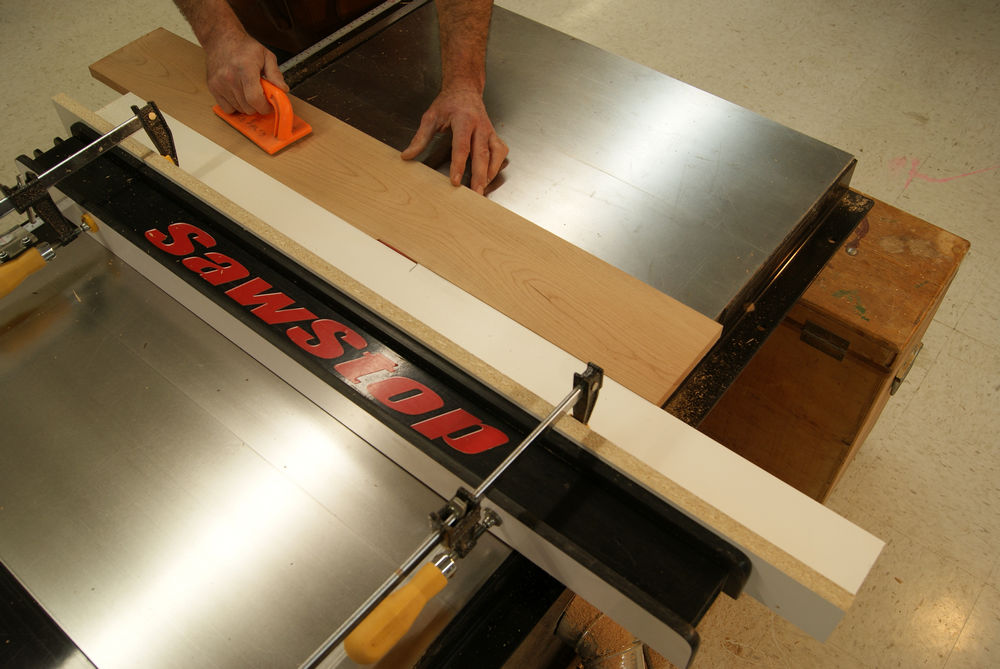
 Make a test cut.
 Check the results. If you’re getting a slight sliver, the jig is too far from the blade. Make small changes in the fence position until the sliver goes away, and the blade can spin without touching the jig.
 Once you’ve tweaked the fence position, you’re ready to joint!
A dose of reality
If you’re careful with the set up, this technique works well. Should you sell your jointer? I think not. Without question it’s easier to turn on a jointer and make a cut than it is to set up the jig on your table saw. But if you don’t own a jointer, or need to joint abrasive materials, the results from the table saw are good, plenty smooth enough for edge to edge glue ups.
This works great on ¾” thick stock. Thicker than that and the results deteriorate. I suspect the thin kerf blade flexes a little on thick stock, since it’s only cutting on one side.


Do I need to remove the roving knife at any point in the jig making process or when jointing a board?
<strong>#45173</strong> The instructions say to use a 40 tooth, thin kerf, ATB blade. The pictures look more like a 24 tooth rip blade? Would it be better to use a rip blade since edge joining is cutting with the grain?
I'm not understanding what does the off set do? Why couldn't you just have a straight edge to the jig?
I am new to woodworking and with no joiner i am sure this will help me turn out a better project.
<strong> Ticket 20414 Why is using this jig better than just running each board of your panel through between the fence and the blade to straighten it on both sides taking a 1/16" off of both sides?
Wouldn't this fail on a board that does not have a straight edge? Most solutions I have seen use a straight board as a sled and have hold-downs so the piece you are cleaning up sits on the sled and hangs over the edge on the blade side. It works for any board no matter how messed up the edge is. Once you have one edge straight, it is easy to clean up the other side and get parallel edges.
Excellent instructions. You're great George.
Ok I get it the offset is one only one side of the blade so only the width of the kerf is exposed to the Infed stock.
It’s not clear how you cut the inset. Did you move the melamine sideways into the blade. It will be important to communicate this. If you cut the jig all the way through the blade, you are back to sq 1 with no offset.
Nice instructions I was wondering how to cut the offset..now I know...thanks!