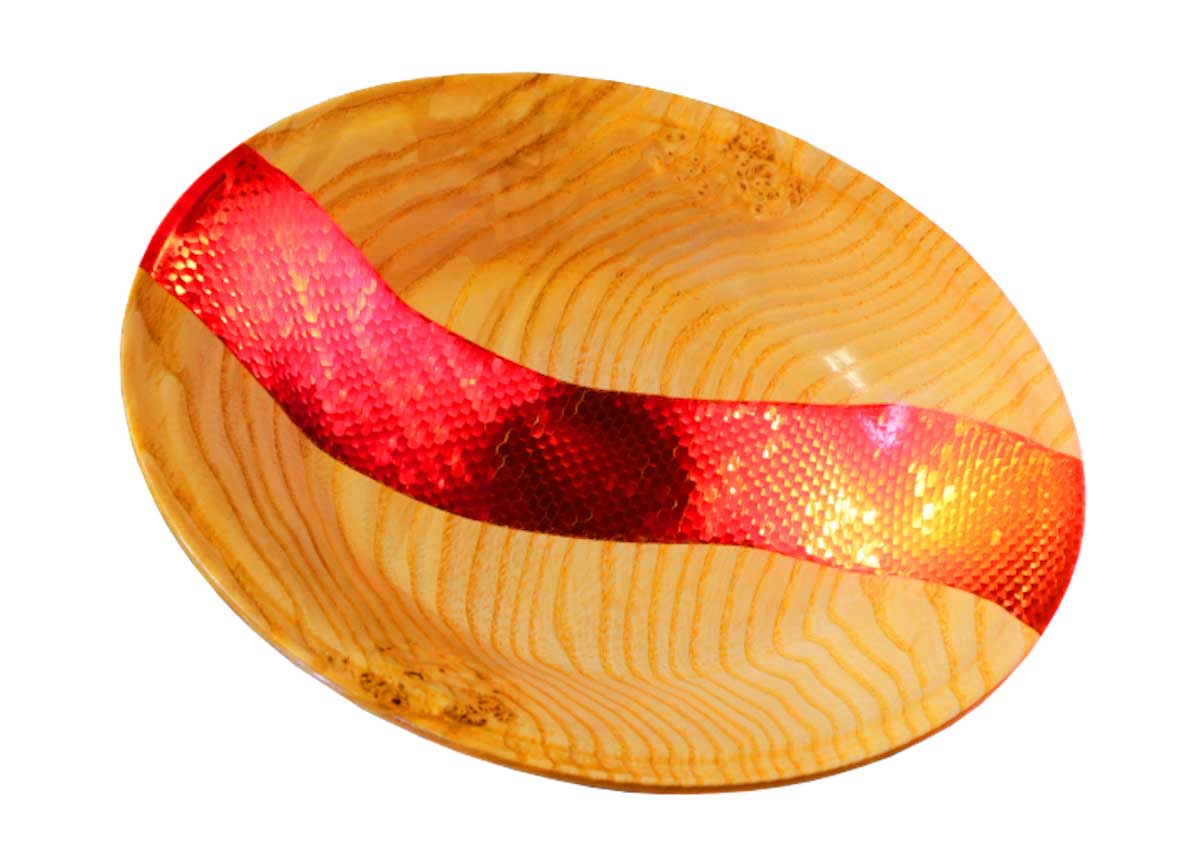
I recently had the pleasure of working with a South African resin artist named Ahron Gropper on a long-distance collaboration. After seeing a beautiful bowl he had created that incorporated a synthetic honeycomb element embedded into the bottom of the bowl, I contacted him to see if he would be willing to create a similar resin bowl blank and send it to me so that I could turn it on my lathe, and he graciously agreed. In this article, I’ll share some highlights from the process, as well as a few tips for turning your own wood and resin bowl.
Preparing the Blank
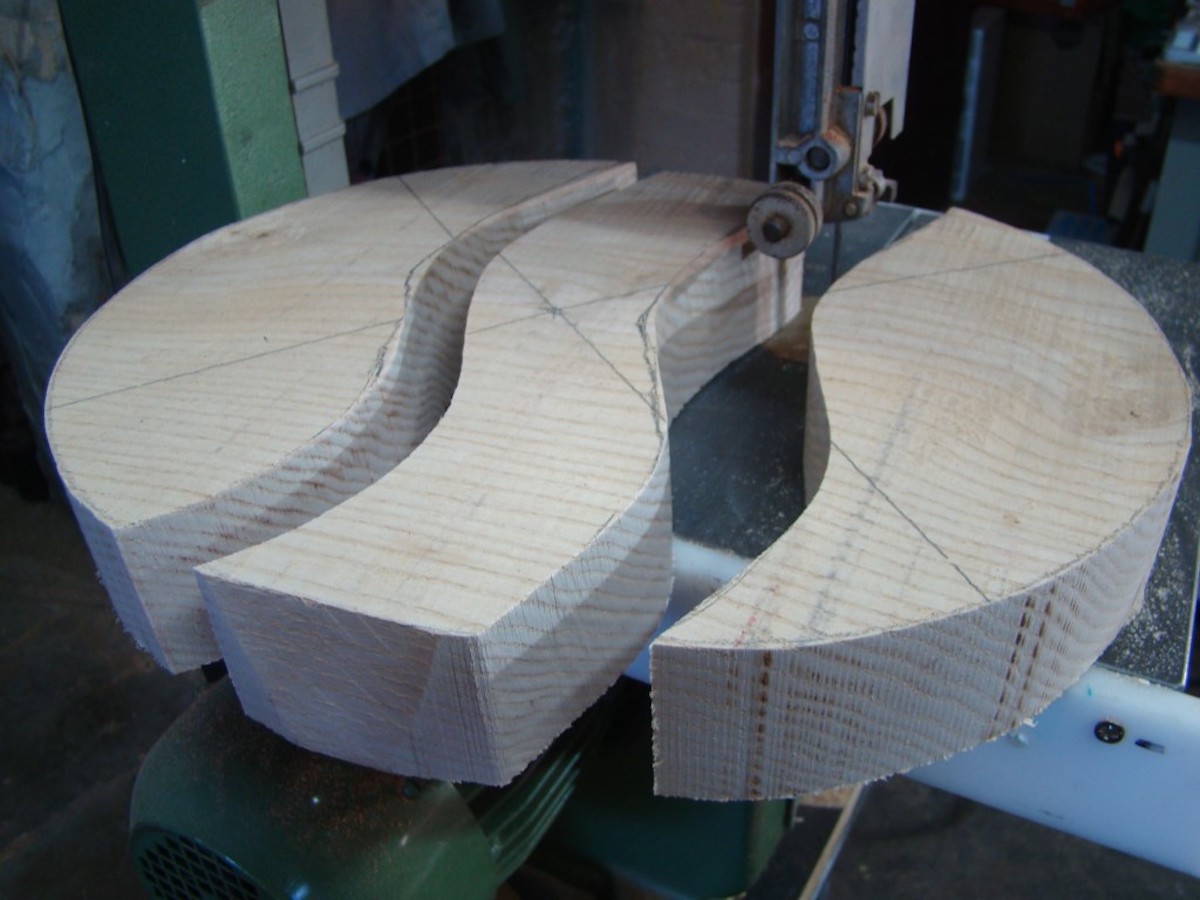
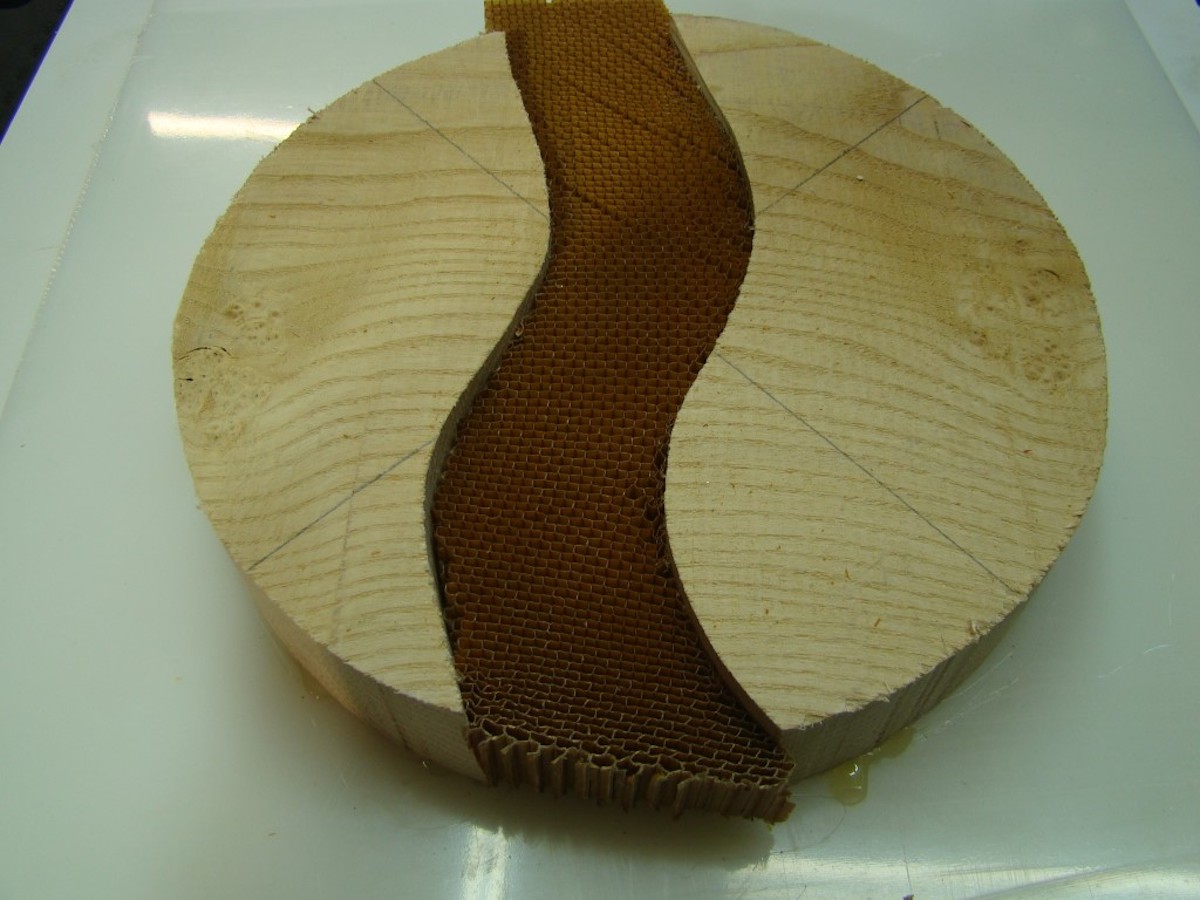
1. Lay out and cut a river pattern in a round bowl blank.
Draw a gentle curved shape that cuts through the middle of the blank and follow the lines to cut out the shape using a bandsaw.
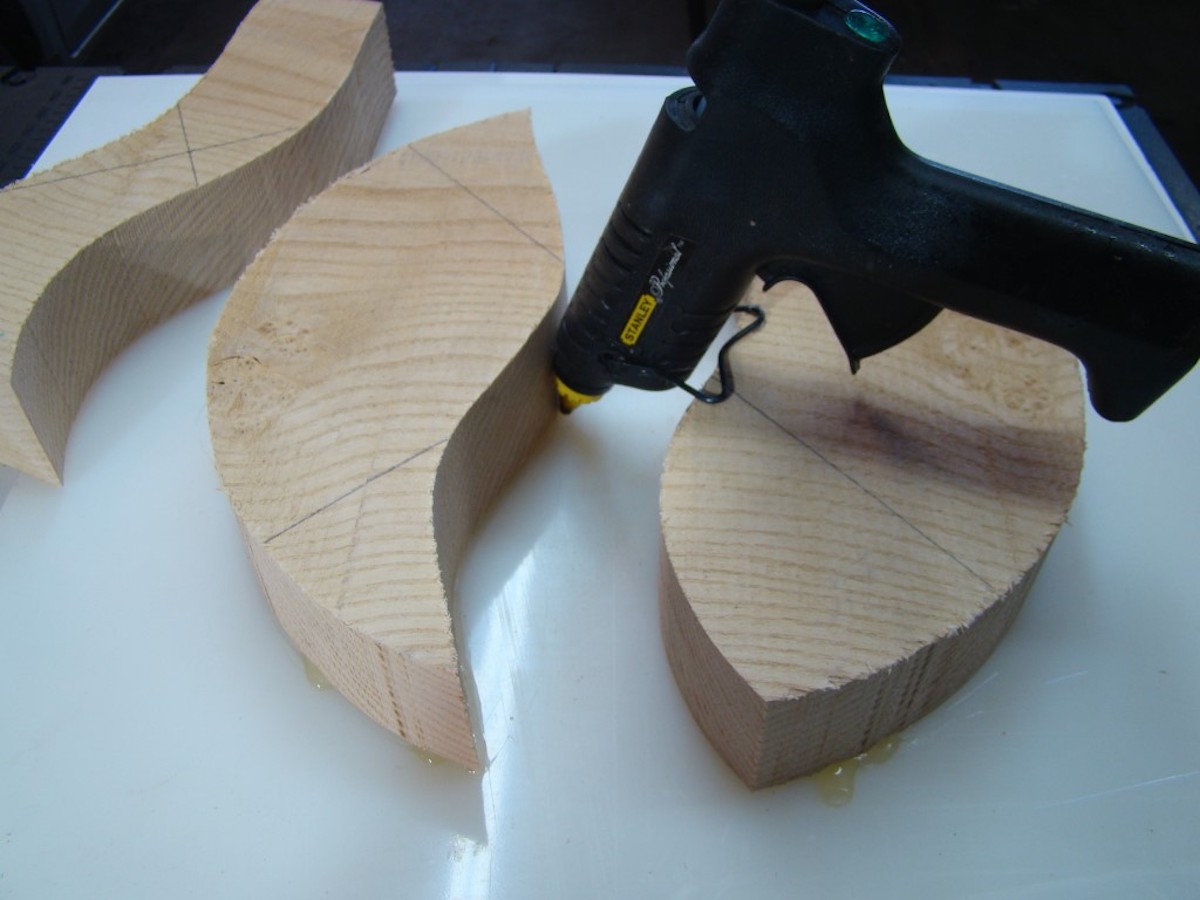
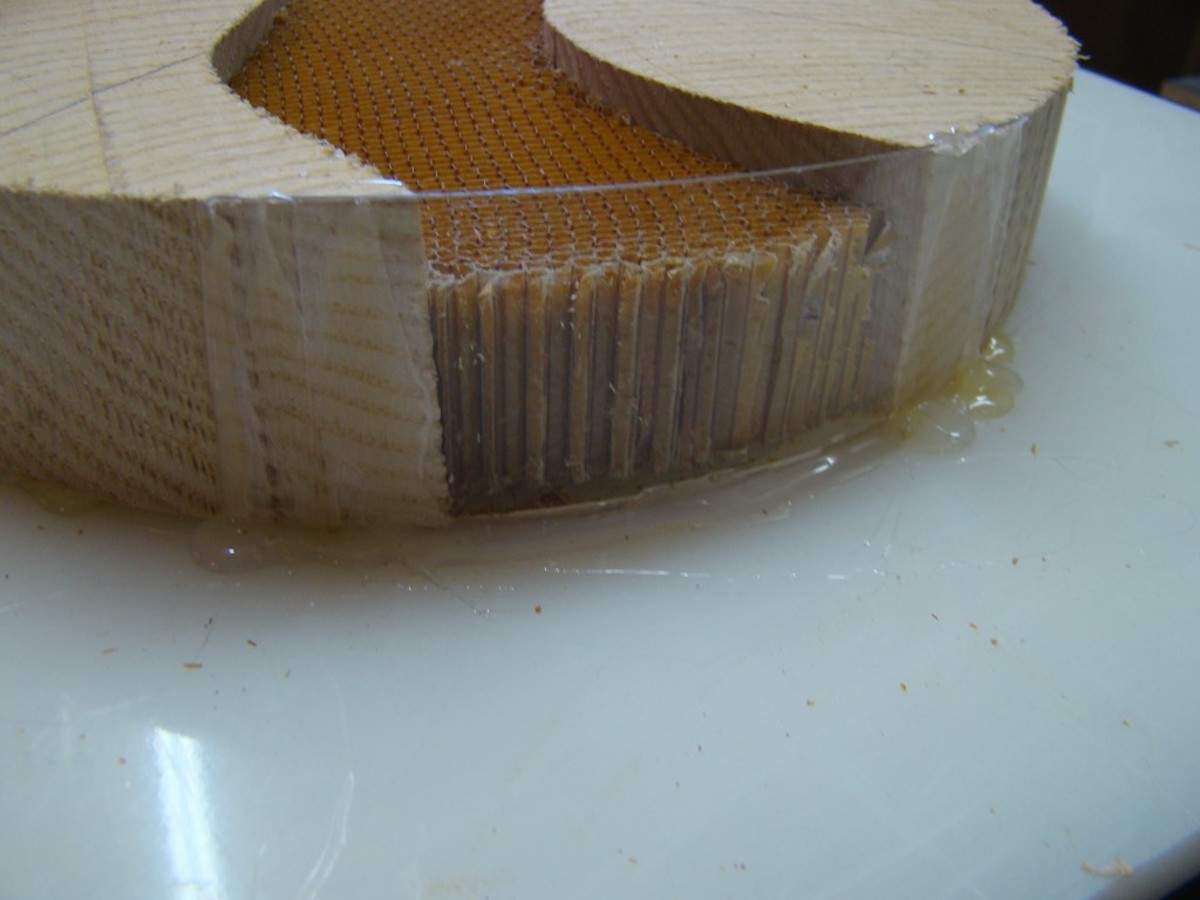
2. Attach your pieces to a non-stick surface.
Set the blank onto a non-stick surface—Ahron used food grade HDPE (high density polyurethane)—and fix the outside pieces in place with hot glue, using the middle piece to space them appropriately. Once the outside pieces are fixed, remove the middle piece. Then, use hot glue to seal the edges of the outside pieces to the work surface to prevent resin from seeping underneath the wood pieces.
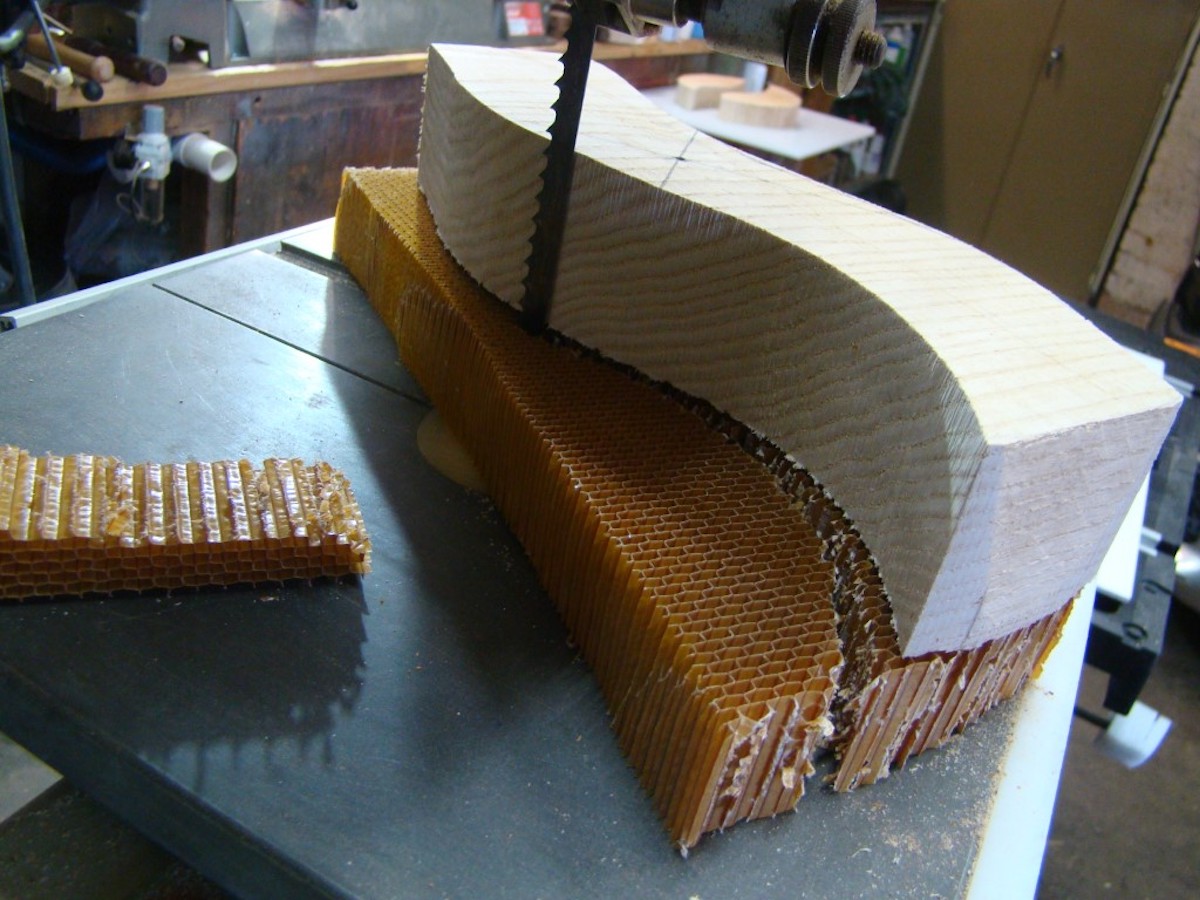
3. Cut the honeycomb insert.
Using the curved middle piece of wood as a template, cut a section of honeycomb to fit snugly between the wooden pieces. Ahron used a bandsaw to cut the honeycomb.
4. Tuck the honeycomb in place and seal the ends.
Carefully insert the honeycomb into position between the wood pieces, and trim away any excess honeycomb material from each end.
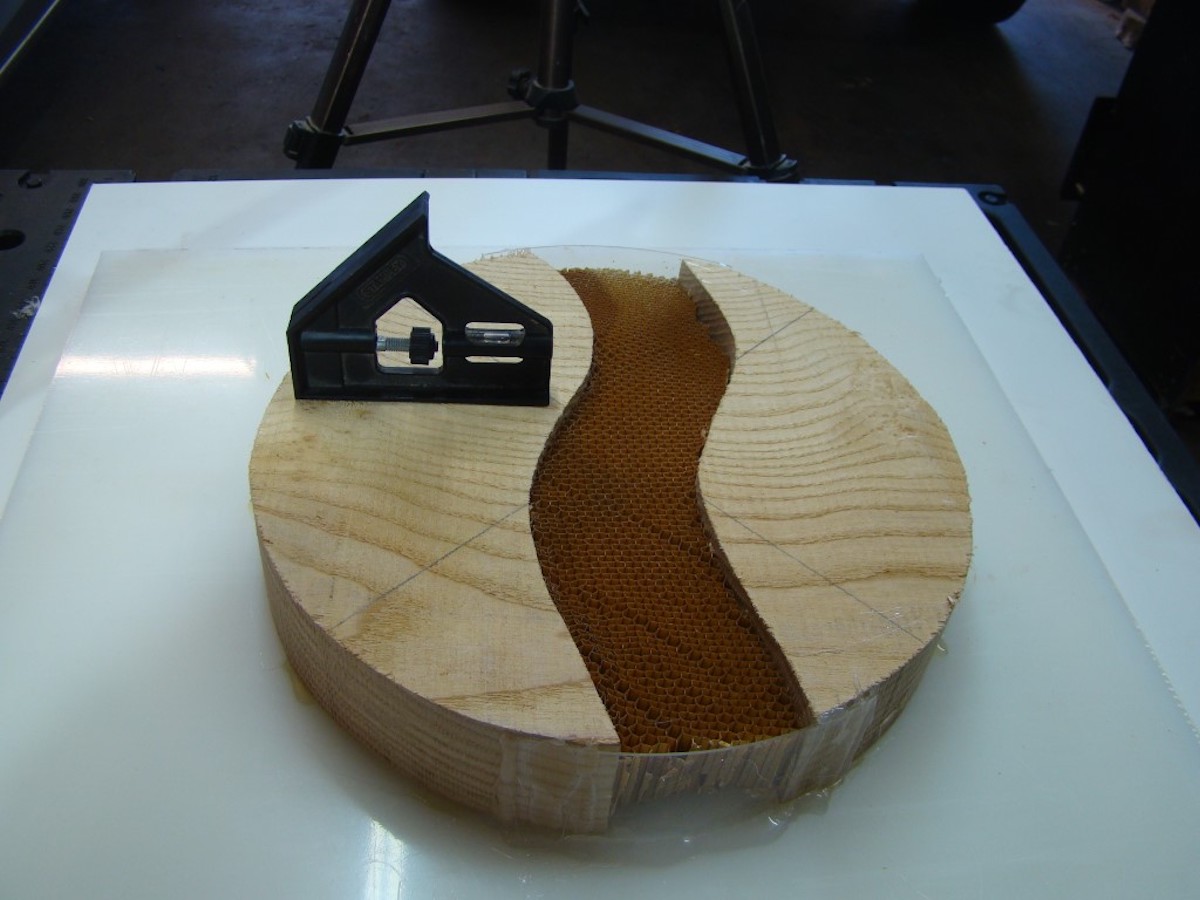
5. Level the blank and seal the ends.
Carefully ensure that the blank is level, adding shims underneath as needed. This will enable you to fill the void completely with resin. Seal the ends of the honeycomb section using a piece of plastic or PVC and some hot glue. This will serve as a form to keep the resin in place while it cures.
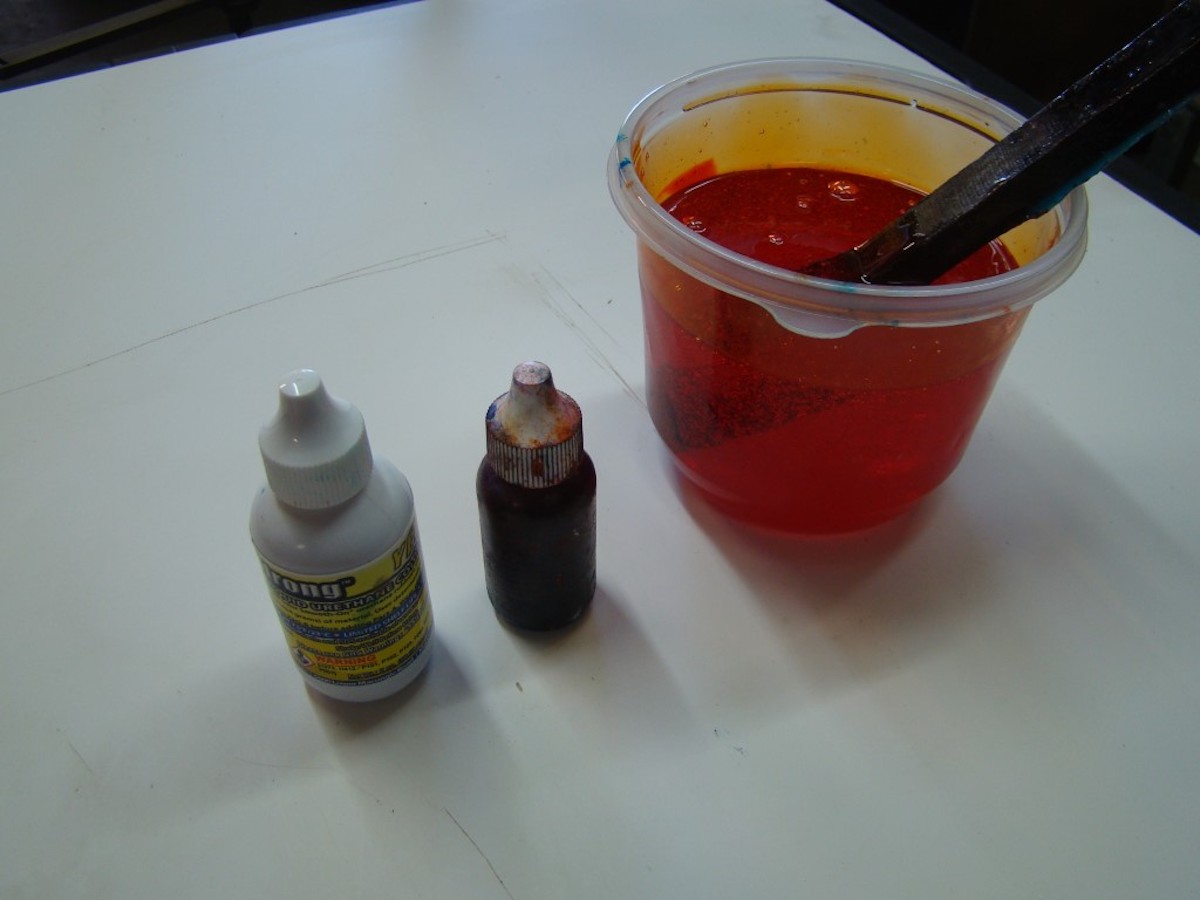
6. Mix your casting resin and add dye.
Ahron used a resin product called Art Expressions South Africa to fill the honeycomb section and added a couple drops of dye to color it. Other brands of casting resin should work fine here as well.
If you’ve never worked with resin or just want to learn more, check out these videos: How to Cast Resin Casting Resin All About Resin
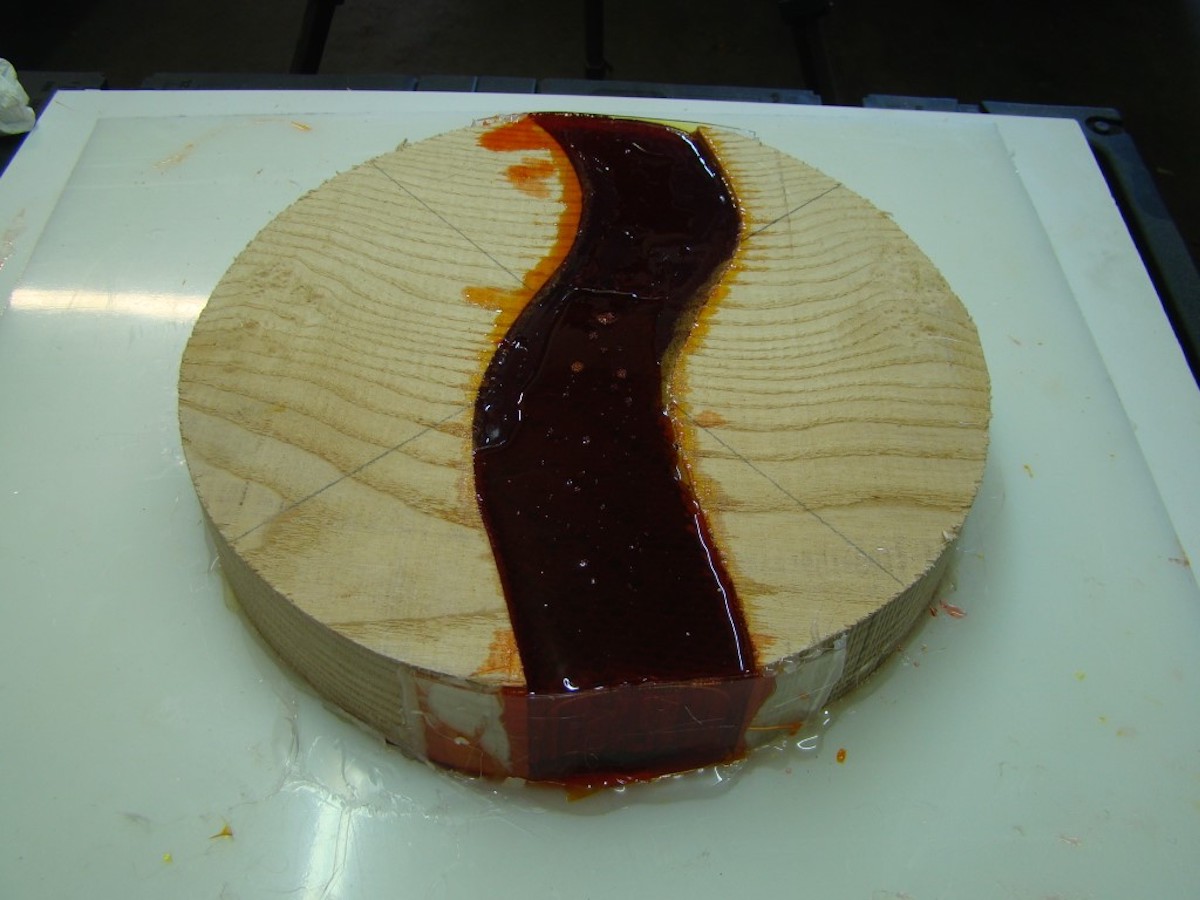
7. Carefully pour your resin and let it cure.
Carefully fill the central cavity with resin up to the top of the form. Make sure you allow the resin to fully cure before mounting on a lathe. This can take quite a bit of patience and cure time will depend on the type of resin you use.
Turning the Bowl
Once your resin has fully cured, turning a resin and wood bowl is much like turning a normal wooden bowl, with just a couple differences.
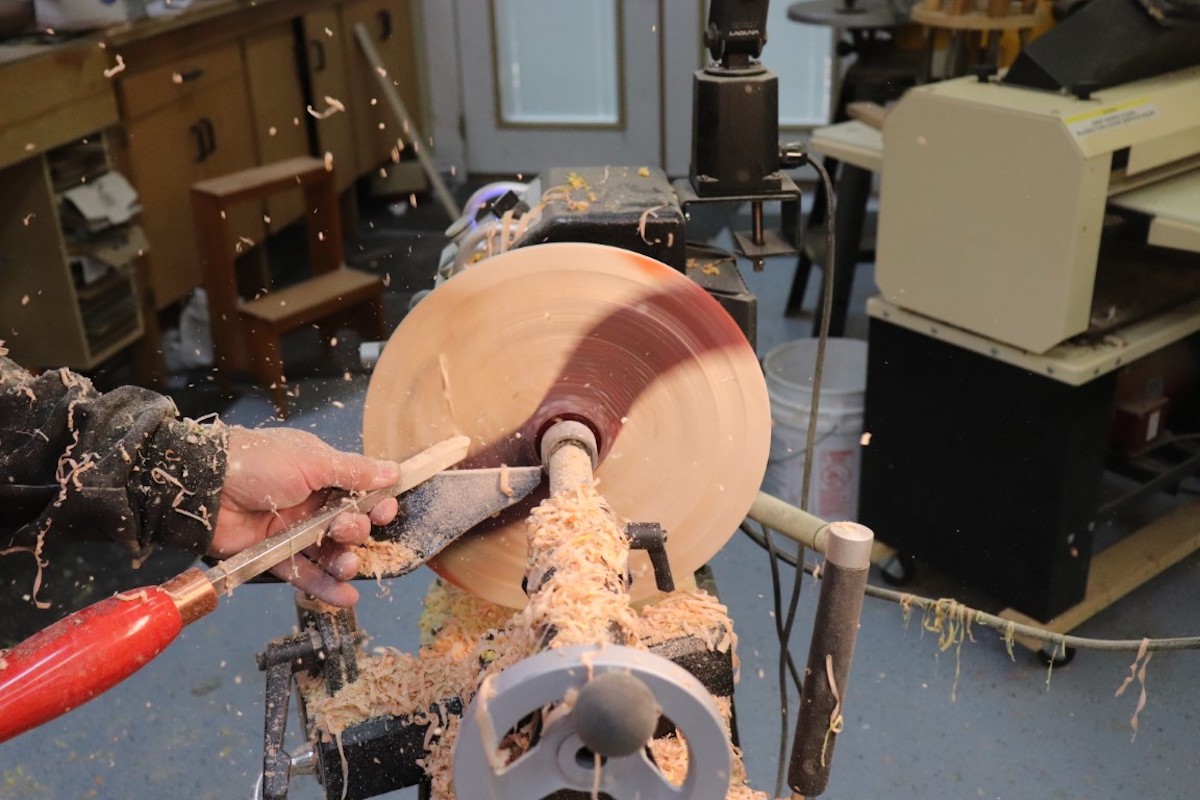
8. Negative rake.
I find that a carbide negative rake scraper works best for turning resin. I use the Easy Wood negative rake round carbide insert which pops right onto my existing Easy Wood handle. Compared to using traditional turning tools, I find that I get a cleaner cut and less of a tendency for the tool to catch.
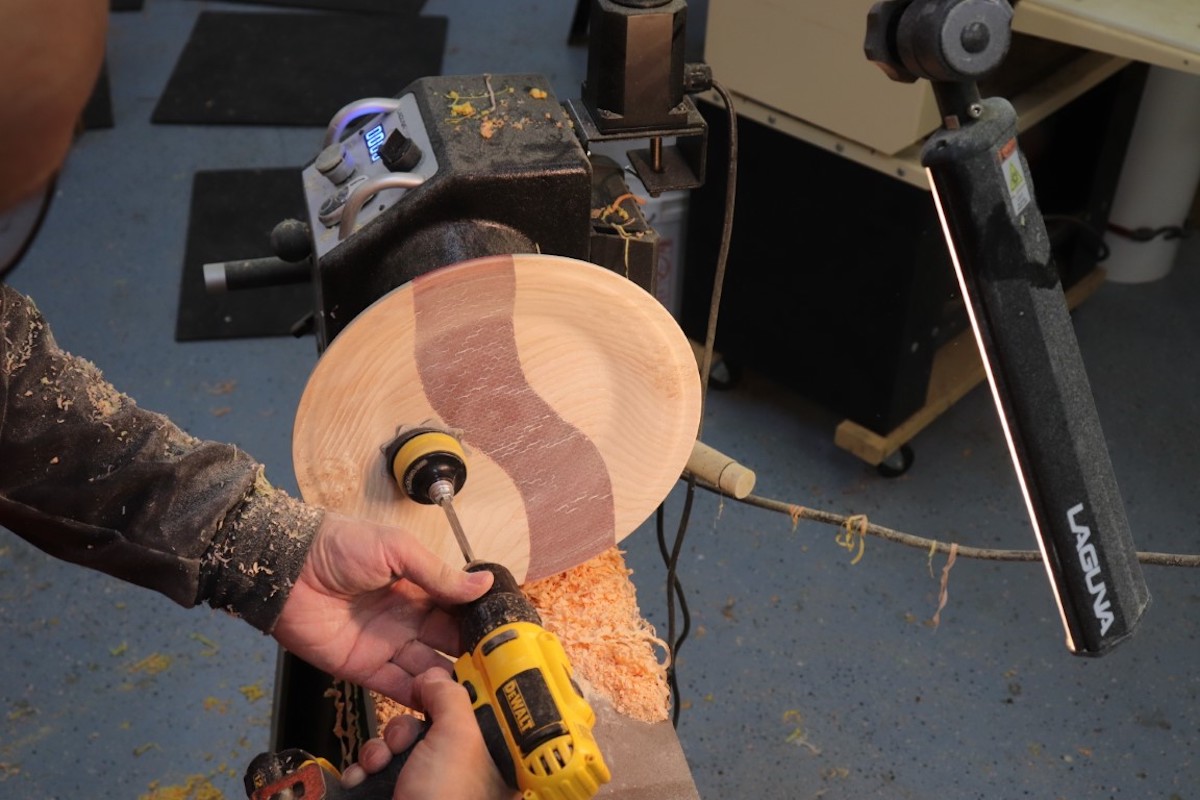
9. More scraping, less sanding.
Get the surface as smooth as possible with the lathe tool. You’ll want to avoid getting deep scratches in the resin, so it works best to get the surface as smooth as possible with your negative rake scraper before moving to the sanding stage, that way you can start with a higher grit. I started with a 180-grit abrasive and moved up to 600-grit.
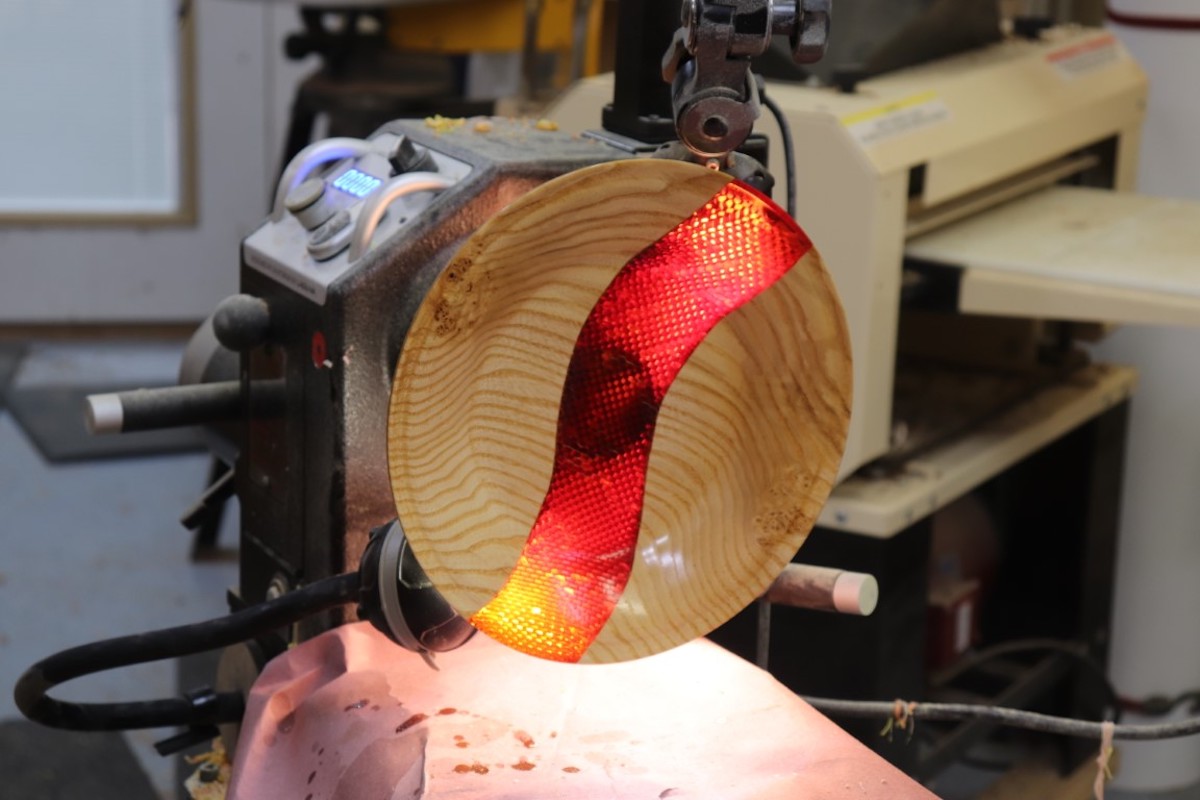
10. Finish.
After you’ve shaped the bowl to your liking, it can be finished with a coat of polyurethane to bring out the luster of the wood and resin. I finished this bowl with a few coats of Minwax wipe-on polyurethane across both the wood and the resin.
Interested in discovering more projects involving resin? Check out some of these videos:
Making an Ocean Resin Pour
Making a Wood Bowl with Resin Accents
Resin River Table
Honeycomb
You can order a 3D-printed honeycomb product that is similar to what Ahron used here: www.etsy.com/shop/MoonsWoodshop
Easy Wood Tools Ci0-NR Negative Rake Round Carbide Insert for Full and Pro Size Easy Wood Tools, $19.99: https://www.easywoodtools.com/negative-rake
Ahron Gropper is a resin artist and YouTuber based in Cape Town, South Africa. His work can be found here: https://www.youtube.com/channel/UCzjqMGA4duqfrcHmHkV0jTA

This is a very interesting article and a beautiful product. However, a couple of comments. Firstly, when casting a large block of resin like that, you will have to choose the epoxy with care. If you use a fast-curing resin, you risk serious exotherm which will as a minimum discolour the resin and distort the product, but at worst it may well catch fire. Even slow-curing resins can run that risk. Check with the manufacturer and do a test piece in a safe place first. Secondly, take effective precautions against breathing-in the epoxy dust and getting it on your skin. Gloves, a paper suit and high-grade filtered dust extraction are a must. Because epoxy doesn't smell quite as bad as polyester resin when curing, it is sometimes assumed to be not as toxic. Don't take that risk!
I am having a hard time finding honeycomb thicker than 1/2 inch. do you know where I can get some 1.5-2.0 inches thick?
Is it actually honeycomb out of wax or a plastic material?
I would love to learn the techniques +
Looks like something I might like to try,
That's lovely!! What would be the cost of the plan?