Wood slabs can make great tables. The problem is getting them flat. The coolest slabs are usually too big to go through a planer or sander; end grain slabs shouldn’t go through a planer. Fortunately, there is an easy way to flatten any oversized board using a shop-made jig and a router. Here’s how.
Build the Router Sled
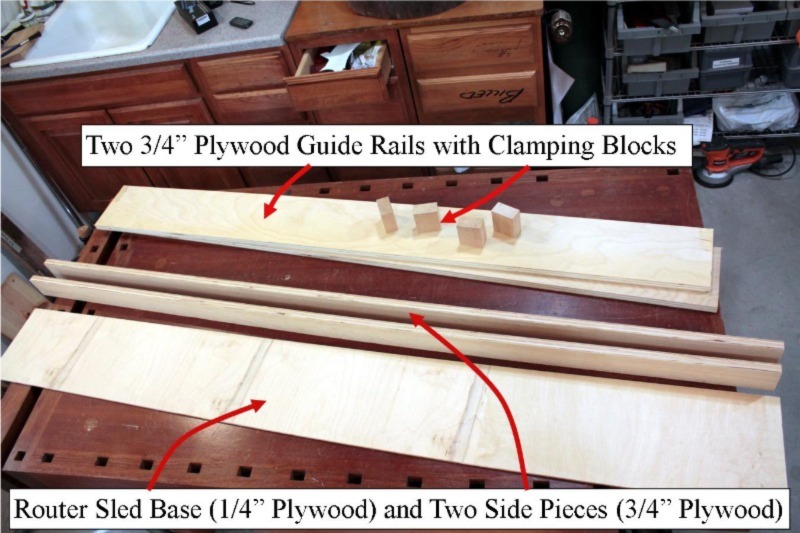
The router sled requires five pieces of plywood and four small blocks of lumber. The router sled should be twice as long as your bench is wide. My bench is 34" wide, so I made my router sled 68" wide. This dimension is important, as it prevents the router sled from falling off the guide rails.
Build the Router Sled
1/4" plywood is best for the sled's base because the router bit must pass through the base before the cutter reaches the wood. If the base is too thick, the router bit might need longer to extend past the bottom of the jig. The base must be wide enough to fit your router plus 1-1/2" to accommodate the 3/4" sides. Most router bases are about 6"-7" in diameter, so I made my router sled base 8-1/2" wide.
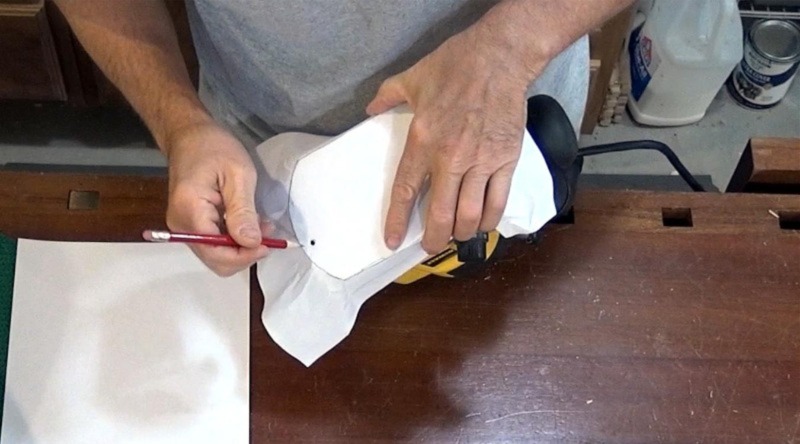
Make a template of your router base by wrapping a piece of paper around the base. Mark the screw holes and collet location by poking holes through the paper with a pencil.
Position the template on the sled base, so the collet location is at the sled's center. Drill and countersink the holes for the router mounting screws and drill a 1-5/8" hole at the collet location for the router bit to pass through.
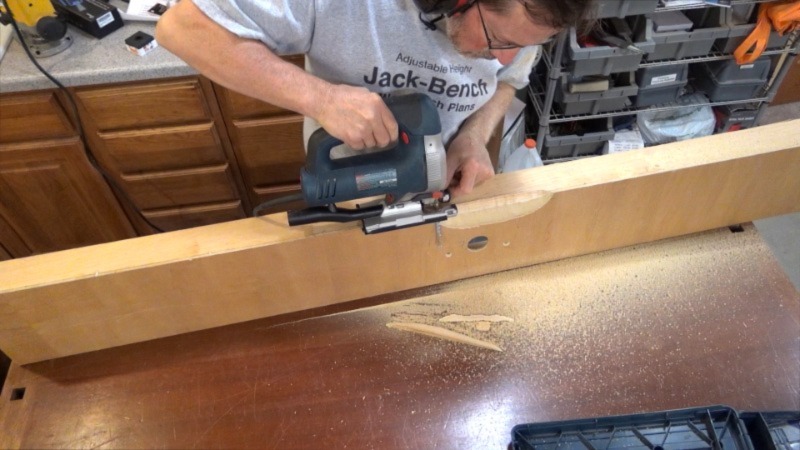
Next, cut the two side pieces for the sled and glue them to the edges of the base piece. The sides of the sled should be about 2-1/2" high and made from 3/4" plywood.
Dust Collection
I take dust collection pretty seriously. Not fanatically, but seriously. Flattening a large board creates a lot of dust and chips.
I decided to add a dust hood (see Sources) to the sled. Before I screwed the dust hood in place, I made a shallow relief cut in the side rail to help move the dust through to the hood.
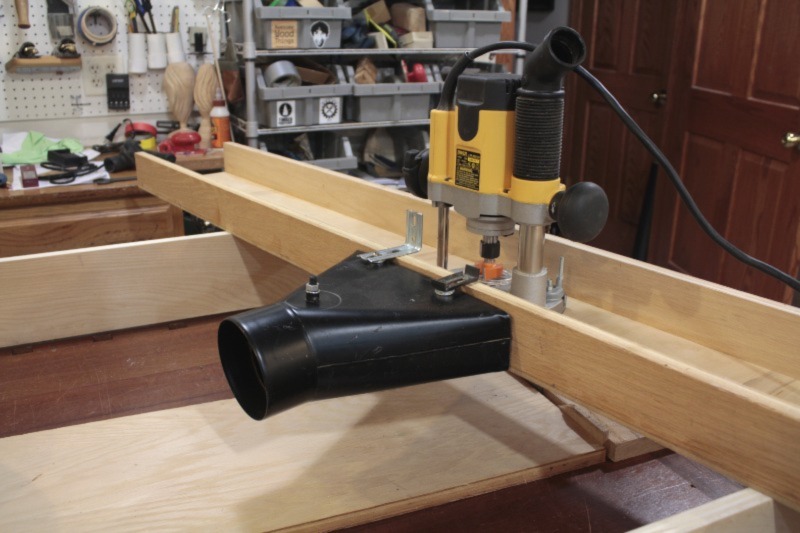
I fastened the dust hood to the router sled with a few old brackets I had saved for "someday." I am fortunate to have a nice dust collection system in my shop, but using even a shop vacuum will help a lot!
Secure and Level the Top Surface of the Wood
Your lumber might be cupped, twisted, or bowed. Your objective is to remove the least amount of wood necessary to get a flat surface.
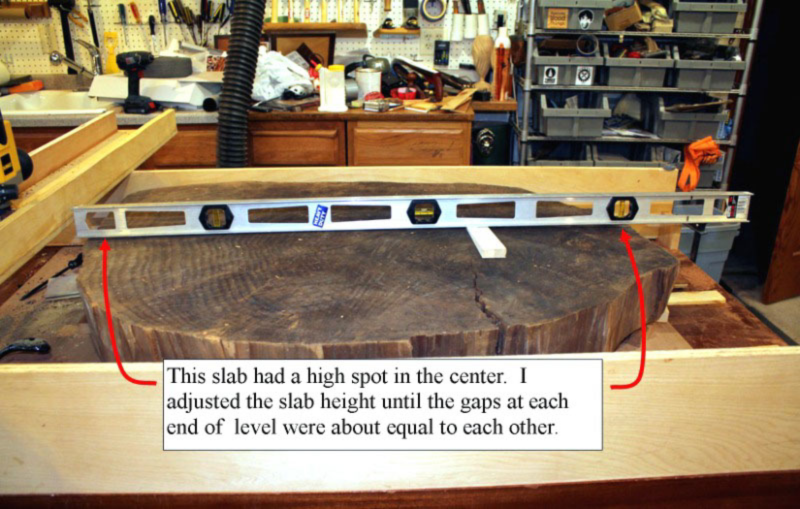
Place a level on the piece (assuming your bench is level) and look at the gap between the level and the low spots on the workpiece. Then adjust the height of the workpiece with shims until that gap has been minimized. After you have minimized that gap, you are ready to secure the piece to your workbench.
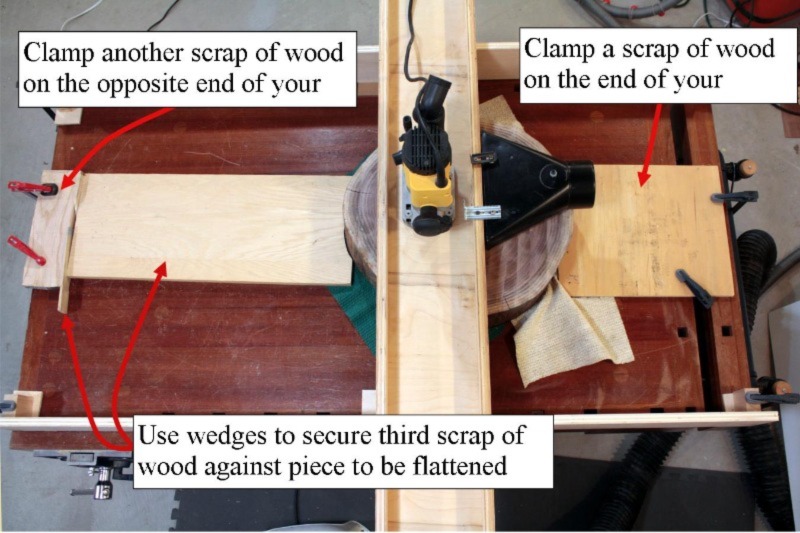
You can secure the wood to your bench with three pieces of scrap wood. Clamp a piece of scrap on one end of your bench and then butt the wood up to that first scrap. Then clamp another small scrap to the opposite end of your bench. Now place a third piece in the space between the wood and the end of your bench. Finally, lock everything in place by tapping a few wedges between the last two pieces of scrap wood. If the material is round, like my piece, it helps to contour the scraps to match the shape.
Securing your work will be distinctive to your particular piece. Just keep in mind that you need horizontal holds, not vertical clamps because you’ll be routing the top face.
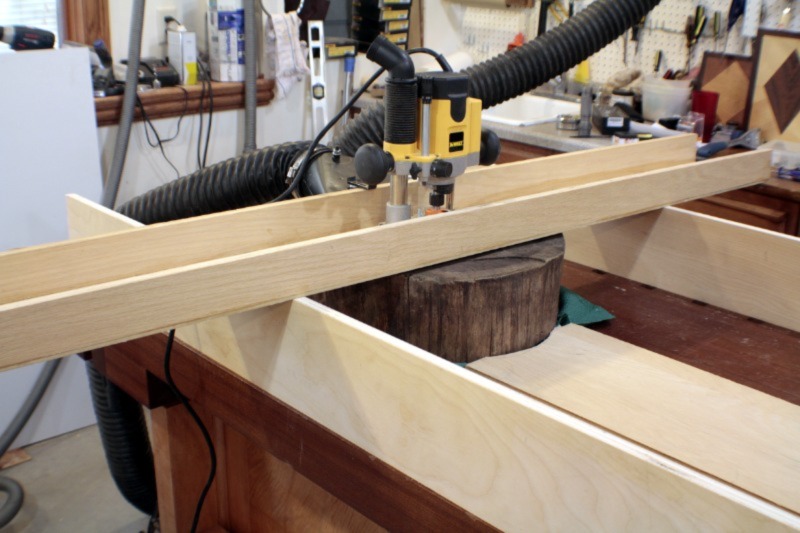
Guide Rails
The guide rails are simply two straight boards on which the router sled rides. If the sides are too tall, your router bit needs longer to reach your board. It is easy to add shims to raise the sides if needed, so it is better to make the sides too short than too tall and shim under them as needed. My slab was about 5-3/4? Thick, and I made the rails 6? high. Glue small blocks on the ends of the guide rails to give yourself another place to clamp the rails down.
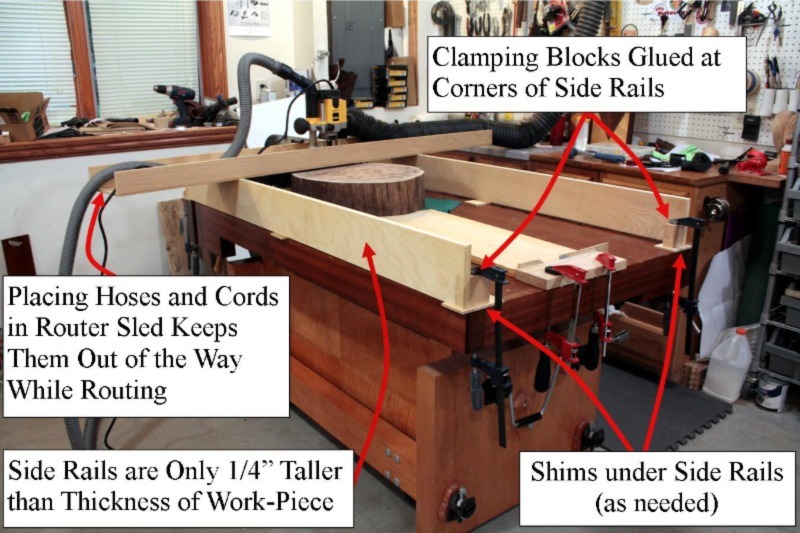
Here’s a great look at the overall setup. Note the shims used to level the guide rails and the “housekeeping” used to keep cords and hoses out of the way.
The router and router bit
You can use any router with a 1/2? Collet, but it will be easier to adjust the depth of the cut with a plunge router. If you use a bit over 3/4" in diameter, you must also use a variable-speed router because running large-diameter bits at full speed is dangerous.
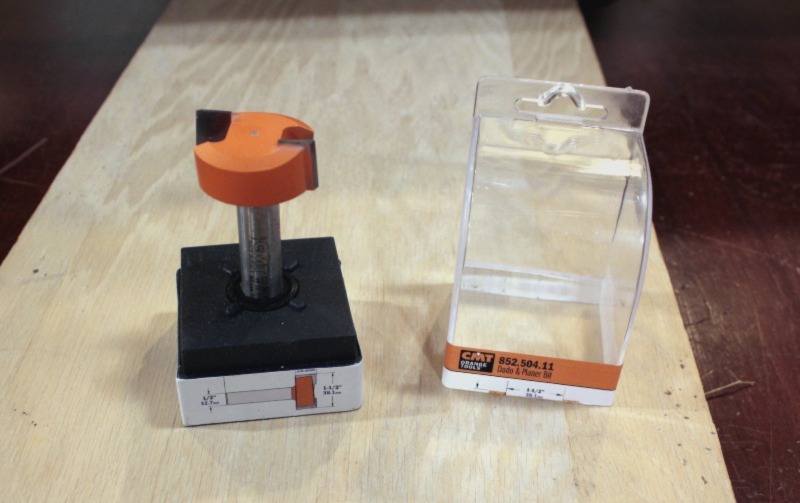
The most important consideration with the router bit is its length. If the bit is too short, it will extend only a short distance past the bottom of the sled. In that case, you might have to shorten the height of the side rails to complete your project. Use a bit that is a minimum of 2-1/4. Long and preferably one that is over 2-1/2". See Sources
You can use any straight bit between 1/2" in diameter and 1-1/2" in diameter. A larger bit will get the job done faster and will likely leave a cleaner surface. Remember that a 1-1/2" diameter bit should only run at about 15,000 RPM. I have used standard mortising bits to flatten boards, and they worked just fine. This time I used a Dado/Planer bit with a 1-1/2" diameter. It did work a little better than a regular bit, but don't worry about it if you don't have one.
Routing
Adding wax to the bottom of the sled and the top of the guide rails will make it easier to move the router sled.
Now for the easy part!
- Hook up your vacuum hose or hoses
- Double check to make sure that your router is set to the proper speed for the bit you are using
- Set the depth of cut so that you will remove about 1/4" from the high spots on the workpiece
- Remember to wear your safety glasses and hearing protection
- Slowly pass the router and sled back and forth across the board until all the high spots have been removed. Watch the video to see this in action
- Re-adjust the depth of cut and repeat until the whole board has been flattened
- Adjust depth of cut to 1/8" or less for a final pass across board
Finishing up

The workpiece will have tracks from the router bit when you flatten it. These are easily removed with either a belt sander or a random orbit sander. If you want both faces of the slab parallel to each other, flip the slab over and repeat this process on the other face. Since this side is already flat, you won’t have to shim it.
Sources:
Dust hood Part #151293 Woodcraft Supply www.woodcraft.com (800) 225-1153Router bit
CMT #352.504.11 Amazon.com
There is reference under the first picture to a video, but I cannot find any video. Please advise
Secure and Level the Top Surface of the Wood description is very confusing. Would like some clarity in the photo or description to explain height of work piece and use of a level to set the height.