Handmade Graduated Butterflies Are Stunning
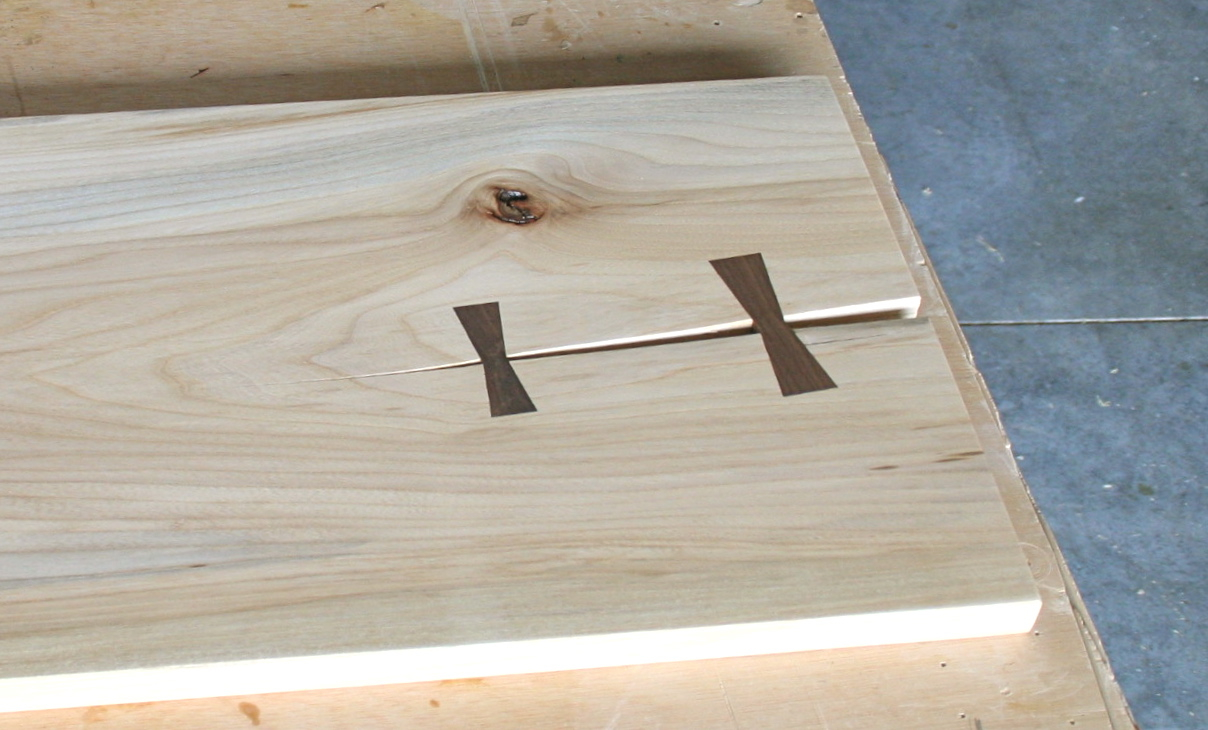
 The butterflies or ‘dutchmen’ embedded in this desktop are custom sized and cut on a bandsaw. Butterflies stabilize the crack and also provide a focal point on top of the desk to highlight your woodworking skills. When making butterfly joints, I tend to avoid templates available at woodworking stores. In my opinion, these templates result in blocky butterflies that have too steep an angle and aren’t as aesthetically pleasing. Besides, if you want something to look uniquely handmade, make it unique and by hand!!! I’ll show you how on a beautiful slab of elm I plan to use for a small side table.

Make Multiple Mock-Up Butterflies to Check for Scale and Proportion
 I set my adjustable angle finder at 8 degrees and mock-up butterflies out of 1/8” plywood. I make multiple iterations in different lengths and widths, allowing me to slide the butterflies around and see if the scale and proportion are right, as well as check for positioning. I don’t have a formula for the dimensions of each butterfly, but too big, and the butterfly feels overkill, too small and it seems like an afterthought. I make mine 1/3 to 1/2 the thickness of the slab and utilize one near the edge and another every 5”-8”. The size of the butterfly has two references: the size of the slab and the size of the crack. They get gradually smaller as the crack gets smaller. Once I settle on the size, I transfer the dimensions to my butterfly blank, which I have made out of contrasting walnut, and cut out the shape on the bandsaw.
Sand the Edges of the Butterflies
 No matter how perfect my technique, the bandsaw blade leaves a slightly imperfect edge on the butterfly. To clean up the edge, I make a sanding block by adhering a half-sheet of 150 grit sandpaper to a flat block of hard maple with double stick tape. I align the waist of the butterfly with the crisp edge of the maple block and move the butterfly rather than move the sanding block. Five or six swipes on each facet of the walnut are all it takes to clean up the butterfly. Harder exotic woods may take longer than walnut, but this technique is still effective.
Mark the Placement of the Butterflies
 I carefully replace the mock-up butterflies with the real ones and trace them in place. A carpenter’s pencil isn’t suitable for this task, or even a #2, which is soft, and dulls easily. My pencil of choice is mechanical with a .07 mm lead. It’s thick enough to withstand rough wood grain, but fine enough to accurately mark an important tabletop cut. Because the butterflies will not be exactly symmetrical, it is essential to mark the orientation of each butterfly.
Mortise the Tabletop

Chisel to the Line
 After the bulk of the waste is cleaned out, I carefully pare to the line with sharp chisels, double-checking often with the butterfly to make sure I’ve not pared too much away. Pen-knives are excellent for cleaning out the acute corners. Once the mortises are cleaned out, I glue the butterfly in place with Titebond III. If the butterfly is an oily exotic species like Cocobolo, I use epoxy.
A Stable and Beautiful Tabletop
 Once the glue is dried I saw off the top of the butterfly with a Japanese saw. Traditionalists are welcome to use a hand planes for the final finish, however the 90-degree opposing wood grain presents a potential problem. For me, I normally hand sand with the grain before applying finish. I prefer a random orbit sander, finishing with 320-grit sandpaper, which ensures there are no issues with tear out or cross grain sanding marks. Now, the tabletop is stable and beautiful. A winning combination!


When designing your butterflies, how do you determine the thickness at the waist in relation to the length and width?
INTERESTED DUTCHMAN JOINT
I'm working on a live edge table. So far have one buttery fly that I have glued into place. I have more that I had cut out with a coping saw. Still working on my tool collection. You said you like to make them 1/3 to 1/2 of the slabs thickness. I've read else where the thicker they are more chance it may show above the slabs surface, depending on the time of year as it reacts to the climates changing. Slab is nearly 2" thick.. butterfly's are made of cherry and the slab is spalted sycamore. I plan on casting it with epoxy resin for my finish. Knowing that information, should I continue putting 1/8 to 1/4 " thick butterfly's or increase the size?
I do like the look of the butterfly keys & also your splendid explanation of the installation. However, I also like the look of clear epoxy filled holes & cracks etc. So while it may seem an overkill to do both I see no reason to not combine both methods that would enhance the ascetics and stop the crack becoming another dust receptacle! Thanks George Regards JimT
I have a large salad bowl (16-18"?) of unknown species - my guess is Maple. It has an approx. 6" long crack from the rim inward bt not directly to center. Would it be a senseless exercise to draw the sides together with clamps and glue it once bowties and slots are cut or am I begging for further or future problems? Also, would you suggest Titebond III or expoxy?
Really good explanation. I'm just starting on my first slab tabletop and had been reading about approaches using a template and hadn't liked the look of them at all.
Just wondering what type of timber he used for the bench top and butterfly joints?
Thanks! I finally got a hit that wasn't origami- this should help me finish my picture frame! :)
I have found using a heavier gauge xacto knife to mark my butterfly keys to be very effective. After I trace the key I go back and score the lines again, and they provide for perfect placement of my chisels when paring the edges.
Just out of curiosity, was the crack in this slab a real crack or was it cut for the demonstration? Either way, it looks great, I was just curious :)