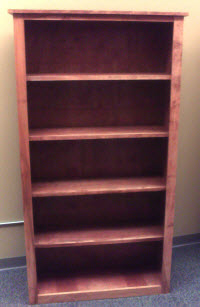
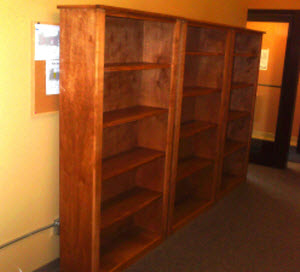
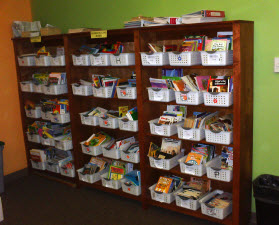
This bookcase plan is designed to be large enough to handle all of the books belonging to the voracious reader in your family, virtually indestructible to withstand years of abuse, and easy on the pocket book using inexpensive materials from your local home center. For about $100 you can have a bookcase that would cost $600 – $800 at a retail furniture store.
Using these bookcase plans, I built three of these for my children’s school about five years ago (five years in an elementary school is equivalent to a hundred years in a typical home). They have seen tons of abuse, and have held up beautifully. The school can’t wait to get their hands on more of them to replace the “bargain” bookcases they got from a furniture chain which have needed extensive repairs over the same five year period.
You can easily build one of these in a weekend using a few simple woodworking tools. In fact, if you were thinking about buying a similar bookcase from a fancy furniture store, I bet you could buy the materials and the necessary tools for about the same as it would cost to buy the bookcase.

Materials list:
- 1 sheet 3/4″ x 4′ x 8′ sheet of furniture grade plywood
- 1 sheet 1/4″ x 4′ x 8′ sheet of furniture grade plywood
- 8 board feet of hardwood (for top, shelf edging, and face frame)
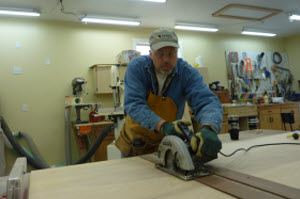 Break down plywood Following the cutting diagram, crosscut plywood along the line marked “first cut”. Take the smaller of the two rip 3/4″ plywood according to diagram and cut list. For safety and easier handling, use a circular saw with a good quality blade (following a straight edge guide for a straight cut) for first cross-cut on plywood. If you are not confident in your circular saw’s ability to cut straight lines with no tear out, leave yourself 1/4″ of extra material (there is enough extra material in a 4′ x 8′ sheet of plywood to do this) and make your final cuts on the table saw.
 Rabbet back edges of side panels to receive plywood back
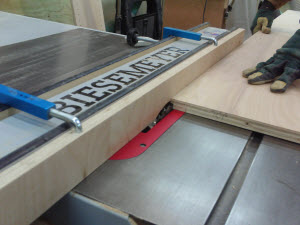
You can do this with a dado blade, or alternatively, you can simply make two passes with a standard kerf table saw blade. I often do the “two pass method” for 1/4″ dado and rabbet cuts simply to save time, avoiding setting up a dado blade. Set up a sacrificial fence on your table saw because you will be spinning the blade right next to the fence. Set your blade height to 3/8″, and remove a width of 1/4″.
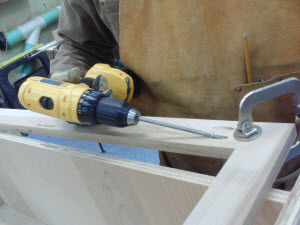
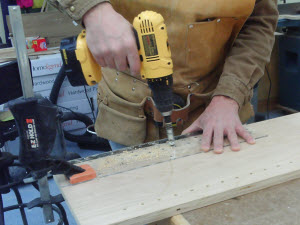 Drill holes for shelving pins
Place the holes 2-1/2″ from the front and back edges. Use a jig to get the appropriate vertical spacing (I like to place them 1″ to 1-1/4″ apart vertically which gives great flexibility for shelf placement), and a solid depth stop so that you don’t blow through the sides of your bookcase. If you accidentally go all the way through the plywood, plug it with a dowel to hide the error, and then re-drill. I recently broke down and bought a fancy jig and drill bit for this operation, but I have drilled many shelf pin holes using pegboard as a spacer jig. The only downside to doing so is that the holes can become sloppy with repeated use, leading to wobbly shelves.
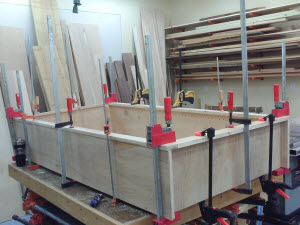
 Assemble carcass using biscuits or dadoes
I generally use biscuits for this (three per joint), and I have never had a joint fail (and a bookcase spending five years in an elementary school is a pretty fair test), but dadoes work great here as well. To assist with accuracy and consistency when using biscuits, mark your biscuit locations on a piece of scrap, and then use the scrap as a guide as you mill biscuit slots in each carcass member. The carcass top is attached so that it is flush with the top of the carcass sides. The carcass bottom is attached so that the top of the panel is 2-1/2″ above the floor (or the bottom of the side panel).
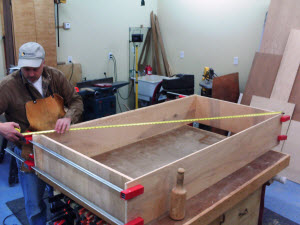 Check the distance from corner to corner to ensure square
If an out-of-square condition exists, use clamp pressure to pull carcass into square.
 Cut plywood back to size
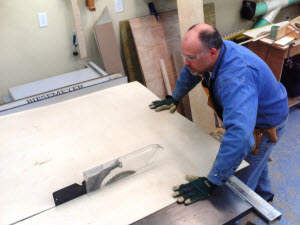
Measure back opening (the plywood sits between the protruding outside edges of the sides that were formed from the rabbets that were previously milled, and fully overlaps the backs of the carcass top and bottom panels). Cut 1/4″ plywood to fit snugly. Even though I have a large cabinet saw equipped with ample outfeed support, I like to make the cross-cut first using a circular saw for a safer, more controlled operation, and then rip to width on a table saw. Be careful when cutting 1/4″ plywood on a table saw, as it can flex, allowing the material to rise above the blade which can cause a dangerous kickback. Use a slow feed rate, apply steady downward pressure when needed, and be sure to use your blade guard for this operation.
 Attach back
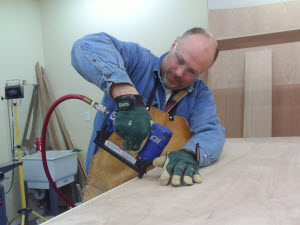
Glue and tack the back panel into place with staples or brads. I prefer staples for this operation because they are less likely to pull through, but if you also glue the back into place as I do, it is highly unlikely that you will ever have a problem with brads.
 Construct the face frame
Stiles are 2-1/2″ x 72″, the top rail measures 1-1/2″ x 32-3/4″, and the bottom rail is 2-1/2″ x 32-3/4″”. My favorite way to assemble frames is with a pocket hole jig, but you can also choose to use biscuits, or simply use brads to nail individual face frame pieces into place. I sometimes use that approach for large built-ins, where it may be cumbersome to construct a face frame on-site during the installation process. The school that will receive these bookcases requested that the face frame go all the way to the floor to prevent pencils and other items from rolling underneath. I generally prefer to keep the face frame about 2″ from the floor to lighten the appearance, but this is a stylistic choice. On larger pieces, such as armoires, I like to keep them high enough to allow a vacuum cleaner to pass underneath.
 Attach the face frame
There are several ways to complete this task, including pocket screws, brads or biscuits. I have used all of these methods, but my preference is biscuits, as they provide adequate strength, excellent alignment, and ease. I generally just place one biscuit in the center of each rail and stile, which provides alignment assistance while not being overly constraining when manual adjustments need to be made to achieve desired placement. After applying glue and biscuits, use lots of clamps to create a gap-free bond between the face frame and carcass.
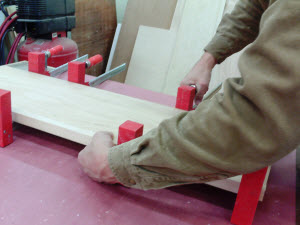 Construct shelves
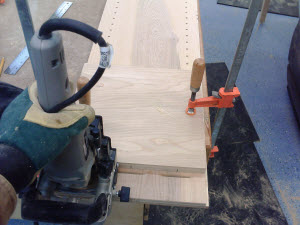
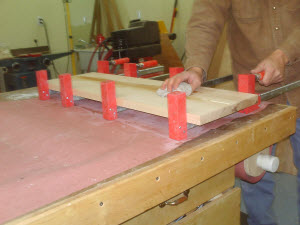
Plywood shelves are simple to cut, but look a little thin and can sag over time under the weight of books and other payload. I like to apply a solid hardwood strip of at least 1″ thick to strengthen the shelf and give it a more robust appearance. Cut four strips to 3/4″ x 1″ x 36-1/4″ (slightly longer than the shelf itself, allowing you to trim flush later). I attach this strip by simply gluing and carefully clamping for good alignment, gluing the 1″ thickness to the plywood. In the past I have also used biscuits or brads for attaching the strips, but I have found it to be unnecessary, and the method I currently use delivers great results every time. Use a lot of clamps to ensure a good bond between the plywood and edge strip. Carefully force each surface flush as you move from clamp to clamp. If you are careful here, you can save yourself a lot of sanding effort later.
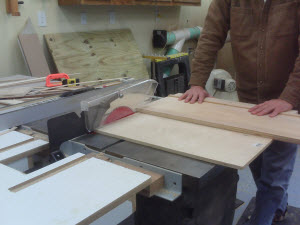 Cross-cut shelves
Use a panel cutting jig to trim each end flush and square, to a final length of 35-7/8″. This will create a nice crisp edge and save on the sanding later.
 Construct top
Glue up a panel using the same material as your face frame. I generally size the top so that it overhangs by about 1″ on all sides, which means a 38-1/2″ x 13-1/4″ panel. Trim to size using a panel cutting jig. An alternative approach to building the top is to use a piece of 3/4″ plywood (same material you used for the sides and shelves), with wood strips applied to each edge as edge banding to mask the laminations, using the same approach as you used to edge band the shelves.
 Attach top
Slightly countersink 1-1/4″ sheetrock screws from underneath. As you drill for the screws near the front of the case, rock the bit slightly to elongate the hole so the top can freely expand and contract.
 Finish
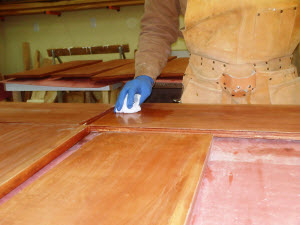
Apply a stain if you want, followed by four coats of poly. Don’t skimp on poly, as this project is likely to take a lot of abuse through the years. After a few days buff out the final finish by wet sanding with 600-grit sand paper.
 Insert shelf pins and shelves
Put some thought into deciding where you place the pins, as you will probably find that you never move them after the initial installation. But, you will have the flexibility if you ever need it.
 Notch the bottom
To allow the bookcase to be placed flush against the wall (the school will actually screw them to the wall), cut a notch on the back along the bottom which will provide adequate clearance for base molding.
 Connect two or three together
Multiples of these bookcases can be connected to form a single, larger unit, generally for a built-in application. To do so, simply build them without a face frame, and finish boards that can be used to construct the face frame separately. Then, nail the face frame in place using brads after the cases are installed. To improve the appearance of the face frame joints using this approach, mill the rails (horizontal pieces) so that they are 1/8-in thinner than the stiles (vertical pieces). This creates a nice shadow line and conceals any unevenness at the joint. Also build a single long top to tie all the pieces together. I use plywood with biscuits to span beyond 8″, edge banded with hardwood strips as you have done for your shelves.
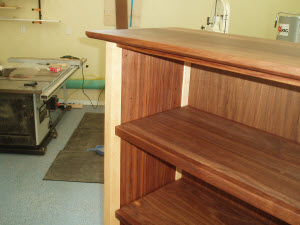 Corner posts
To add some additional dimension to the bookcase, you can use corner posts to dress up the bookcase. I like to use a contrasting wood to highlight this element (such as maple posts with walnut carcass as shown), but this is a stylistic preference. The posts can be square, or tapered. I prefer to cut these as tapers, using a band saw to make the angled cuts on the two outside surfaces of each corner post.
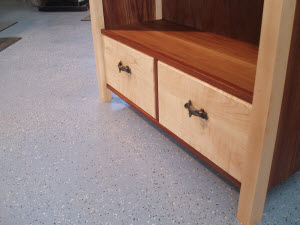 Drawers
Another nice unique touch for a bookcase is to add a drawer or two to the bottom. It is visually interesting, and offers a nice concealed storage area to store things that you don’t want creating clutter on your shelves.
I hope you will build a bookcase of your own. It is fun, it is satisfying, and you can do it!
Paul Mayer lives in Lakeville, MN and is a hopelessly addicted hobbyist woodworker. He also assists his father, Vernon Mayer, in his woodworking business Vern’s Wood Goods where they build serving trays, cutting boards, kitchen utensils and other fine crafts.

Hi... In the section titled “Construct shelves”, where should I apply the 1” strip to the bottom of the shelf? Front of the shelf? Middle or back? Thanks!
Building a bookcase is a lot of fun. Your design is a good one. No rookie should shrink from this task, as it builds much confidence in the maker.
Thank you
Looks good
Drawers on the bottom are also good because books on the floor level are hard to access, hard to see and take a lot of damage from dust, kicks, vacuums etc.
Nice shelves, just what I needed.
I didn't see any plans??? All I saw was the cut list.
[…] woodworking bookcase plans wood bunk beds twin over queen shop workbench plans made with 2x4s. Rocksolid, lowcost bookcase plans. Paul mayer walks you through the stepbystep process for building a solid, beautiful bookcase for […]
I like the straight forward instructions for this plan. The alternate construction methods discussed are also helpful. I don't have several hundred dollars tied up in clamps so suggesting pocket hole screws as an alternative is a good ideal. I do realize that this would add to the cost of construction.
Nice project, good planes