
CNC Machine Programming Tips
Randy JohnsonAre you looking to turn your creative ideas into reality using a benchtop CNC machine? In this video, hosted by Randy Johnson, you’ll learn valuable tricks and techniques to help you streamline bringing your innovative concepts to life with precision and accuracy.
Expert Insights on CNC Programming
Randy Johnson shares his wealth of experience and provides practical knowledge about programming for CNC operations. Whether you’re a beginner or an enthusiast, you’ll find expert advice that will empower you to harness the full potential of your CNC machine.
Unlock Your Woodworking Potential
Sign up for our newsletter for endless woodworking inspiration! Become a member today and gain access to a world of craftsmanship.
Share tips, start a discussion or ask one of our experts or other students a question.
Already a member? Sign in
5 Responses to “CNC Machine Programming Tips”
Premium Membership
Unlock exclusive member content from our industry experts.
- 24/7 Access to Premium Woodworking Videos, Projects, and Tips
- Step-by-Step Instructional Demos, Plans, and Tutorials
- 50% Off Video Downloads Purchased in the Woodworkers Guild of America Shop
- 2 Printable Woodworking Plans
Unlock exclusive member content from our industry experts.
- 24/7 Access to Premium Woodworking Videos, Projects, and Tips
- Step-by-Step Instructional Demos, Plans, and Tutorials
- 50% Off Video Downloads Purchased in the Woodworkers Guild of America Shop
- 2 Full-Length Video Downloads to Watch Offline
- 2 Printable Woodworking Plans
Gold Membership
$370 Value
Get everything included in Premium plus exclusive Gold Membership benefits.
- 24/7 Access to Premium Woodworking Videos, Projects, and Tips
- Step-by-Step Instructional Demos, Plans, and Tutorials
- 8 Full-Length Video Downloads to Watch Offline
- 3 Full-Length Woodworking Classes to Keep for Life
- 7 Printable Woodworking Plans
- Discounts on Purchase-to-Own Content in the Woodworkers Guild of America Shop
- Access to Ask the Expert Program
- Exclusive GOLD LIVE Streaming Events


He stated that using a photograph would be more difficult. Is it possible to use a black and white photo and apply that to the carving? Convert to 3-D sort of? Thank You
George, Are you a member of the 4% with us? I noticed the Eagle Scout patch on the wall. Take care Ritchie
Your welcome, George, and any improvements on future videos to help novice Vcarve users would be most appreciated, I'm sure.
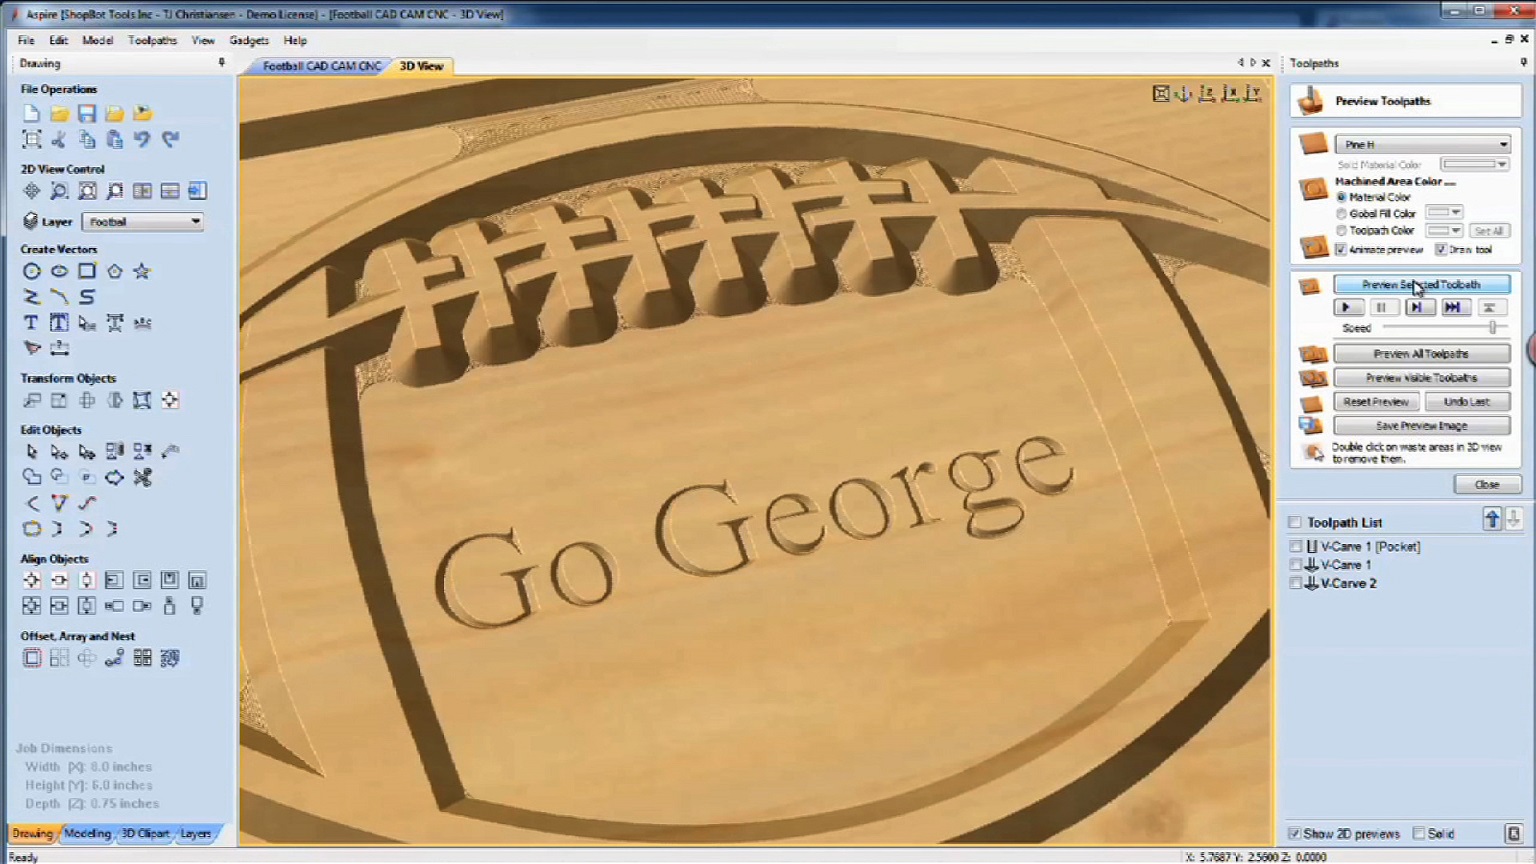
George, forgive me, at age 75 I may be dense, but I would like to add-to my last comments regarding your 'Go George' video. I would hope my additional comments would add to the directions given by Randy Johnson and he would assist you by providing more specific/step-by-step directions for the novice to follow. On the initial CAD or Drawing Part, when setting the 'vector' for a clip art, I think it would be beneficial to the novice to see exactly the steps taken on setting-up the bitmap and vector layers (the setup for the text layer is good). Also, to make sure the specific keys or icons are pointed out to use when required. On the tool path side, when the tool path(s) are selected it should be shown how, why and when the separate 'layer' tool paths should be selected, how, why and when each tool is used and how, why and when the different depths are used. Also, it should be pointed out to save each file path separately and to run each file path separately (please note that I am using the Rockler Sharp Pro with the Vectric/Vcarve software). I did notice how you added your spoil board to your machines deck and also how you use hot glue to stabilize the work piece. I'm going right out now to buy the material for my spoil board. And, could you provide the link for the football bitmap so us just starting out can try 'Go George'? Thanks, George, and I appreciate your time in reviewing my comments.
George ... At age 75, I took the plunge and purchased the latest Sharp Pro system and I have to point out, I've viewed a number of tutorial videos that are available on YouTube for my system, but I've found that your tutorial videos have been more positive and direct in teaching what the subject matter is. NOW ... this 'Go George' video is, by far, the BEST that I've seen in providing specific direction(s) on how to perform a CNC operation, such as you provided, and I thank you for your concerns for the novice CNC enthusiasts. I anticipate your future videos.