This is the first of a two-part series on the biscuit joiner. This article provides instruction on using a biscuit joiner, along with advice on setting up your machine, choosing the correct size biscuits, proper gluing techniques, and more. Woodworkers know that there are many approaches to joining two pieces of wood together. The key is to choose the appropriate joint for the application at hand. Sometimes a project might be subjected to heavy stress during its useful life (dining chair, step stool, etc.), and under such conditions you might call upon the industrial strength of mortise and tenon joinery, dadoes or other robust mechanical connections. On other occasions you might choose to make the joinery itself a showcase portion of the project, in which case you might choose the timeless beauty and symmetry of dovetails or finger joints. But sometimes you are looking for a joinery method that is quick, simple, and strong enough for light to medium duty applications. In these situations, I commonly turn to my biscuit joiner. I find a biscuit joint to be great for boxes, drawers, cabinet carcasses, face frames, miters, edge banding, and as a lightweight substitute for mortise and tenon joinery.
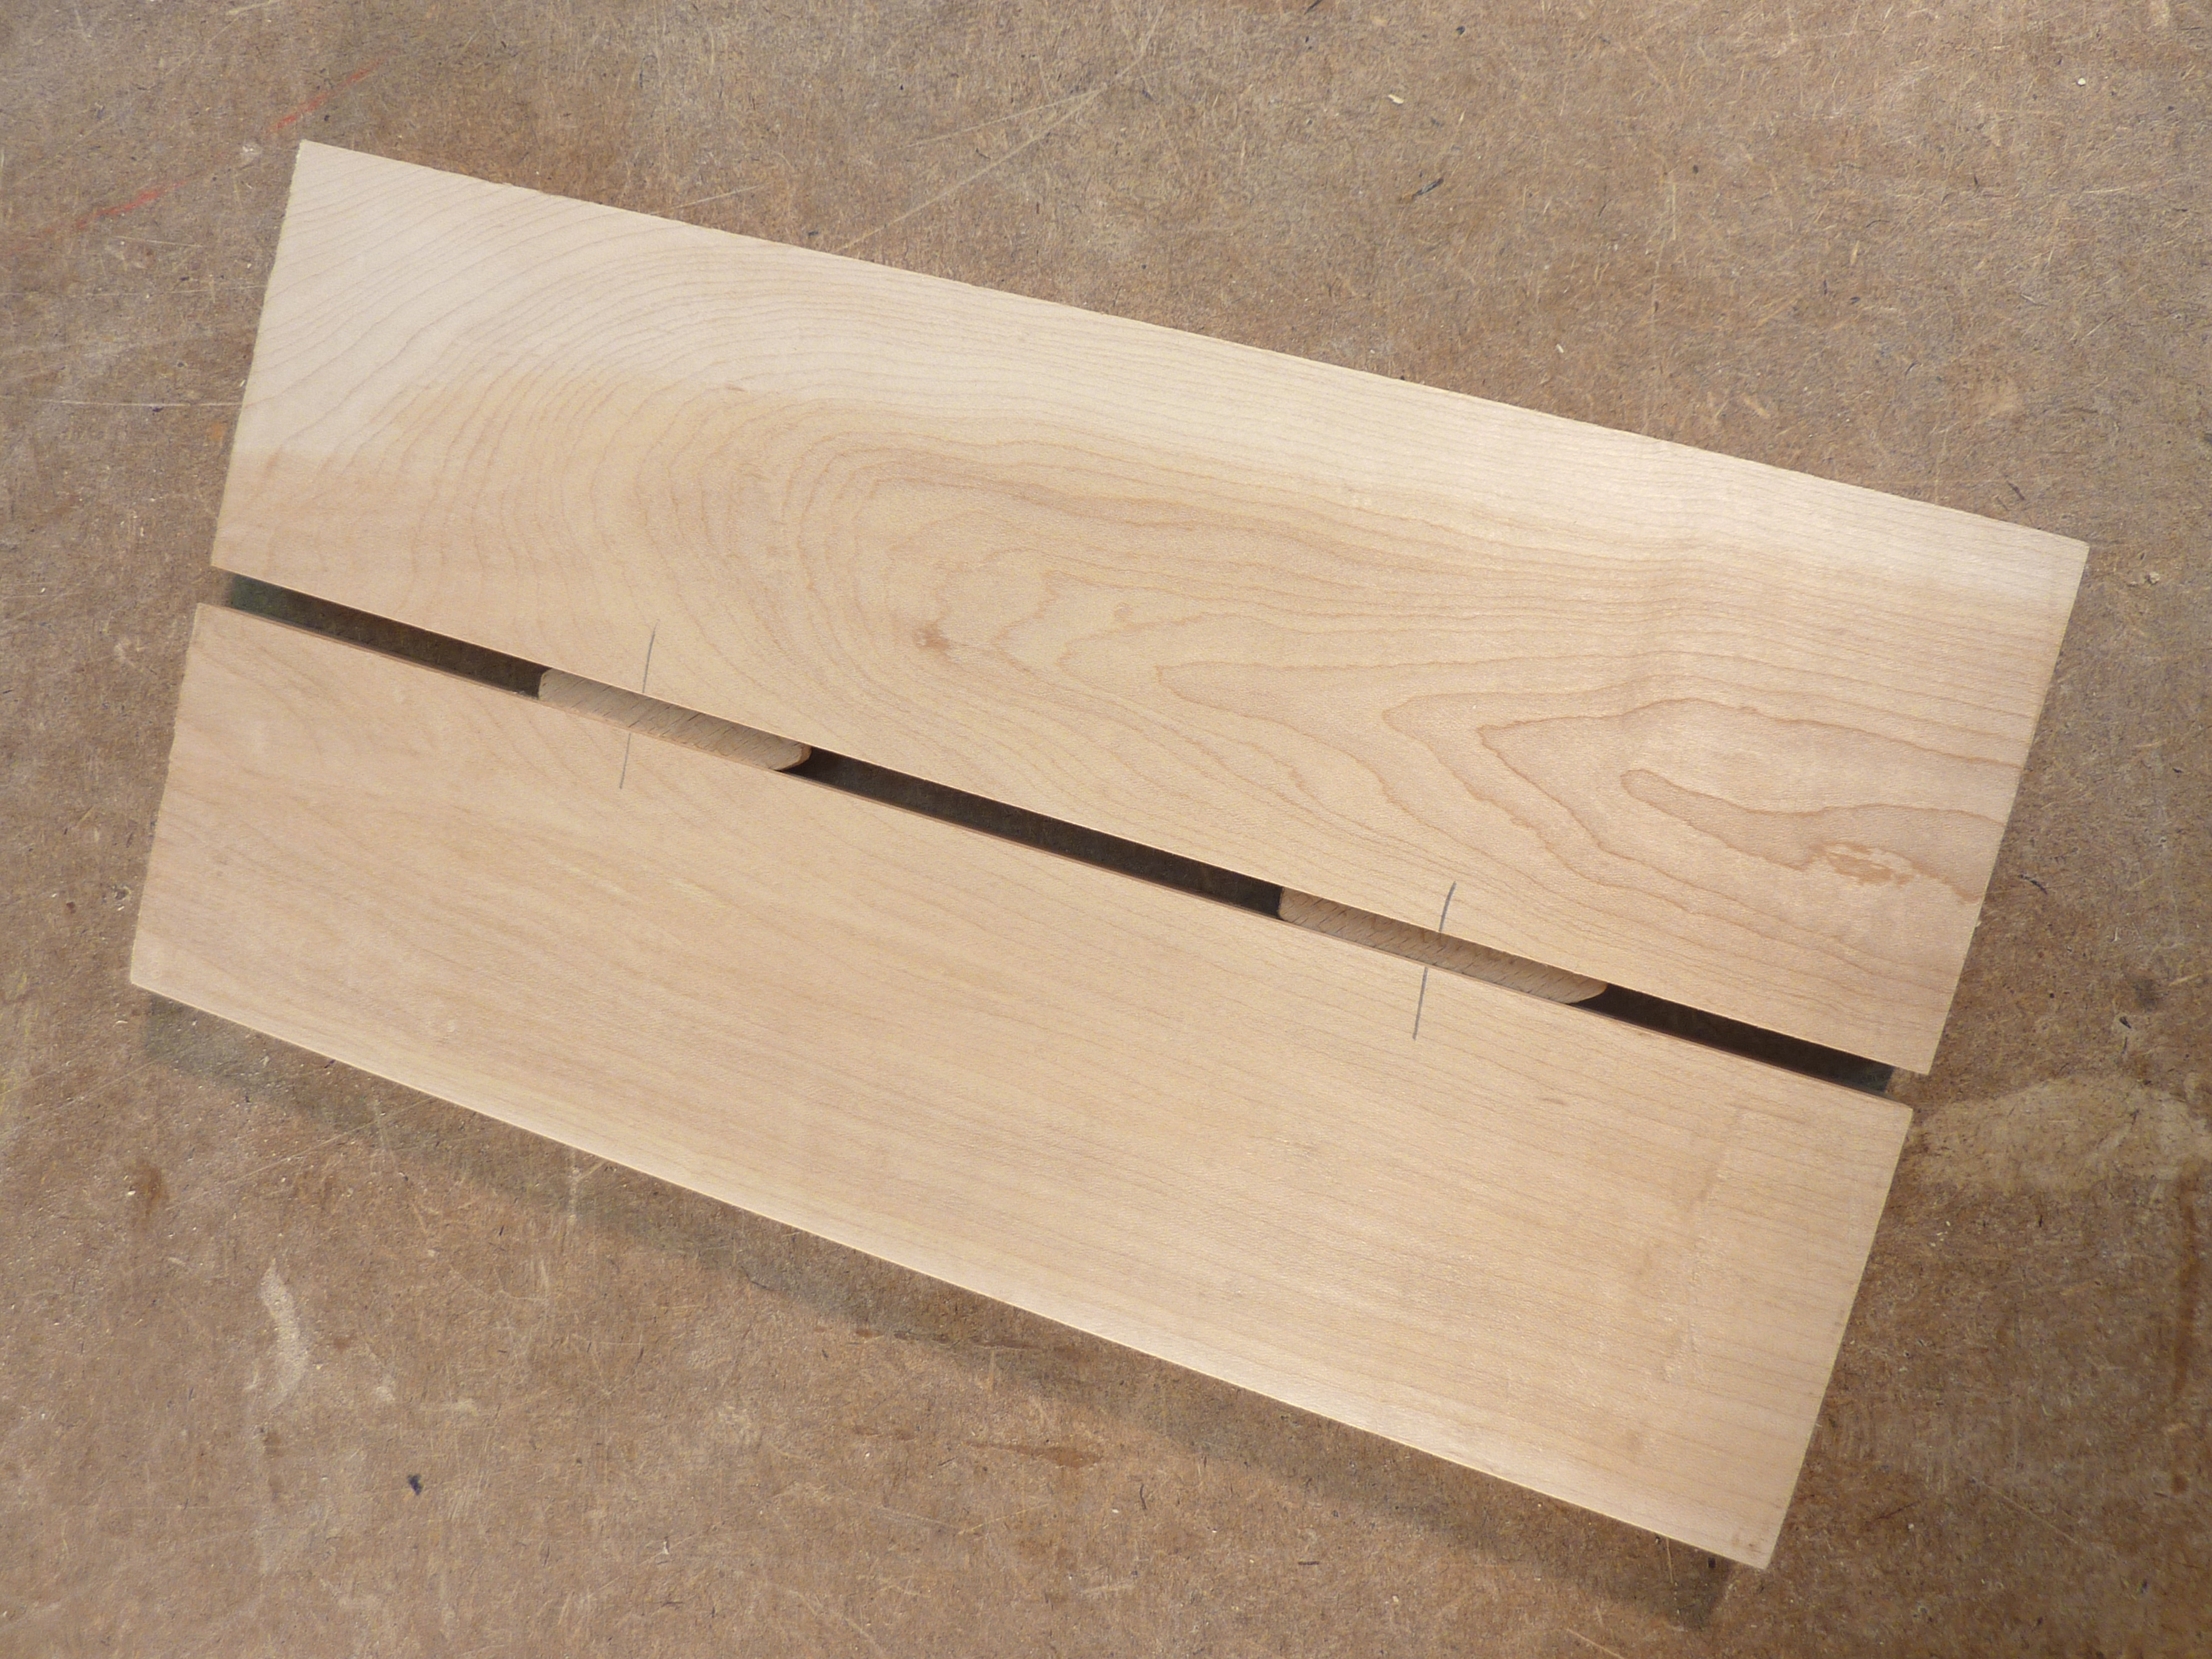
 Nothing beats biscuit joinery when it comes to quick and simple woodworking joints. Just mill slots in the mating pieces, apply glue, slip biscuits in place, assemble, clamp, and done. In about a minute, your joint is perfectly aligned, adequately strong for many applications, and the horizontal wiggle room provided in the joint (as represented in the picture by the offset biscuit center marks) makes it easy to make tuning adjustments at assembly time, just when other forms of joinery leave you high and dry.

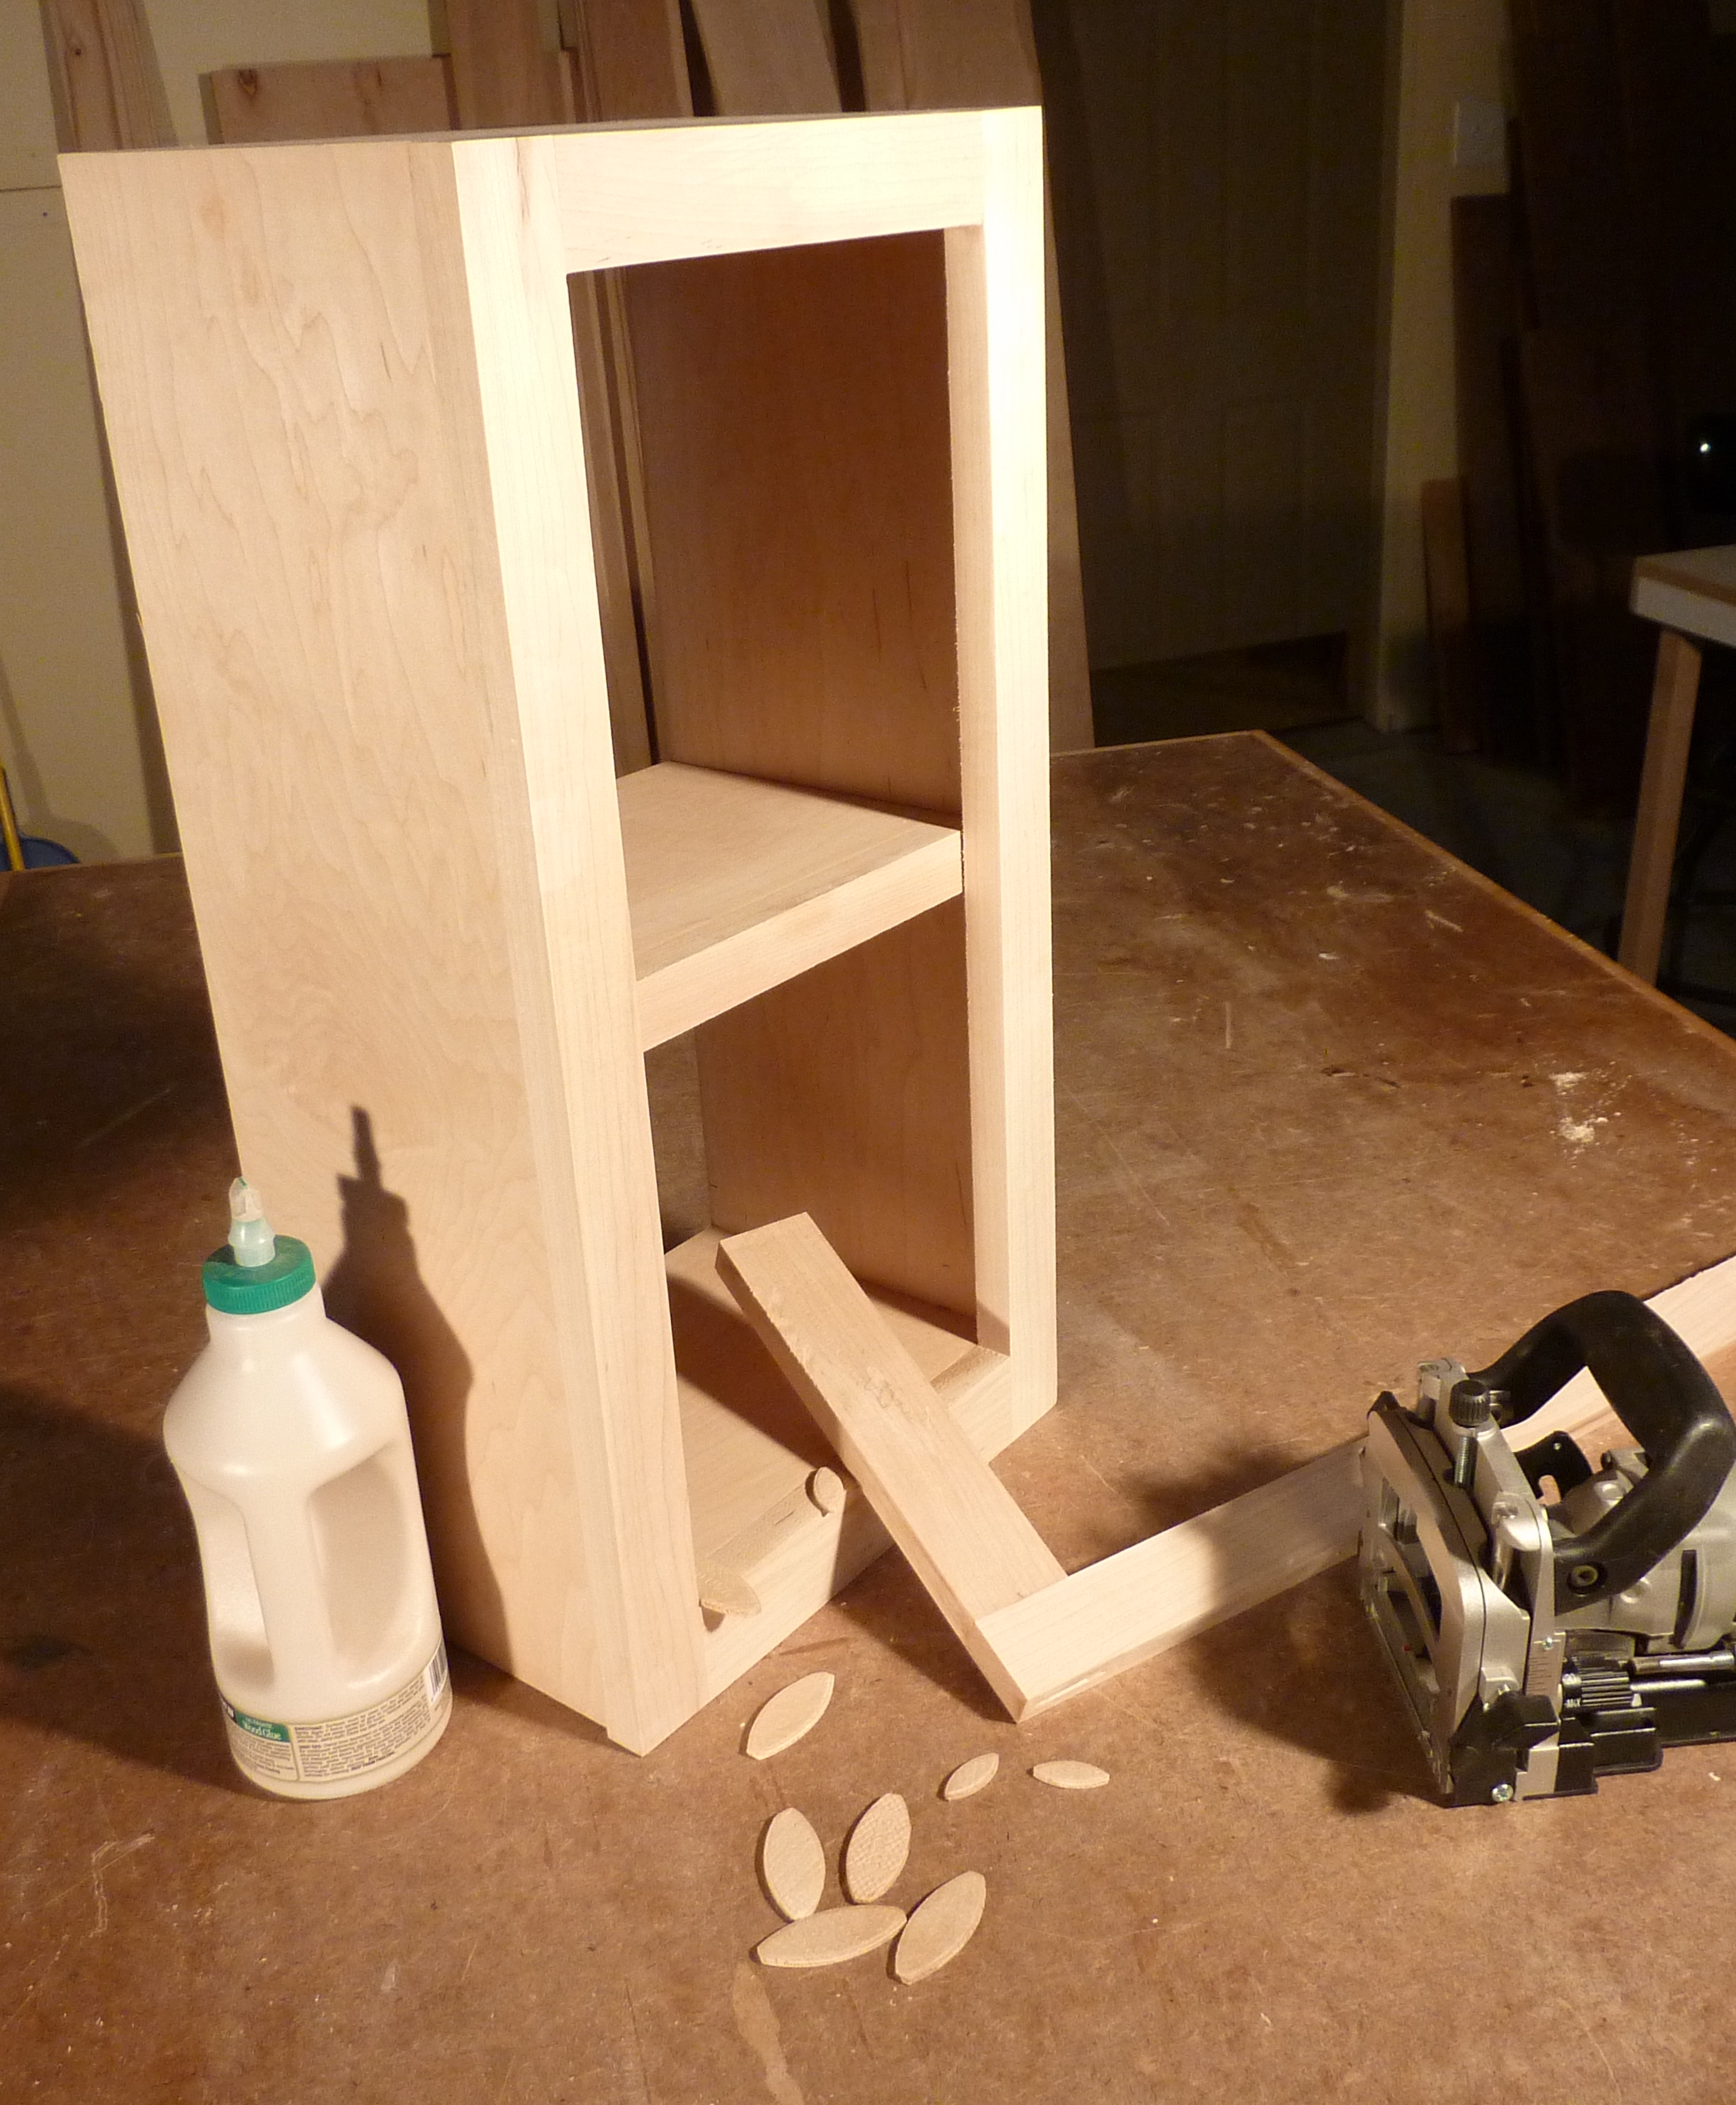
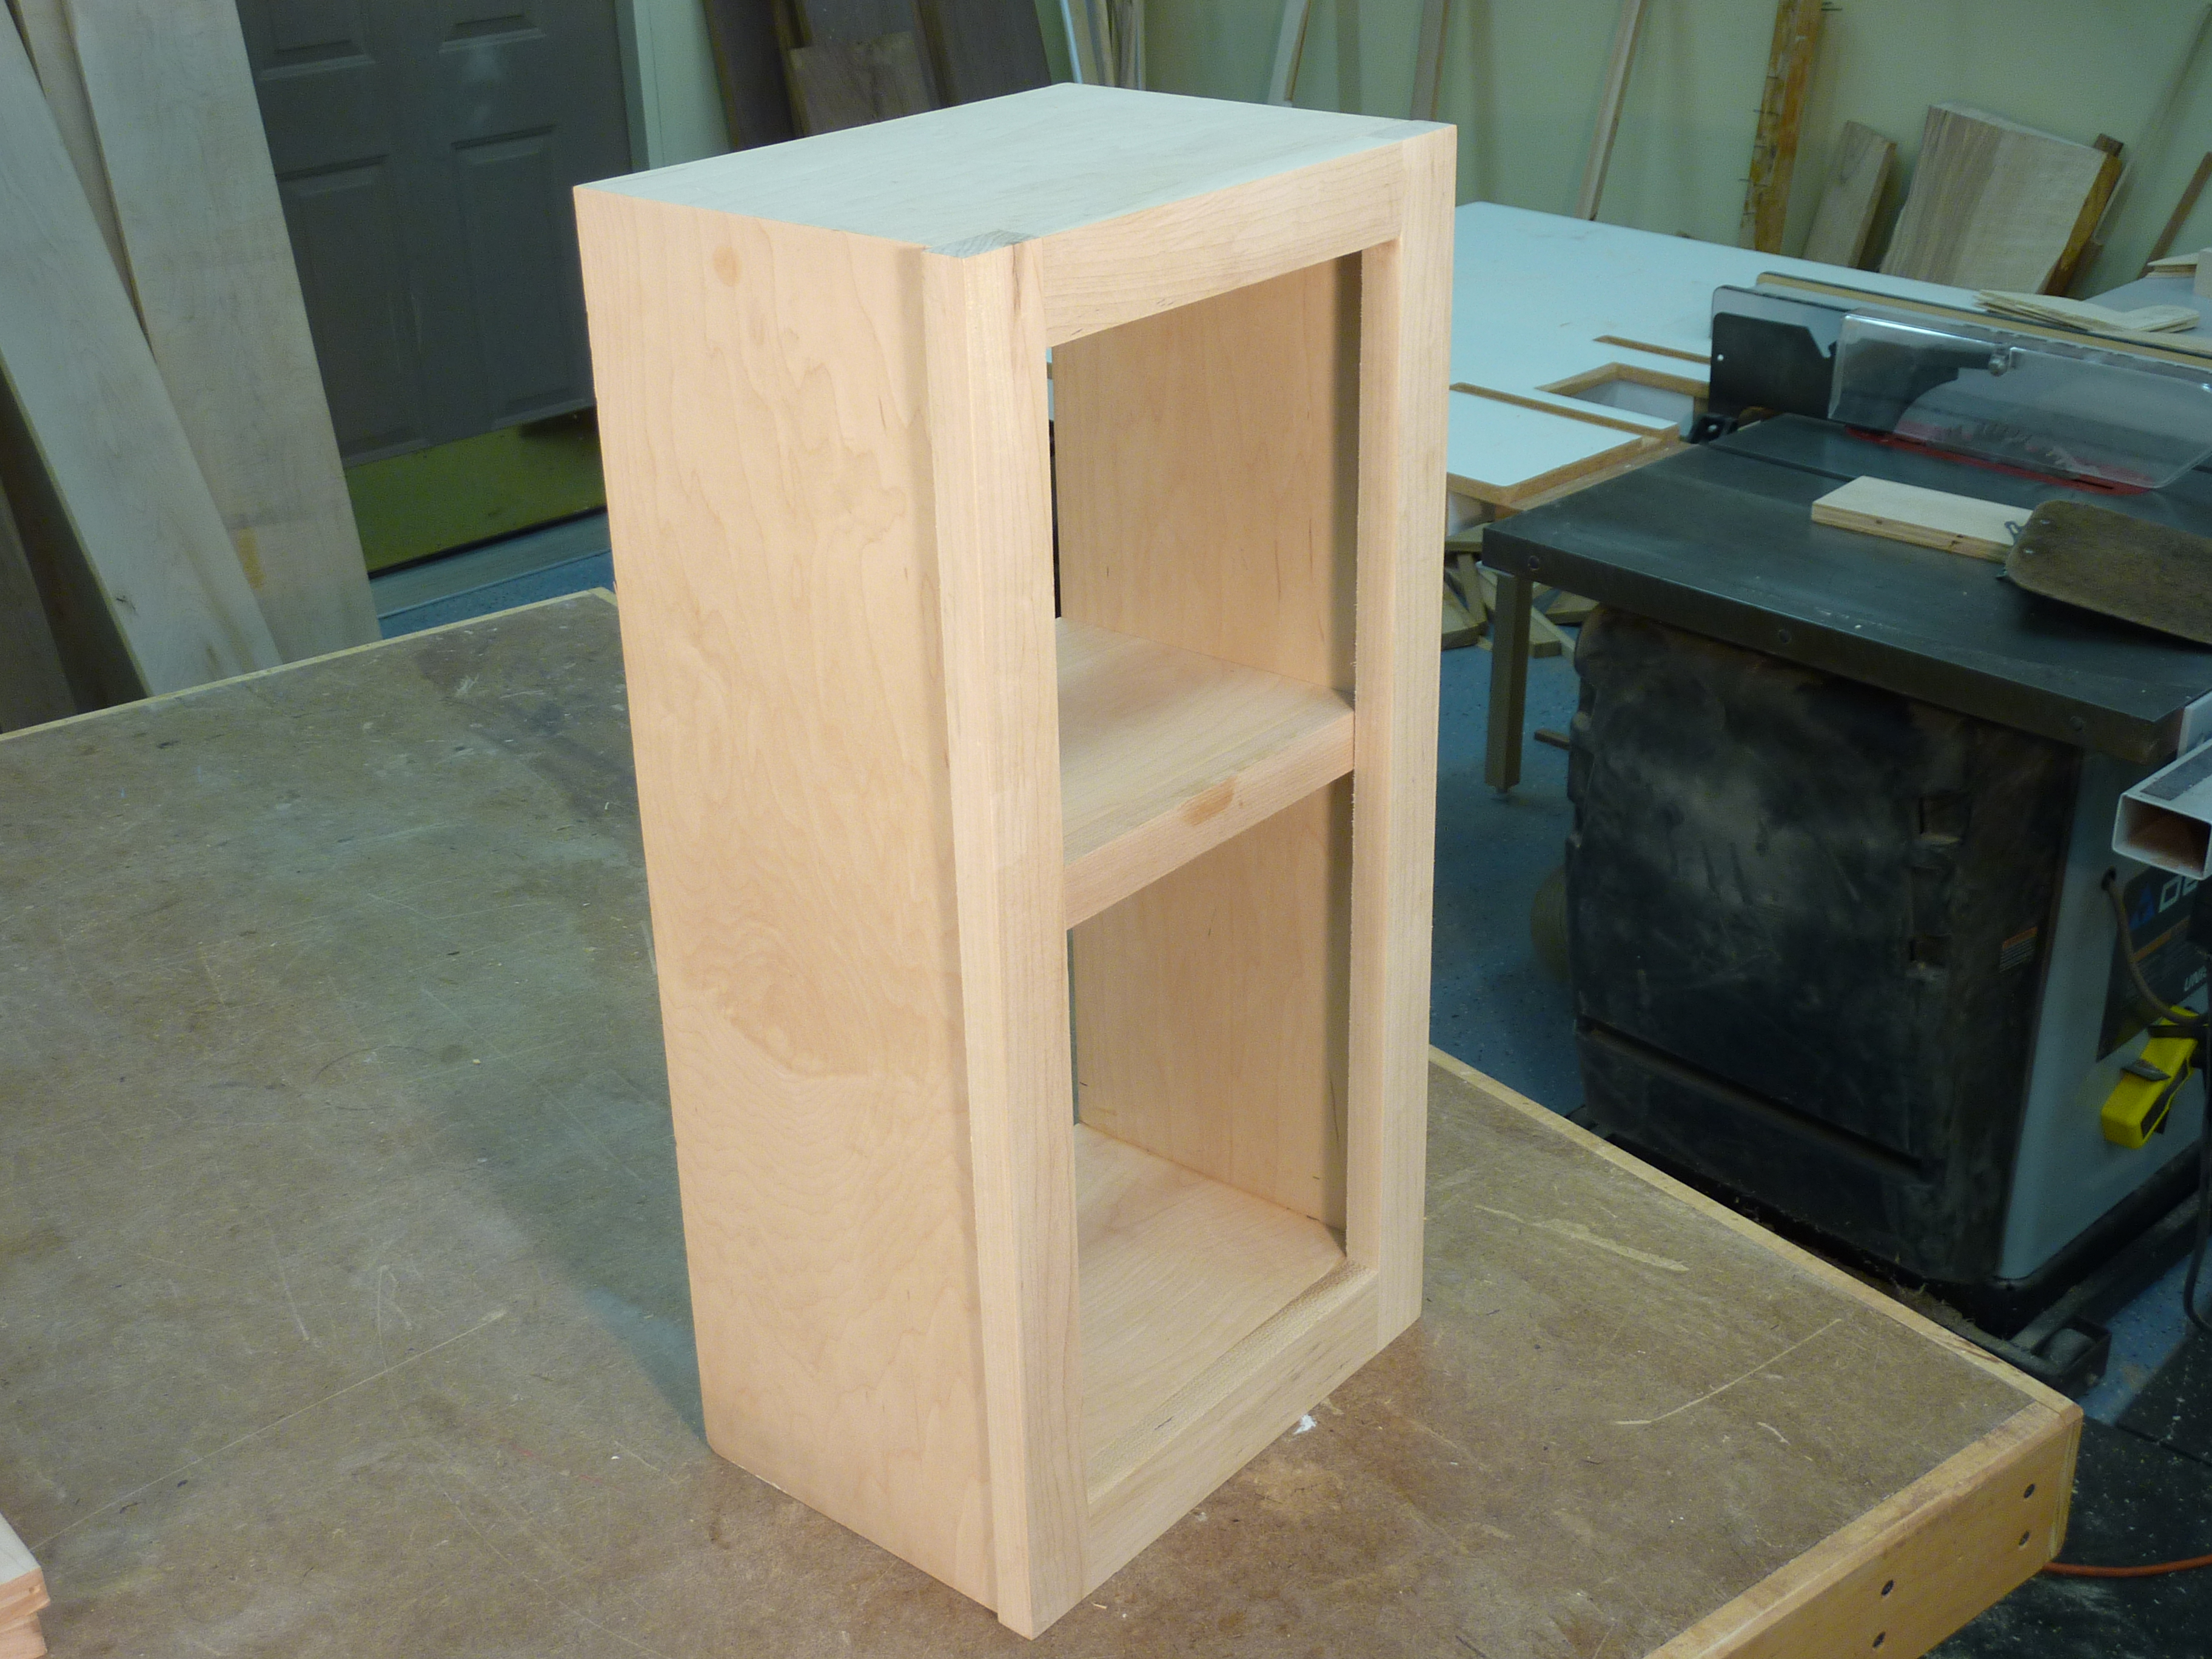 In this tutorial, I will walk through some of the joinery applications where biscuits can be used. To make this a real-world exercise, I will incorporate all of the example joinery into a simple mini-bookcase, using biscuit joints for every joint in the project, including assembly of the face frame, carcass construction with miters, edge banding for the shelf, attaching the shelf to the carcass, and finally attaching the face frame to the carcass. The intention here is not to provide a plan for this bookcase, but rather to illustrate several practical applications and provide context for the joinery discussed throughout.
Before we build, let's talk about a few biscuit joiner tool best practices
Check your depth of cut first. Before we get started, let's tune up the biscuit joiner to be sure that it will serve us well during the project. When adjusted properly, the biscuit joiner will cut a slot 1/32" deeper than half the width of your biscuit. The additional 1/32" provides a little wiggle room, as well as room for glue. If it is set too deep, the biscuits will be too far embedded on one piece, and won't deliver the holding power that we want. If it is set too shallow, the biscuits won't fit. You will notice the latter condition when you dry fit, but the former condition won't be noticed until a joint fails.
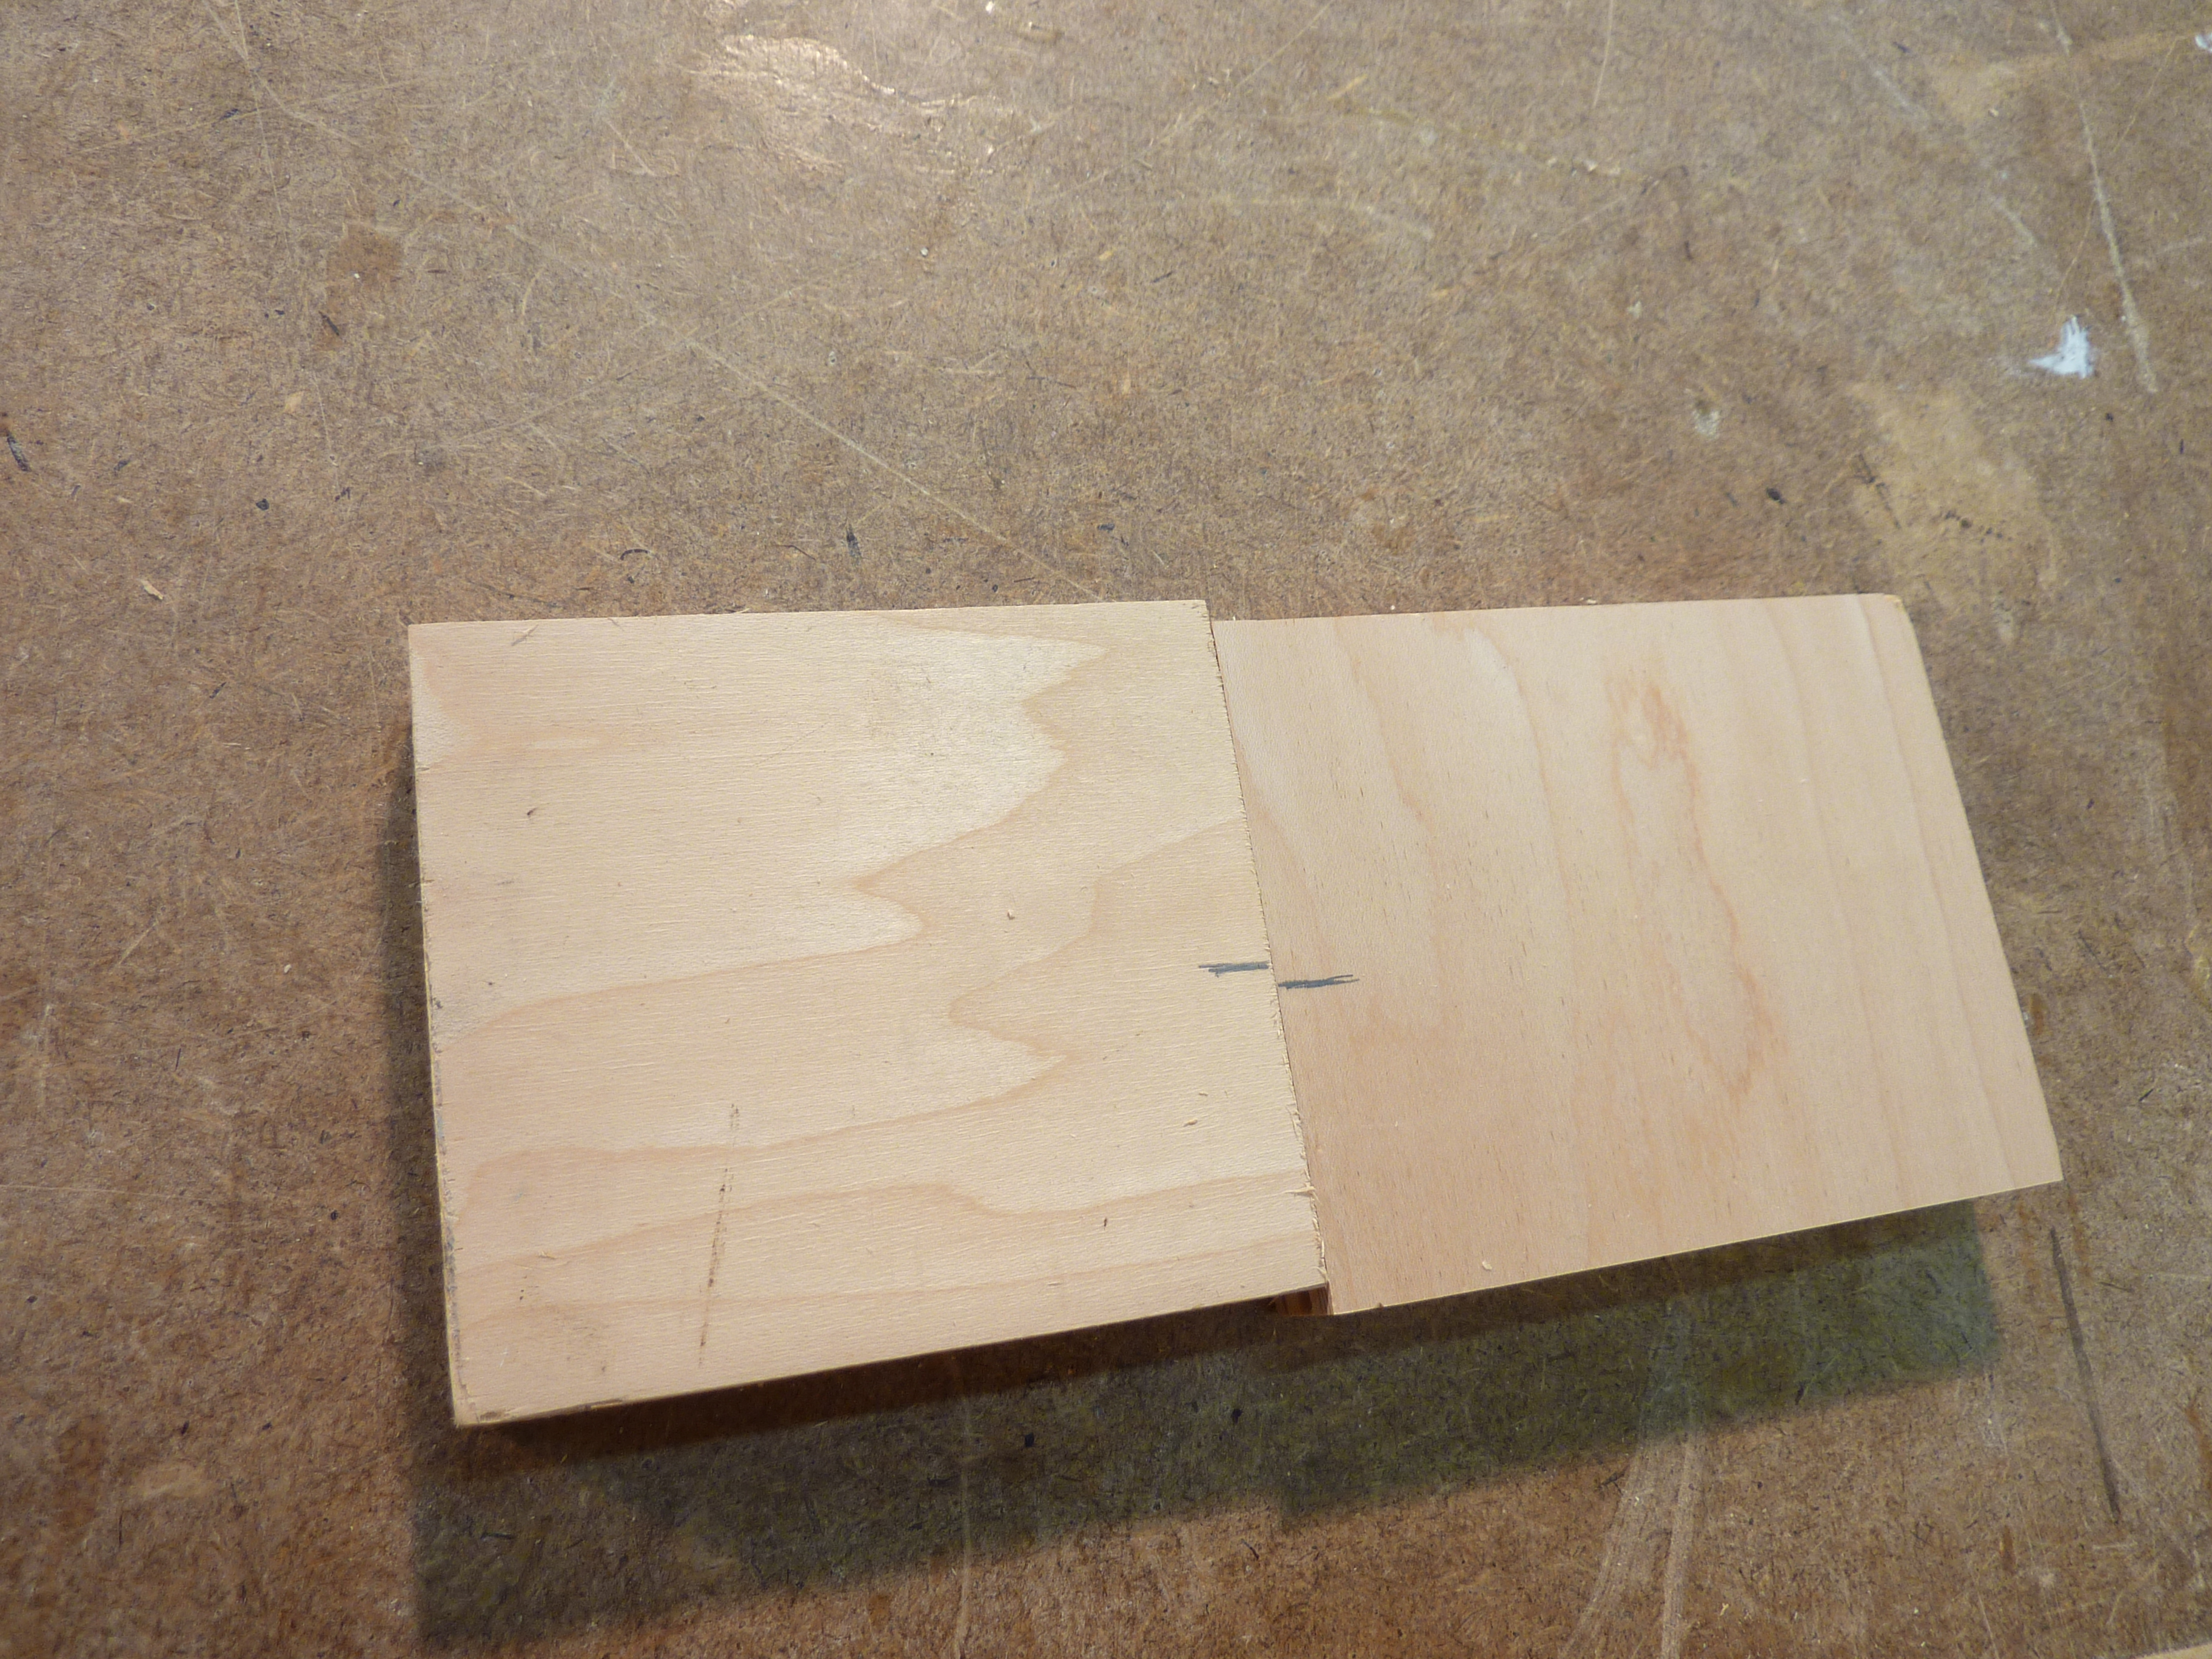
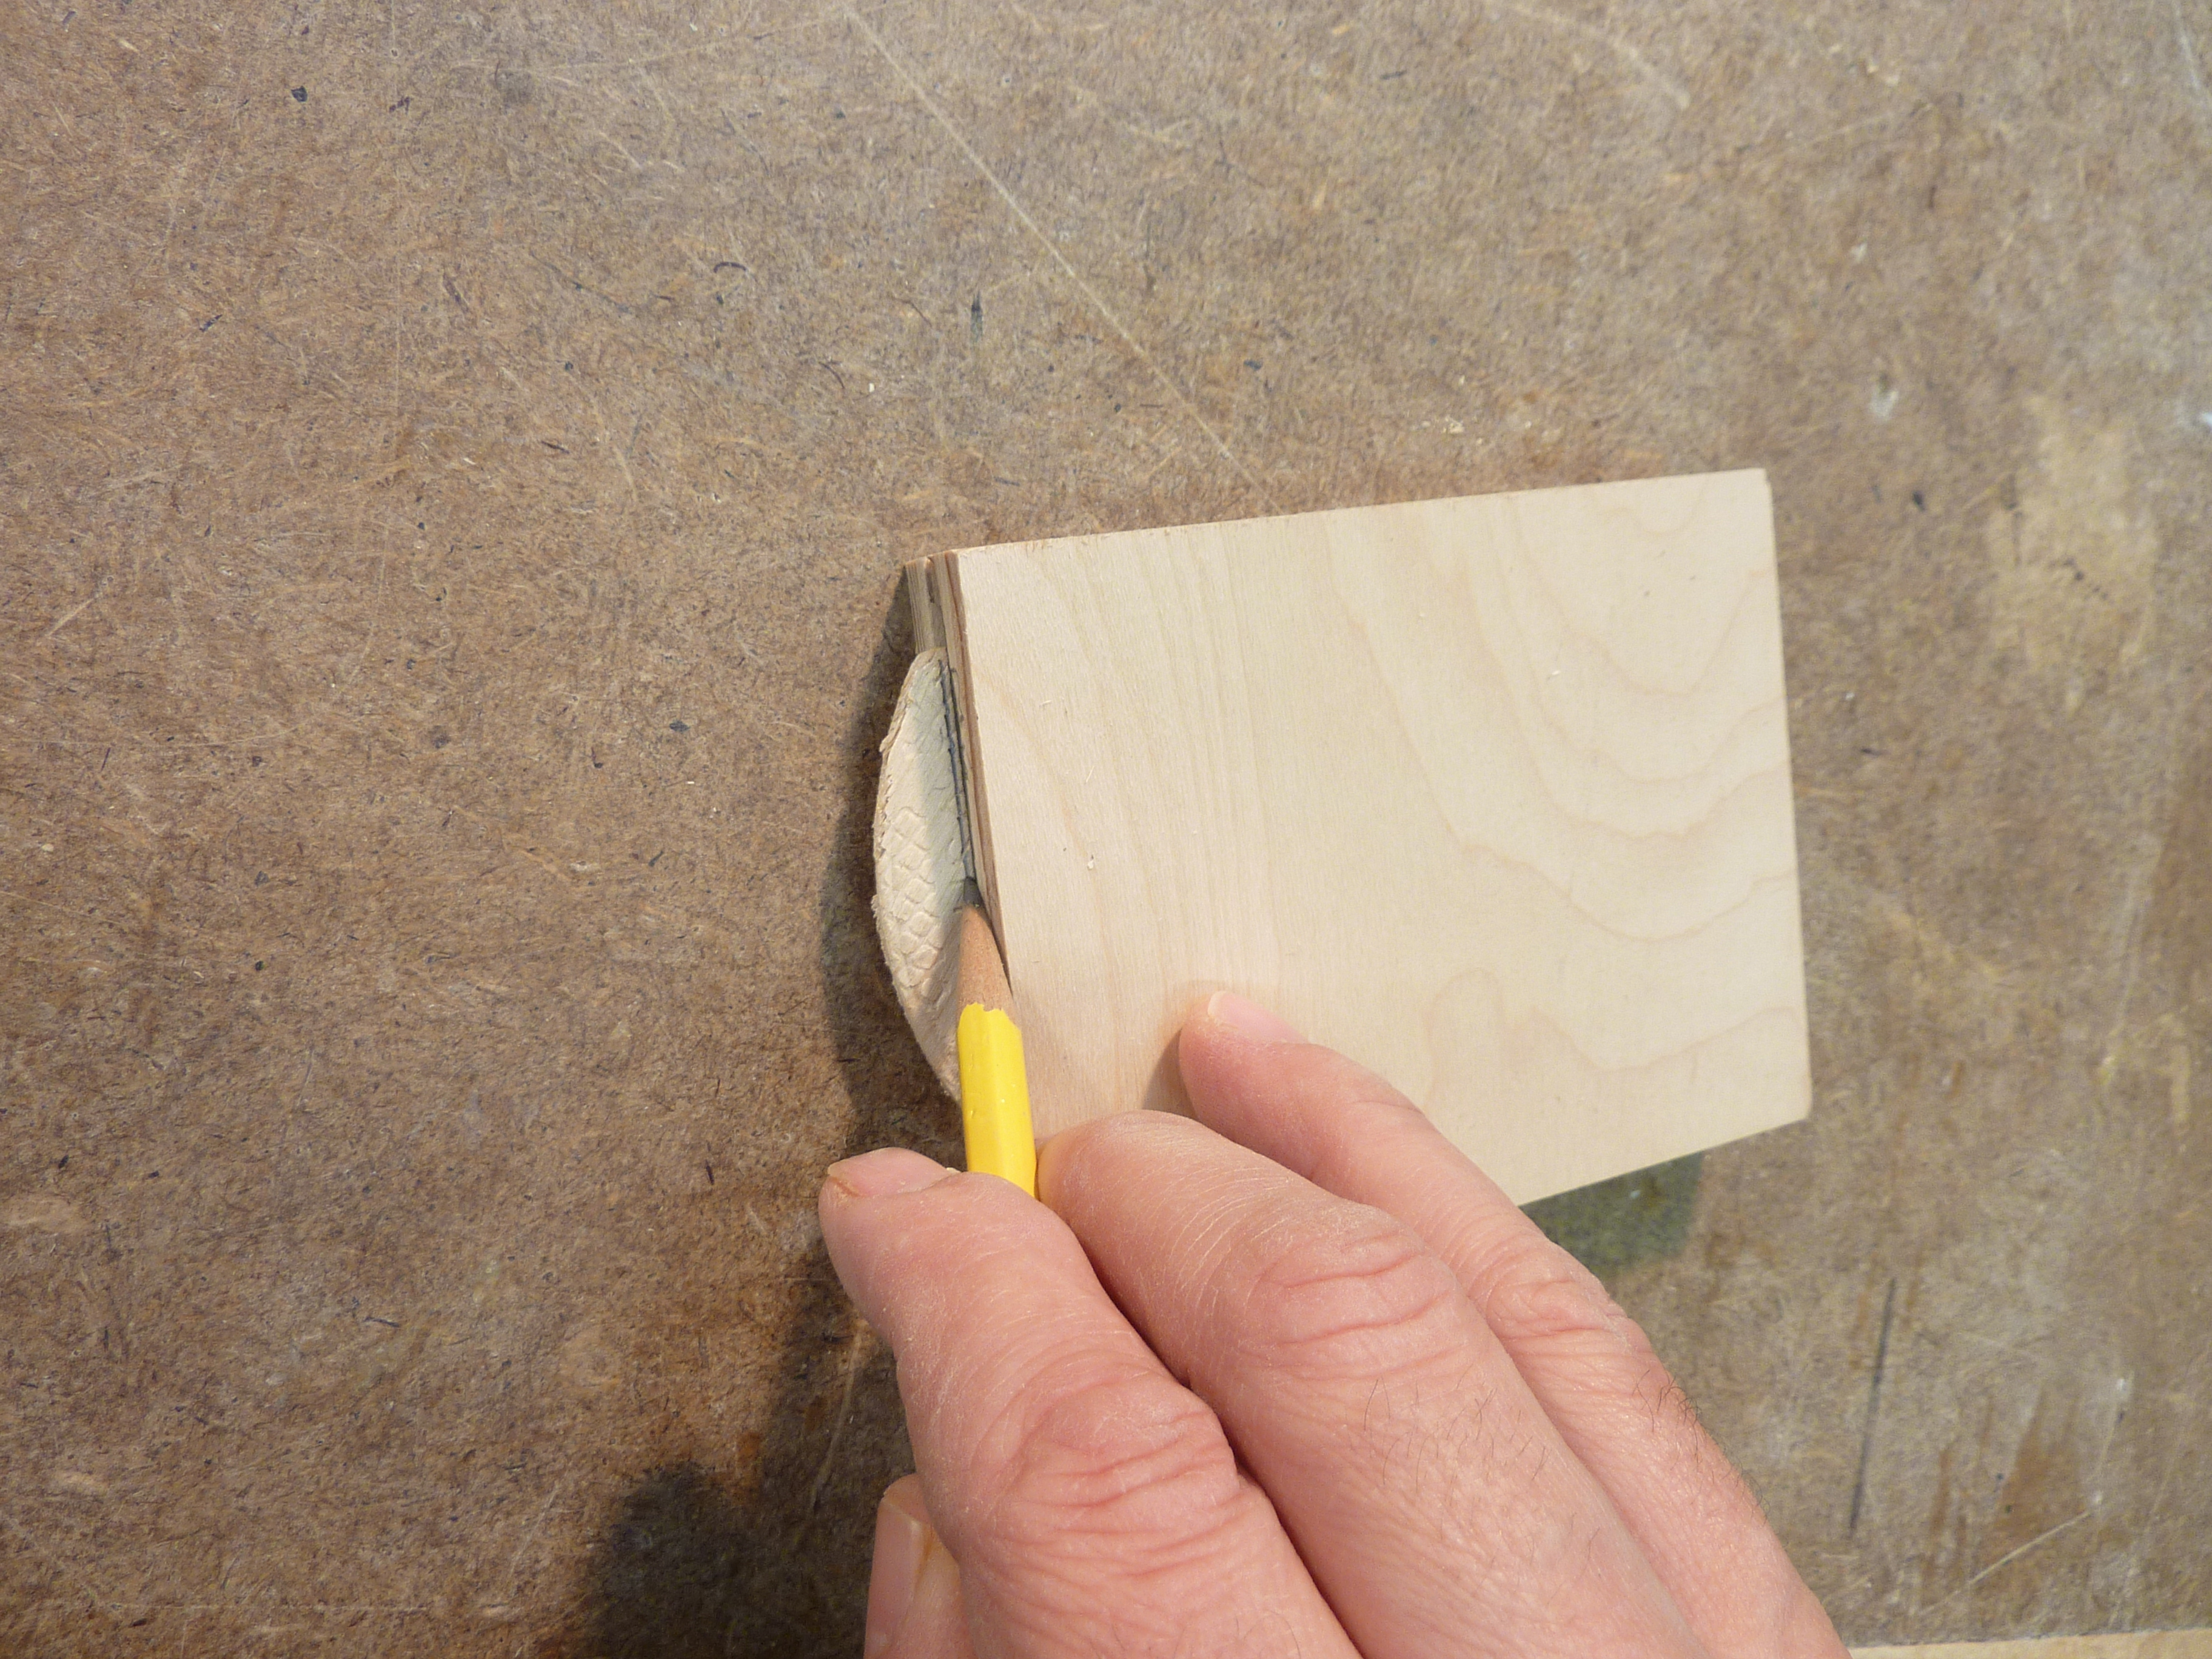 The best way to test this is to mill a slot in a piece of scrap wood. Then, insert the biscuit into the slot, gently tapping it in until it bottoms out. Then, use a sharp pencil to draw a line across the biscuit where it meets the scrap board. Next, remove the biscuit, insert the opposite edge into the slot and draw another line.
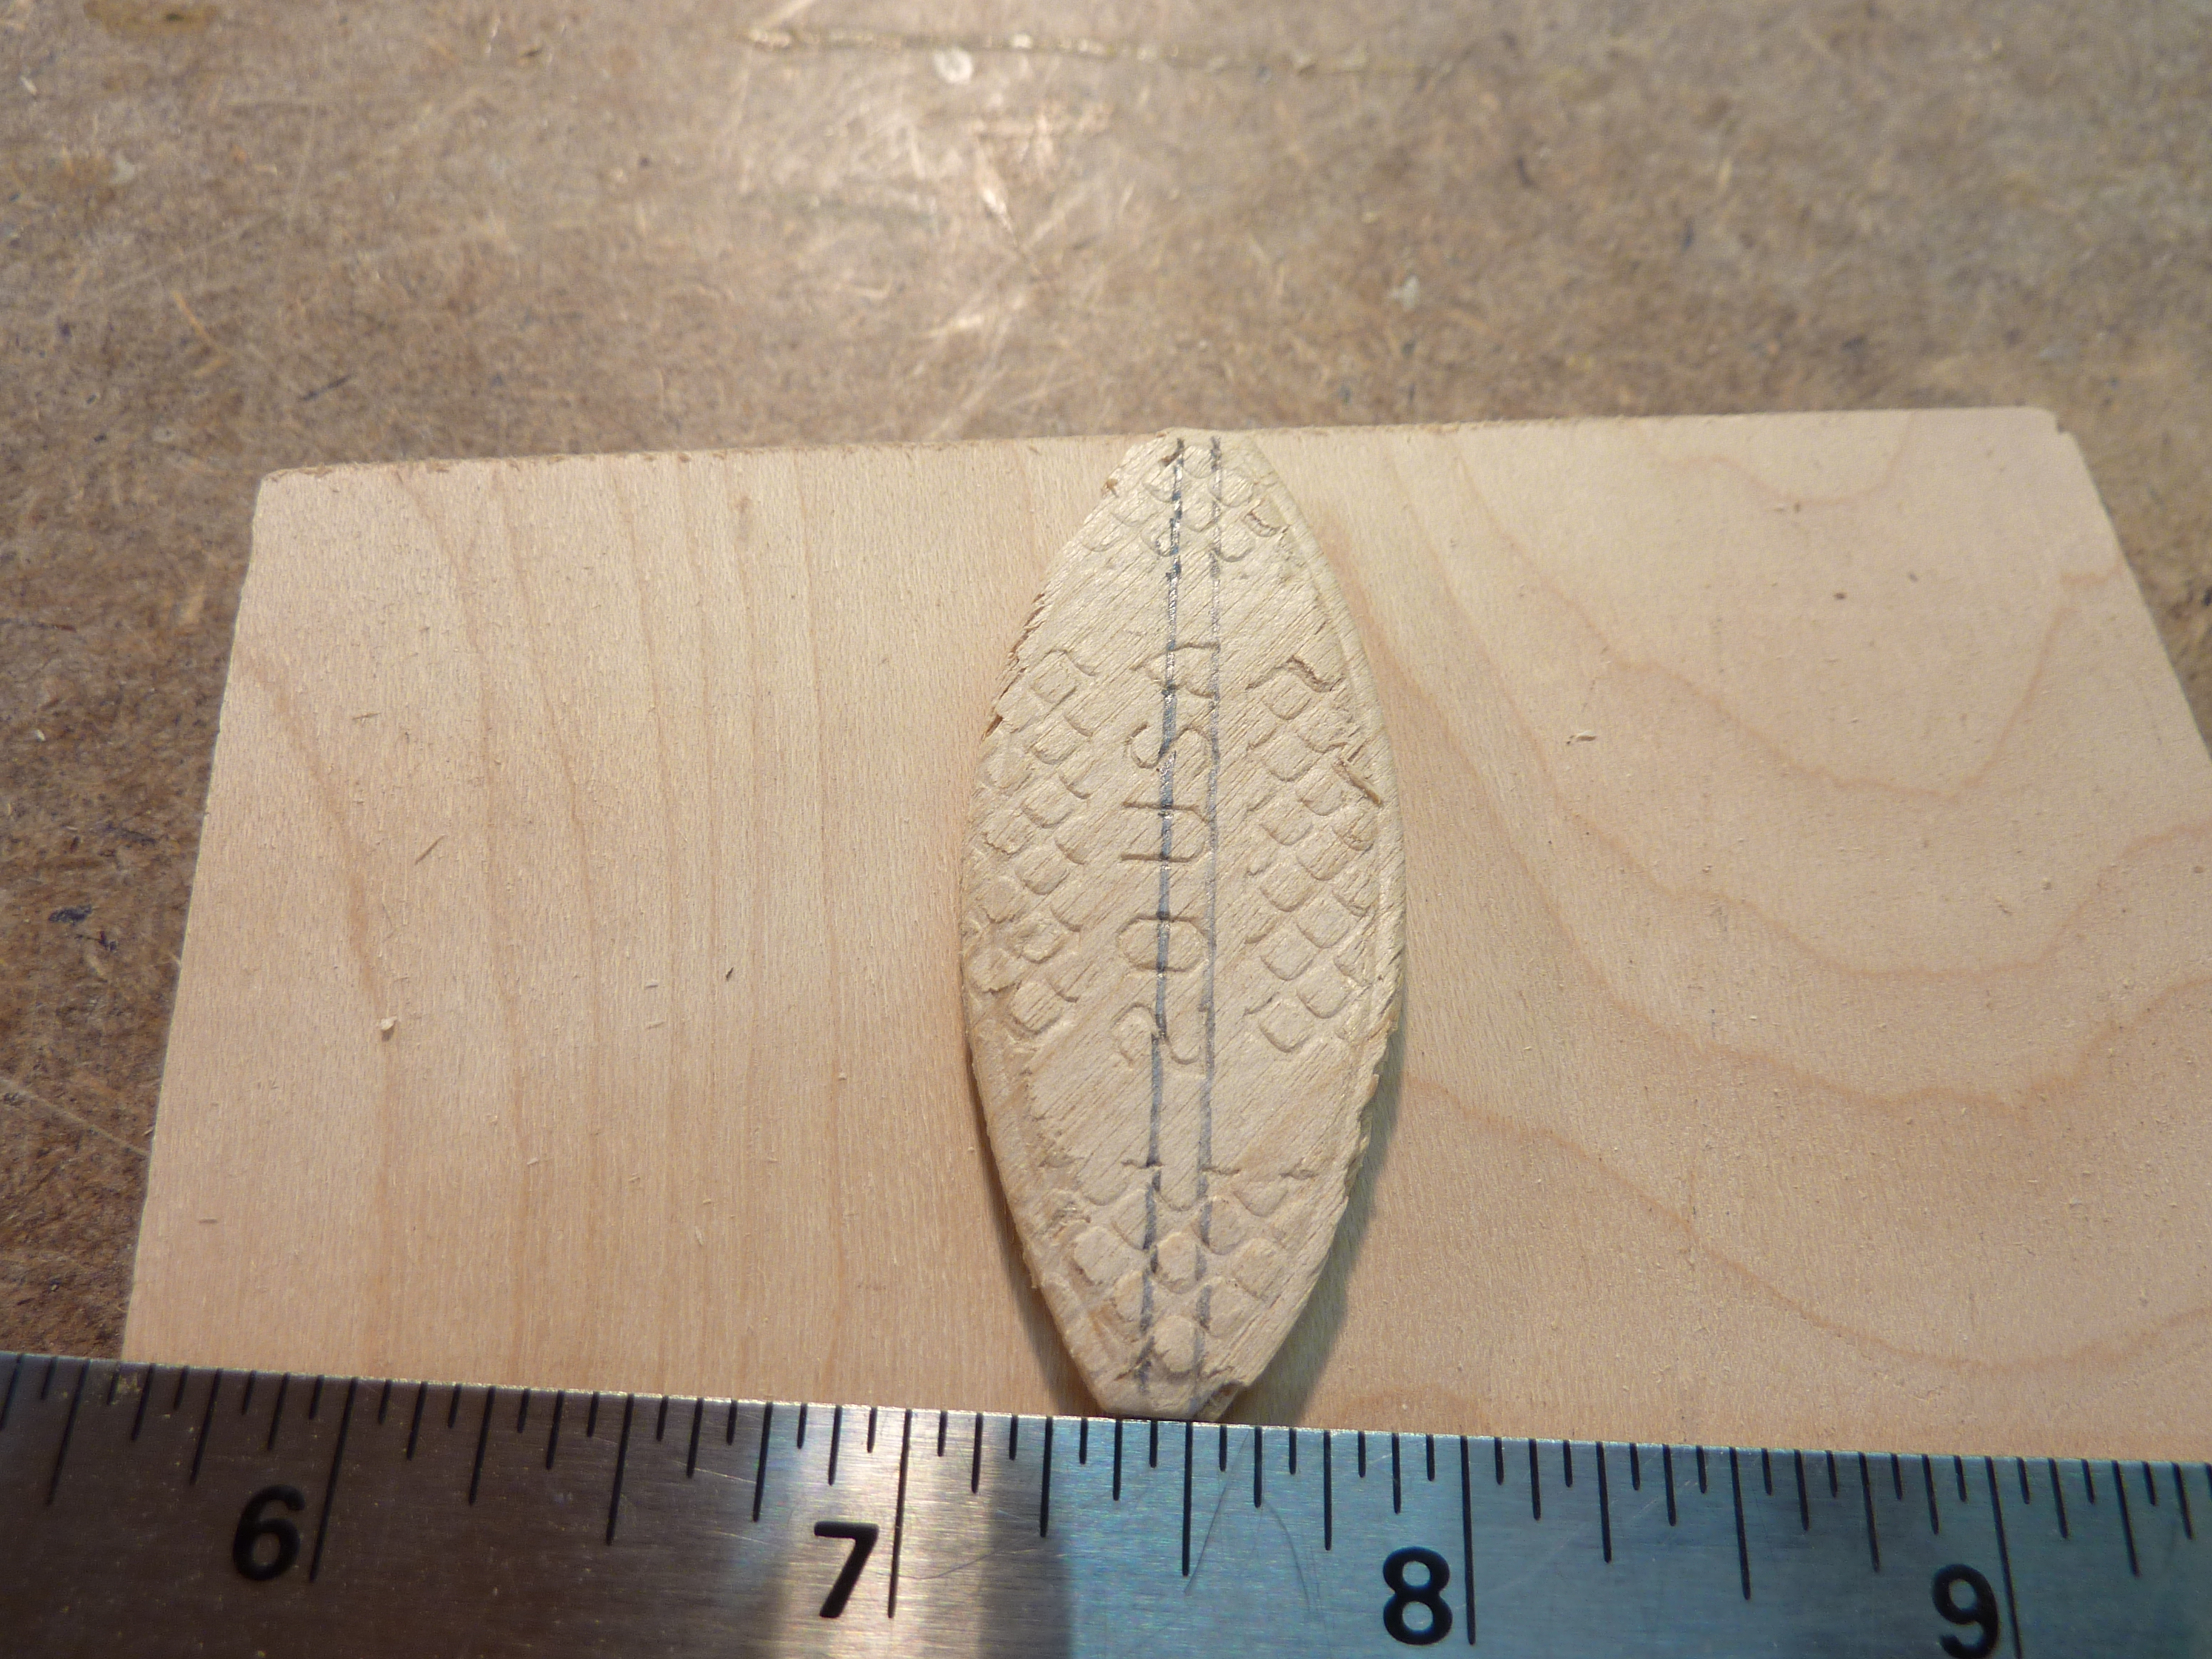 Your first line should be hidden in the biscuit slot, and if it is not, you will need to adjust for a deeper cut. Remove the biscuit and measure the distance between the lines. If it is approximately 1/16", you are ready to start milling biscuit slots. If not, refer to your owner's manual to get instructions for adjusting the depth of cut on your specific machine. Also be sure that your fence is square to the face of the machine when it is set at 90-degrees, as an out-of-square condition can cause sloppiness in the biscuit slot.
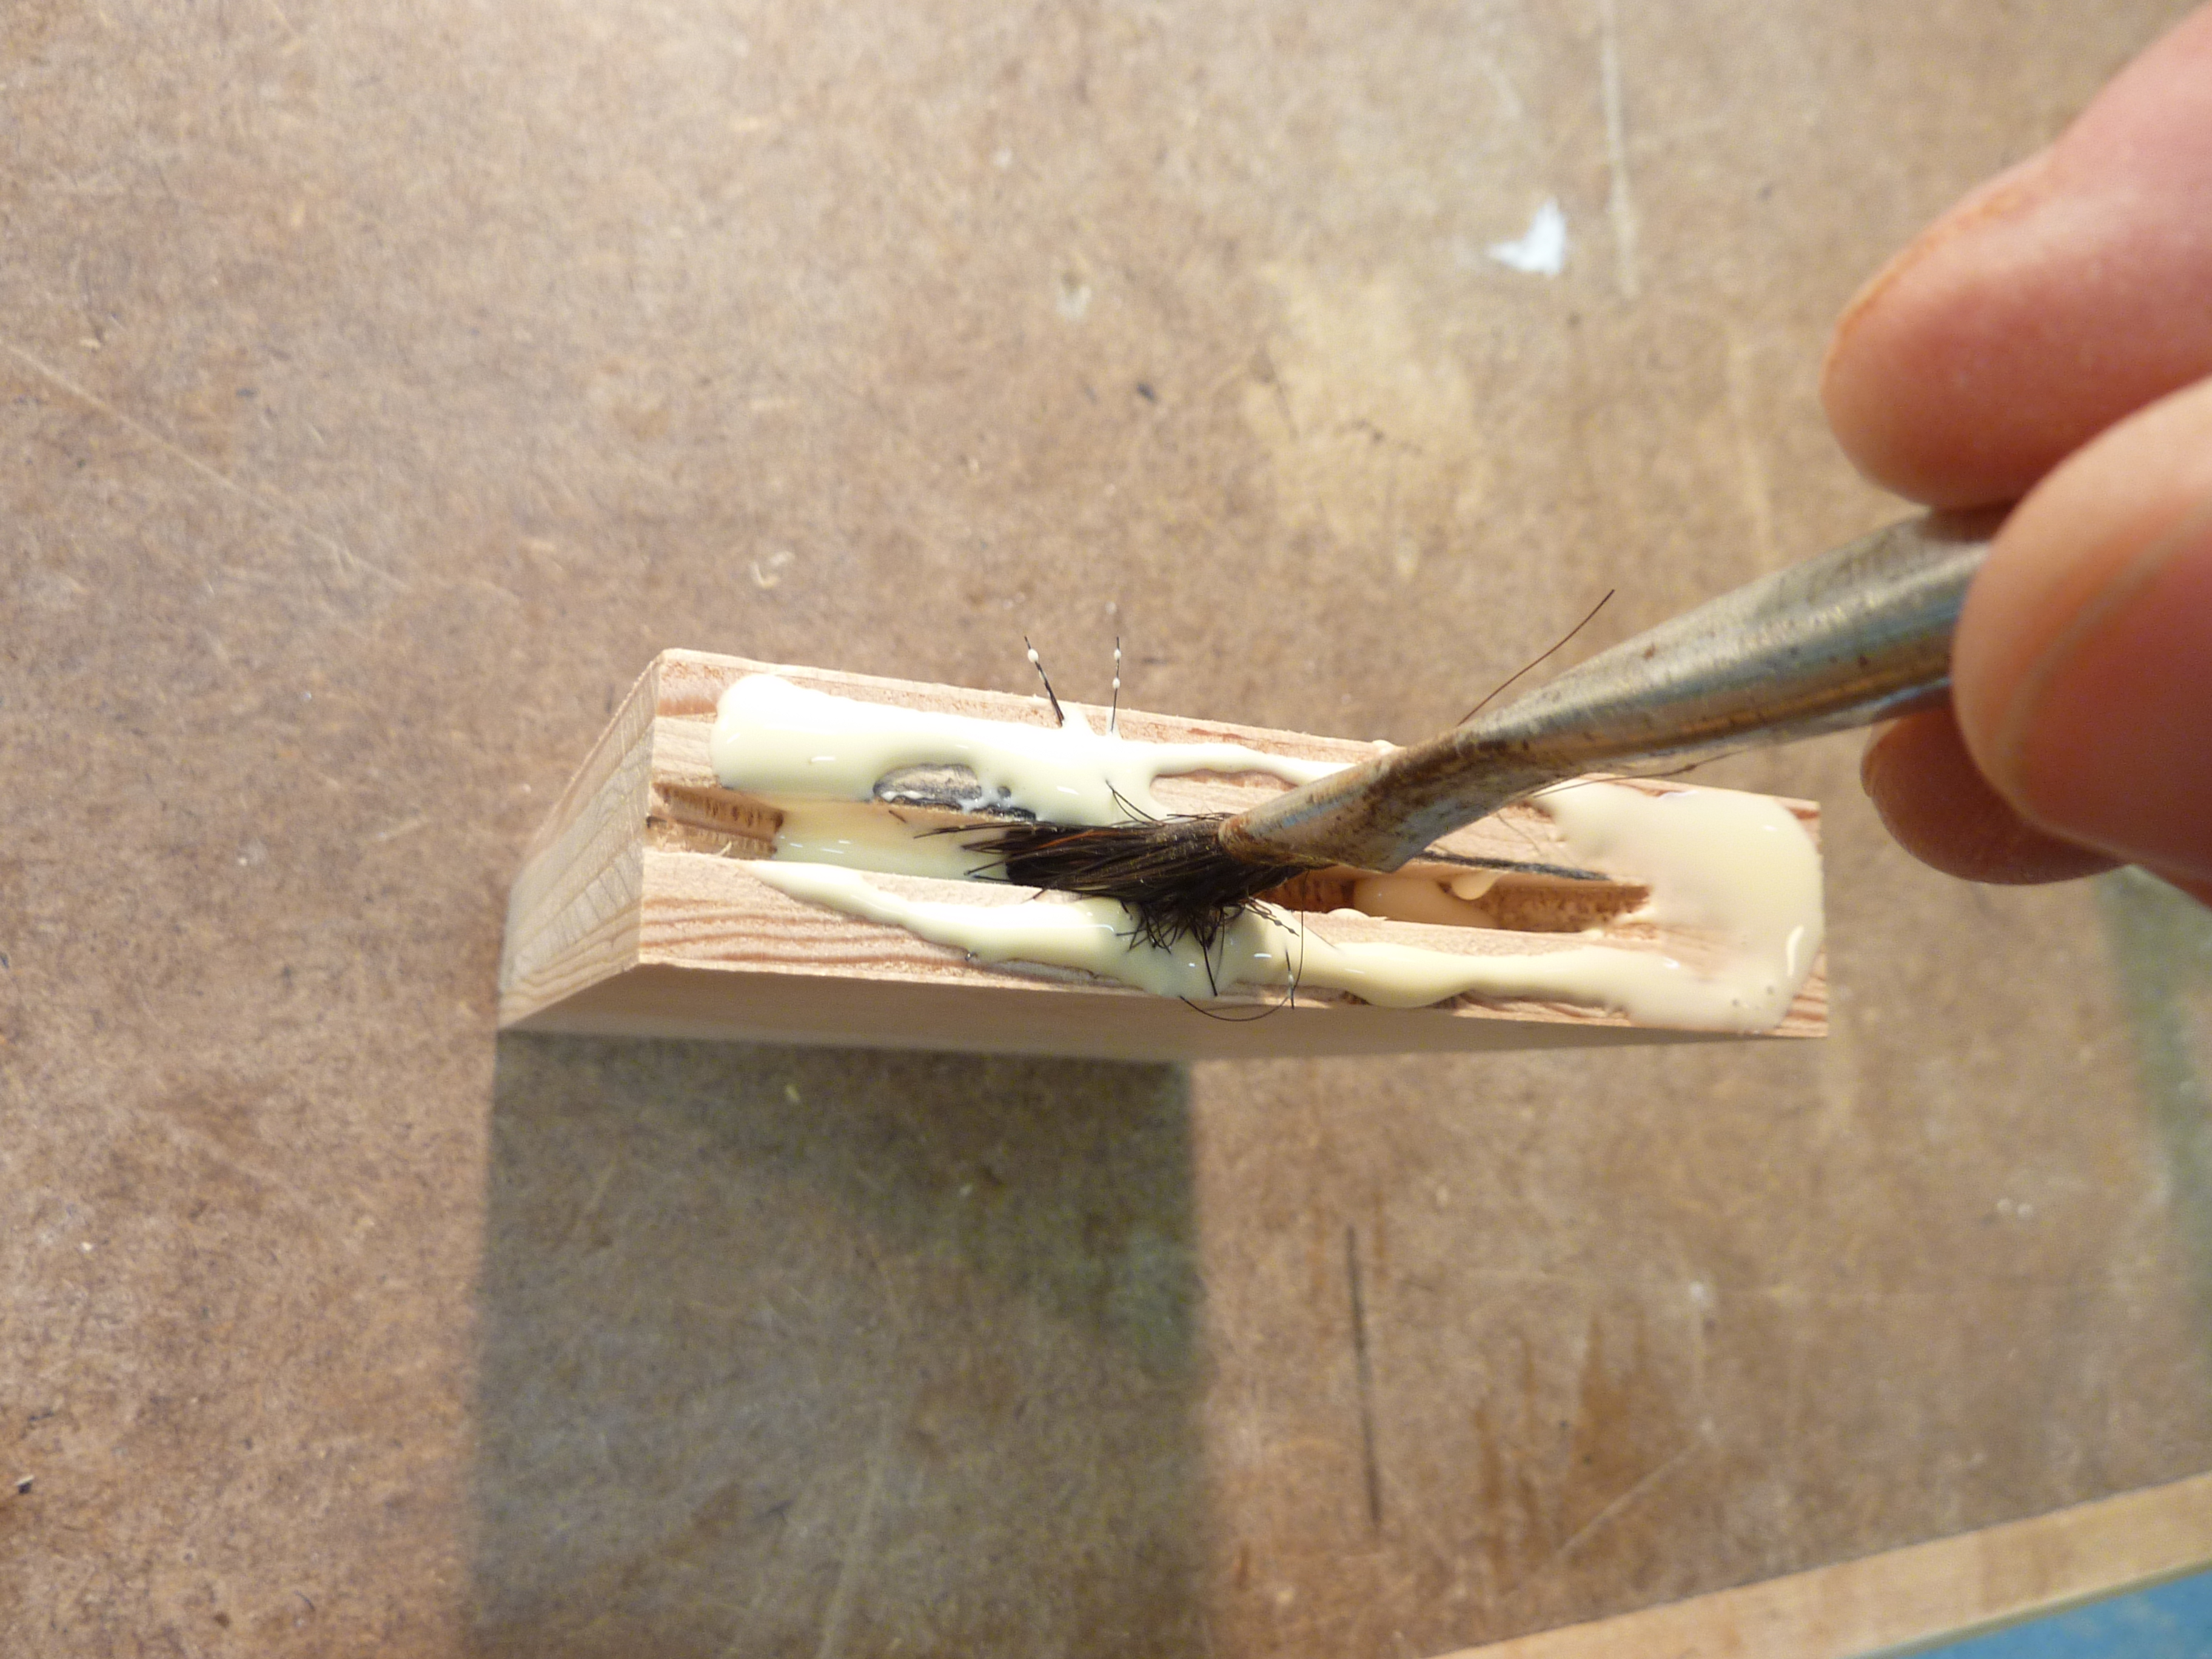 A word about gluing. It is important to get an ample amount of glue into the joint when using biscuits because biscuits absorb glue, which causes them to swell and provides some of their holding power and precision alignment. If you fail to get enough glue into the joint, you can end up with a joint that is prone to failure and poor alignment. There are a number of ways to get an adequate supply of glue into the joint. You can simply place the tip of your glue bottle over the slot and squeeze the glue in, but that can be a bit messy and uneven. You can buy a specialty glue bottle which fits on the glue slot and delivers a perfectly portion shot of glue into the slot. I have tried this, and it worked okay, but over time I decided I didn't want to maintain this dedicated glue bottle which was only used occasionally. So, the solution I have settled on is to use a flux brush (available at any home center, hardware store or woodworking specialty store) and normal glue bottle. The flux brush spreads the glue evenly within the slot, getting it up onto the walls where it can coat the biscuit. I also apply a bit of glue to each side of the biscuit to ensure good coverage. Here's the trade-off: too much glue and you have a mess on your hands. Too little glue and you have a starved joint, and equally bad, the glue can set up so quickly during glue up that you lose the ability to make lateral adjustments. This happens very quickly, so I generally opt for a bit more glue, which yields a solid joint, and provides more open time during assembly. I also opt for a glue with a bit more open time for biscuit assembly, particularly for a complex assembly. As much as I dislike cleaning up glue, I know I would absolutely hate throwing away a project because a joint failed, or because it set up too quickly during glue-up and I couldn't get something square or properly aligned.
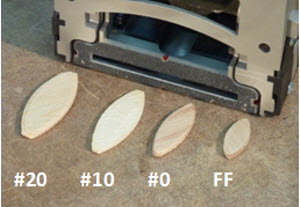 Choose the right biscuit size. The rule of thumb here is simple; use the largest biscuit possible for your application. Most of the time I use the largest common size; #20 (1" x 2-3/8"). Occasionally if I am working with thinner or narrower material, I will scale back to a #10 (3/4" x 2-1/8") or #0 (5/8" x 1-3/4"). For the smallest joints, I will occasionally use FF (FaceFrame) biscuits (1/2" x 1-11/64") which are great for picture frames, small boxes, or face frames as we will use them in this article. Most joiners will accommodate the three most common sizes; #20, #10 and #0. Some will also cut a slot for FF biscuits, but a blade change will be necessary as the profile for FF biscuits is more round than football shaped, requiring a much smaller diameter blade. If a #20 biscuit will not fit fully within your joint, you may choose to trim off the portion of the biscuit that would protrude from the joint if that area will not be visible. As an example, this may be possible in smaller face frames if they will be painted (and therefore hidden using filler) or on a narrow carcass that will be covered by a face frame. This gives additional strength by providing a deeper mechanical connection within the joint.
Using the fence. Some applications will require the use of the fence, while others don't. I tend to use the biscuit joiner's base (against the bench or workpiece) more commonly than the fence as the reference surface. I find that this approach gives me solid, reliable registration, where I find that I occasionally experiencing a small amount of rocking when using the fence, and that throws off the positioning of my joint just enough to drive me crazy at glue-up time. Other woodworkers prefer to use the fence in most joinery scenarios. The choice is yours, but when you use the fence it is important to ensure full engagement of the fence to the workpiece to avoid problems downstream in your project.
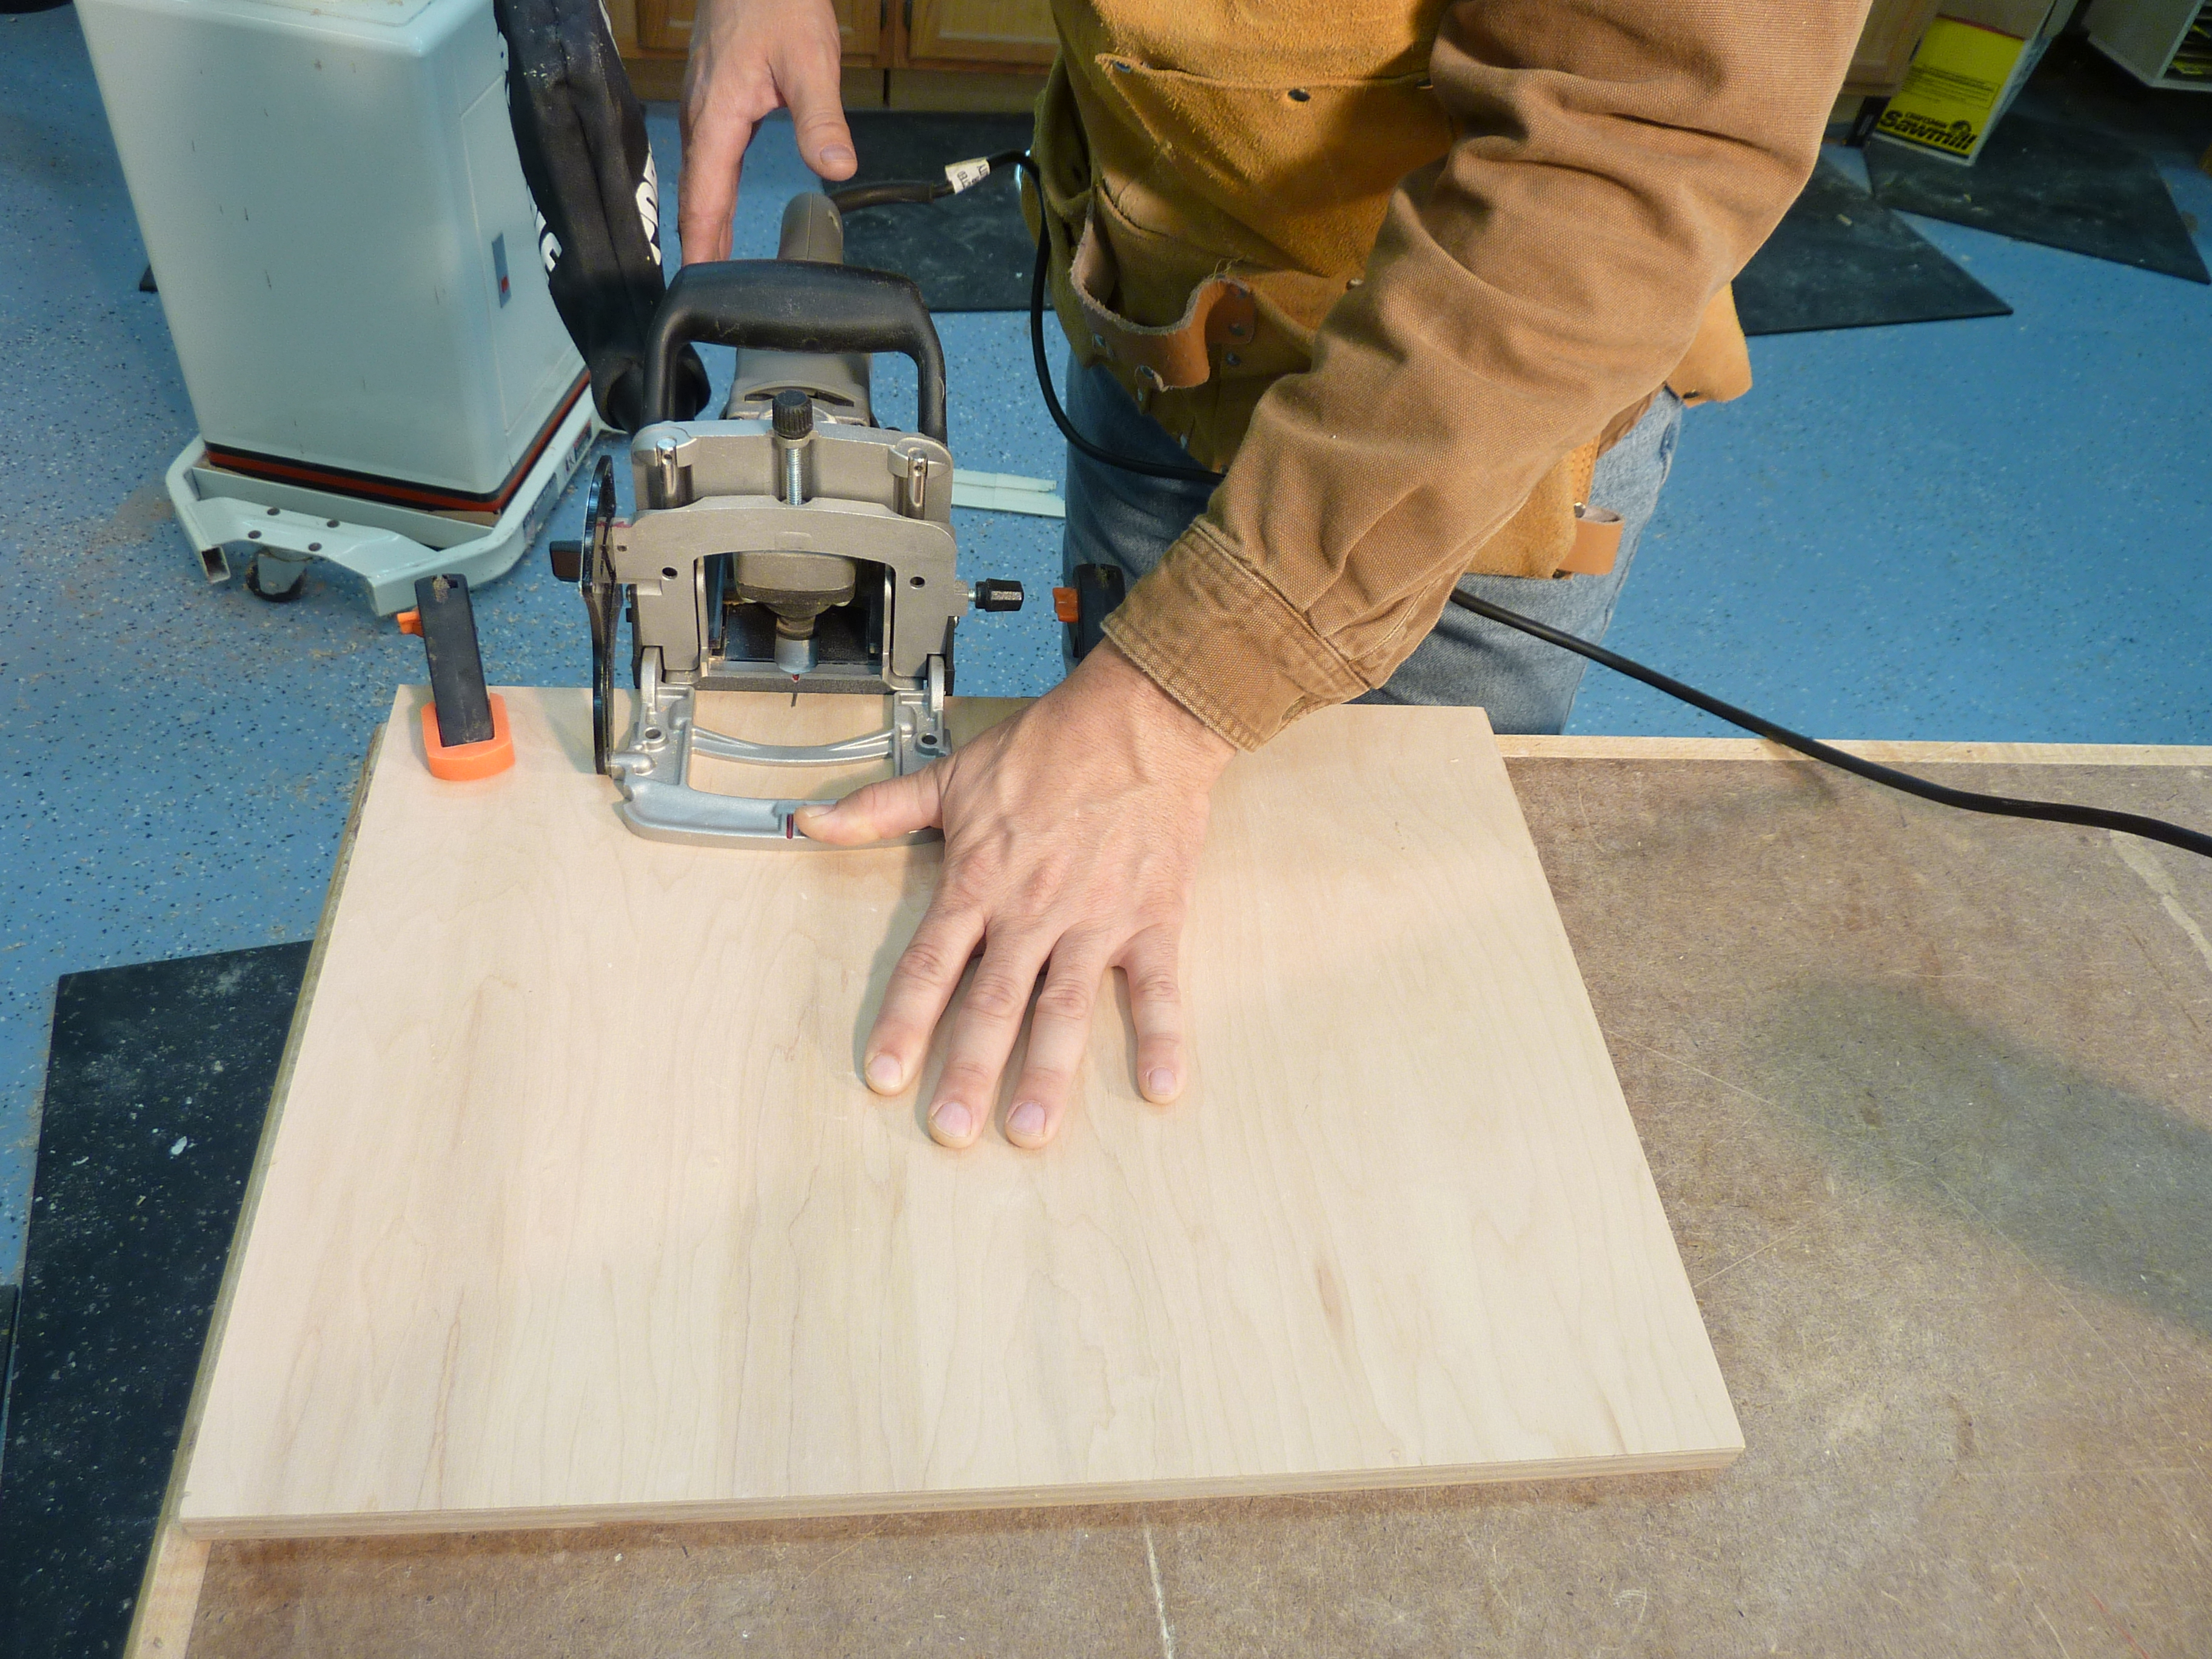
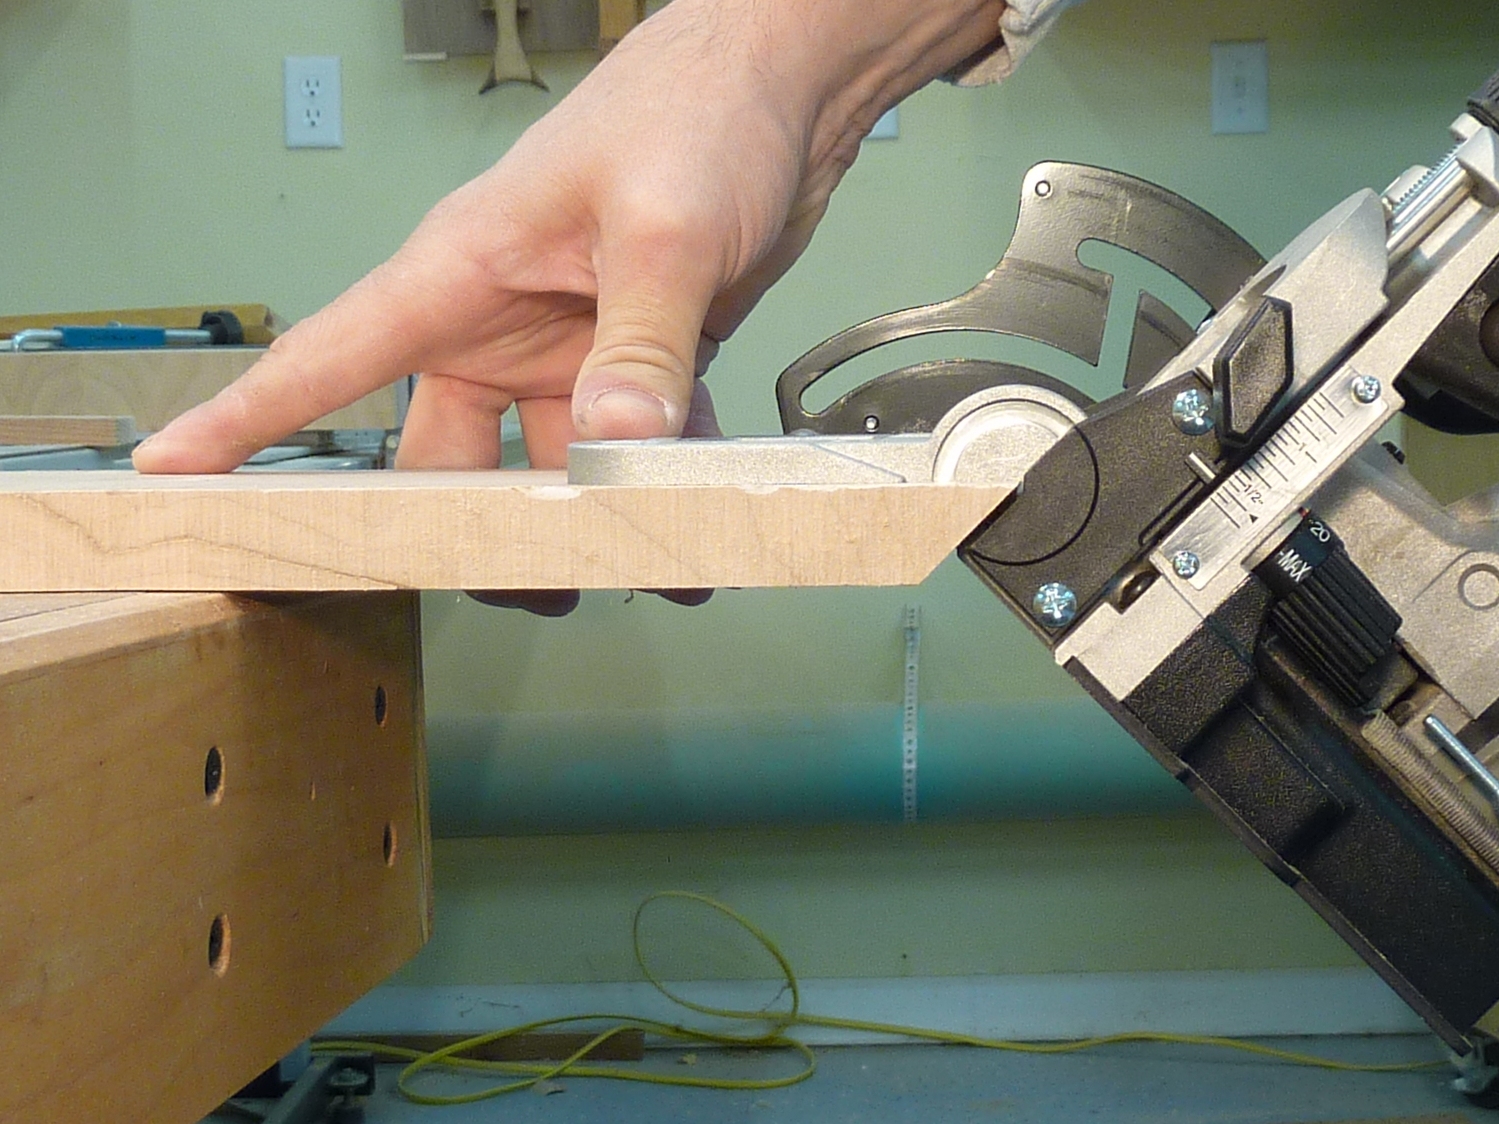
Notice that the work is firmly clamped to the bench, freeing up both hands for controlling the joiner. As you begin to setup for your cut, start by carefully positioning the biscuit joiner to align with your biscuit placement mark. Start with the handle high and the tip of the fence on the work piece. Slowly lower the handle until you feel the fence seated solidly on the work piece. Once you get solid placement of the biscuit joiner and fence, find the detent on your biscuit joiner's fence (most have this), place your thumb firmly on the detent, and let go of the handle to allow the biscuit joiner to "bottom out" on the work piece. This extra step is one more check to ensure that you have proper positioning of the tool against the work piece. Then place your hand back on the handle, and slowly engage the power switch with barely enough pressure. Visually inspect the fence to verify that it is still solidly placed flat against the work piece. Then slowly plunge the cutter into the material with a steady motion, being careful to not rock the tool as it enters or exits the cut. The first couple times you do this, you will want to practice on scrap material, moving it in and out of this position before making cuts so that you can begin to feel the difference. After you have some experience with this it will become second nature. Remember, biscuit joinery is fast enough, so take your time during the plunge and your biscuit slots will be positioned correctly in the work piece. If you rush here, you will find yourself taking far more time to fix it later.
Joining miters. Biscuit joinery provides a simple way to strengthen and align miter joints, which can be challenging and frustrating with other methods. This is an area where biscuit joiners vary in their capabilities. Some provide a fence that pivots from 0 to 90-degrees, while others actually tilt forward past 90-degrees, all the way to 135-degrees. In either case, carefully check the position of the biscuit slot on the miter to make certain the cutter isn't going to blast through to the outside face of the piece.

With a biscuit joiner that pivots to a maximum of 90-degrees, you will set your fence to 45-degrees and reference off the inside (shorter) surface of the mitered work piece. Getting proper setup before making your cut is tricky with this type of fence because the tool tends to slide off of the proper location easily, and it becomes tricky to establish and hold the correct positioning. But with practice it can certainly be done. Follow the steps previously described for general fence use, and pay close attention to ensure that the face of the biscuit joiner is flush against the mitered surface on the work piece, and plunge extra slowly into the cut!
For biscuit jointer fences that swing to 135-degrees, it is easier to mill slots for miter joints in that position. To do so, set your fence to 135-degrees and place the fence on the outside (longer) surface of the mitered piece. In this setup, it is much easier to get the tool into correct position, as the fence configuration almost forces correct setup. Still, take the time to ensure that the fence is flush against the work piece, and the face of the biscuit joiner is held solidly against the mitered surface before plunging slowly.
When to use biscuits. This has been a highly debated topic to say the least. The answers range from, "Don't use them at all because they don't add any strength in any situation" to "They are great in nearly every application." I have read several "torture test" studies that position biscuits at the low end of the spectrum for joint strength relative to mortise and tenon, dado, lap joints, etc., and I don't dispute any of these studies. The question that I ask myself when I consider biscuits relative to other types of joints, is whether or not glue and biscuits are strong enough for the particular application at hand. If I know that a particular joint will undergo a lot of torture, such as the leg/stretcher joint on a large table or chair, I will use heavier duty joinery for that application. But for accent tables, small boxes, cabinet carcasses, etc., I do not hesitate to incorporate biscuit joinery into the project. I will also occasionally push the limits and use biscuit joinery for some high stress joints if I can reinforce the joint with additional means.
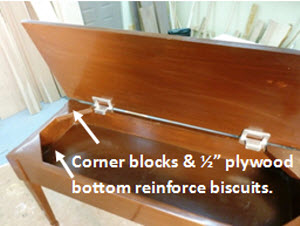 As an example of pushing the limits, in the piano bench pictured I used biscuits to attach the apron to the legs, but I reinforced with corner blocks on the top, and with a glued 1/2" Baltic birch ply bottom to support heavy book loads and minimize racking. With that much reinforcement (which I also would have done if I would have used mortise and tenon joinery), the biscuits are not undergoing much stress. I have tested this bench with greater stress then it would ever see in normal use, and have seen no signs of strain during this process. It has also held up fine through daily use by three piano players in the house, including regular duets.
Ultimately there is no clear cut answer here and you will have to decide for yourself on a project by project basis. If you have a nagging feeling about a particular application, it is best to not use biscuits and instead opt for a heavier duty approach so you can sleep better. But once you develop some experience with biscuit joinery, you can develop a keen sense of when to use them. You might find that you incorporate them into projects more than you think. I have been using them regularly for well over a decade, and have never had a joint failure, nor have I ever seen one fail in a scenario outside of a published joint torture test. I am not saying that it COULD NOT happen, I am just saying that I have never experienced it, or even come across it "in the wild."
 The edge joining debate. There has long been a debate about whether to use biscuits to help align and/or strengthen joints when edge gluing a panel. As evidenced in George Vondriska's video, modern woodworking glue alone is stronger than the wood itself in this application, so biscuits will not add further strength to the joint. I have also found in my own experience that I can achieve joints that are more consistently flush in a panel glue-up without using biscuits. Therefore, I don't typically use biscuits for this application. I recognize that they are a legitimate alignment aid for panel construction, however, so I am not critical of others who use this approach.
Telegraphing biscuits. Over the years I have heard many stories of biscuits swelling with glue inside a joint and expanding the wood fibers such that you could see the shape of the biscuit telegraphing through to the surface of the project, or conversely shrinking over time and pulling the wood fibers inward with it. The most common scenario where this seems to occur is in edge joining, and as I previously stated, I have rarely used biscuits for this application, so I suspect that my chances of experiencing the telegraphing biscuit are low. I suspect that this would be most likely to occur with thinner, softer materials, that could be more easily manipulated by the expansion or contraction of biscuits. In an attempt to produce this condition as I wrote this article, I joined a panel with 1/2" pine boards, and another with cheap 1/2" plywood. After observing for a few weeks, I was unable to observe any telegraphing in either panel, but I have heard enough people expressing their frustration over this condition that I suggest keeping its potential in mind as you determine when to use biscuits in your projects. In other words, I wouldn't bet my cherry dining table top against a telegraph occurring at the most inopportune time.
In the next installment of this article I'll show you how to put the biscuit joiner to work. The article covers case construction, miters, face frames, and edge banding for shelves.
Photos By Author

That "biscuits are only for alignment" is a myth that just won't die. I've made over 100 pieces of furniture from floor-to-ceiling bookcases, 7' tall cabinets and bunk beds using only biscuits over the last 25 years with zero failures. I tell them this and they still believe "only for alignment."
This is an excellent review article on the use of a biscuit joiner. Like many other tools, it's no panacea. I use it for fast edge joining but perfect alignment is elusive and after the glue dries, planing or drum sanding is still required and that results in further thinning of the finished board. For best results, the workpiece needs to be securely clamped to the workbench while leaving room for the saw to also lie flat on the workbench and that will require some long reach clamps that often get in the way of the saw. The biscuit method often permits further workpiece finishing before the glue has fully dried, otherwise there is no advantage, in my opinion, to other methods including tongue-and-groove and glue joints made with a table router.
I would like to know more
Does glue really go into the pores of wood in a glue up?
Thank you for this. I am a fan for the appropriate applications and use them regularly, including this afternoon Just this morning, I heard the familiar, "They are just for alignment, they don't add any strength."
I use one of those specialty glue tips for gluing biscuits. The tip conveniently fits on a Titebond glue bottle so you need only clean the tip when done with the biscuits instead of having a dedicated glue bottle.
interesting gives good information on where to use biscuits
Hi all, First time looking at these articles. I am planning building my honey a wall entertainment center, in 3 sections. Will a biscuit joint be better for support and allowing the boards not to warp or start sagging over time? The left and right sections will have 2 shelves 3 feet long and 1 foot deep. Any better suggestions? FYI, will be my first large project. Corner shelves is largest project to date, LOL Thanks for advice and suggestions
[…] machine with a very sharp blade, you must always comply with all safety rules. This implies all stages of work. Namely, we are talking about preparing the equipment, preparing the wood, securing all elements, […]
[…] Using the jointer, you can also create angled mortise up to 90 degrees with positive stops at 22.5, 45 and 67.5 degrees. Moreover, if you need different depth sizes of the mortise, you get that option in this jointer. There are five different mortising setting so that you can control the device as you need and quickly make the precise mortise. […]