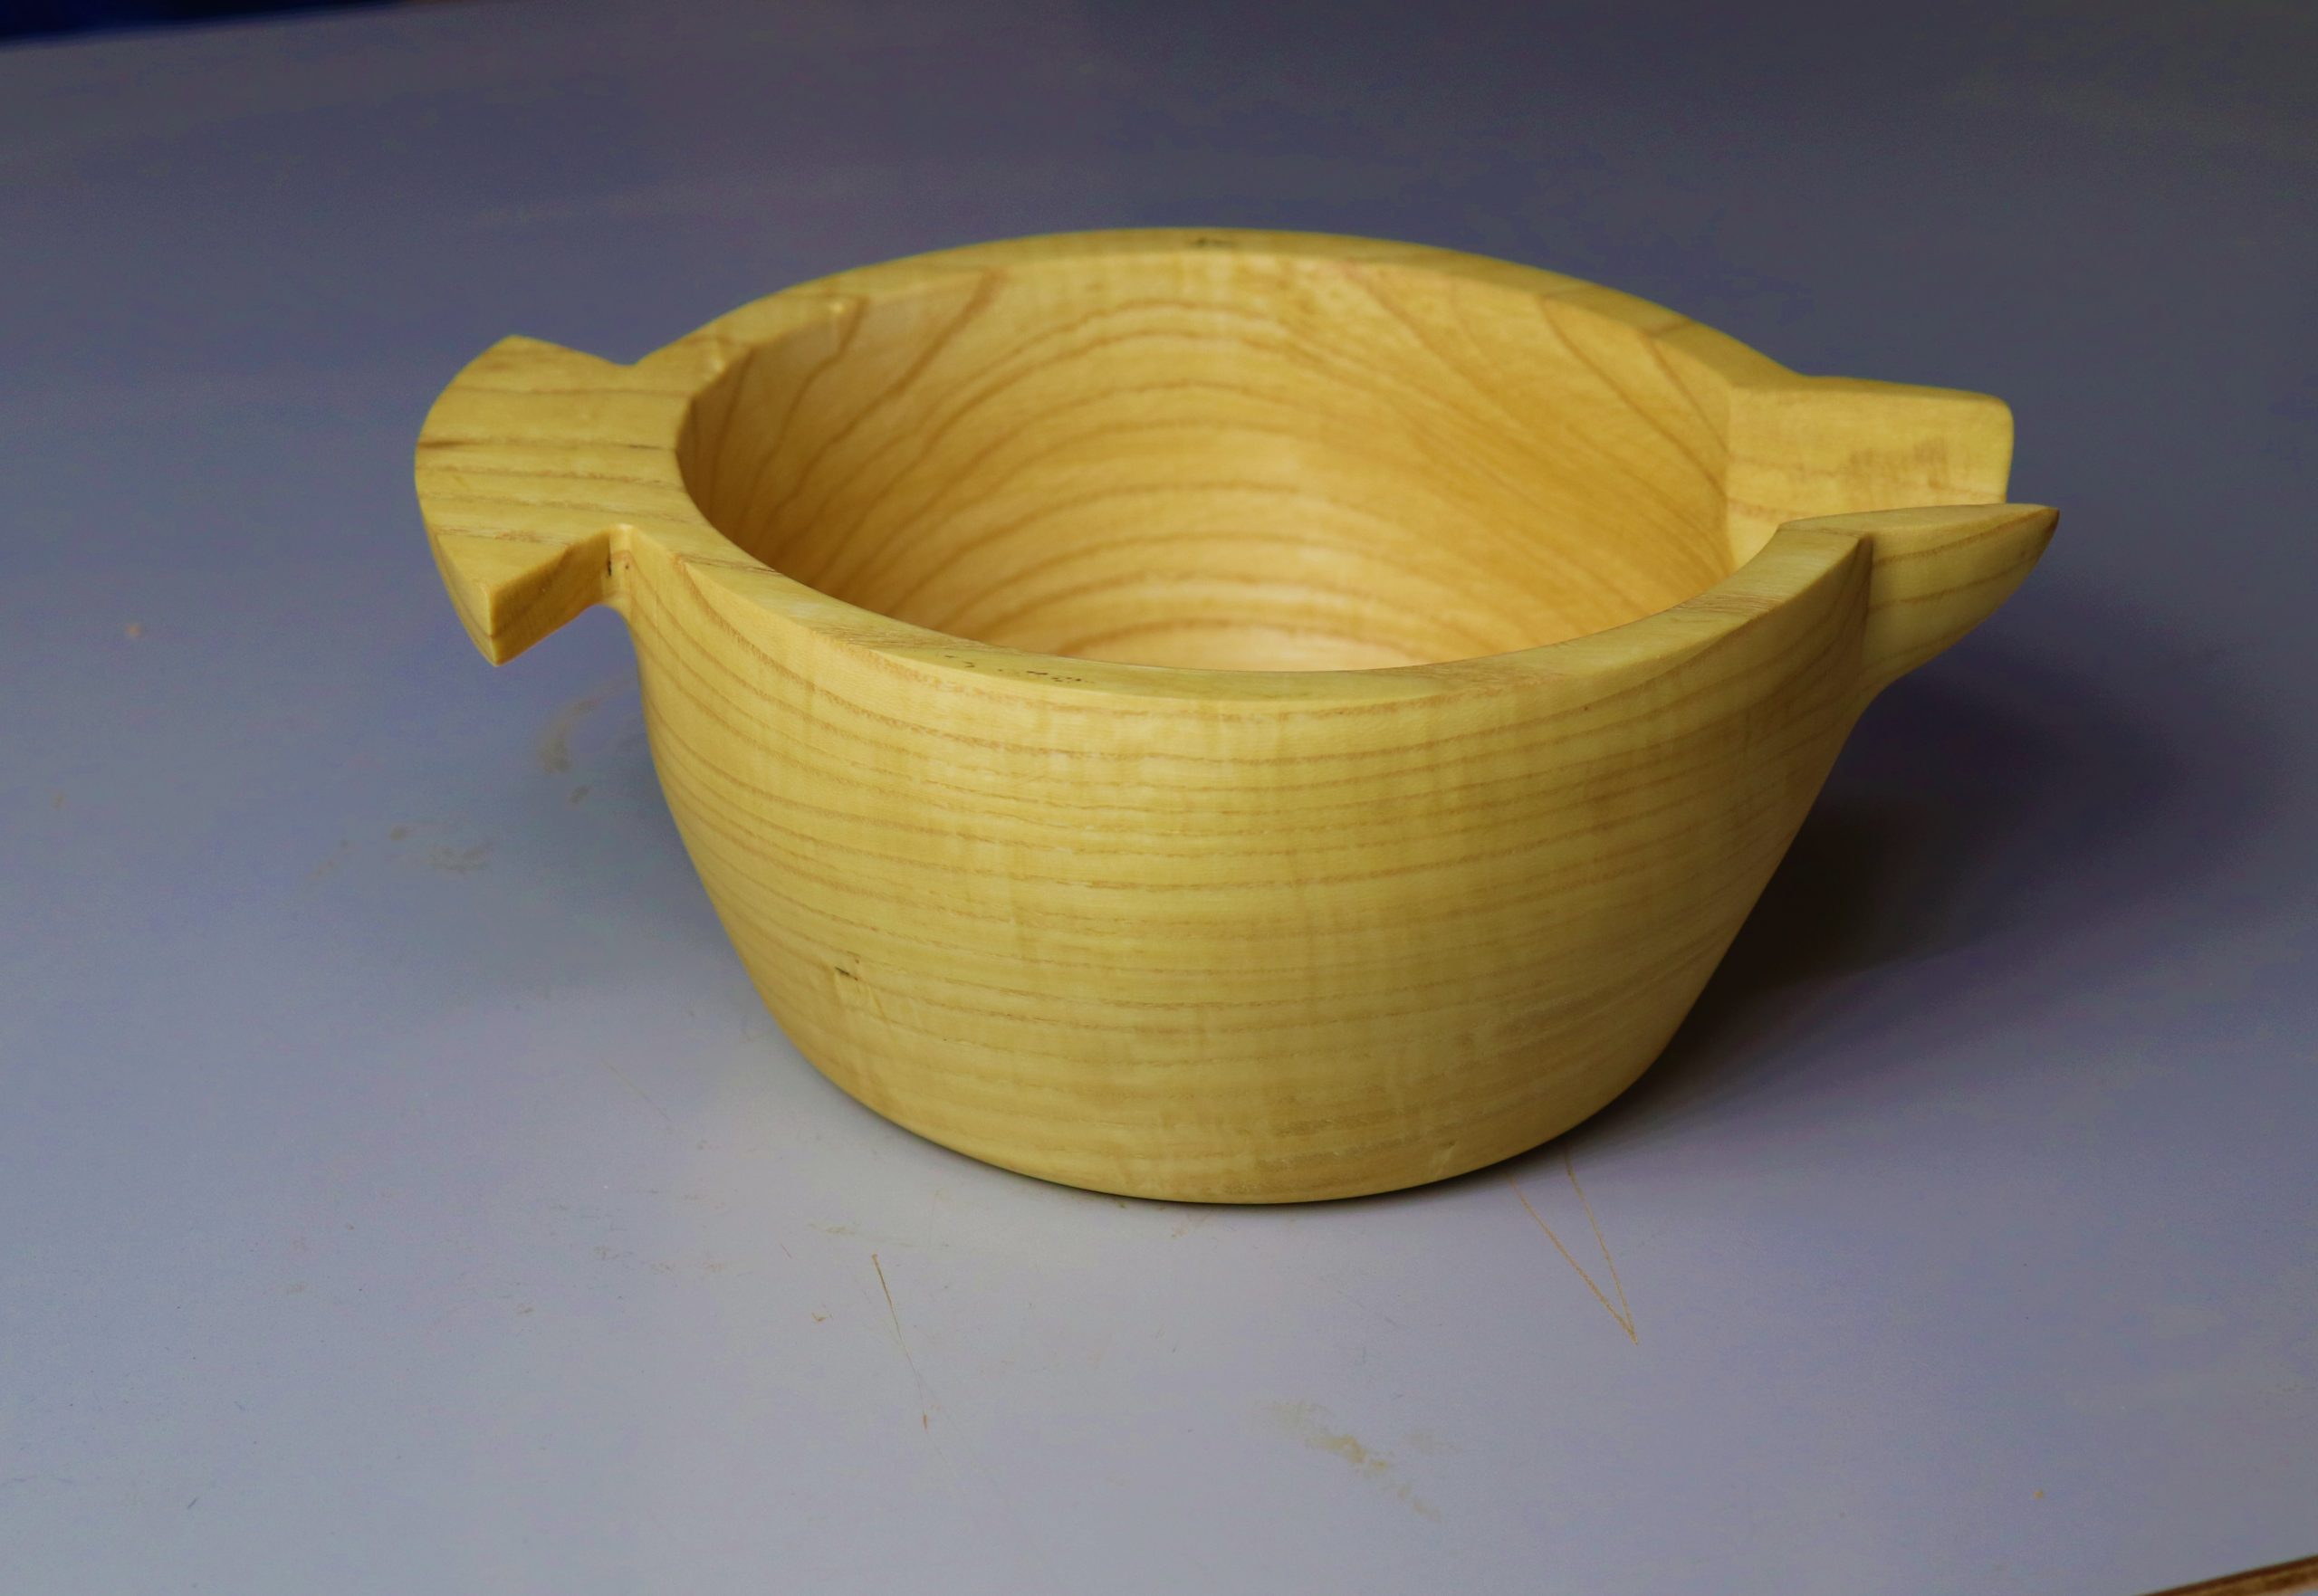
Creating a beautiful bowl with a spout and a handle is easier than you might think, and woodturners will wonder how you could turn a bowl with protruding adornments around the rim. This project requires a small amount of carving, but don’t let that scare you off. Even the most novice carver will find the carving aspects of this project accessible with a little care and patience.
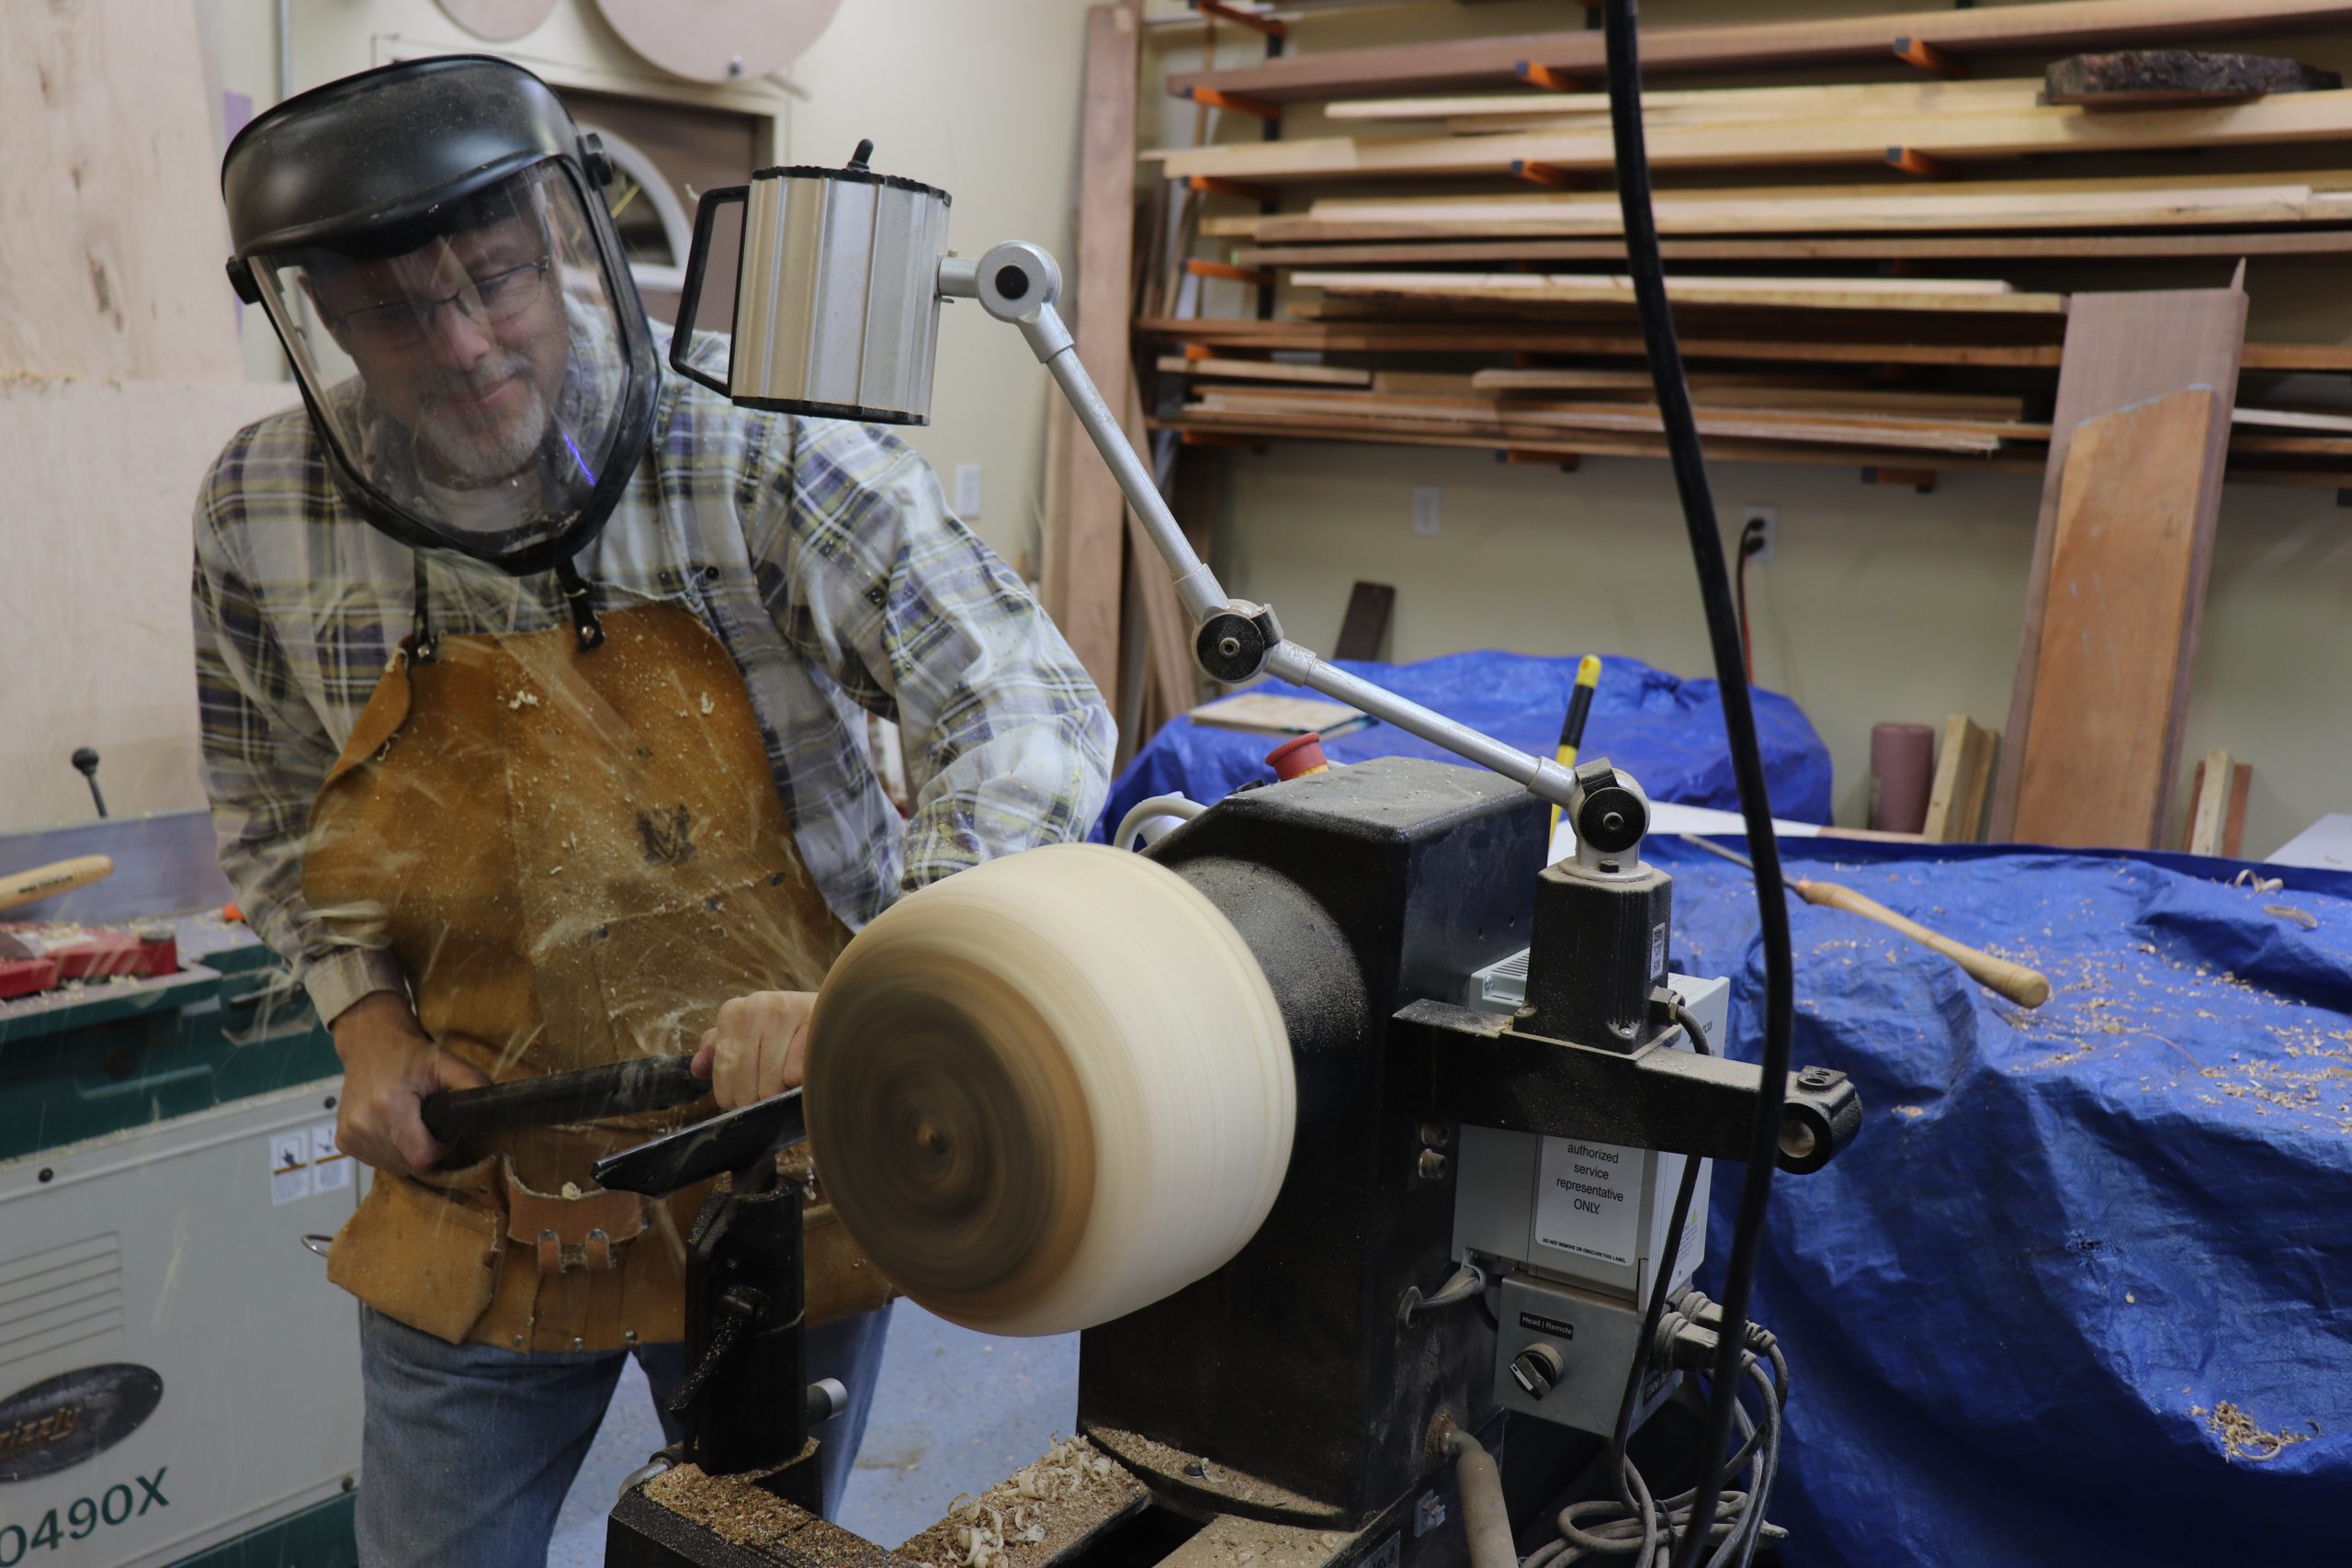
Mount up a blank
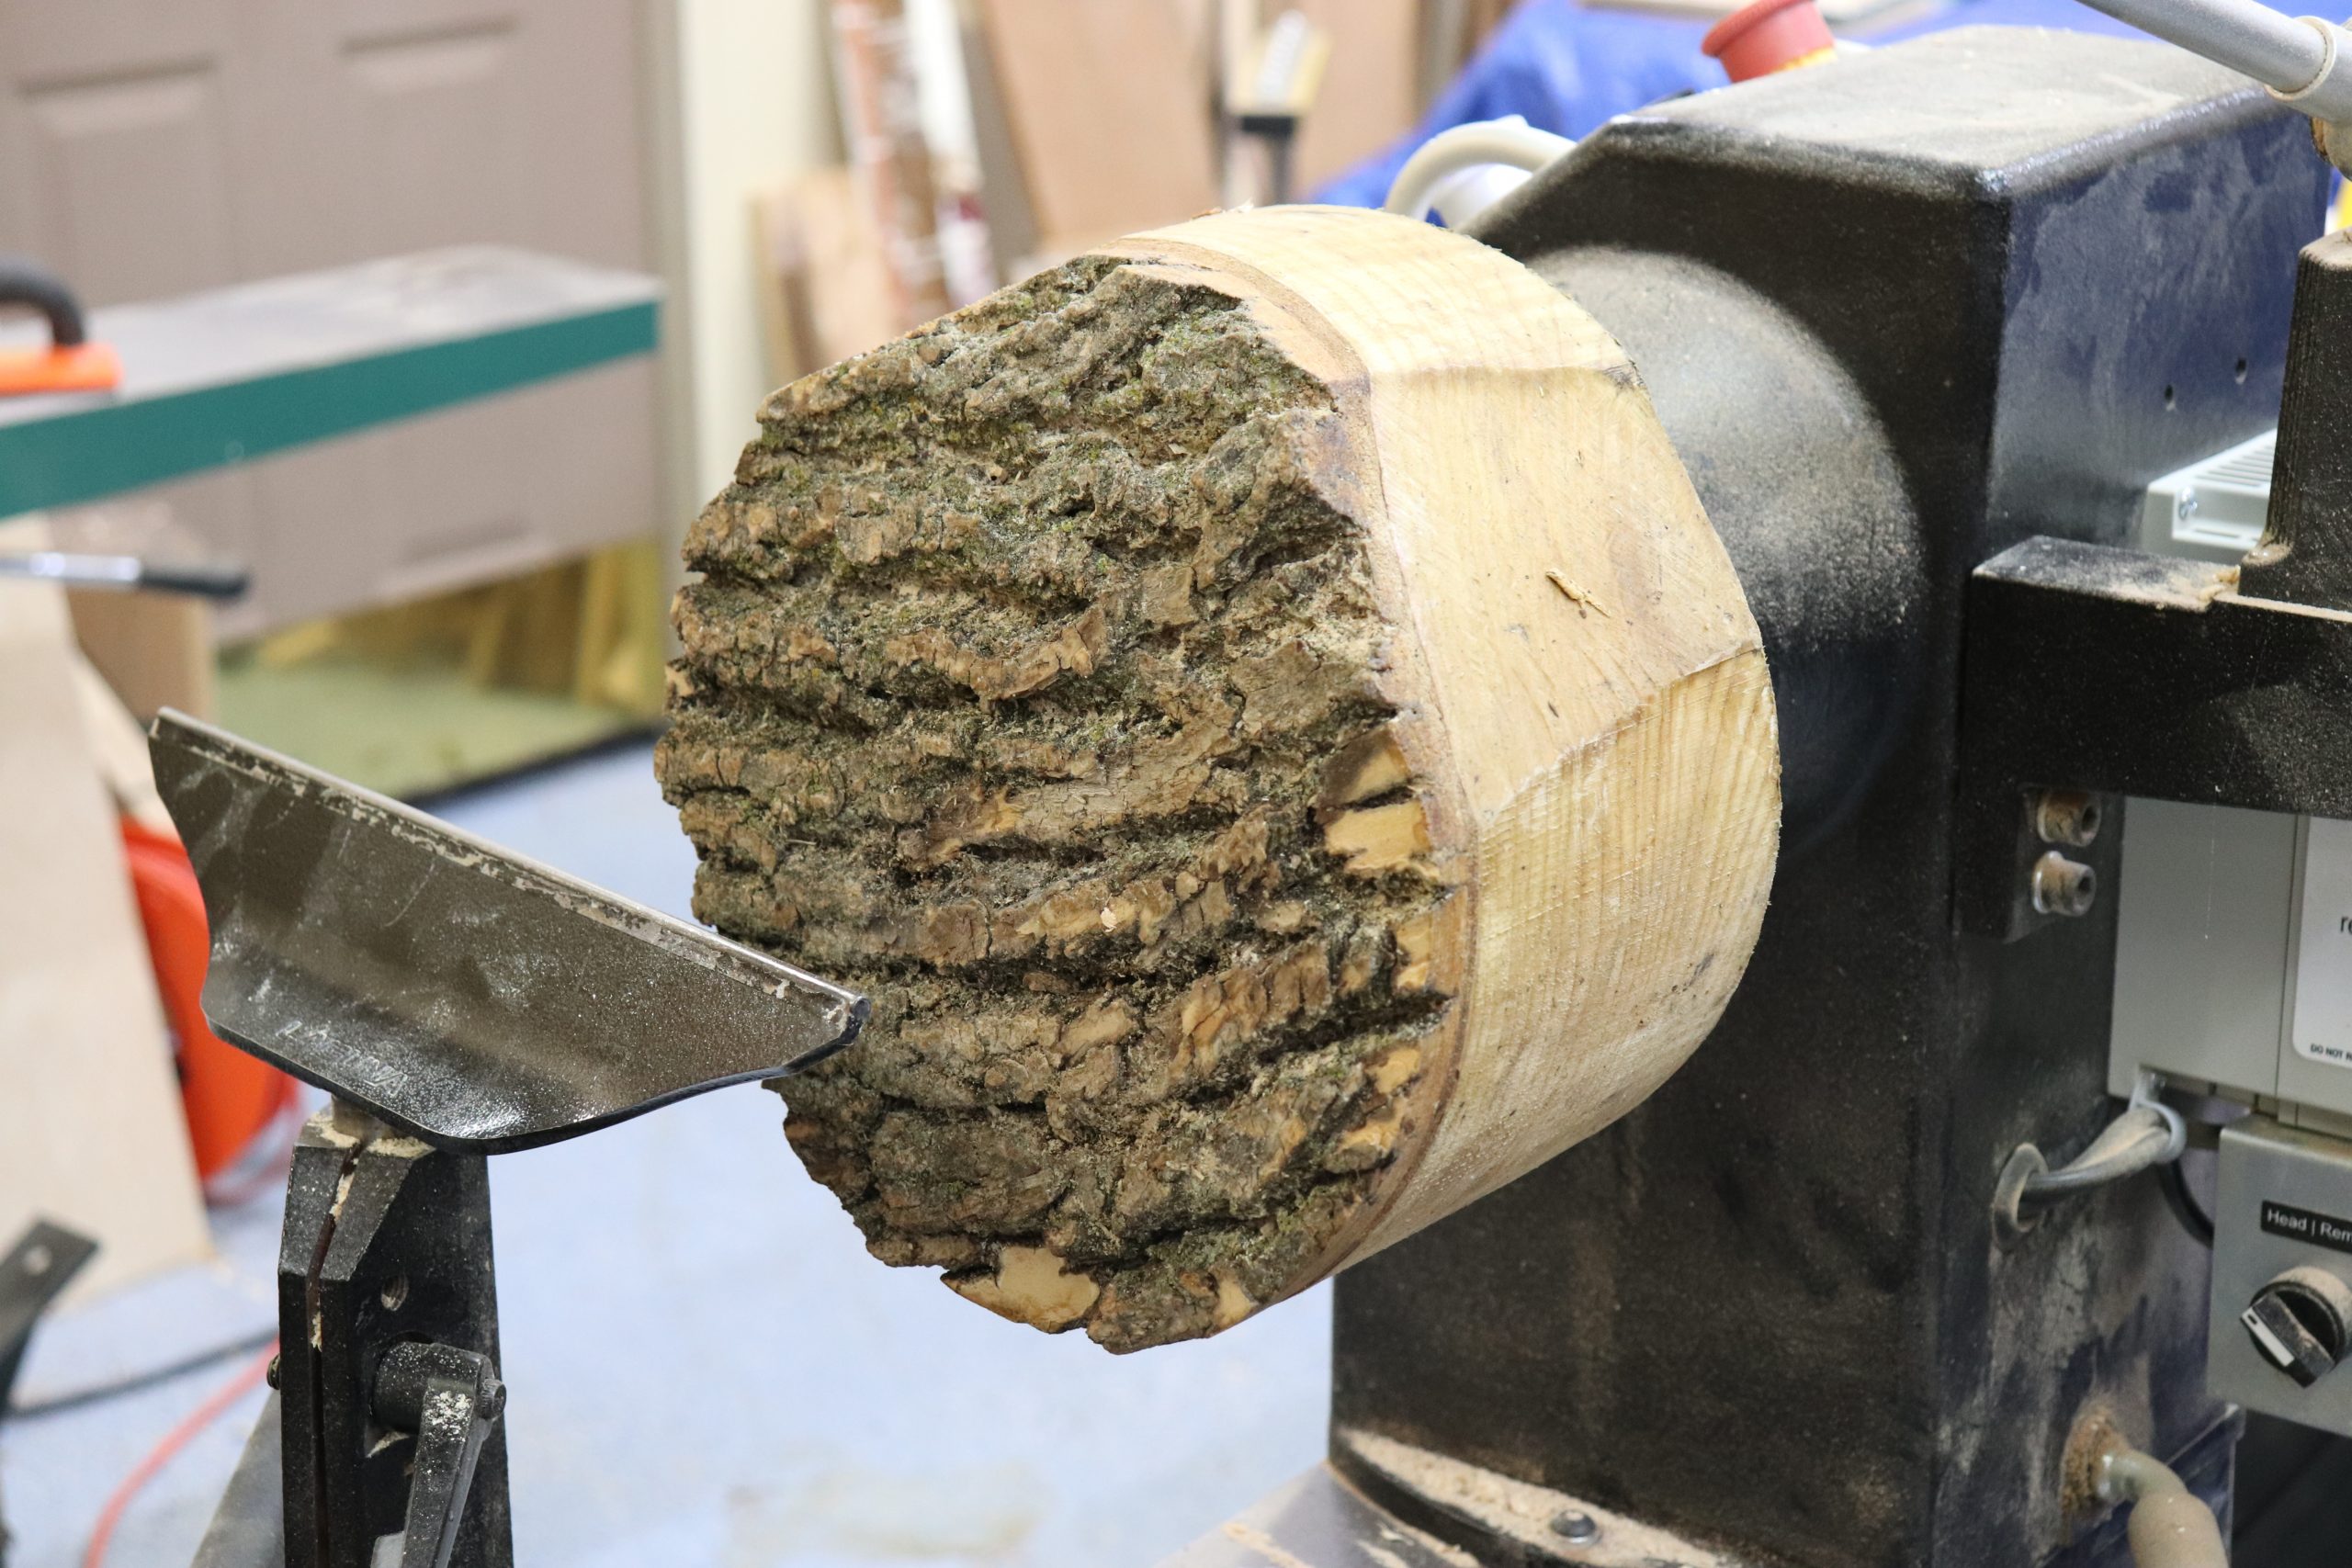
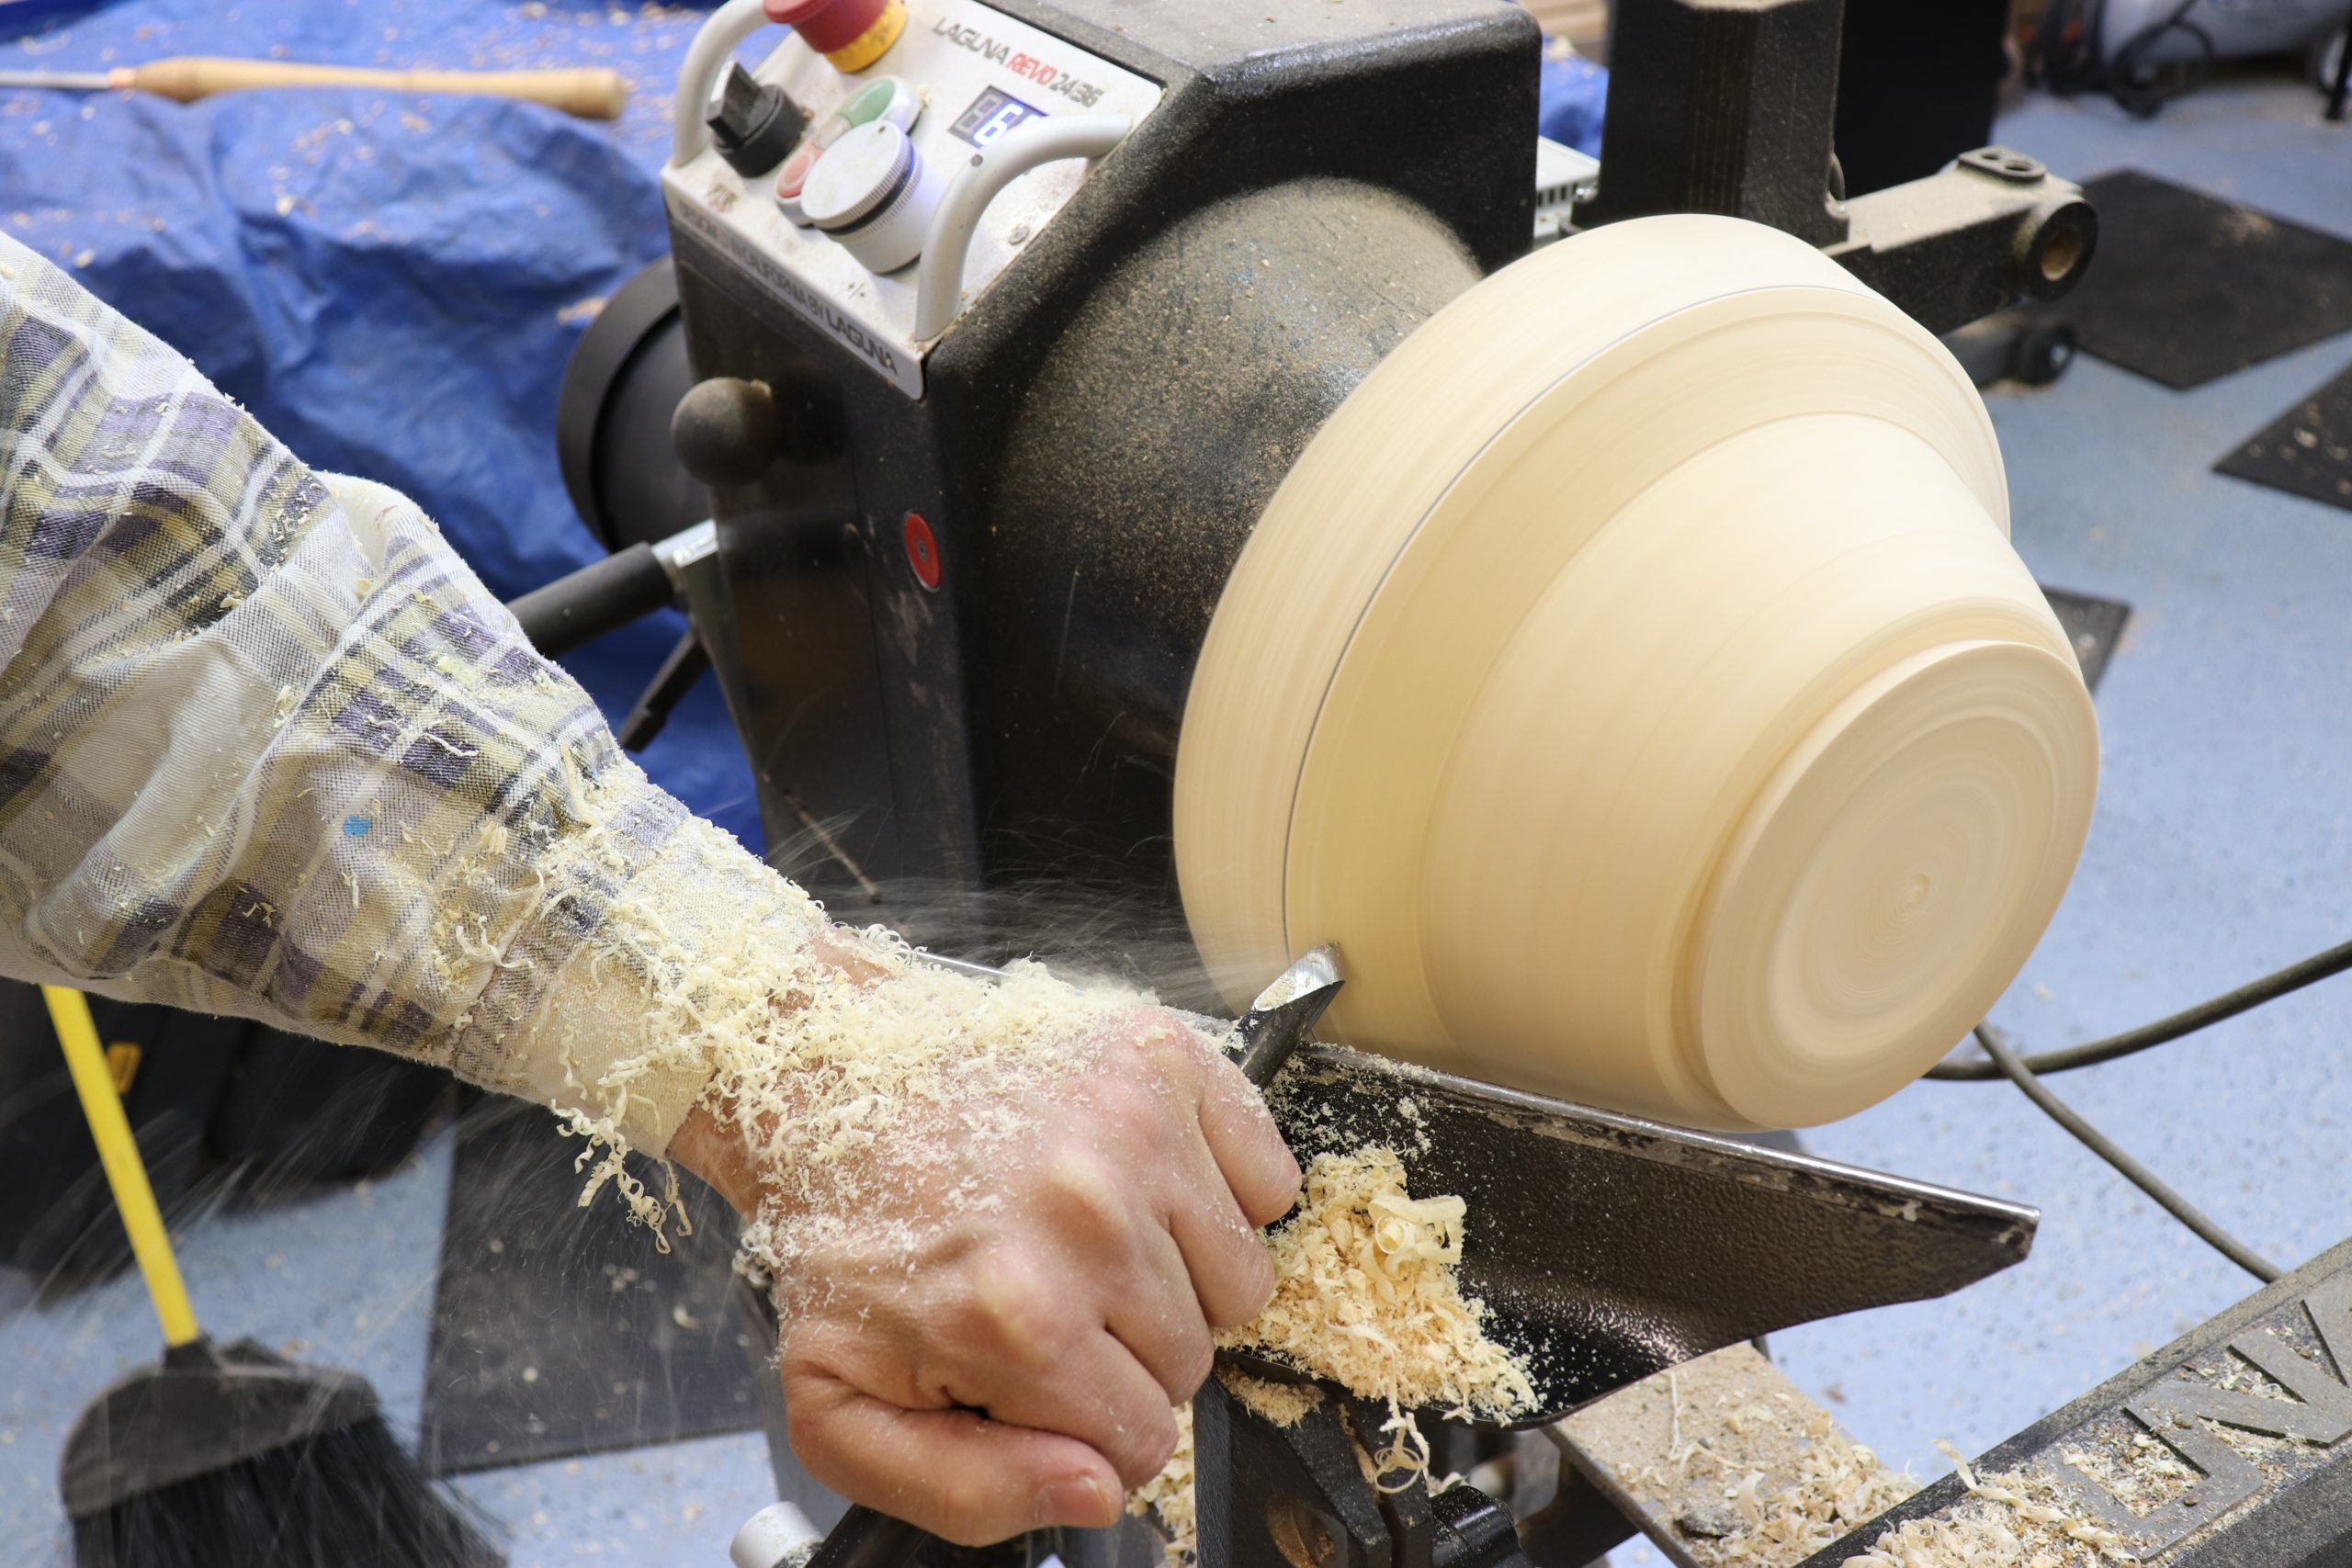
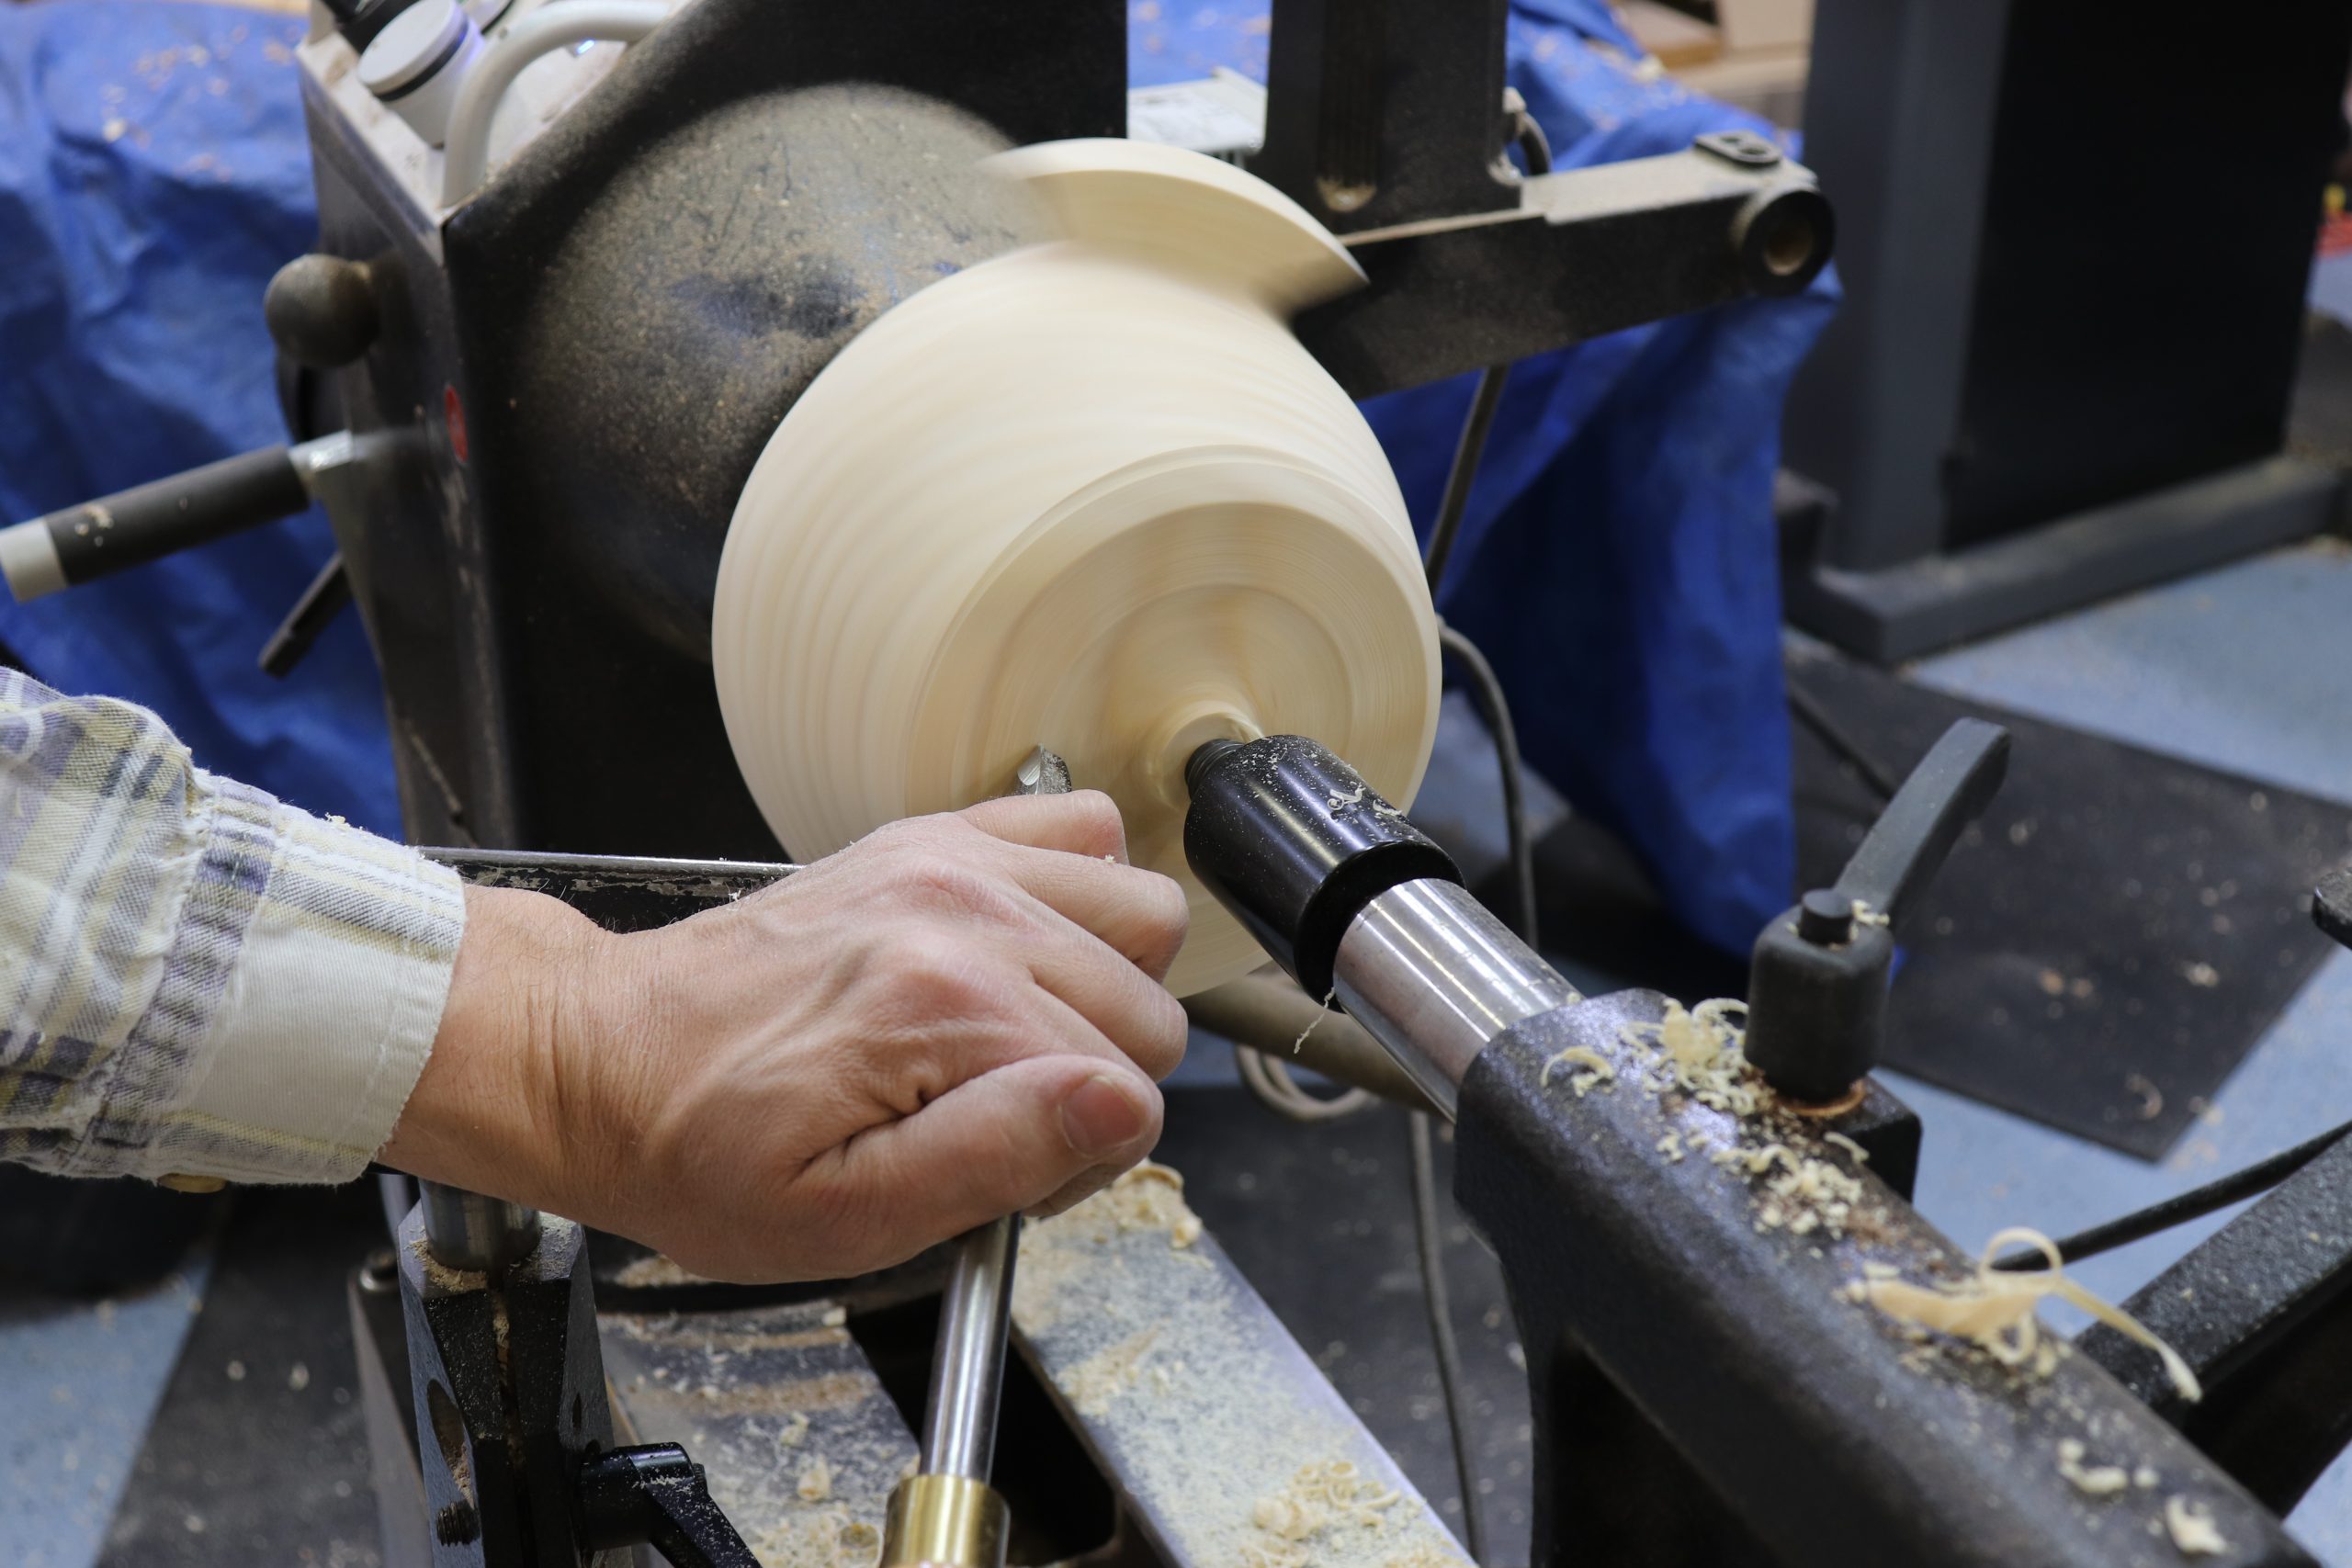
The work starts at the lathe, with a bowl blank of whatever size you choose mounted using a faceplate. This one started as a 10” x 4” chunk of ash, but this article aims to teach a technique that can be used on any size bowl blank rather than to strictly focus on the dimensions of this piece.
Make it round
Begin by turning the blank round, as with any bowl turning project.
Mark your transition points
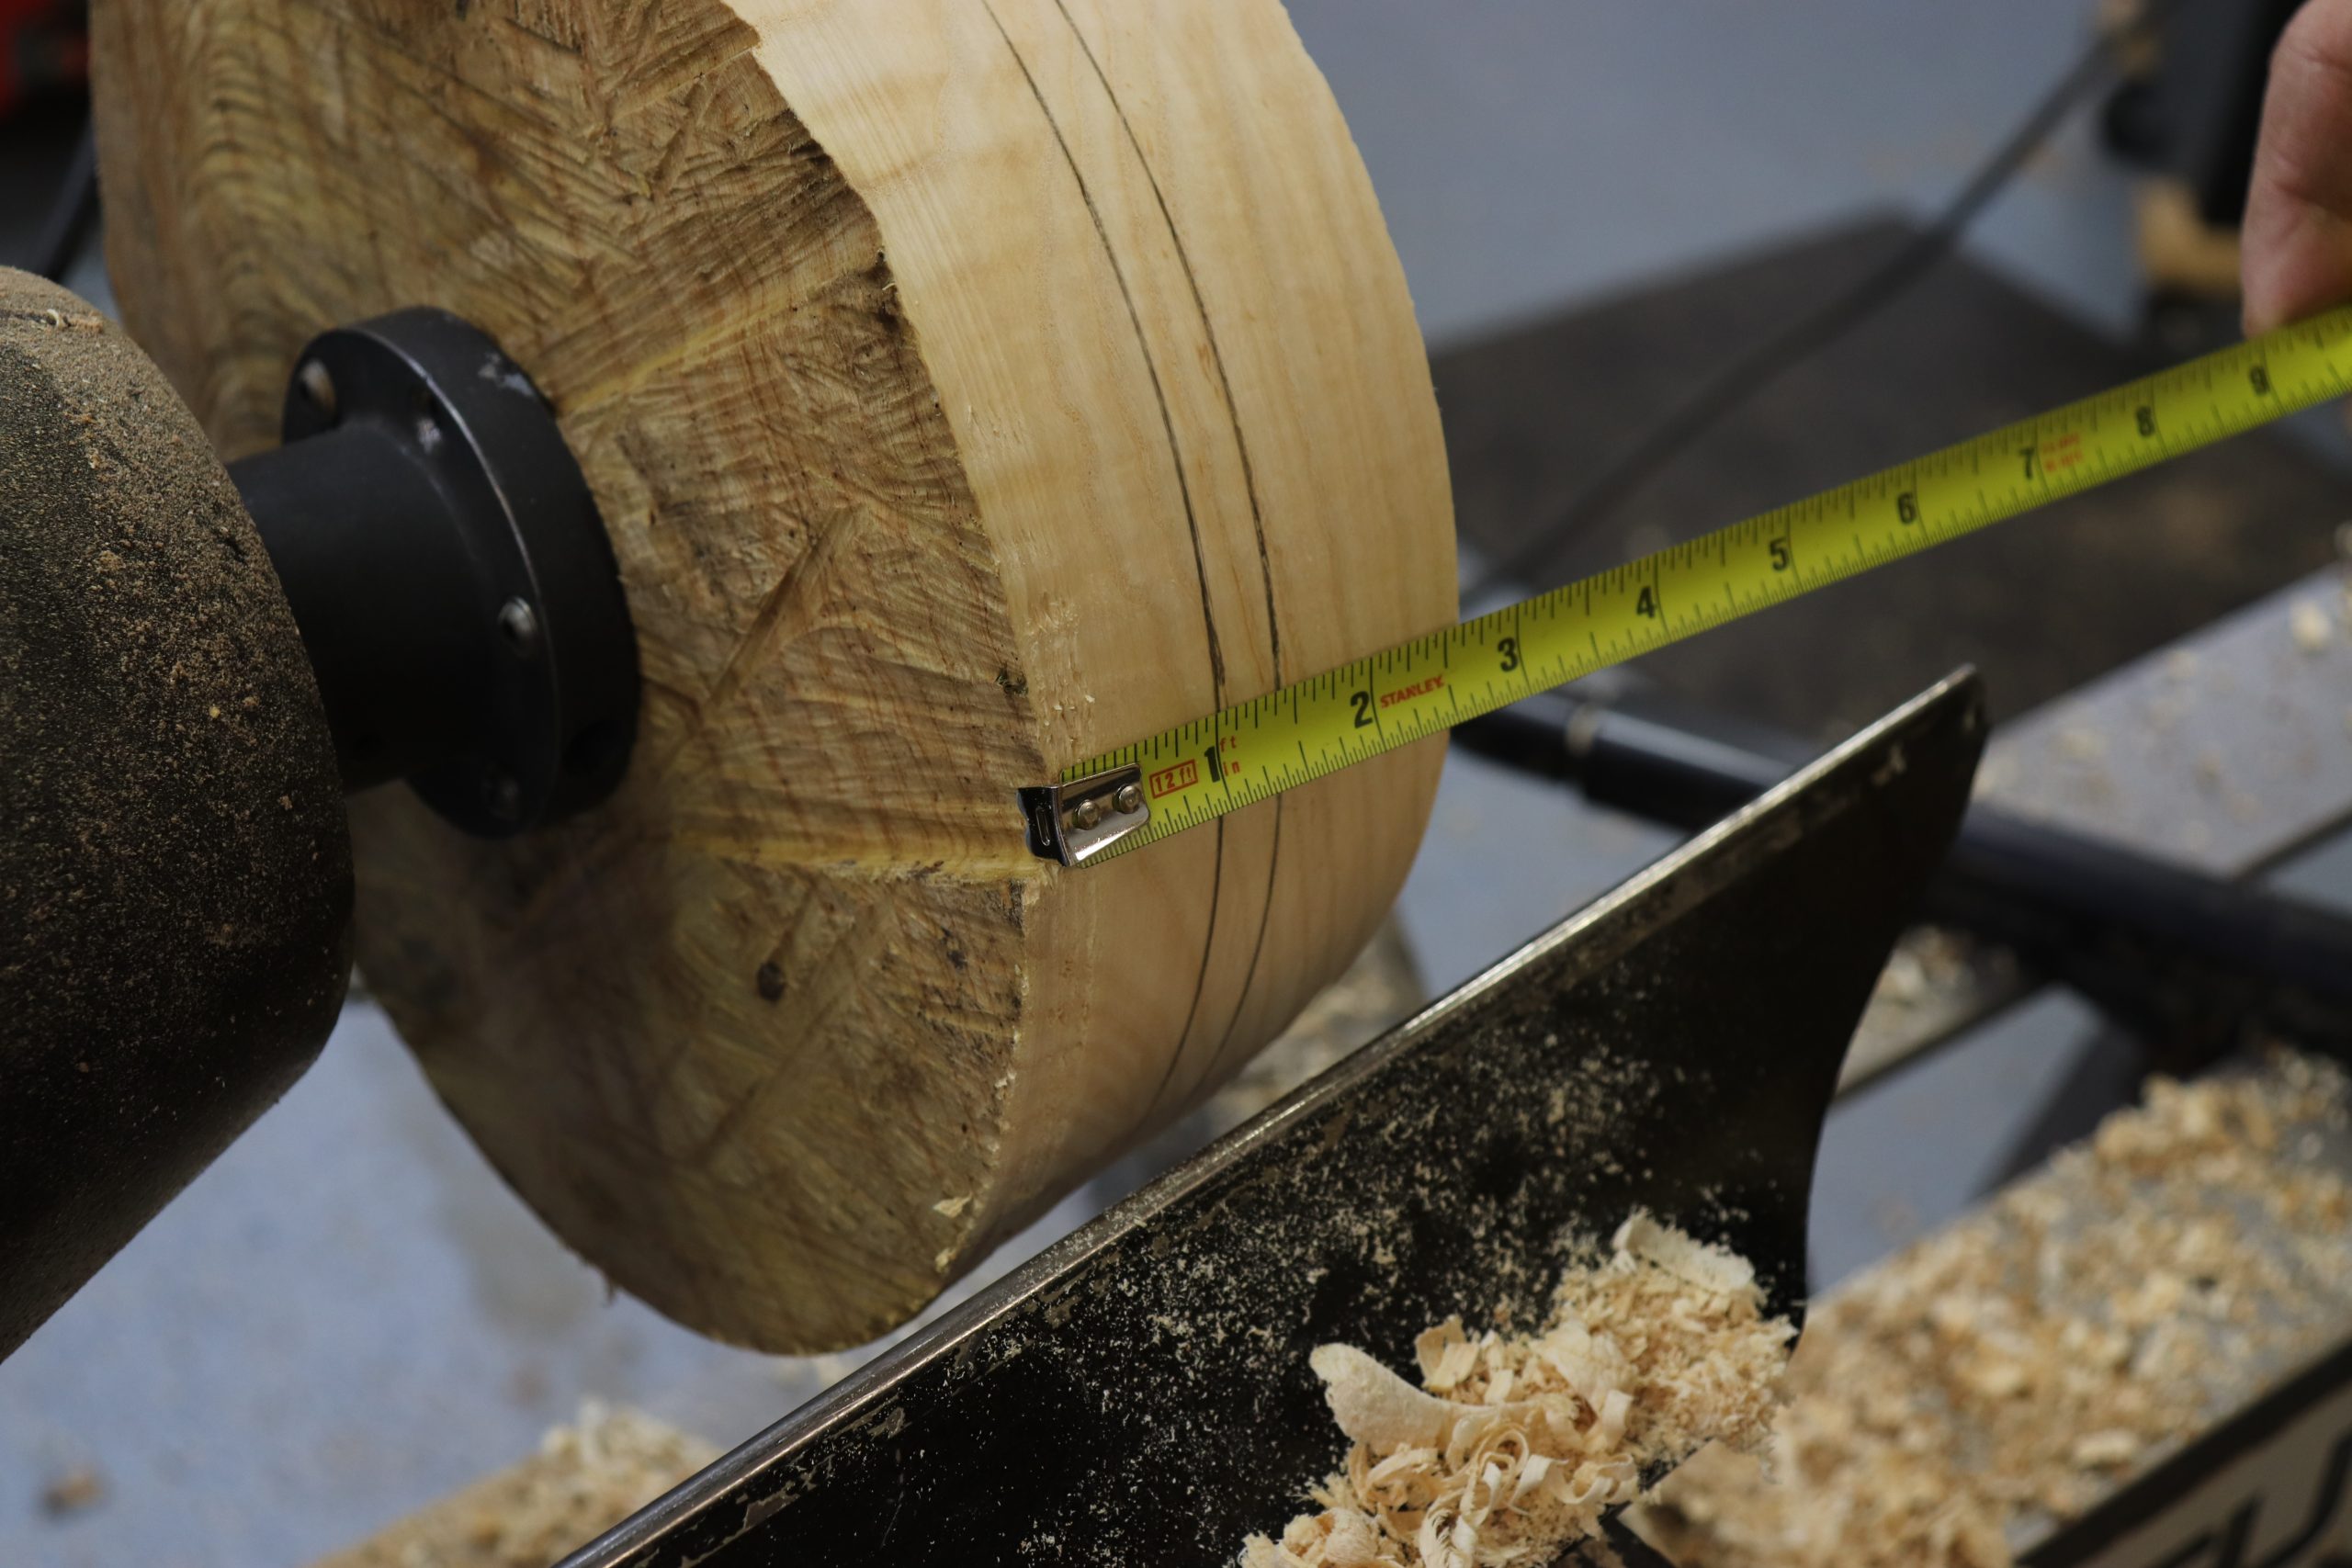
After the blank is round, mark two lines around the perimeter, one at 1” from the lowest point of the bowl’s top, and the next one 3/8” down from the first line.
Tapering cuts
Using a bowl gouge, cut to the lower line, removing a 1” depth of material. Then taper from the upper line to the lower line as pictured. Turn a tenon onto the bottom of the bowl to be mounted in a four-jaw chuck.
Chuck it up

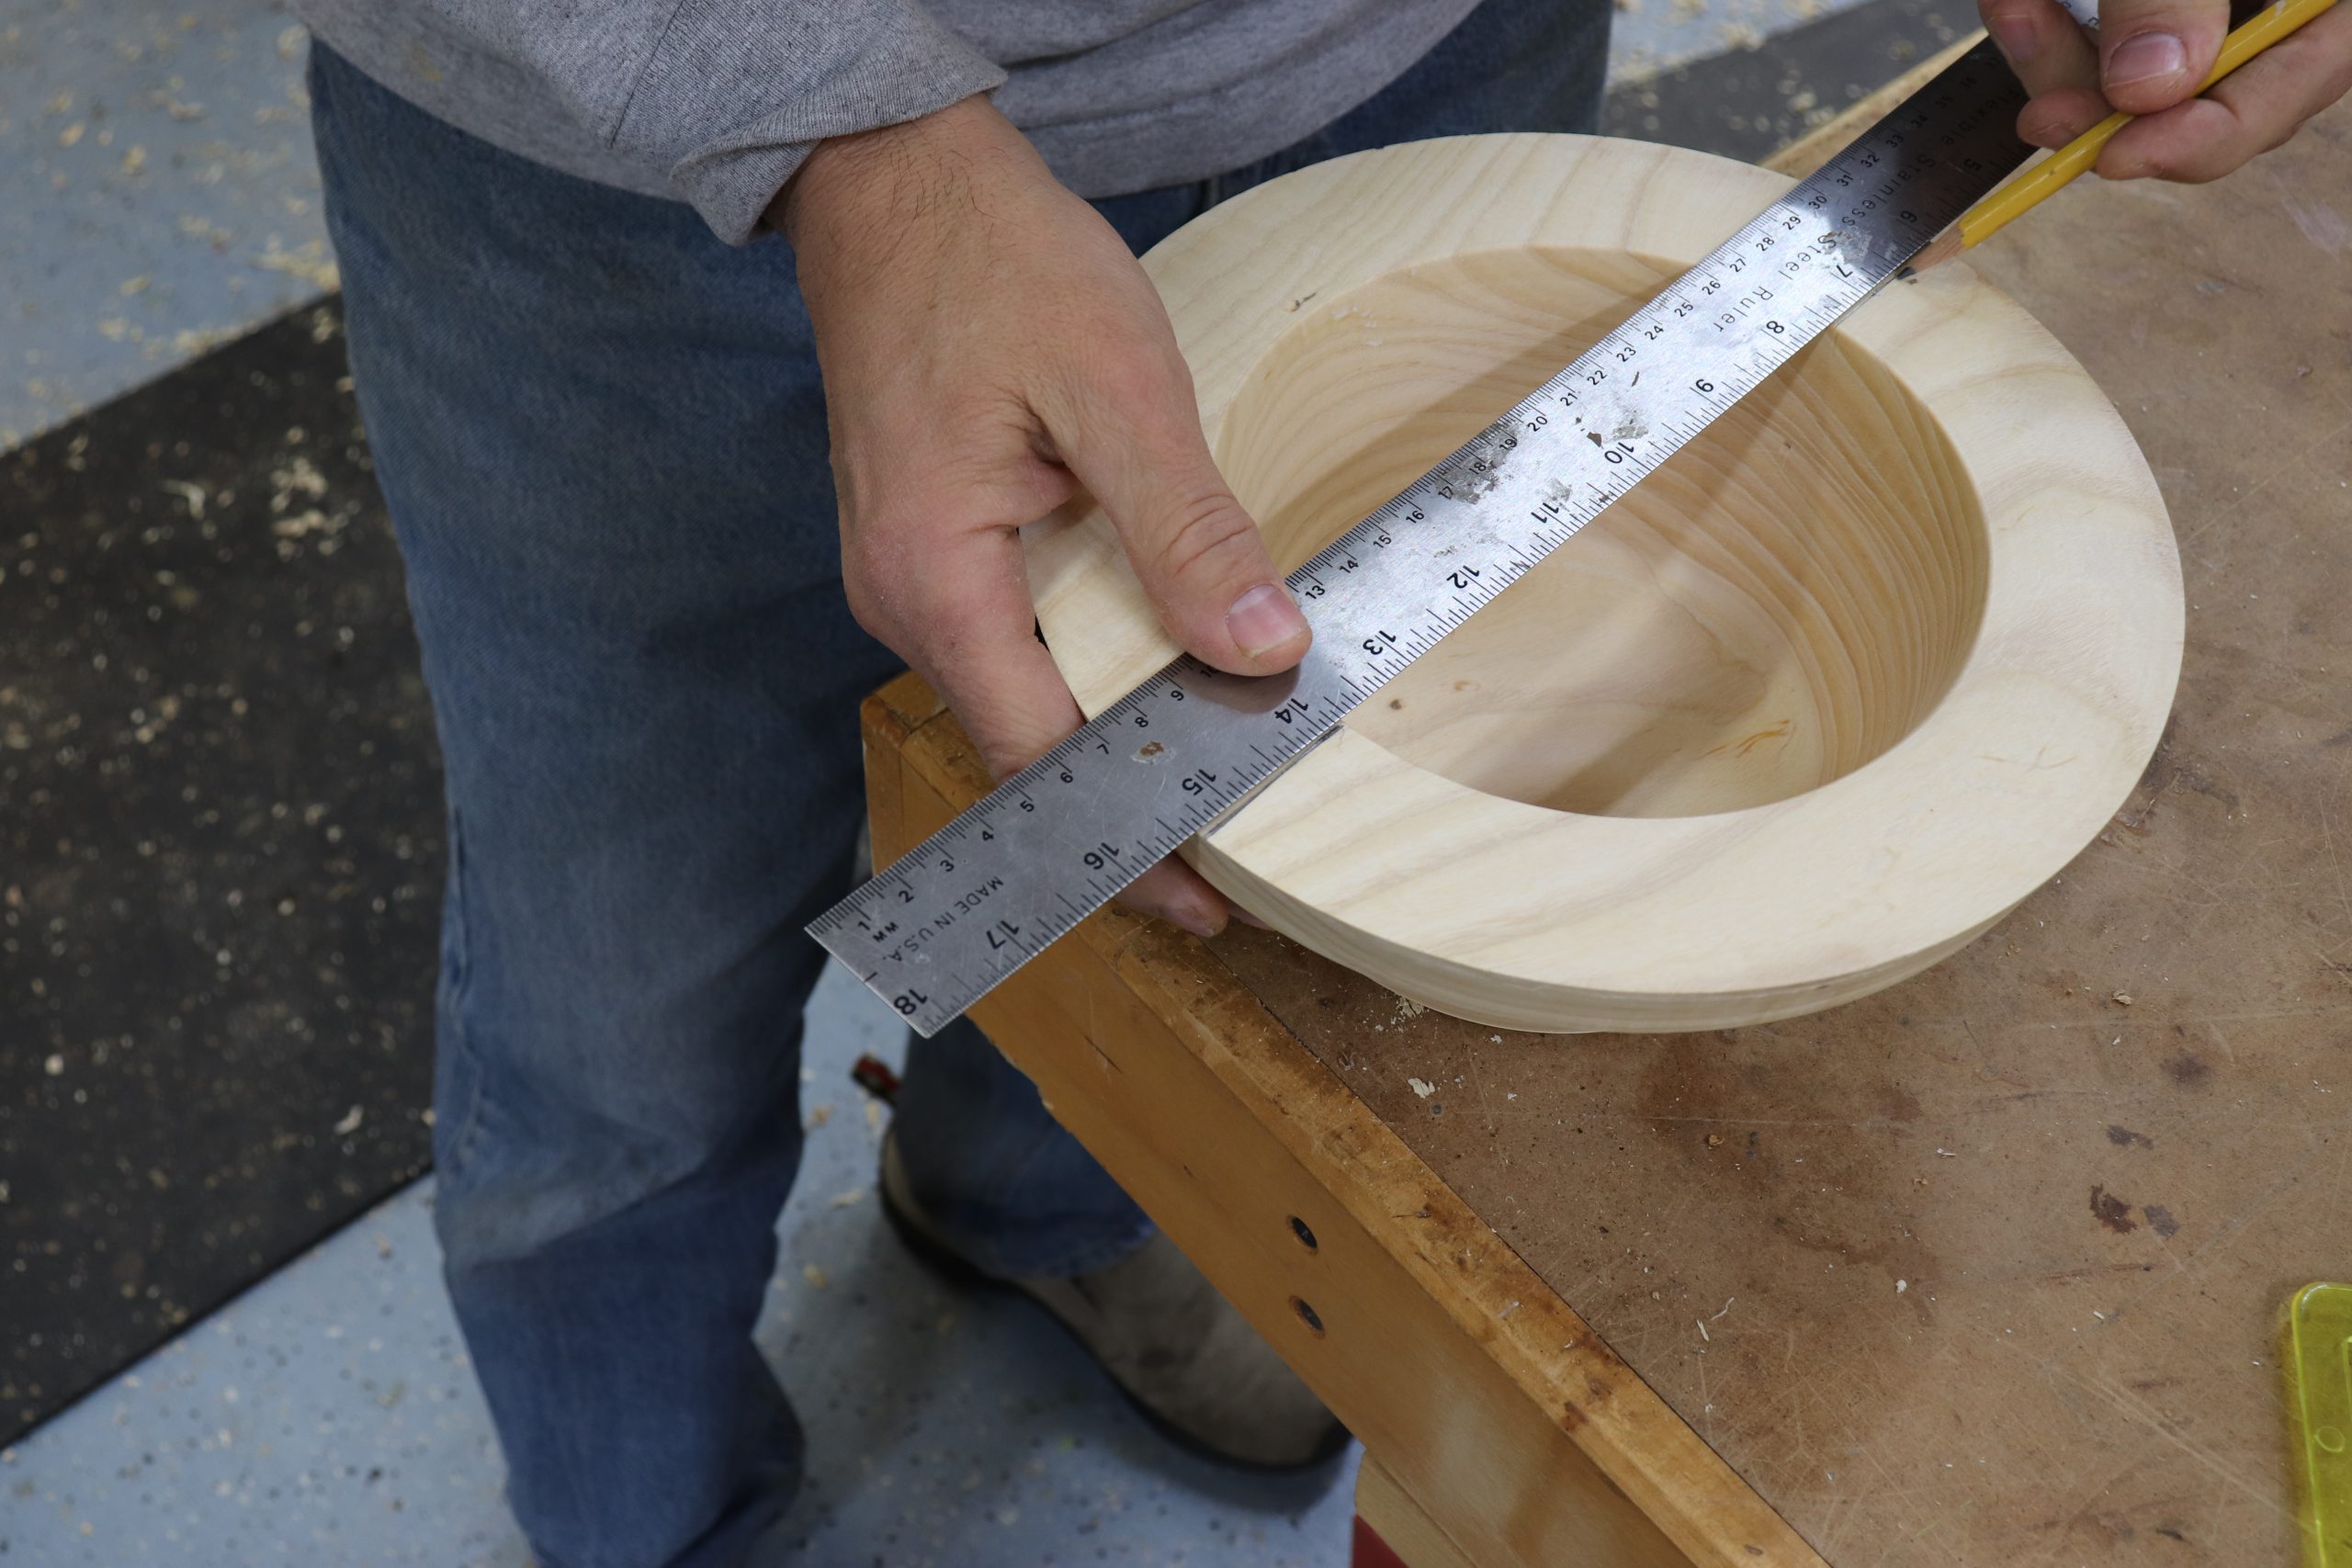
Flip the bowl around and mount the tenon into a four-jaw chuck. Mark a line 1-1/2” from the outer rim. It’s critical that you remember to not base the inner wall line near the outer perimeter at the top of the bowl, because most of this material will be removed later.
For now, it will look like a bowl with a very thick rim. The 1-1/2” rim thickness represents 1” of the perimeter that will be used for the handle and spout and ½” of actual finished wall thickness.
Scoop out the inside
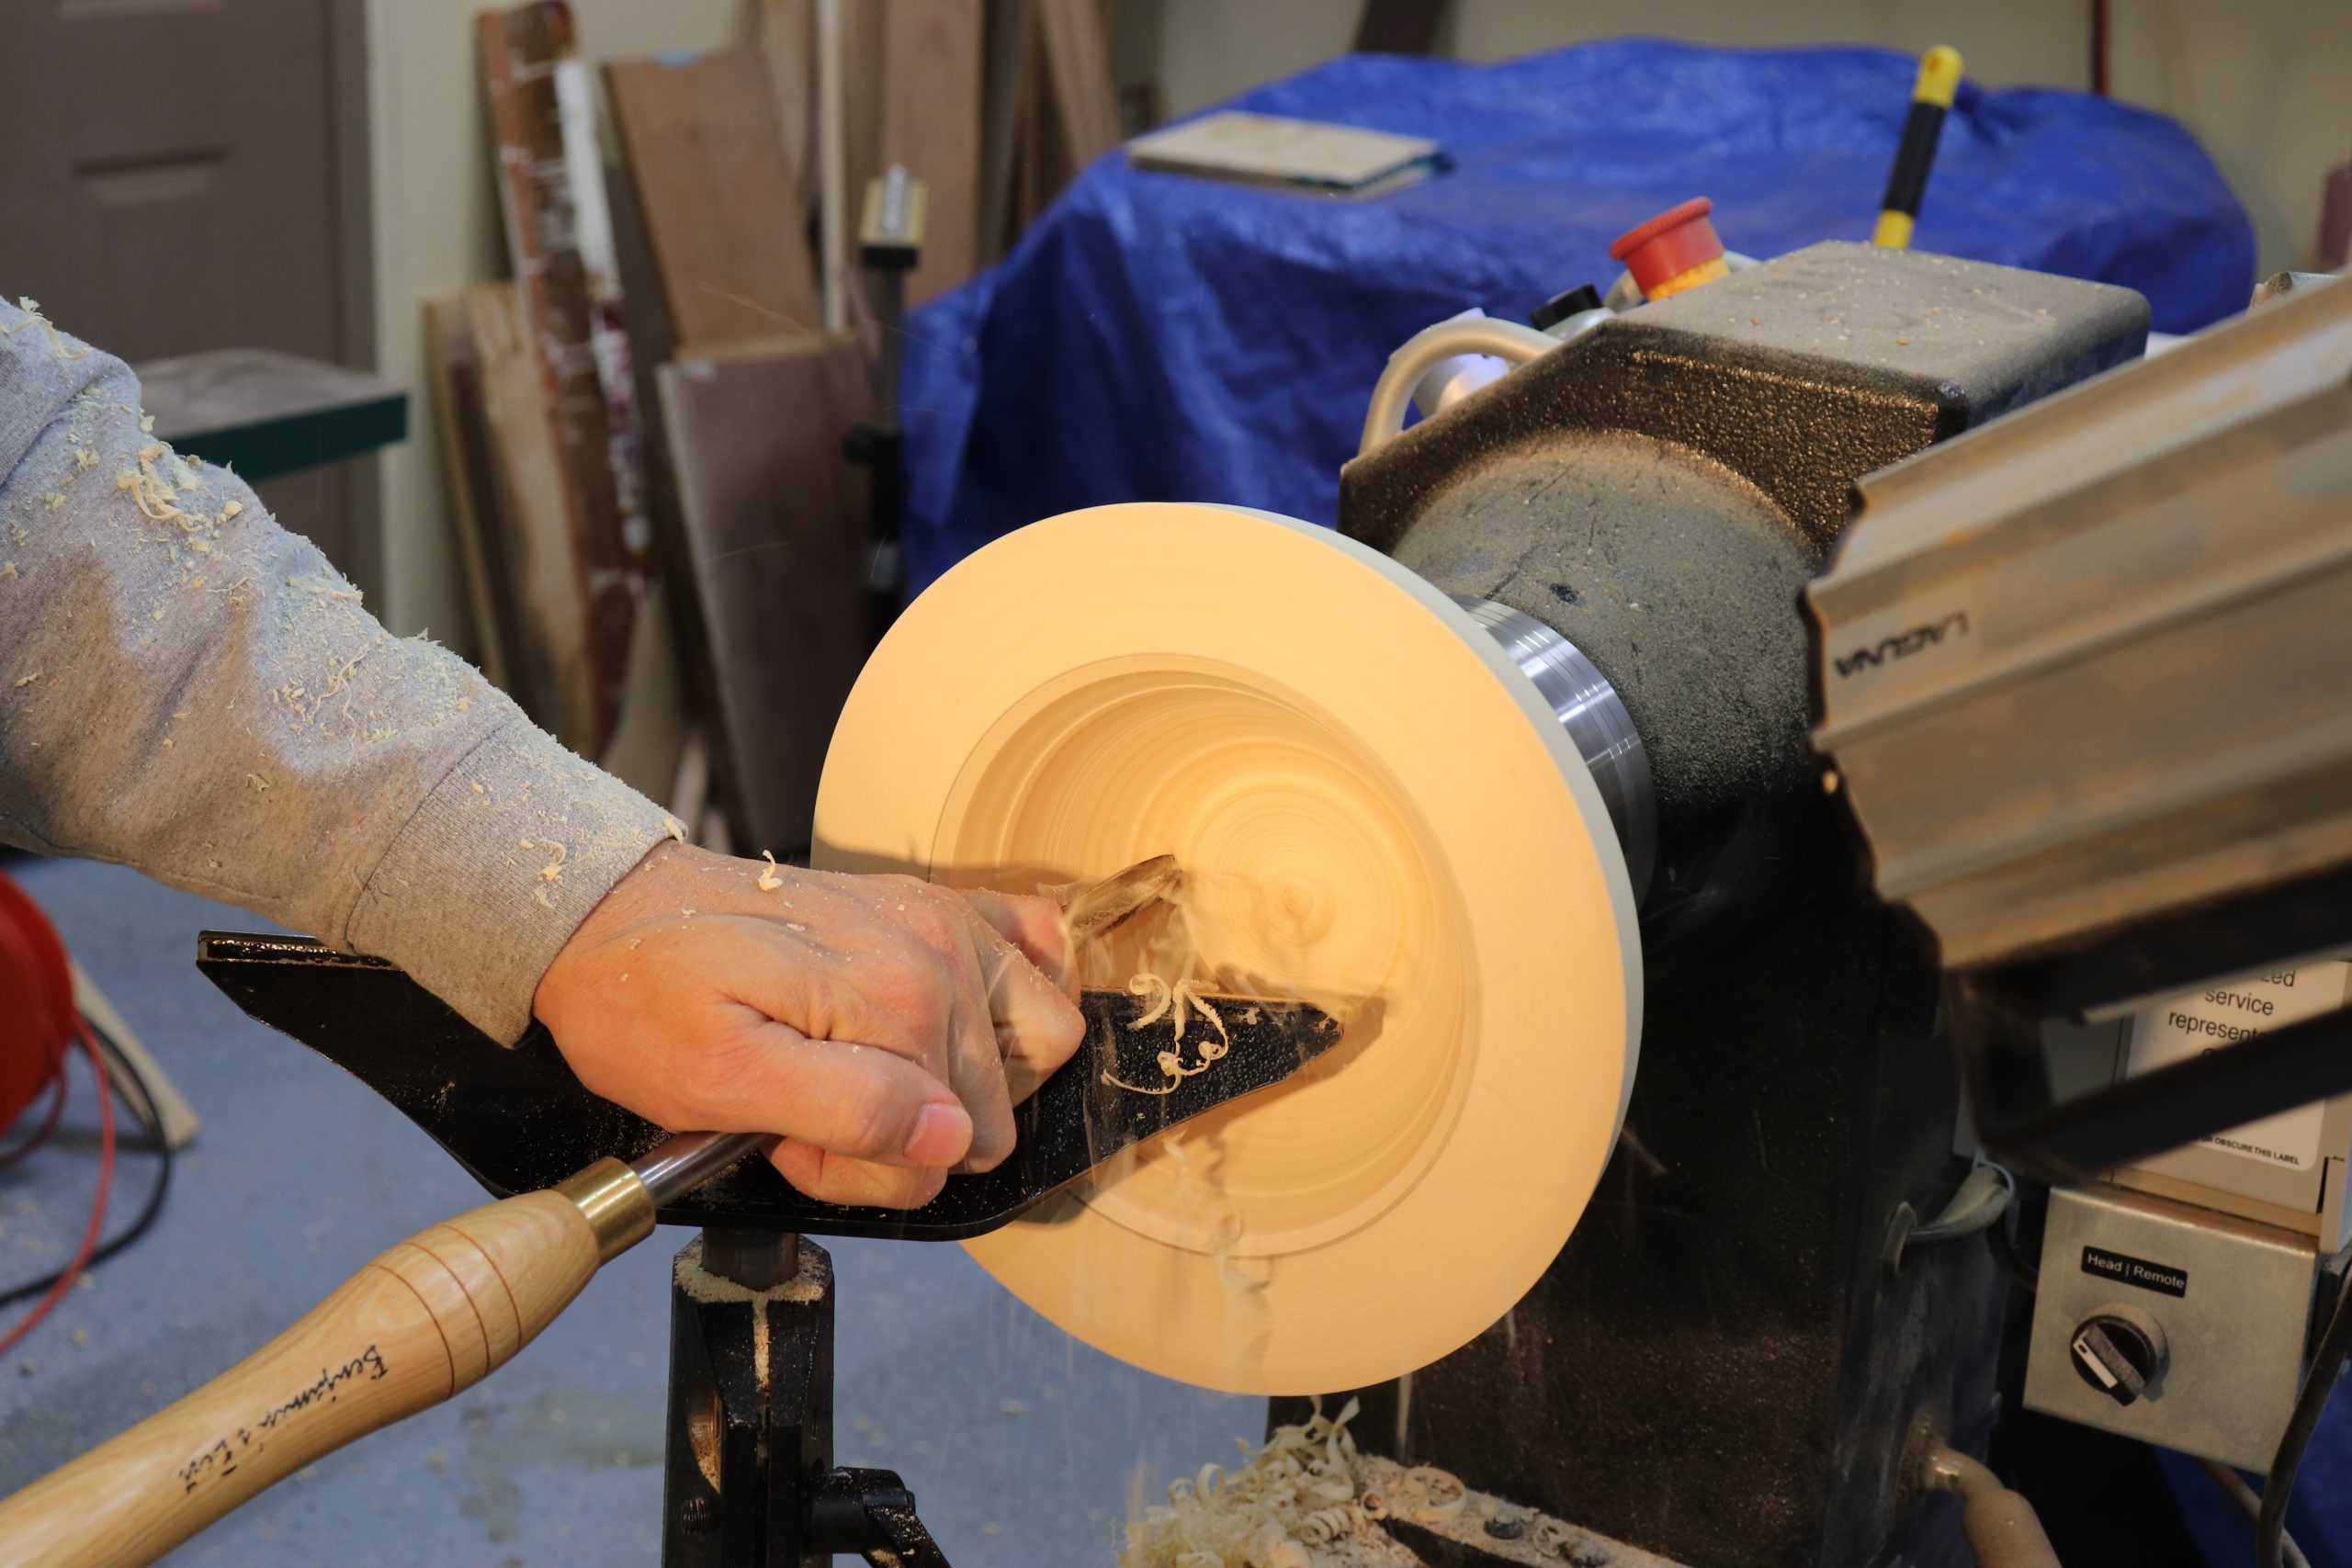
Remove waste from inside of the bowl, checking wall thickness from below the thick portion of the rim.
Power sanding
Sand the bowl, inside and out.
Establish a cut line
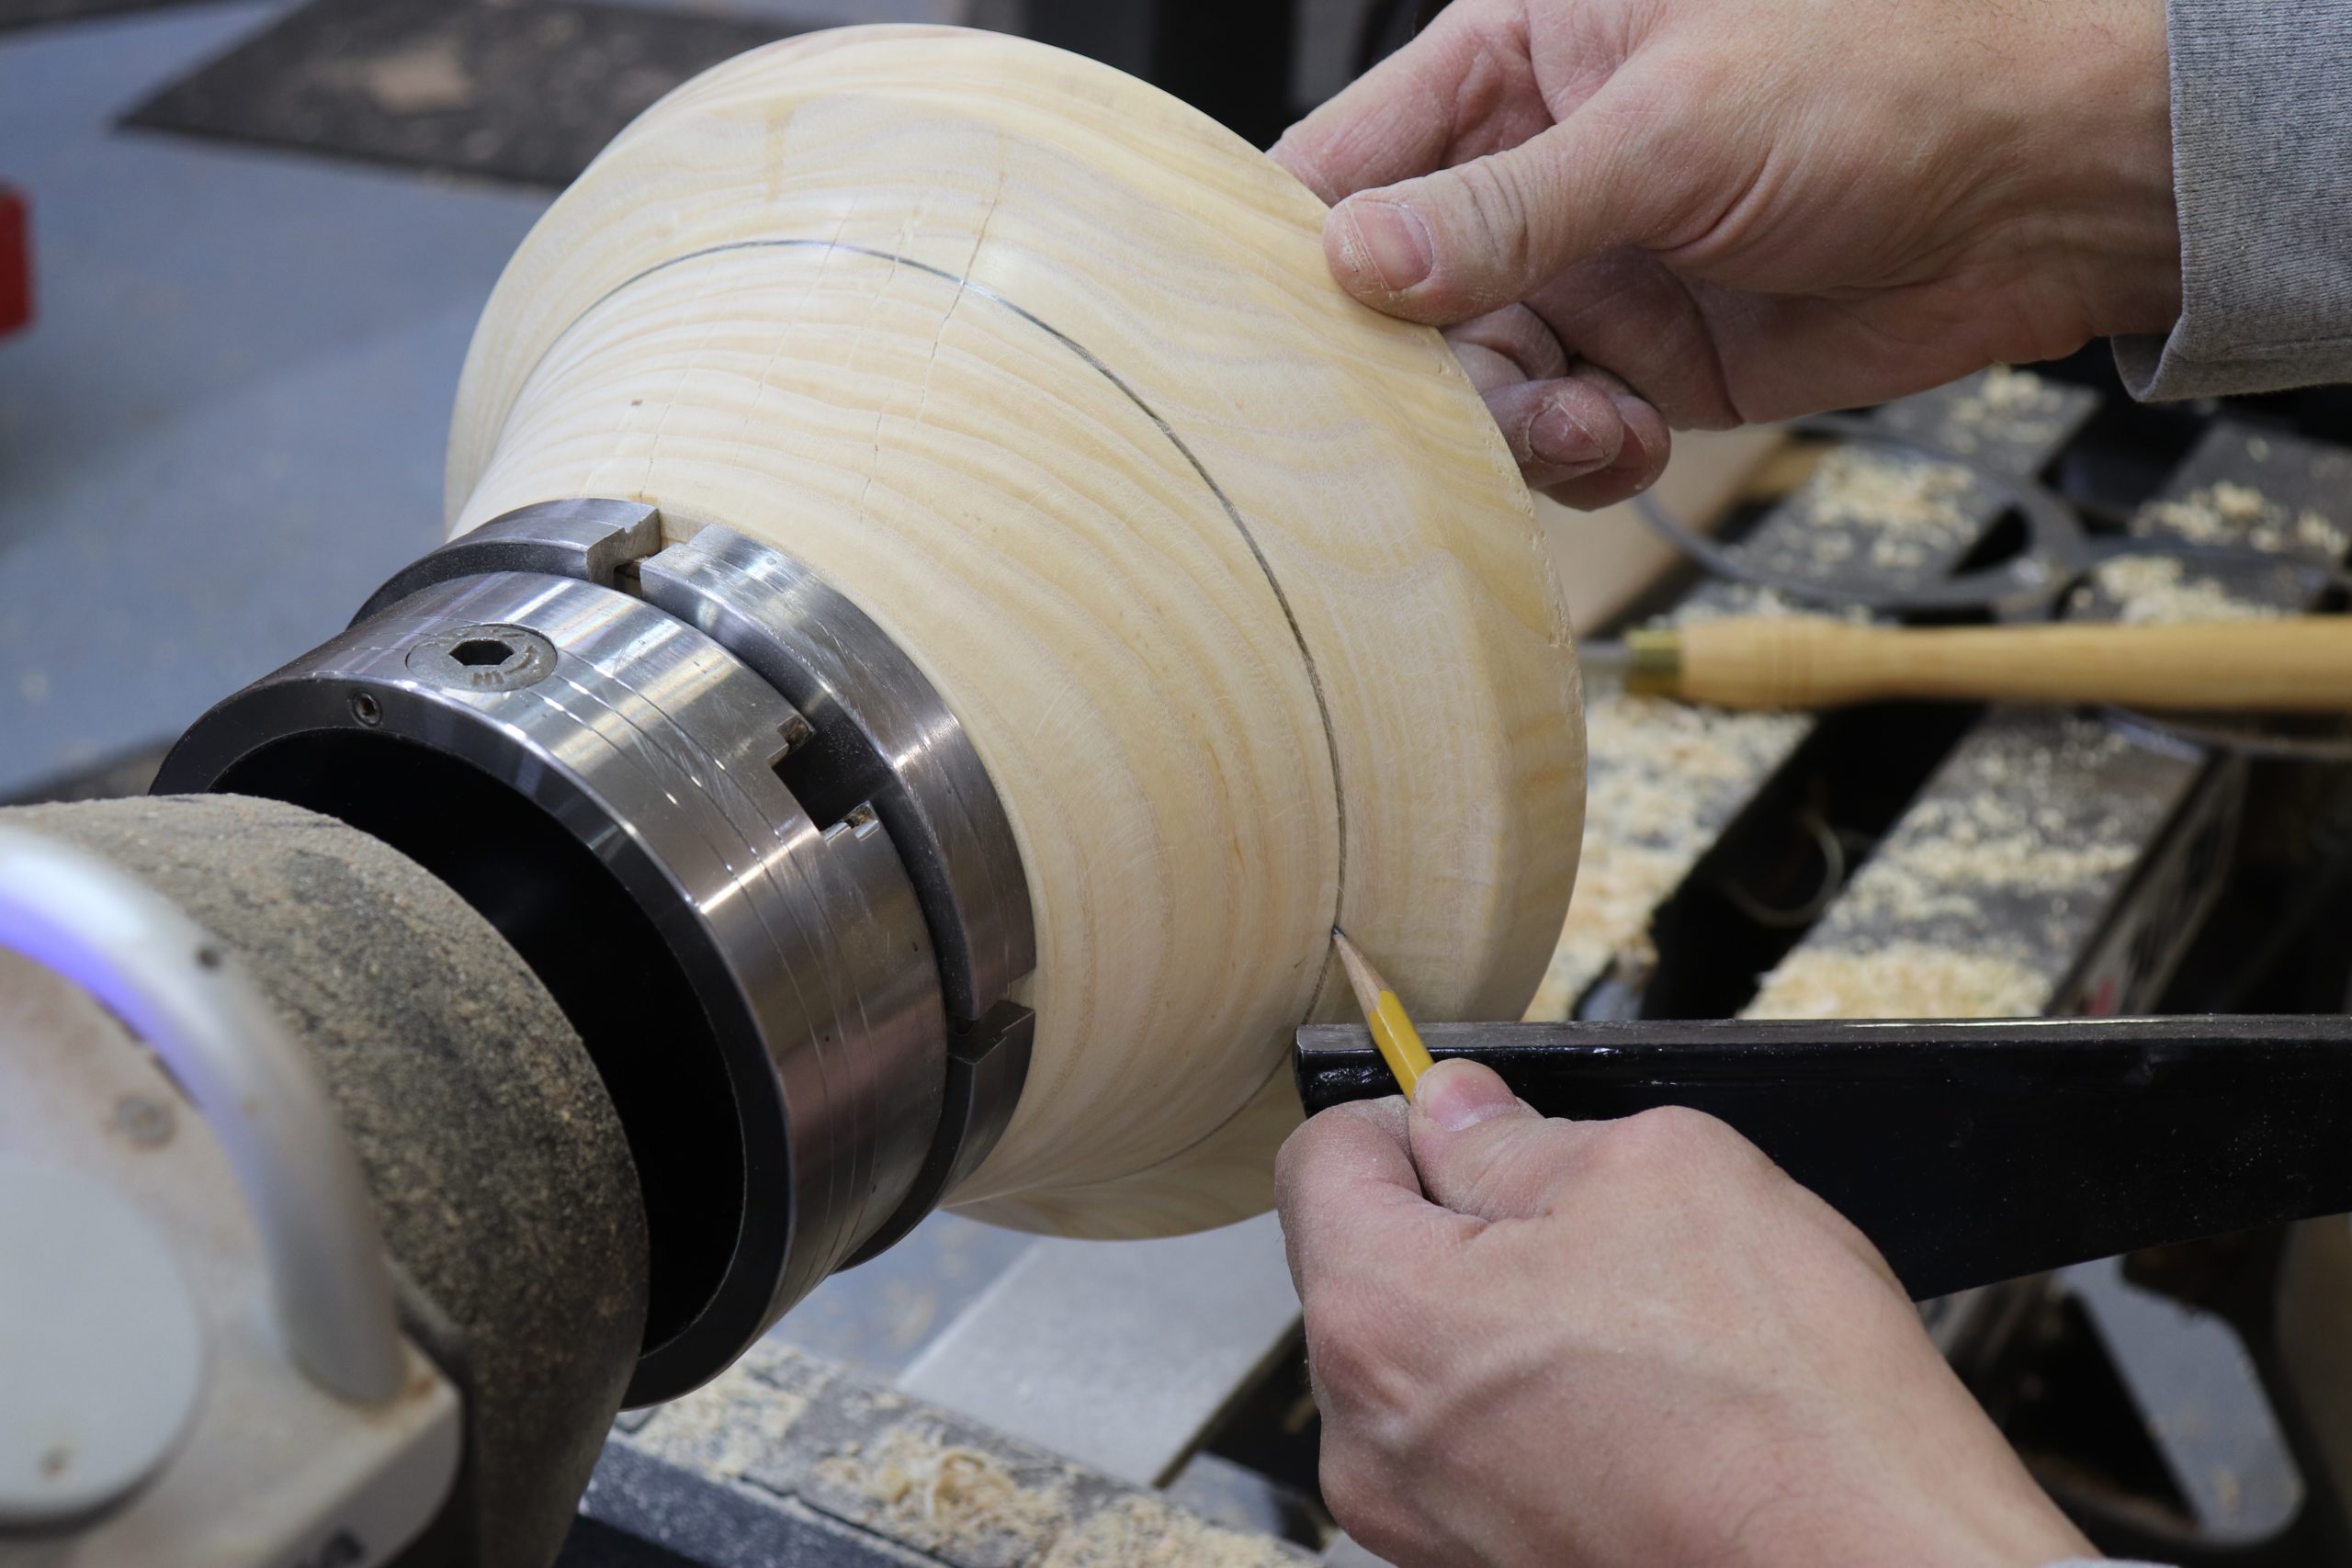
Mark a line around the perimeter of the bowl where the rim begins to flare.
Mark center line
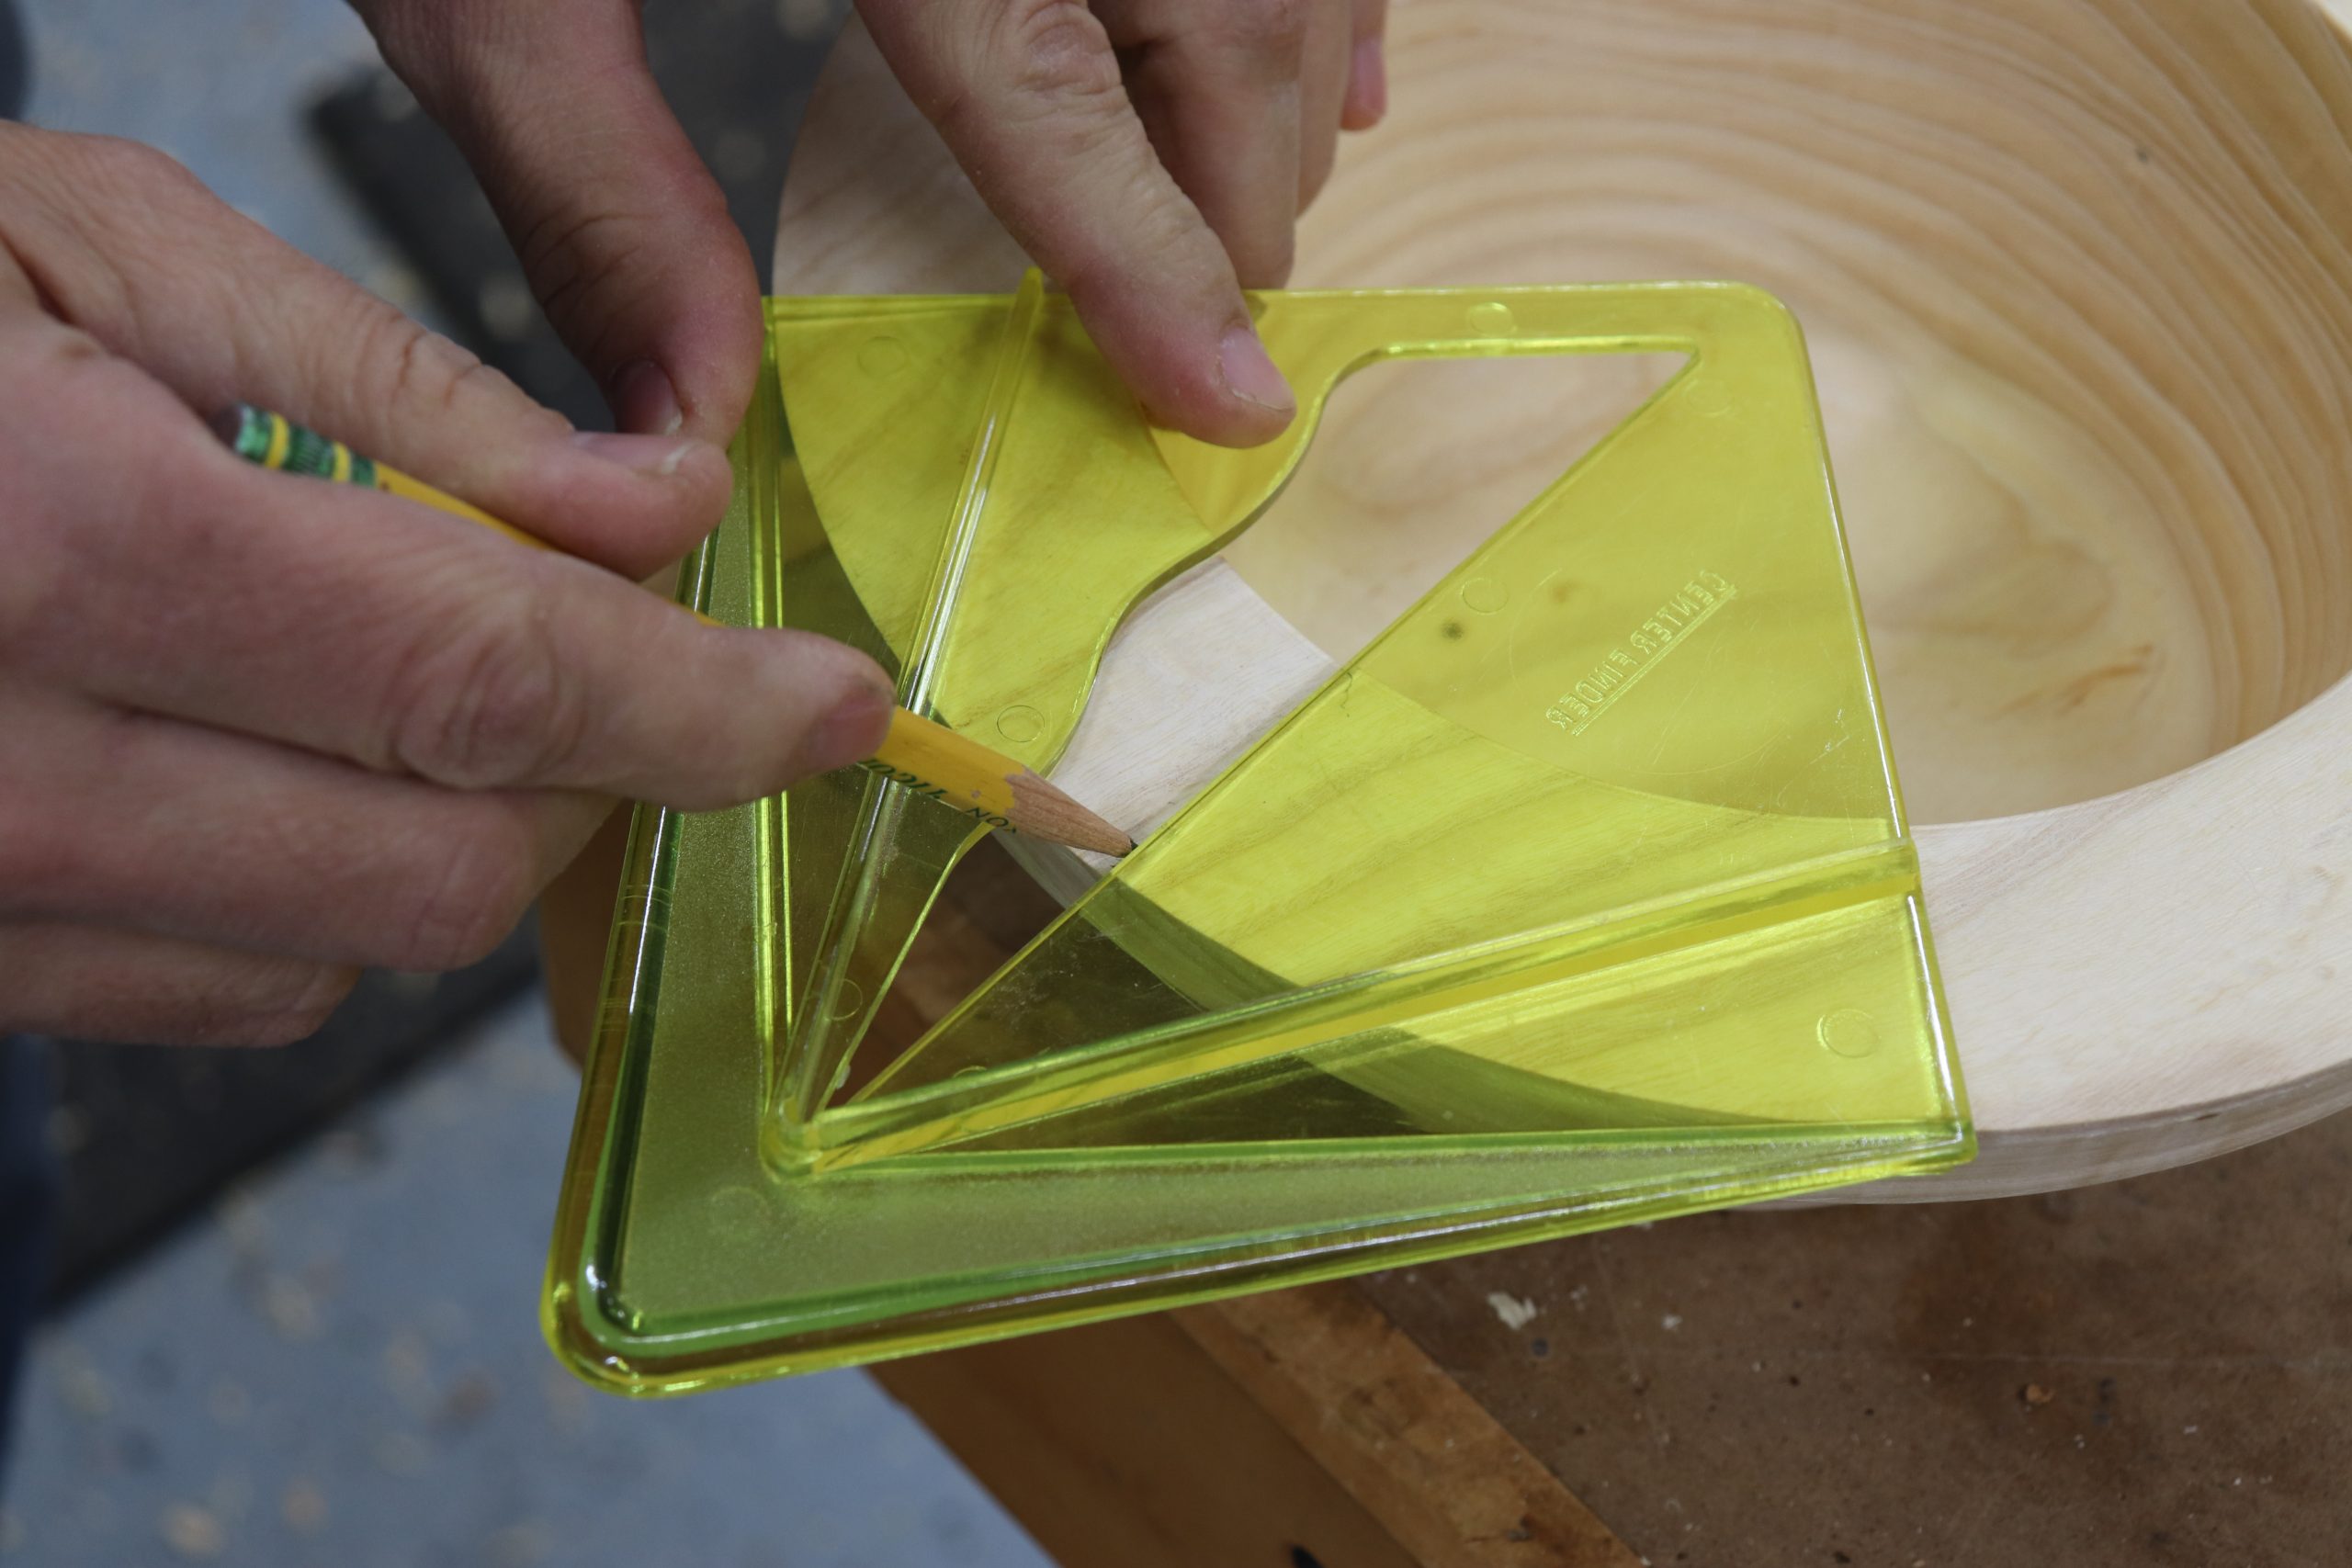
From the top of the bowl, mark a center line on one end using a center finder tool. It is important to mark this line on the end grain side of the bowl as this will provide much greater strength for the spout and handle.
Extend center line
Use a ruler to extend the line across to the other side of the bowl.
Mark cut lines for spout and handle. Start by extending the centerline from the top of the rim back to your line outside the bowl where the rim starts to taper. Here’s where you can apply your creative eye and experiment with shapes for the spout and handle.
Here’s what I did:
For the spout, I started by making a mark 1” from each side of the centerline at the top of the bowl, making the top outside of the spout 2” wide. I drew lines at the bottom of the spout that was 1-1/4” from the centerline.
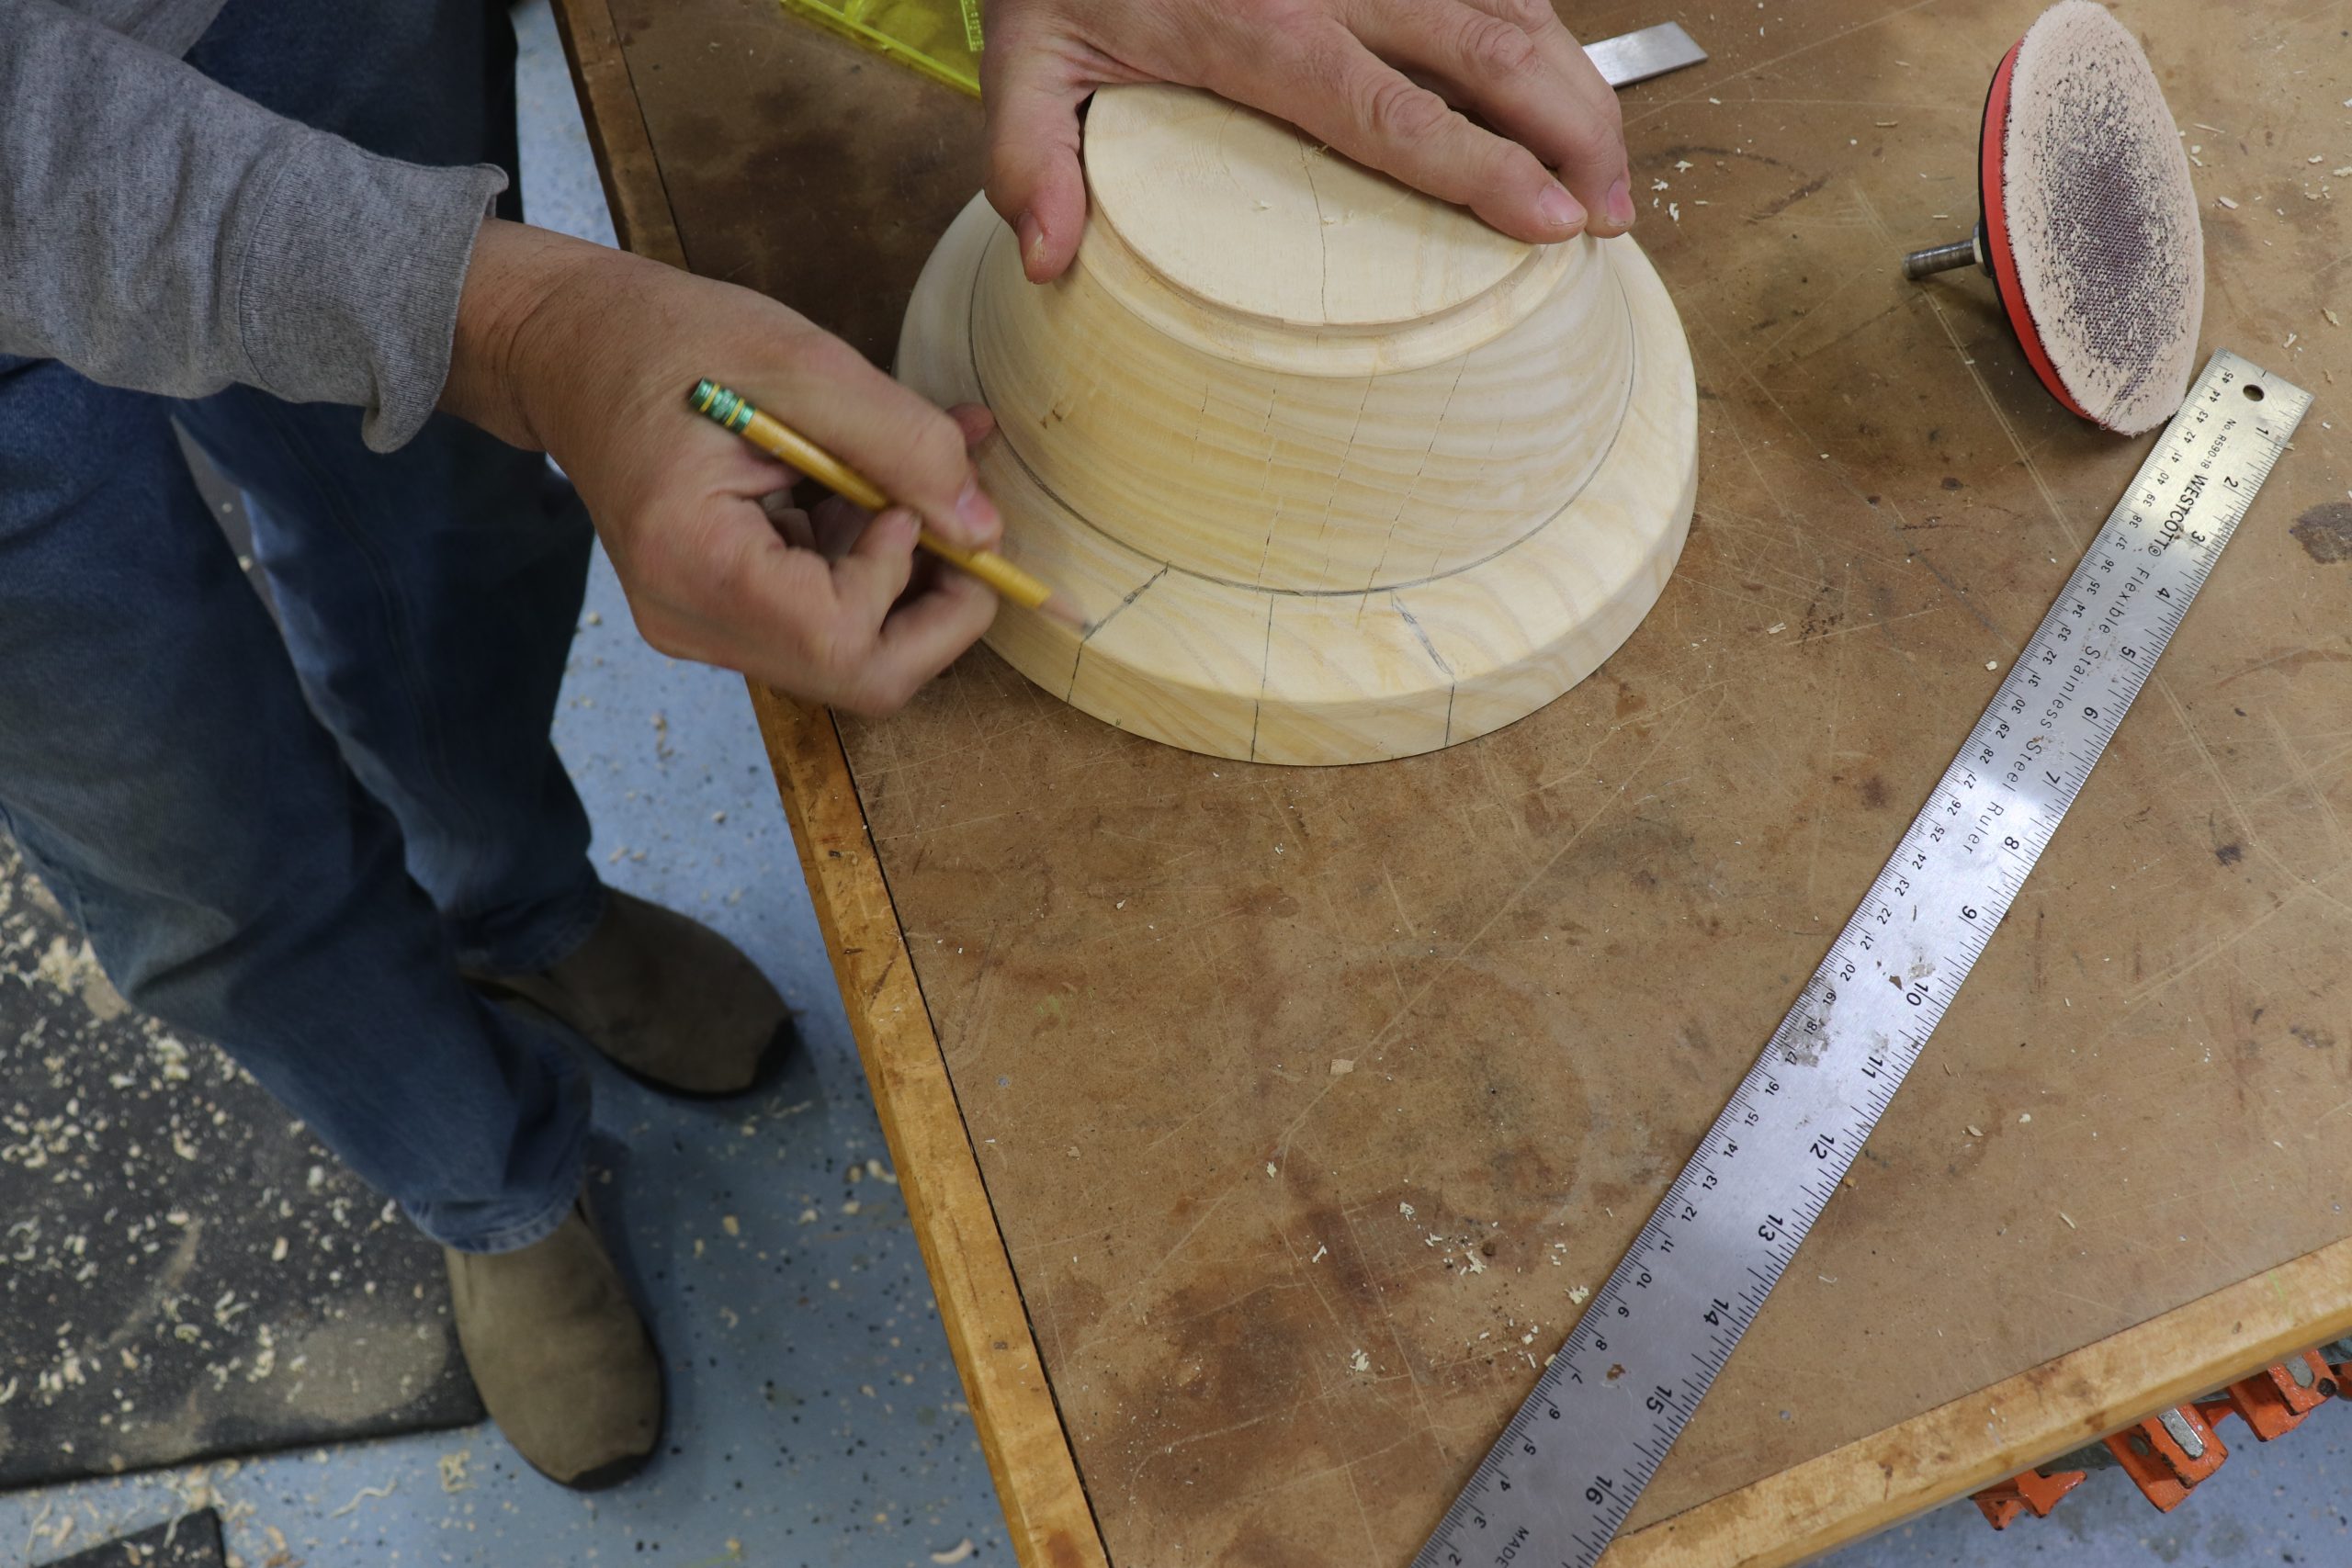
Then I marked a line that connected the two marks that I created, which tapered the spout from 2” at the front to 2-1/2” at the rear.
I marked the handle using a similar process, but on the handle, I started at 4” wide at the rim (2” mark from the center line in each direction), and tapered into 2-1/2” wide on the inner portion of the handle, making it look like a bird’s tail.
Remove waste
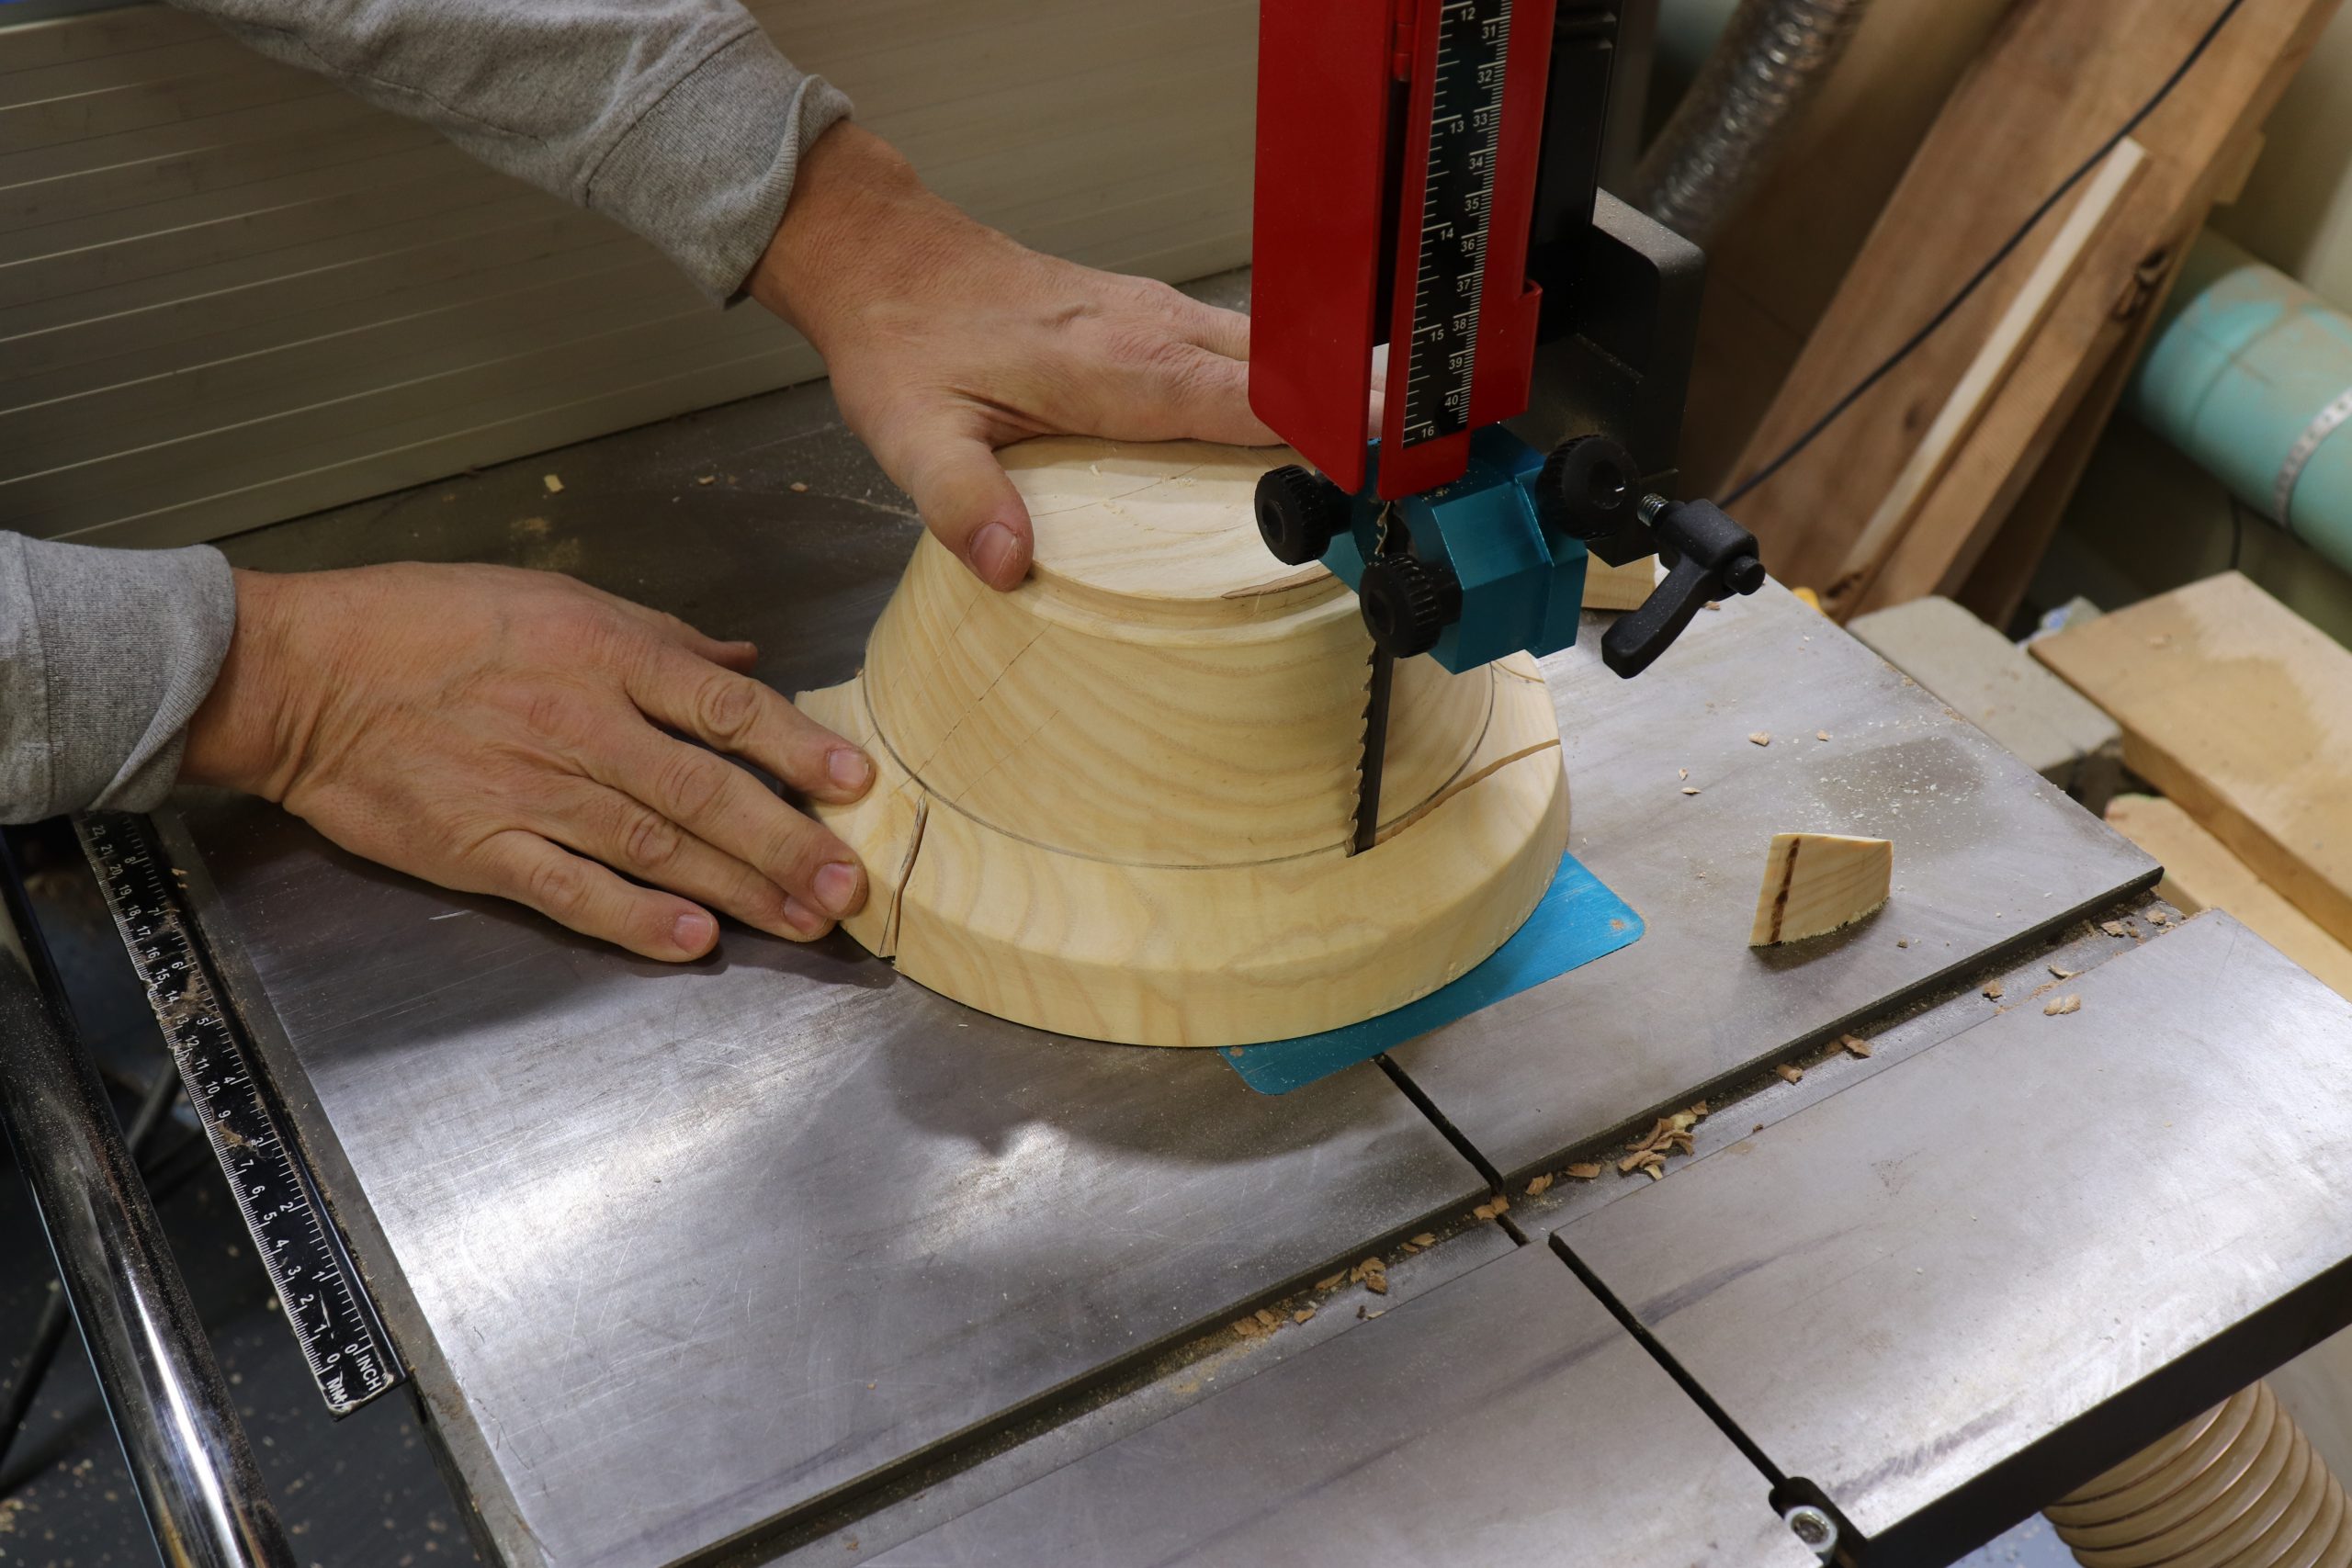
Place the bowl on your bandsaw table upside down, and carefully remove the waste, being careful not to cut into your spout or handle. Taking your time and cutting as close to the line as possible will save cleanup time later. A ½” 3 TPI blade works well for this cut.
Carving time
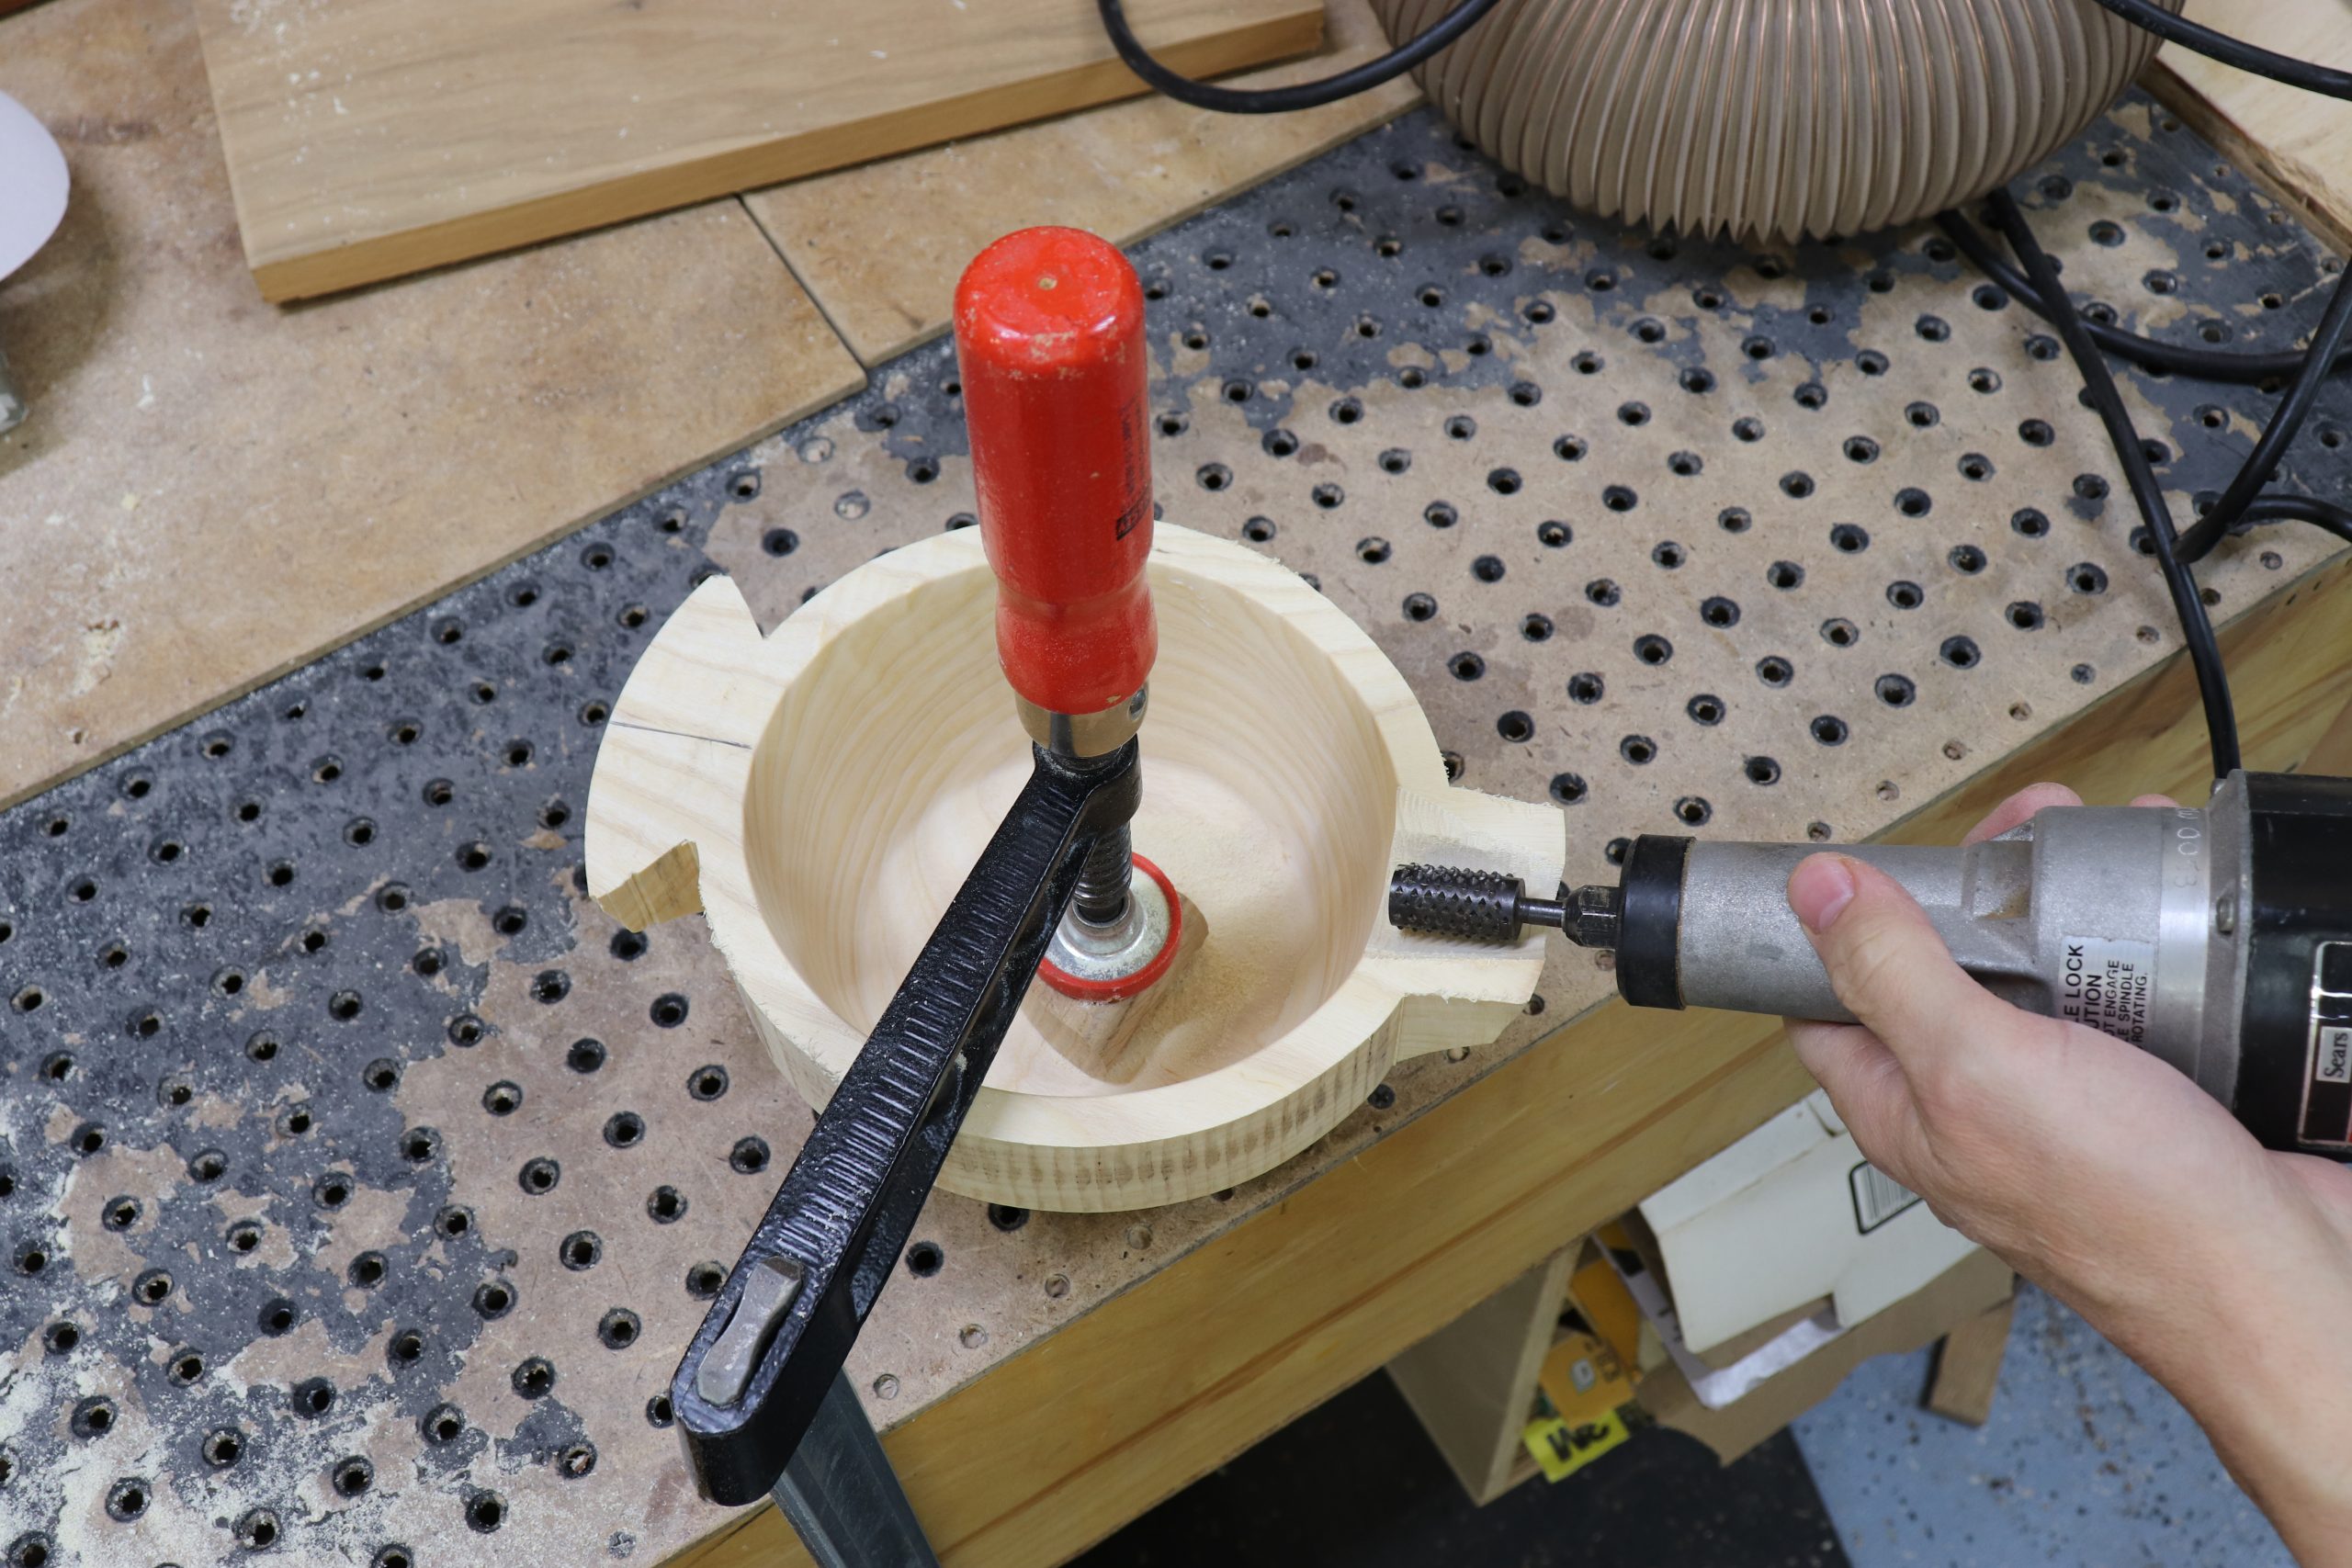
Using a die grinder (or traditional carving tools if you prefer) remove waste from the spout, leaving a final wall thickness of at least 3/8”. Be careful not to carve too thin if you are using a die grinder, as the rough surface will require a lot of cleanup and you don’t want to make the spout too fragile.
Shape the spout
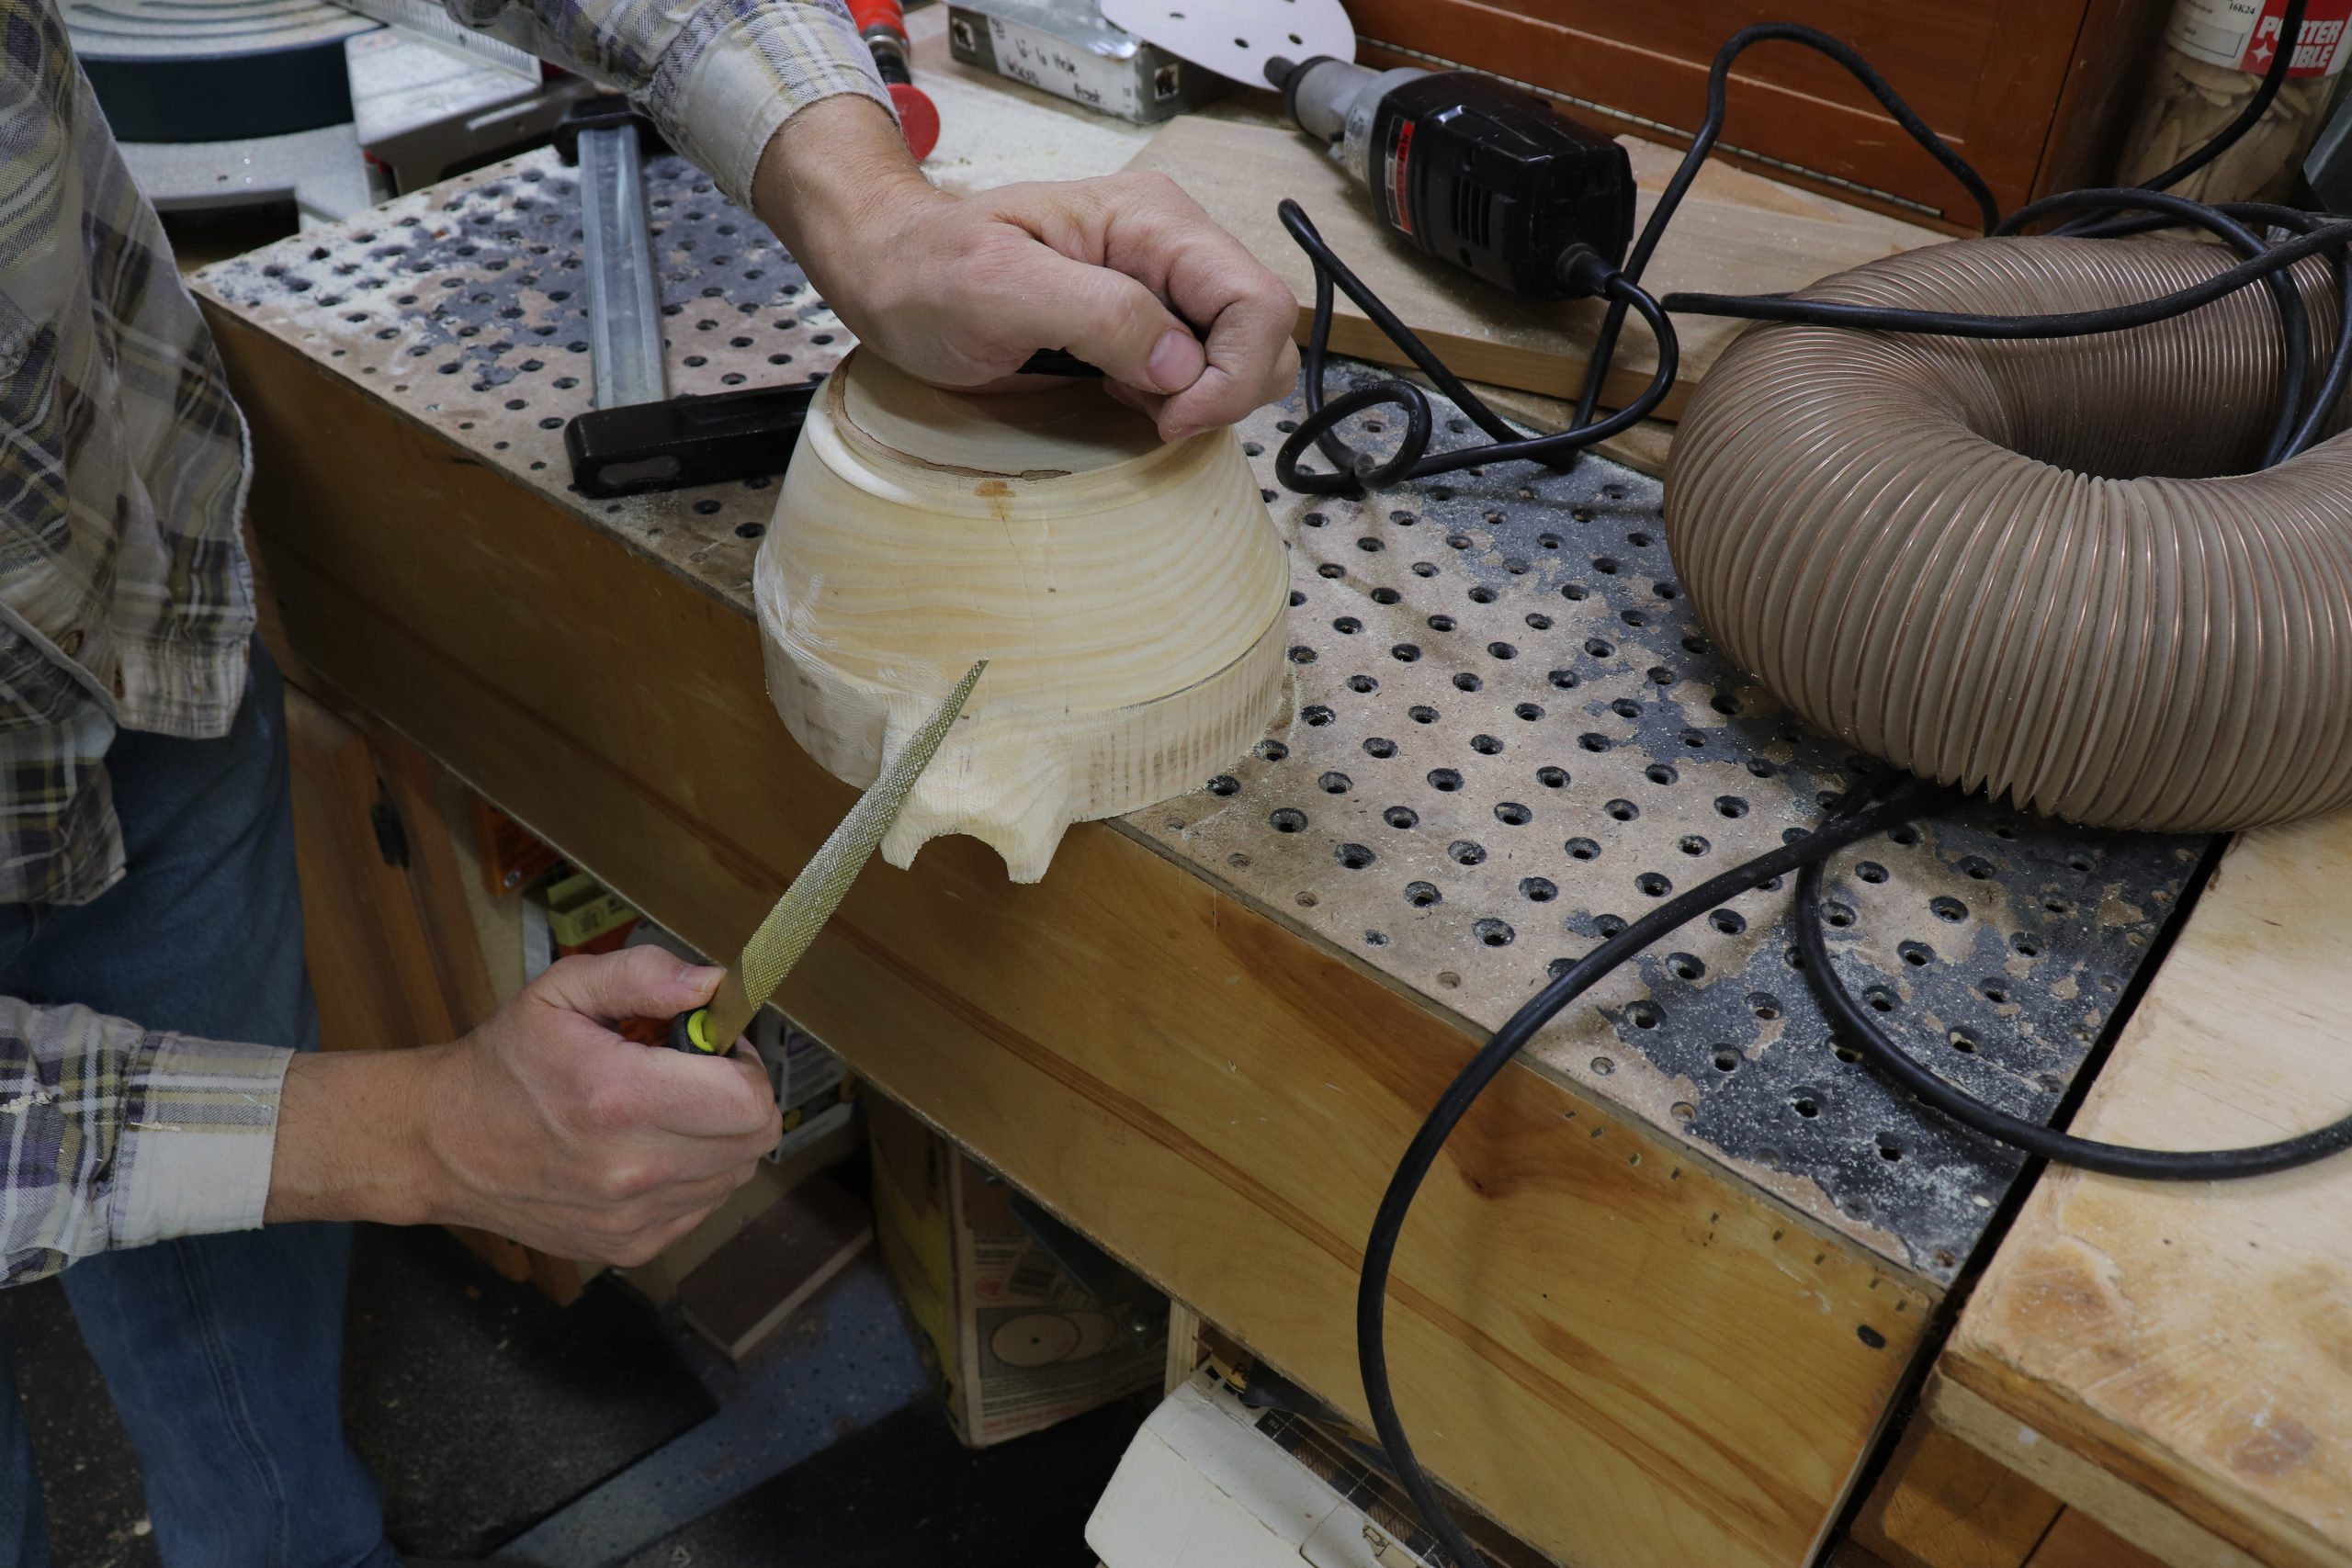
Using rasps, smooth out rough edges and taper to a pleasing shape.
Shape handle
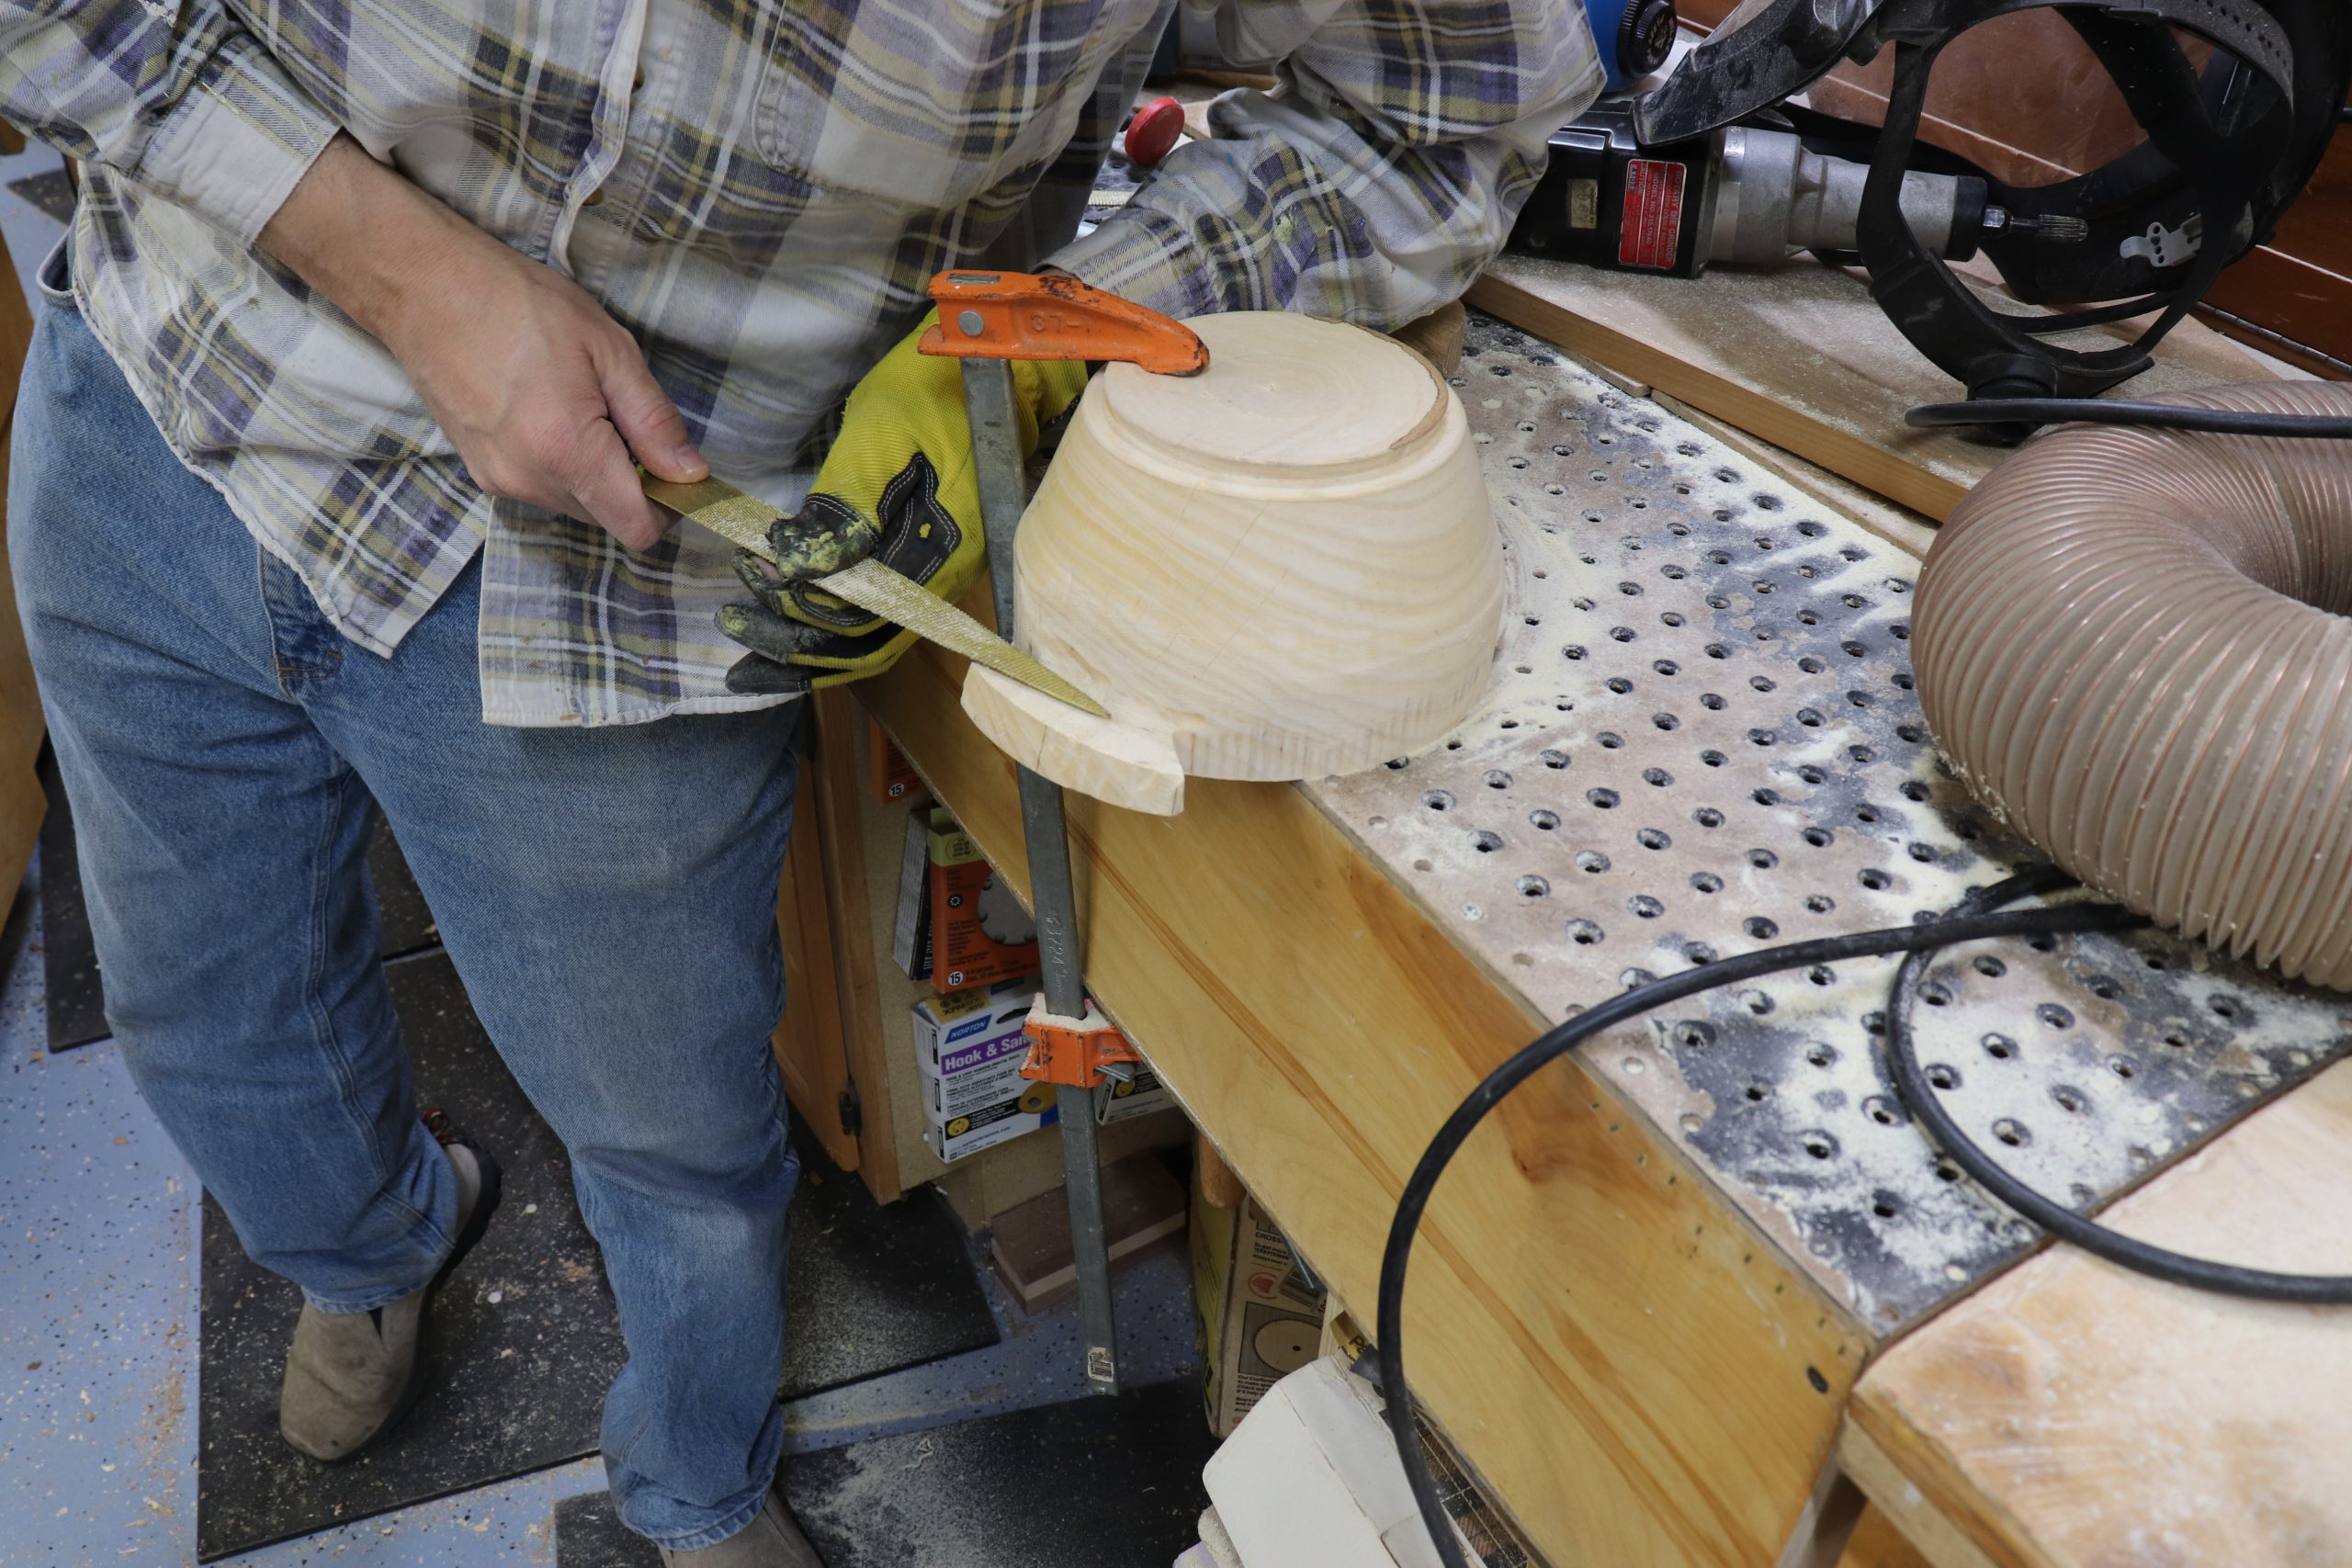
Undercutting the handle makes it easier to hold when using the finished bowl. You can remove a lot of waste with a die grinder to speed things along, and then shape things with a rasp as you get closer to your final dimensions.
Smooth the sidewalls
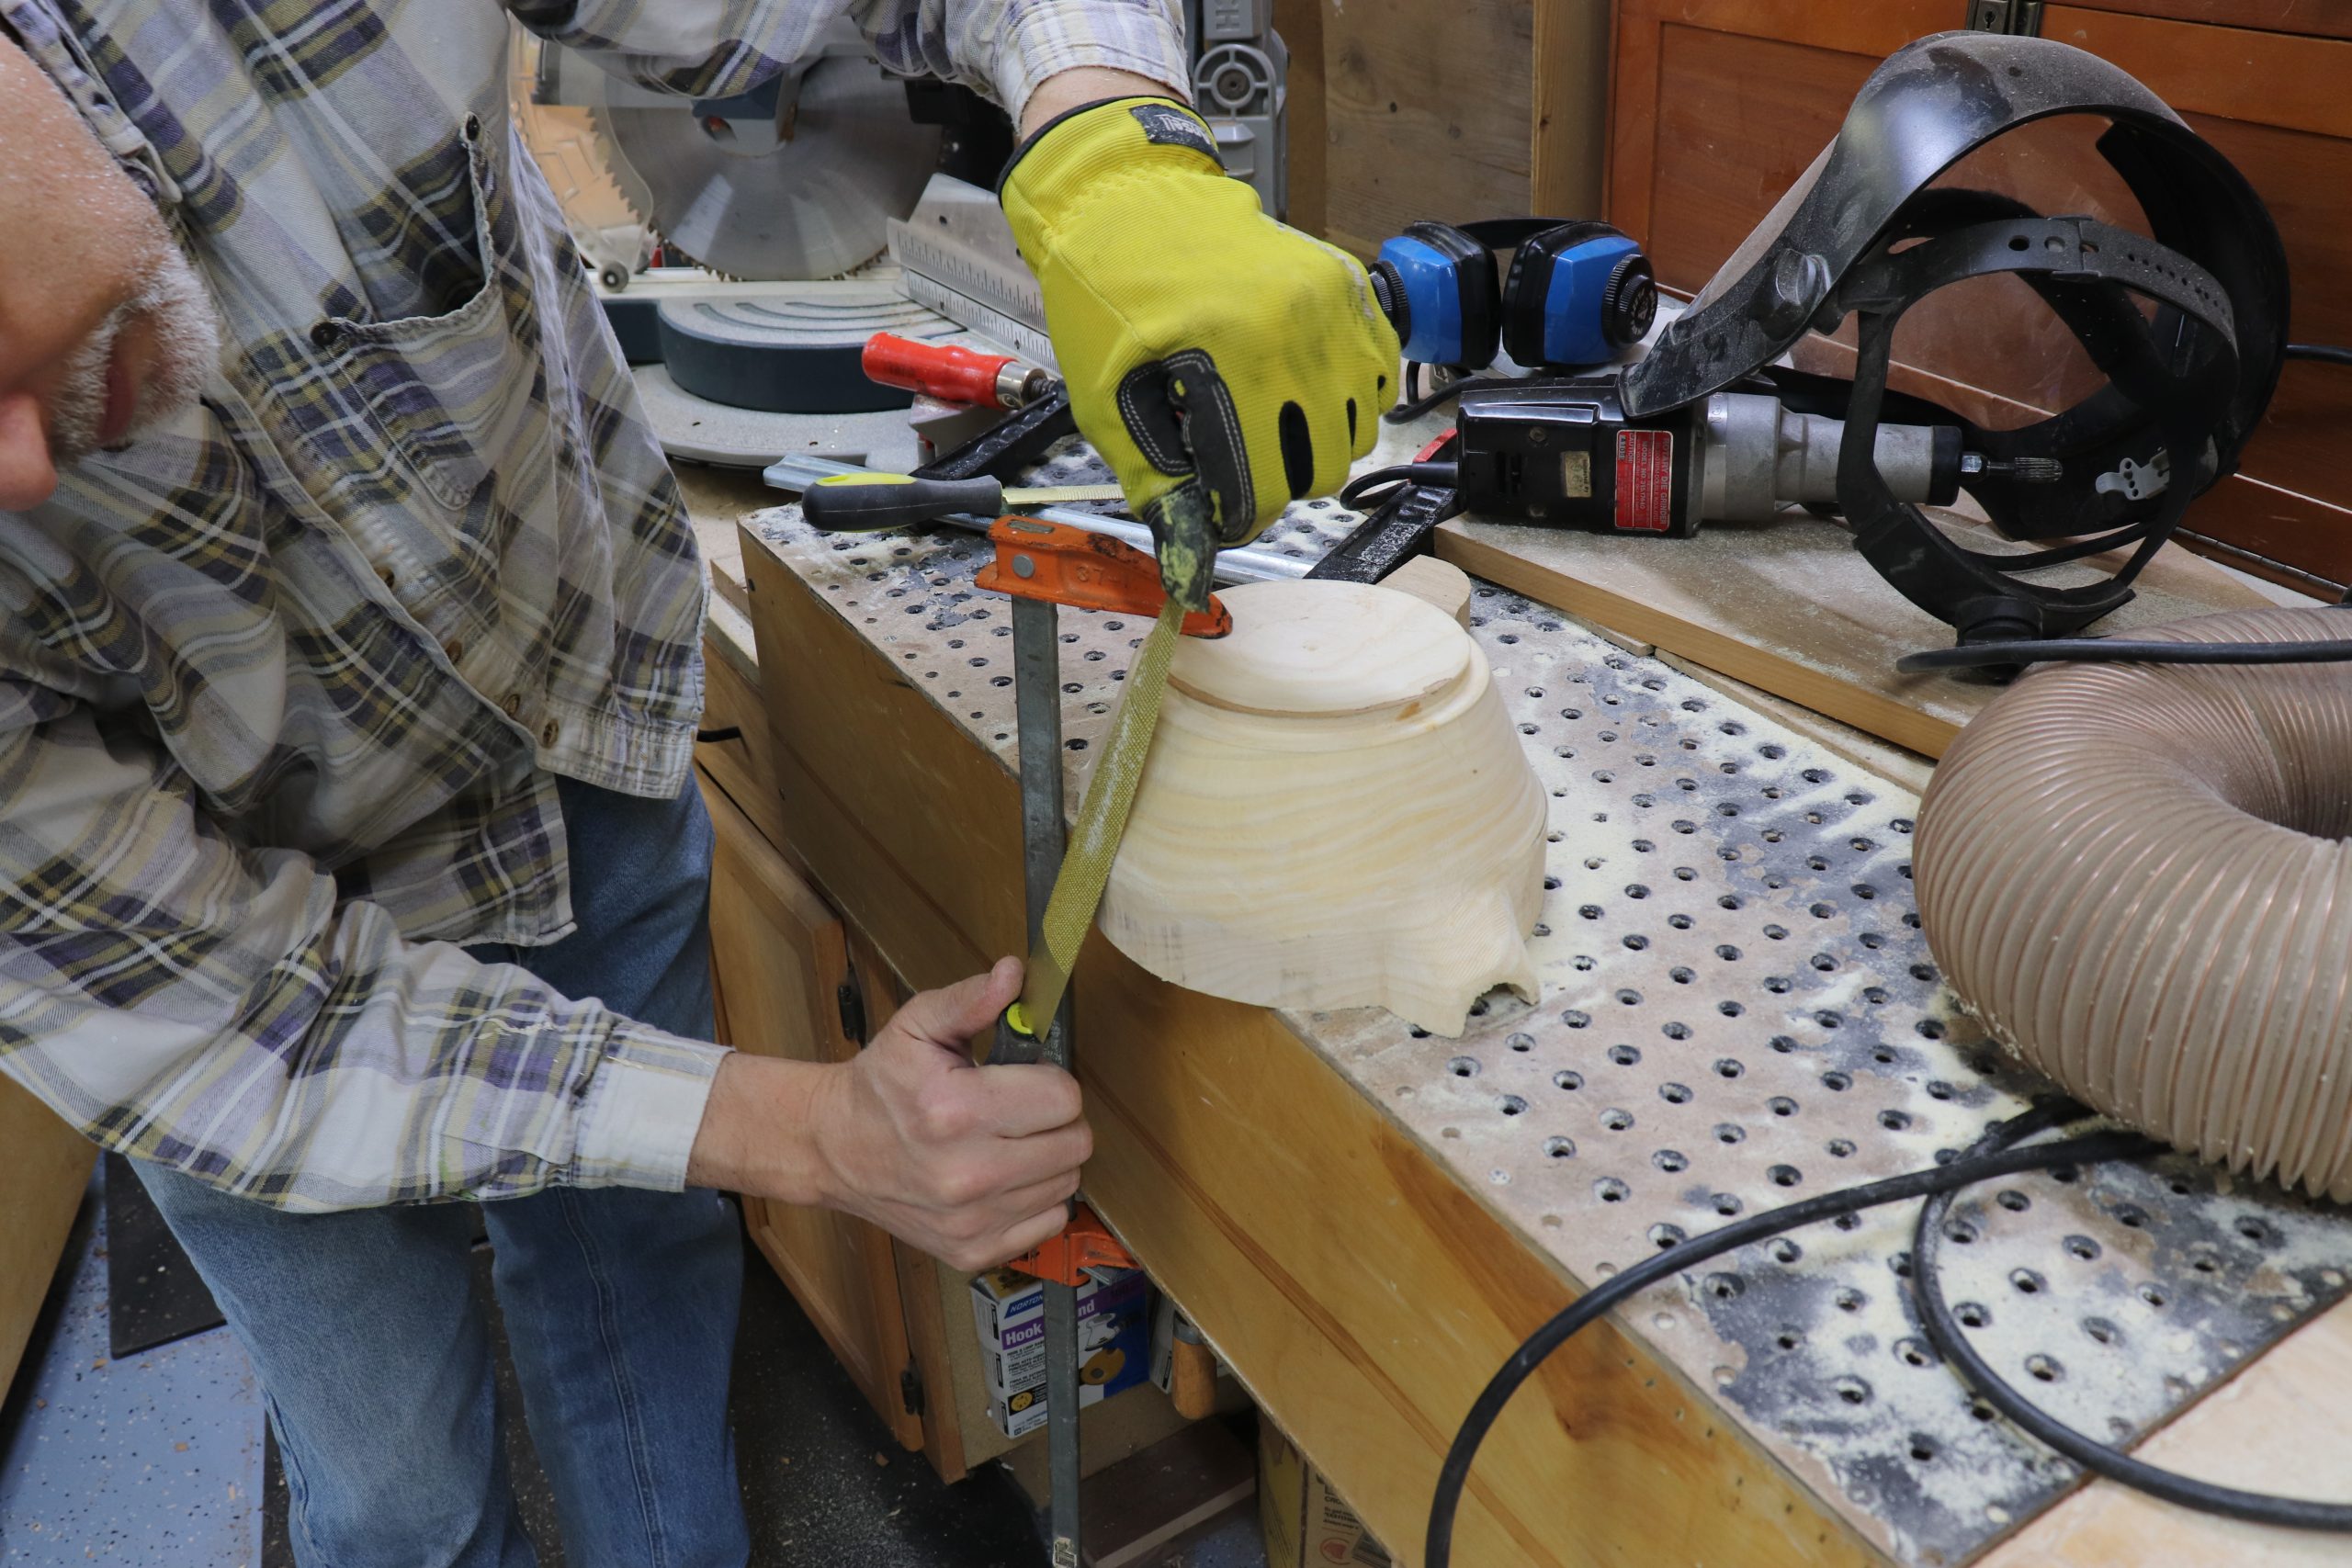
Use a rasp to smooth the transition where the rim was removed at the bandsaw. Use a broad sweeping motion and avoid adding flat spots to the bowl.
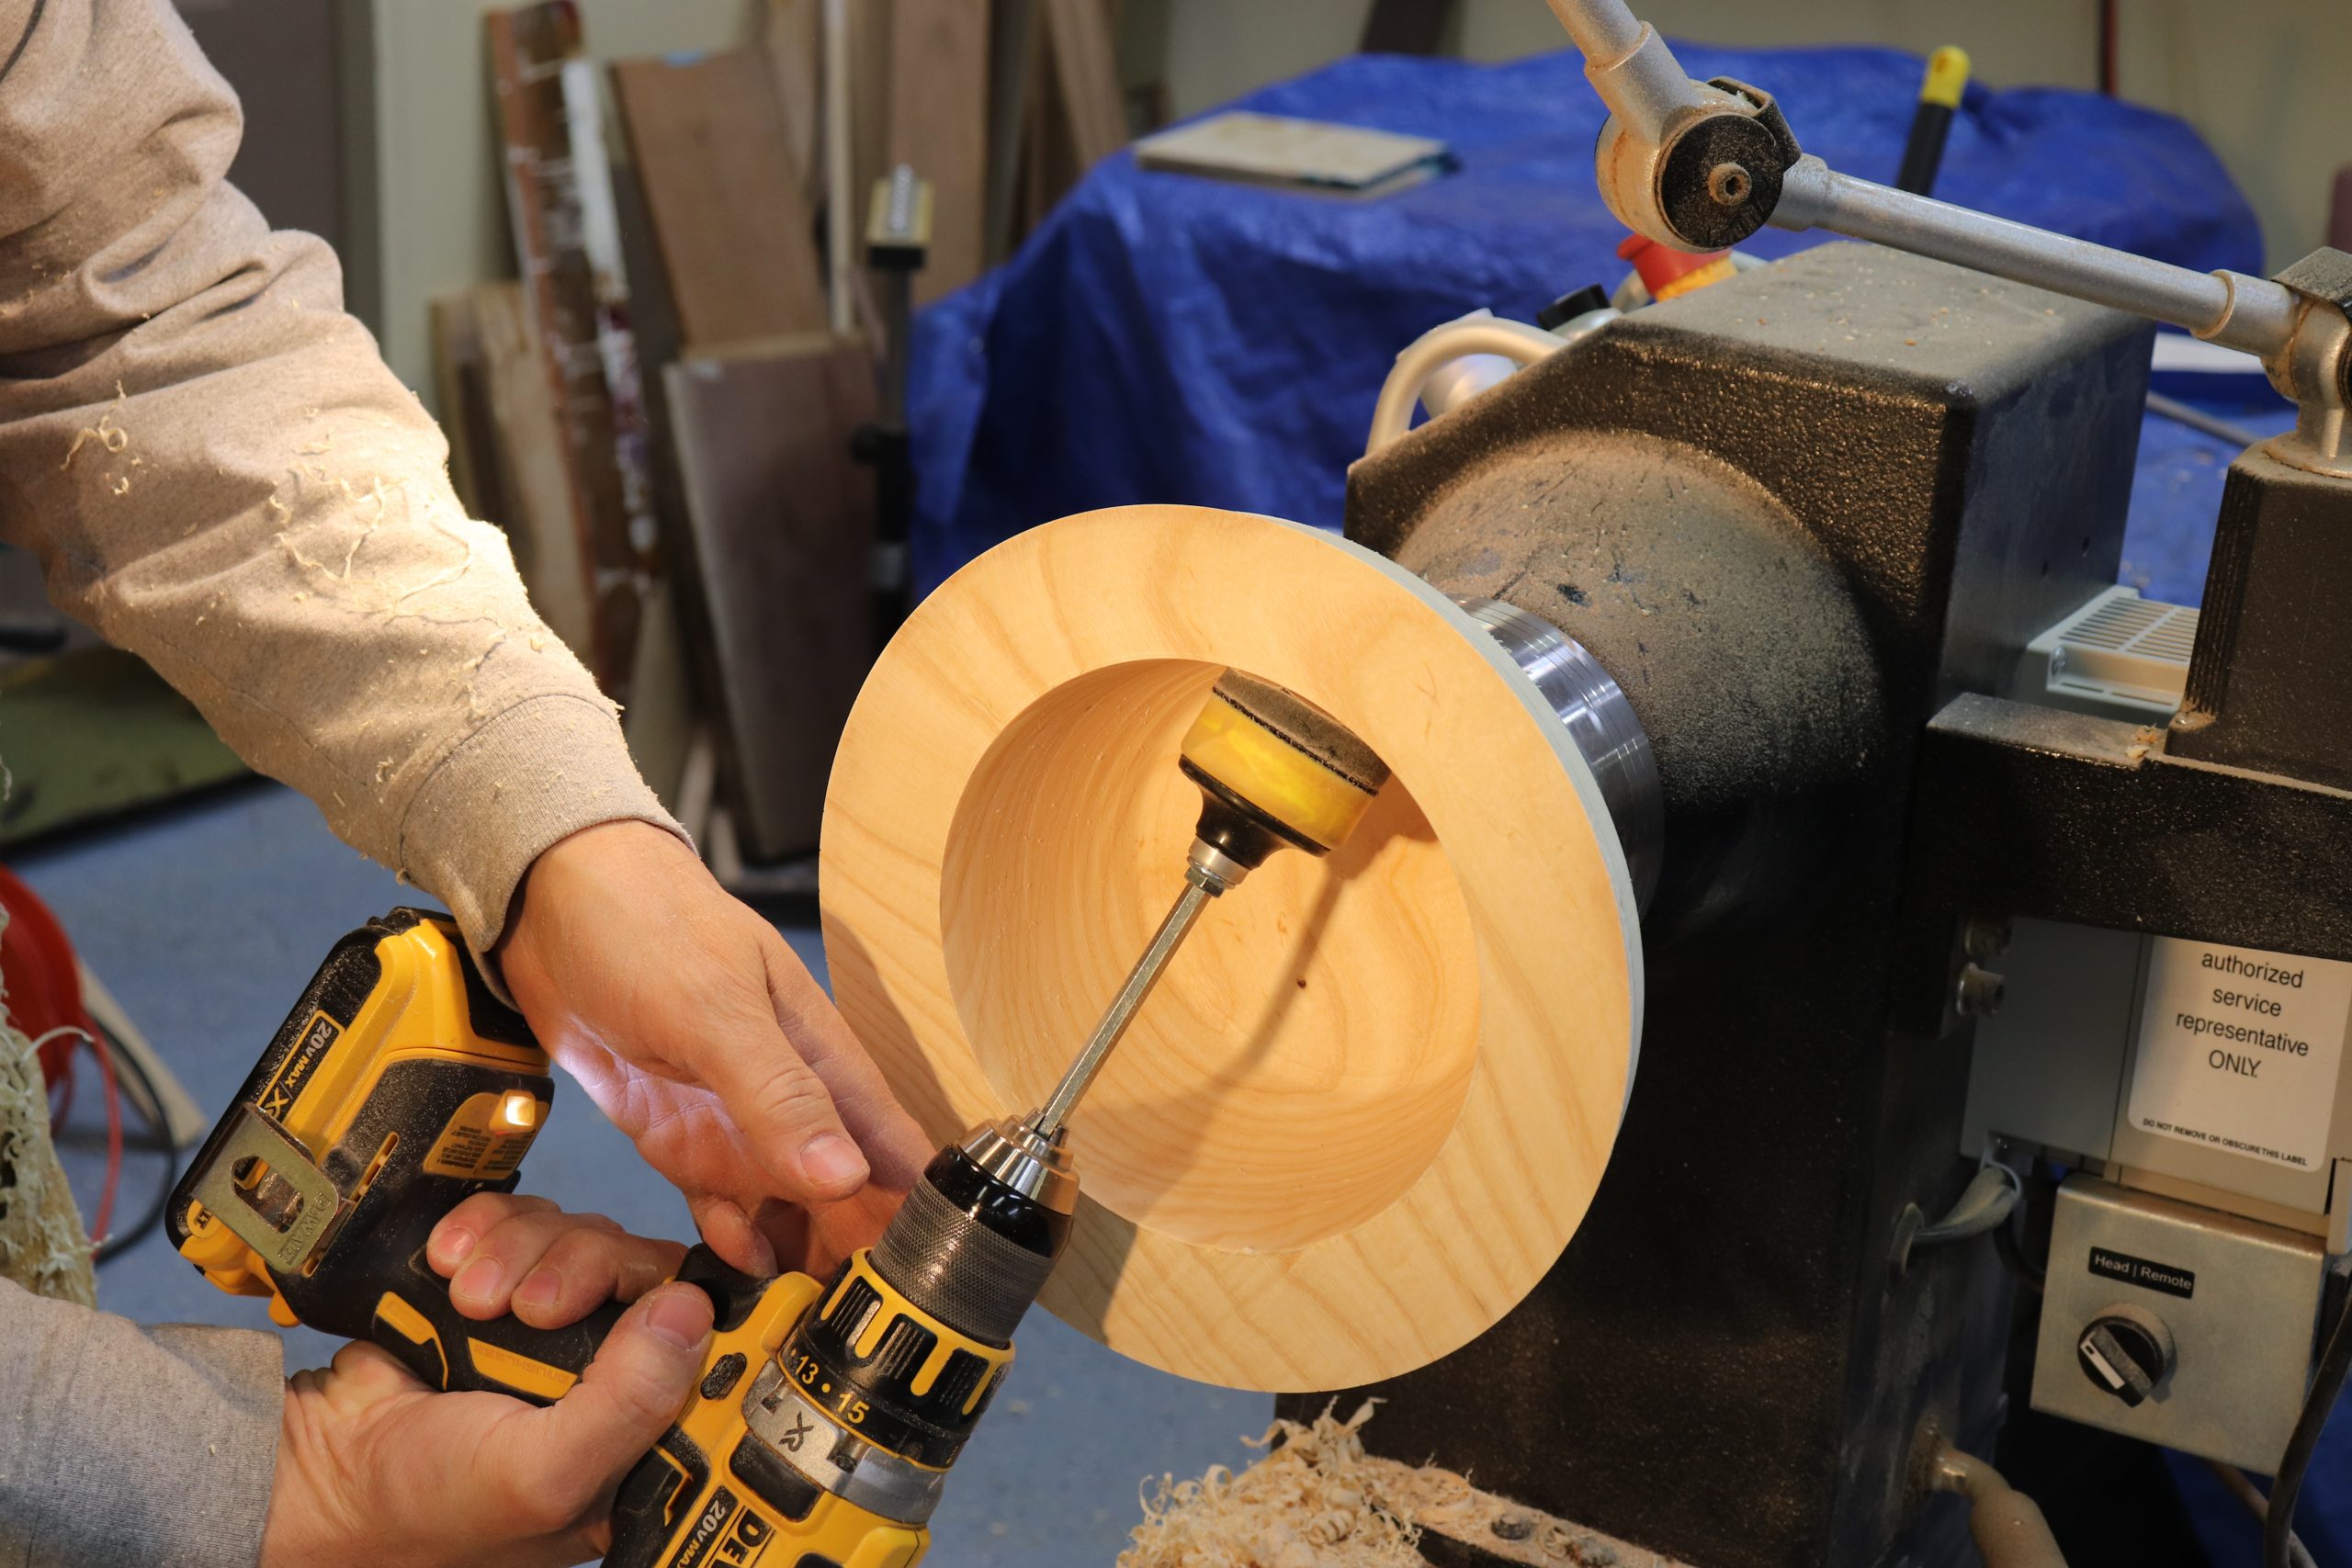
Remove tenon
Remount the bowl on the lathe using a jam chuck or vacuum chuck and remove the tenon.
LOTS of sanding
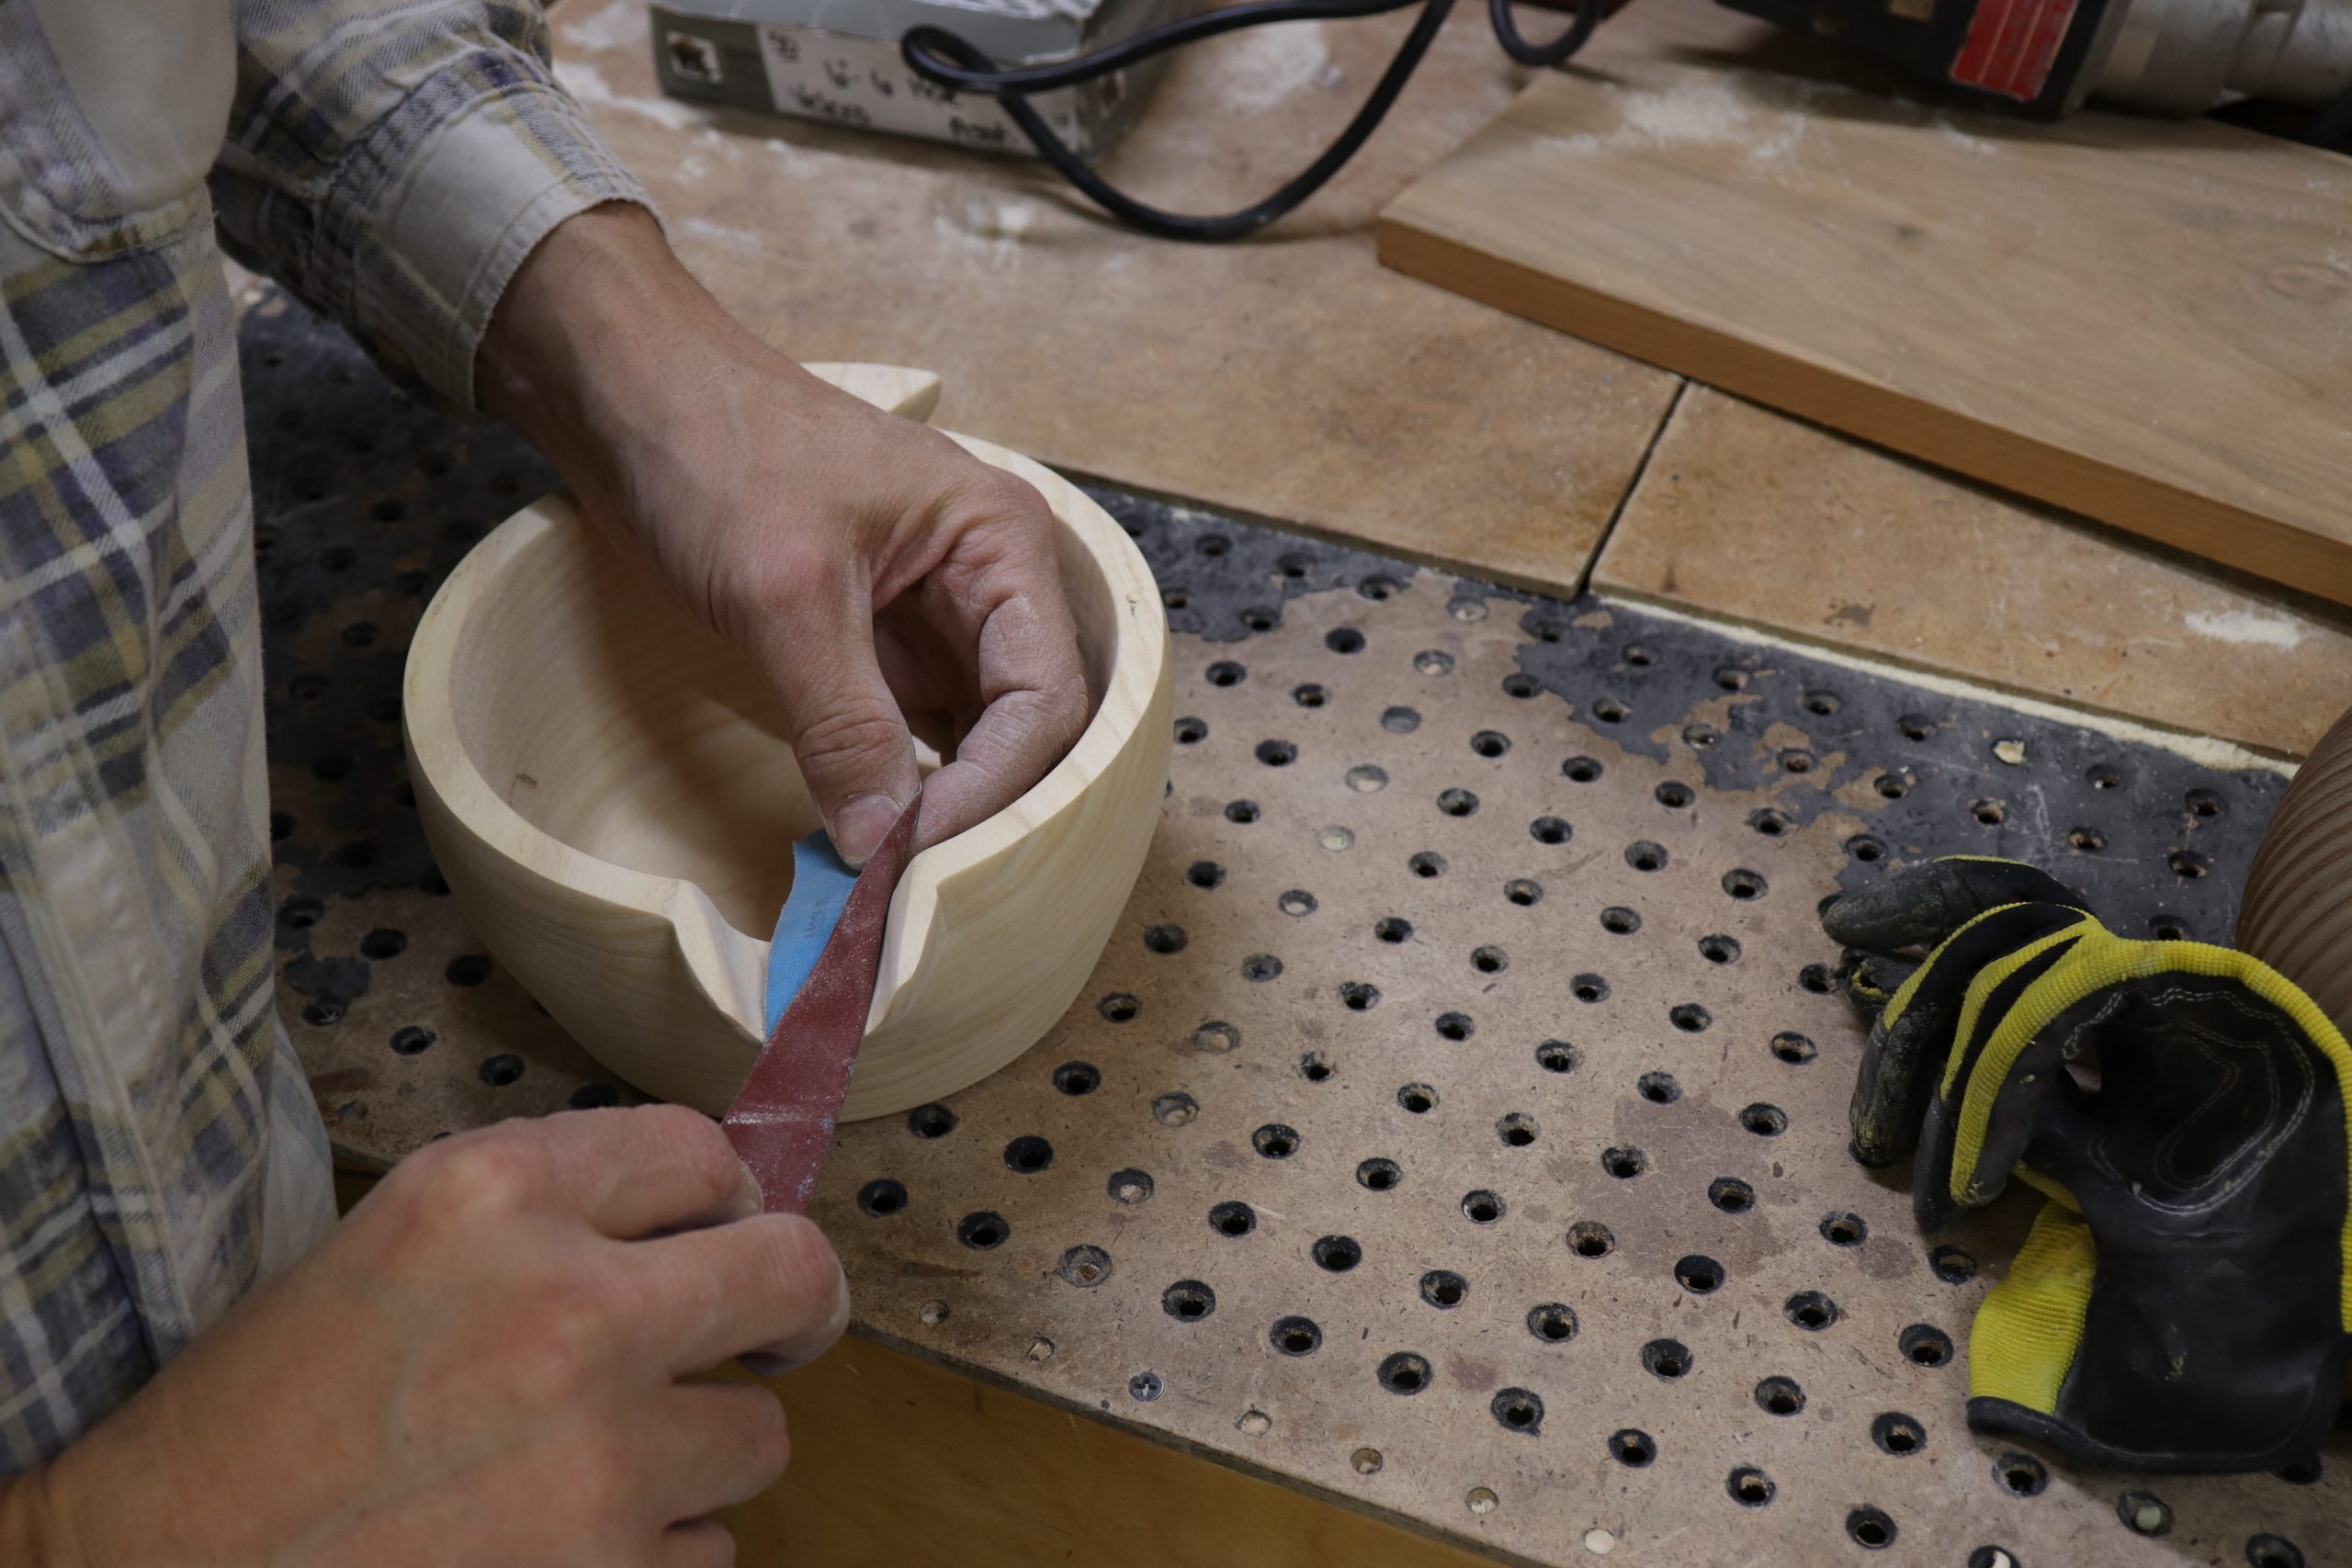
Rasps and die grinders leave many tool marks, so carefully sand everything using a random orbital sander for the body of the bowl, and hand sanding in areas that are hard to reach with power sanders.
Finish it up and use it proudly
If you want to hold the liquid in your spouted bowl, you will want to finish using epoxy. Check with the epoxy manufacturer to determine if their product is food safe. Otherwise, apply your finish of choice.

Thank you for sharing such a concise and enlightening piece! https://supremefencinglakewood.com/
Outstanding content with practical takeaways! Thank you for sharing.
What a refreshing take on the topic! This was a pleasure to read. Thanks for sharing such valuable insights <a href="http://www.supremefencinglakewood.com">Fencing Companies Lakewood</a>
What a refreshing take on the topic! This was a pleasure to read. Thanks for sharing such valuable insights <a href="http://www.arvadatreeservicellc.com">Tree Removal Arvada</a>
Engaging, insightful, and practical—everything I look for in quality content. Excellent work! <a href="http://www.supremearvadafencing.com">Fencing Companies Arvada</a>
This article is incredibly engaging, Thanks for sharing! <a href="https://allmelbournehandyman.com.au/handyman-in-brighton/>Handyman Brighton</a>
Brilliantly articulated points, Thanks for sharing! <a href="http://www.treeservicedenverllc.com">Tree Service Denver</a>
Information is accessible and easy to grasp, Thanks for sharing! <a href="http://www.treeservicedenverllc.com">Tree Service Denver</a>
Great work easy instructions
What kind of oil do you use to maintain the finished bowl?