 My flooring project started over a year ago when a pile of pine logs was dumped in my yard. Those logs were milled into planks, dried, and converted to tongue and groove flooring. You can see those stories here:
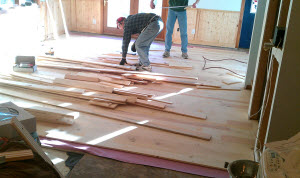 The wood flooring was milled into 3″, 4″, 5″ and 6″ widths, in random lengths. There were four different species of pine used. Part of the challenge in putting the flooring down was working to maintain a random pattern. The advice I was given was to not think about it too much. Just grab pieces and go. That technique worked out OK. I had quite a crew of helpers on hand, which made the work go fairly quickly.
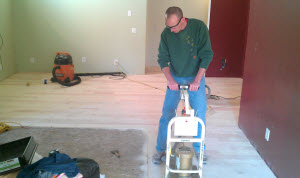 Once the flooring was down it needed to be sanded. This was the part of putting the flooring down that scared me the most. I’ve heard so many stories about floors being messed up by a sander. But I found a really cool machine that has four 6″ random orbit discs on it. It was very easy to use, and I highly recommend this type of machine if you need to sand a floor. (Thanks, Trent, for manhandling the sander for me.)
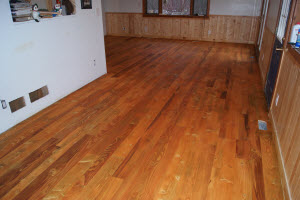
 It took a few long days to get the first floor of the house, about 1100 square feet, down. My knees hurt, my back hurt, and I was tired, but the floor was down.
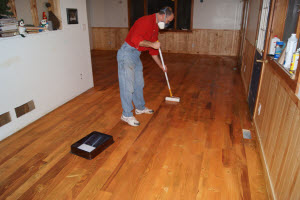
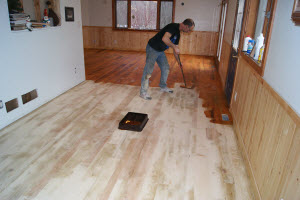 I stained the floor with an off-the-shelf product, applying it with a mop designed for use when staining decks. I had to go back and wipe the excess off with a rag, just like on a woodworking project. I cranked up the heat on the furnace and left the building.
 After allowing the stain to dry overnight, I rolled on a coat of Arboritec water-based floor finish. It really leveled out nice. I put on three coats, scuffing in between the second and third coats with a hand-held random orbit sander. Yes, I was back on my knees again to sand 1100 square feet of flooring, but it had to be done to knock the nibs down.
Everyone loves the results and it’s REALLY cool that it all started with a pile of logs in my own front yard.
Photos By Author

Very interesting article. Thirteen years ago my wife, brother in law and I cut approximately twenty two cords of red oak and maple trees from my brother in law's property one weekend. I took what ended up to be 12 cords of oak. A friend of mine and I hauled the logs to another friend of mine who has a bandsaw mill and had him cut them into one inch boards which ended up to be approximately 6000 board feet. My wife and I hauled them home and piled and stickered them outside. Two years after we had another friend mill about 2000 bf into flooring, 8,6, 5, 4, & 3 inch widths. We hauled them 20 miles by water to our cabin and let them acclimate for two years before putting them down. We face screwed them with finish head screws to give it a rustic look and it turned out fantastic. We also hauled approximately 8 cords of white pine from our island after getting hit by a tornado in 2003. We hauled these across the ice to the same friend with the bandsaw mill and had them cut into dimension lumber, 2x4, 2x6, 2x8, 2x10, 2x12 and the same in one inch boards. We had enough to frame most of our new cabin and make t&g paneling, and 8" half log siding. We have been salvaging logs and lumber from anywhere we can find it for many years. Our buildings on our island, of which there are three, 12x24, 10x16, and 32x40 are 80% salvaged materials. The cost of everything with the oak, 6000bf, was around $1,200. The pine around $600.00. Not only did it save us a ton of money, it was fun doing the work. We are constantly looking for trees and salvageable materials for future projects. Thanks for the great article.
Won't the boards have a tendency to warp because they where finished only on one side?
Never knew it was such a time consuming and difficult process of getting lumber on the racks at the lumber store. Can now understand why lumber is going at the price it does.
What tools did you use if is concrete or wood
Now I can see how you got into shape for the trip to Philmont. The only way this could have been "cooler" was if the logs had come from your own property. I have an uncle in North Carolina who built a custom home in the 1960's. He utilized the many felled hardwood trees for his flooring and paneling. You did a great job George. Thanks for sharing.
I heard that staining the T&G prior to nailing or stapling down guards expansion and contraction exposure. Any truth to that or BS?
Really enjoyed watching that show. Thanks