 Need to make dadoes, Daddy-O? I think the table saw provides one of the easiest ways to do this. There are a couple of limitations, and I'll cover those later, but when it comes to set up and cuts, I think the table saw is the grooviest way to cut a groove. Here's some background info, and what you need to know to get the set up right on your machine.
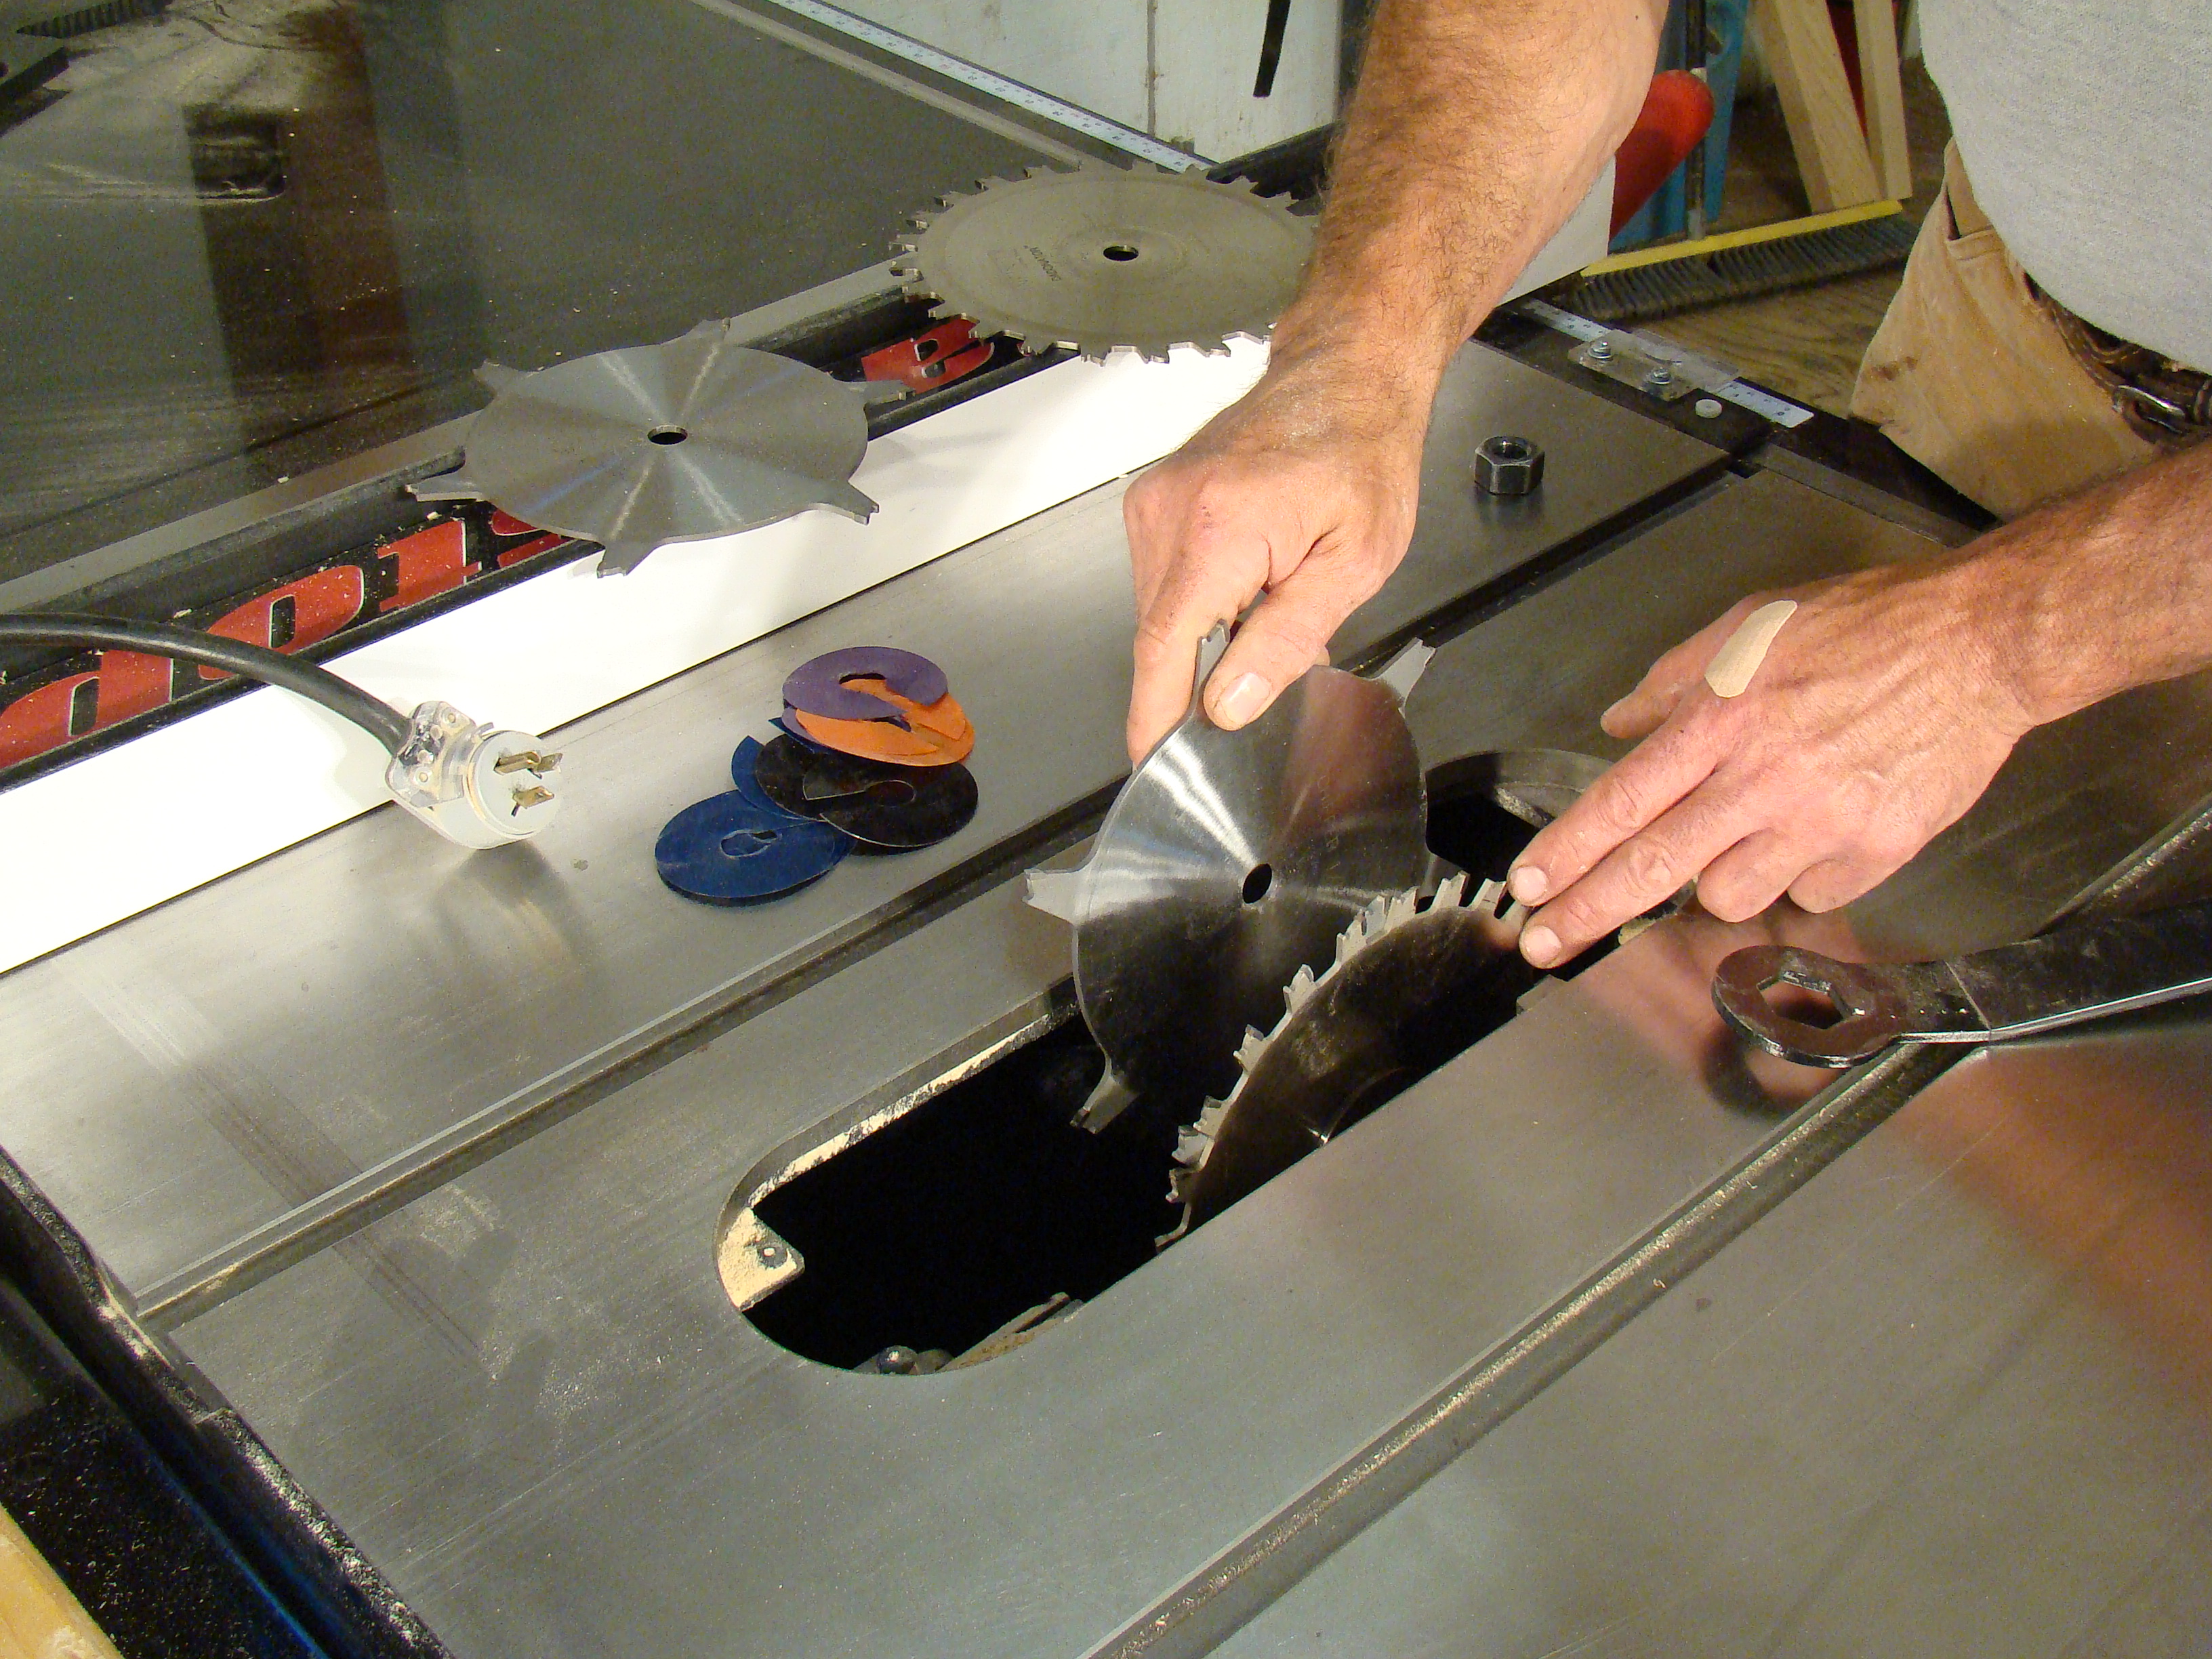
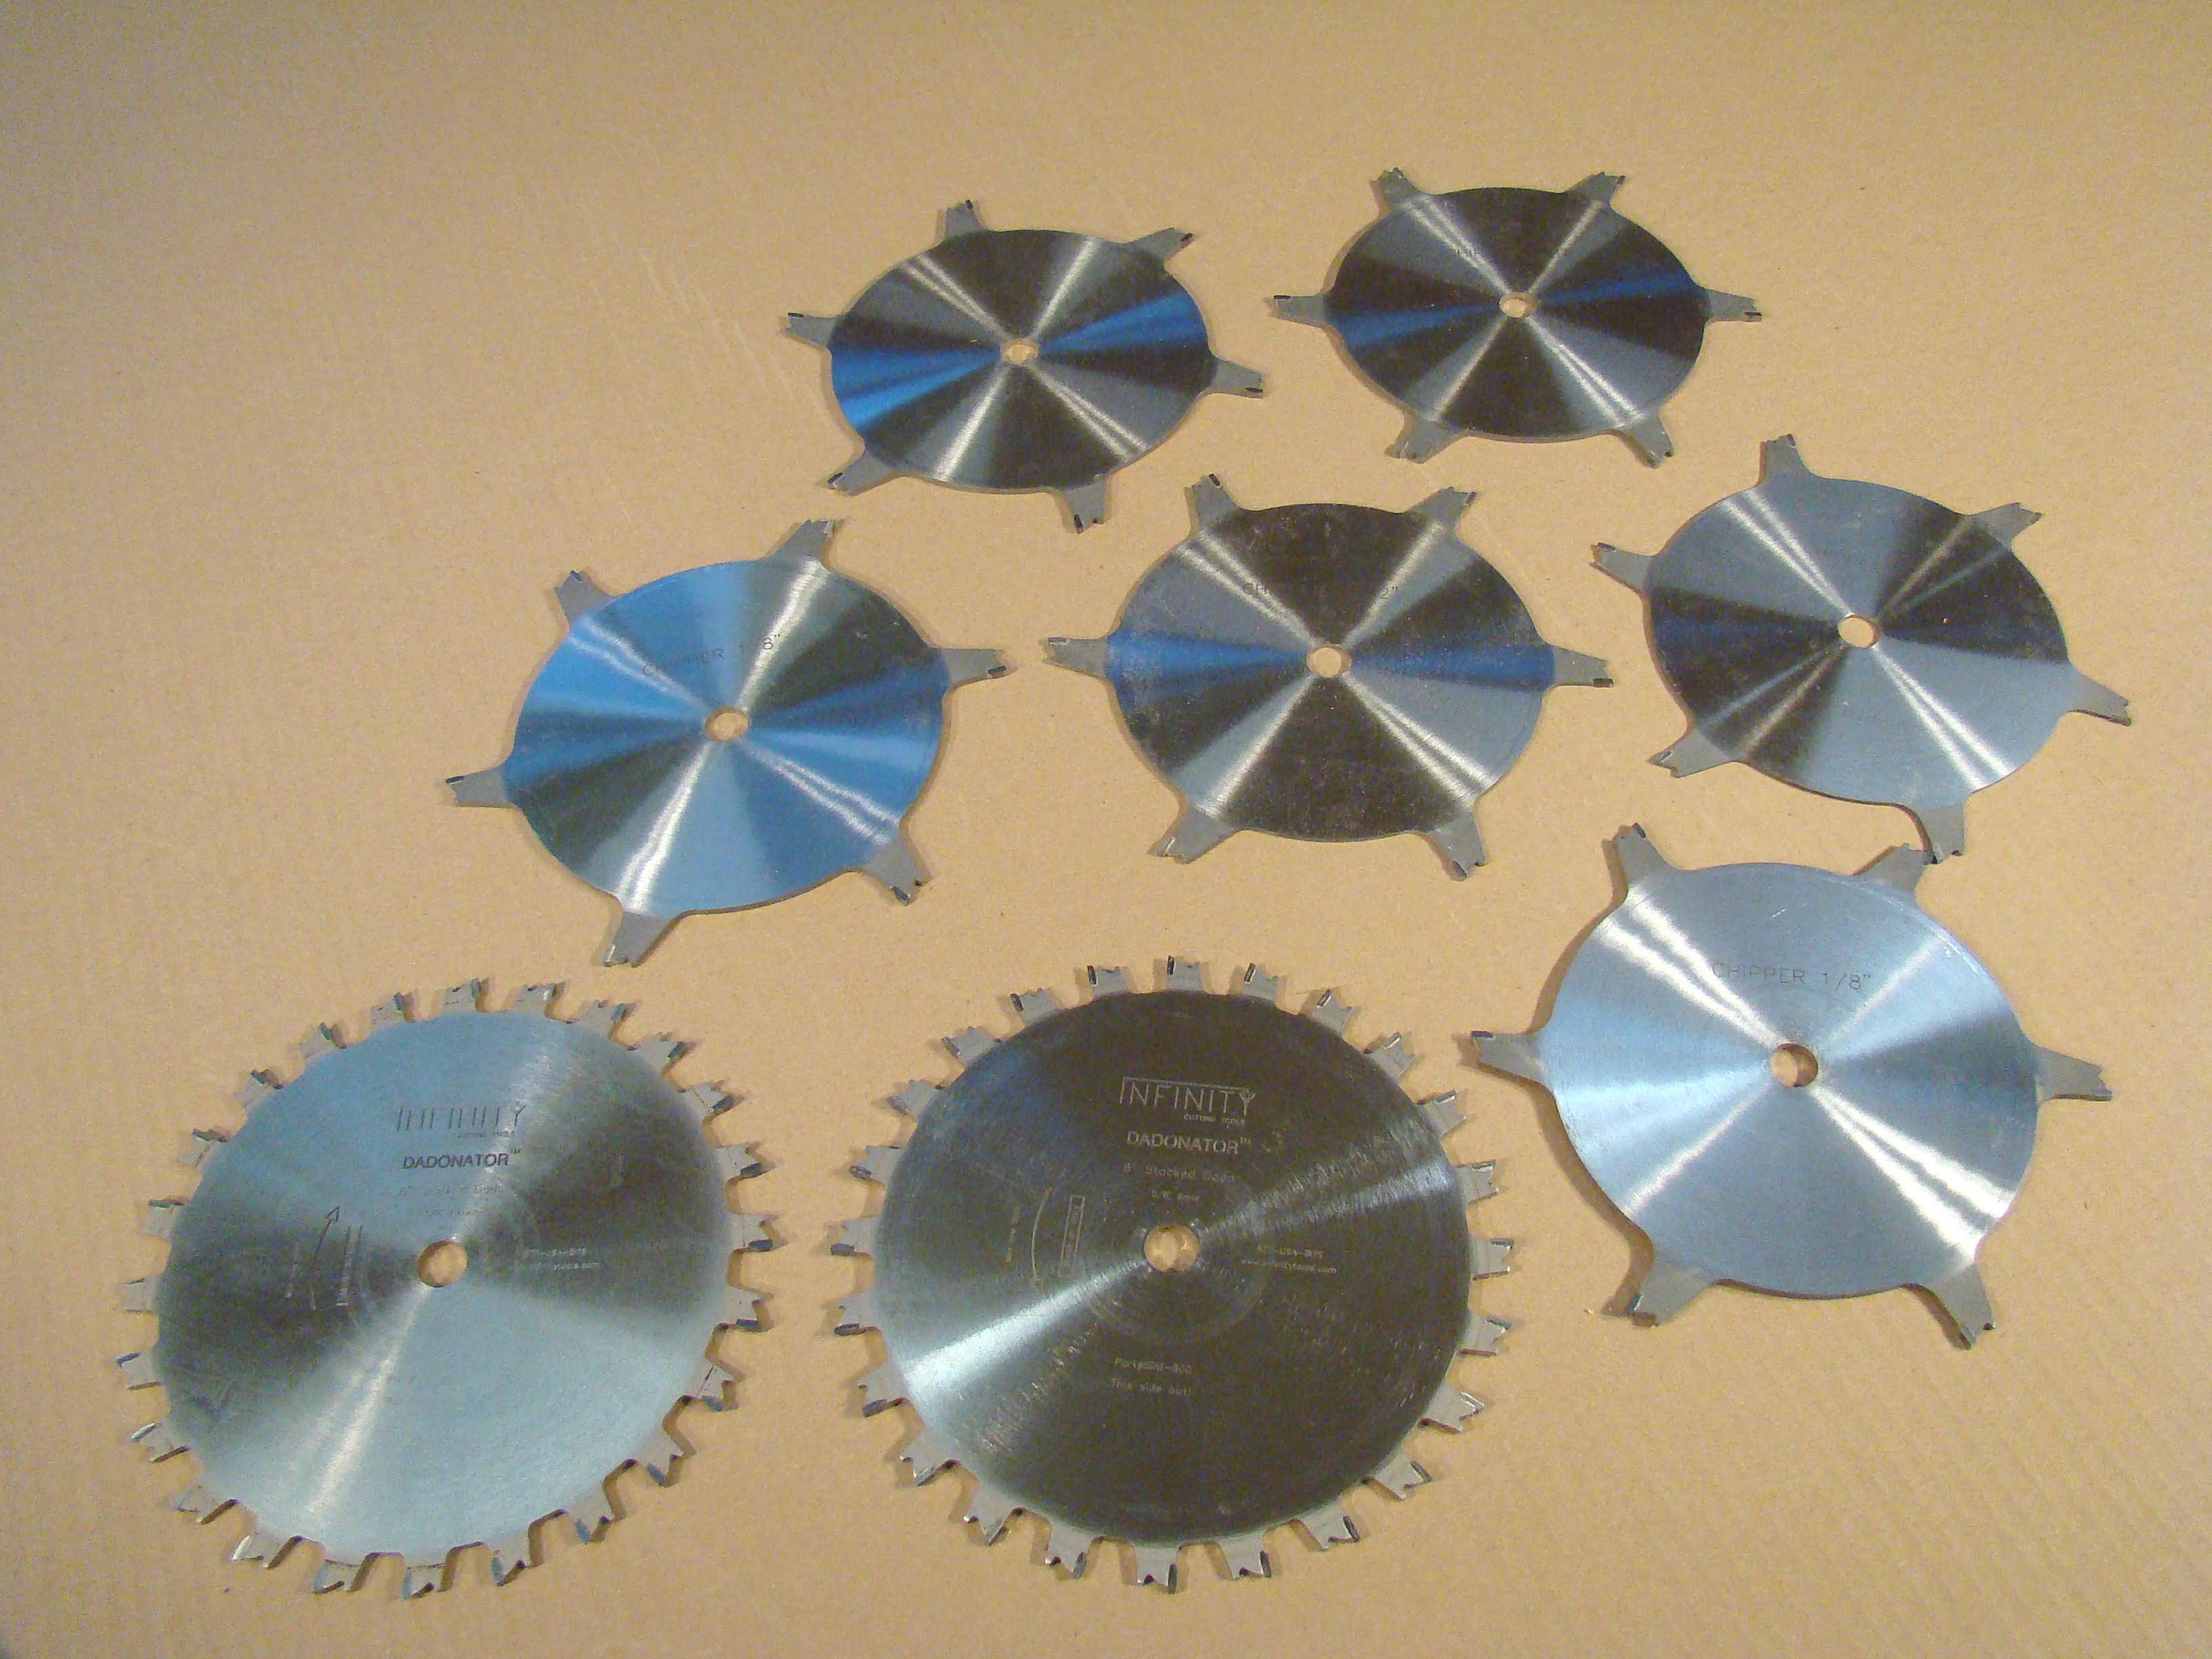 Stackable dado heads are the way to go. They consist of two rim blades (the ones that look like conventional blades) and a bunch of chippers (the ones that look like Ninja throwing stars). Typically, the rim blades and a handful of chippers are each 1/8" thick. One chipper will be 1/16" thick. I like sets that also include a 3/32" chipper, allowing you to change the width of the stack in 1/32" increments, which makes it easier to hit weird sized dadoes. You'll always use the rim blades, along with some combination of chippers, to make a dado sandwich that's the correct width.
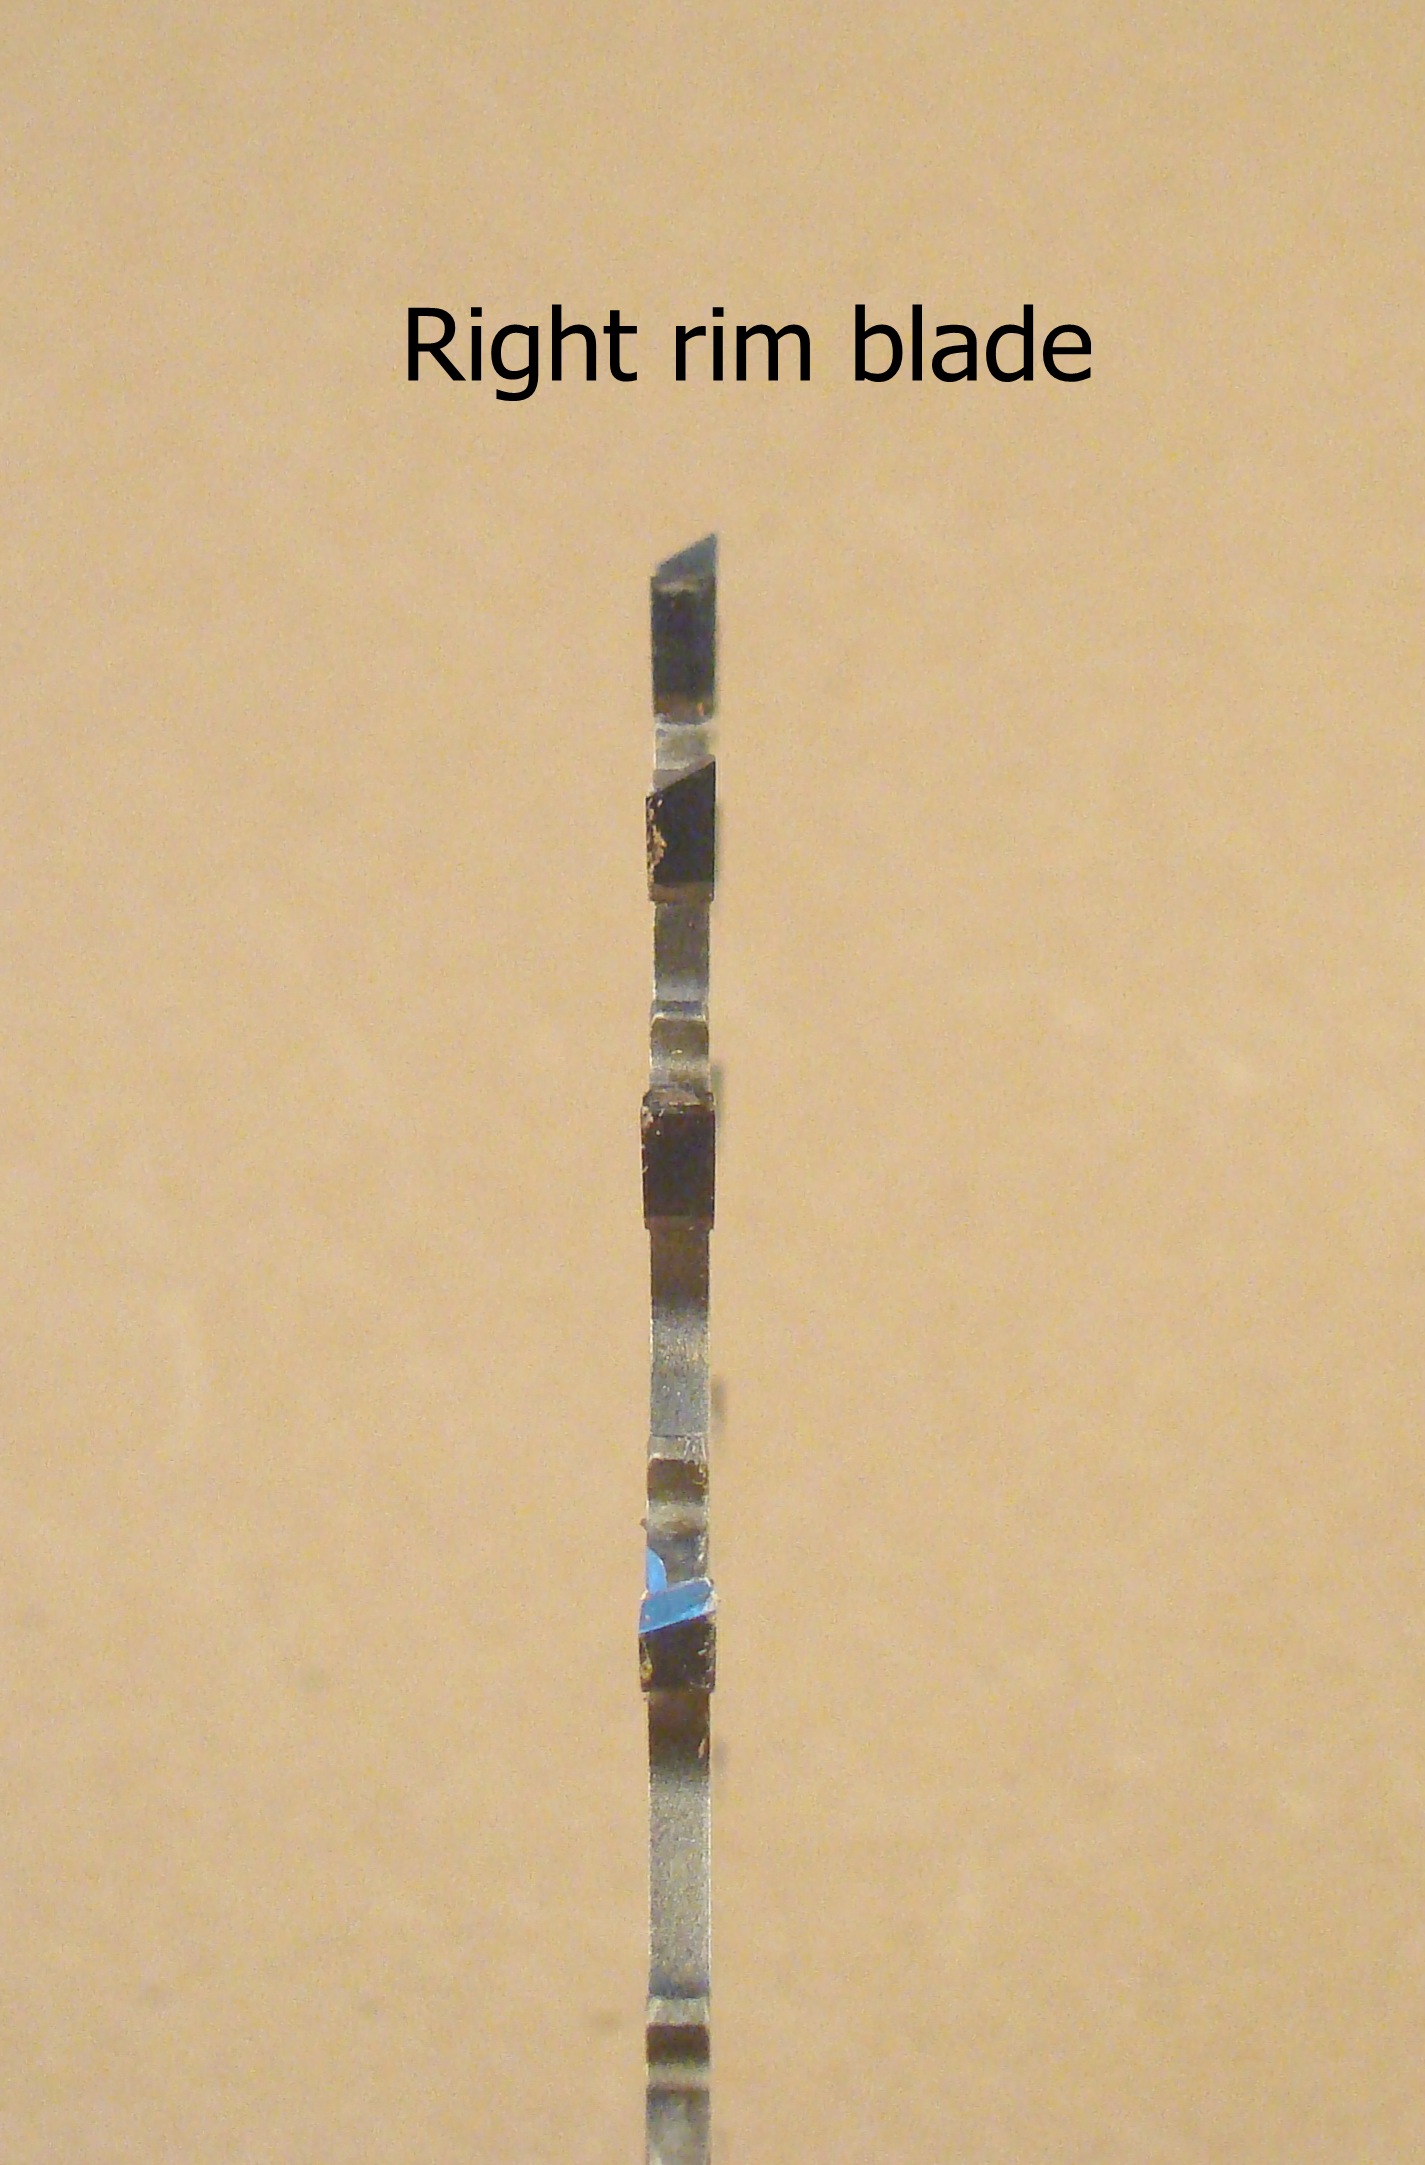
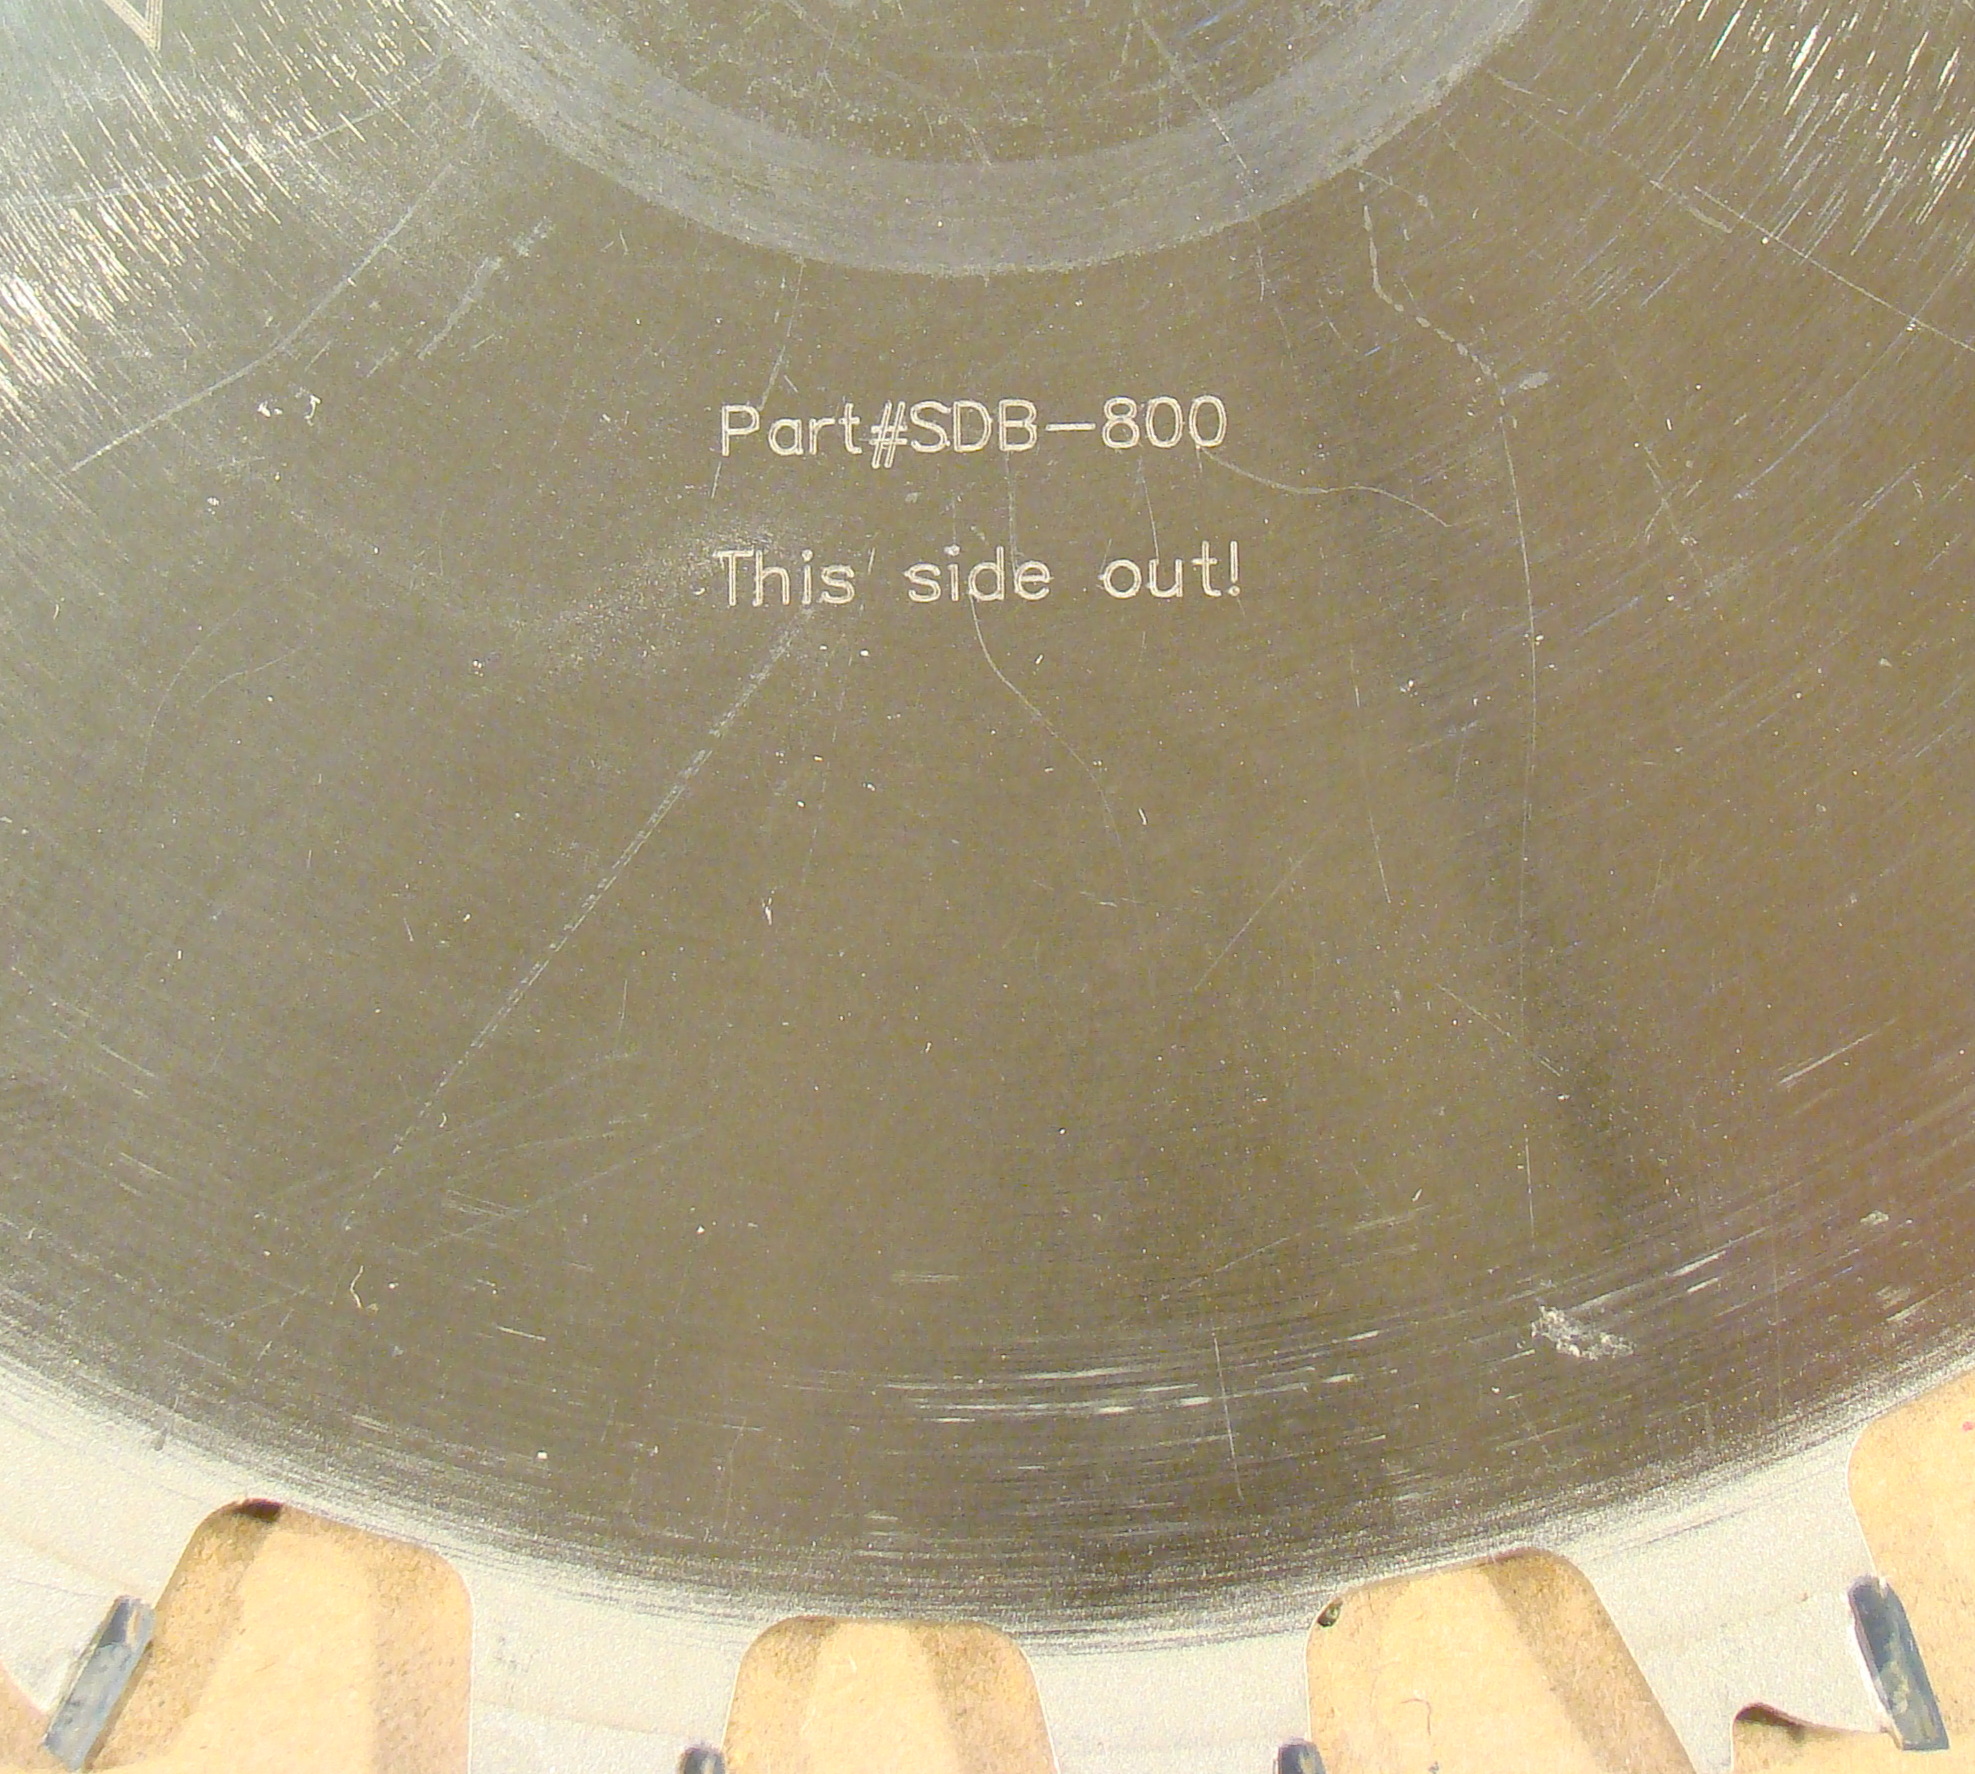 Notice that one face of this rim blade says "This side out". The left and right chippers create an alternating tooth pattern. You've got to be certain that you put the rim blades on correctly or you'll get a lousy cut, and the width of the cut won't be predictable.
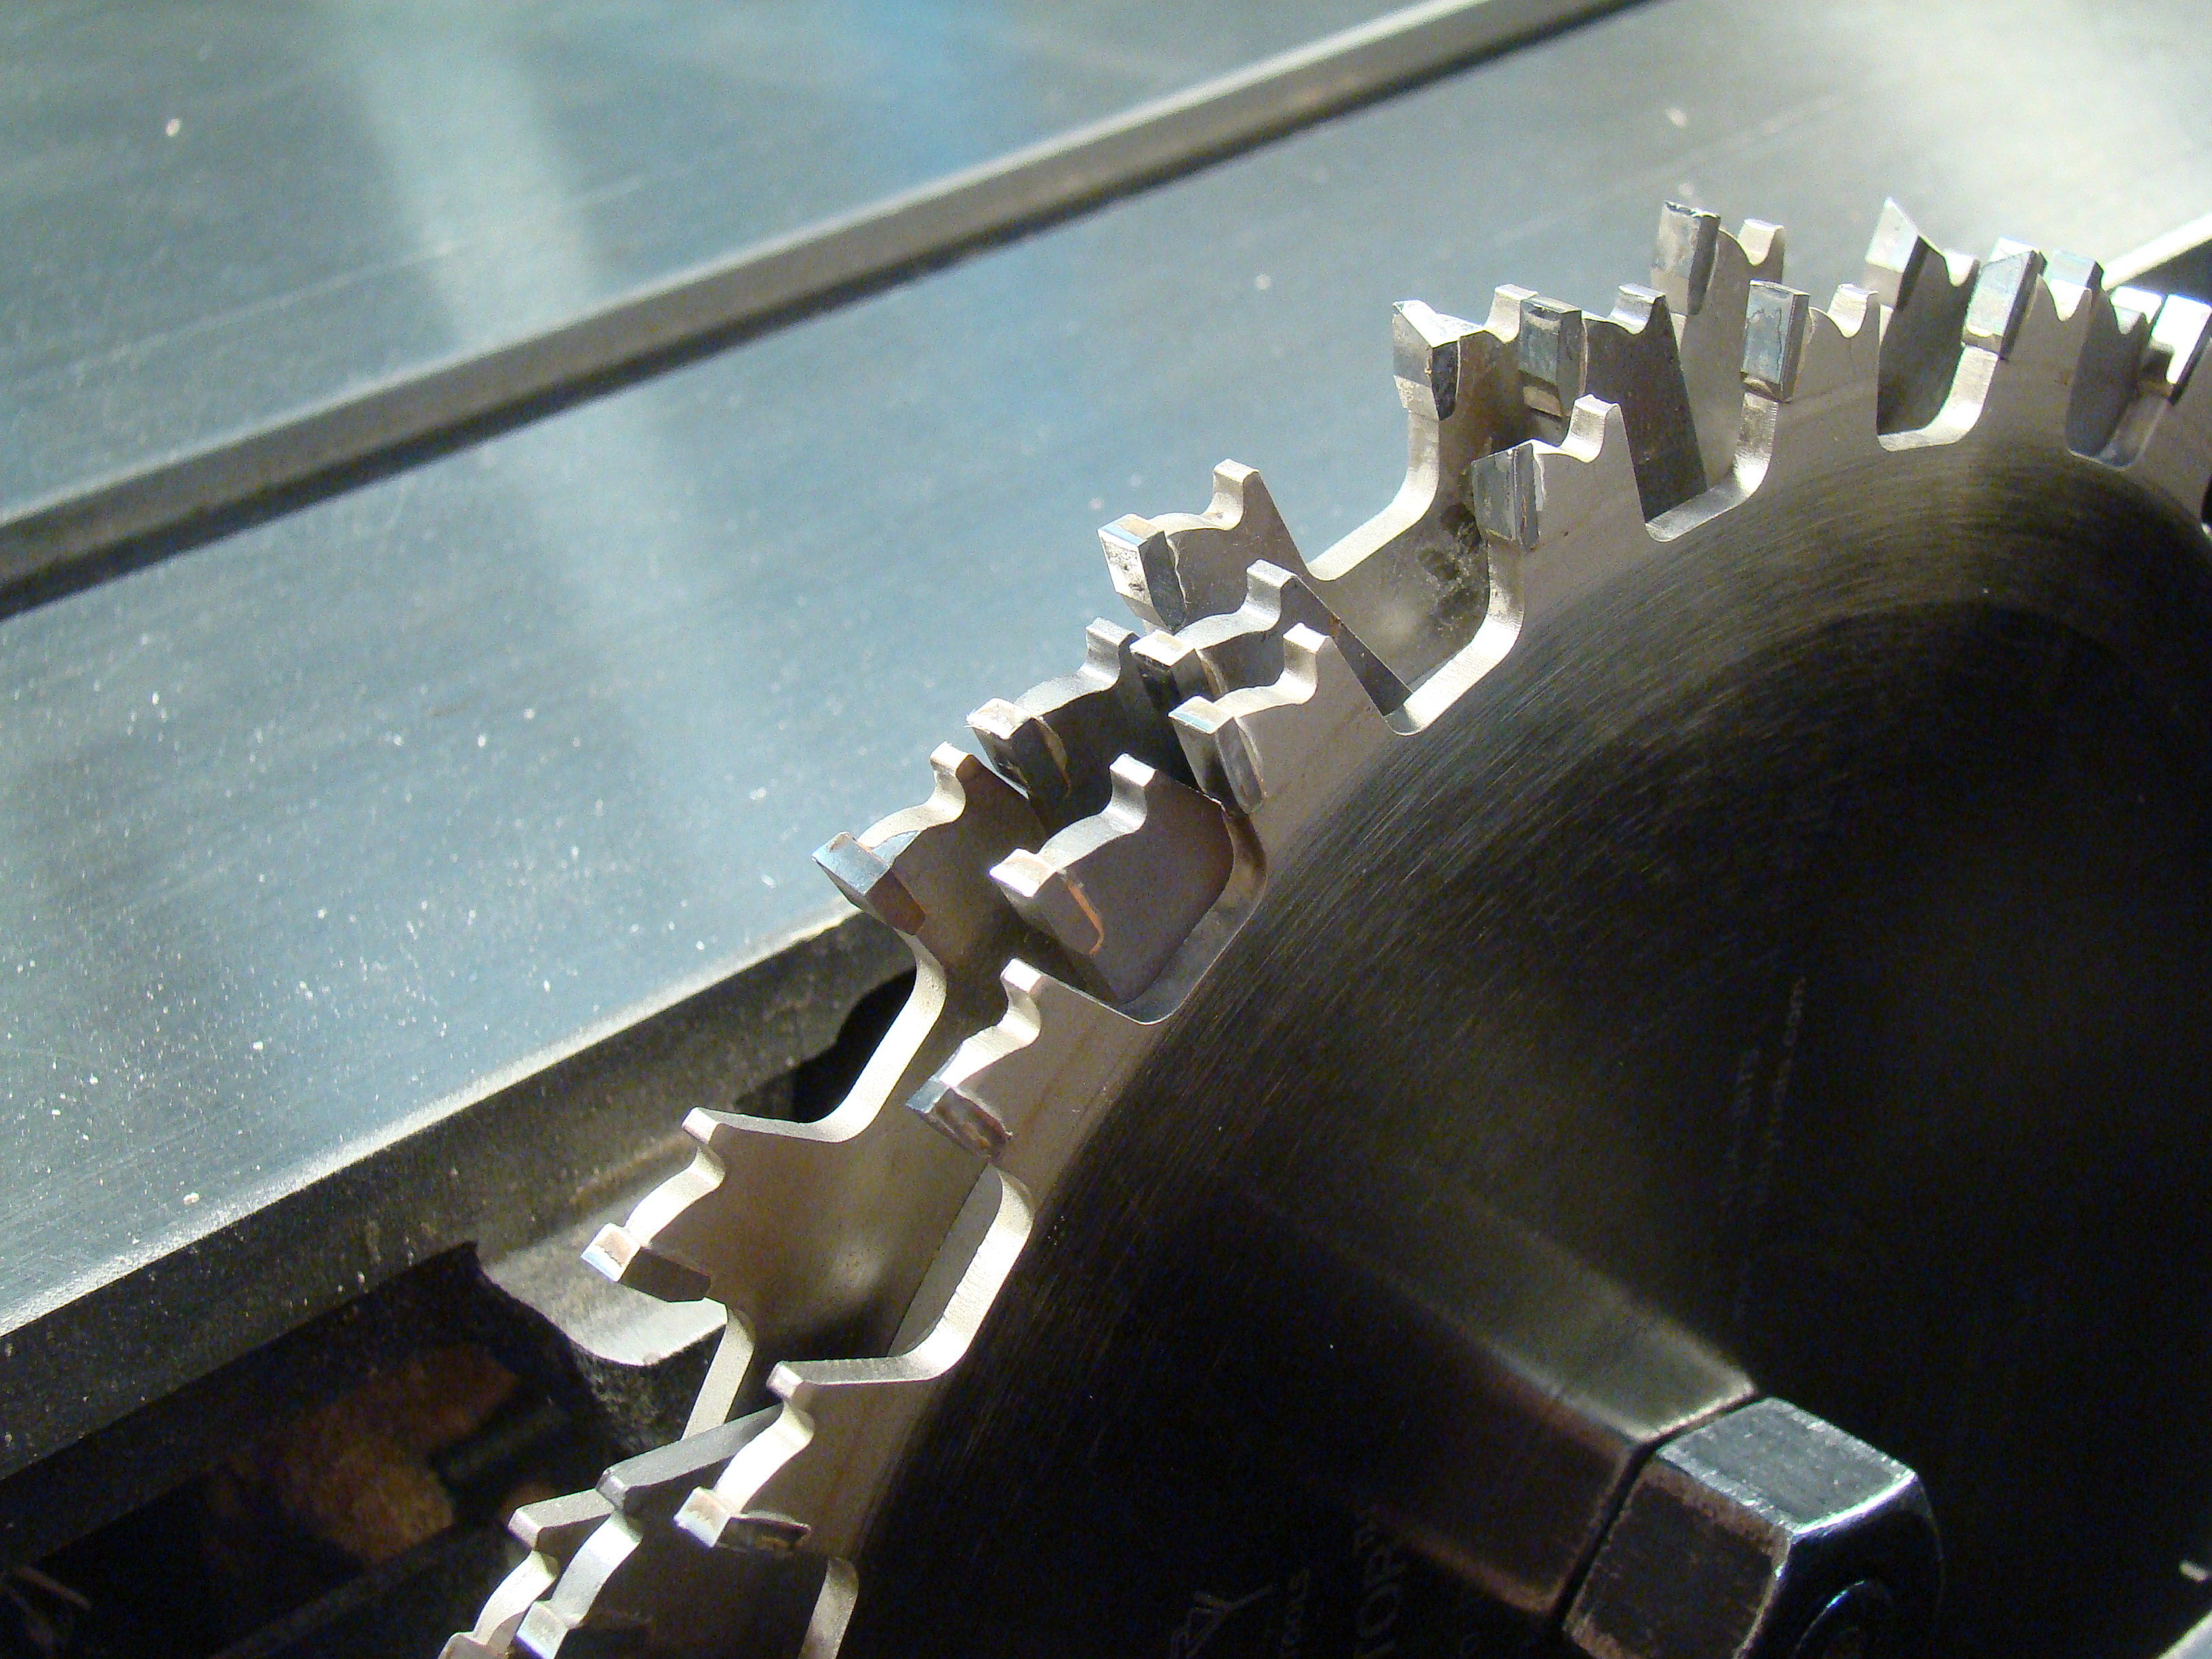
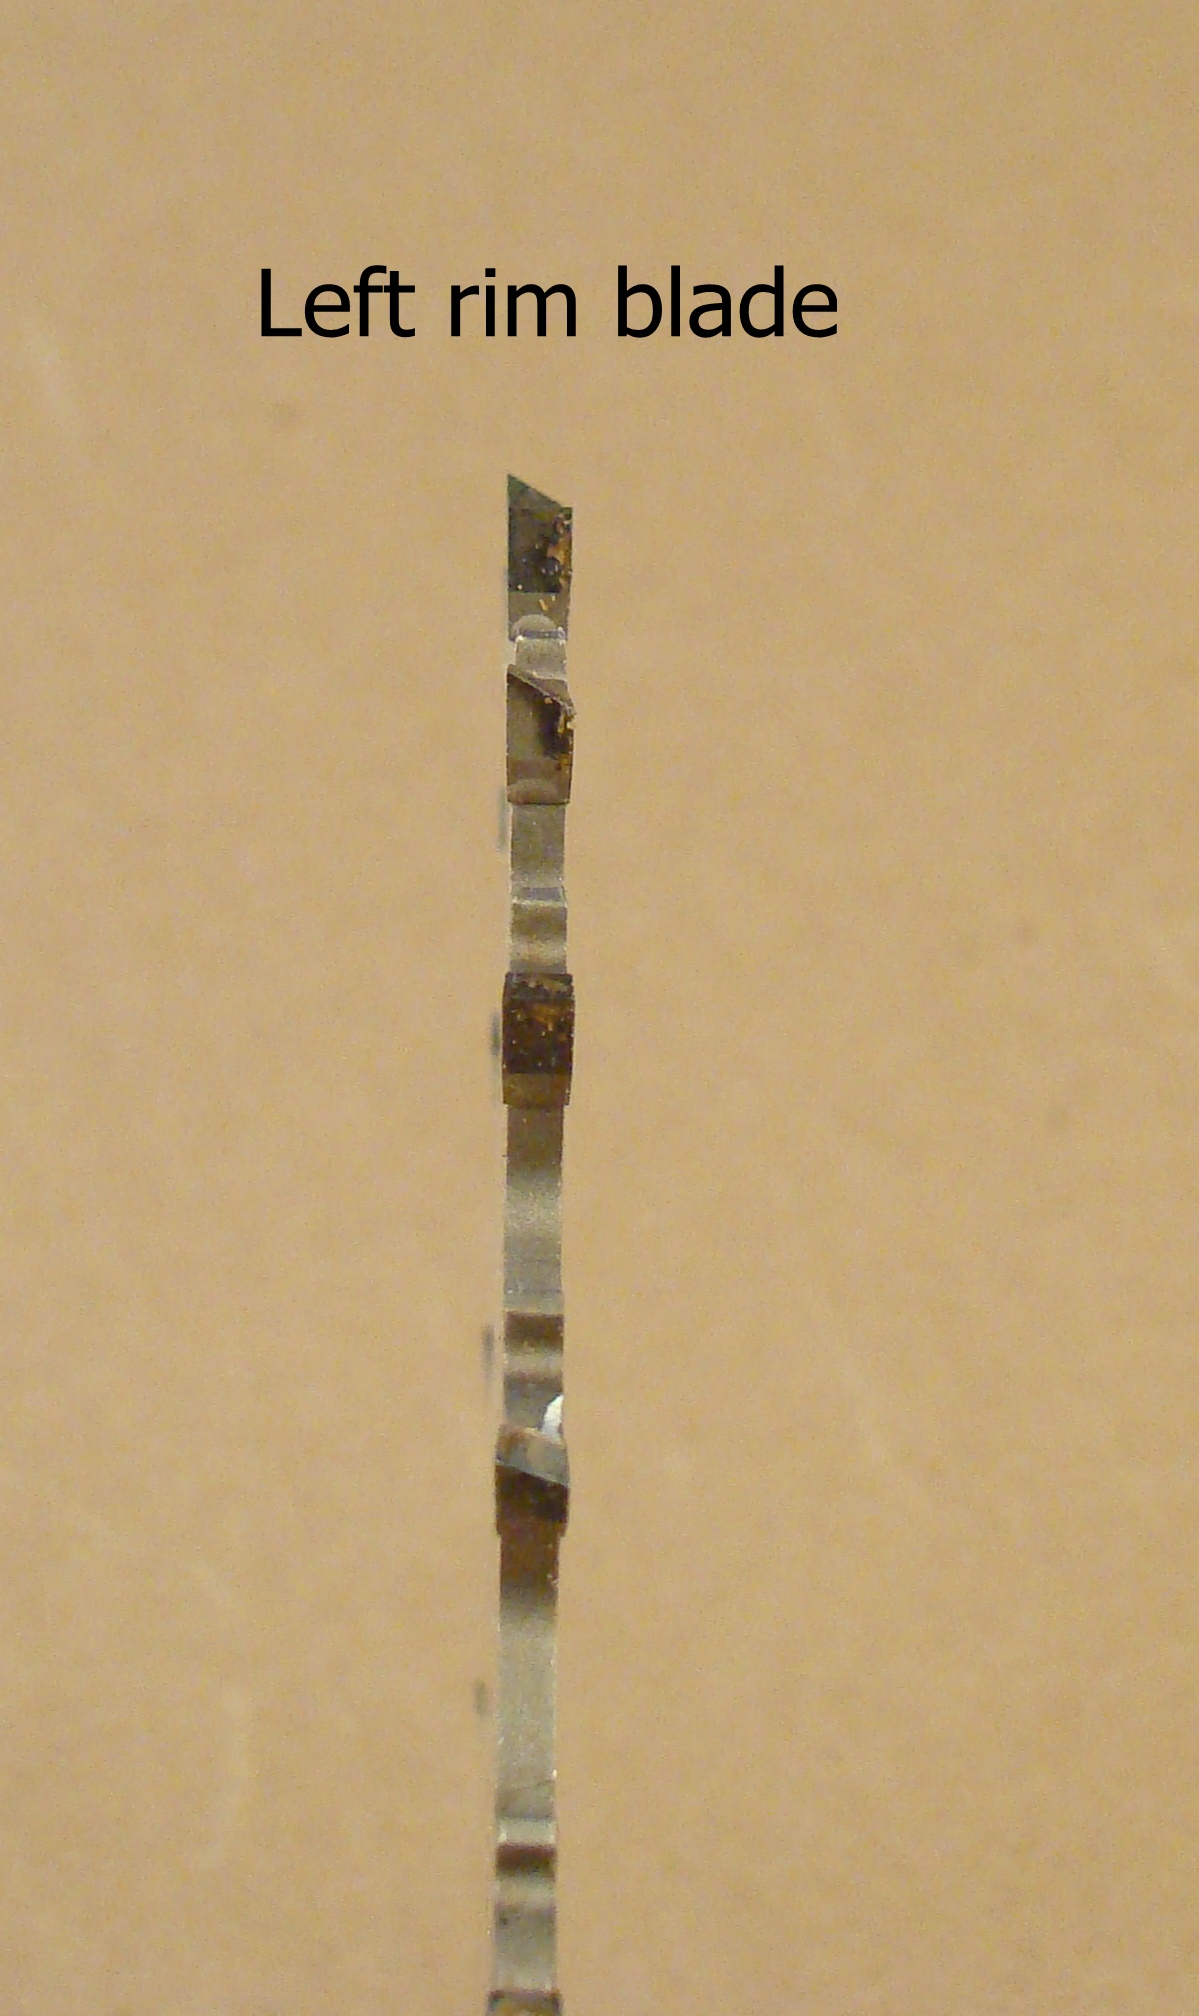 If the chippers don't tell you which side should be out, don't panic. The chippers will point the way. Teeth on the left chipper should point primarily to the left, and on the right chipper primarily to the right, as shown here. Always double check and make sure you're putting the stack together correctly.
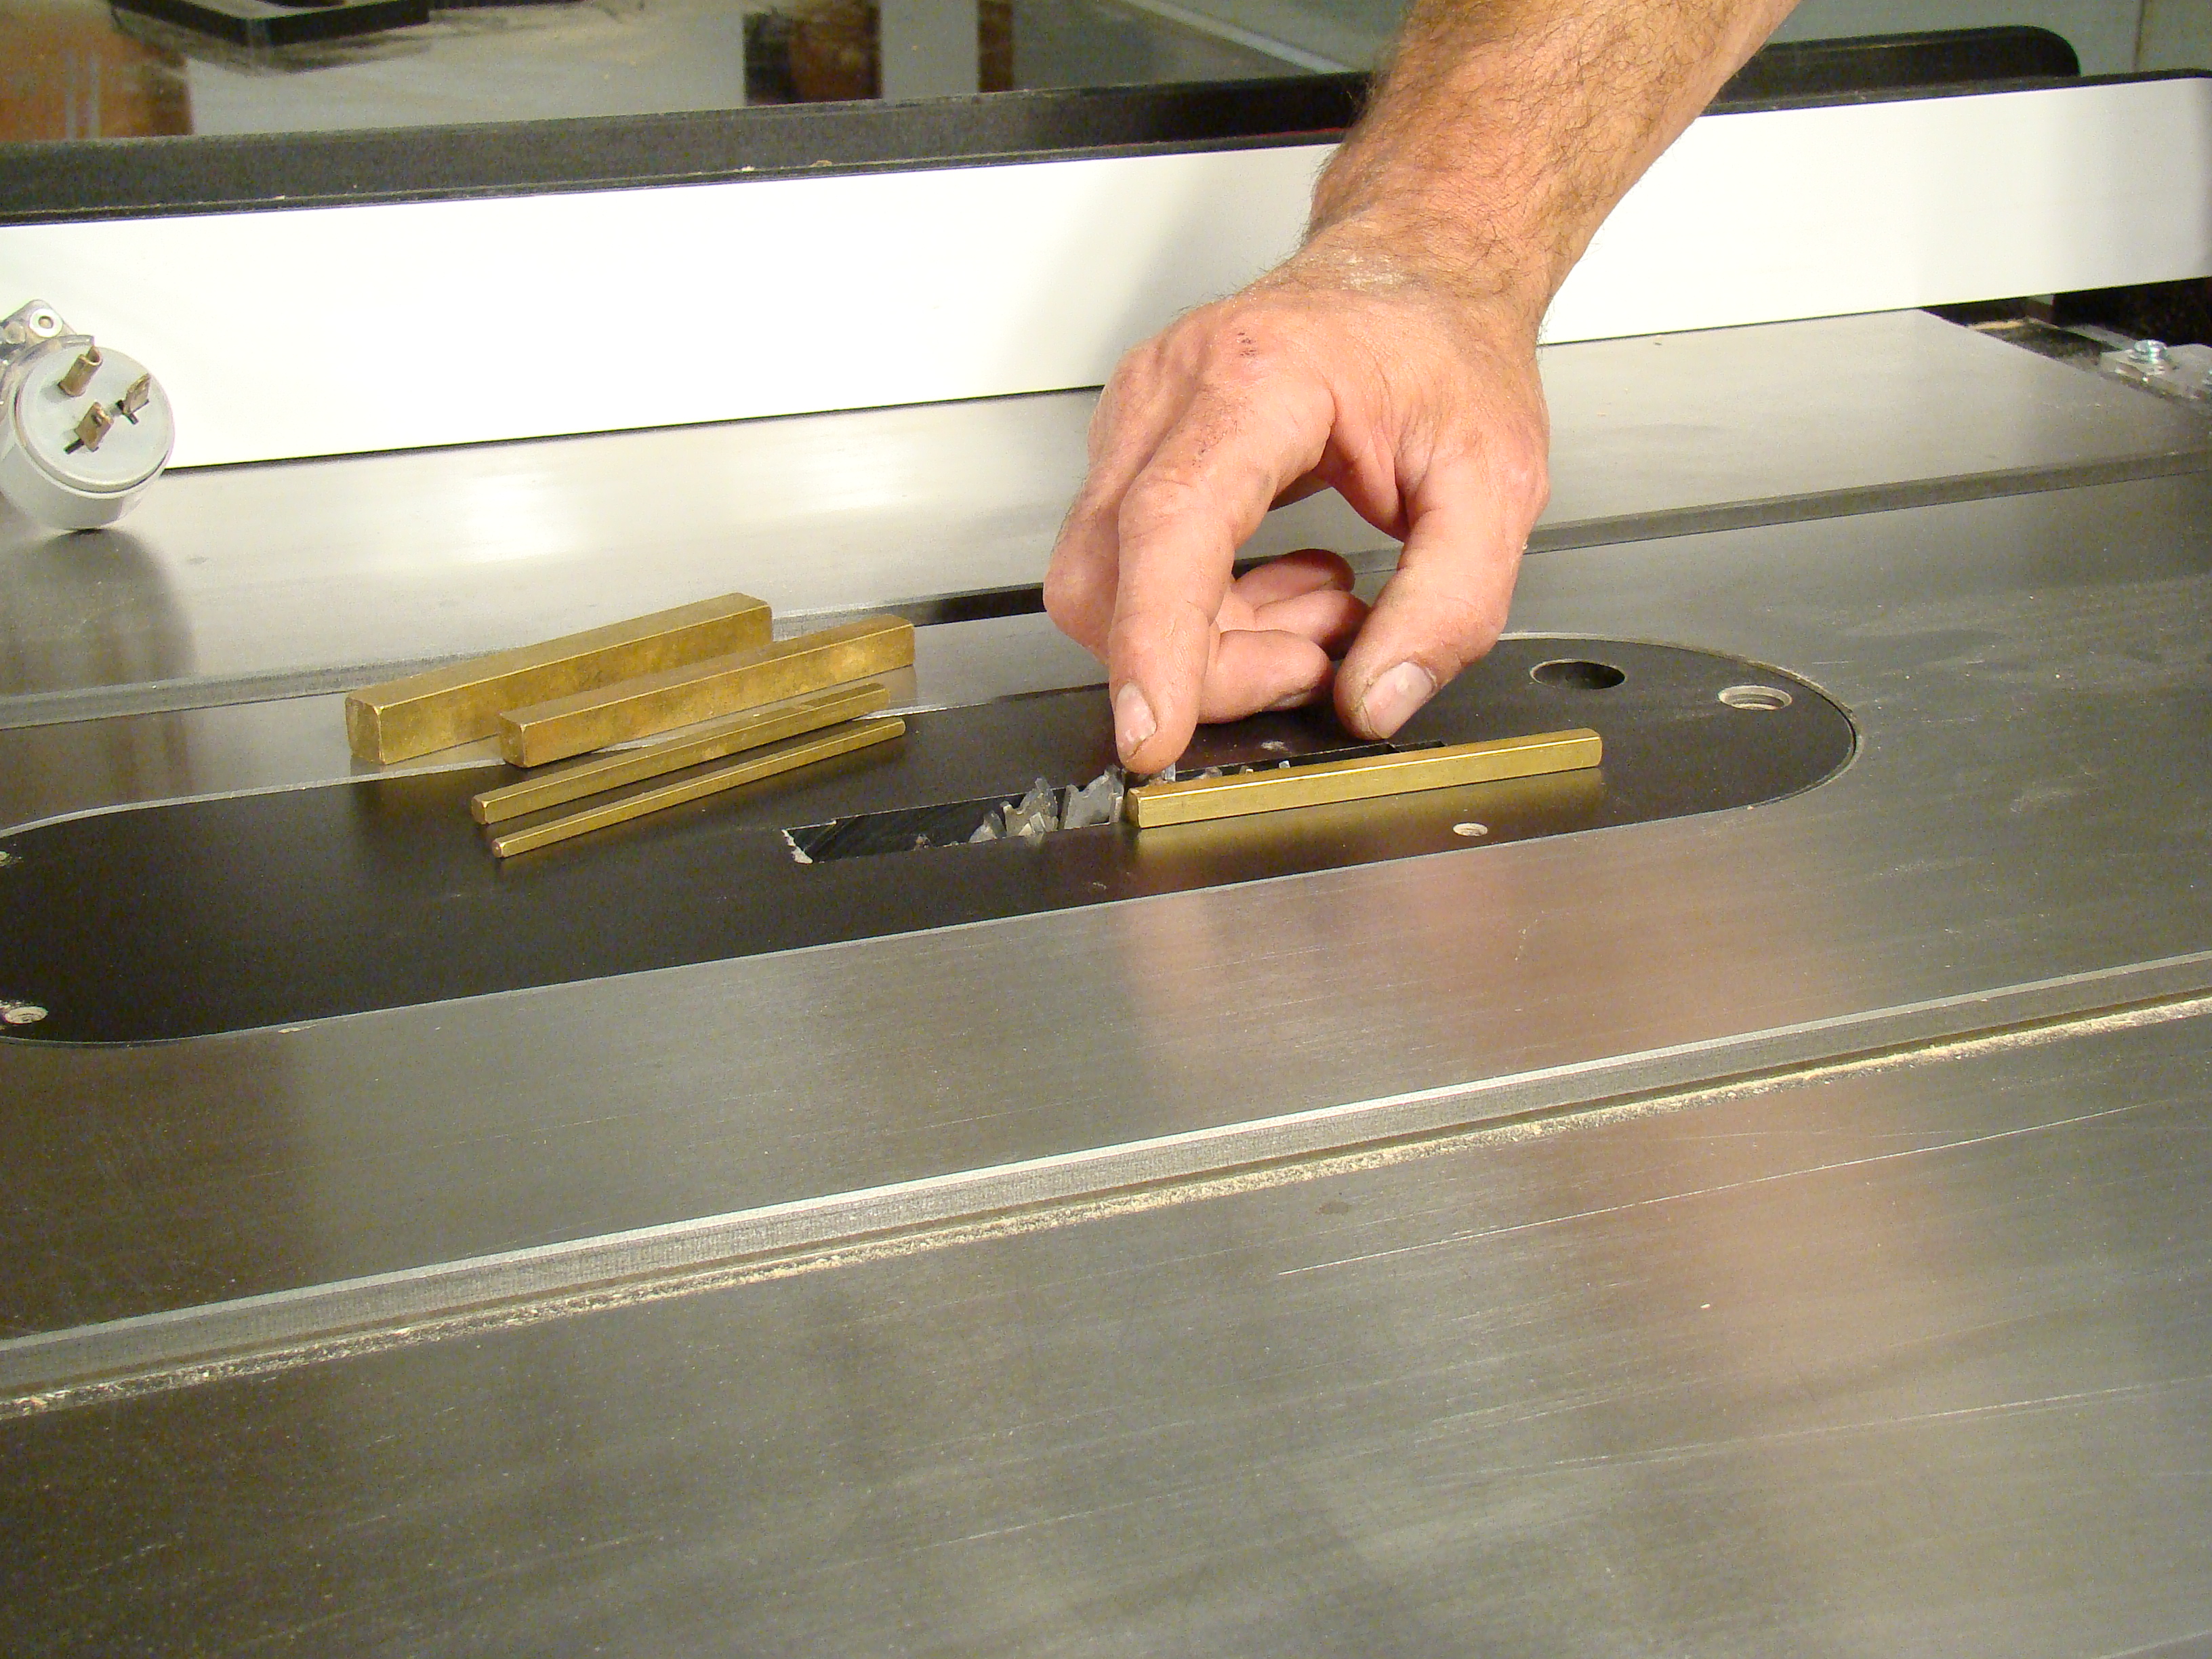
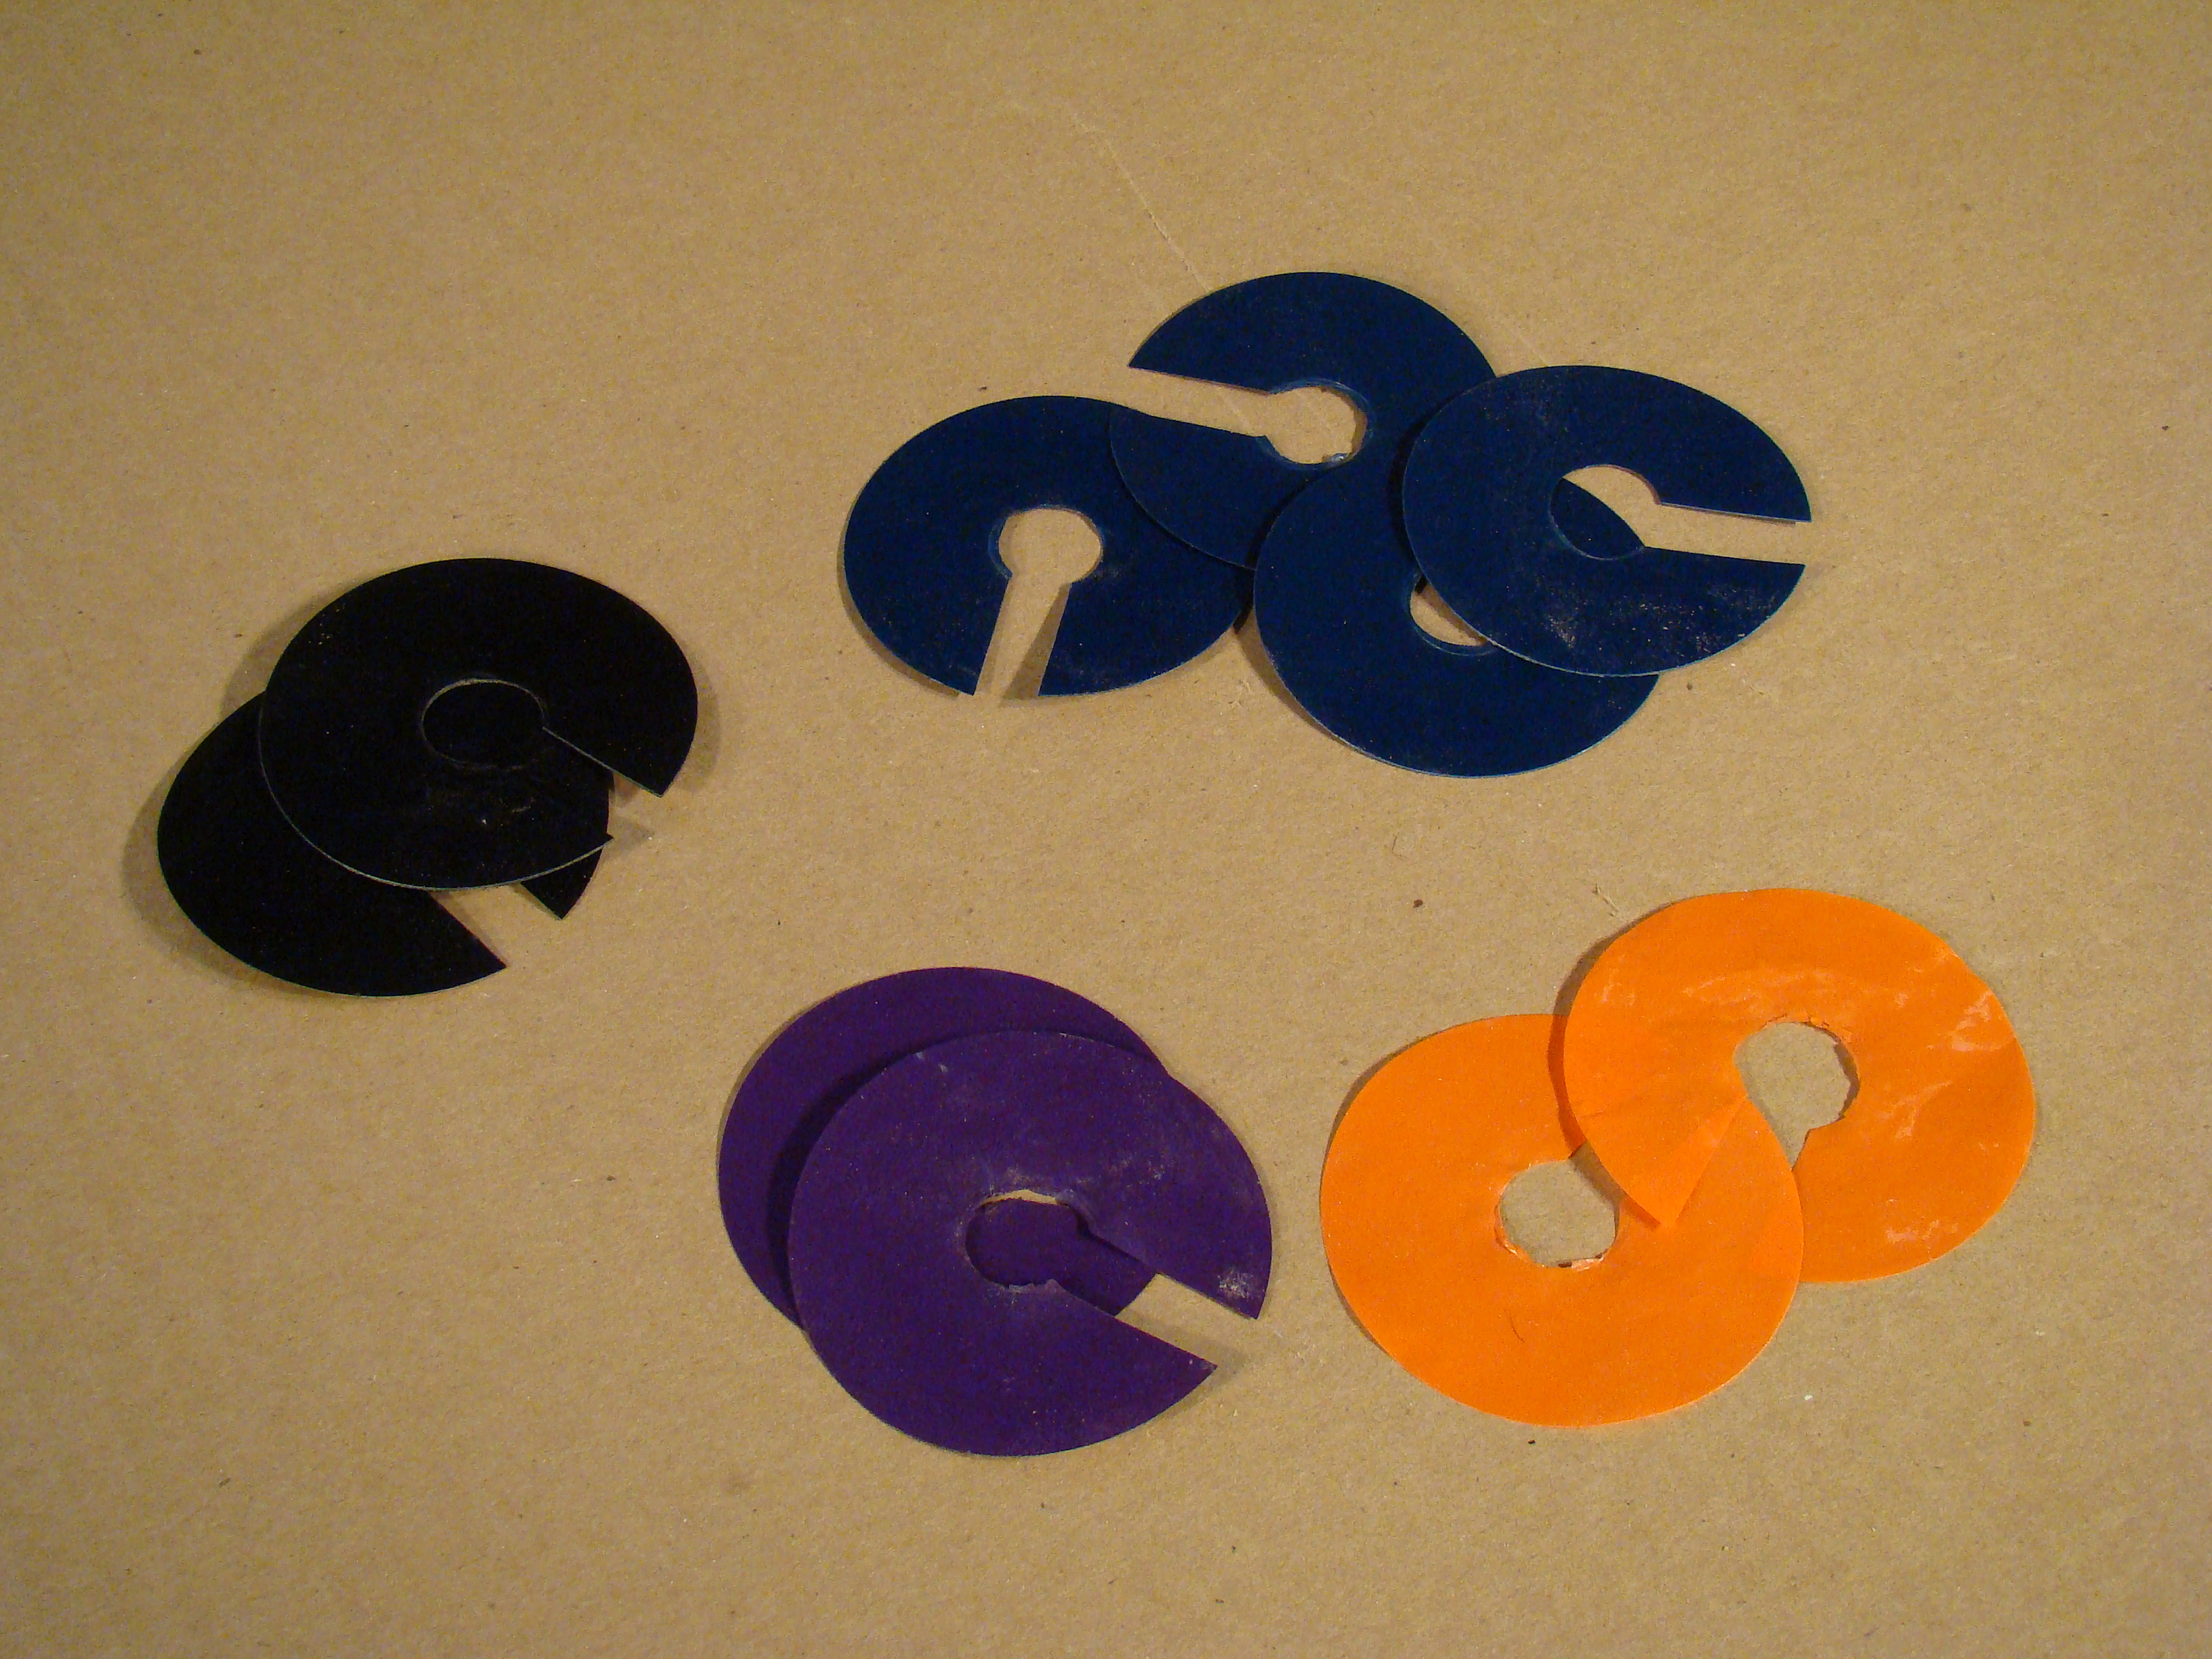 You're also gonna need dado shims. They may be plastic, like these, or metal. Dado shims are used to make TINY changes in the width of a stackable dado. Each color in this set represents a different thickness. The thickest shims in this set are .020", and the thinnest are .002". To give you a feel for the delicate changes this allows, you're changing the width by about 1/64" when you add a .020" shim. Adding a .002" shim changes things by less than the thickness of a dollar bill.
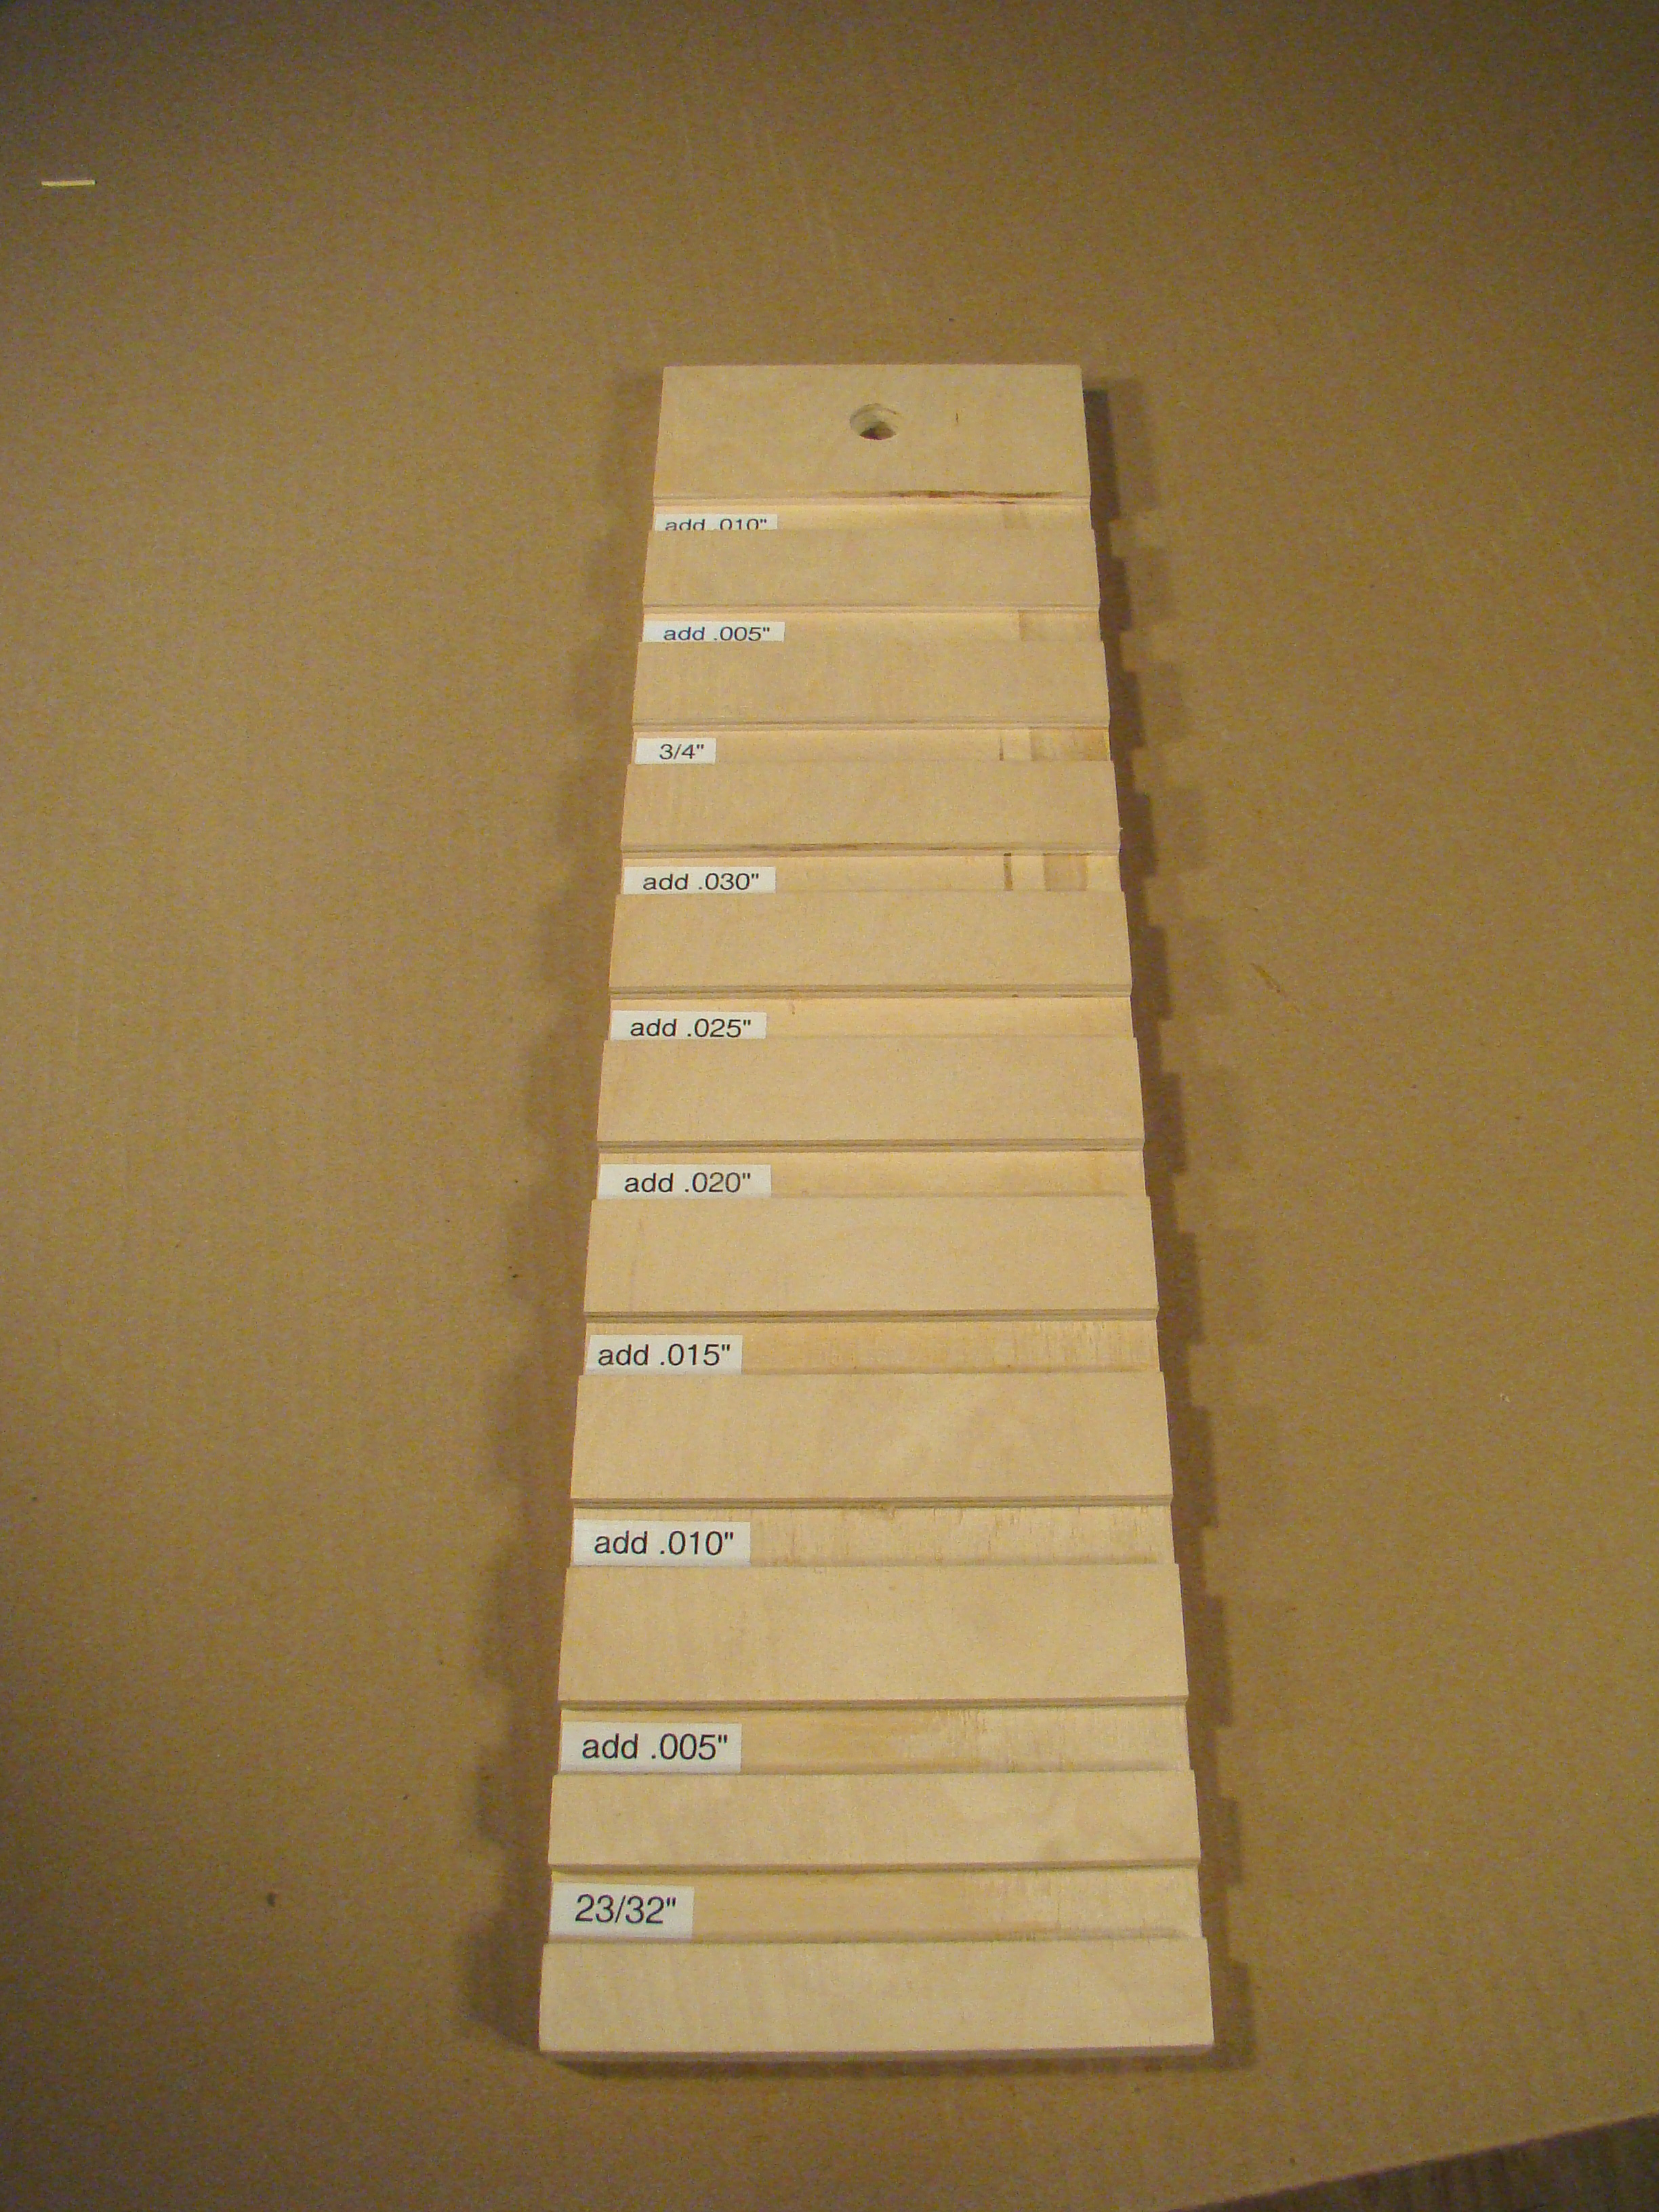 You're also gonna need, and love, this shop-made set up jig. Here's the deal. Set up your dado head for just under 3/4" (assuming most of your dadoes will be for 3/4" stock). Cut a dado. Label the width. Add .005" dado shim, and make another cut. Continue cutting and adding shims, .005" at a time, until you're got a series of dadoes from just under 3/4" to slightly more than 3/4". If you routinely work with 1/4" or 1/2" stock, make another set up jig for those sizes.
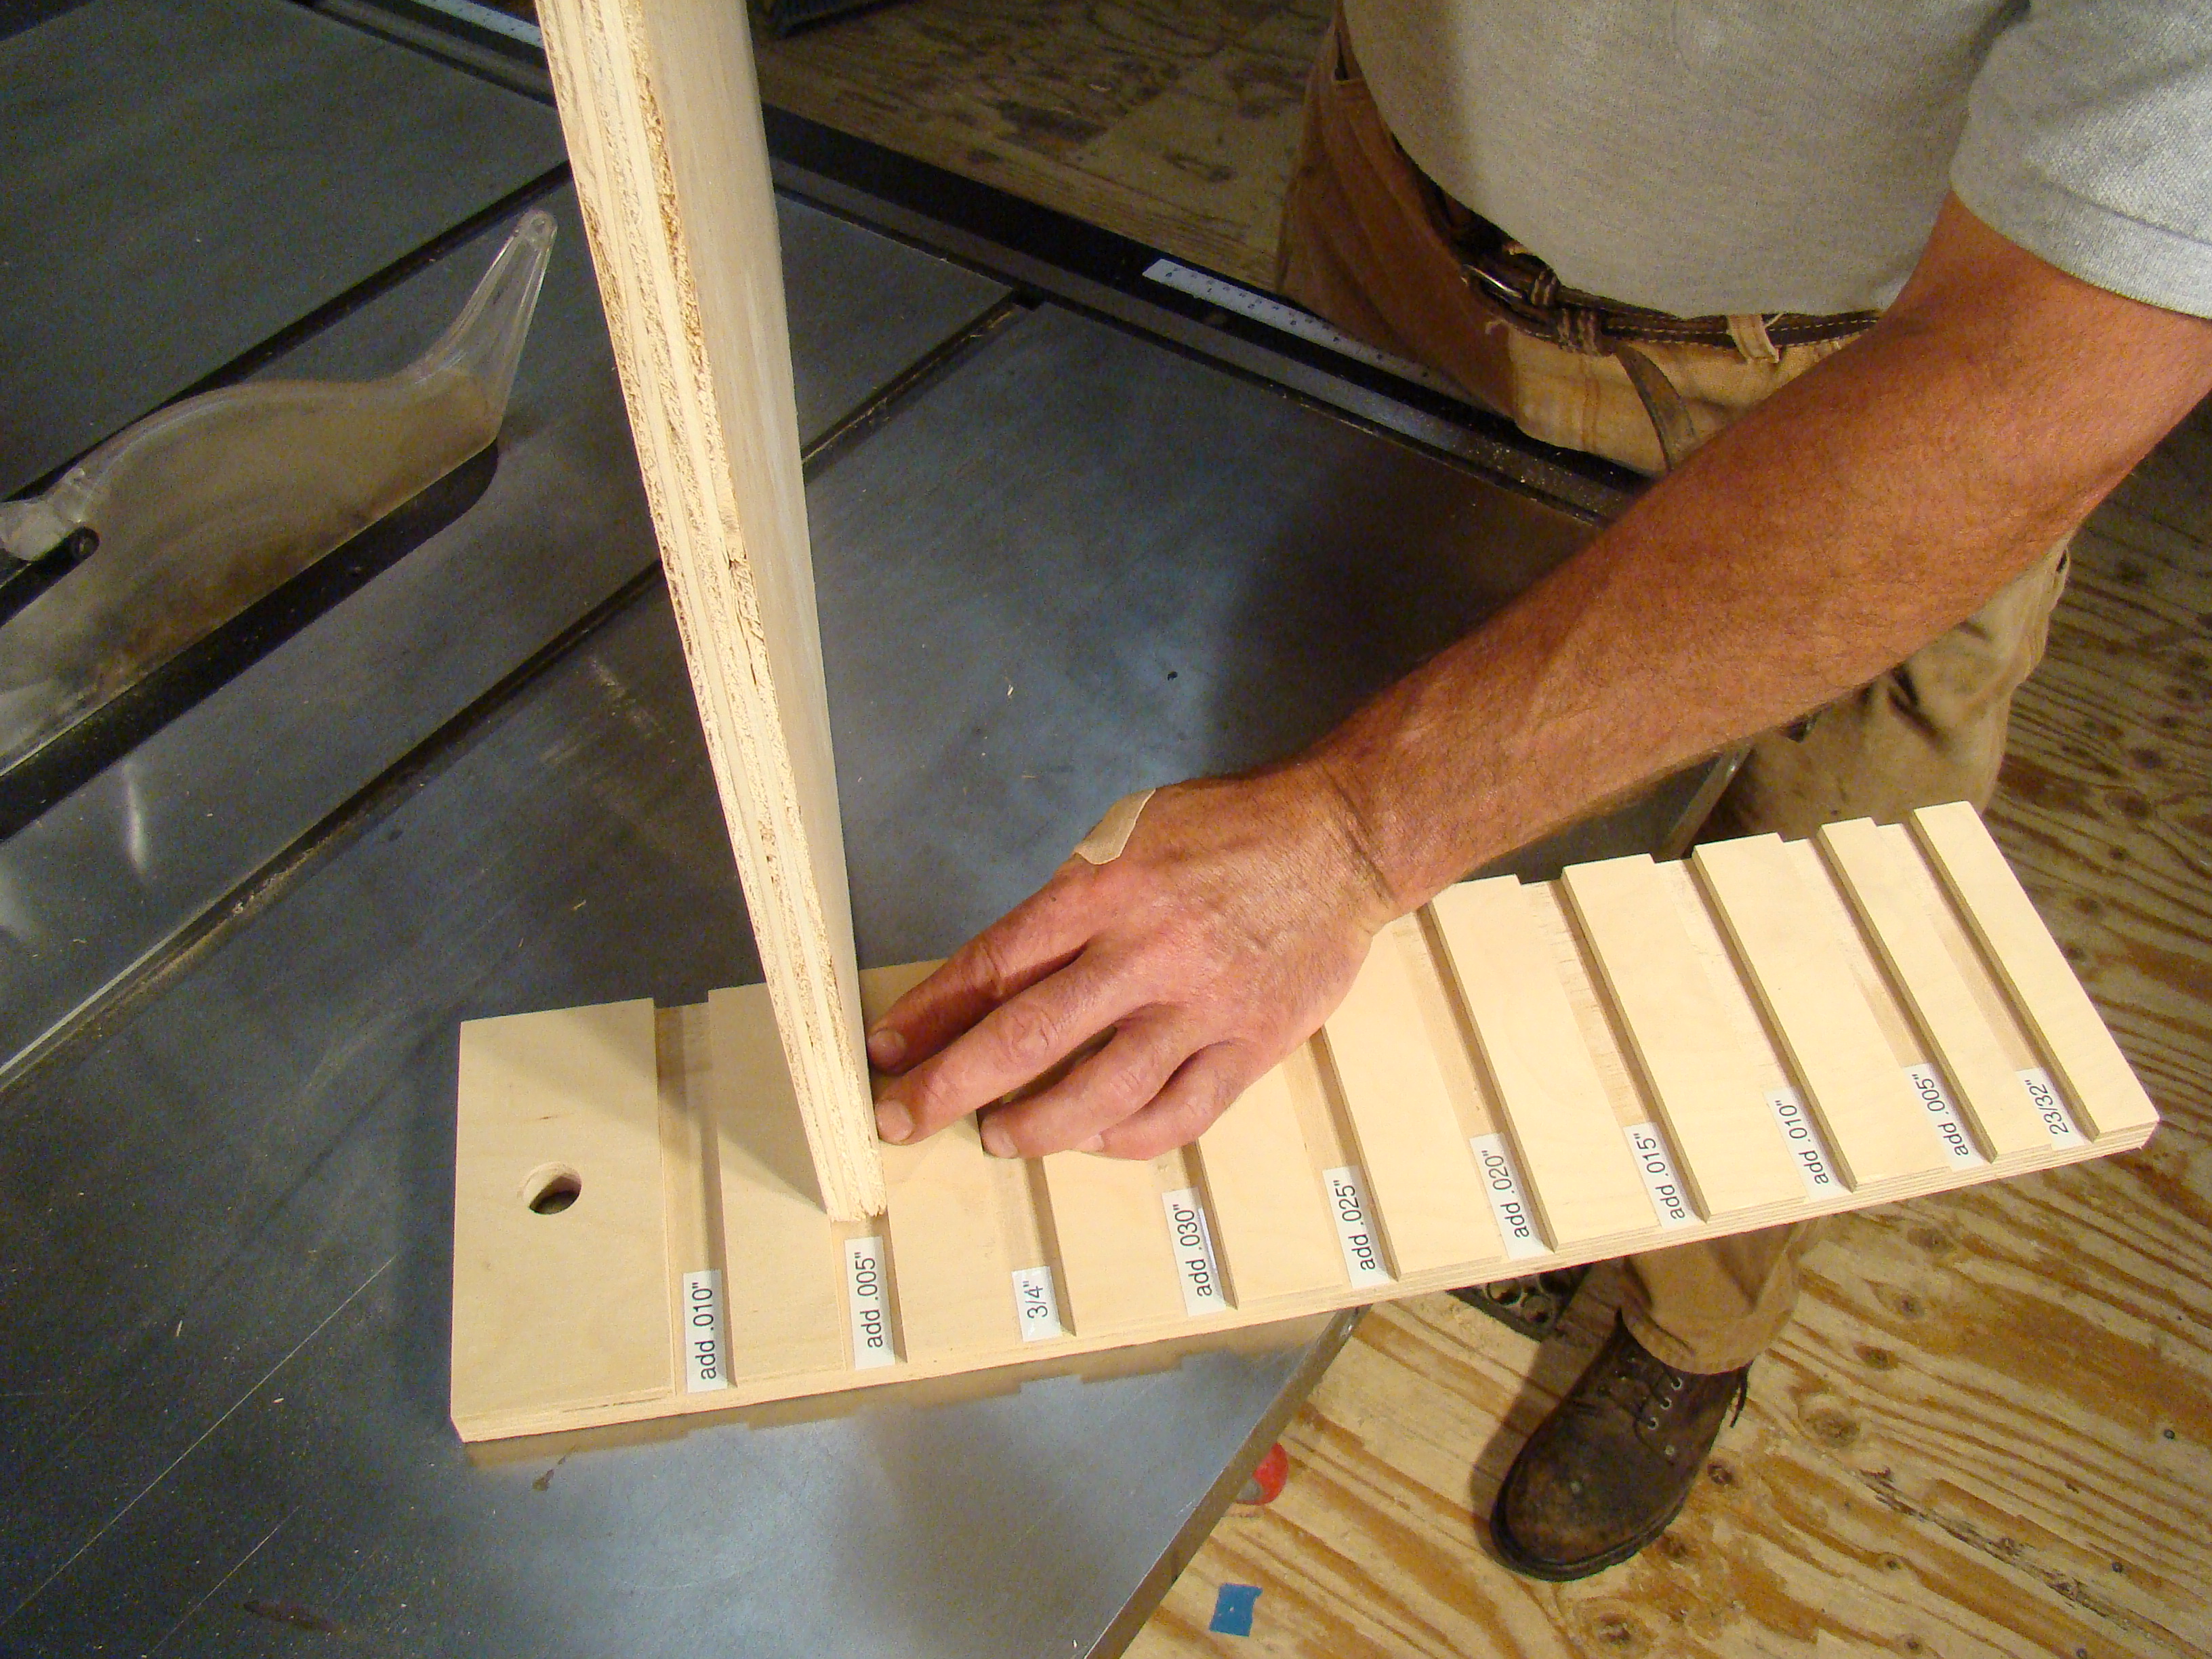 Use the set up jig by testing your material in each slot until you find the correct fit. This will get you very close to the correct set up when you stack up your dado head and shims. Be sure you're testing with the material that will be going into the dadoes.
 Build up the stack. Notice that I NEVER lay the chippers or rim blades on the cast iron top of my saw. This contact can knock the tips off the teeth. Orient the chippers so that their teeth are in the gullets (valleys) between the teeth on the rim blade. I place the dado shims between the last chipper and rim blade so they're easy to get at if I need to make a change.
 Don't tighten the arbor nut until you've double (or triple) checked the chipper and rim blade positions. If carbide teeth are touching each other, or a steel blade, when you tighten the nut, you'll be needing a visit from the Tooth Fairy. Yes, if you bust off a tooth the blade can be retoothed, but let's not let that need arise. Notice that the arbor nut is on, but not the washer. You've got to be able to fully thread the nut. On a wide stack, like this one, that may mean leaving the washer off.
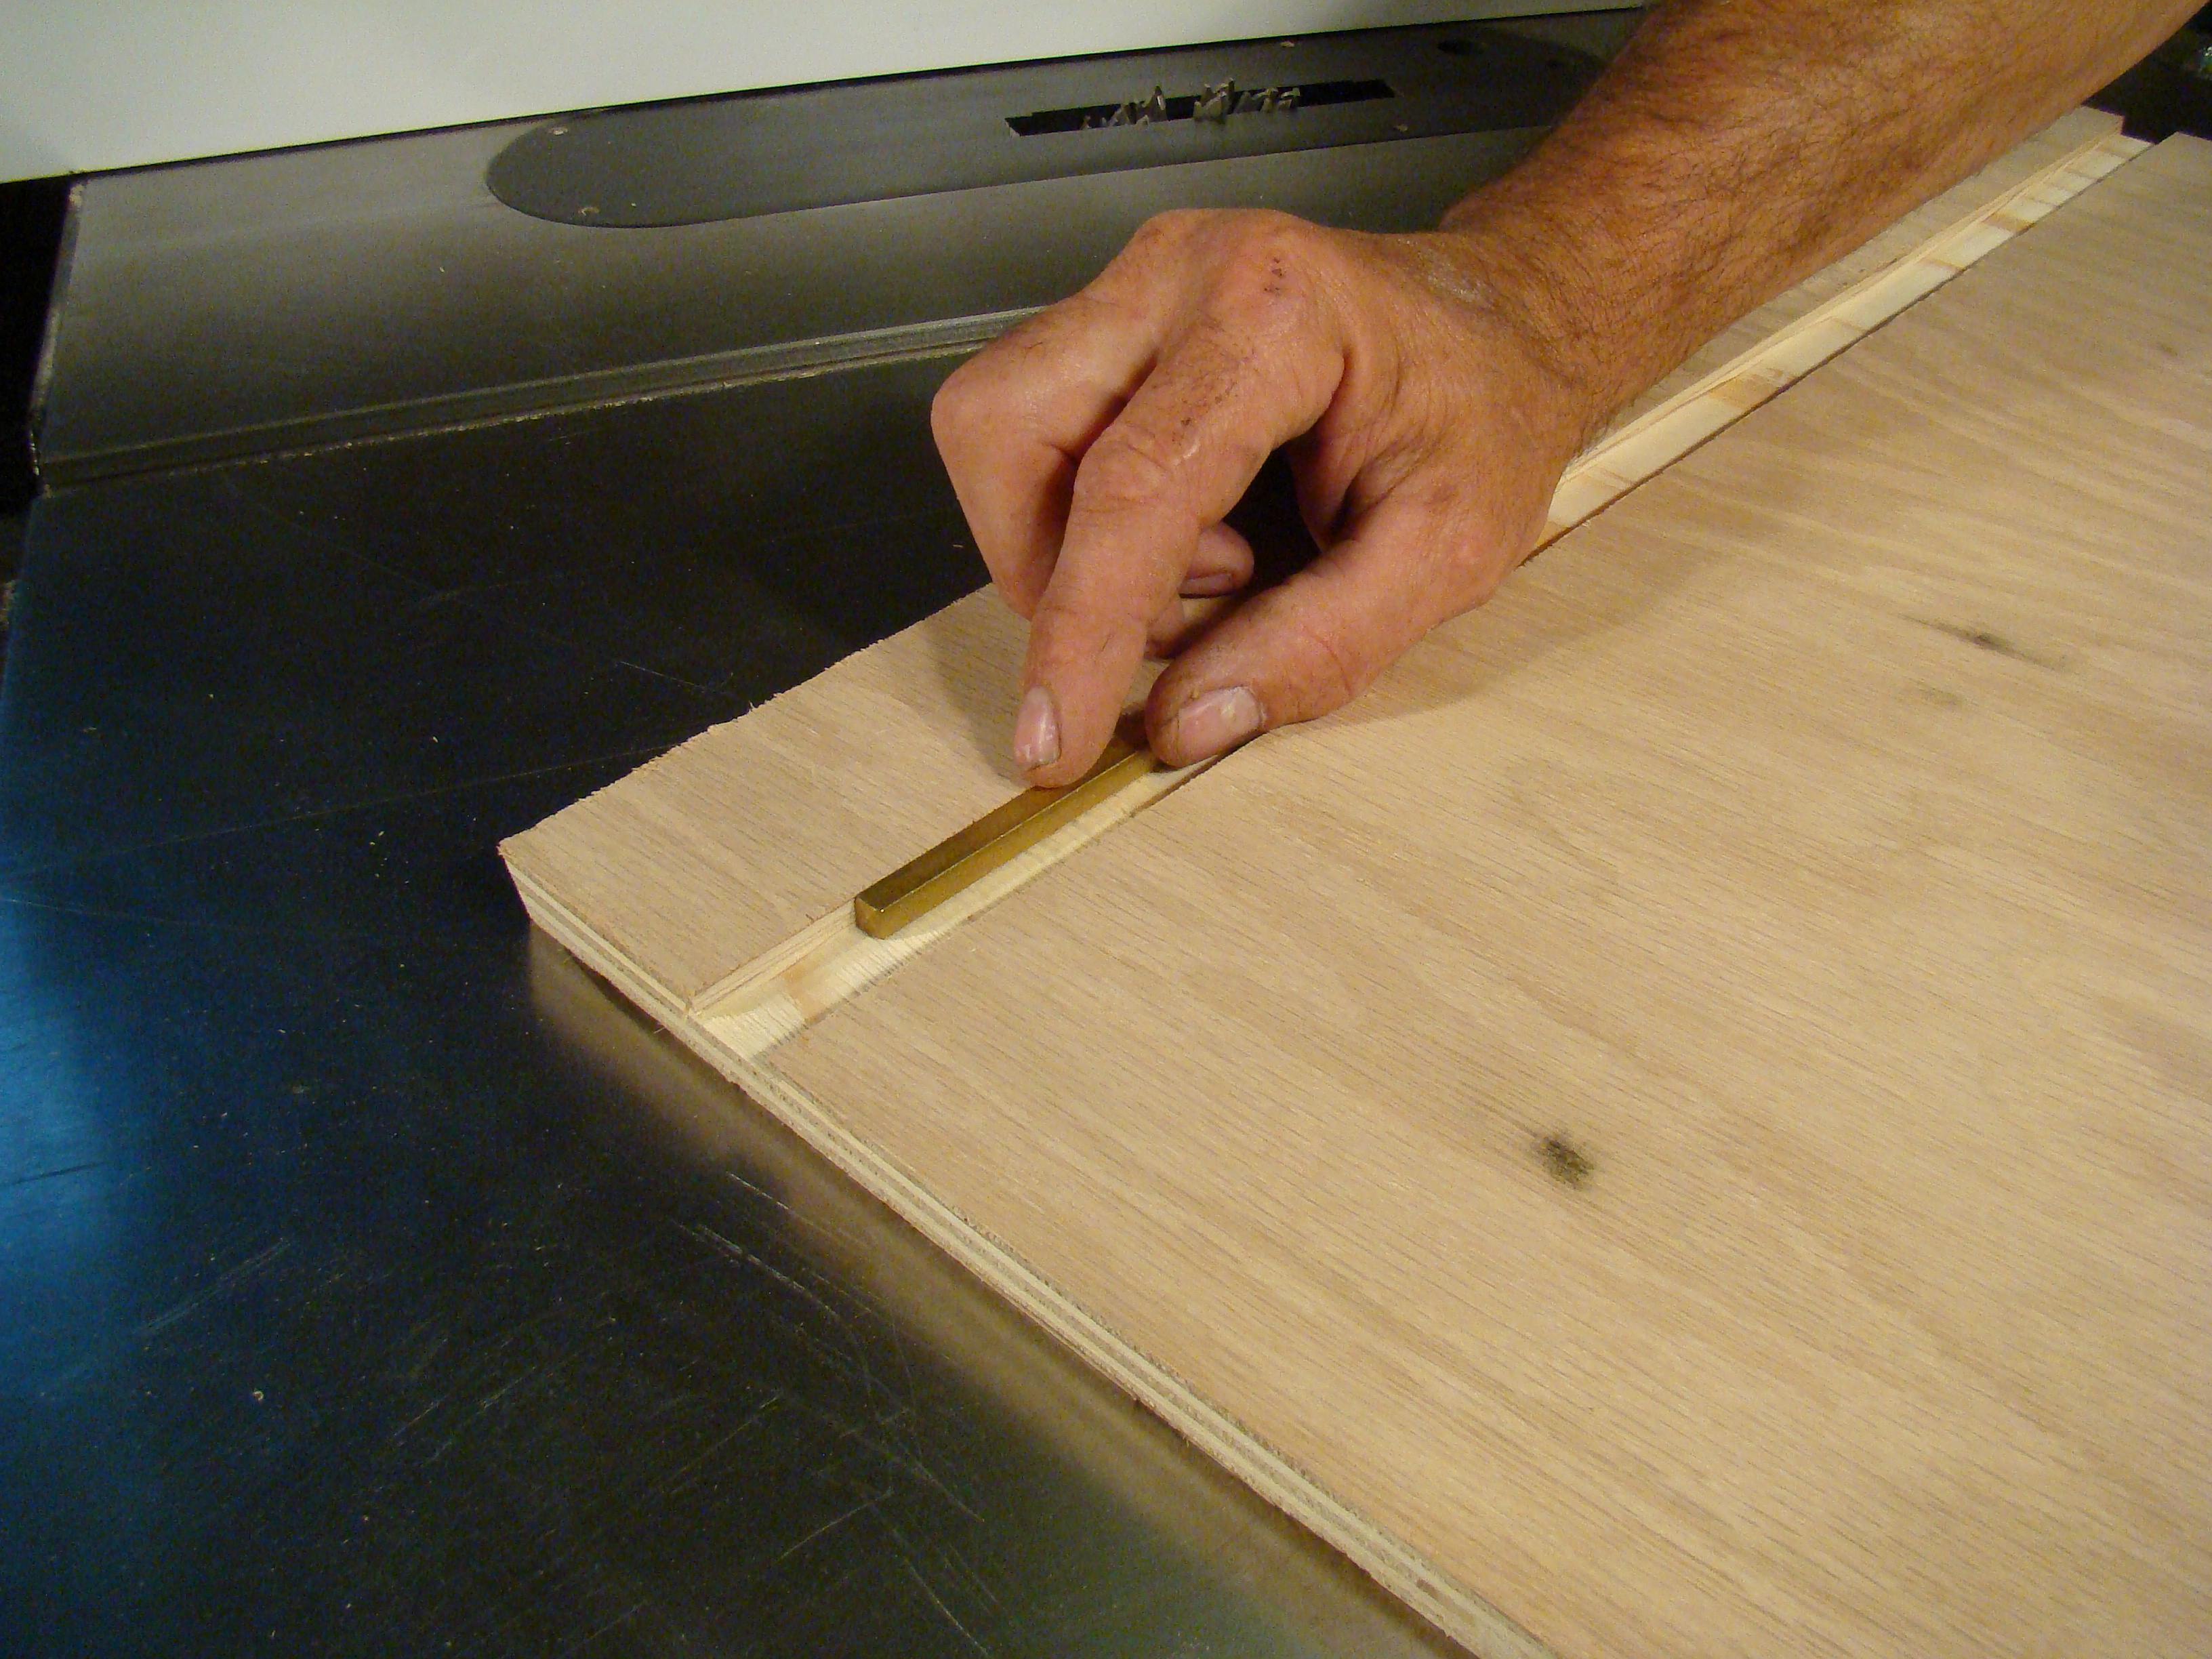
 Set the height of the blade. I prefer to do this with gauge blocks, instead of measuring. The height of the blade is 1/3 the thickness of the material I'm cutting into.
 Make a test cut. The cut can be in any material. Use a small piece for test cuts (12" x 16" or so) so it's easy to handle.
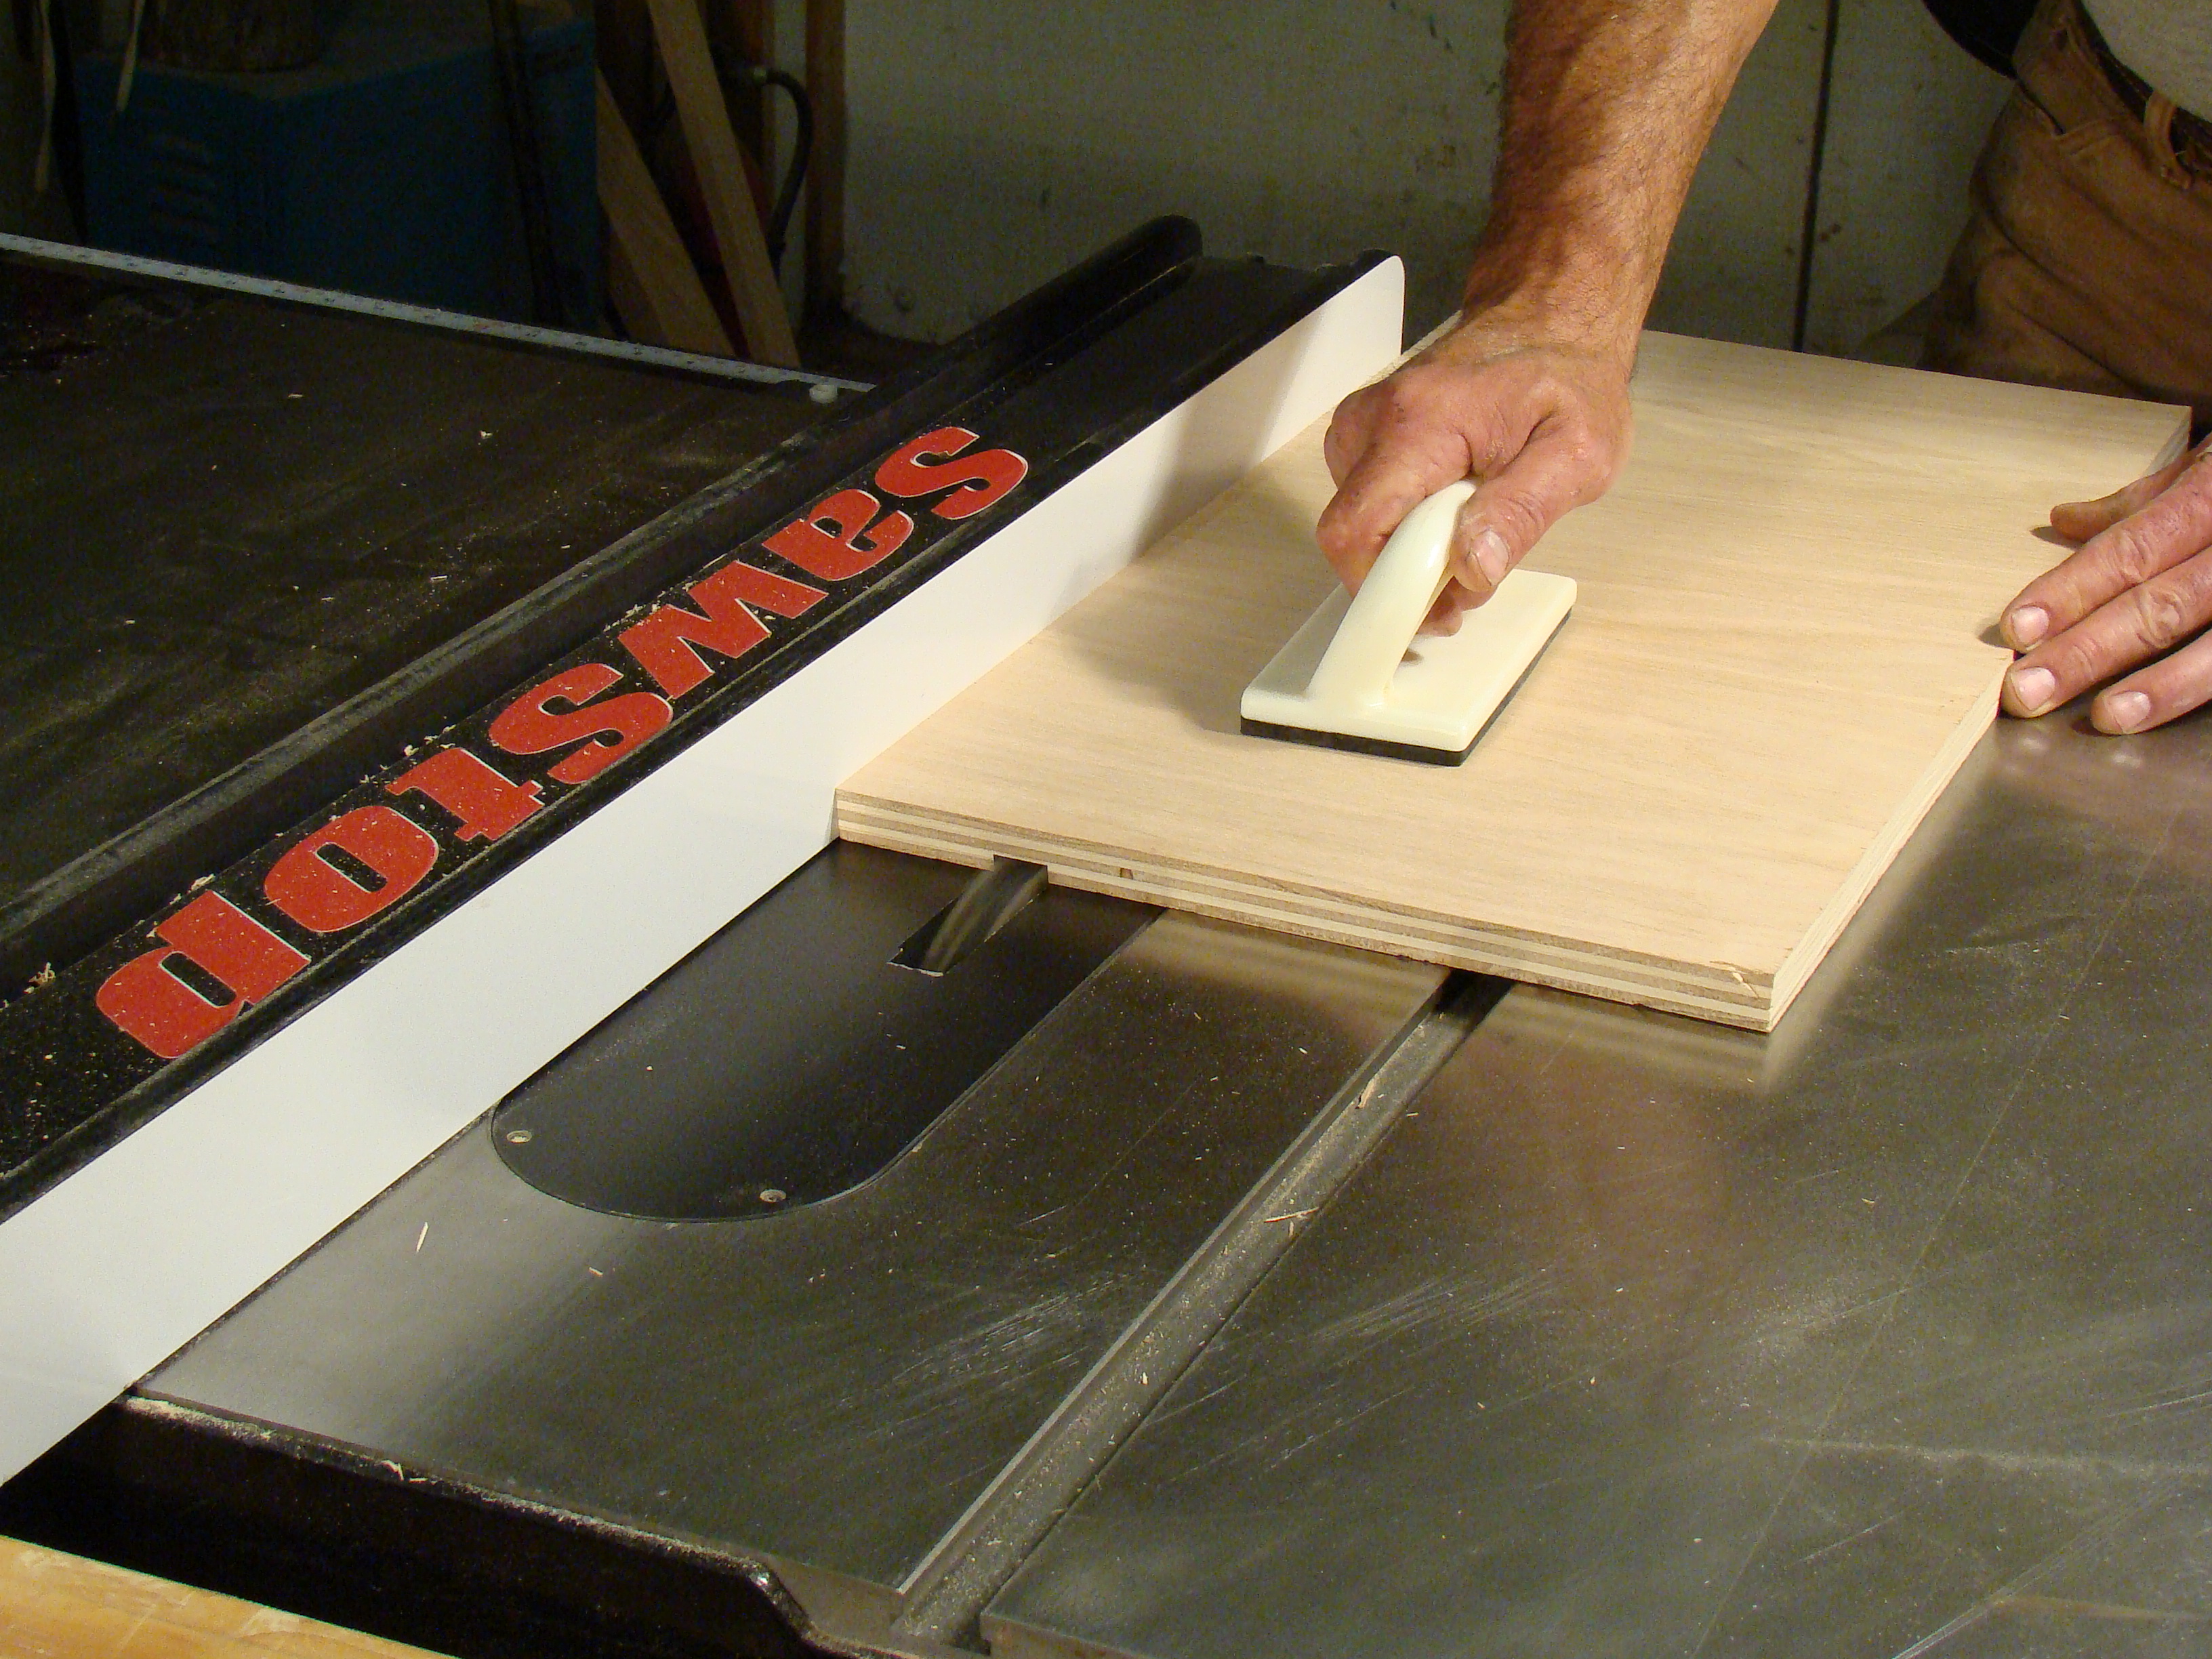
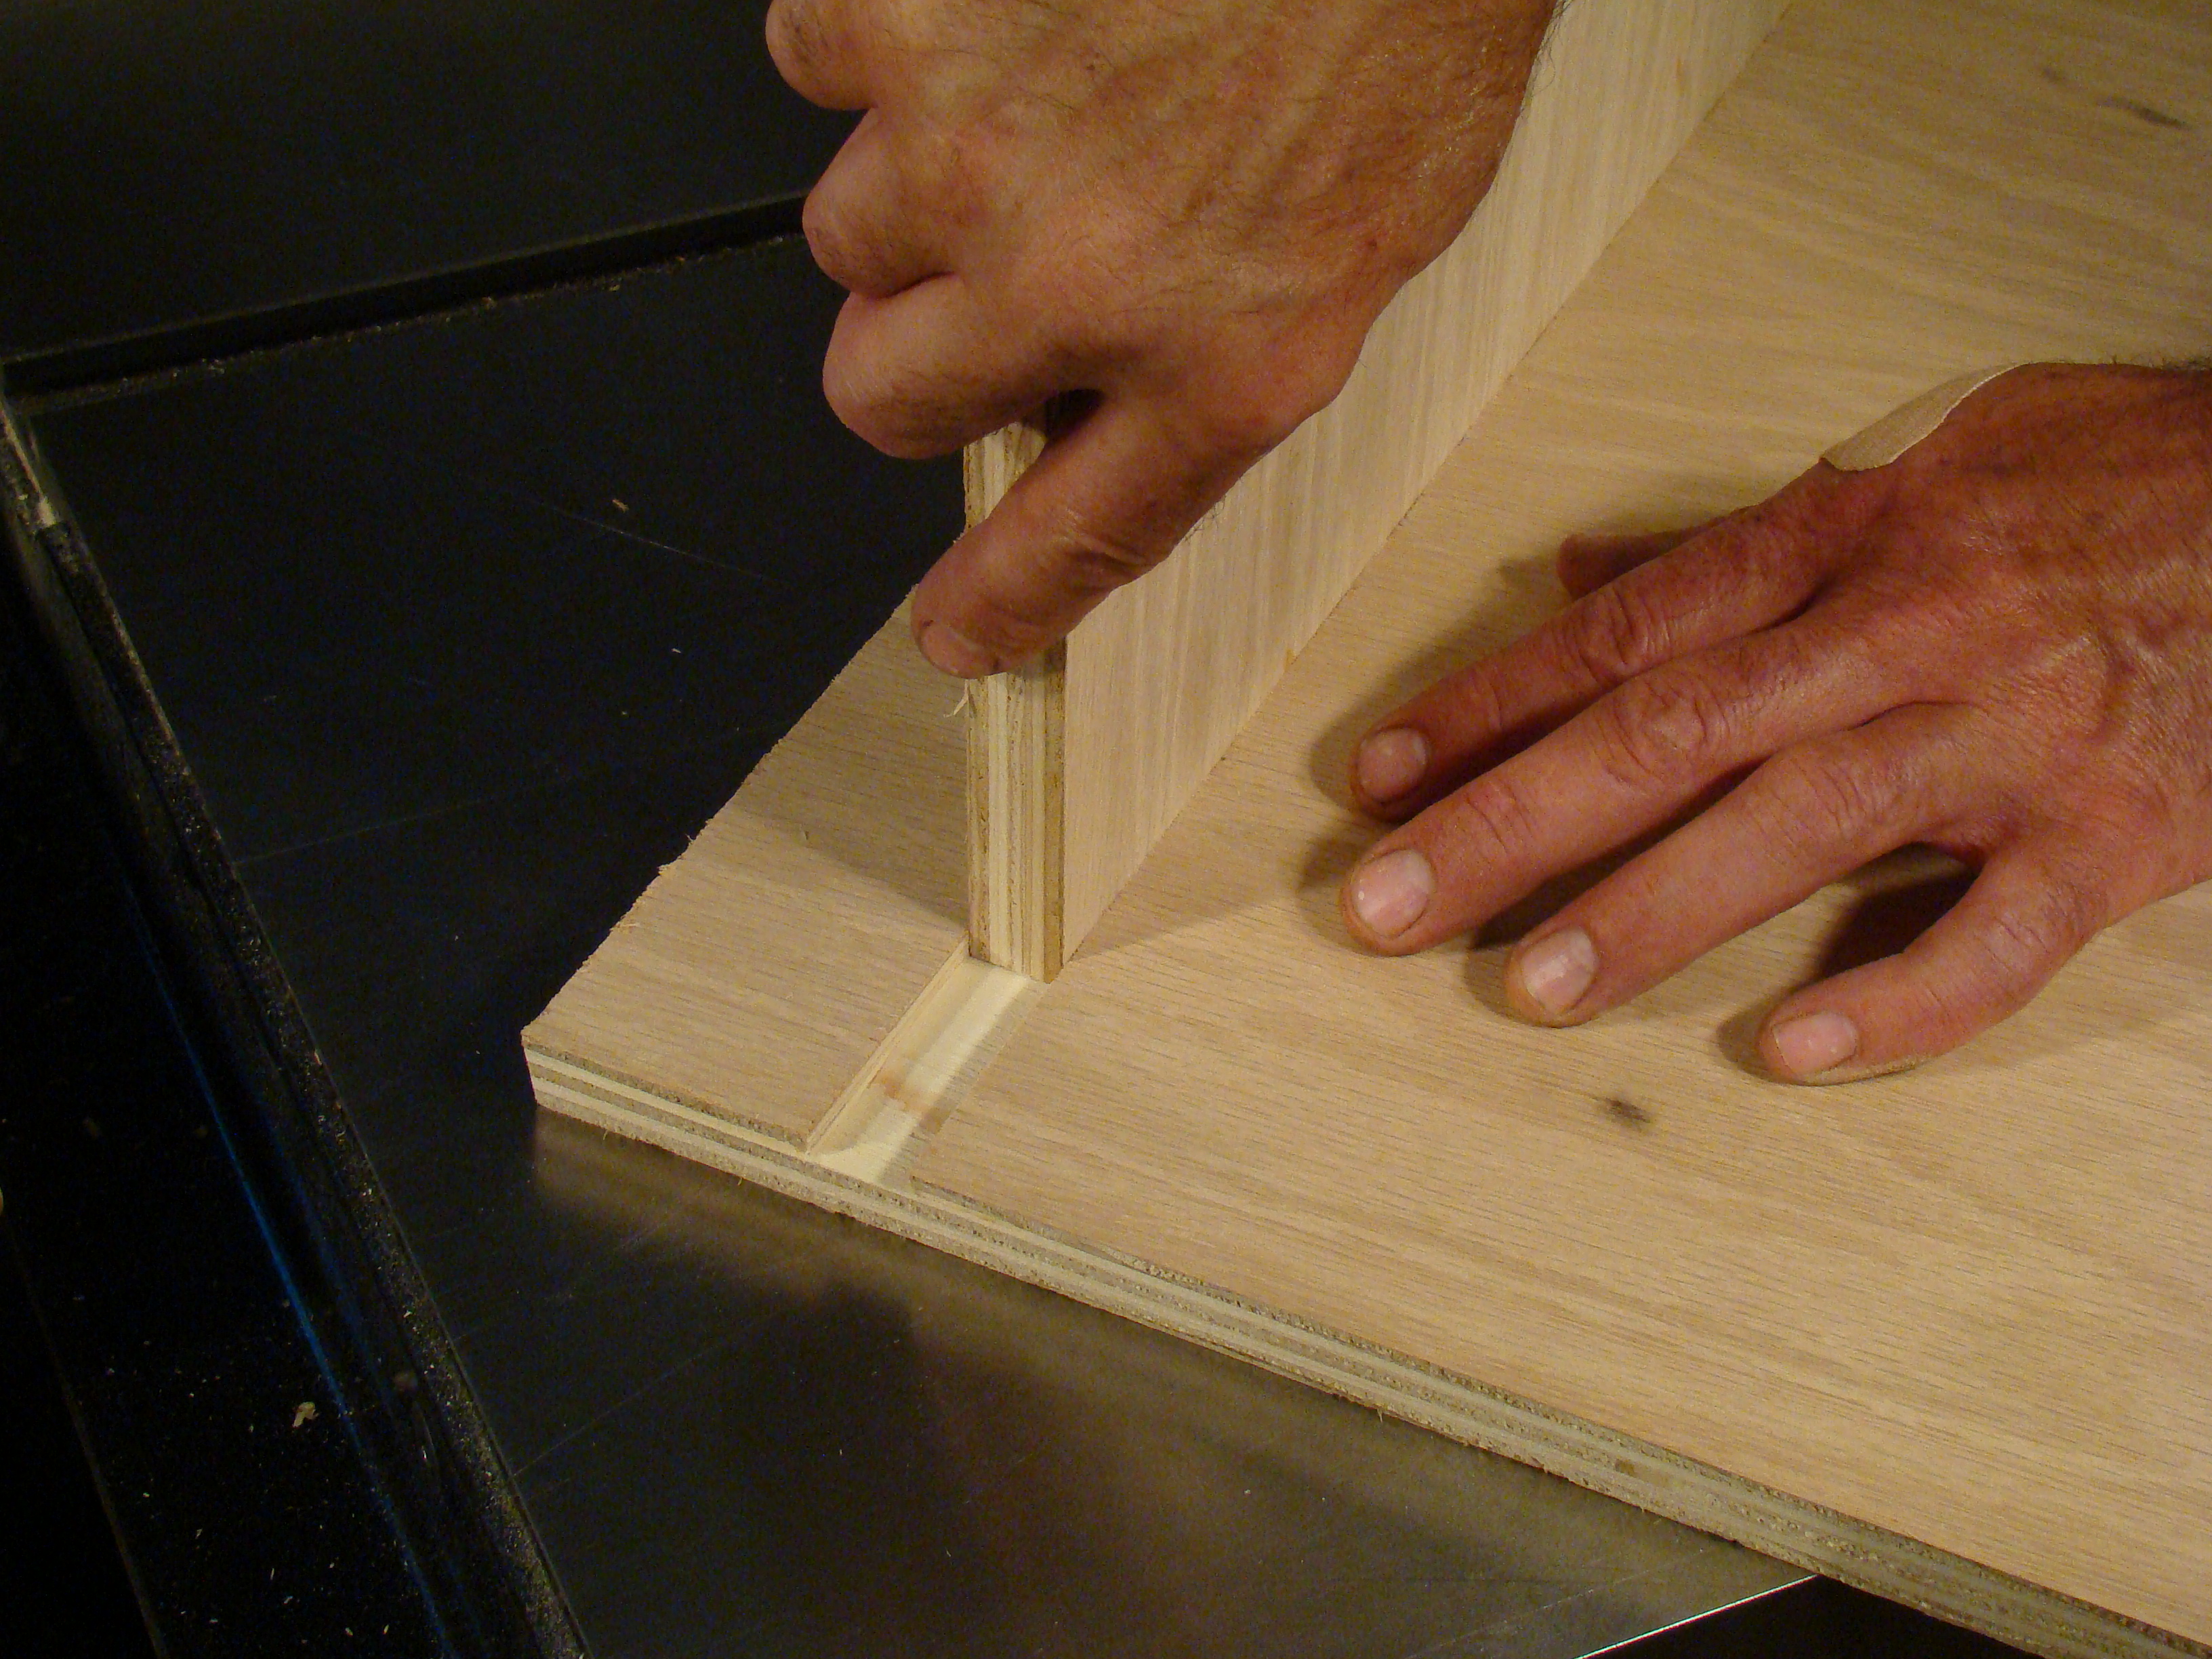 Check your work. You should be able to push the shelf material into the dado. You shouldn't have to pound on it.
 Lift up on the shelf, and the piece with the dado in it should come along for the ride. Even without glue there should be enough friction between the parts to keep them together.
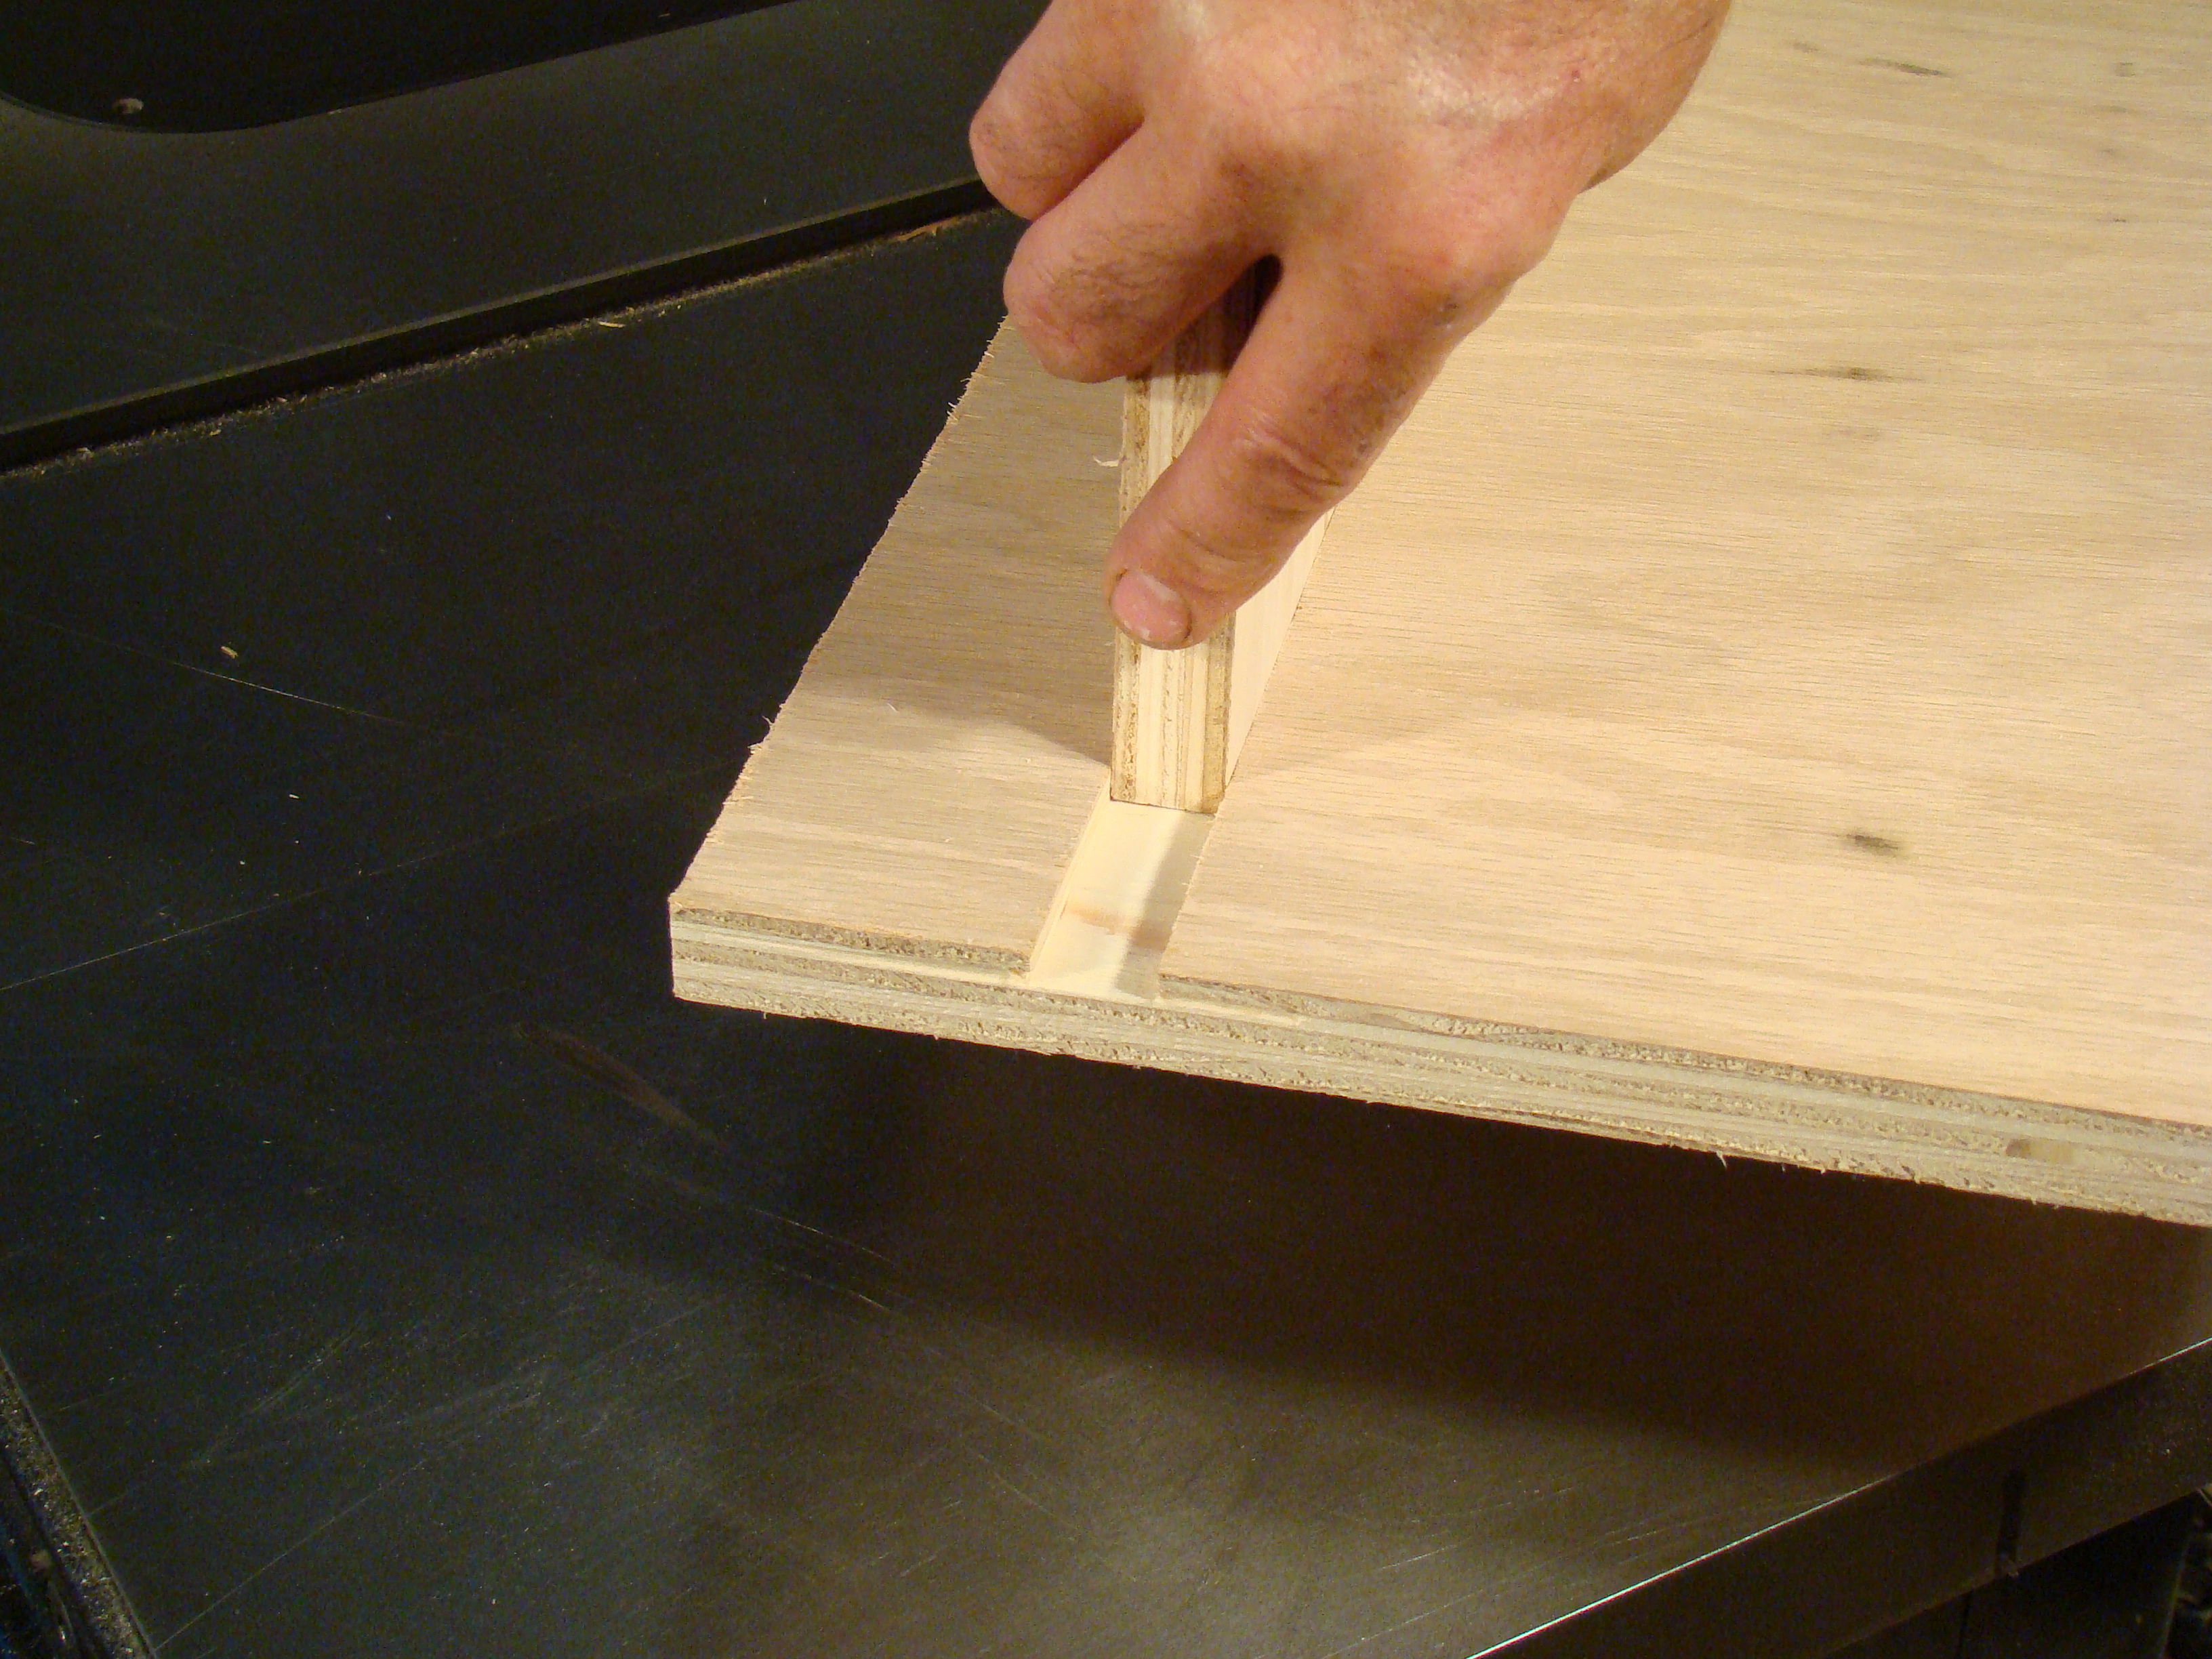
 Check the depth. The top of the bar stock should be even with the face of the material. Adjust the width and height of the dado head until the set up is correct.
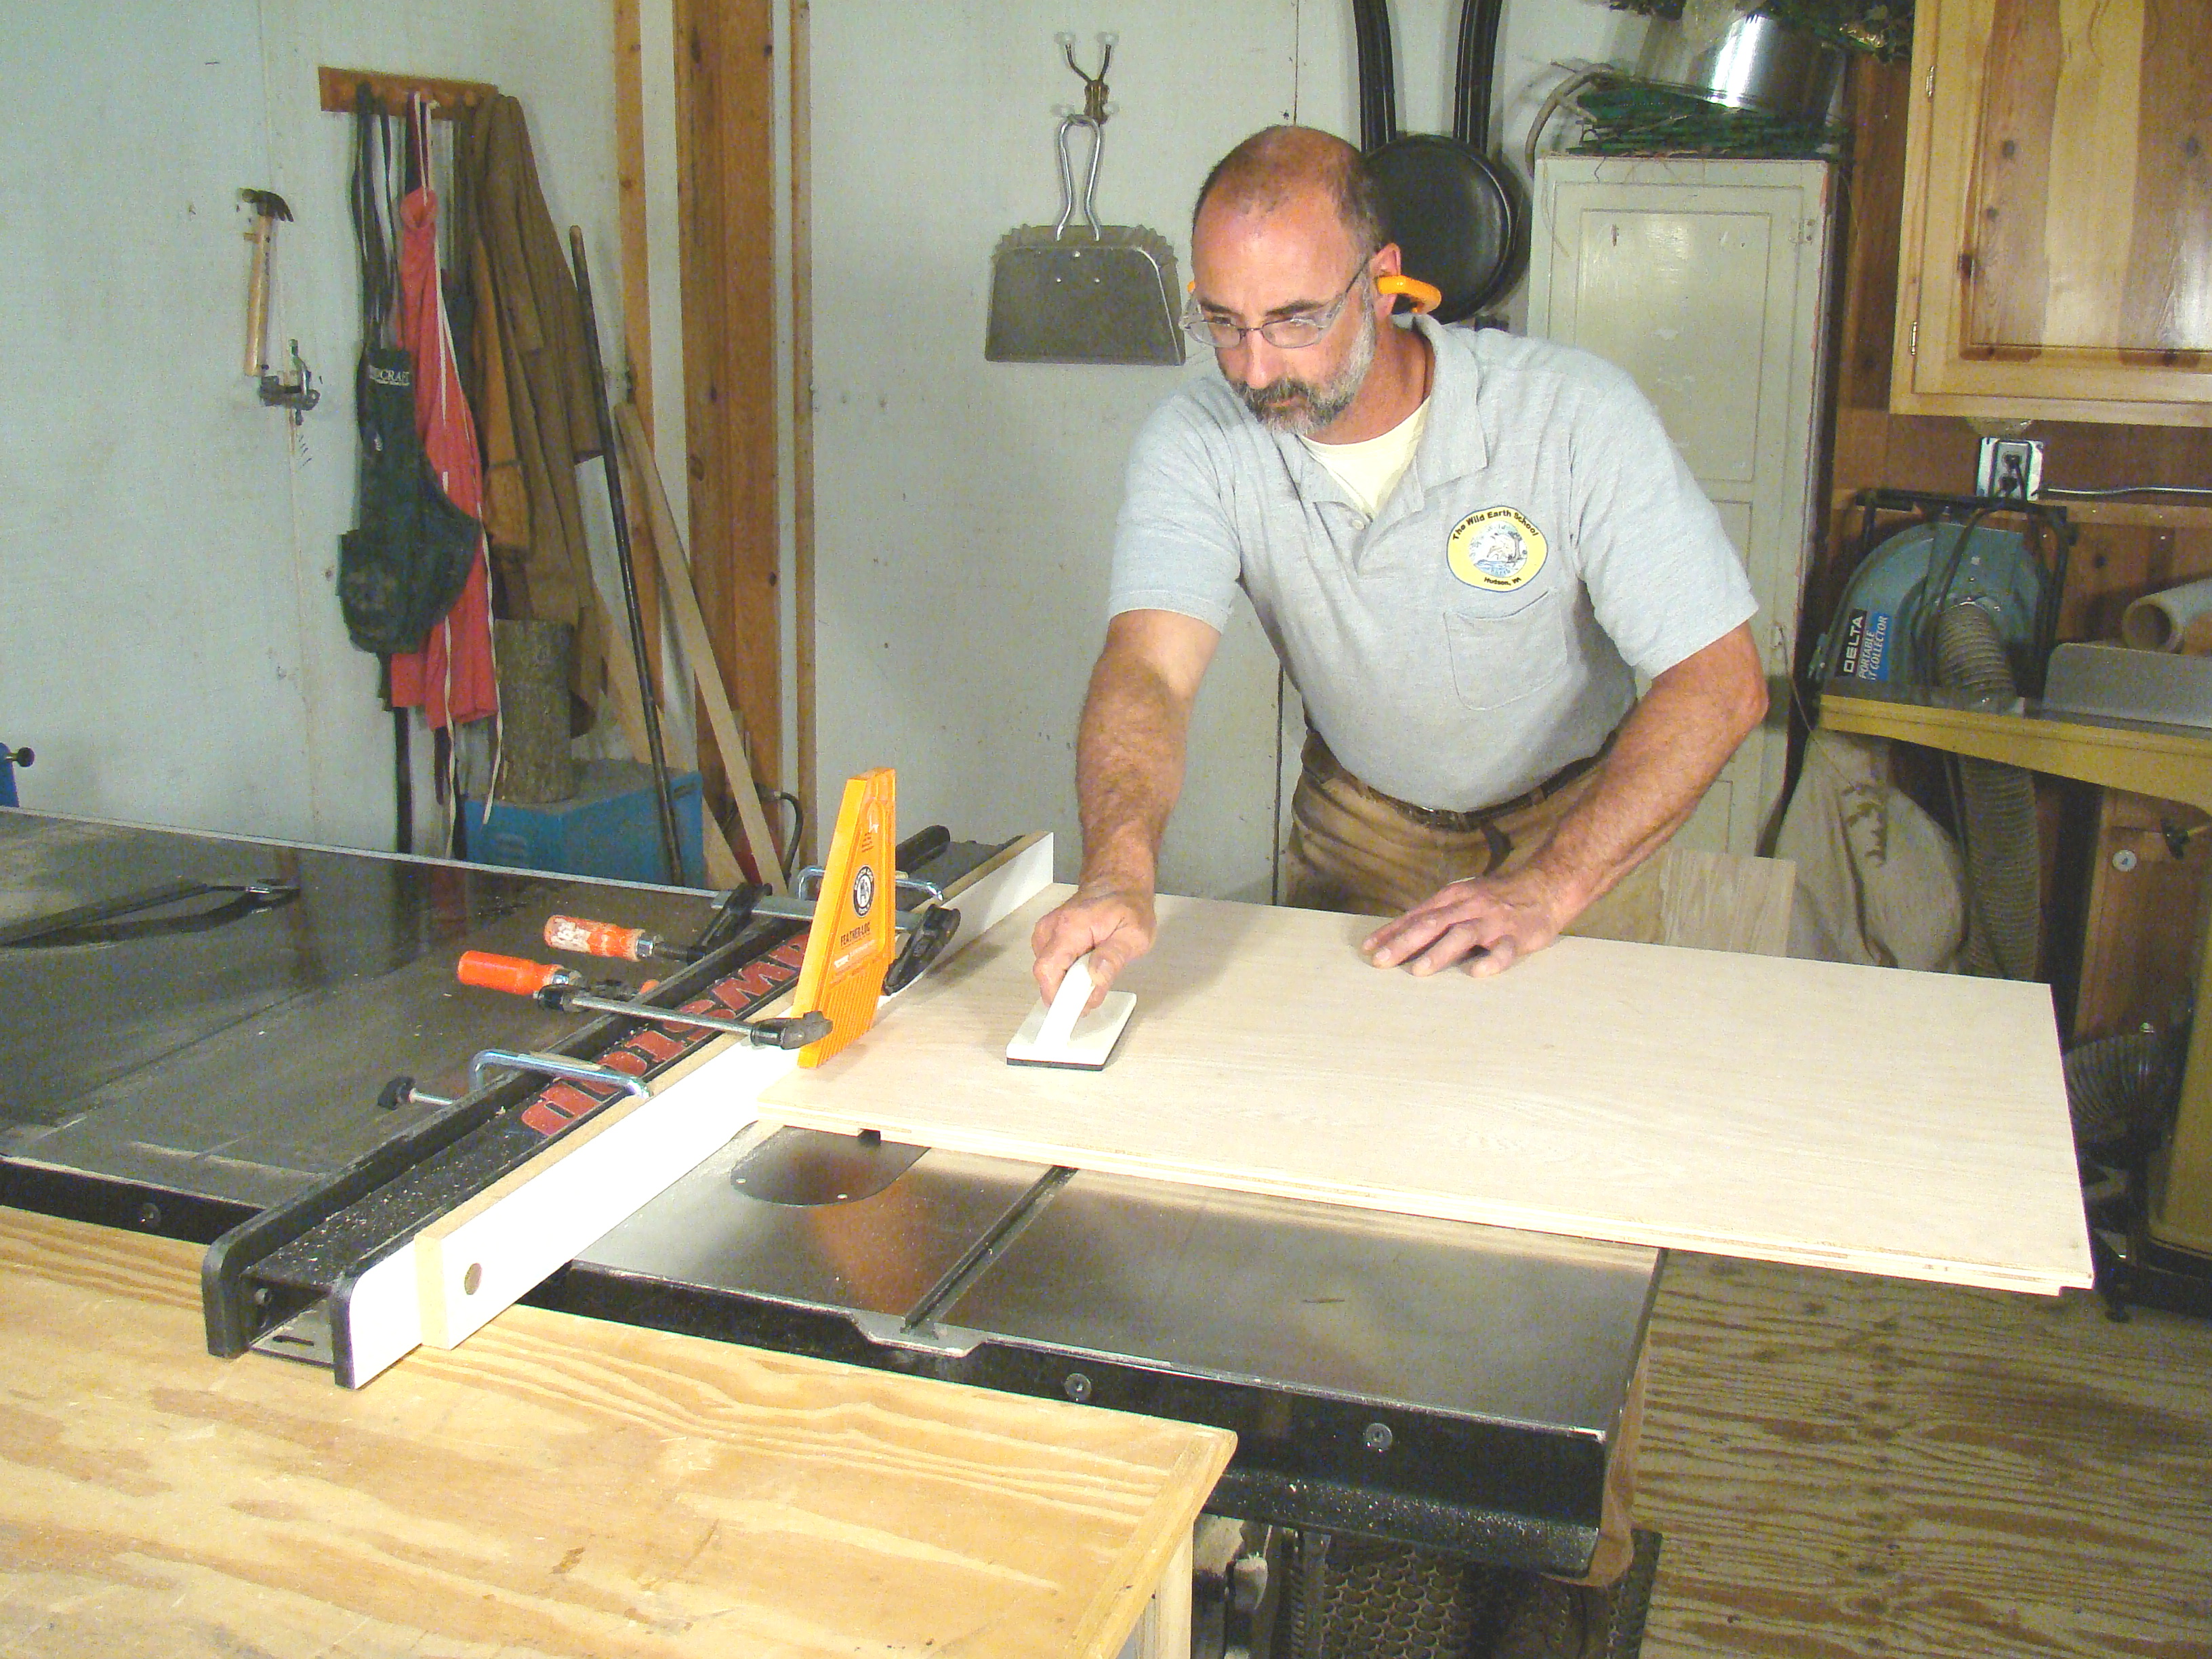
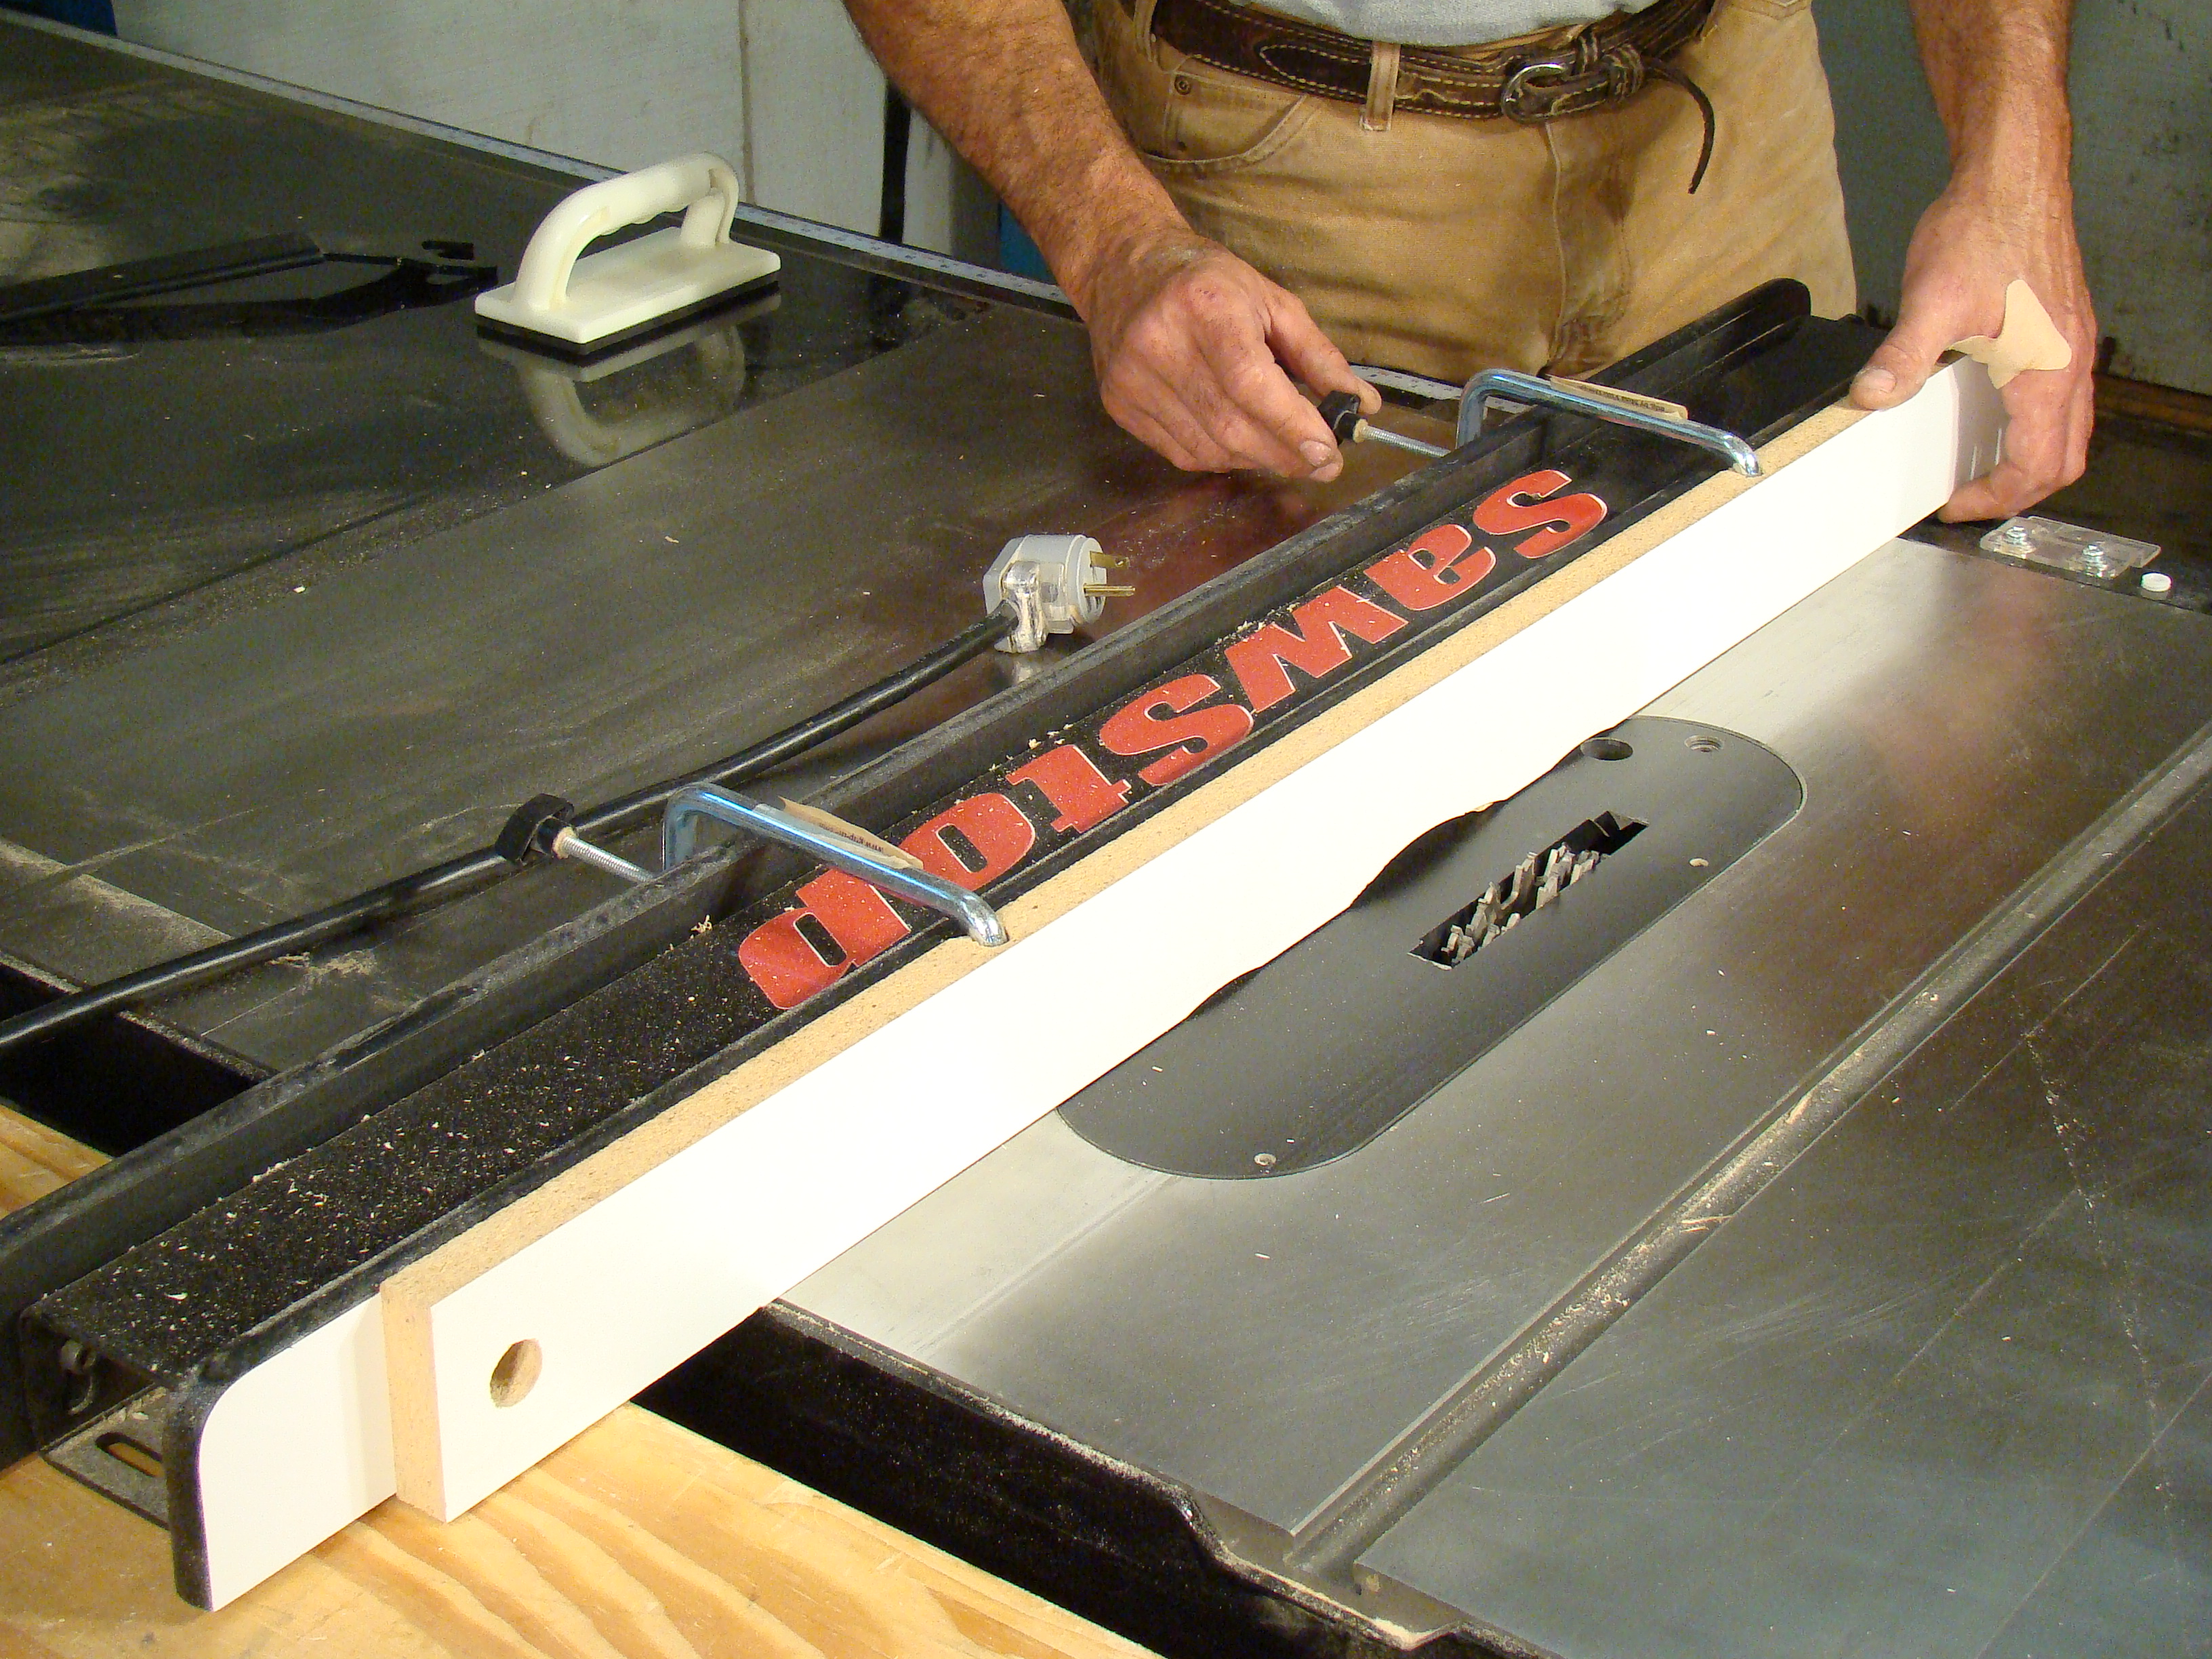 Add a sacrificial fence to the saw. This one is made out of melamine. With a sacrificial fence in place you don't have to worry about scarring your fence when cutting rabbets. The scoop that's cut out of the bottom of the sacrificial fence allows me to bury part of the blade. I can toggle between 3/4" wide and 1/4" wide rabbets without disassembling the stack.
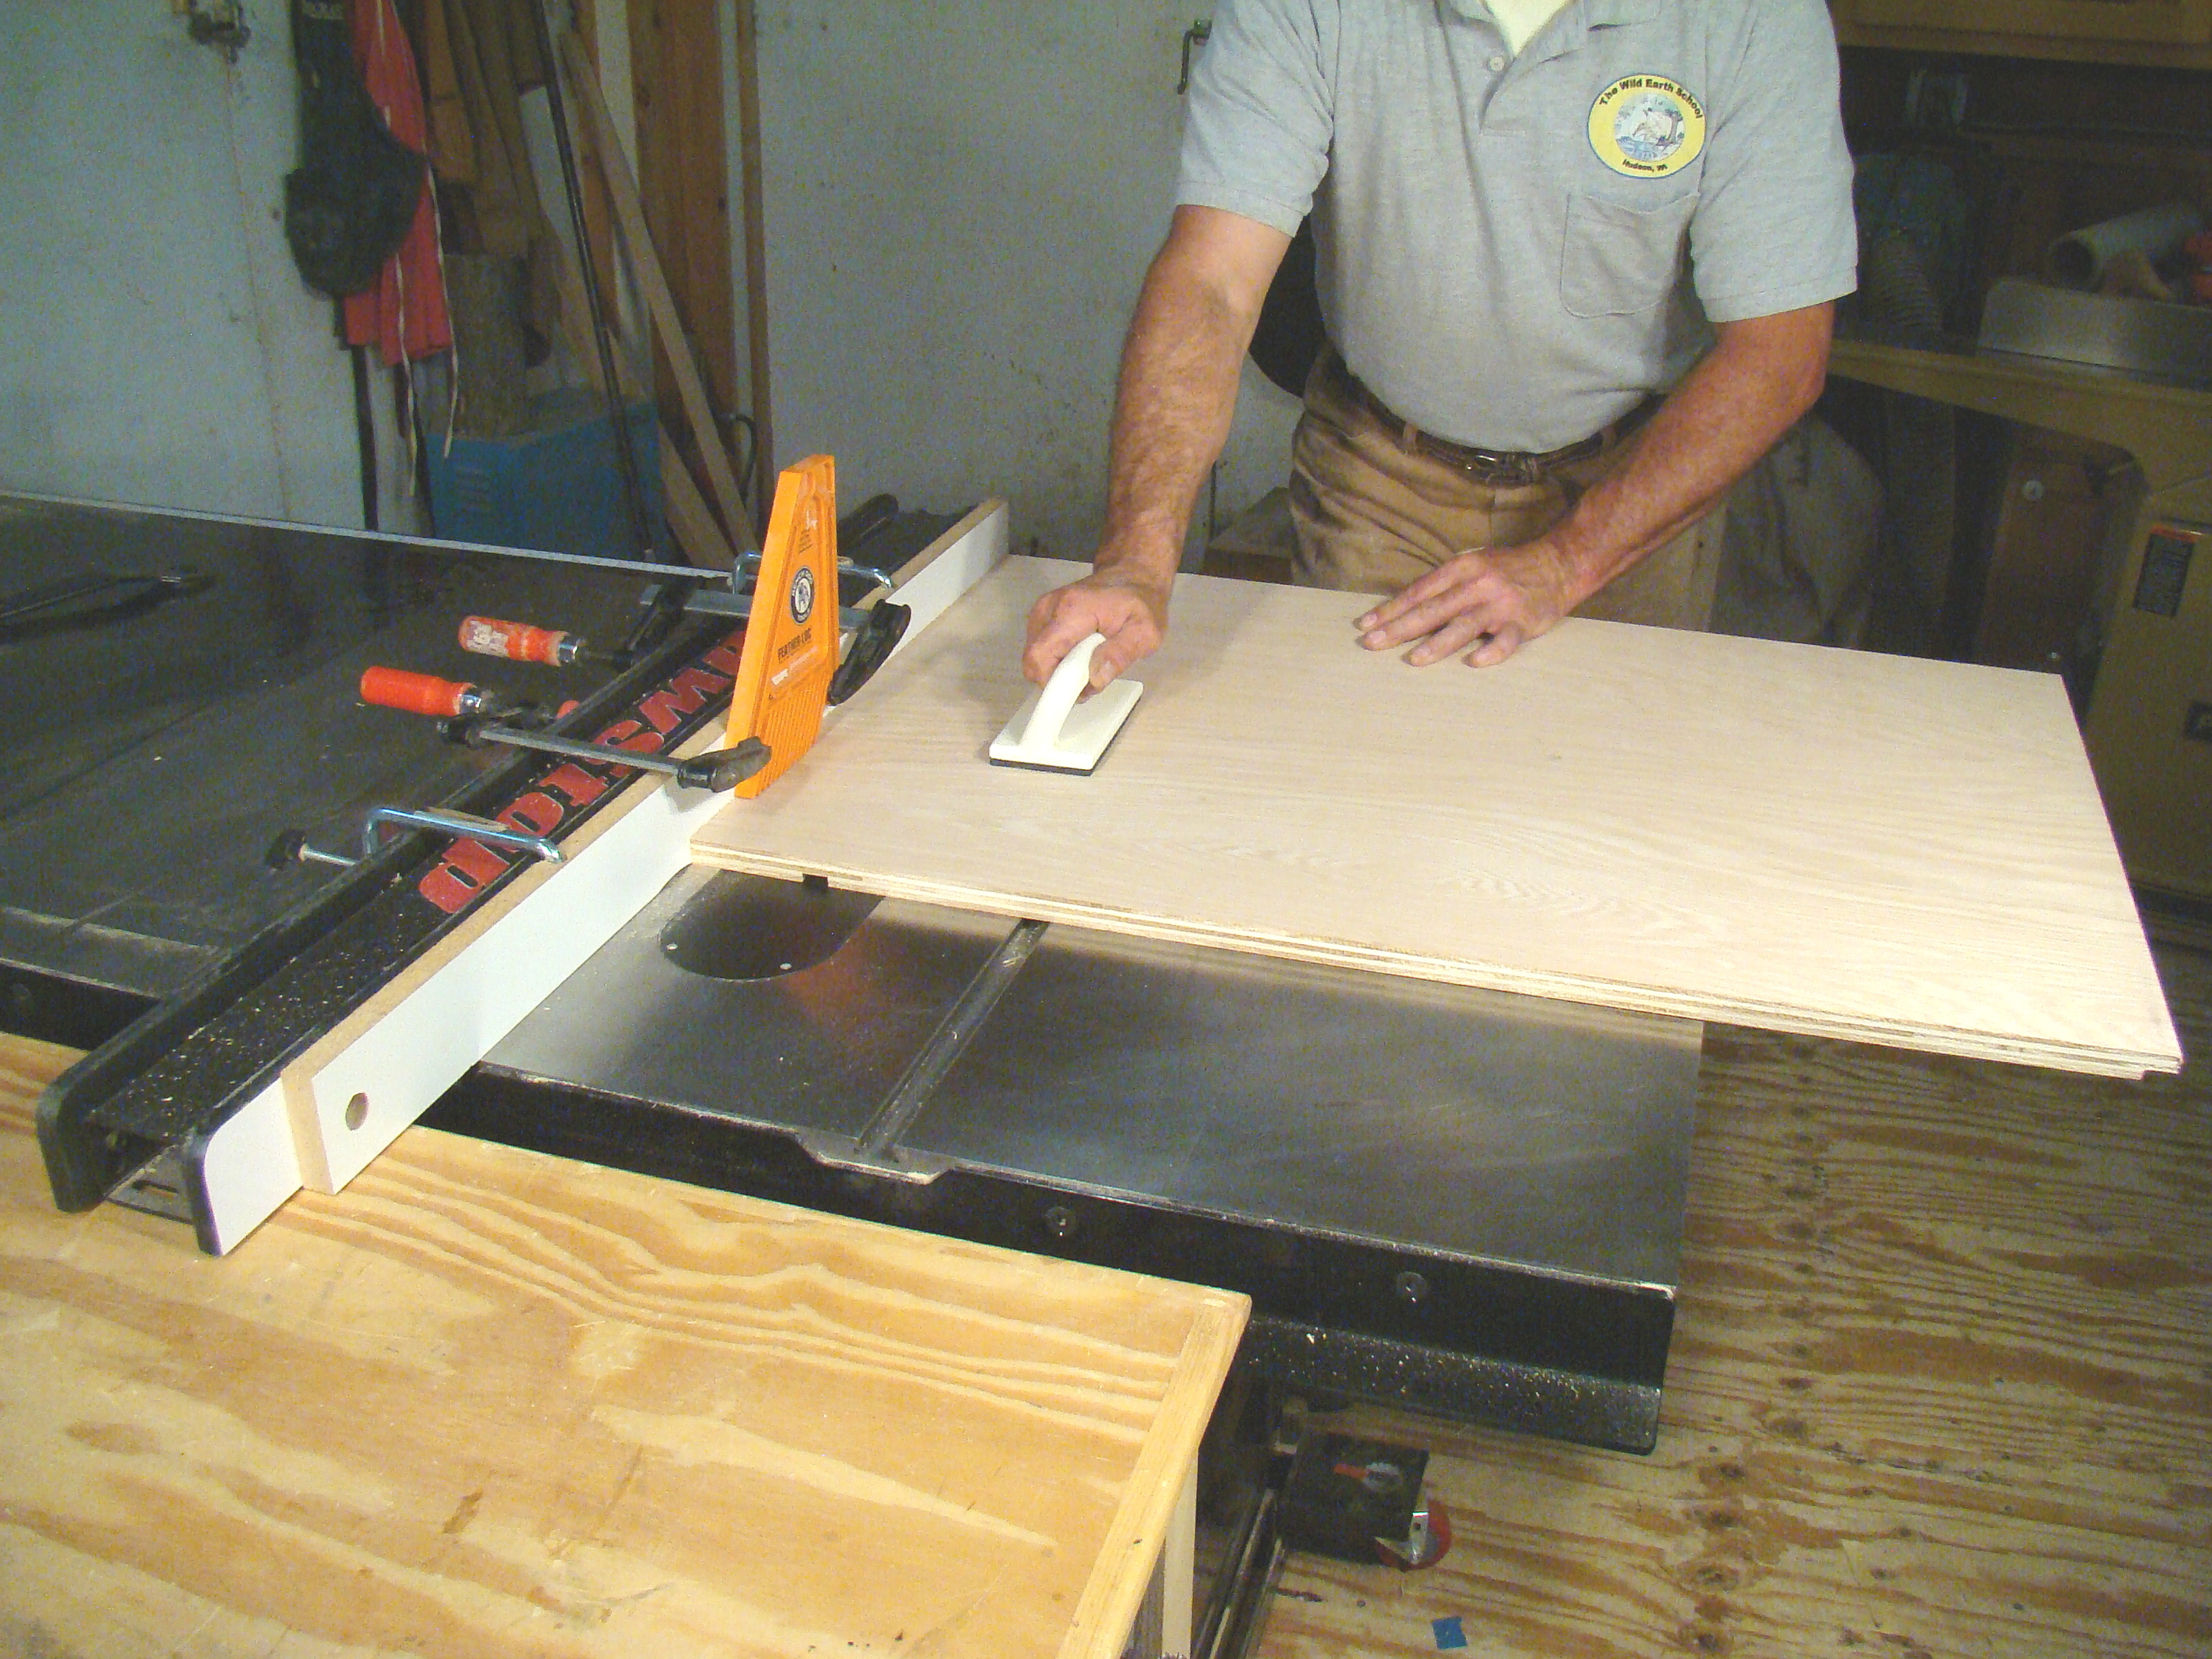
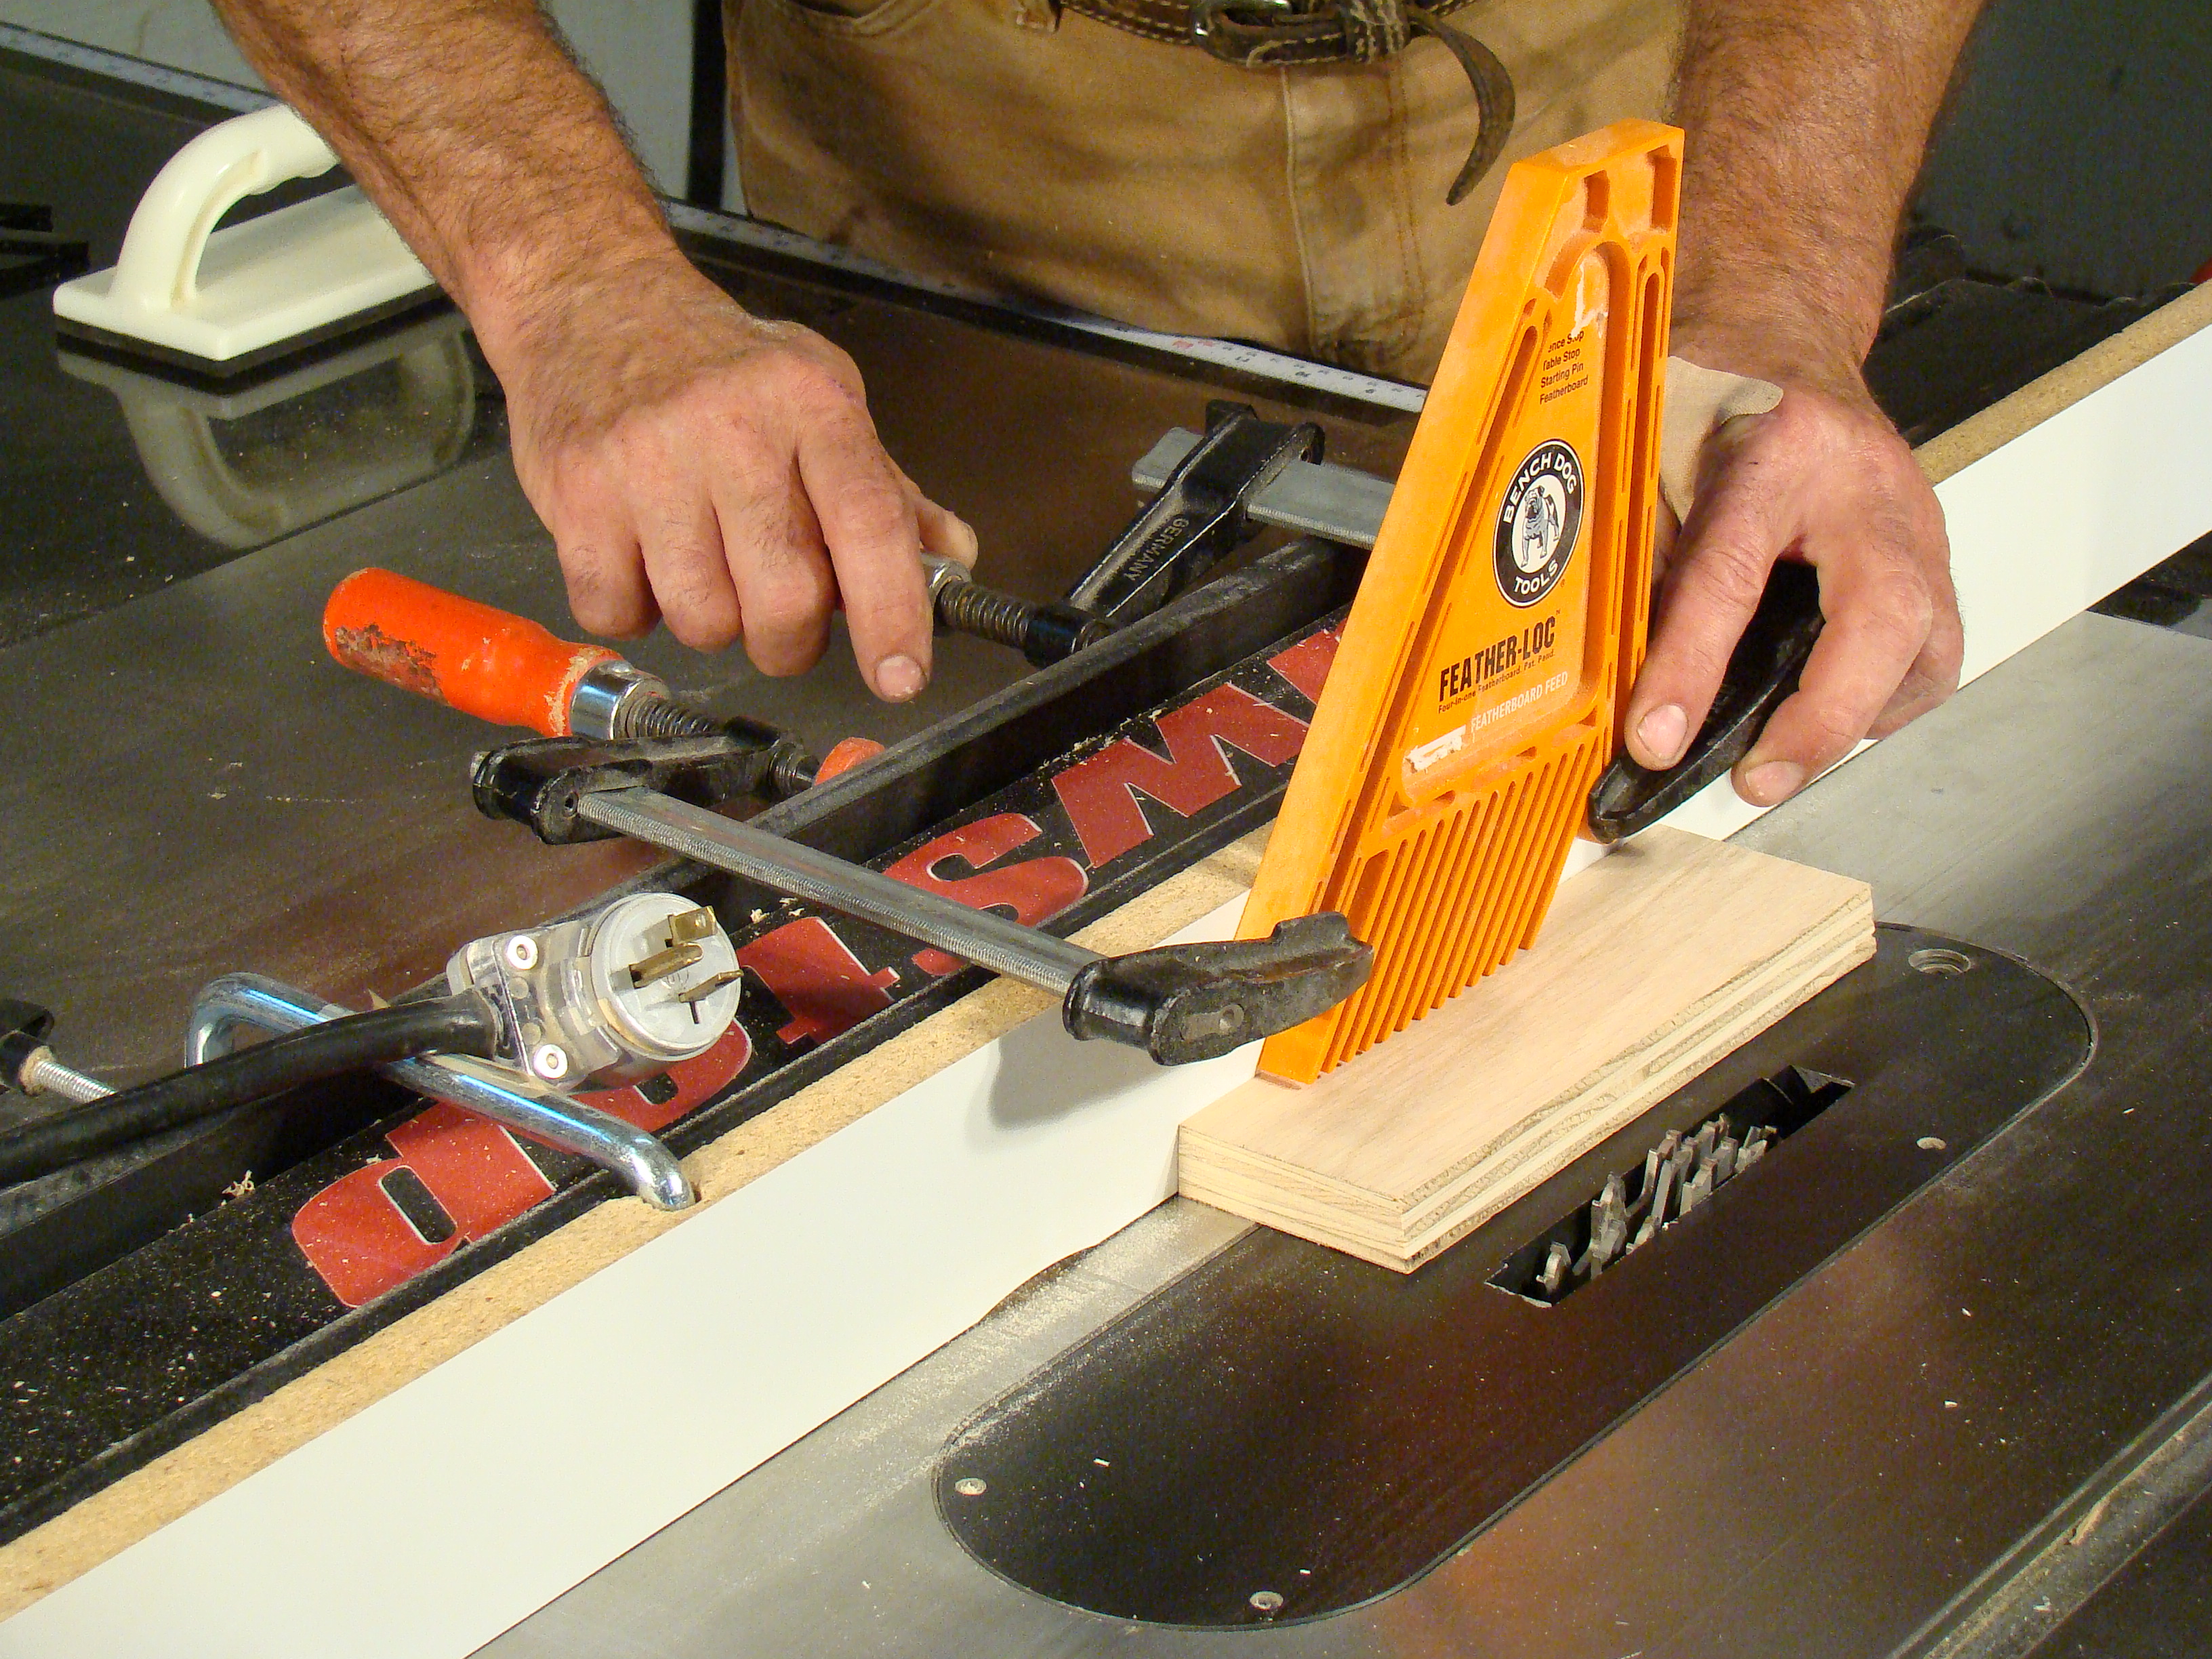 Add a feather board. Position the feather board so it'll be right over the dado head. Use a piece of scrap (the same thickness as your project material) to set the down pressure of the feather board.
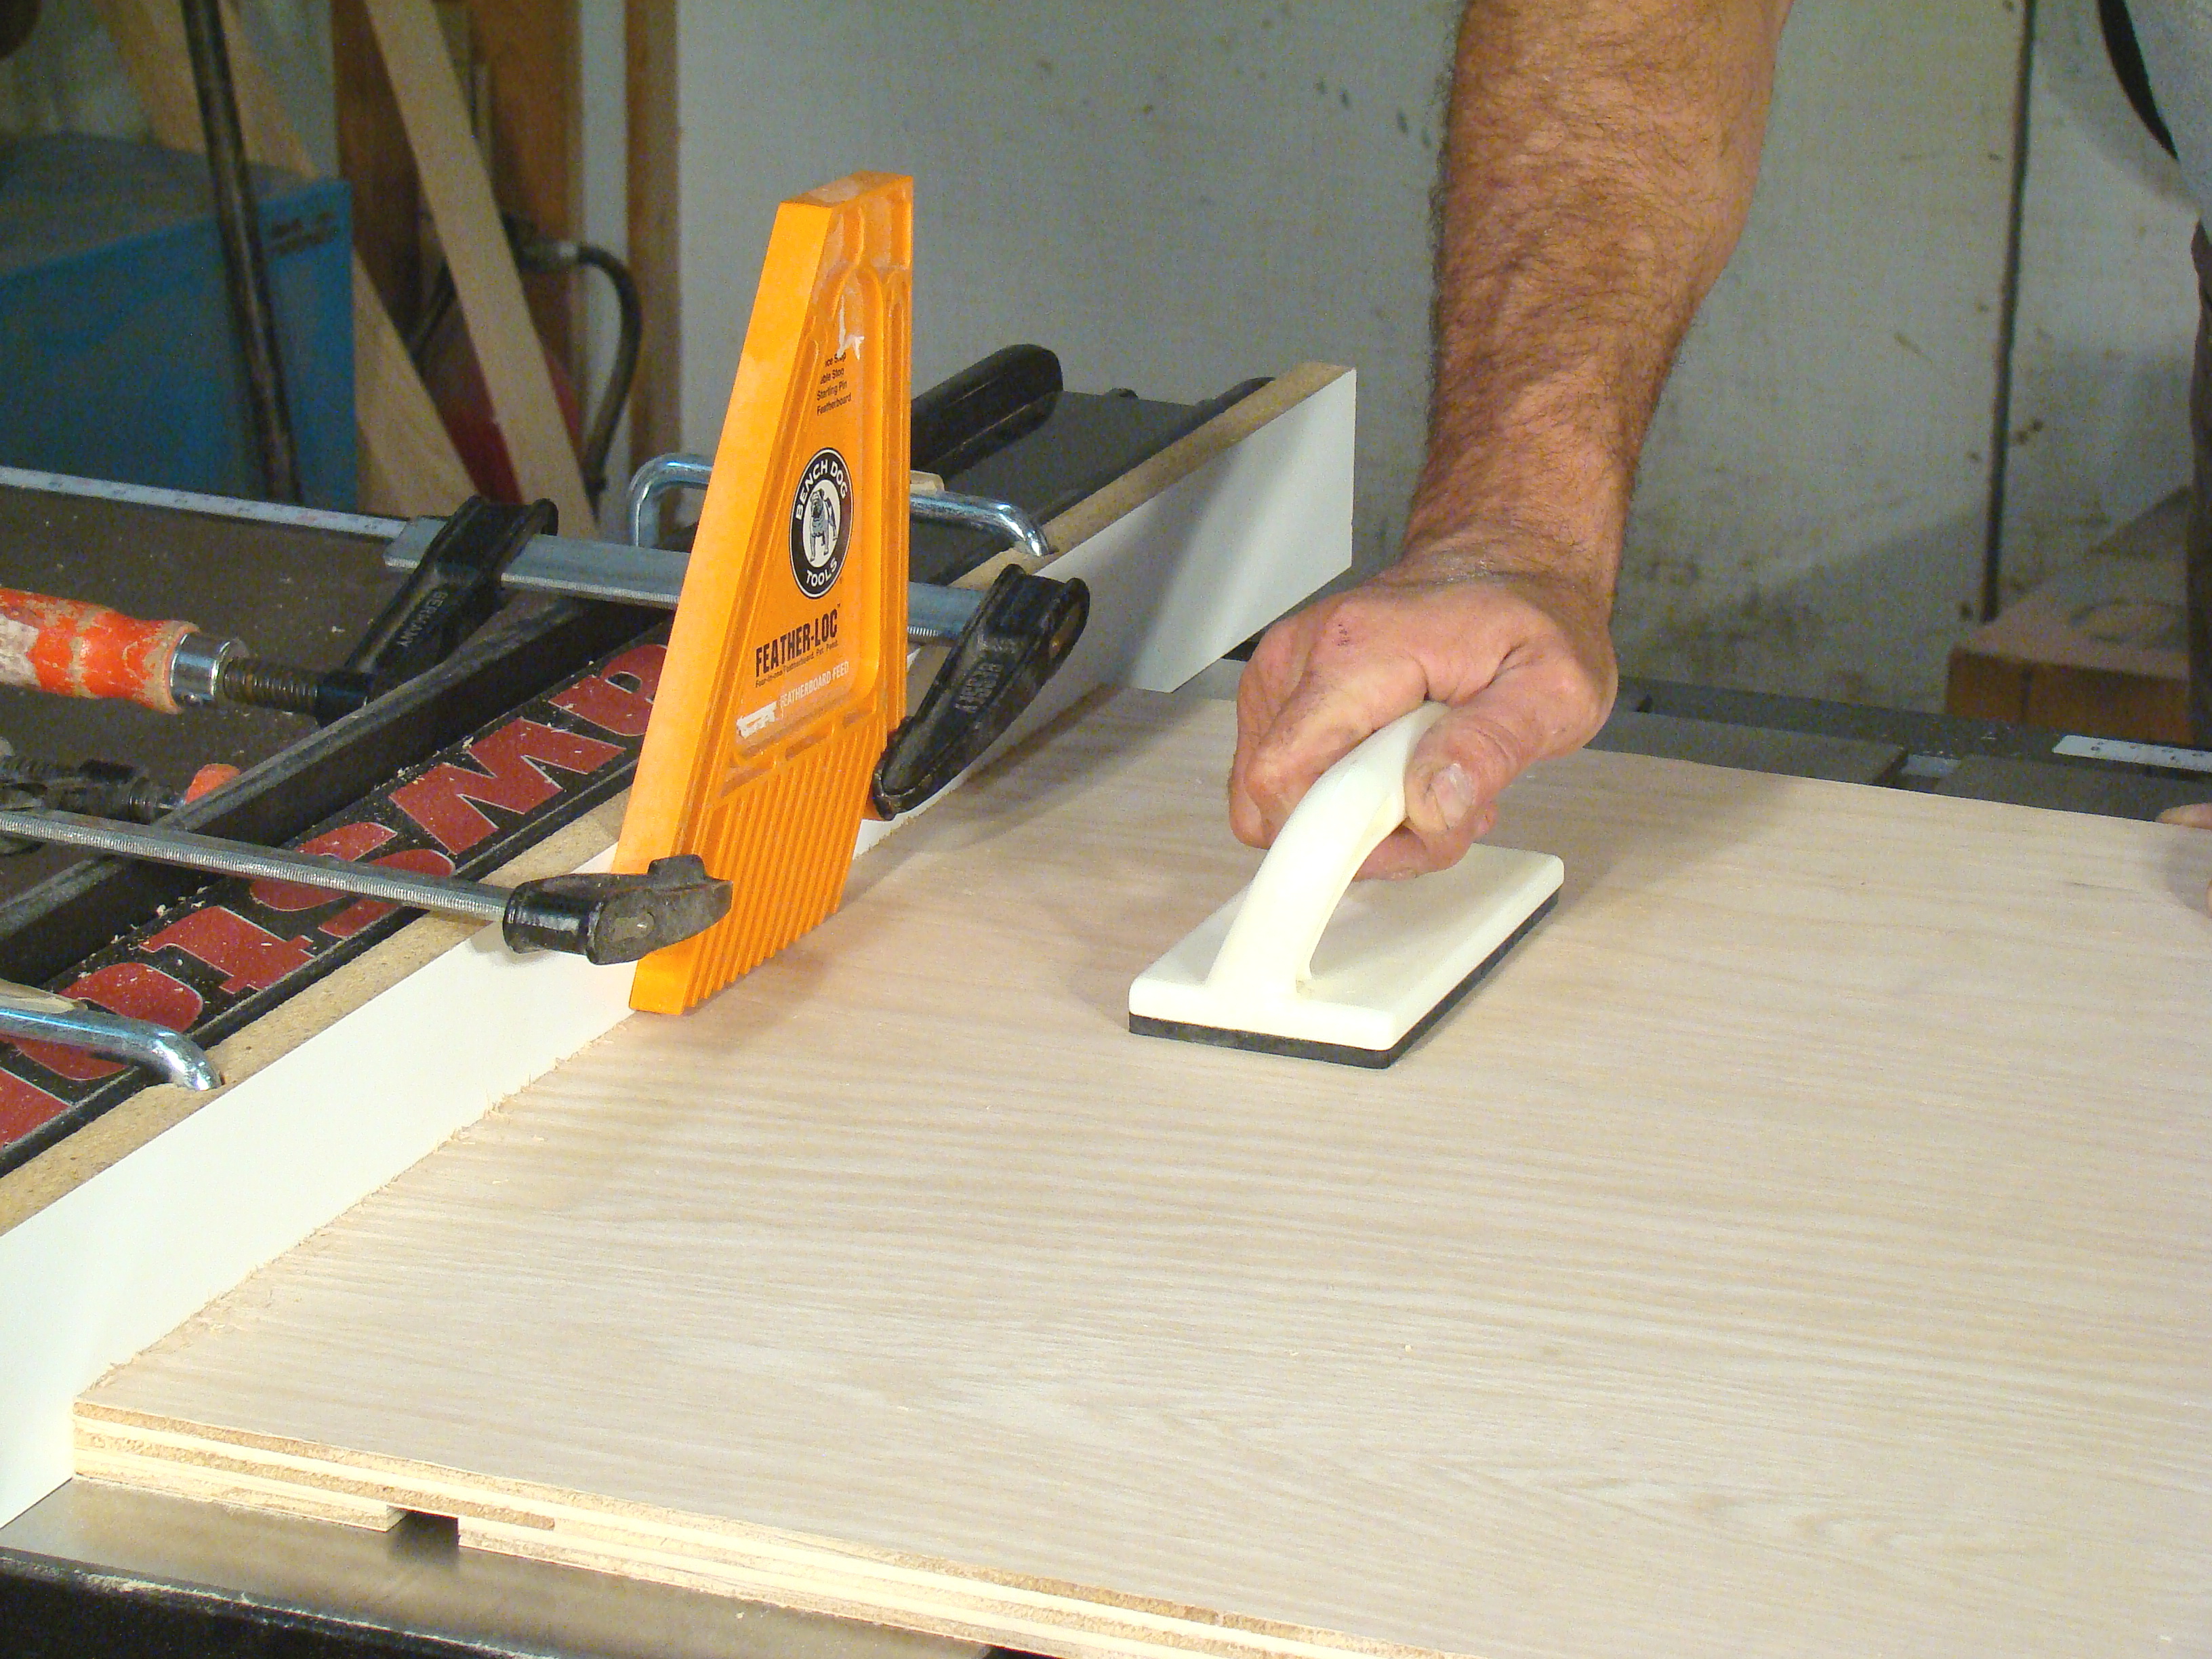
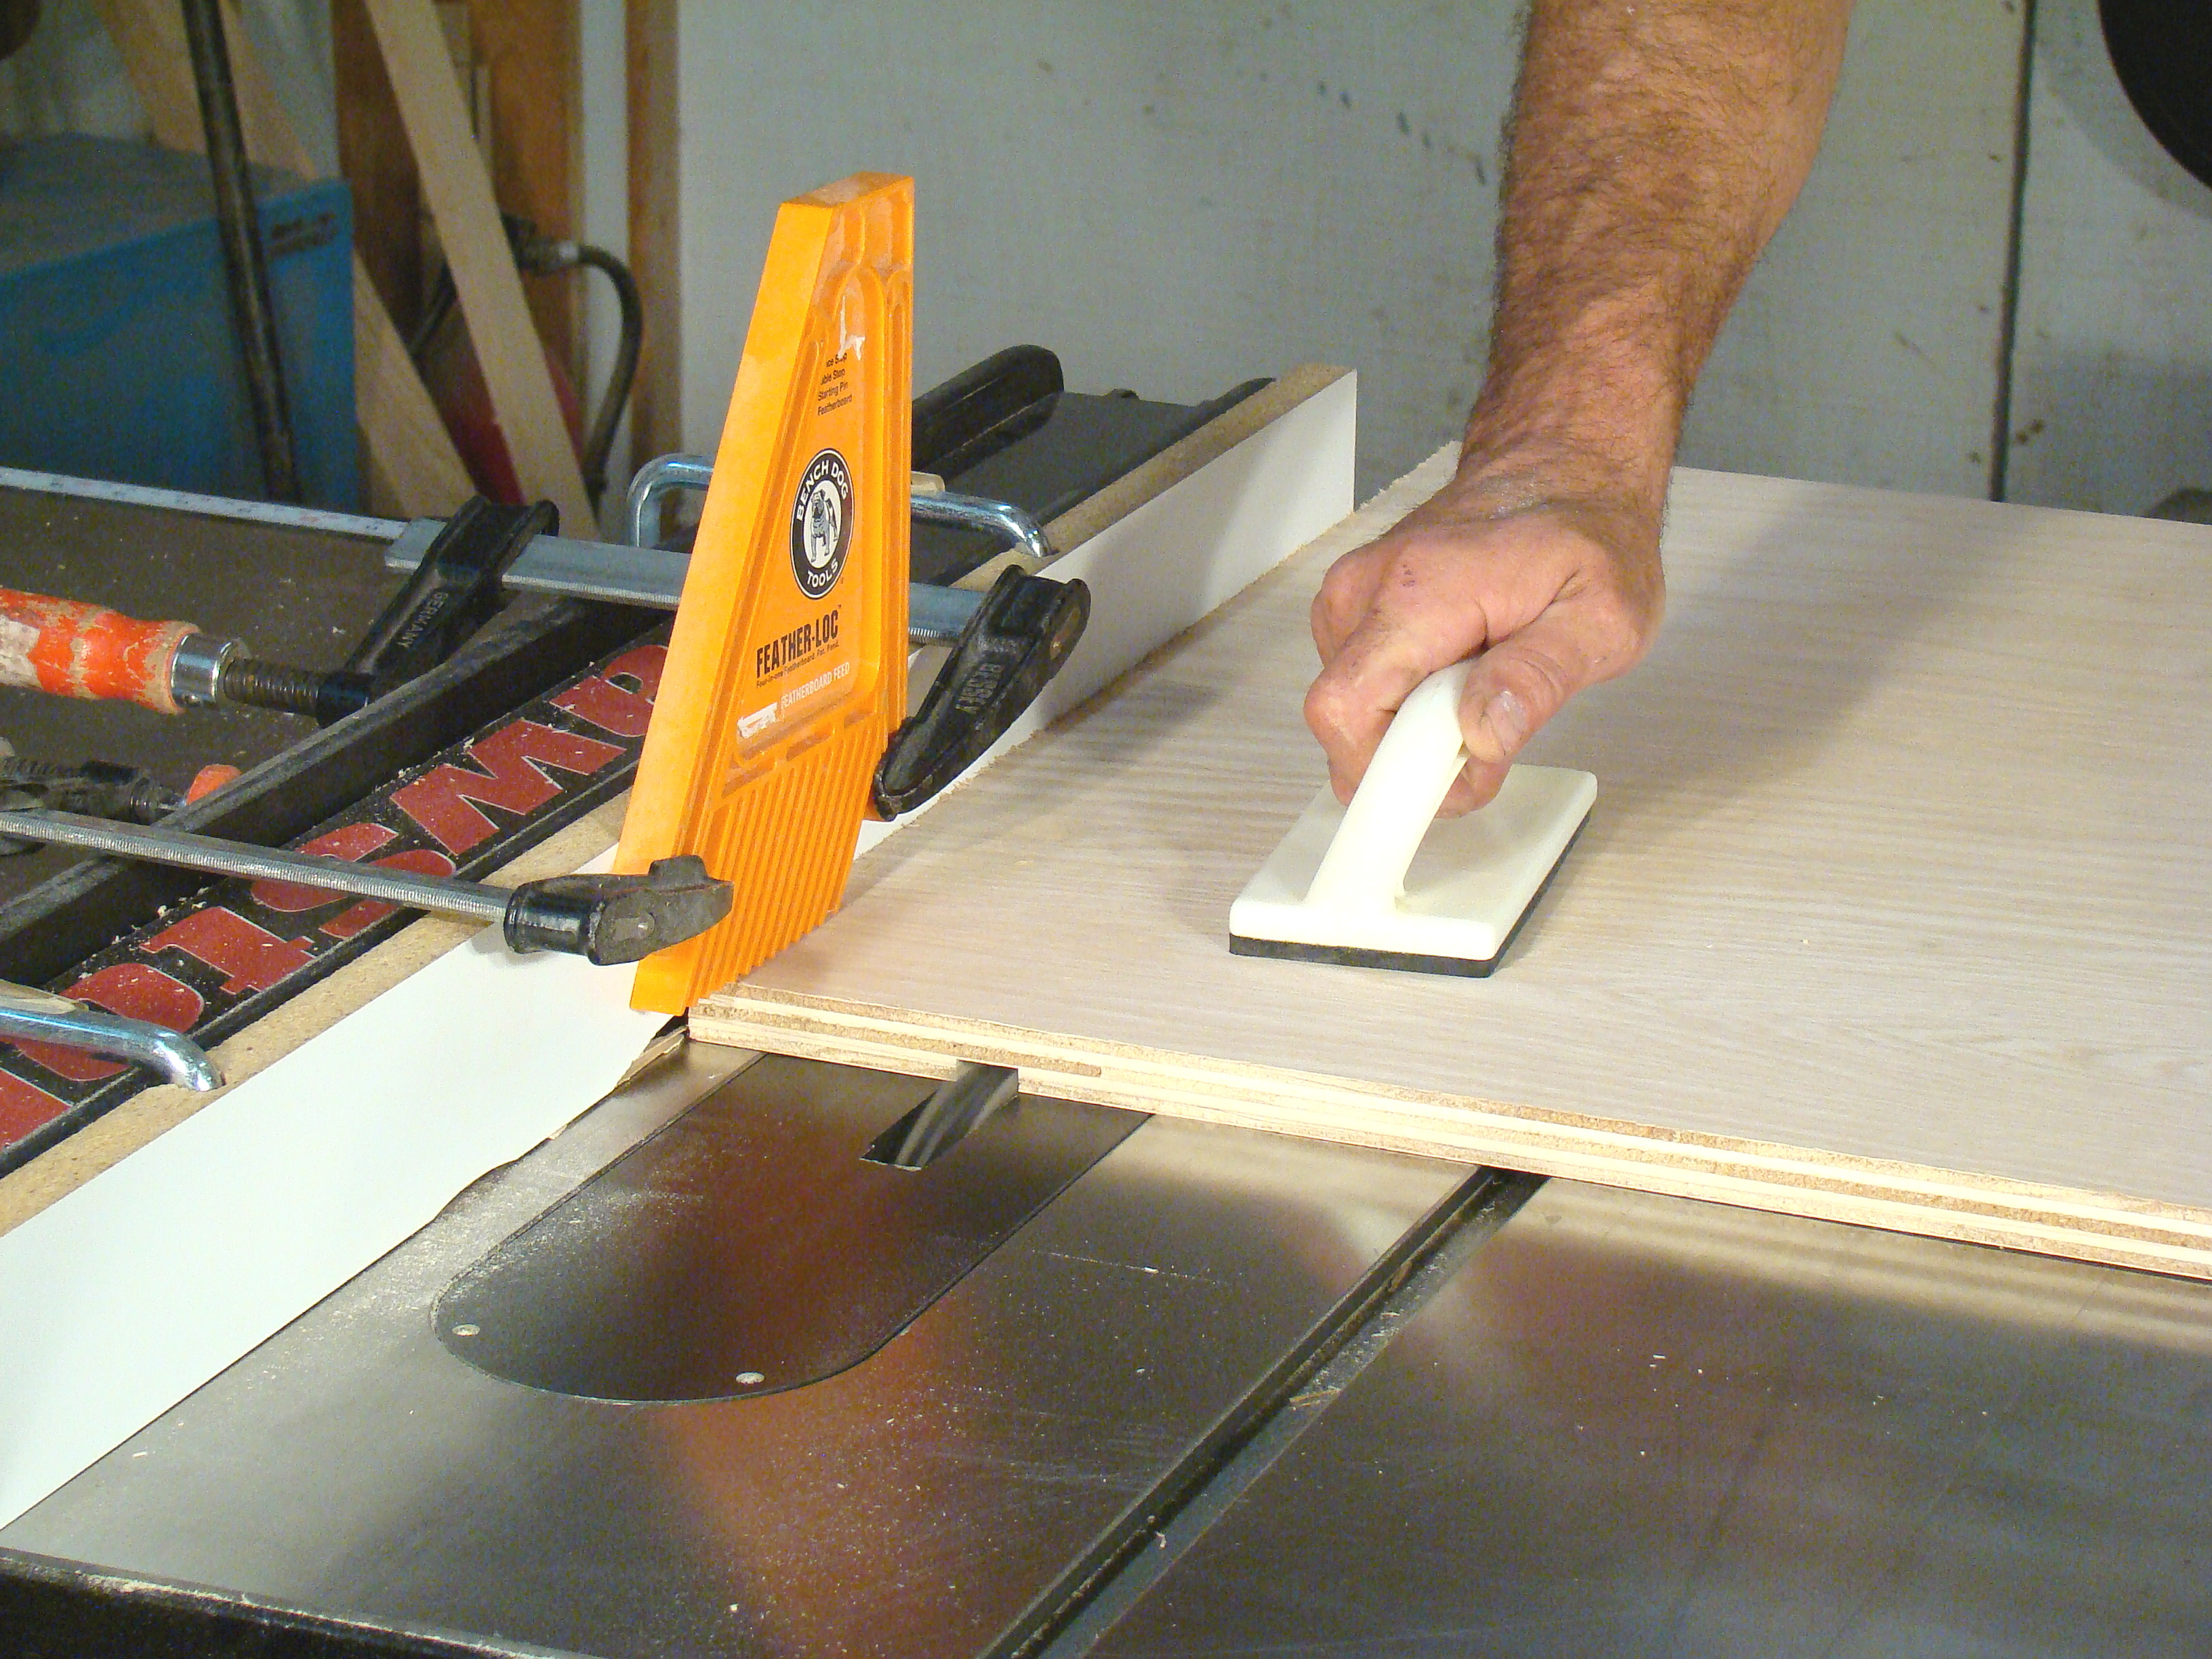 Use the right technique. Use a push pad to hold your material down tight to the table saw. Use your left hand to keep the material against the fence. Slide the push pad back as you feed the material forward to maintain down pressure near (not over) the dado head. Never push down directly over any cutting tool.
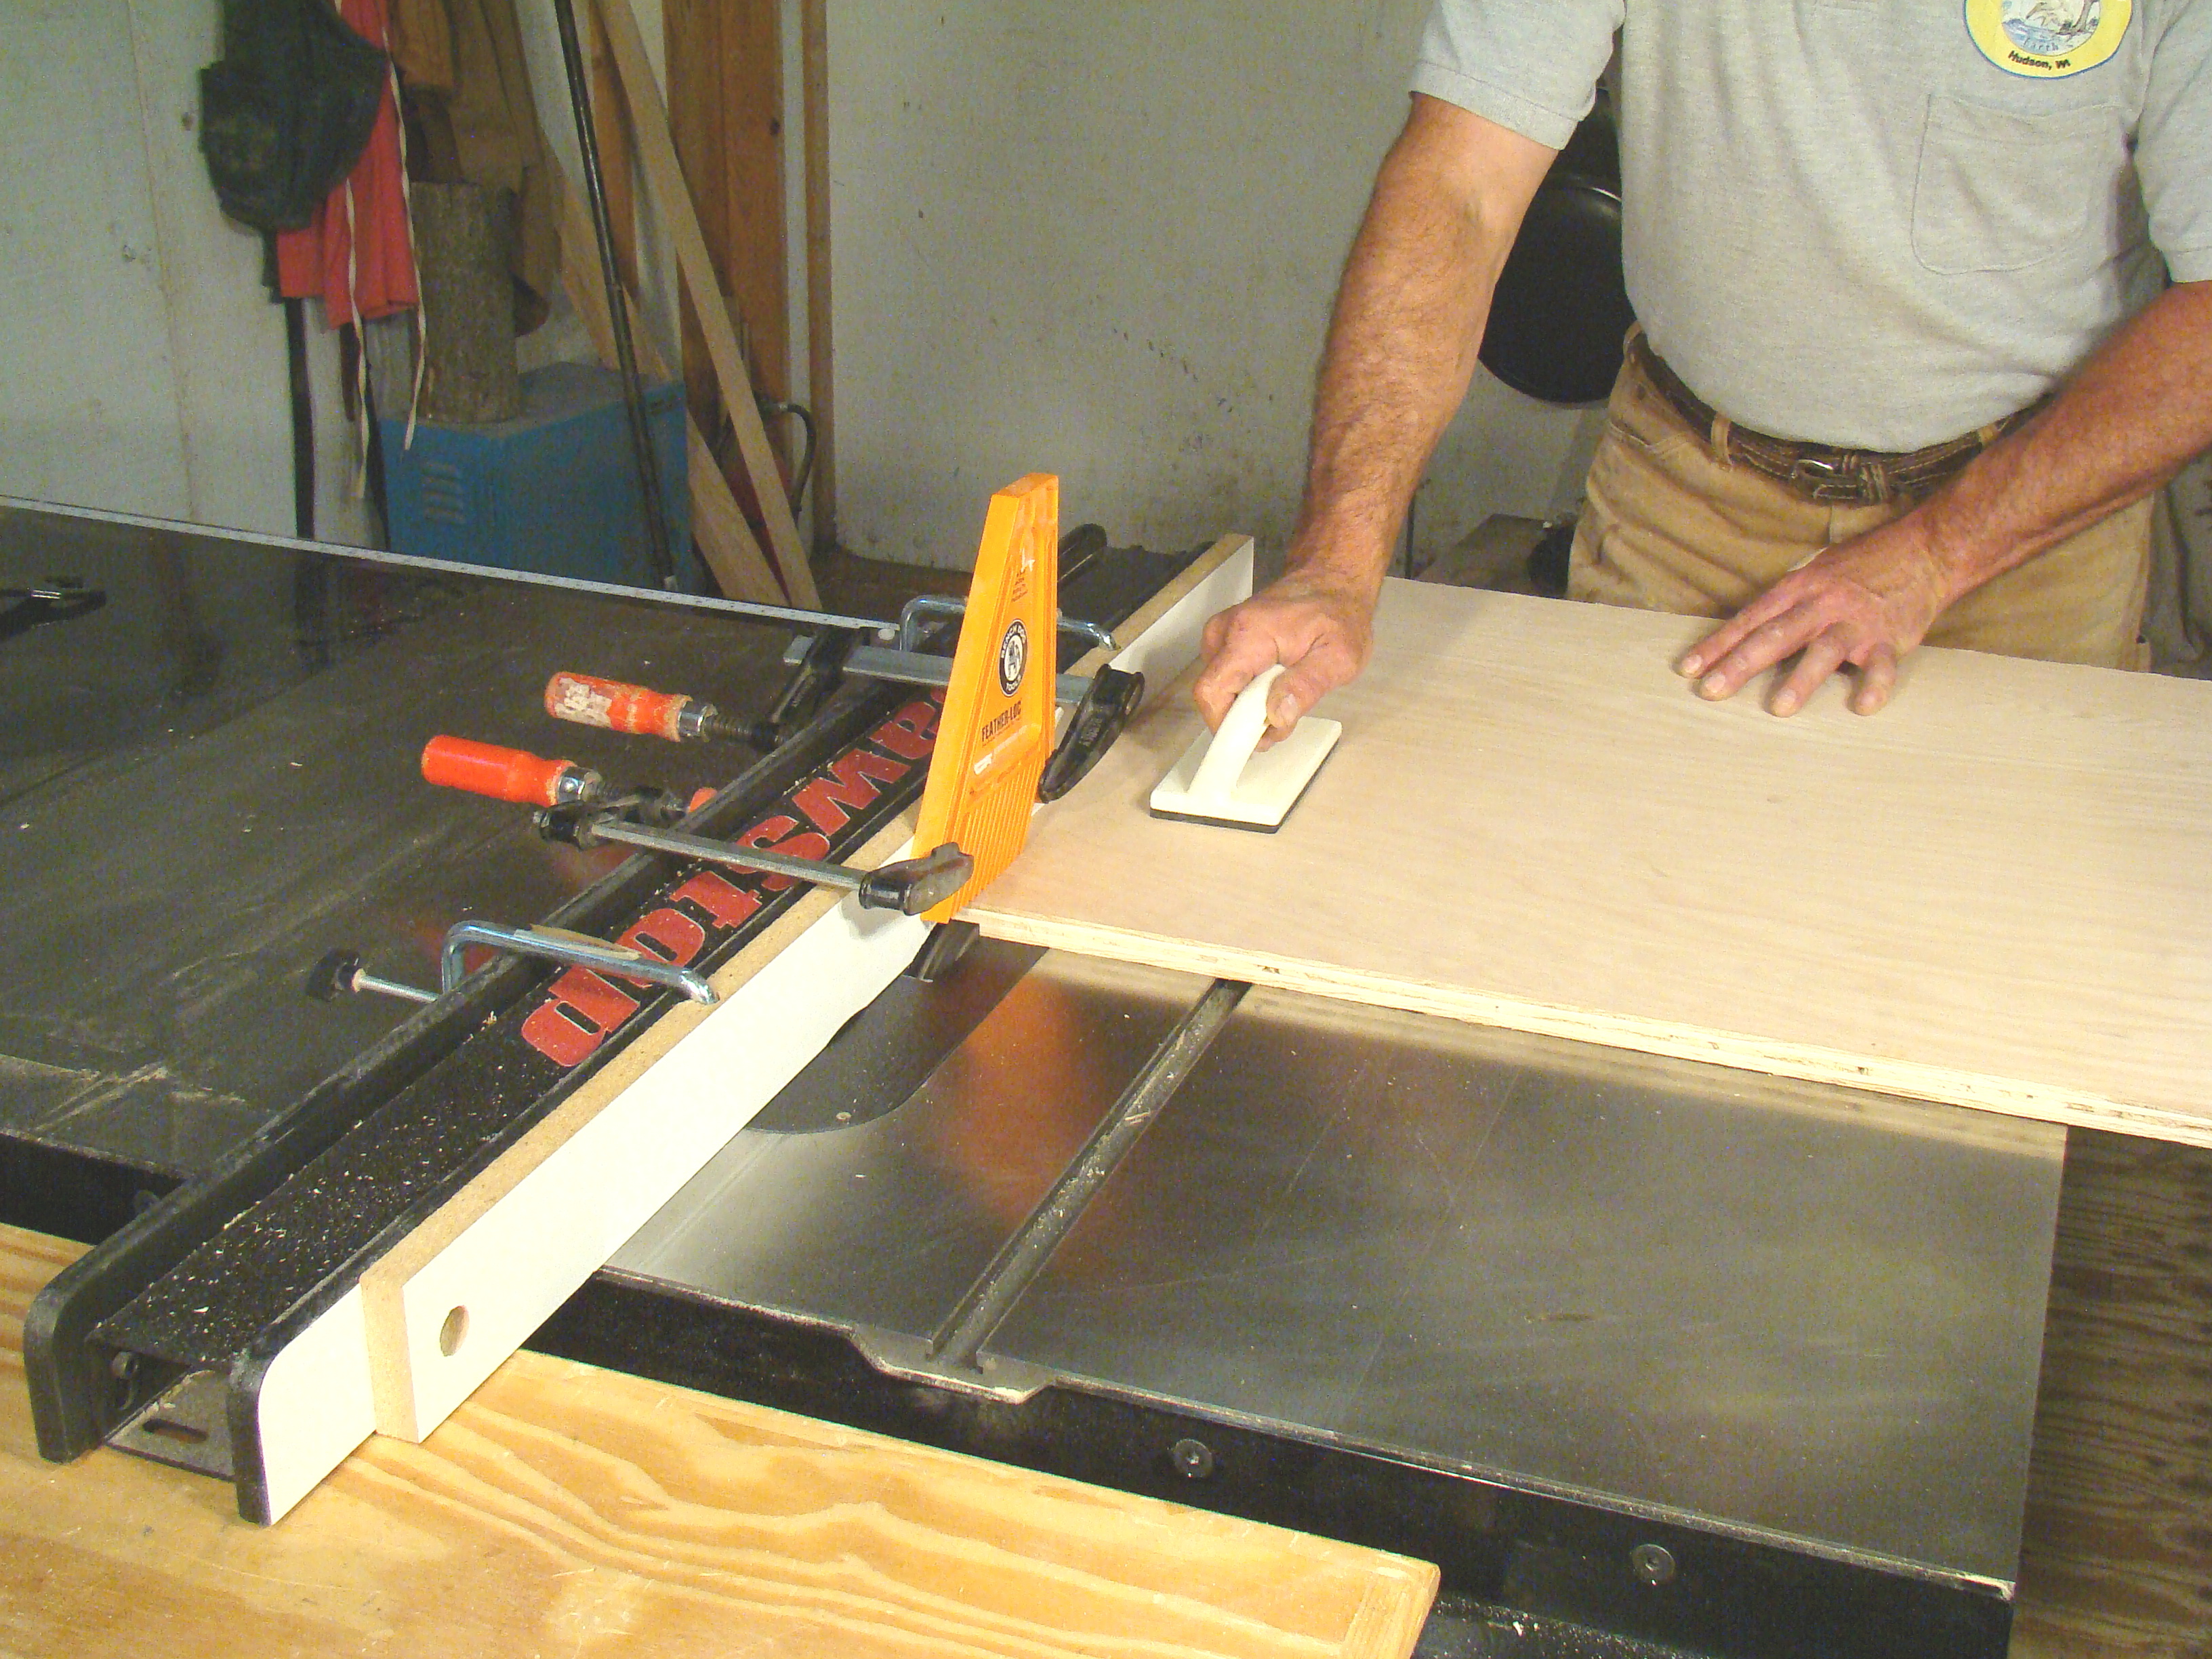
 Position the fence to locate your dadoes and rabbets.
Why This Works Well
Once the dado head is correctly set, you can cut dado after dado and they'll all be exactly the same width. Position the fence once, and every dado or rabbet you cut with the material riding against the fence will be located uniformly. You don't have to lay out each location, the saw does it for you.
When This Doesn't Work
Imagine you're making an entertainment center. Could you horse a 24" x 84" piece of plywood onto your table saw, hold it flat on the machine, and accurately cut dadoes and rabbets? Probably not. With large pieces it's often easier to take the machine to the work than bring the work to the machine. This is when knowing how to make dadoes with a hand-held router pays off.
Some projects call for stopped dadoes so the dado won't show on the front of the piece. Can't do that (safely) with a dado head on a table saw.
Plywood can create dado problems. It's prone to bowing, and you've got to make sure you can push the bow out of it when cutting dadoes. Featherboards help but, depending on the size of the piece and the amount of bow, a table saw may not be the answer.
Photos By Author

Sources:
Dado Shims
Lee Valley
#05J13.01
www.leevalley.com
(800) 871-8158
Brass Set Up Bars
Woodcraft Supplies
#836311
www.woodcraft.com
(800) 225-1153
HoleClamp (for sacrificial fence)
Grip-Tite
(800) 475-0293
Also check out our video "Size of Dado Head".

Would you please fix the content link on the images, please? Every image I click in this writeup go to dead links. Thanks!
hi sir I am looking for dado blade for table saw
Hi George, love the show , but postage really kills a lot of your offers, (australia), do you have digital versions? John
Unfortunately Sawstop doesn't want you to use a dado with solid disk chippers...I think it voids the warranty. The extra mass of a solid disk can bend the shaft upon trigger.