Box Joint Jig Video: How to Make a Box Joint Jig/Finger Joint Jig for a Tablesaw
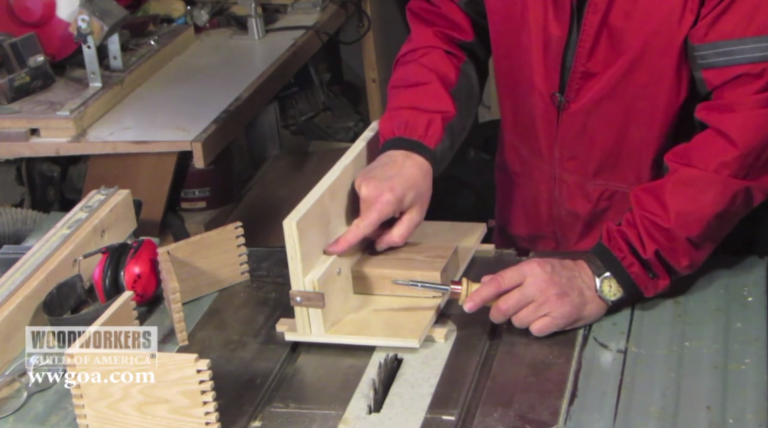
David RadtkeBox joints, also called finger joints, are a great way to join corners on a box. Not only do they add a significant amount of strength, they also look great. Especially when the box joint is made from contrasting materials. The table saw, equipped with a dado head, provides a great way to make box joints, provided you have a jig. WWGOA’s box joint jig video shows a simple shop-made box joint jig is the perfect solution to your box joint needs.
The plans for this jig can be found here.
Explore videos by David Radtke


Premium Membership
Unlock exclusive member content from our industry experts.
- 24/7 Access to Premium Woodworking Videos, Projects, and Tips
- Step-by-Step Instructional Demos, Plans, and Tutorials
- 50% Off Video Downloads Purchased in the Woodworkers Guild of America Shop
- 2 Printable Woodworking Plans
Unlock exclusive member content from our industry experts.
- 24/7 Access to Premium Woodworking Videos, Projects, and Tips
- Step-by-Step Instructional Demos, Plans, and Tutorials
- 50% Off Video Downloads Purchased in the Woodworkers Guild of America Shop
- 2 Full-Length Video Downloads to Watch Offline
- 2 Printable Woodworking Plans
Gold Membership
$370 Value
Get everything included in Premium plus exclusive Gold Membership benefits.
- 24/7 Access to Premium Woodworking Videos, Projects, and Tips
- Step-by-Step Instructional Demos, Plans, and Tutorials
- 8 Full-Length Video Downloads to Watch Offline
- 3 Full-Length Woodworking Classes to Keep for Life
- 7 Printable Woodworking Plans
- Discounts on Purchase-to-Own Content in the Woodworkers Guild of America Shop
- Access to Ask the Expert Program
- Exclusive GOLD LIVE Streaming Events
Share tips, start a discussion or ask one of our experts or other students a question.
Already a member? Sign in
No Responses to “Box Joint Jig Video: How to Make a Box Joint Jig/Finger Joint Jig for a Tablesaw”