 A very good friend and mentor once told me it’s a mistake to play cribbage with your significant other – unless you really relish conflict in your relationship. Hey, I just make cribbage boards. Well, I do play a little cribbage.
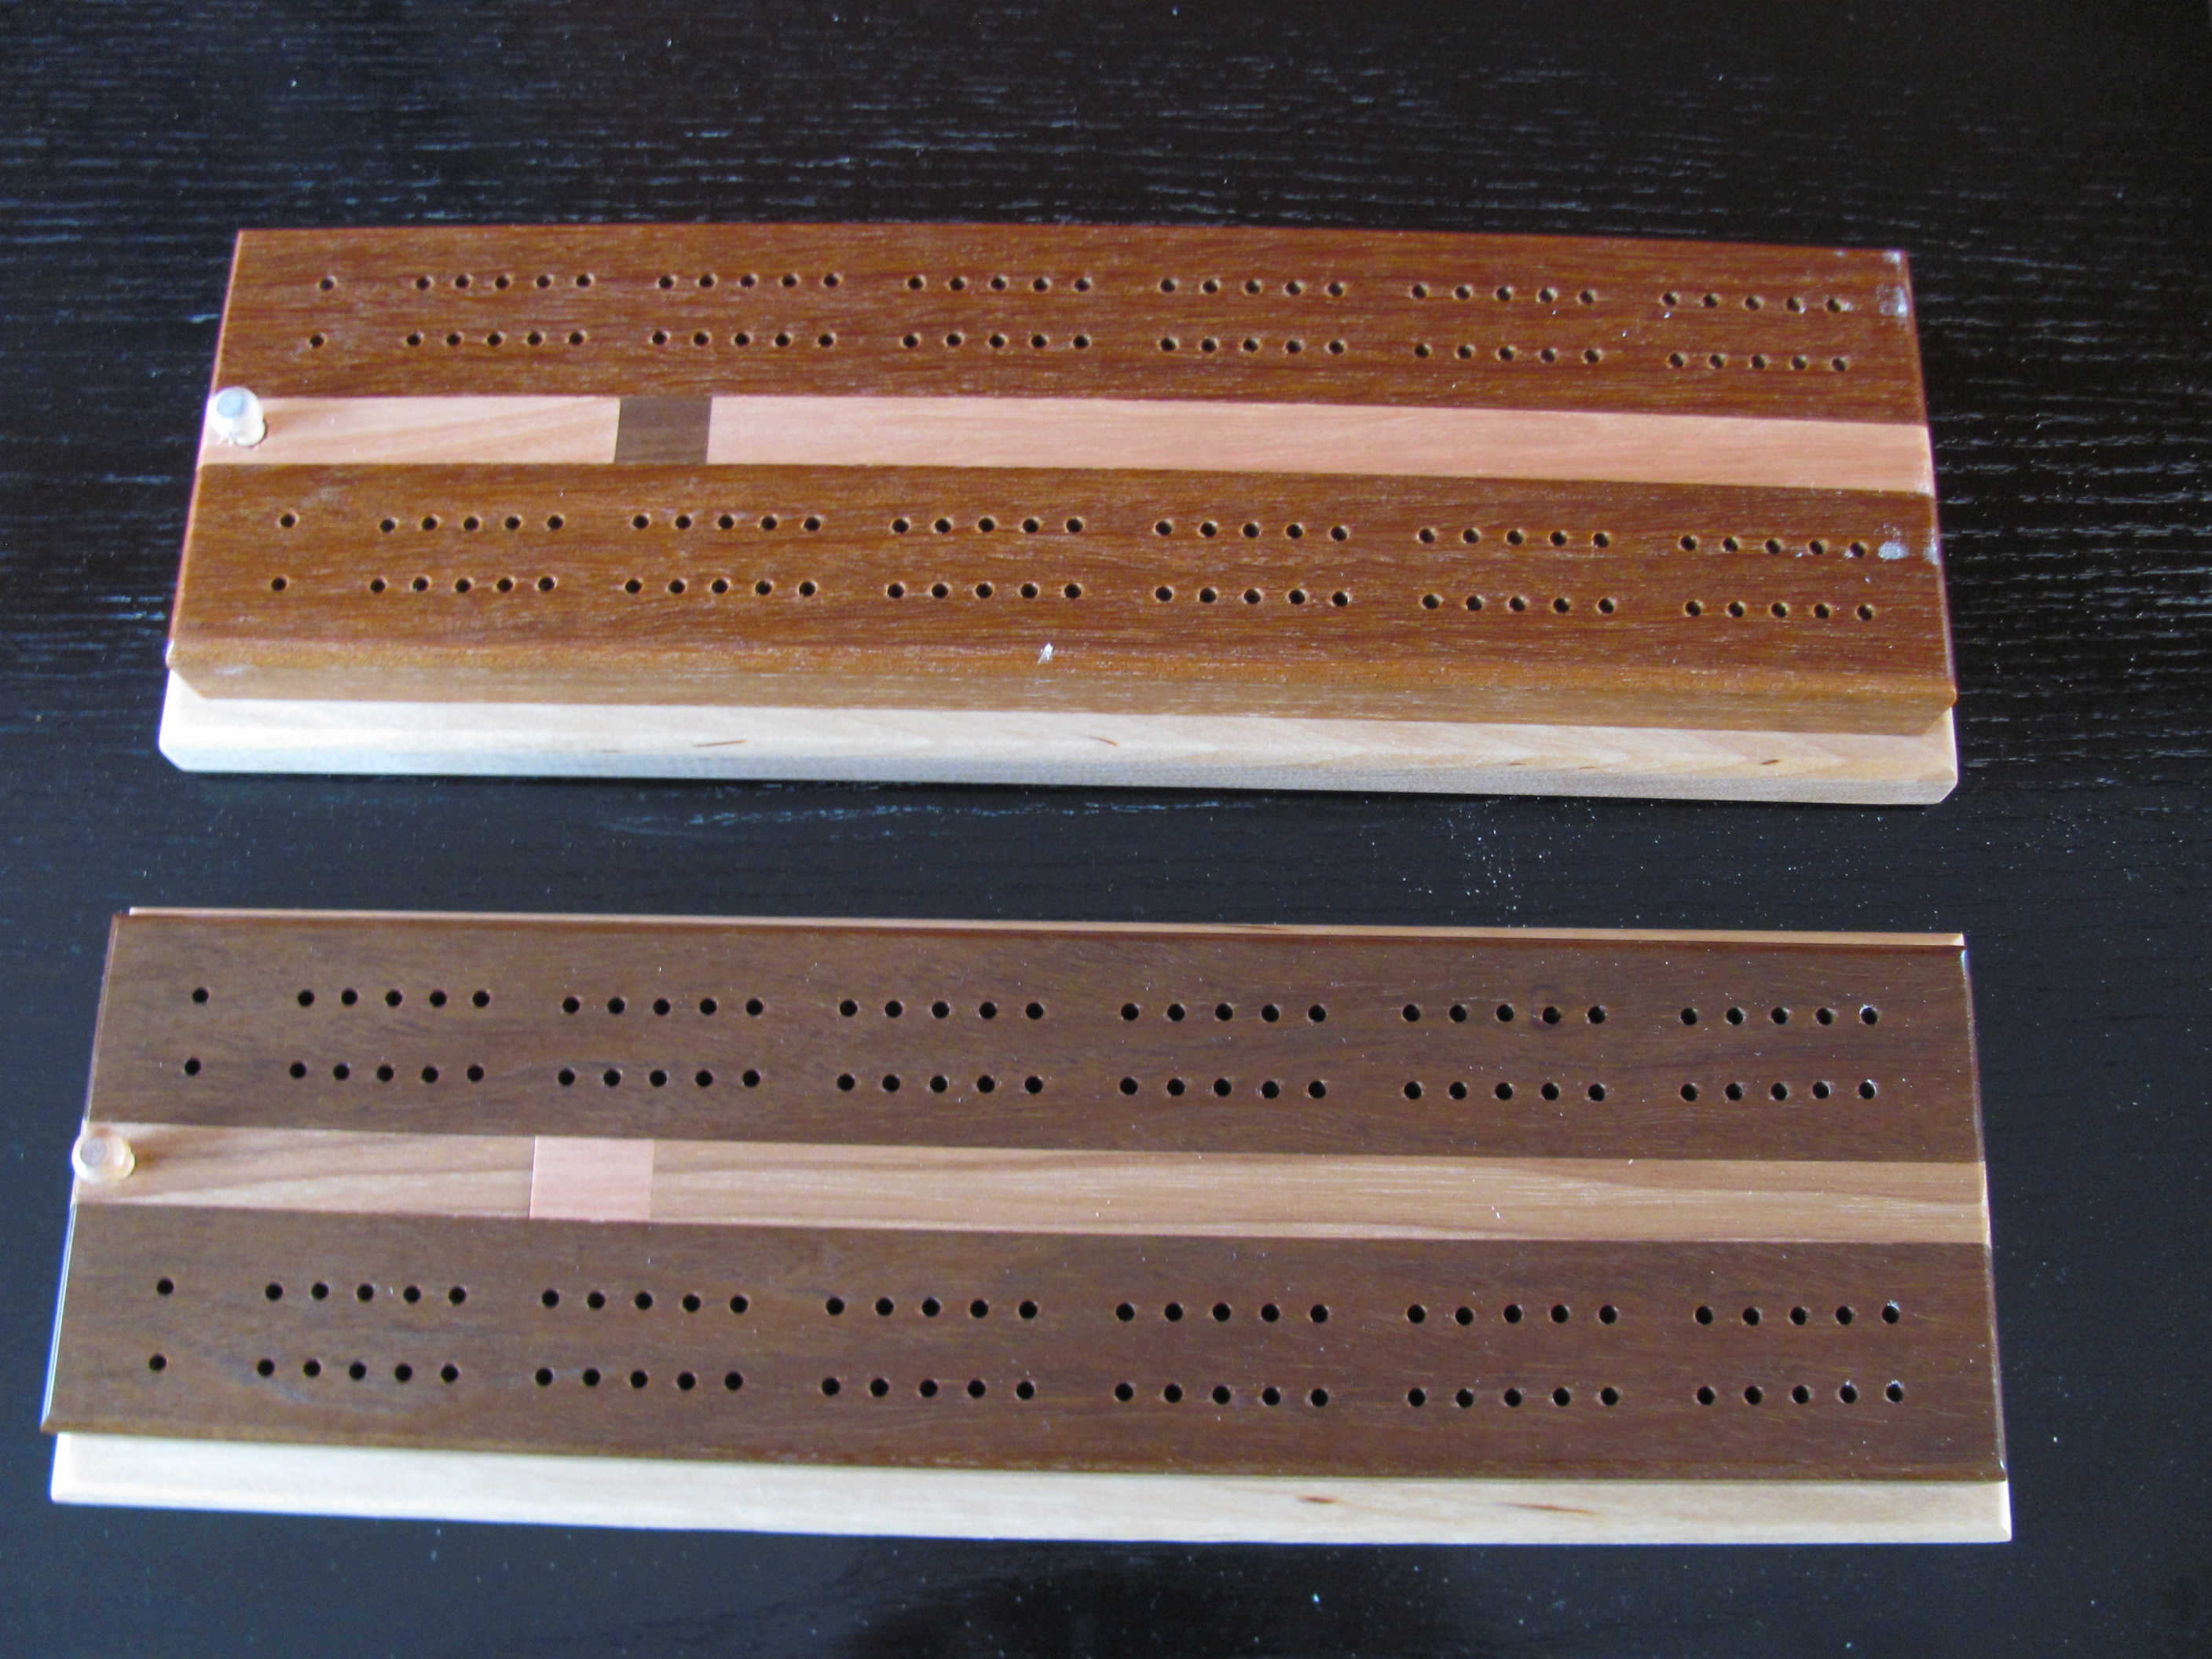
Cribbage Board Template Material Choices
Any shop accumulates scrap materials. My wife accuses me of actually buying scraps – they can get out of hand. This project is a great way to use up scraps. Here are the approximate sizes you’ll need:
- 2 sides 3/4″ x 14″ x 2″, one side beveled at 15-degrees along its length
- 1 – center section 3/4″ x 14 x 1-1/2″
- 1 slide stop in a contrasting wood – this piece has the same profile as the center section.
- 1 bottom board – 3/4″ x 14″ x 4″
- 6 pegs
- Drilling Template- available at woodworking stores or on-line Source: Miesel Woodworking
- 1/8″ drill bit
- 4 C-clamps
- Glue
Finish such as lacquer or polyurethane
Cutting the Sides and Center Section
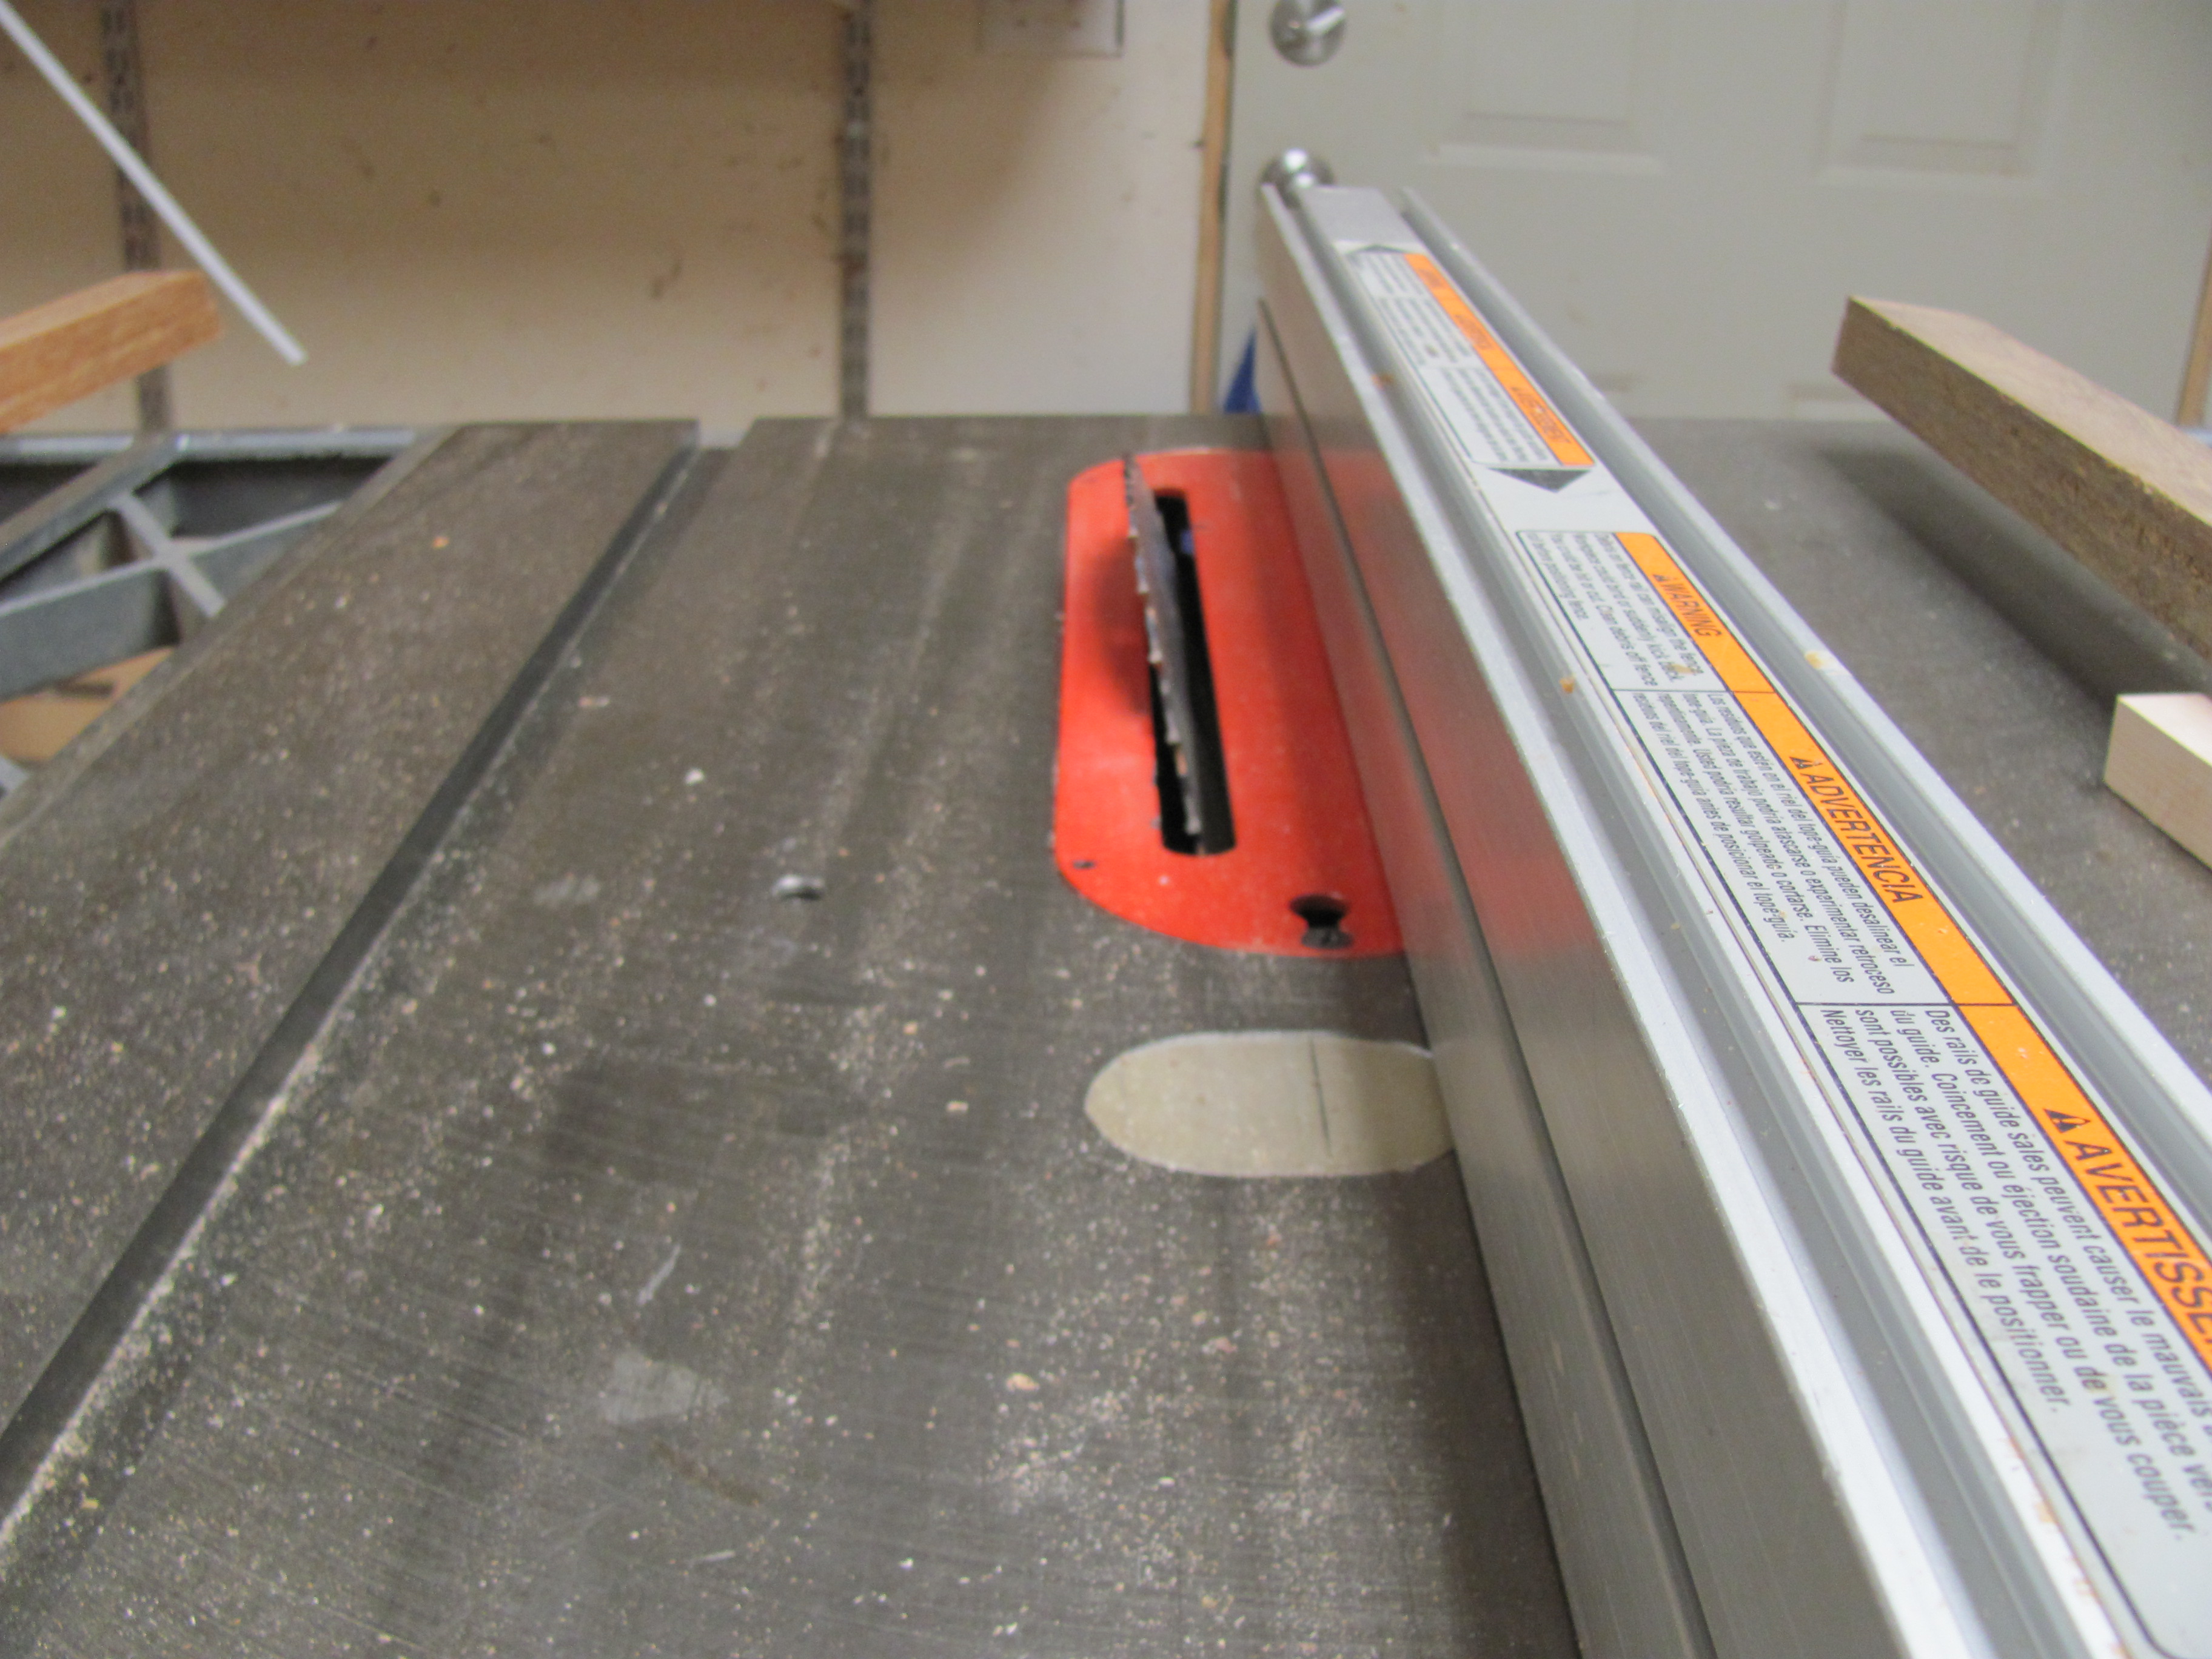
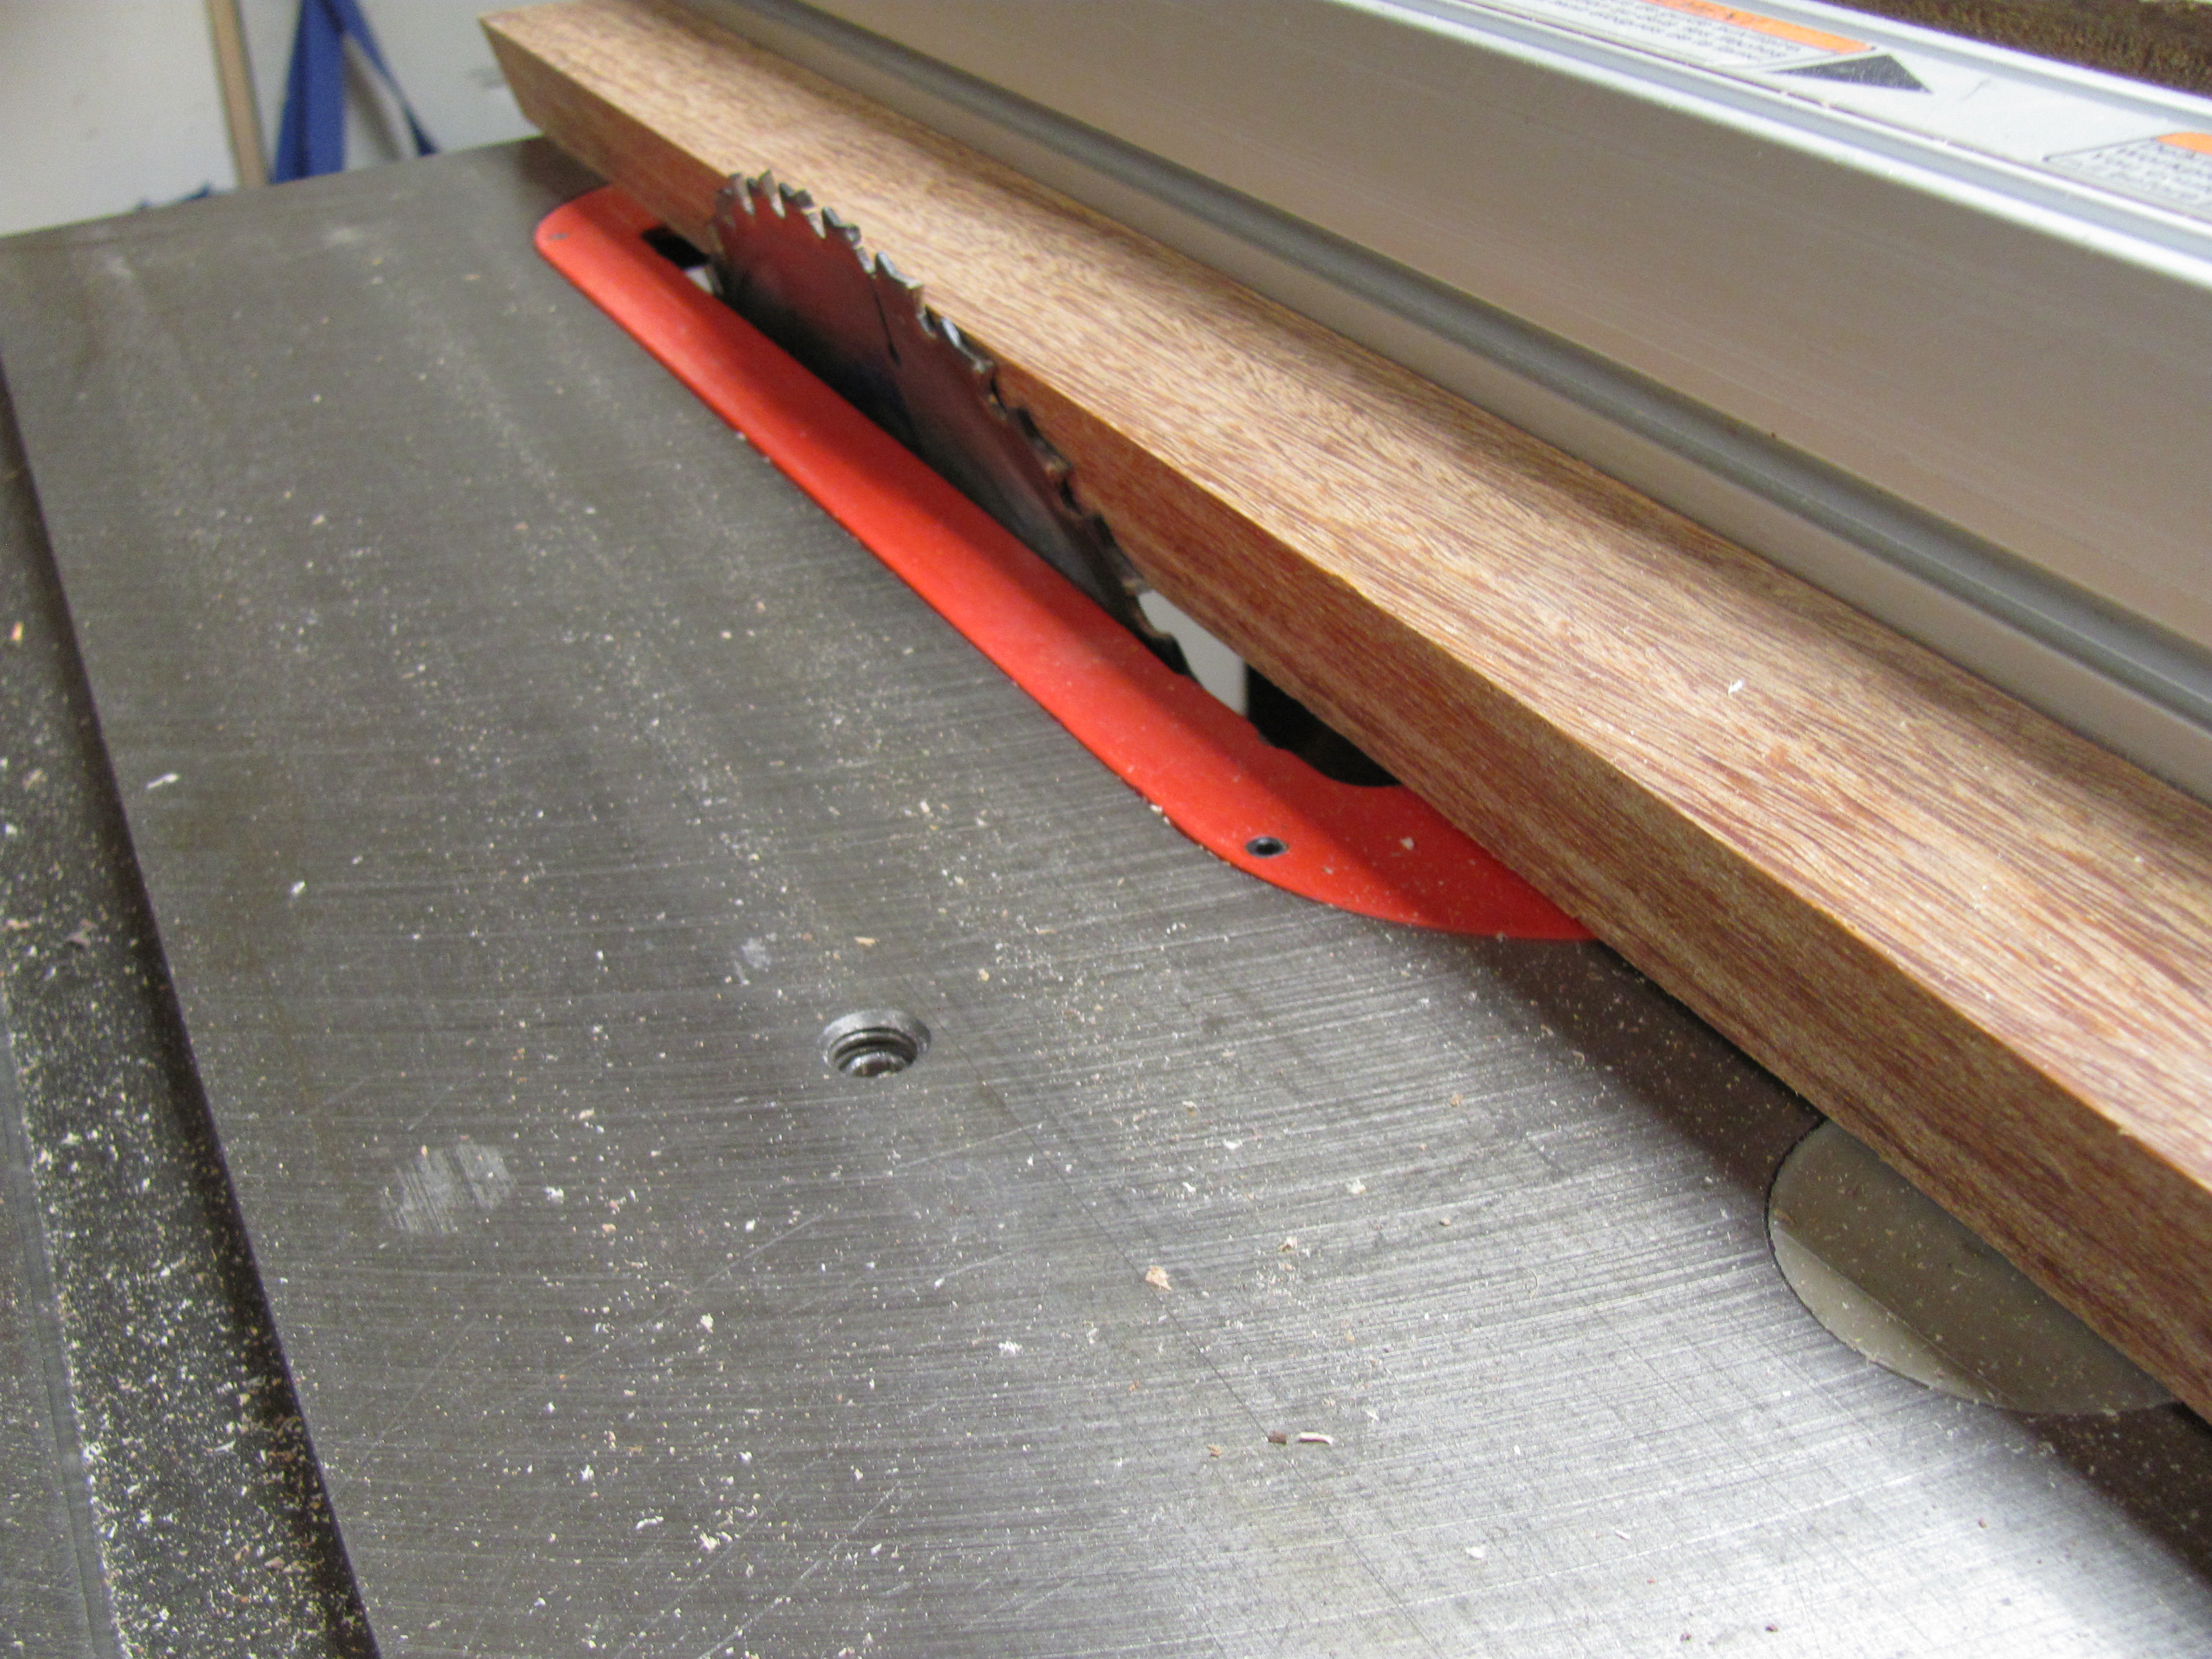
You can cut one 28″ piece for the sides. Joint one edge of your side and center pieces before you cut the beveled edges. Set your table saw blade at 15-degrees and rip the side piece so the large, (top), edge is around 1-1/2″ wide.
Cut the Contrasting Center Piece
You can cut these pieces to length in a moment. While the same angle is set on your saw, rip both sides of the center piece.


 Be sure to cut a contrasting piece for the slide stop the same way you cut the center – it has to match the profile exactly. Keep in mind that you shouldn’t cut a piece shorter than 12″ on the table saw. I make 2 or more boards at a time – actually, my last batch was 16 boards. I just cut my center pieces a little long, and from a variety of materials. That way it’s easy to cut a stop or two off each center piece.
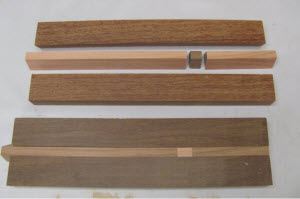
Cutting Parts to Approximate Size
Cut about 4″ off the end of your center slot – this will become the slide over the peg storage compartment. Here’s a blowup and dry-assembled version side-by-side. Missing is the base. It’s a simple rectangular solid with a slot cut using a plunge router.
Glue-up
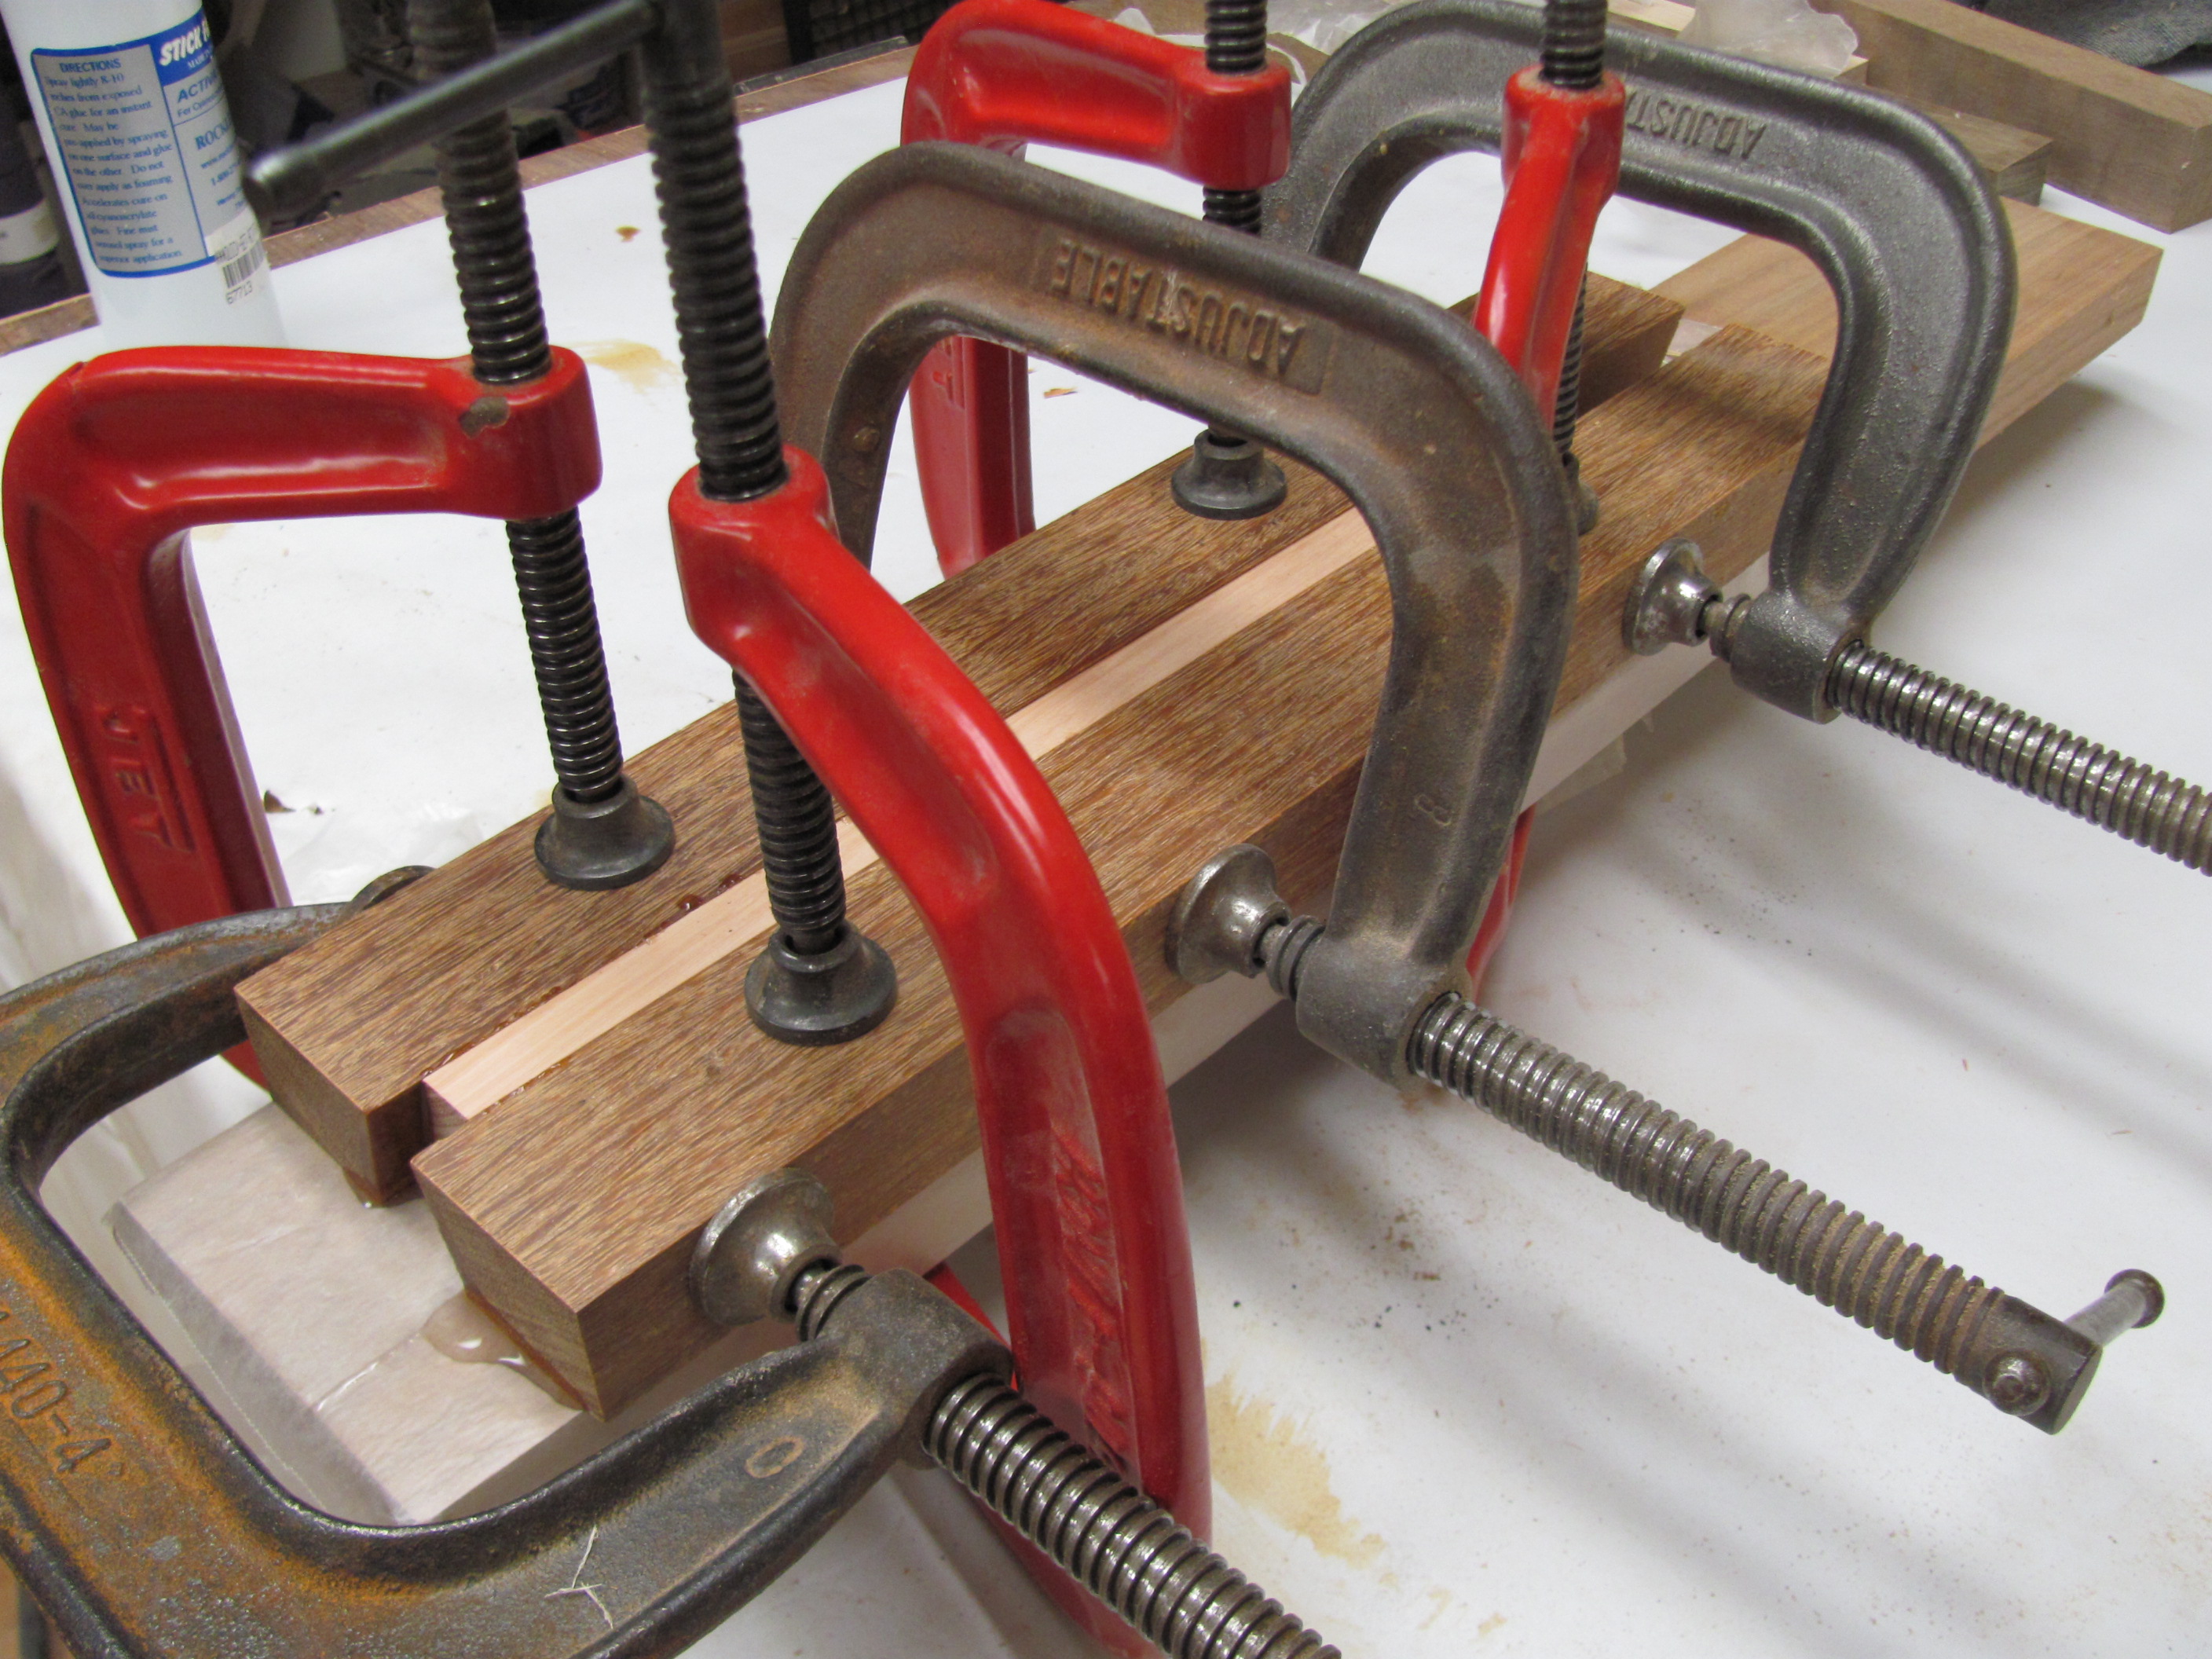
Glue-up is dicey – but here’s a trick to overcome that little bit of difficulty. It comes because the tapers tend to slide out of alignment when you clamp the joint. I use a simple flat hardwood block wrapped in waxed paper as a clamp base, then 4 C-clamps to hold the two sides firmly in place.
Place the 4 hold-down C-clamps in position on the dry assembly of 3 parts – the red clamps in our photo. This holds the 2 sides stationary. Use the stationary center section – the longer of the 2 pieces – as an alignment guide. Once things are fitted, slide the stationary accent piece out and apply glue to the 2 surfaces that will contact the sides. We don’t want any squeeze-out at the point where the stop-block attaches – it will cause an unsightly gap when you try to position the stop block.
 Carefully slide the center piece in and use 2 additional C-clamps to pressurize the glued joints. Let the assembly cure completely.
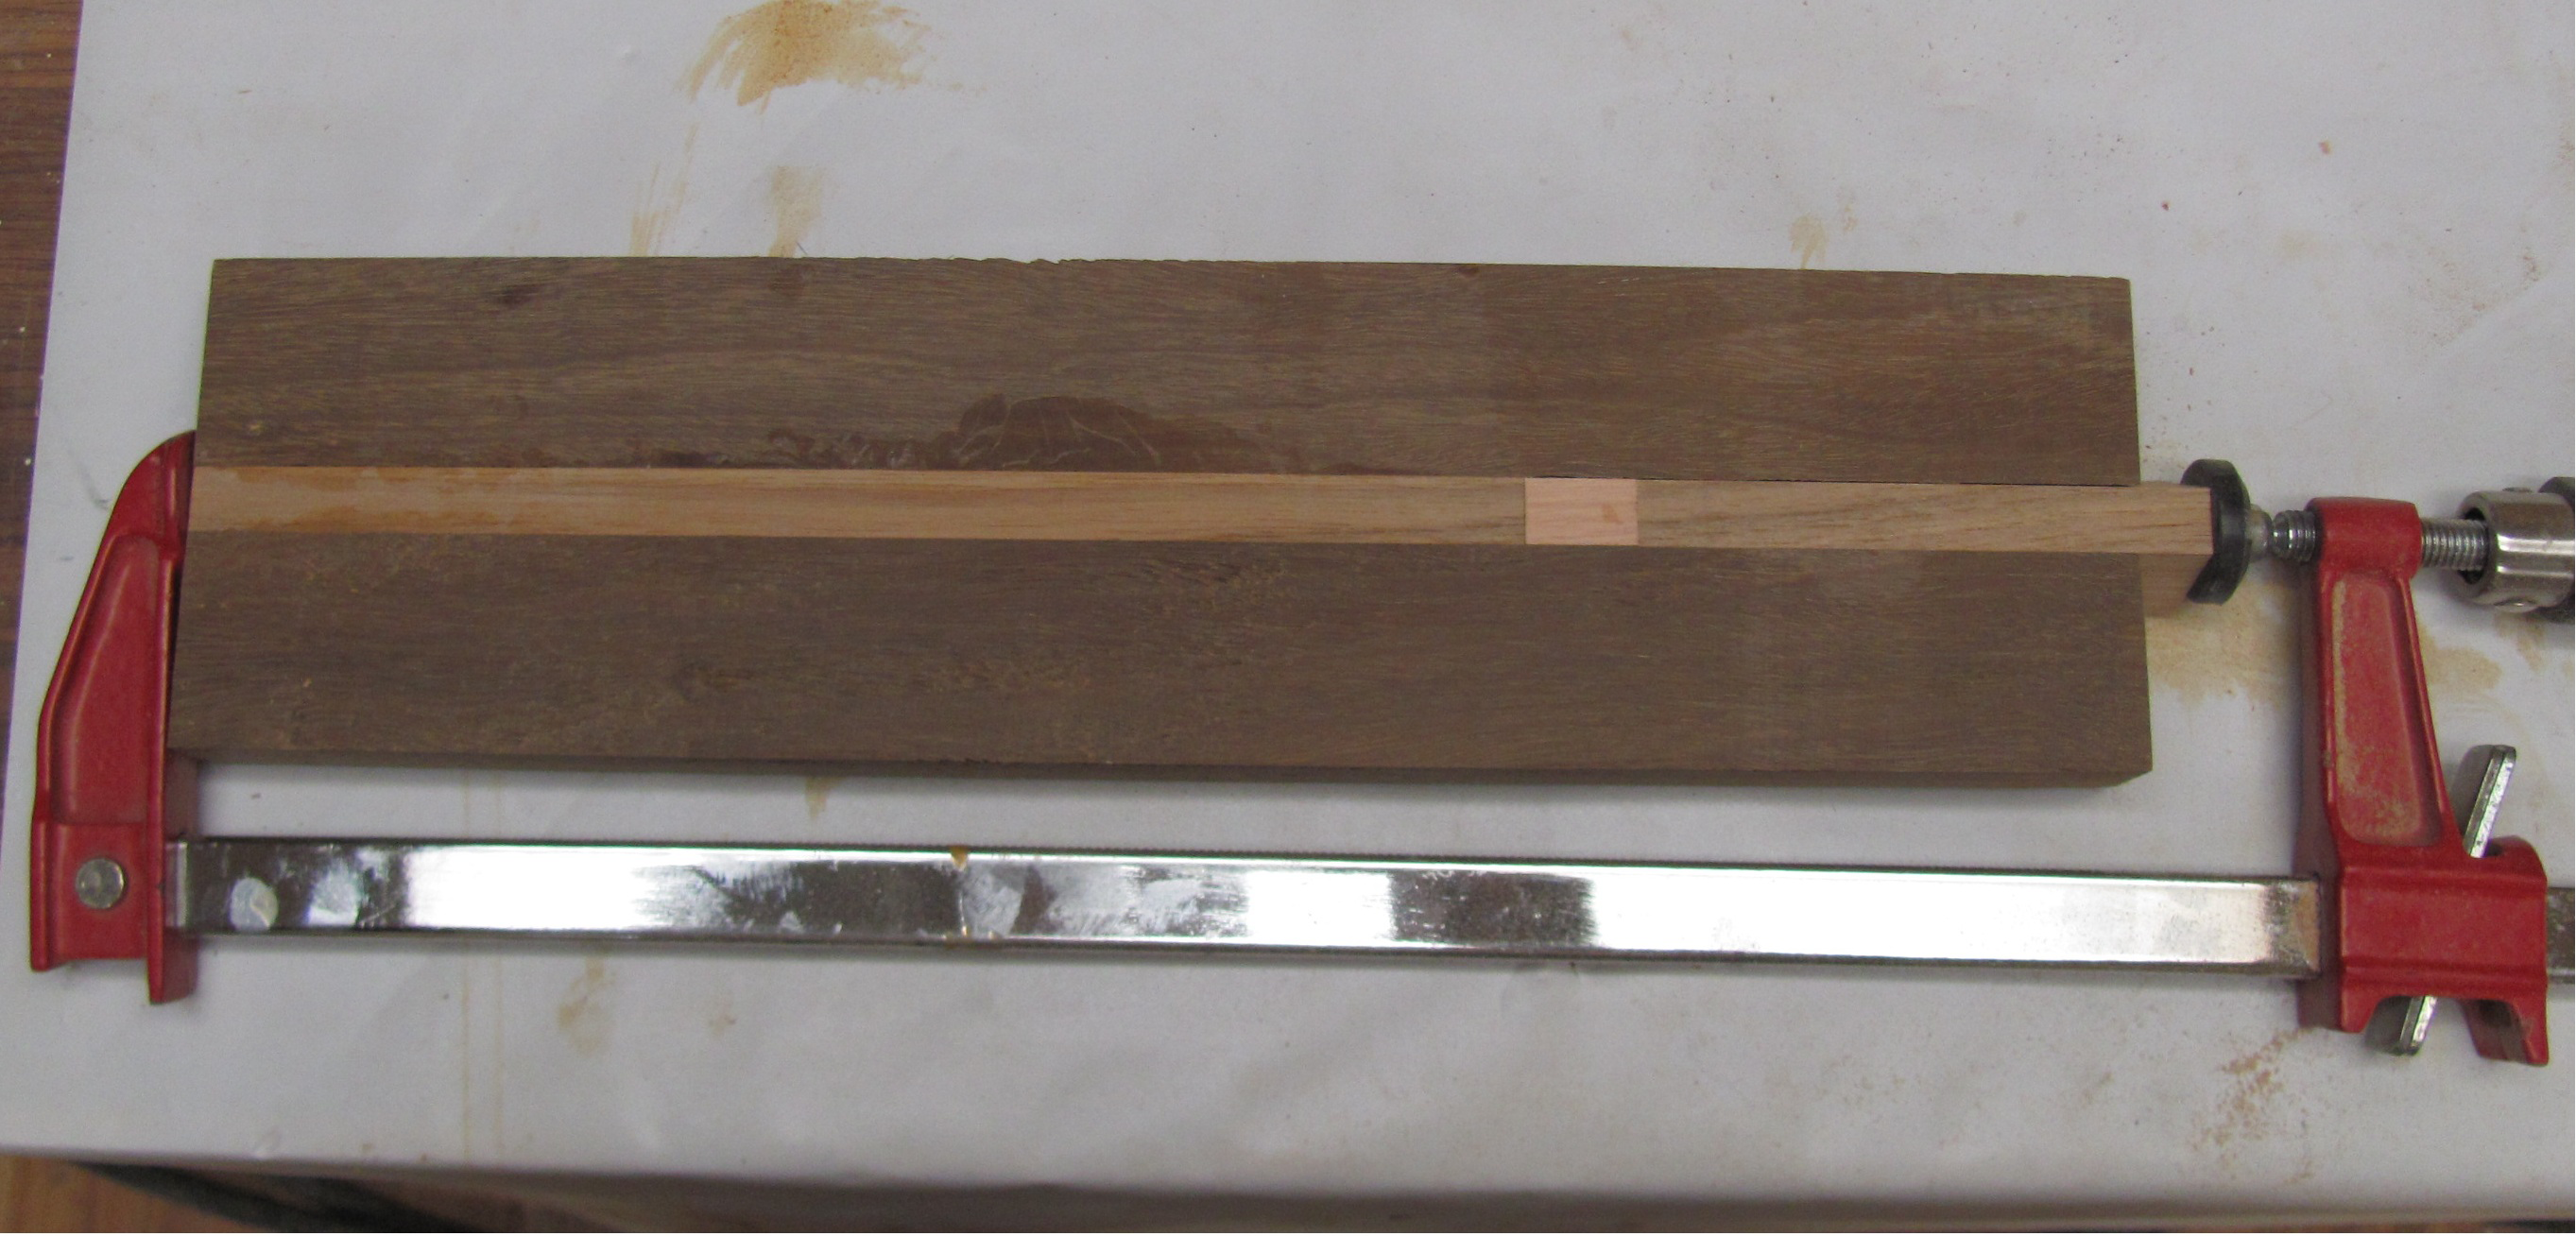
Next, glue in the stop block – use glue on 3 surfaces – then clamp it as illustrated in this photo.
Truing the Board and Final Cut to Size
Once this is cured, re-insert the sliding door and flatten everything. You can use your jointer, taking very thin cuts, a drum sander, or just sandpaper adhered to a dead-flat surface such as your bench top or table-saw top.
Now is the time I cut the board to length. Match it to your drilling template and true up both ends in the process. Be sure your sliding door is well seated when you true that end!
Drilling the Holes
Drill, baby, Drill. Using 2 clamps, hold the template to the board. Don’t try this with one clamp – the template and board will invariably swivel out of alignment. I drill 2 holes a few inches apart and seat cribbage pegs through the template into the holes to help keep the template and board in alignment.
Prepare the Base
Cut it to 1/2″ to 3/4″ wider and 1/2″ to 3/4″ longer than the board. That gives me a 1/4″ to 3/8″ overlap on each side and end.
Next, round over the top edges of the base and finish sand.
Last step for the base
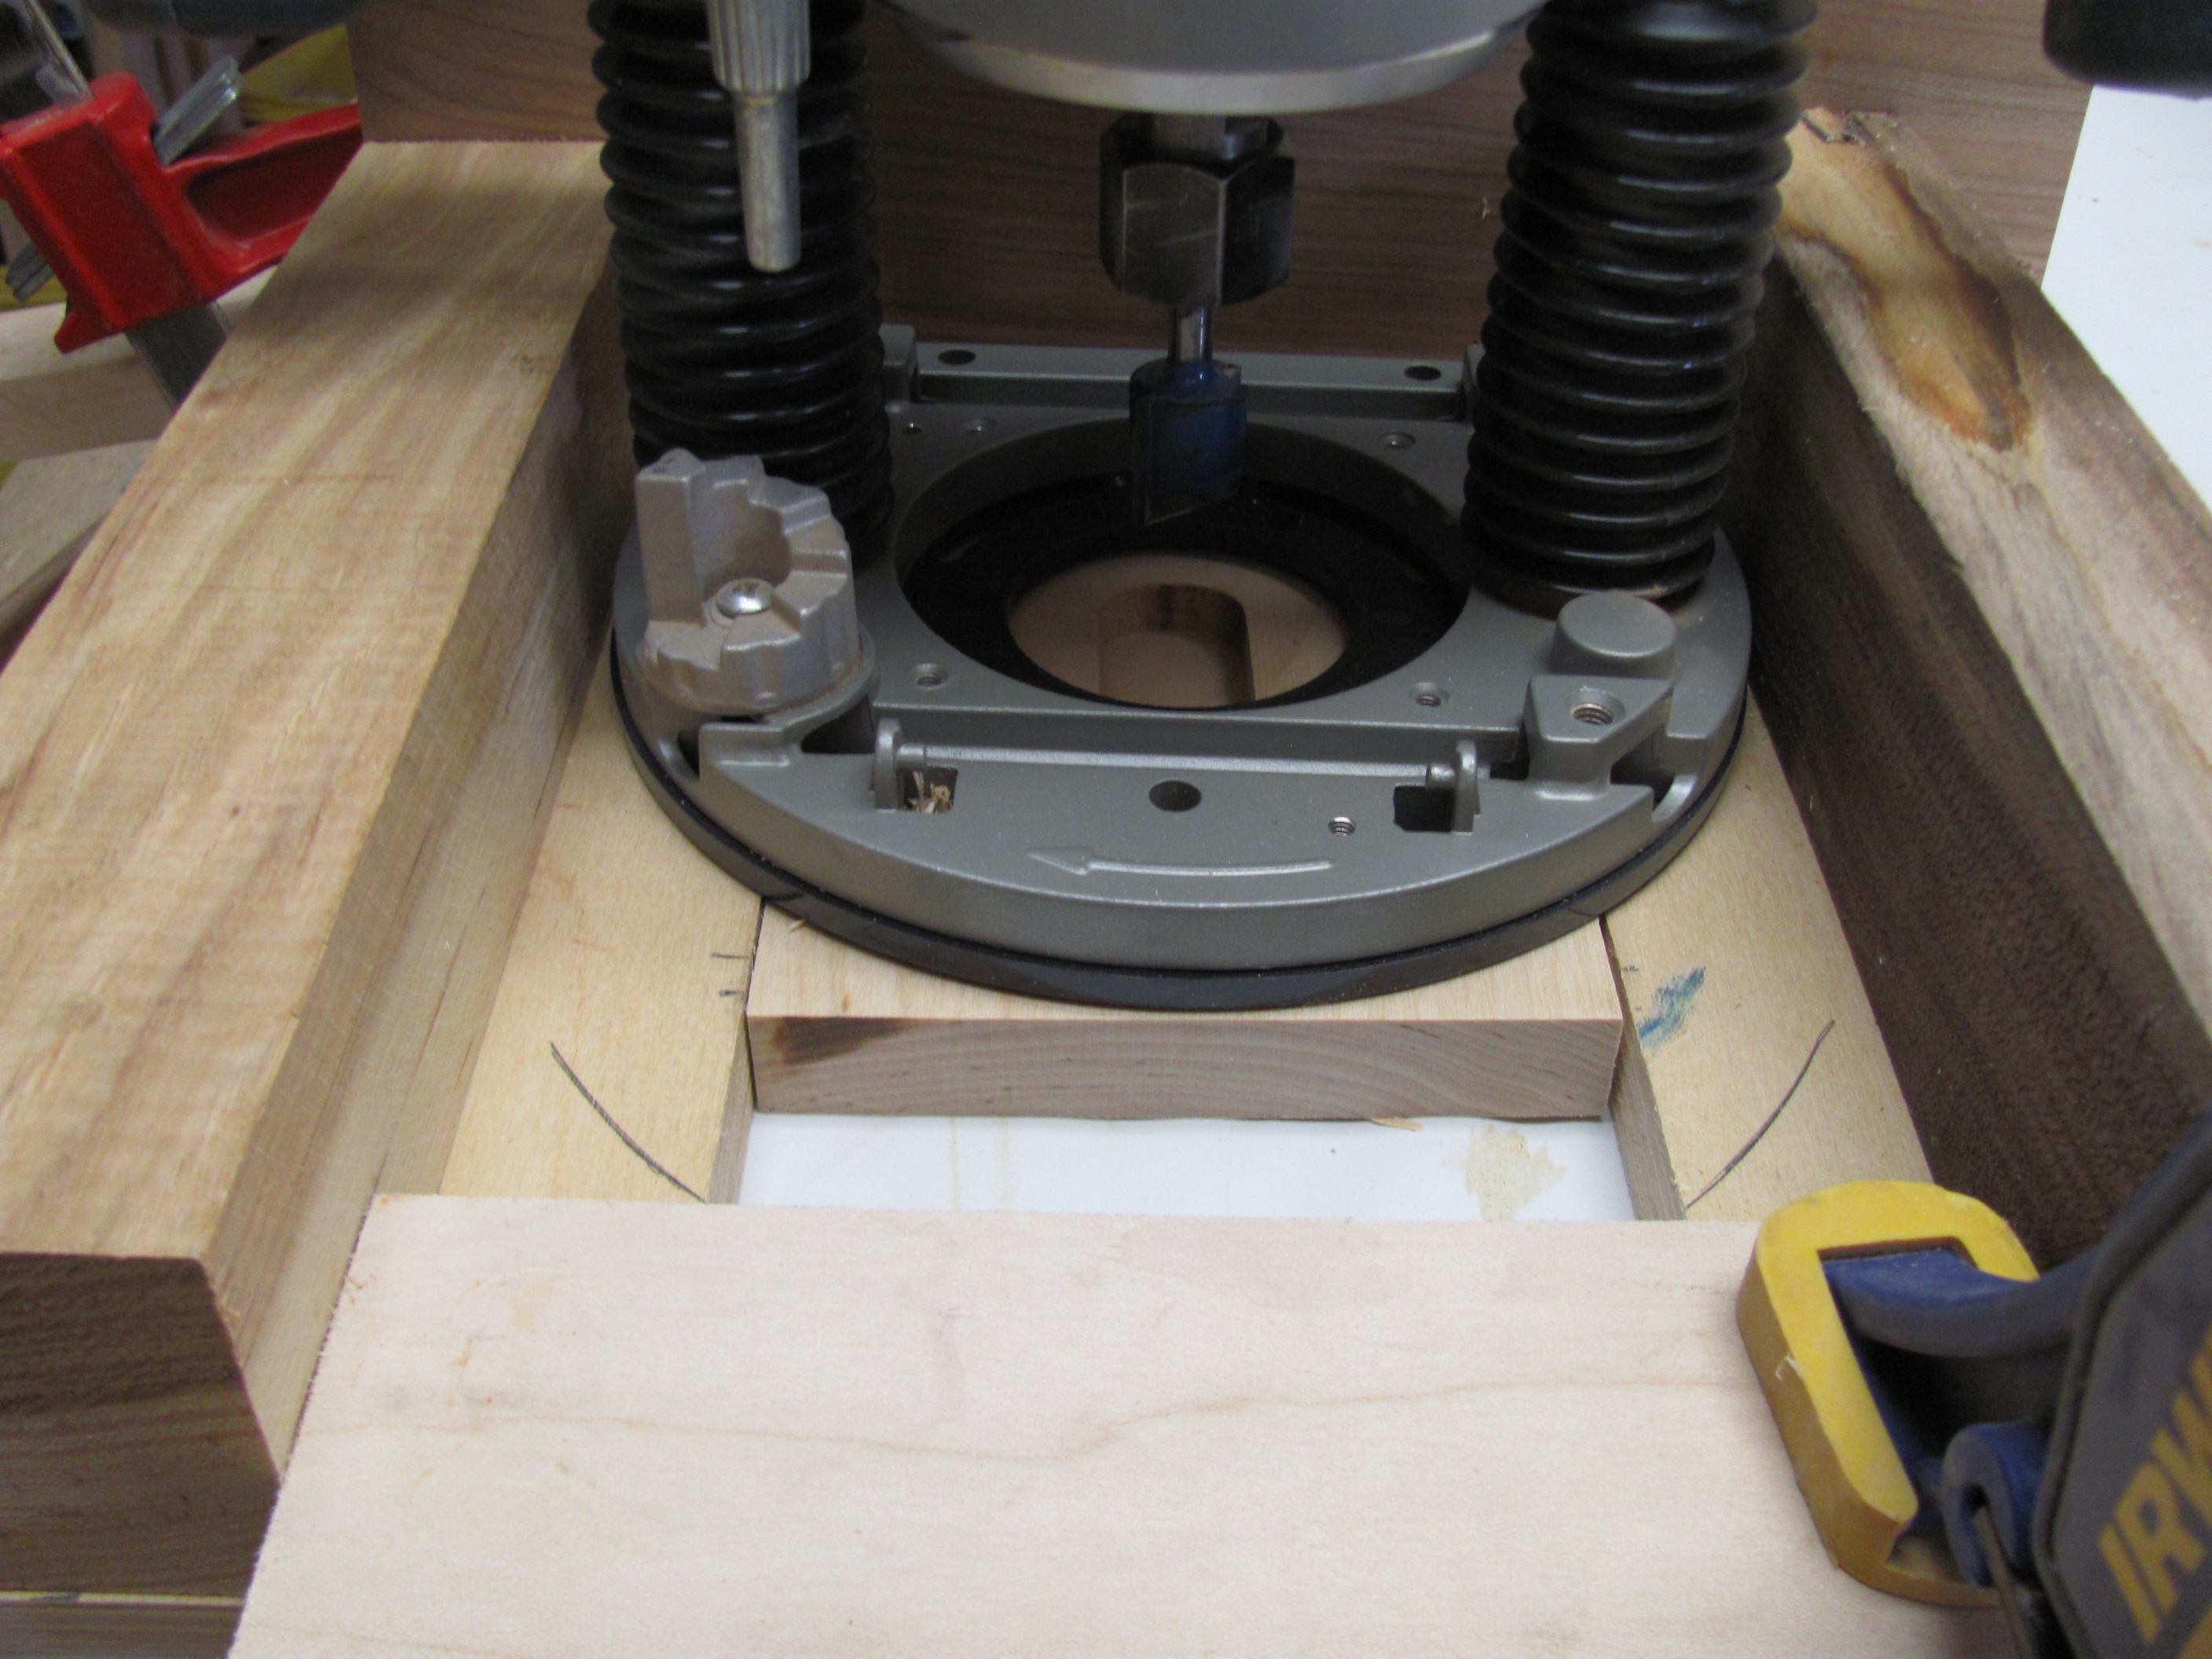
You can make a simple jig for your plunge router as a guide to cut the storage slot for pegs. Set the plunge router to leave about 3/16″ material beneath the storage slot. Note – don’t come too close to the end – you’ll need enough material to ensure your door stop peg seats adequately in the base. Another option for this recess- though less attractive – is to use a large Forsner bit to drill out a recess.
Last Step for the Cribbage Board Base
Glue the board to the base making sure the side and end over-lap is equal all around. Let cure completely.
With the slider door in place, round-over the edges of the top on your router. Finally, drill a dowel hole in the slider for the stop peg – this keeps the door from opening when you don’t wish it. I drill the hole undersize by 1/64th and sand the peg a little until it fits snugly.
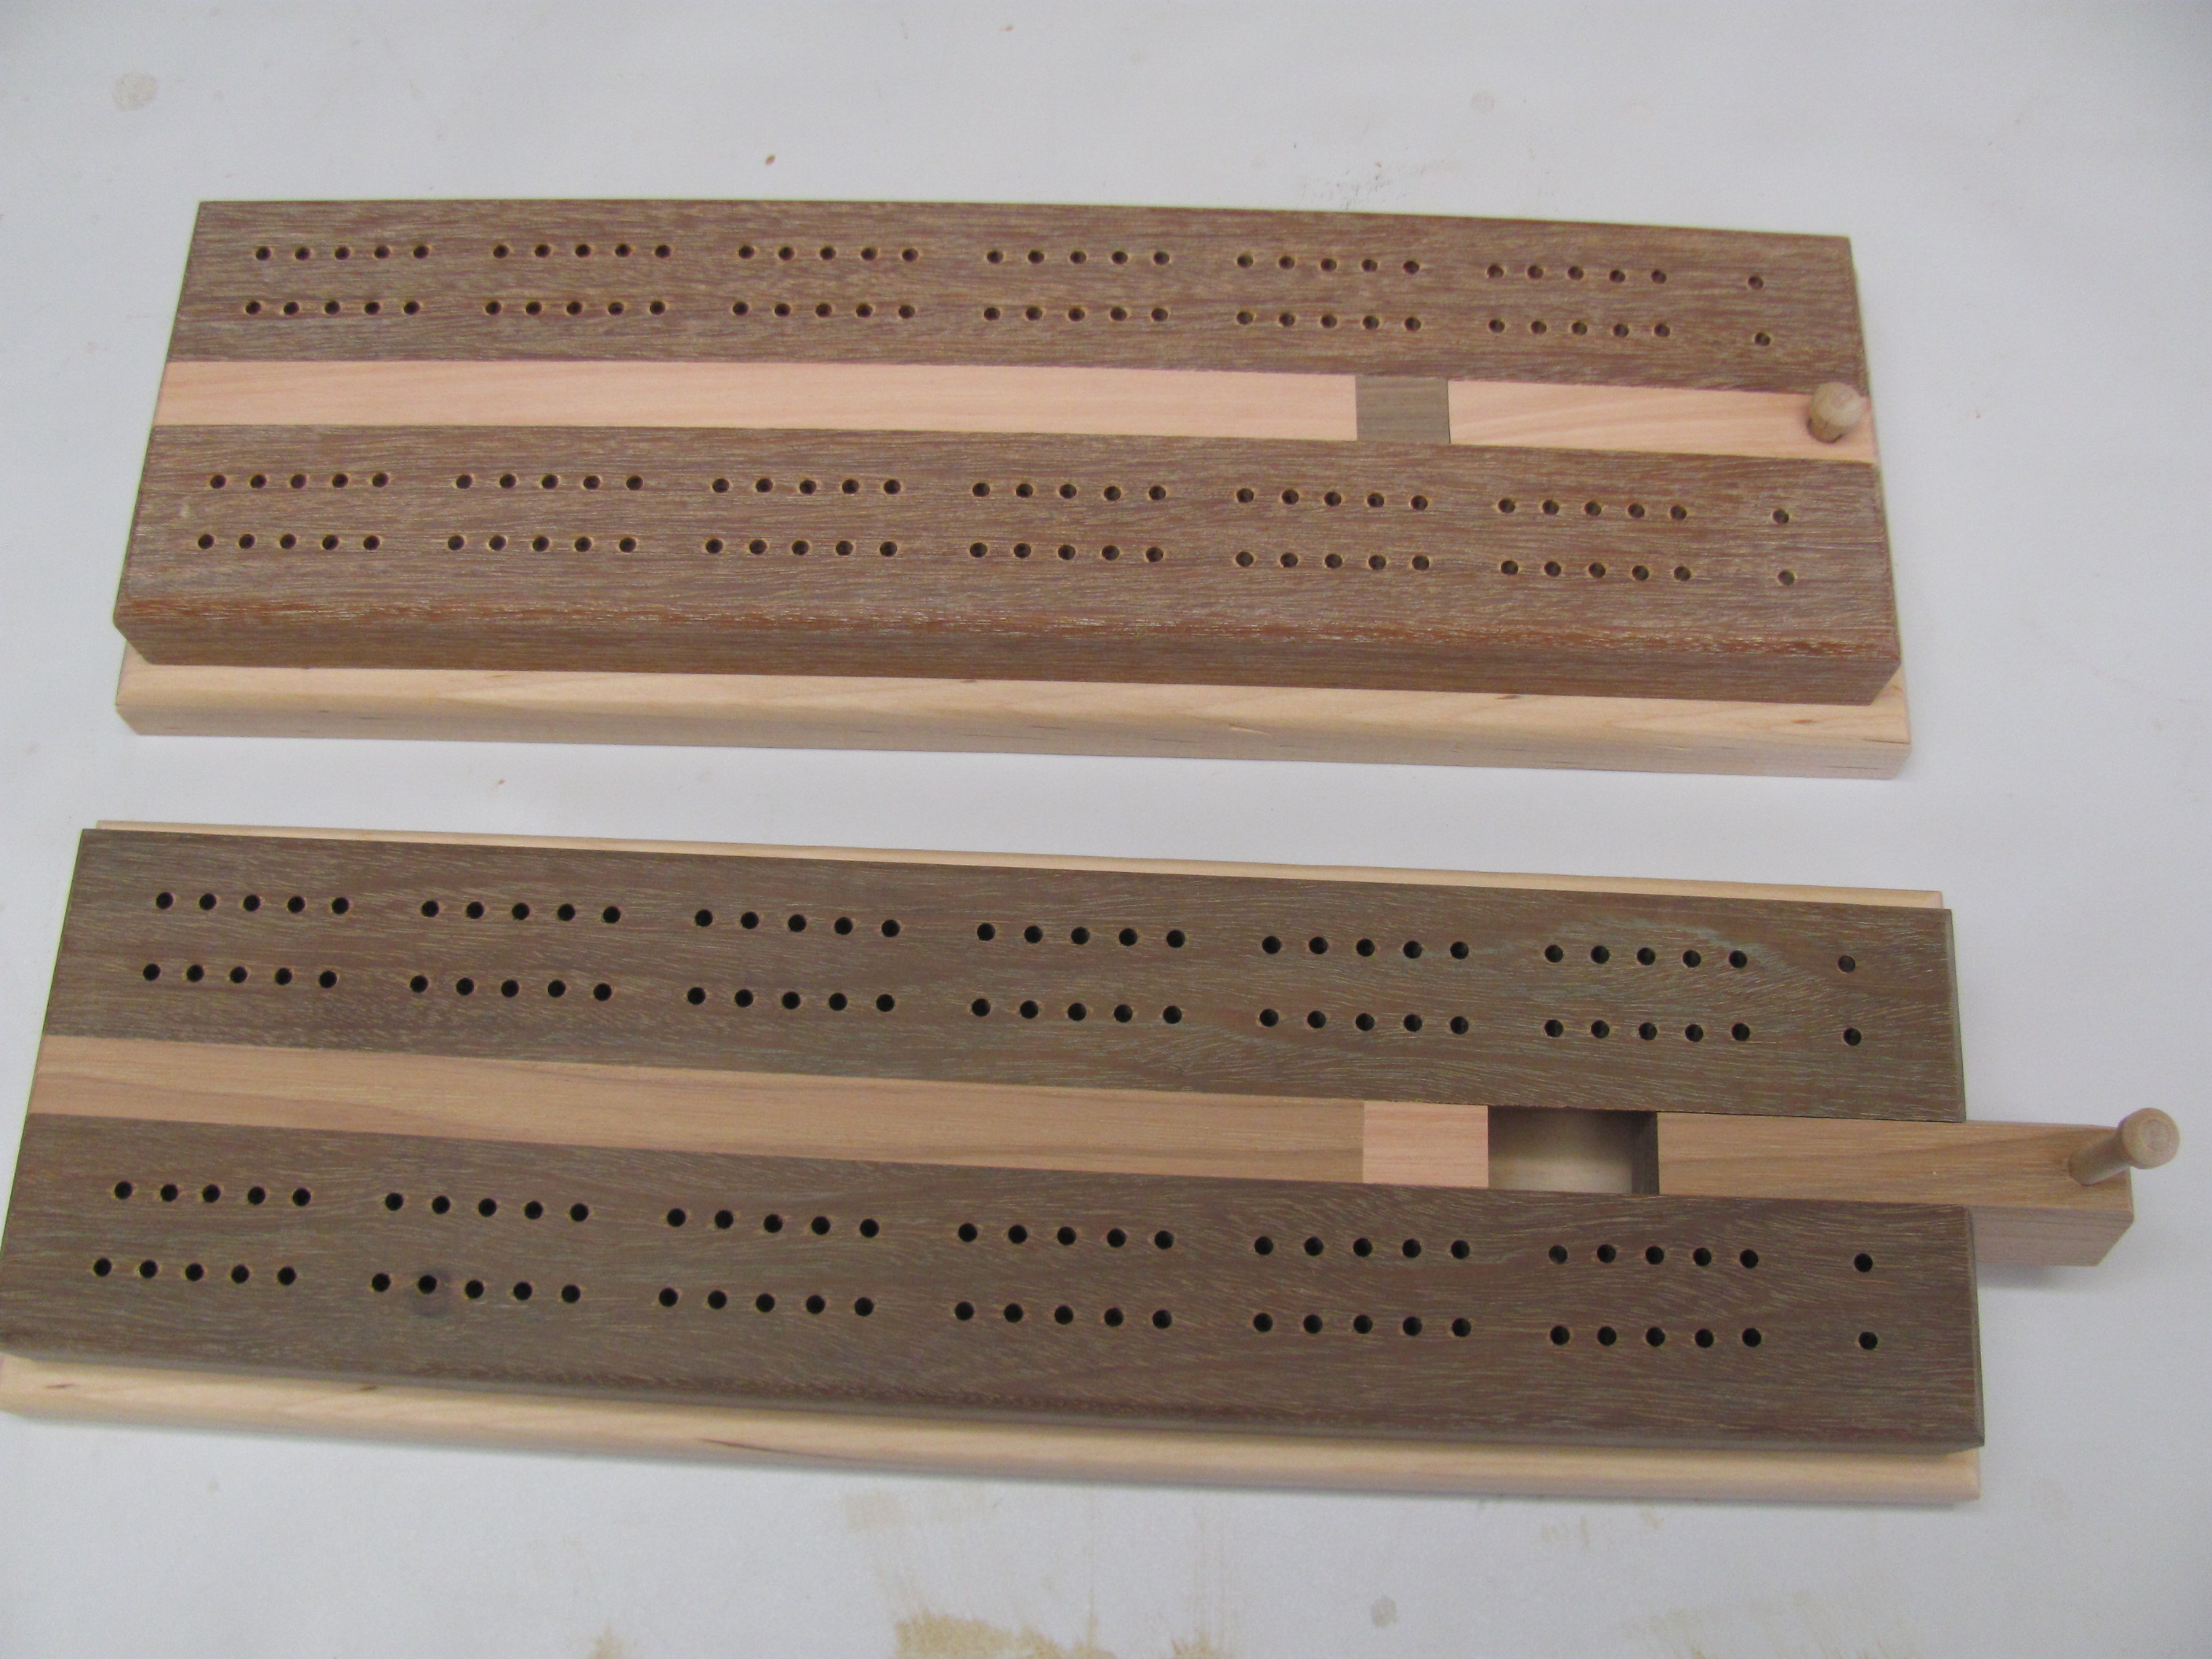
Finish with a durable product such as lacquer, polyurethane or other varnish.
Photos By Author
Share tips, start a discussion or ask other students a question. If you have a question for an expert, please click here.
Already a member?

You don't show the drilling template or the process. Where do I get the template, and how is it used?
Nice Cribbage Board. Can I ask why the center stop piece is needed? Is it just for looks?
It's an awesome post for all the internet users; they will take advantage from it I am sure.
can this be downloaded?
What is the template made from. Looks like a fun project.
very nice... thank you
It looks like it is good project and easy to do.
Pictures are here. You probably have a browser issue
What do we need to do get the pictures for this project?
Good idea to use scraps but at $40 for the template I will look for another way!