When it comes to running a CNC, figuring out how to secure material to the machine is sometimes half the battle. Having a vacuum table setup is great for easily holding large sheets of plywood and cutting out cabinet parts, but what if you want to hold smaller items and still use the vacuum table? Smaller parts can be difficult to hold securely with vacuum because they have less surface area. In this article, I’m going to share how I concentrated the suction from my CNC’s vacuum table to hold parts that would otherwise slide out of place while being cut.
The biggest enemy of vacuum clamping is air leaks, and the easiest way to mitigate this is by having a freshly surfaced spoil board and/or using gasketing material. Without going off the deep end on all the different ways you can use gasketing, we’ll keep it simple and just discuss two applications of gasketing.
The first is called on-board gasketing. This is a thin adhesive-backed material that you lay out on your spoil board slightly smaller than the profile of the piece you’re needing to cut out. This approach is great for one-off parts where you need a little extra clamping force to hold parts in place, but is not the best solution for multi-run production settings.
The second approach is in-board gasketing, which is used when higher volumes or multiple batches of parts are made. With this method you create dedicated fixtures and lay gasketing material into grooves that have been cut in the board.
I make my fixtures by using two layers of 3/4” Baltic birch plywood (Delrin, ABS plastic, or Corian are other good alternatives). Don’t cheap out and use MDF because it’s too porous for this application and you’ll struggle to hold parts in place.
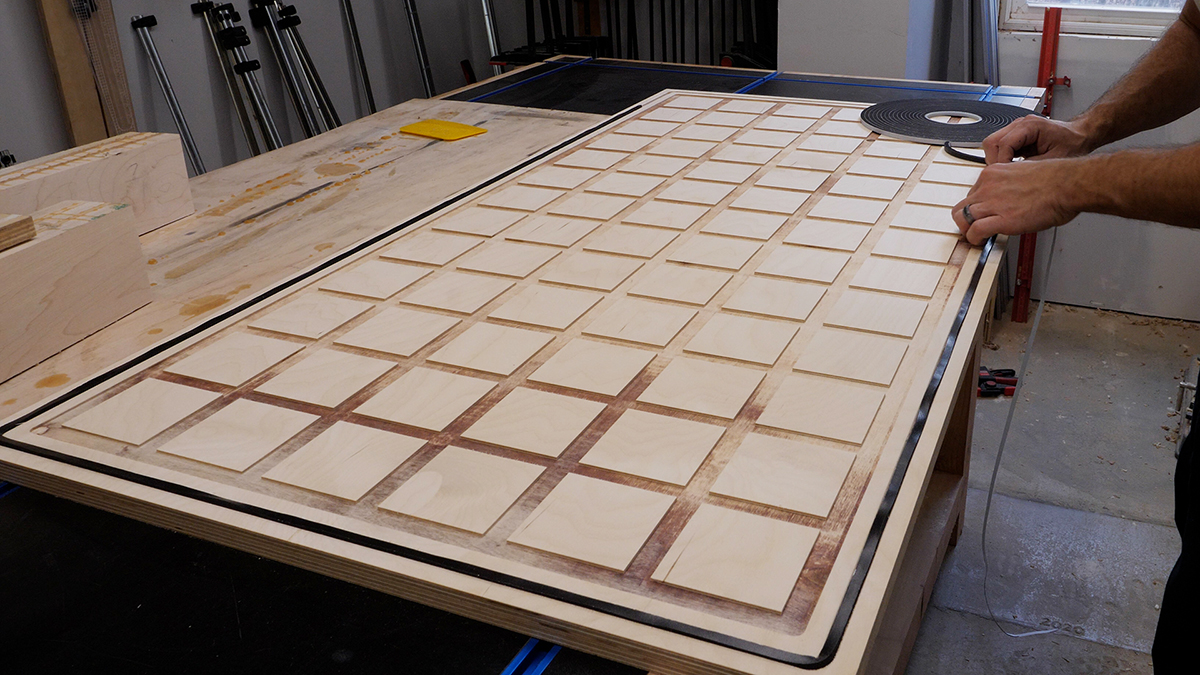
The base layer is simple. It has a grid cut on the bottom with a single bleeder hole and a groove for the in-board gasketing around the perimeter. It’s also 1” larger in width and length than the vacuum zone at the origin or 0,0 position on my CNC. This way the entire 2’ x 4’ area of the zone is captured by this base layer and the vacuum is concentrated to a single bleeder hole. Along two edges there is a lip that locates the base layer at the 0,0 location and also registers the second layer fixture at 0,0.
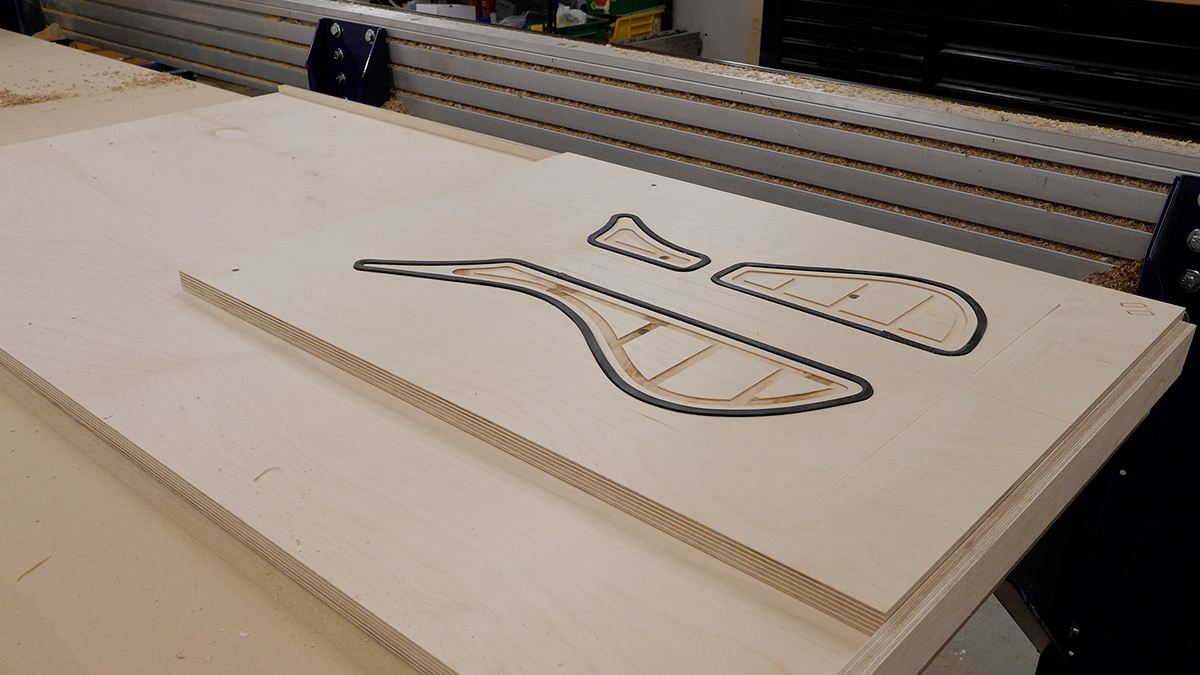
The second layer is made from another piece of 3/4” Baltic birch plywood and is only as large as necessary to hold the part(s) being machined. This layer also has a grid and in-board gasketing running the perimeter of the board on the underside. The top side of the fixture has in-board gasketing about 1/4” inset from the profile of the part(s) being cut out along with a bleeder hole that intersects the grid on the underside and a dished out portion inside of the gasket channel.
Just in case you’re wondering, it’s not completely necessary to make this fixture in two different layers, but for me it made sense to make one 2’x4’ layer to concentrate the vacuum and subsequent smaller fixtures that are easier to store.
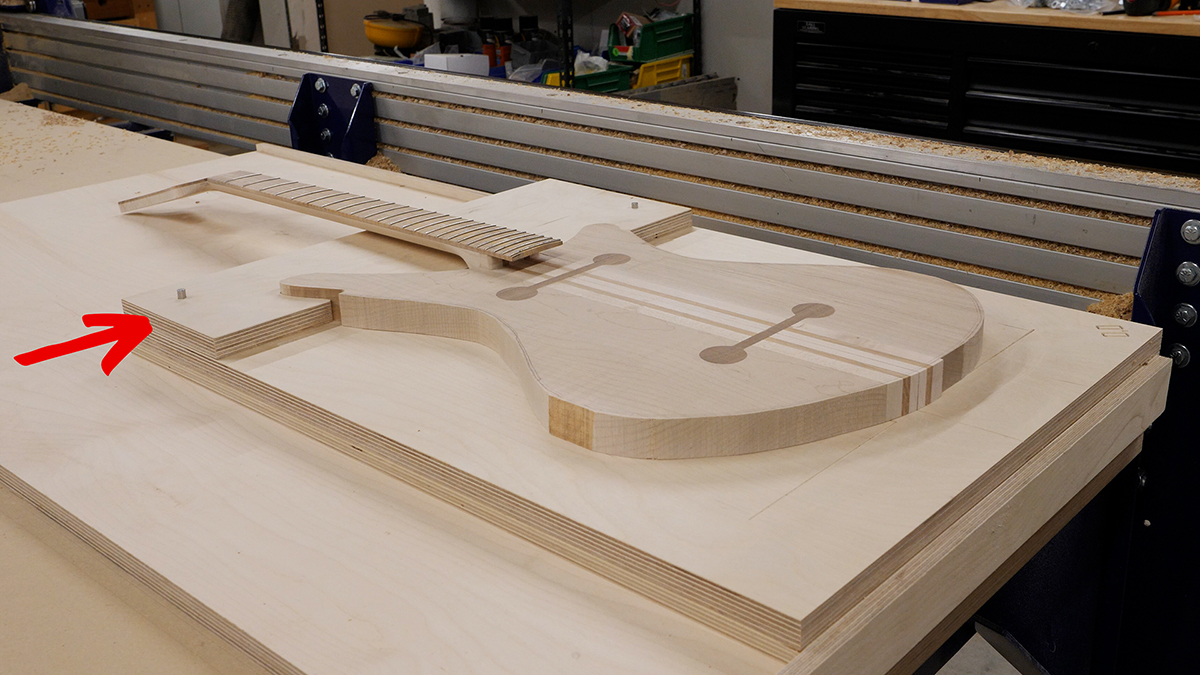
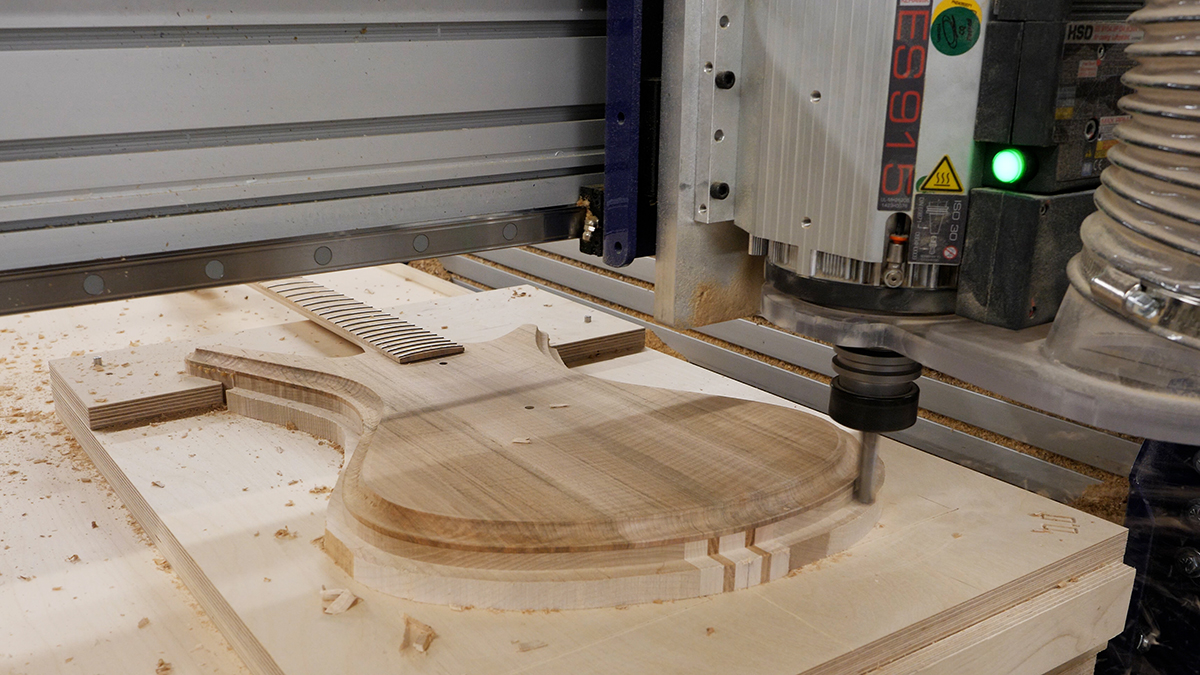
To take this one step further and create an even stronger work holding solution, you can route a shallow cavity (1/16” - 1/8” deep) into your fixture that matches the profile of your piece. Another option is to make locating features like this.
By adding a piece like this that accurately locates with two dowel pins, I was able to use one fixture for multiple operations. This allowed me to take the guitar off the CNC for secondary operations like glue ups, and then accurately put it back on the machine, or flip it over for additional machining.
If you’d like to see these fixtures in use, I built a guitar using this work holding method and have a playlist on my YouTube channel here.

share, respond and print u-tube web siteto my e-mail