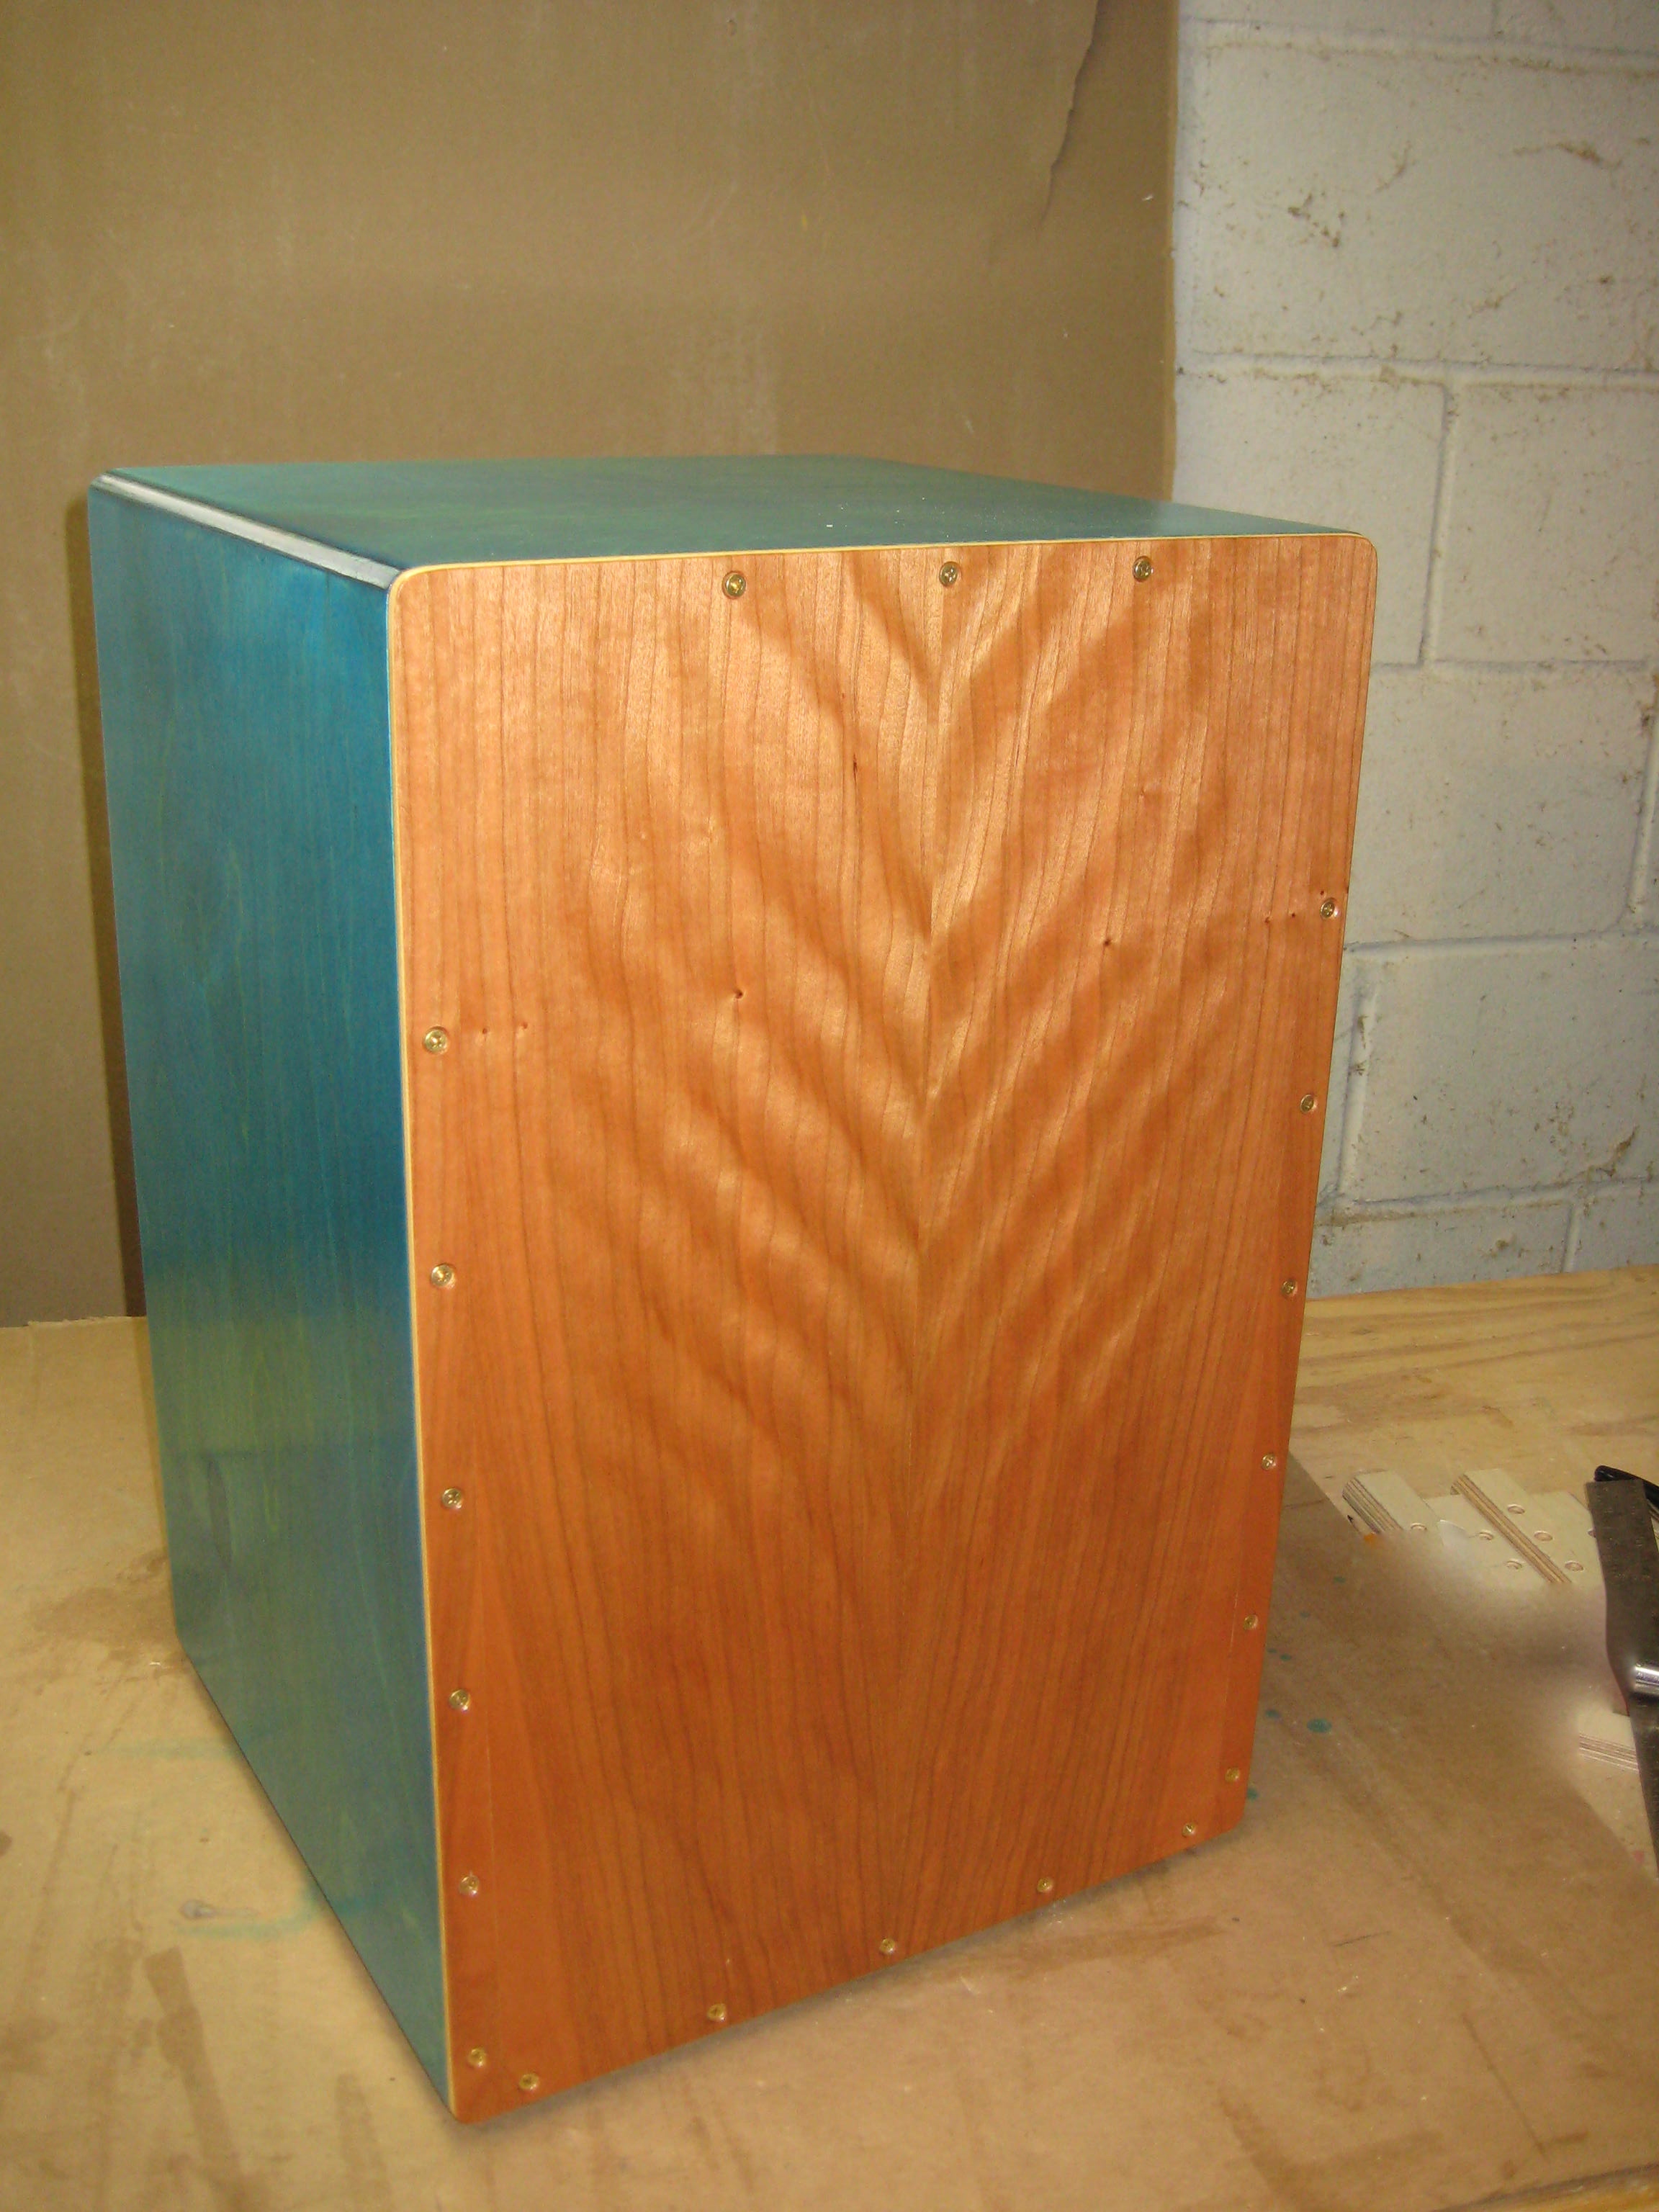
How to Build a Cajon Drum Like a Pro

front-drum-small - How to Build a Cajon Drum

Cajon drums produce a professional percussion sound and are easy to build in a typical hobbyist woodworking shop. Joe Cruz is a professional Cajon builder and provides the basic information needed to build one including a scaled drawing.

The Cajon (pronounced ka-hone’) is a wooden percussion instrument that is simple to make, can be played as a fair substitute for a full trap set, and is used by professional musicians to deliver a full, rich sound in studio or live performance venues. This style drum has been around for hundreds of years and can be built by most woodworkers with basic tools and skills.

To help us get up to speed on the nuances of producing high-quality sound in a Cajon, I consulted with Joe Cruz, a veteran Cajon designer and builder from Minnesota who has built Cajons for many professional and amateur musicians. Joe has been refining his Cajon design for about a decade, and he was willing to share his secrets for those of us who want to take a crack at building our own. Joe even provided his personal scale drawing to simplify the building process if you want to take this on.

If you are still not convinced, click here to see a video of Joe playing a Cajon that he built.
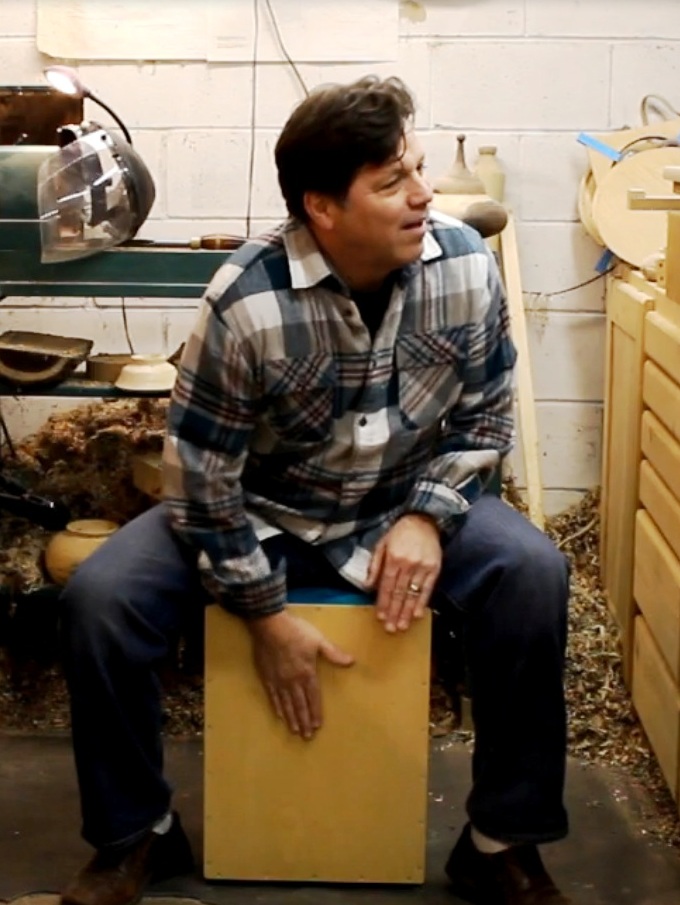
joe-playing-small - How to Build a Cajon Drum Joe is a well known professional musician in the Minneapolis/St. Paul area, skilled on stringed as well as percussion instruments. He is also an accomplished woodworker, with a stellar portfolio of furniture as well as turned pieces.

When he started building Cajons, he found it to be a great way to mingle his music and woodworking passions into a single project. Since building that first Cajon, he has continued to hone the design to achieve a richer sound, experimenting with materials and even incorporating a snare into the design (this is cool!).

Don’t be fooled by the modest appearance of these drums. These relatively simple boxes deliver professional-sounding percussions, suitable for a variety of performance and studio environments. Cruz said; “When I work in small venues where it is not practical to bring in a full set of drums, the Cajon allows me to produce nearly any sound I need while requiring very little space. In fact, since it also serves as my chair, it doesn’t really require any additional space. It is also not as loud as a traditional trap set, so it serves as a way to scale back the volume for quieter venues. Mostly, I love the unique, rich sound, and the portability and versatility of the Cajon”.


become a member

Tips for making a Cajon

The Cajon can be built to a size that makes it ideal for the person using it. Because you sit on it while playing, the dimensions should provide a comfortable sitting platform for the intended drummer. Joe finds that the dimensions provided in his drawing produce a comfortable Cajon for most people, but obviously the dimensions can be adjusted as you see fit. The larger you build it, the lower the frequencies it will produce.
back-of-drum-small - How to Build a Cajon Drum

How to Build a Cajon Overview

You essentially will be building a big six sided box with a hole in it. First use rabbet joints to attach the sides to the top and bottom. The back is then fastened into a rabbet that is milled in the back edge of the top, bottom and side panels, and the front is simply attached with screws placed into pre-drilled holes.
clamping-small - How to Build a Cajon Drum

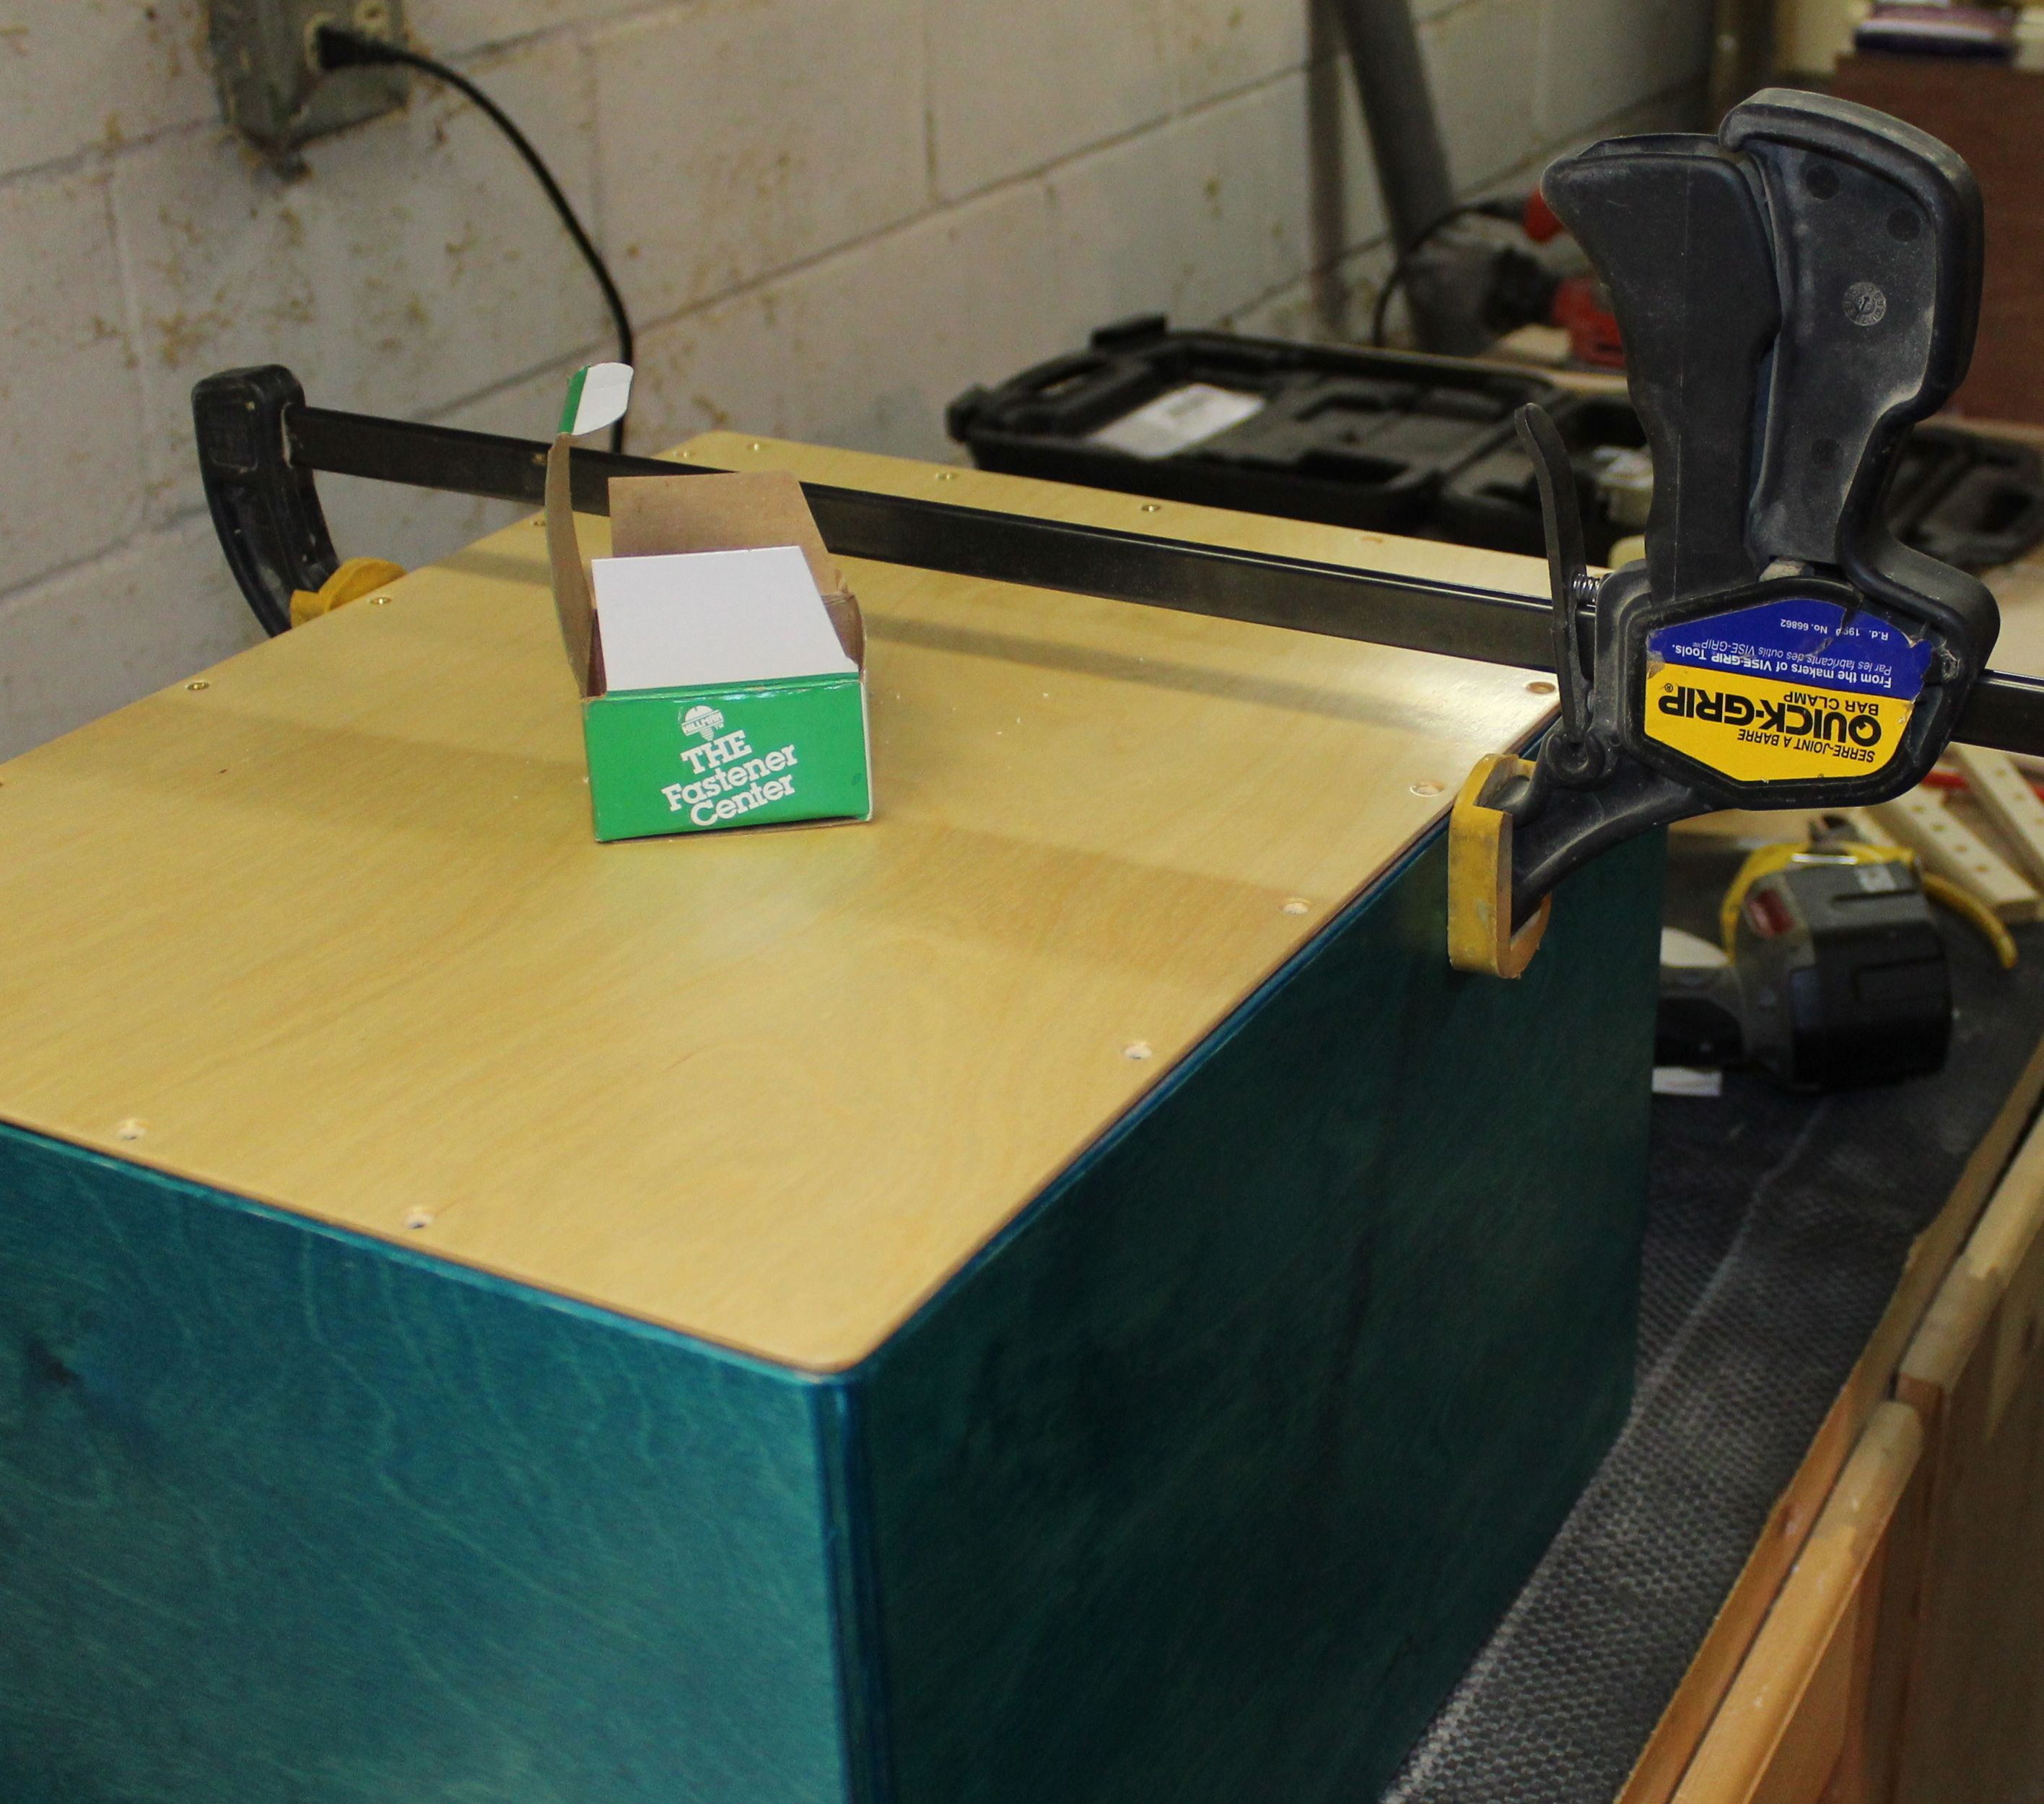
Square up the sides

Joe cuts the playing surface (front) to the specific size in his plan (see plan here), and he uses a clamp to pull the sides into alignment with the front prior to attaching.
attaching-small - How to Build a Cajon Drum

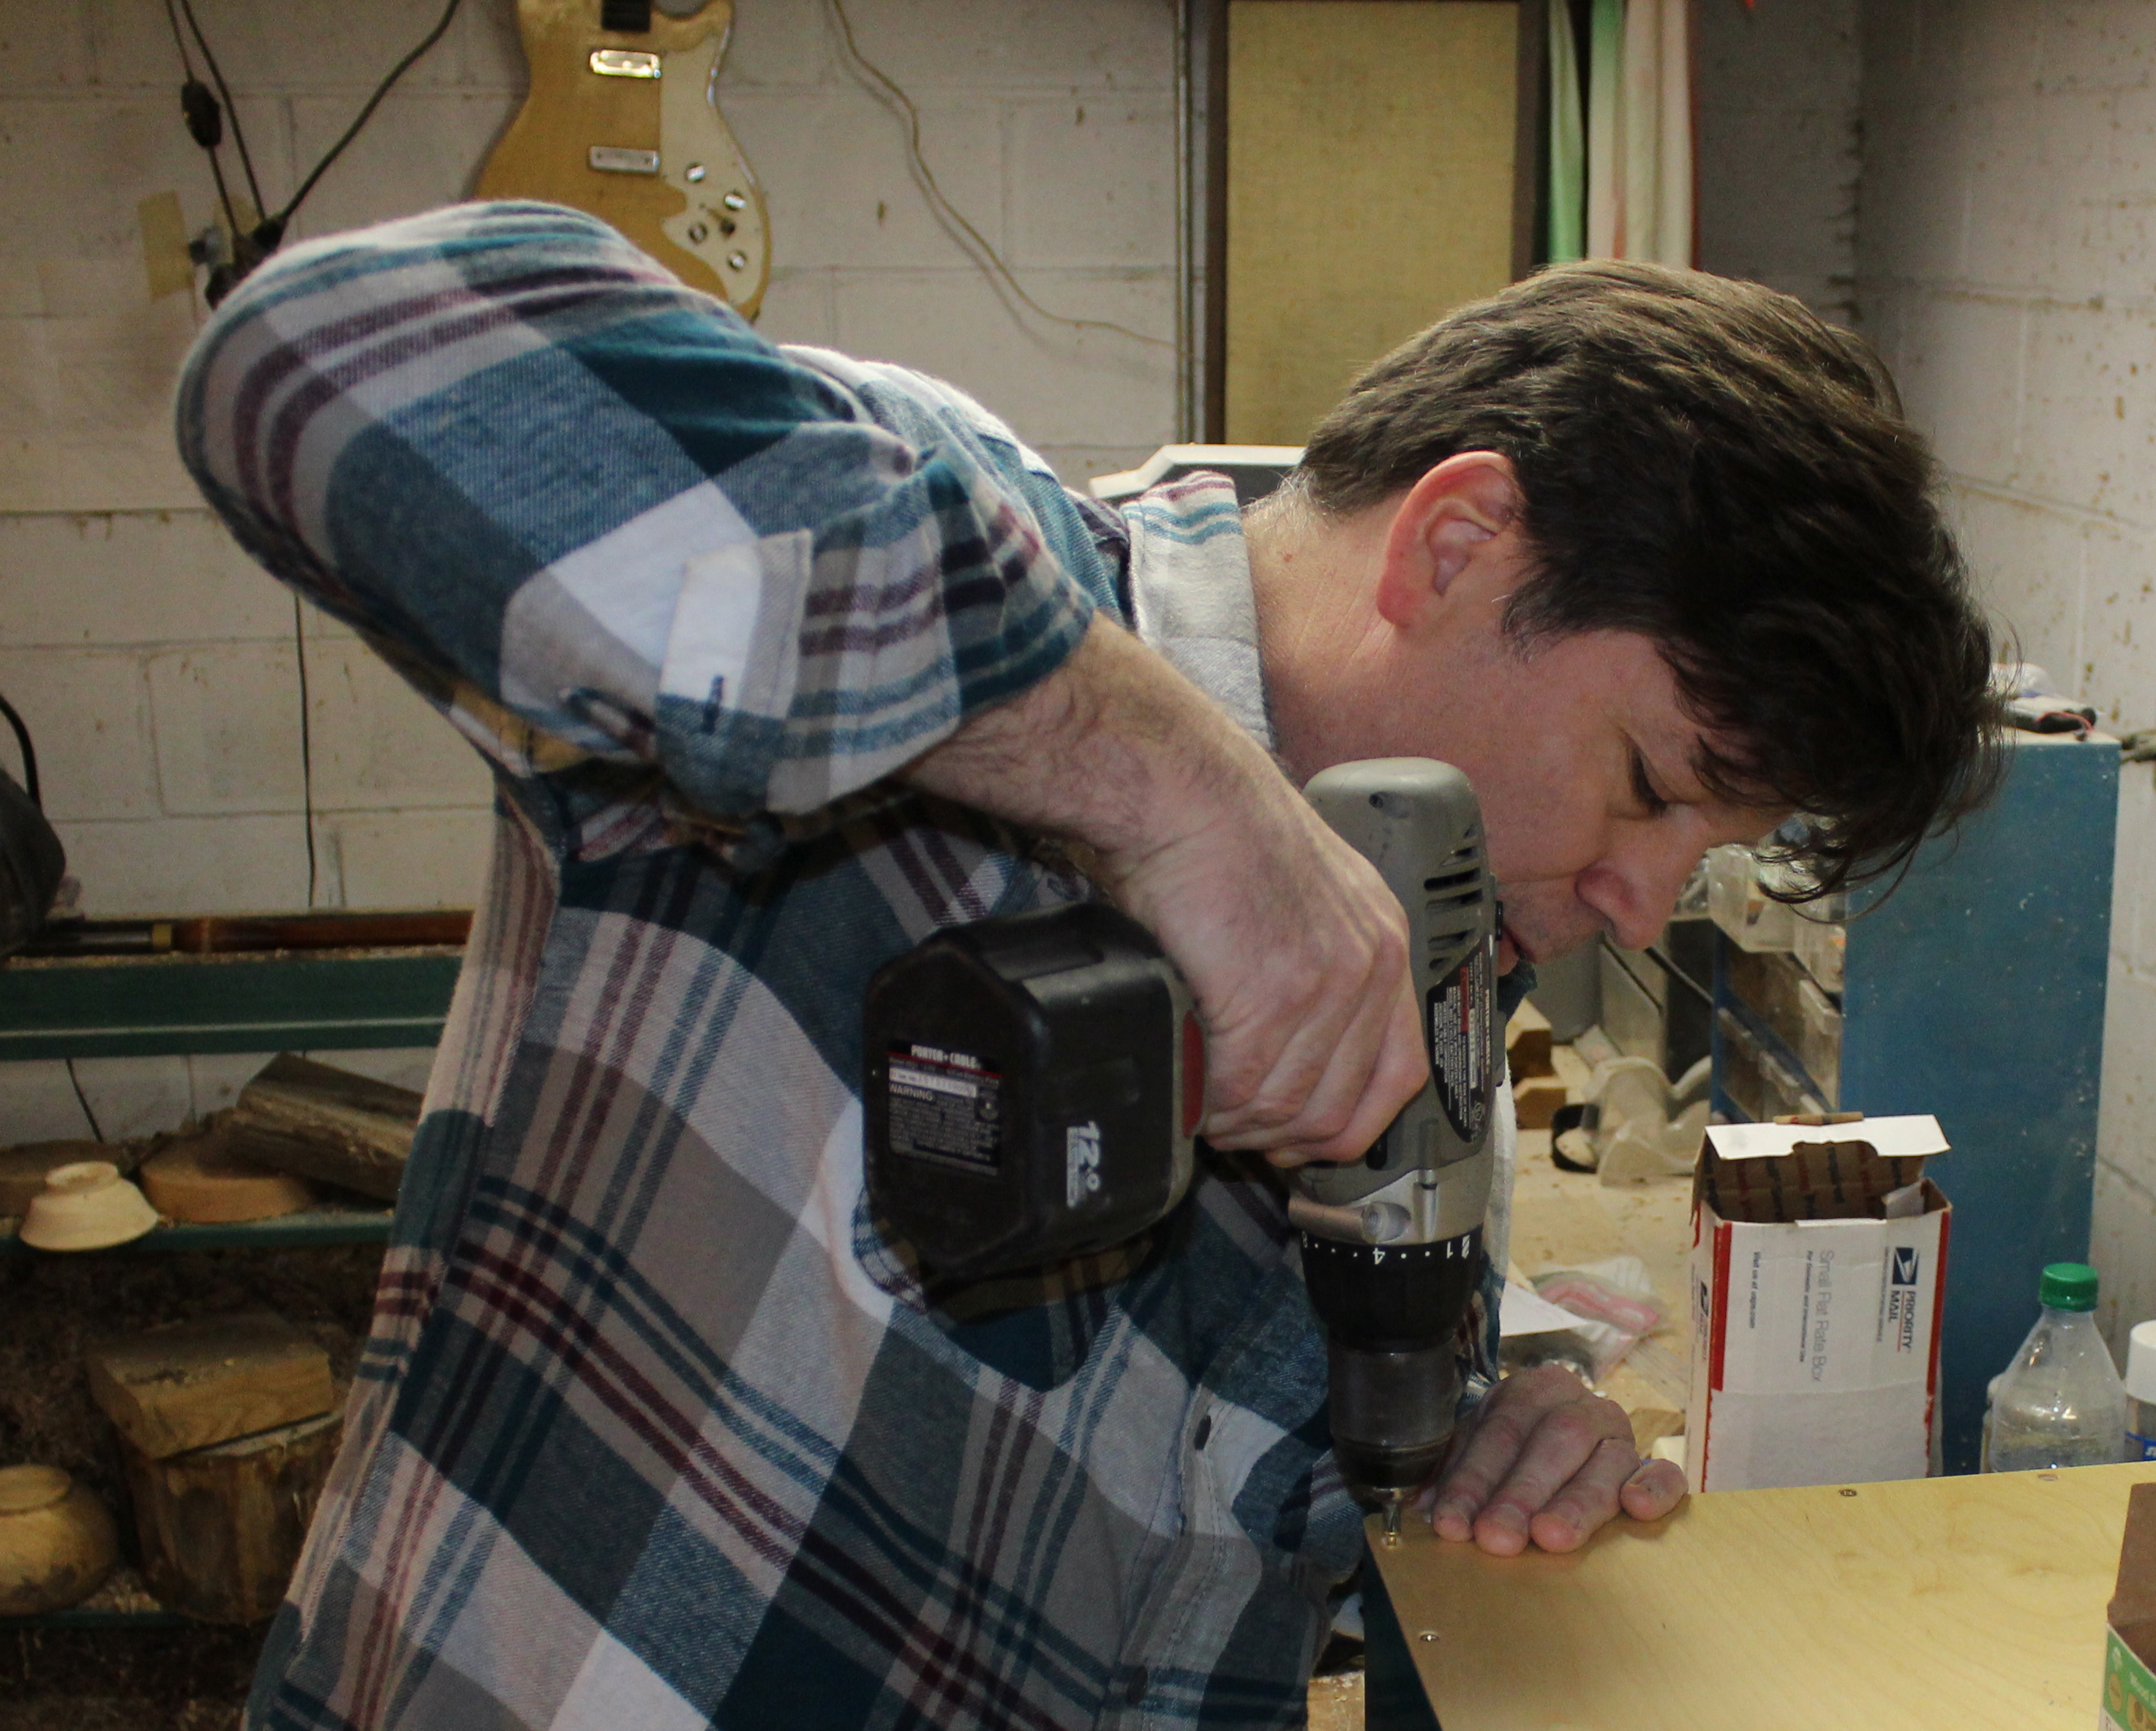
Attaching the front

Joe attaches the front with wood screws. This panel is visible while you are playing so you might want to use stainless steel or brass screws.
corner-small - How to Build a Cajon Drum

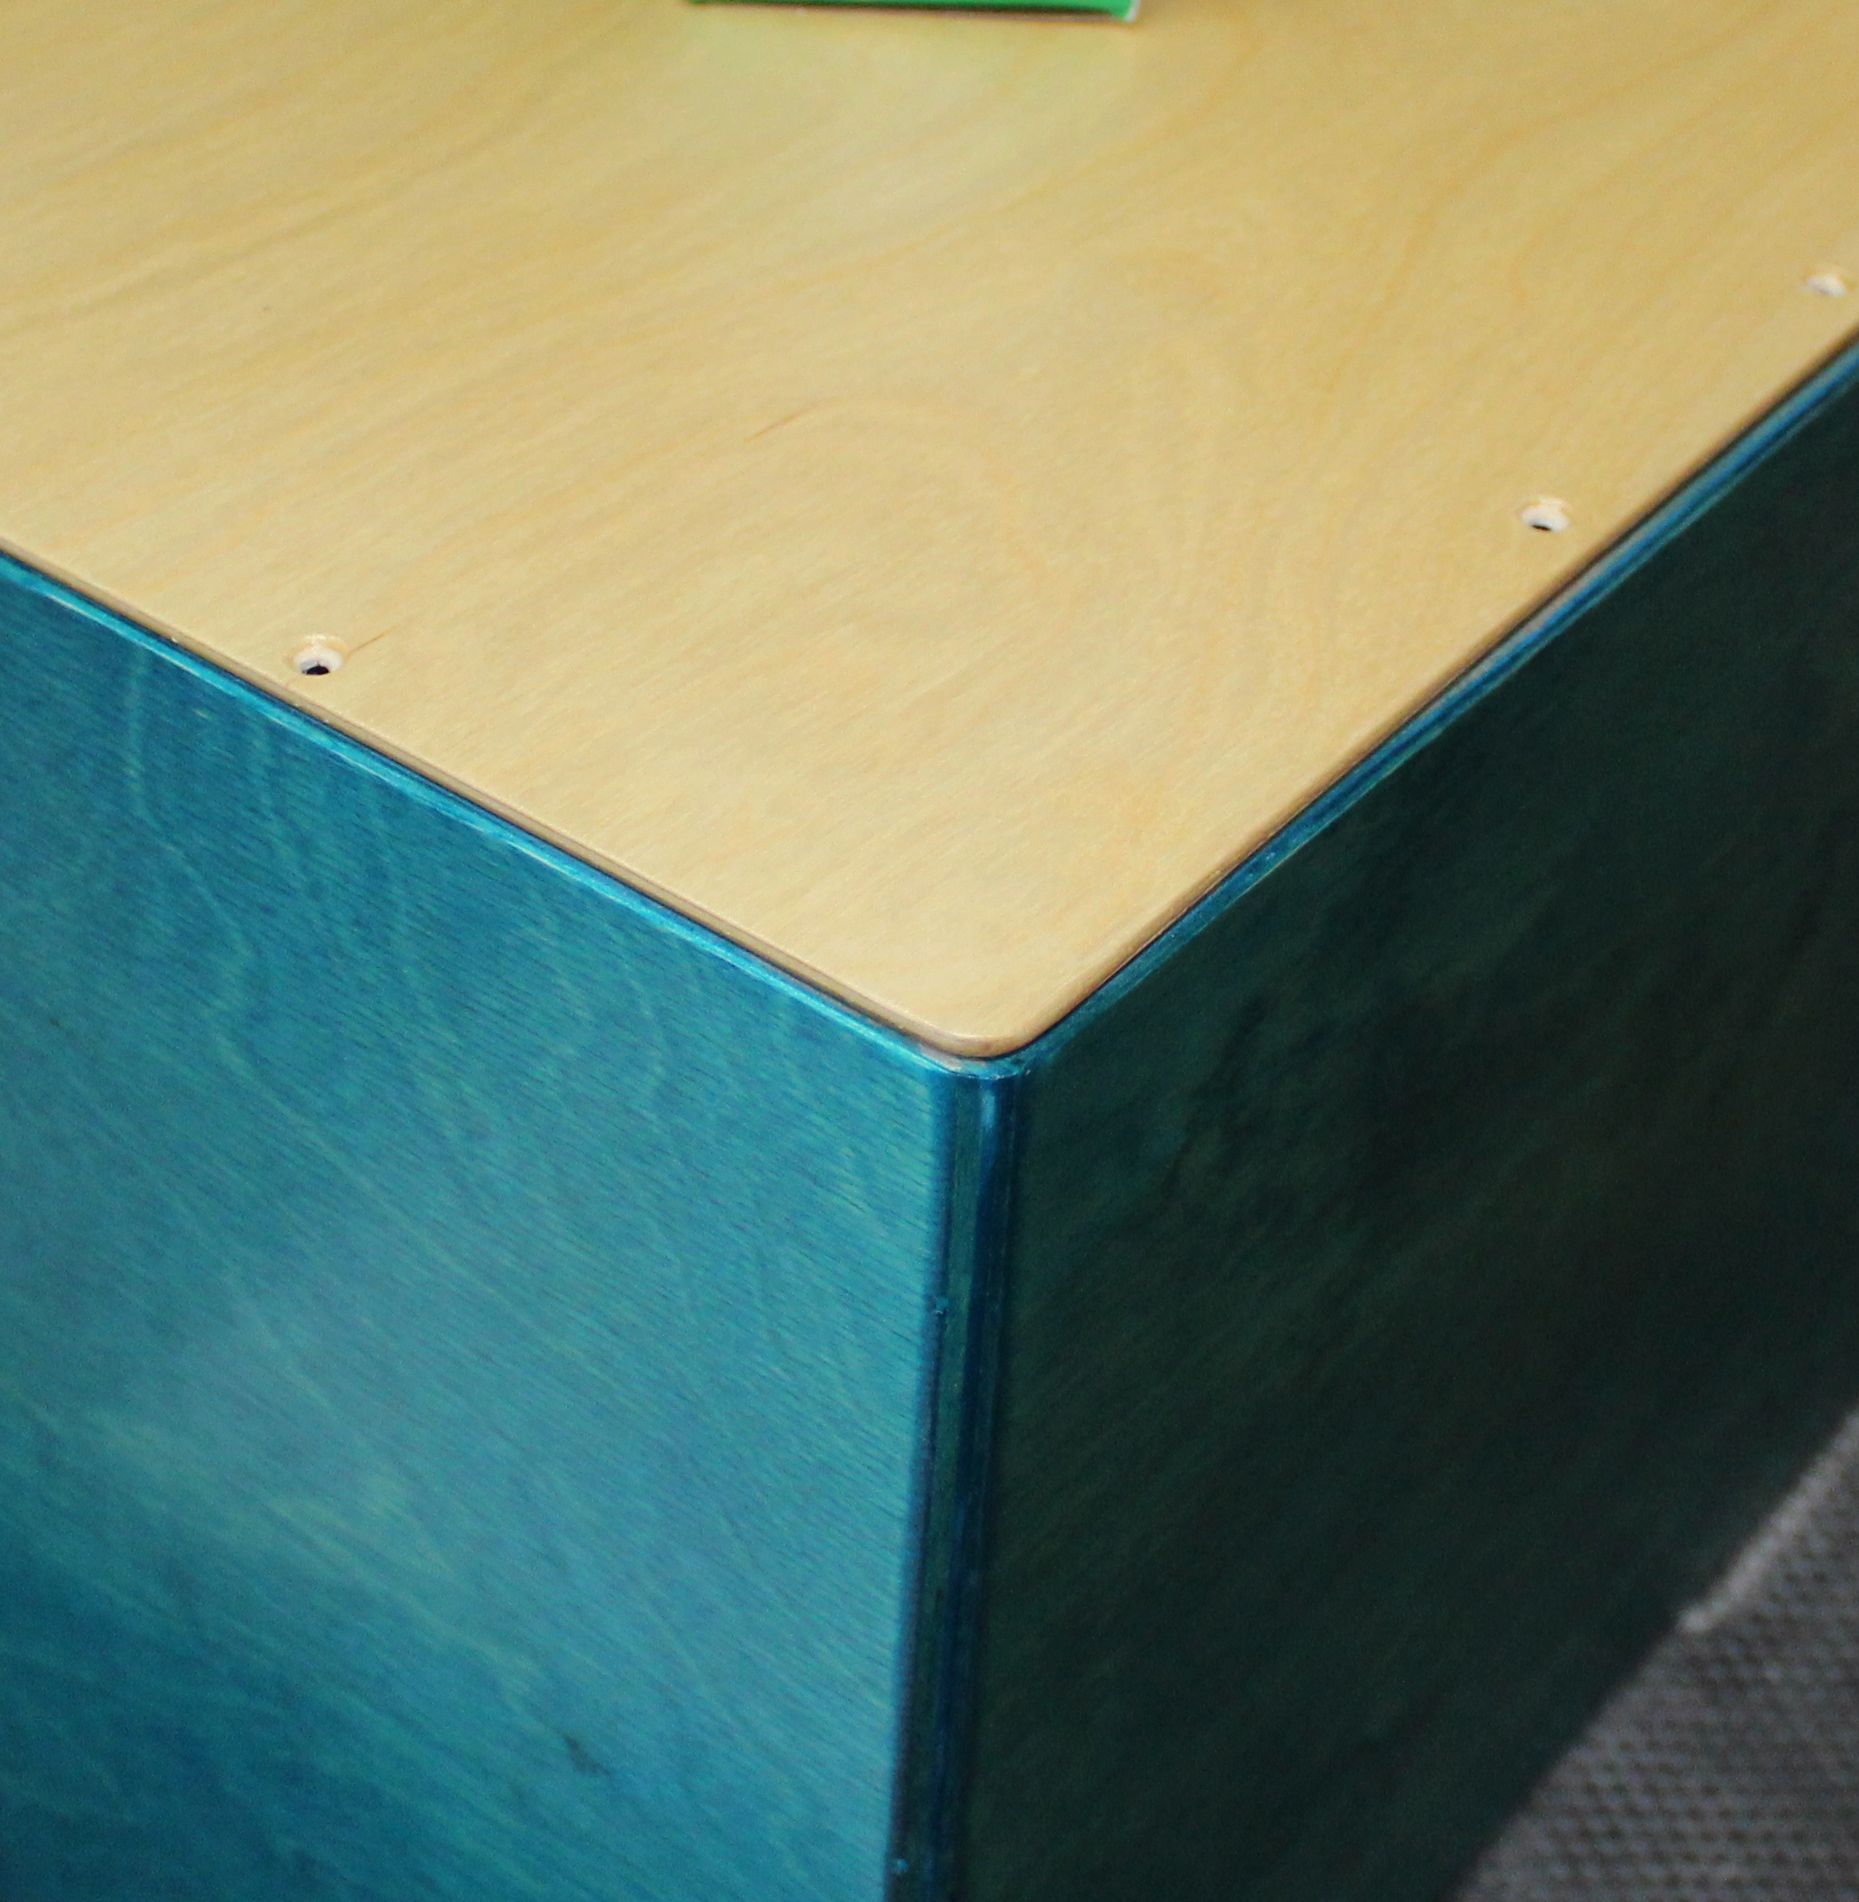
Let the top corners “slap”

Screws about every 3″, but at the top corners, leave about 4″-5″ with no screws. Leaving this gap creates a more powerful slapping sound when the drum face is struck.
sanre-strings-small - How to Build a Cajon Drum

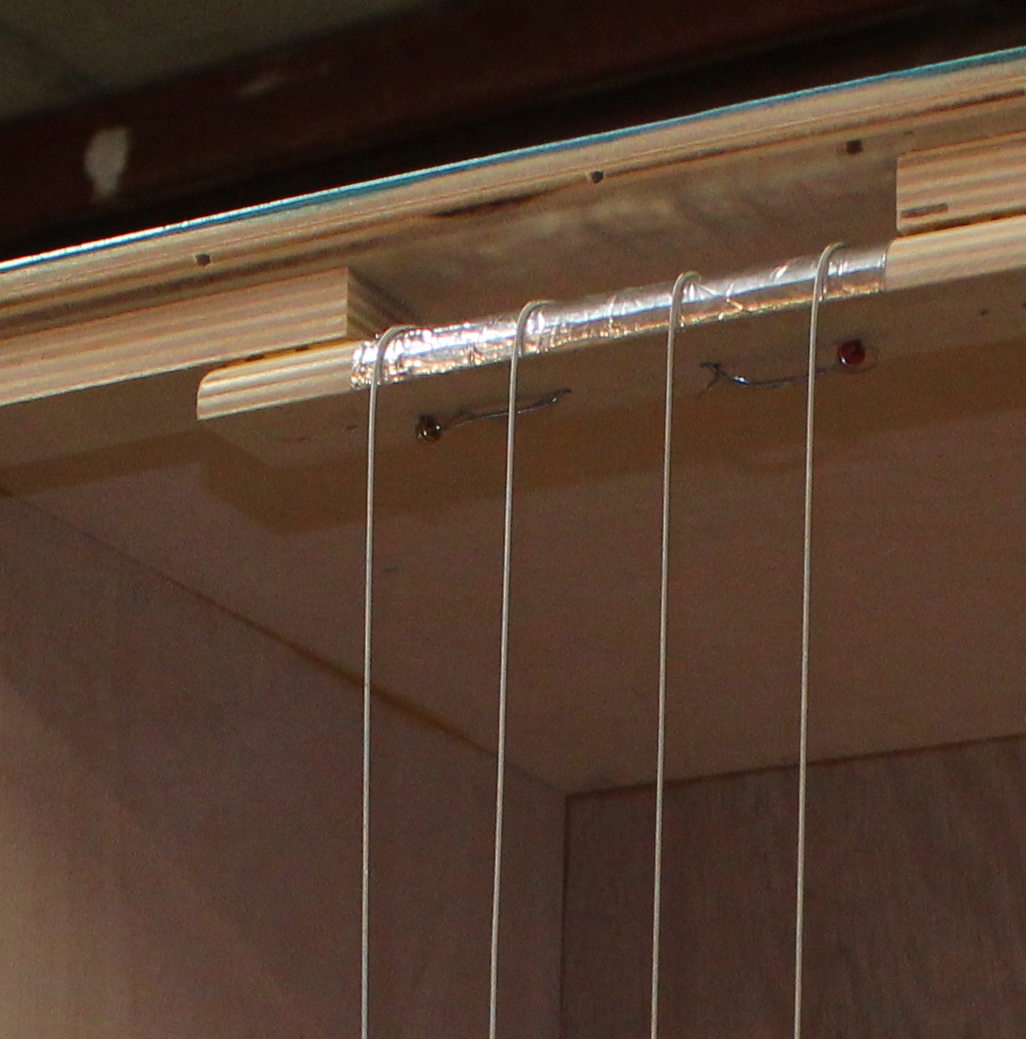
Built in snare

Many of Joe’s drums go out as strictly a drum, but some customers request a built in snare. If you want to attach a snare, you will simply attach guitar strings on the back side of the front head, stretching them so they are tight against the back panel. If you want to get fancy and allow their tension to be adjusted, there are several ways to do this. Joe has used guitar tuners, Hammered Dulcimer tuners or simple spring mechanism.
sound-hole-small - How to Build a Cajon Drum

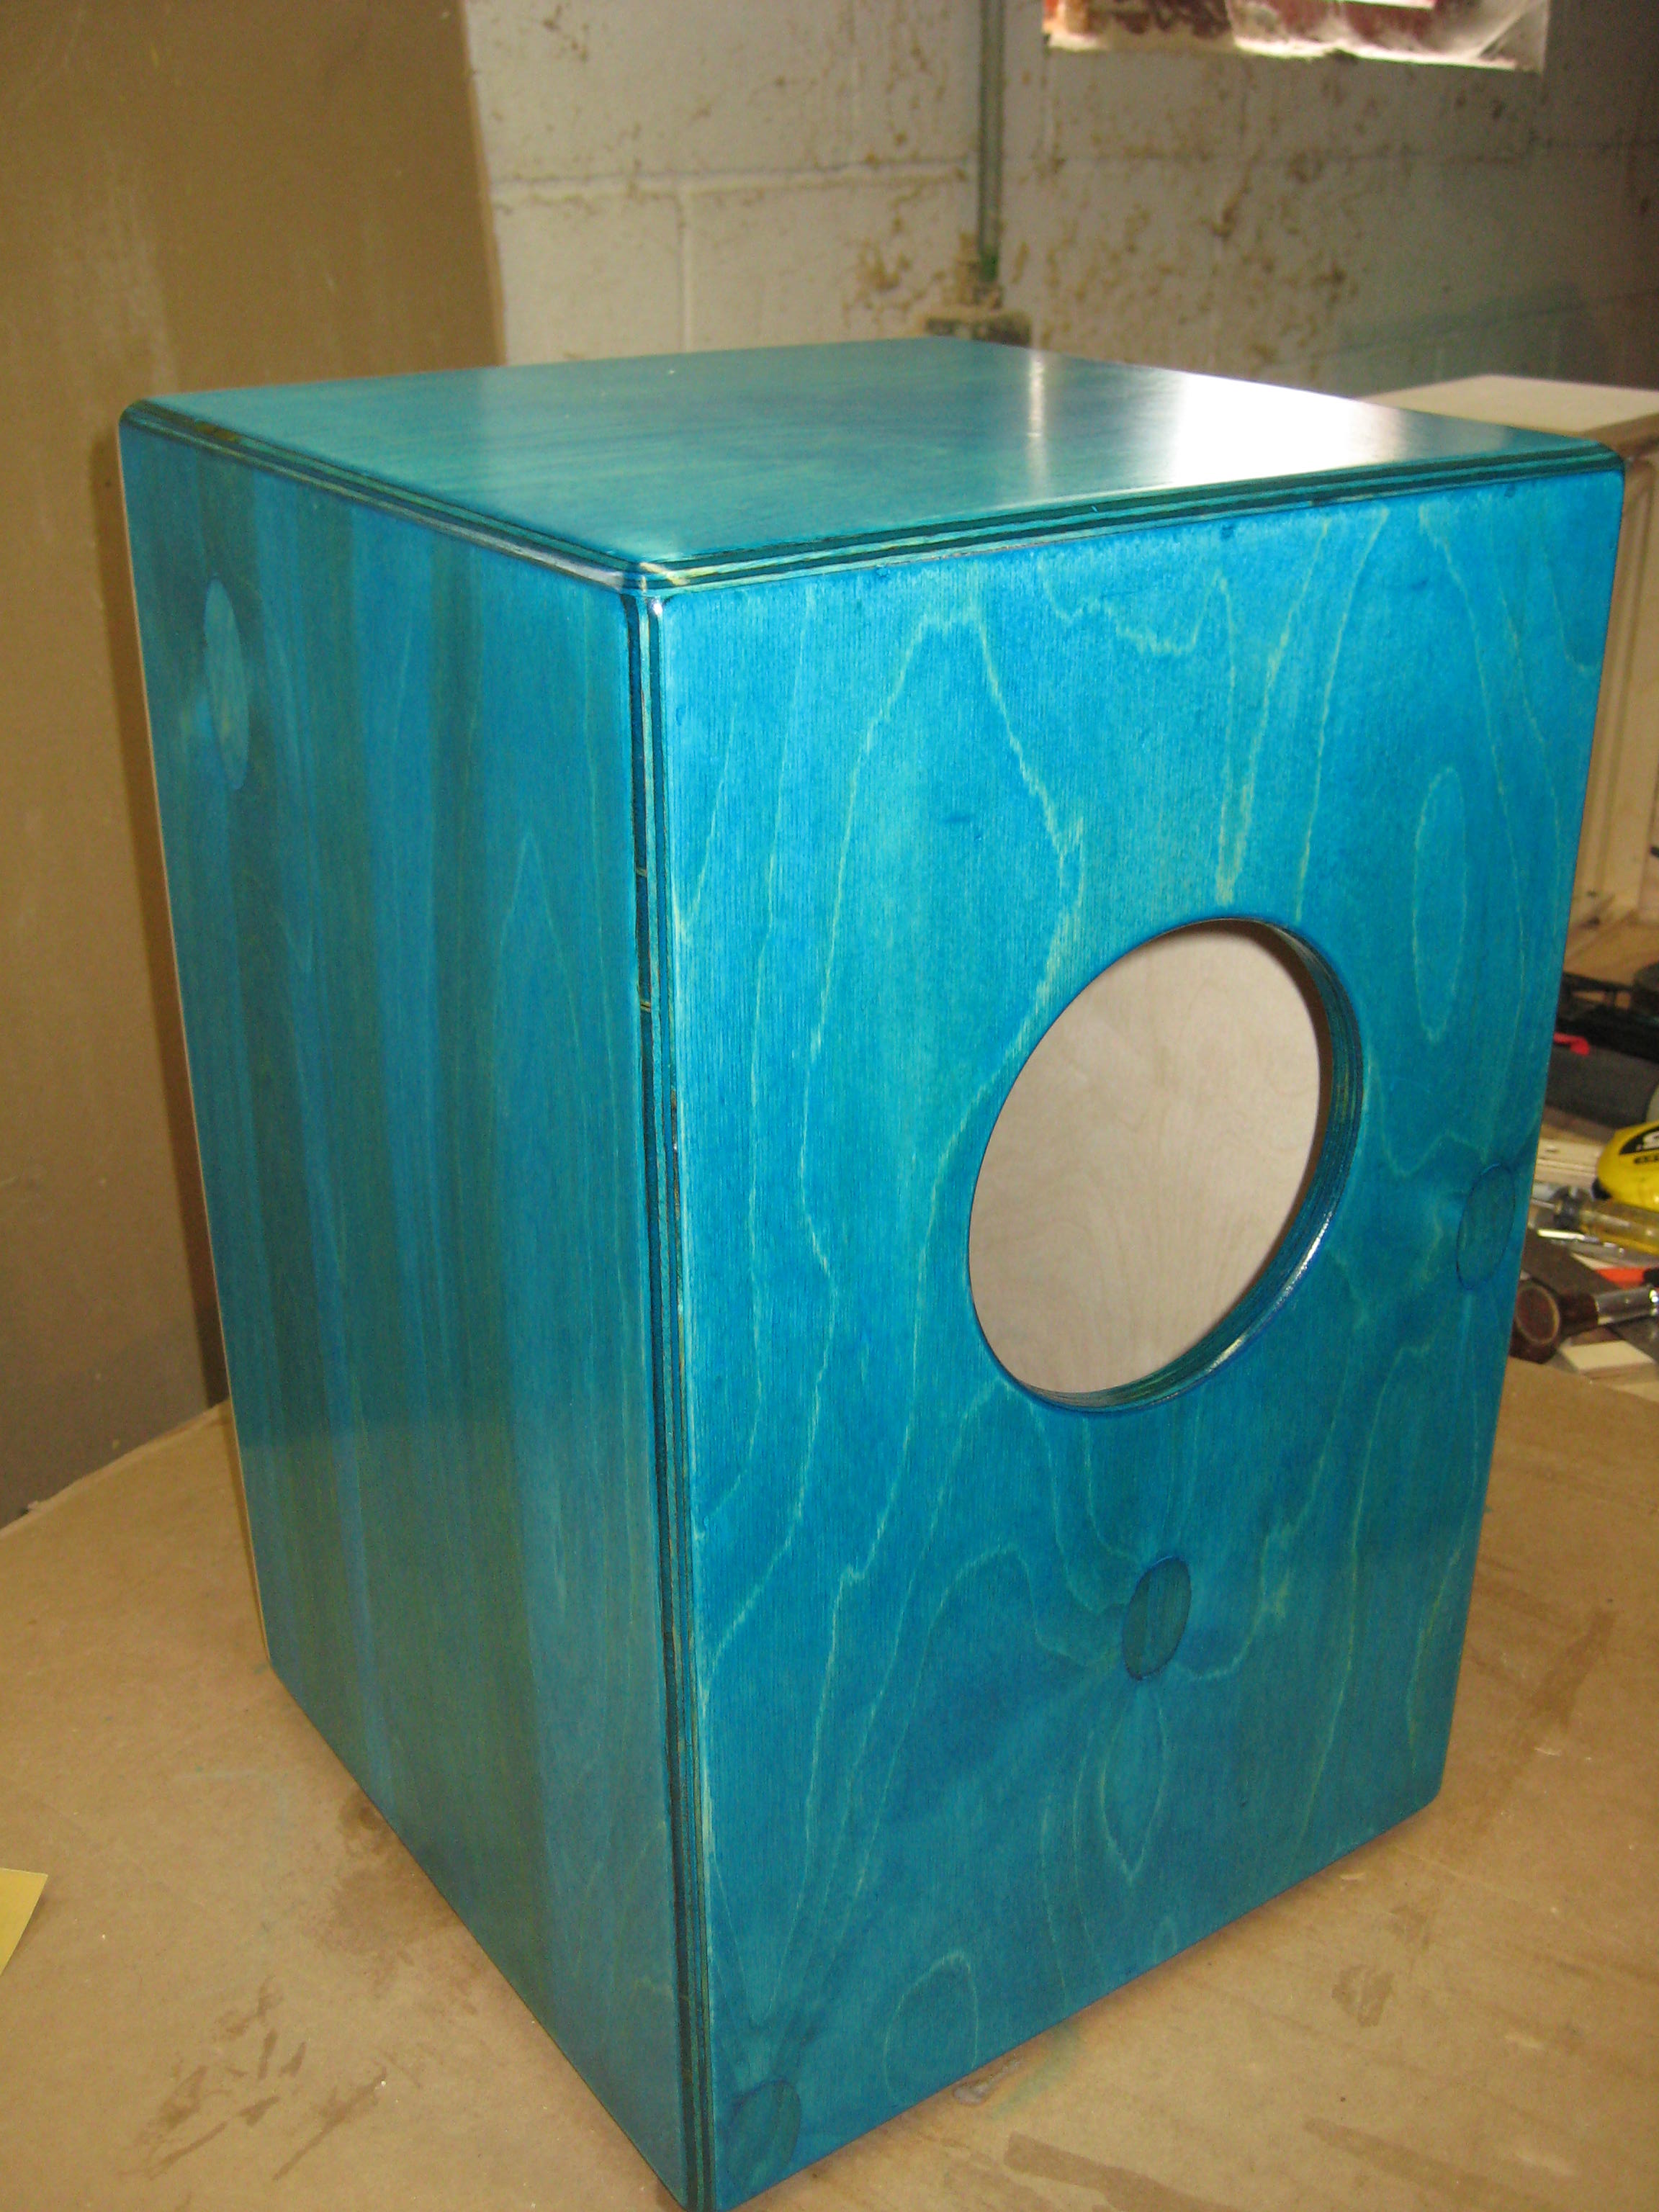
Sound port

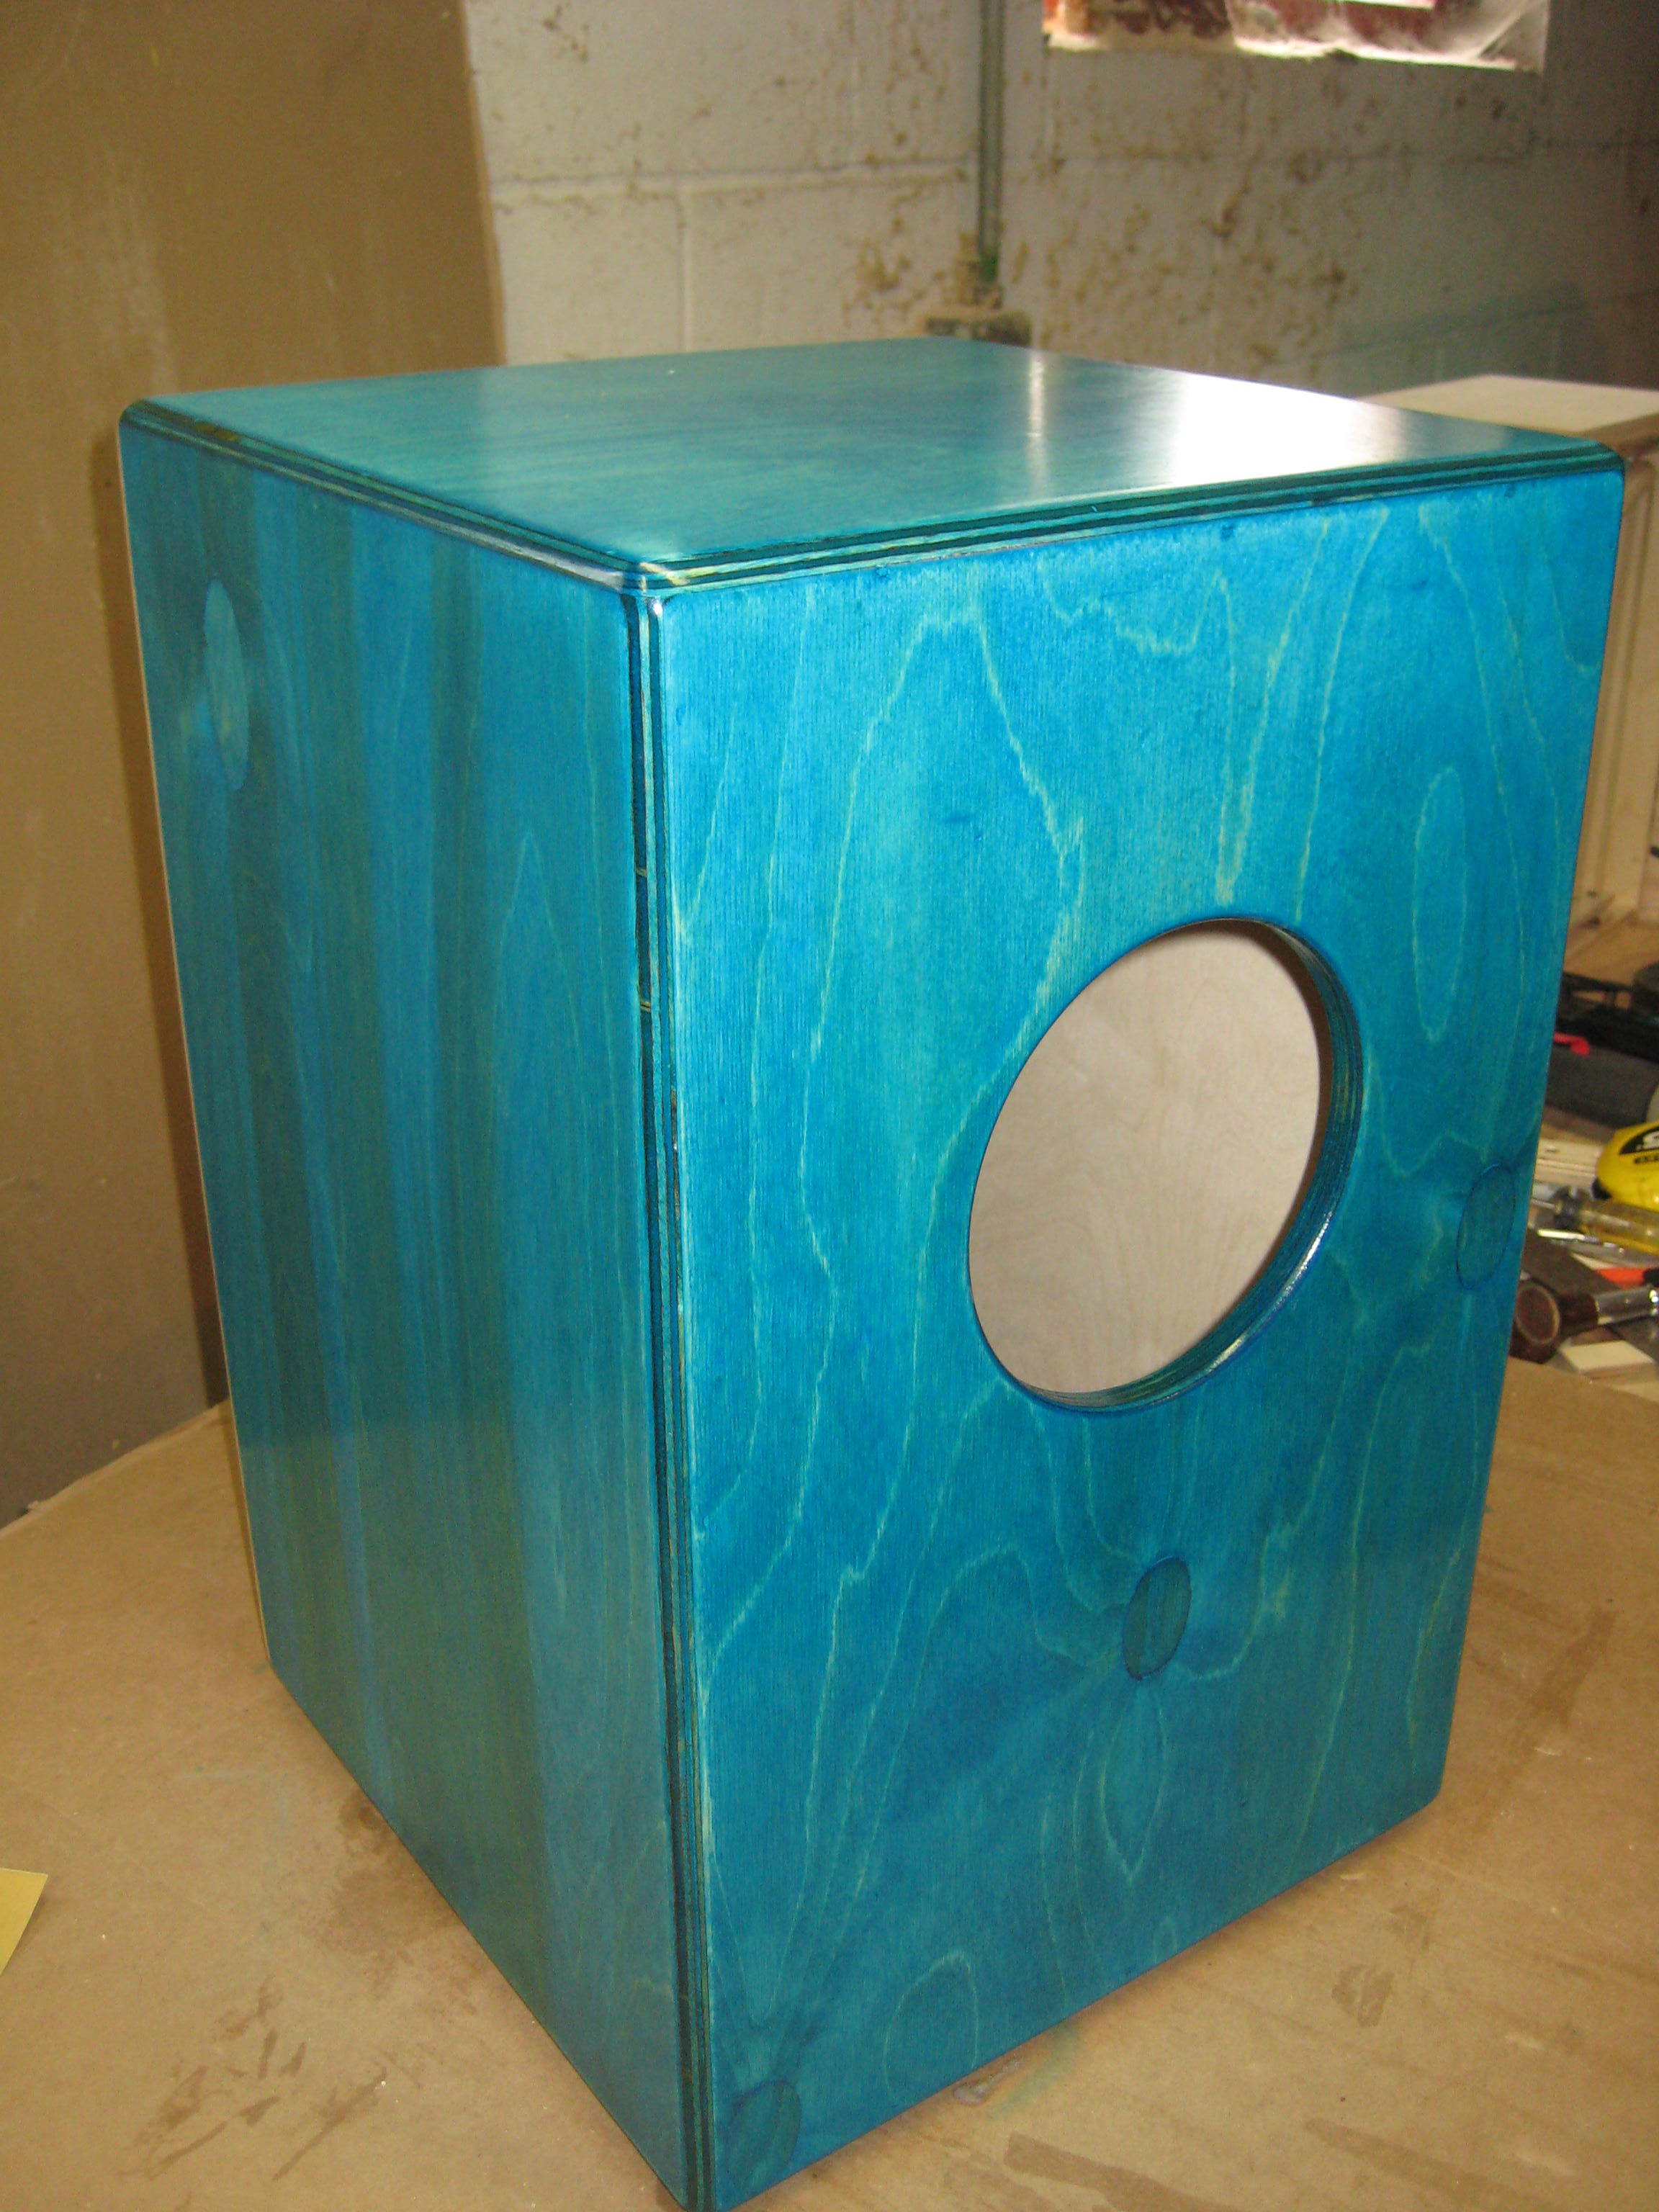
4″- 5″ hole is milled in the back which will serve as a sound port. The hole is centered from left to right, and positioned 1/3 of the distance from the top to the floor. Some people prefer that this be milled into a side panel because that allows the back to be used as another playing surface, and because the back is made of a thinner material it produces a different sound.

Materials

Joe prefers Baltic birch plywood for all components. The top, bottom and panels should use 1/2″ thick material, while the back which can use 1/4″ thick material to keep it lighter, and the front head is 1/8″ Baltic birch plywood. Baltic birch is a great choice for musical instruments as it is high quality plywood with no gaps, and it produces a clean sound with no unwanted vibration.Finish. Finishing is an important step for Cajons, as it serves to protect the instrument from some of the normal wear, and it can also help preserve the sound. Joe uses a wipe on poly on his drums and says “finishing the drum helps preserve the sound quality, as seasonal changes can alter the pitch and sound of the drum.”

The other finishing step that Joe takes is to apply turquoise dye to the body of the drum. While this step is purely aesthetic, it is the signature look of a ‘Joe Cruz Cajon’, so if you want to take this project ‘all the way’ you can make yours turquoise too.

A Few Final Tips for Building a Cajon

Joe provided some final suggestions for anyone who might be interested in building their own Cajon:

  • When selecting the wood for the box, be sure to use straight wood, not warped wood.
  • Joe likes to install rubber feet on the bottom of his Cajons because it saves the floor and drum from scratches.
  • Construct the box square, so the back and front fit well. Measure the diagonals carefully and be sure they are identical before the glue cures.
  • When attaching the front head, if the 1/8″ plywood has a slight bow, attach the crown to the front edge (crown facing in), so the upper corners stick out slightly. This will give the corners more slap.
  • After the front head is drilled and attached to the box, I trim it to the contour of the box using an edge trimming router bit.
  • To get the upper corners to slap more (this gives a more lively sound), I stick a wedge in the upper corners between the head and the box, for a few days, which creates a slight gap between the front head and the box.
  • Be aware of burning up hours playing your drum in your shop. It’s highly addictive, and now you have been given fair warning.
  • Special thanks to Joe Cruz for sharing his secrets to building a high quality Cajon. You can learn more about Joe through his web site www.joecruzmusic.com.

Photos By Paul Mayer and Joe Cruz

gift ideas download
Make a comment
  • (will not be published)

98 Responses to “How to Build a Cajon Drum Like a Pro”

  1. Jan Earl Miller

    Does Joe create a special “roughed up” surface on the face of the cajone to give “sand block” sound, sorta like that beat up face of Tommy Emanuel’s acoustic guitar that he drags his fingers across?

    Reply
    • Customer Service

      Hi Jan. No he doesn’t, but that’s a cool idea!
      Paul
      Woodworkers Guild of America

      Reply
    • Customer Service

      Hello Bob,

      Thank you for contacting us.

      I’m not familiar with that. I’m sure it would work to some extent, but you might have to try it to know for sure how well.

      Thanks!

      Reply
  2. Stephen

    Just to let you know, the link finally works. You should tell people that it does not work in the Chrome browser. It now works in Safari and Firefox. However, before it did not work in any of them. You will continue to get complaints until you fix it for Chrome (arguably the most popular browser) or at least notify users not to use Chrome.

    Reply
    • Customer Service

      Hello Stephen,

      Thank you for contacting us. The link provided works appropriately in all browsers at this time. As mentioned previously, the link itself had expired so we generated a new one.

      Thanks again for bringing this to our attention.

      Sincerely,

      Michael
      Woodworkers Guild of America Video Membership

      Reply
  3. James

    After 8 years there is still not a link included in the article, nor does any link in the comments section work. Brilliant WGOA! This could be considered a click bait article for views. 👏👏

    Reply
    • Customer Service

      Hello James,

      Thank you for letting us know that the links provided in past comments was no longer working. We never supply an article in the hopes that our information is not up to date. The new plan PDF is located in the section titled: SQUARE UP THE SIDES. There, you’ll see an option to click to download the PDF for the cajon.

      If you have any other questions, please call 1-855-255-0822.

      Sincerely,

      Jessica
      Woodworkers Guild of America Video Membership

      Reply
  4. Stephen

    As stated in Jan, this link has never worked. Do you really want this many people phoning in for help or can IT just fix the link? And yes I’ve tried every link in the article, hard and soft started and used four different browsers. If this has been a problem since “16” why are you putting it back up in a new email without working links? This all seems weird especially for members.

    Reply
    • Customer Service

      Hello Stephen,

      Thank you for contacting us.

      We were not aware that the link had been broken after supplying the link nor had we been notified up until this point. To find the new link, please look under the article section titled: SQUARE UP THE SIDES. There, you’ll have the chance to download the plan for the cajon.

      If you have any other questions or concerns, please call 1-855-253-0822.

      Sincerely,

      Jessica
      Woodworkers Guild of America Video Membership

      Reply
    • Customer Service

      Hello Jack!

      To locate the plan for the Cajon, please look under the section titled: SQUARE UP THE SIDES. There, you’ll have the chance to download the plan.

      Thank you!

      Jessica
      Woodworkers Guild of America Video Membership

      Reply
  5. Ken

    Shared this site with my woodworking high school students who are home due to the virus.

    Reply
  6. DEAN

    Let’s look at this link since 2016 has not worked many times and not working again today. Maybe someone at WWGOA could fix this? Telling the customer to let you know if it’s still not working seems to be counter productive. Can you send me the information or working link? Deankathycoppell@twc.com

    Reply
    • Customer Service

      Hi Dean. I am sorry you are having trouble viewing this. Please try hard refreshing the page or using a different browser. If you are still having trouble viewing, please contact our customer service team at 1-855-253-0822.
      Thanks
      Jean
      Woodworkers Guild of America Video Membership

      Reply
  7. Sue Yopek

    Is there any way you can put the drawing link back up? I get an error saying it is no longer at that url.. thanks!

    Reply
    • Customer Service

      Hi Sue. I am sorry you are having trouble viewing the plan. Please try hard refreshing your page or using a different browser. If you are still having issues viewing the plan, please contact our customer service team at 1-855-253-0822.
      Thanks
      Jean-Woodworkers Guild of America Video Membership

      Reply
    • Customer Service

      Hi Joe. There is a bottom. It’s symmetrical; identical to the top.
      Thanks
      Paul-Woodworkers Guild of America

      Reply
  8. John Hawkins

    your plans show the 1/4 inch plywood withe the 4 inch hole to be 13 1/2 x 17 1/2, I think it should be 13 x 18.

    Reply
      • Customer Service

        Hi John. The size is correct as stated. It needs to fit between the the rabbets on the sides, top and bottom.
        Thanks
        Paul-Woodworkers Guild of America

        Reply
    • Customer Service

      Hi John. The size is correct as stated. It needs to fit between the the rabbets on the sides, top and bottom.
      Thanks
      Paul-Woodworkers Guild of America

      Reply
    • Customer Service

      Hi John. This link has been fixed. I am sorry for any inconvenience.
      Thanks
      Jean-Woodworkers Guild of America Video Membership

      Reply
  9. Brian Dalton

    Perhaps I am missing it but are there PDF plans and a video

    Thank You

    Reply
    • Customer Service

      Hi Brian. At the end of the first paragraph, if you click where it says “click here” you will be able to view the video. If you have any questions, please contact our customer service team at 1-855-253-0822 and they would be happy to assist you.
      Thanks
      Jean-Woodworkers Guild of America Video Membership

      Reply
  10. Derek

    Is there any recommendation on finishing the interior for better sound? Sanding and/or poly?

    Reply
    • Customer Service

      Hi Derek. The designer of this cajon doesn’t finish the inside. I don’t know whether it would make much of a difference.
      Thanks
      Paul-Woodworkers Guild of America

      Reply
  11. John Besharian

    These “Drums” look awful lot like Alembic speaker cabinets. No, I’m not saying anyone’s ripping anyone else off, just that, as the former Guitar Doctor at Stars Guitars in San Francisco, I happen to have an Alembic B-12 speaker cabinet. (The letter “B” means there are two speakers in a cabinet, and an “A” would mean a single speaker.) The dimensions are similar but critical as a standing half-wave cancels itself. I won’t get tecnicle on that, but I’d like to point out that their design uses Finnish (as in from Finland) Marine grade plywood -¾” for the sides, top & bottom and ⅝” for the speaker born and the divider between the two speakers internally. Not only are all the plus void free, they’re laminated with water proof glue. That means they can survive in damp conditions such as outdoor concerts w/o falling apart. It’ ain’t cheap. It just works better and lasts longer. (No voids in any of the layers also means no sources of unexpected “Odd” sounds caused by them.)

    Reply
    • John Besharian

      [Sorry for the typo’s: “technical”, not “tecnicle”. “These “Drums” look an awful lot like … “, not, “These “Drums” look awful lot like … “, etc.]

      Reply
    • Customer Service

      Hi Dennis. In the “Square Up the Sides” section you find the PDF with the plans. If you are having trouble accessing this please try hard refreshing the page or using a different browser. If you are still having trouble accessing the plans please contact our customer service team at 1-855-253-0822 and they can assist you with this.
      Thanks
      Jean-Woodworkers Guild of America Video Membership

      Reply
  12. Chevy Leflaive

    would it make a difference to use two pieces of 2mm plywood for the tapa as opposed to using one piece?
    its just that for my design i hope to bend the tapa around the sides, and i cant do so with a 4mm or 3mm piece of plywood, so using two pieces of a thinner wood makes it easier to bend, however i don’t know whether it would change the sound quality at all.

    Reply
    • Customer Service

      Hi Chevy,

      I’ve never tried it so I can’t say what effect it might have on the sound quality. You will have to make sure that they two sheets form a gap free bond.

      Thanks,

      Paul
      WoodWorkers Guild of America Video Membership

      We’d love to have you be a part of our community. We are convinced you will enjoy the benefits of becoming a member and having access to the best instructional how to videos and professional tips. We would like to offer you a special promotion for your first-year membership.
      https://go.wwgoa.com/C15794

      Reply
    • Doc Kerash

      The tapa acts as a drumhead and is supposed to be flexible so that it can vibrate at several frequencies. Normally it’s thin flat plywood, so approximately equally flexible in all directions. Bent plywood is VERY DIFFERENT. It is far more rigid in the direction at right angles the bend. If the plywood is bent across the playing face, that will change most of the resonant modes and increase their frequencies, which is probably not a good thing.

      Reply
    • Customer Service

      Hi Ari. Any PVA woodworking glue would work fine. I use Titebond 3.
      Thanks
      Paul-WWGOA

      Reply
  13. Rhonda

    I know this is an old article, and it’s probably simple math, but what are the dimensions to cut the top and bottom piece? Thank you!

    Reply
    • Customer Service

      Hi Rhonda. The top and bottom are 14″ x 12″
      Thanks
      Paul-WWGOA

      Reply
  14. Al Chamorro

    I want to make a Cajon for my grandson. Can you suggest dimensions better suited for a 3 year old.

    Reply
    • Customer Service

      Dear Al,

      Thank you for your patience. In regards to your question-

      I would suggest scaling it down so that hi feet touch the floor when he sits on it.

      I hope this helps!

      Sincerely,

      Paul
      Woodworkers Guild of America Video Membership

      We’d love to have you be a part of our community. We are convinced you will enjoy the benefits of becoming a member and having access to the best instructional how to videos and professional tips. We would like to offer you a special promotion for your first-year membership.

      https://go.wwgoa.com/C12711

      Reply
  15. Richard

    Thank you joe for all the information and to all the others input to this interesting topic. Im a woodworker for many years and my son wants one of these. Glad to see a link to Amazon for the decent bit of birch for the front. I’ll be buying this. You do a great job on your one, love the dye bit, nice. Would you possibly take a photo of the snare position in the drum. Im not into acoustics but would like to get this right, and even be able to adjust it for my son also. Thanks for all the good advice. Richie

    Reply
    • Customer Service

      Hi Richard. I am sorry, but we are no longer in contact with the author of this article. You want to position the snare very close to the front panel without touching it.
      Thanks
      Paul-WWGOA

      Reply
  16. Jalberto

    Hi there, just one question here, what is the preferred gauge of the guitar strings used?thanks

    Reply
      • kurt

        did you mount that snare in one piece across the top of the face? I have seen other videos where the builder cuts the snare in half and mounts them vertical..

        Reply
        • Customer Service

          Hi Kurt. The snare in this case actually consisted of guitar strings that were strung from top to bottom.
          Thanks
          Paul-Woodworkers Guild of America

          Reply
    • Customer Service

      We are sorry that you are not able to view the post. Please try hard refreshing the page or using a different browser. If you are still not able to view the post, please give our customer service team a call at 1-855-253-0822 and they can assist you.
      Thanks
      Jean-WWGOA Video Membership

      Reply
  17. Jim

    Would recessing the tapas (to a flush depth) into a rabit cut:
    1. Offer any protection to the plywood edges
    2. Affect the sound
    What is your thought on this?

    Thanks!

    Reply
  18. Jim

    Would recessing the tapas (to a flush depth) into a rabit cut:
    1. Offer any protection to the plywood edges
    2. Affect the sound
    What is your thought on this?

    Thanks!

    Reply
    • Customer Service

      Hi Jim. It would offer protection on the edges of the tapas surface. I don’t know about how it might affect the sound as I have not tried it. I have built four cajones in the way that is described in the article and have not had any problems with the plywood edges getting damaged.
      Thanks
      Paul-WWGOA

      Reply
  19. John

    What dye would you recommend that would produce the turquoise color that finished his Cajon with.

    Reply
    • Customer Service

      Hi John. You can make the roundovers using a router or a palm sander.
      Thanks
      Paul-WWGOA

      Reply
      • John

        Thank you on the reply. Were the roundovers done prior to assembling as the pictures make it look as though they were made after assembly and I am not familiar with this technique.

        Reply
        • Customer Service

          Hi John. These roundovers are made after gluing up the carcase and before attaching the drum head.
          Thank
          Paul-WWGOA

          Reply
    • Customer Service

      Hi Nelson. Sorry, but unfortunately we do not have any additional information on this.
      Thanks
      Paul-WWGOA

      Reply
  20. Jesse Caligiuri

    Hello there, I know you must be a very busy guy so thank you for taking this moment to read this email.
    I am 26 years old living in Chico CA with the grandiose idea of building cajons using locally sourced materials and opening a store front for lesson entitles “J&J’s cajon connection and rhythm workshops” I plan to work with my dad Joe Caligiuri who asked great prove in his wood building and restoration projects.
    I am writing to you today because I simply want to get as much information as possible from the person who has taken on the endeavor of building these amazing instruments. Any info including, specs, ideal materials, expected expenses and overall operating costs would be tremendously helpful. YouTube tutorials, blogs, etc. Can I ly get me so far.
    Thank you again and I hope to hear from you shortly.
    By for now, Jesse A Caligiuri

    Reply
  21. Mason

    I am building my own cajon for a band I’m in, but we only have 1/3in wood to use for the entire thing, will that effect the sound in a bad way?

    Reply
    • Michael S.

      The thicker the wood, the duller the sound. Thin wood flexes more and adds to the sound, or “makes it livelier.” Thicker wood will make deeper but softer sounds.

      Reply
  22. bwear

    The 1/4″ back sits in a 1/4″ recess. How is the back fastened in to the sides / top /bottom ?
    It seems to me that there is not the space for any screws .

    Reply
    • Customer Service

      To attach the back you just put a bead of glue into the rabbets and set the back in place. Then put clamps around the perimeter to hold the back in position until the glue dries. No need for mechanical fasteners.

      Reply
  23. Joe Collins

    I sure can’t hardly wait till find the time to start on this drum … sure sounds like it’s going to fun to make

    Reply
  24. Cesar

    I love it, would you mind please show the video of the step by step on how to make a Cajon mr mr joe ? I am a amature wood worker and I make it as a hobby but now it realy grow and have my heart on it. Having been retired I am planning to work on any project that can give my means, because I dont have work for the last 1 1/2 year. Thank you so much being a part of your million of wood enthusiast. Thank you so much and God bless you !

    Reply
  25. Rory O'Brien

    I made one with a flexi ply. The boom is better and the snare really gives a better rattle.

    Reply
  26. Dean R

    I’m going to be building a custom Cajon and wanted a professional opinion on my design.

    I’ve noticed that a lot of Cajon players will tilt back on the instrument when playing. Leaving a gap between the floor and the bottom of the Cajon. I can only imagine this does two things. Makes it more comfortable to play and improves the sound by allowing some of the vibrations to escape from underneath and be focused toward the front.

    I’ve used this observation to design the Cajon pictured in the link. My design allows for the playing surface to be more ergonomic to the player without tilting it. And the opening in the front caused by the raised bottom panel and bottom sound hole should focus more sound toward the front of the Cajon.

    http://i.imgur.com/Wn6pz7M.jpg

    My questions are, will the additional sound hole on the bottom degrade the sound quality in any way? If I add a sound hole on the bottom, is there a need for one on the rear panel? And last, are there any other considerations I need to keep in mind when building this to maintain the best sound quality possible?

    Thank you for any advice you can lend.

    – Dean –

    Reply
    • Customer Service

      Hi, Dean. Hello and thanks for your question. I don’t know much about acoustics, but I showed your design to my 15 year old son who is an avid drummer and also plays a cajon, and he speculates that the acoustics and ergonomics should be quite good. He thinks you would want to also leave the back port. In terms of tips to maintain good sound quality, use the best quality 1/8″ plywood that you can find for the drum head as that is your primary strike surface, and be sure that all of your joinery is tight. I like the idea of a light bead of glue on the drum head in addition to the screws, even though it makes replacing the drum head a bit more hassle. Also, don’t forget the countersink the screws on the drum head as it makes it uncomfortable to play if they are protruding.

      Reply
  27. Thom

    Can a cojon also be made out of solid wood? Are there any advantages or disadvantages as far as the quality of sound? What solid wood work best? Thanks.

    Reply
    • WWGOA Team

      Yes, I have seen cajones that were made from solid wood side, although a plywood drum head is still normally used. This needs to be quite thin to gain the resonance that you want for an effective drum, so 1/8 baltic birch plywood is ideal.
      Any solid wood species should work as long as you use a baltic birch plywood head

      Reply
      • Doug LaFleur

        Hey! Wait! It’s a Peruvian instrument. Where did the ancient Peruvians source their Baltic Birch plywood?? :)

        Reply
  28. Varenya Joshi

    What if we take 6mm plywood for tapa? 4 mm really works out? Isn’t it too thin?

    Reply
    • WWGOA Team

      If you have good quality 4mm plywood with no gaps, that will be perfect. 6mm would work as well, but it would not have as lively a sound as 4mm.

      Reply
    • WWGOA Team

      Joe uses 1/4″ Baltic birch plywood which is available from some lumber suppliers and woodworking specialty stores. In some cases he covers this plywood with veneer, such as the Cajon pictured in the article.

      Reply
      • John Besharian

        for outdoor concert gigs, I would suggest Marine Grade Finnish (as in Finland) plywood. No gaps, no loose knots, etc. to add unexpected weird overtones. [It’s what Alembic used with great success for all those outdoor concerts by major touring bands and groups during the ’60’s/ ’70’s and the ’80’s.]

        Reply
    • Theo Hogers

      1/8 inch (3mm) plywood you may get from the store around the corner works fine.
      However 4mm plywood already gets to heavy and sounds to boxy for my taste.

      If you can’t find 1/8 inch or 3mm plywood in your local shop or just like a lighter tapa,
      you may want to look online for “airplane” or “aircraft” plywood.
      It goes up in thickness from a way to thin 0.3mm (1/80 inch)!
      The stuff is normal plywood but these thin variants are often used for building aircraft.
      A 2mm to 2.5mm version will give a nice light playing tapa.

      Reply
      • Fredrik Lagerqvist

        ‬Thank you for great tips. Can i use a small nailgun whilst attaching the top and bottom?

        Reply
        • Customer Service

          Hello Fredrik. Sure, no problem. Just be sure that the brads are countersunk.
          Paul
          Woodworkers Guild of America

          Reply