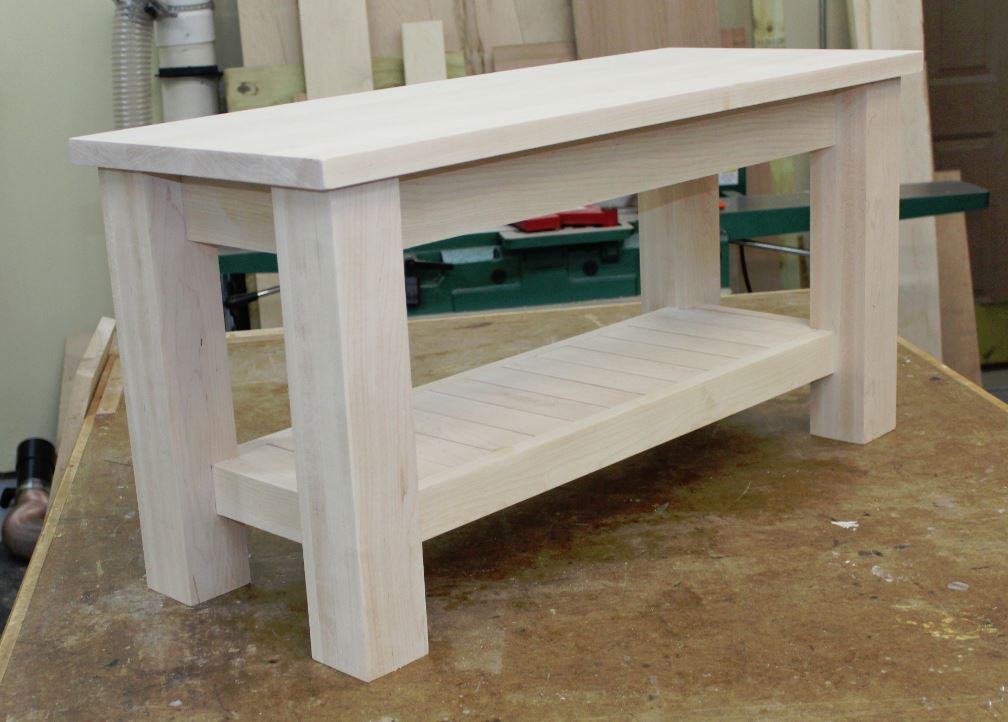
 A bench that will be placed in a home’s entryway is an important project for a couple reasons. First; visibility. It will be one of the first things that visitors see when they arrive, and so it will help to set the first impression of the overall home. Second, it is likely to receive a lot of use, particularly if there are children in the home, so durability is critical. When I set out to create woodworking bench plans to construct an entryway bench for a friend’s home, it was important that it matched the aesthetic of the overall decor while providing a solid landing pad for the kids and their gear. We collaborated on a design that met these objectives and we built it from sugar maple, as the density of this wood makes it a great choice to withstand years of heavy use.Some of the key design attributes:
Substantial legs
These 3” square legs deliver the hefty look and feel that my friends desired.
Thick top
I started with 5/4 maple stock and removed as little as possible during the panel construction process in order to yield this 1-1/8” thick top that nicely complements the massive legs.
Lower shelf
My friends wanted a lower shelf to allow for placement of hats, gloves, etc. We decided on a front-to-back slat design that provides some air flow for drying as well as a nice look.
Construction techniques
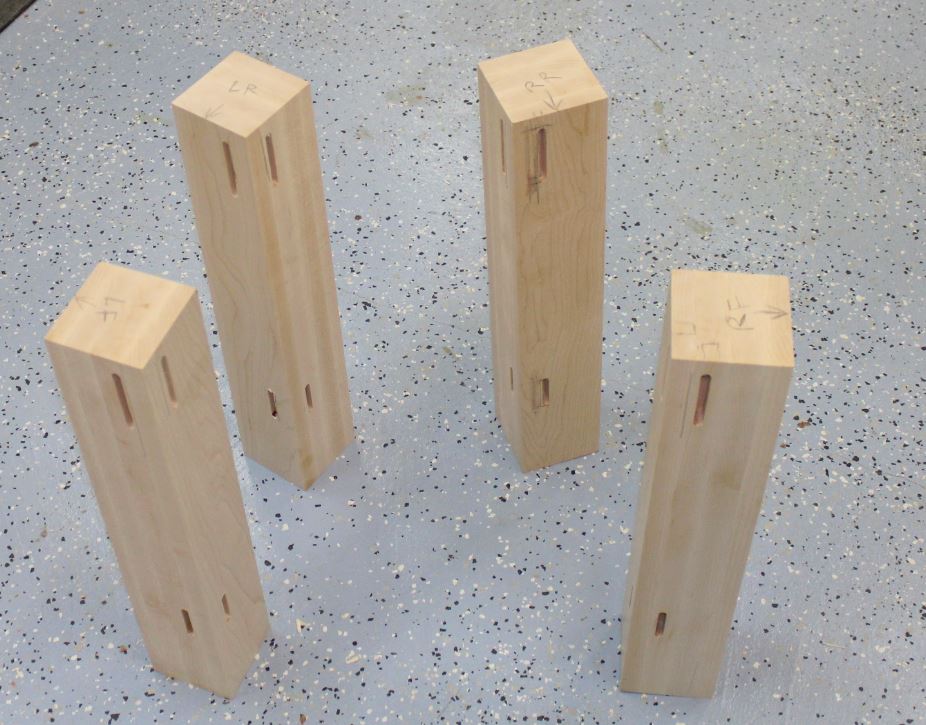
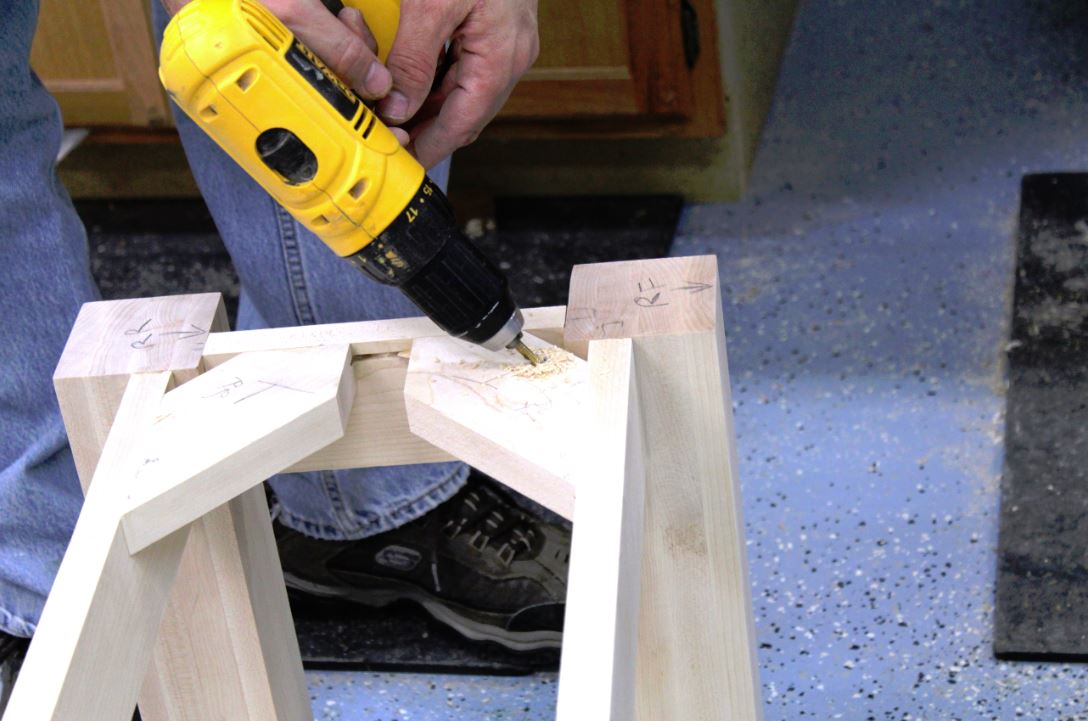
Start with the legs.
For each laminate four pieces of 7/8” thick maple, then mill the blanks to 3” square using a jointer and planer. Next, mill ¼” wide by ¾” deep mortises in each leg to accept the upper and lower rails. For projects that will be subject to a lot of wracking like this bench, my preferred joint is the tried and true mortise and tenon. For tips on constructing simple and strong mortise and tenon joints refer to these two sections of the “Modern Media Cabinet” article: Part 1 and Part 2
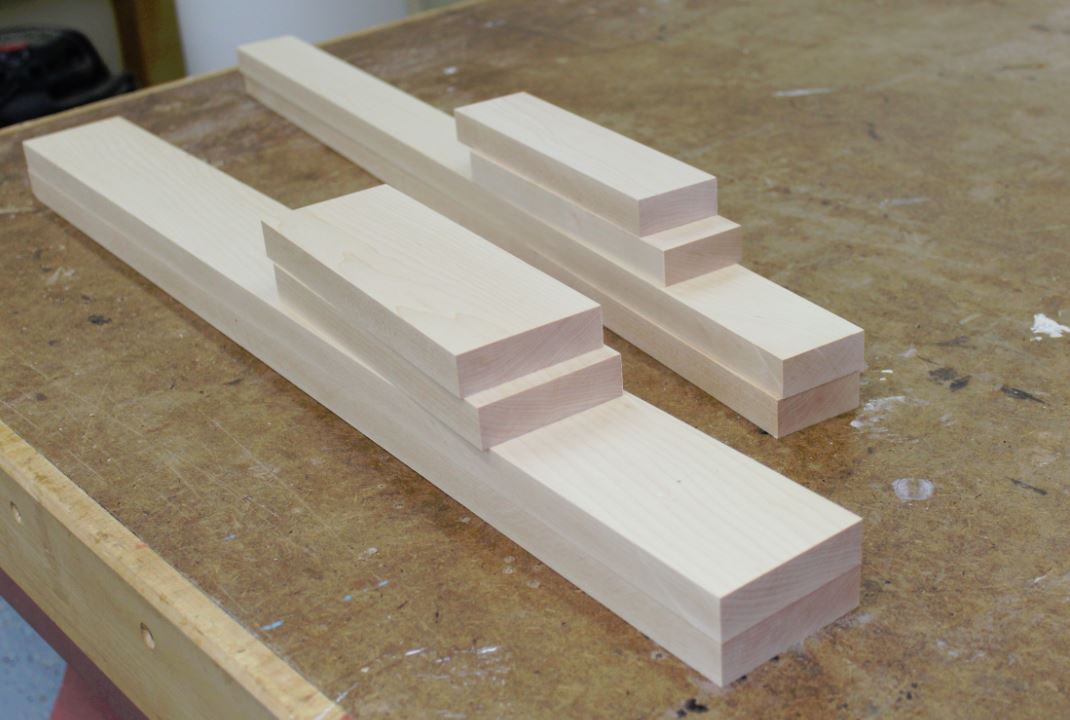
Mill the upper and lower stretchers
See cut list for specifications. I left all of these pieces 1-1/2” long to accommodate a ¾” tenon on each end.
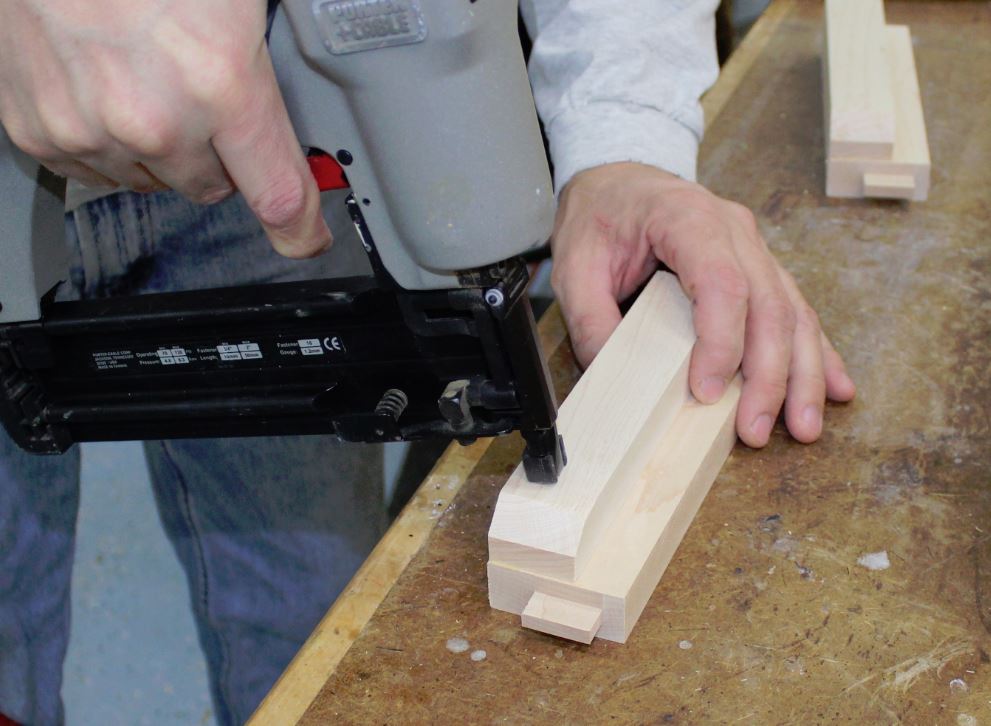
Install cleats on lower stretchers to accept the slats to form the shelf
Make 45 degree cuts on the end of each cleat so that it will fit nicely with the other cleat when the base is glued up. Note that the cleats do not run all the way to the end, and stop short by approximately 1/8”. This is done so that the cleat does not prevent the mortise and tenon joint from fully engaging. Use glue and brads or screws to secure the cleat.
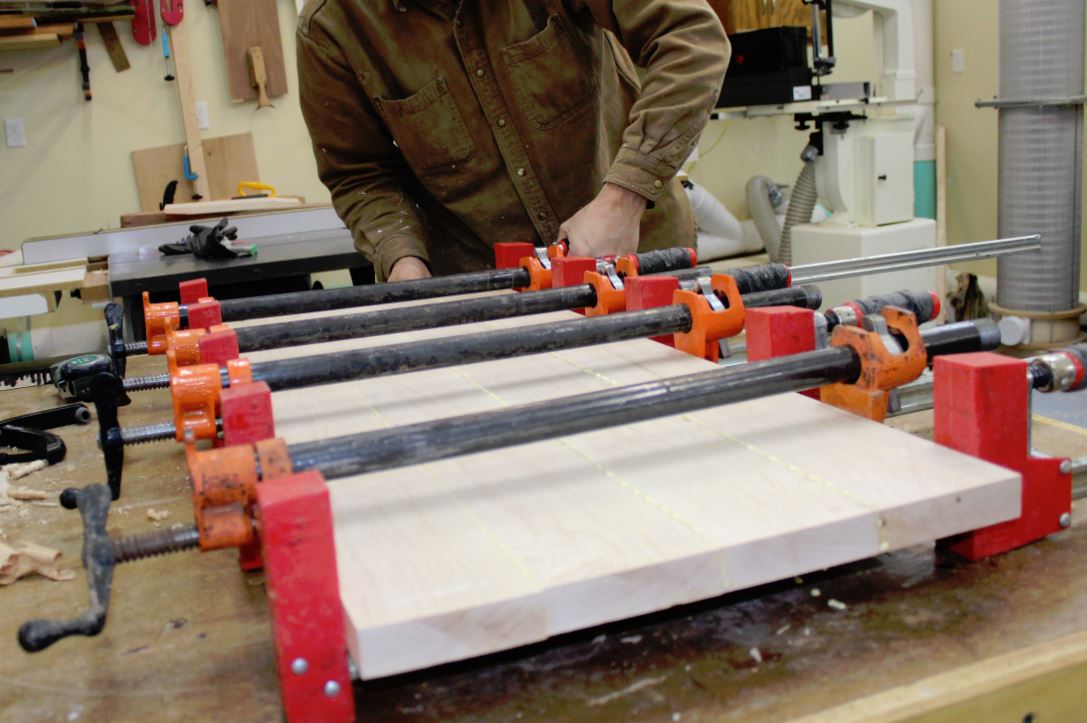
Panel construction for seat
I glued four boards together to form the seat, but you can use more or fewer depending on the materials you have available. For tips on panel construction see this article
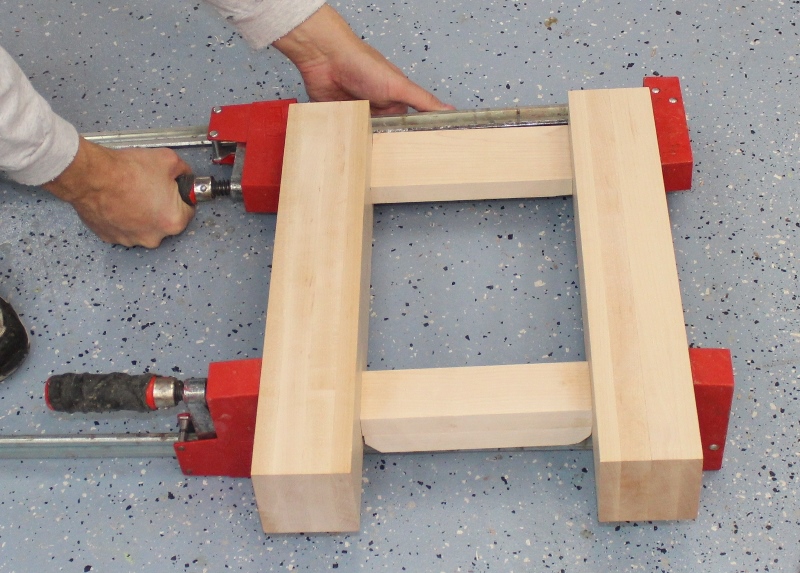
Assembly #1, end panels
Assemble the left and right sub-assemblies by gluing and clamping the short rails into place. Clean out the squeeze-out right away using a wet rag and a utility blade so that the glue does not interfere with your finish.
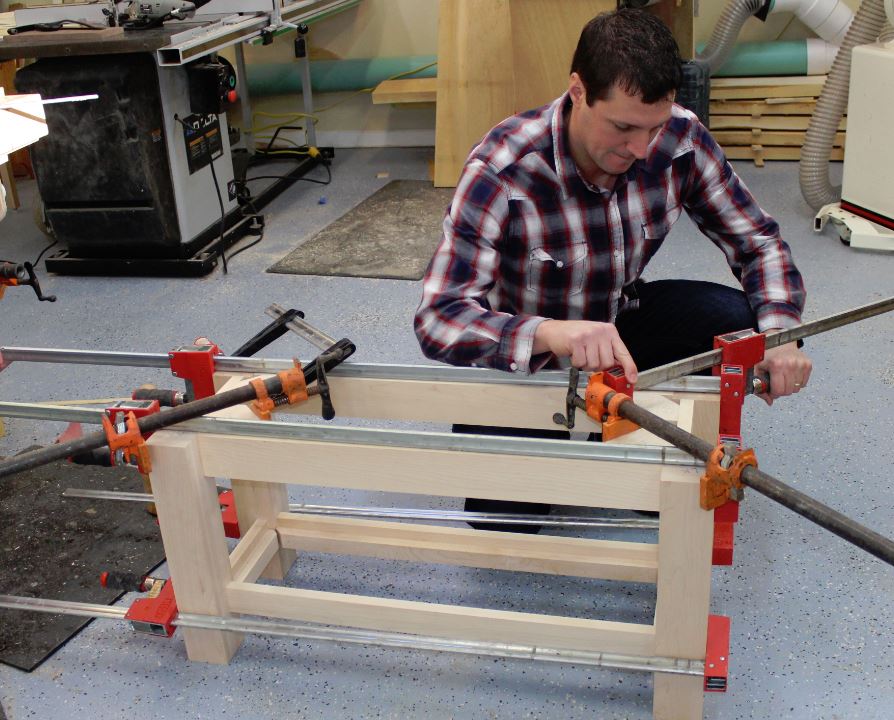
Assembly #2, full base.
After the glue has sufficiently cured from the previous glue-up, glue and clamp the long rails into position. In this step it is also a good idea to add corner braces using biscuits. These braces help prevent racking of the base and will also be used to attach the top. They also help to force everything into square during glue-up.
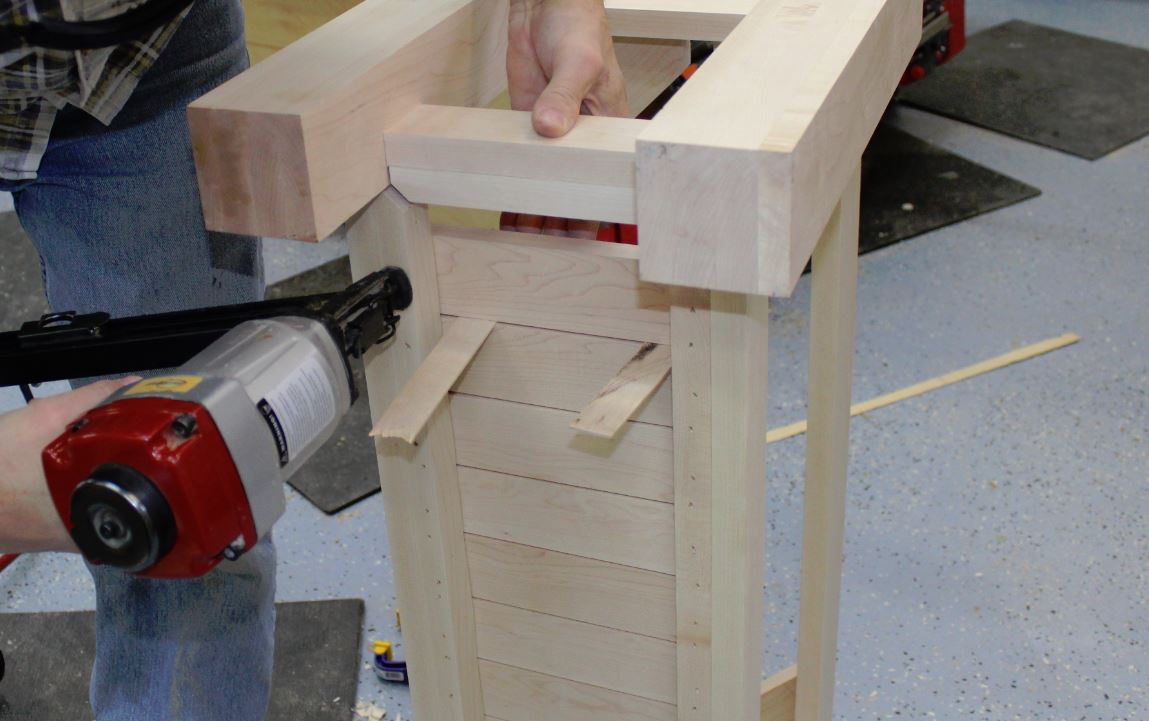
Attach slats from below.
On the lower shelf I shot 1-1/2” finish nails from below, along with using a little dab of glue. This was a quick method of installing and also served to hide the fastener penetrations. Note the use of 1/8” spacers to maintain even spacing on the slats.
Attach top.
Drill screw holes through the corner braces. Then elongate the holes by rocking the drill toward the front and rear of the bench. This provides some wiggle room to allow the top to expand and contract through seasonal changes, minimizing the possibility that it will split.
Finish with your favorite product
I applied polyurethane to provide a durable finish that will stand up to the abuse the kids with backpacks, slushy boots, and all kinds of sports gear will render upon this bench. Be sure that you finish both the top and bottom of the seat to make sure it’s completely sealed.


Great plan. I'd put a back on to keep dirty clothes off walls while leaning back to remove boots, and to have a place for hooks for coats, purses, etc, unless your friends don't trust you.
hiii
That table is beautiful, I have never used maple. Thank you for sharing. Would you have any plans for a Cal King platform bed, with storage, I'm thinking Maple would great to use when I can find the right plans. Thanks again for your time .
disappointed, I want to know how to secure the leg to the front and back do you glue the Connor braces? wanted to see video.
Appears to be a great project. If I every have an entryway with room for a bench I will have to try to build it.
Nice
Question; How do you set / adjust the 'chuck' on cordless drill or driver to change from drilling to driving to avoid stripping screws, pocket hole screws, etc.
Thank you I was wondering if you had plans for a entry way bench that is enclosed with a hinged lid for storage?
This is something very neatly done.Do you perhaps have plans for a sleeper couch[sofa]?
Thank you for sharing this idea and technique!