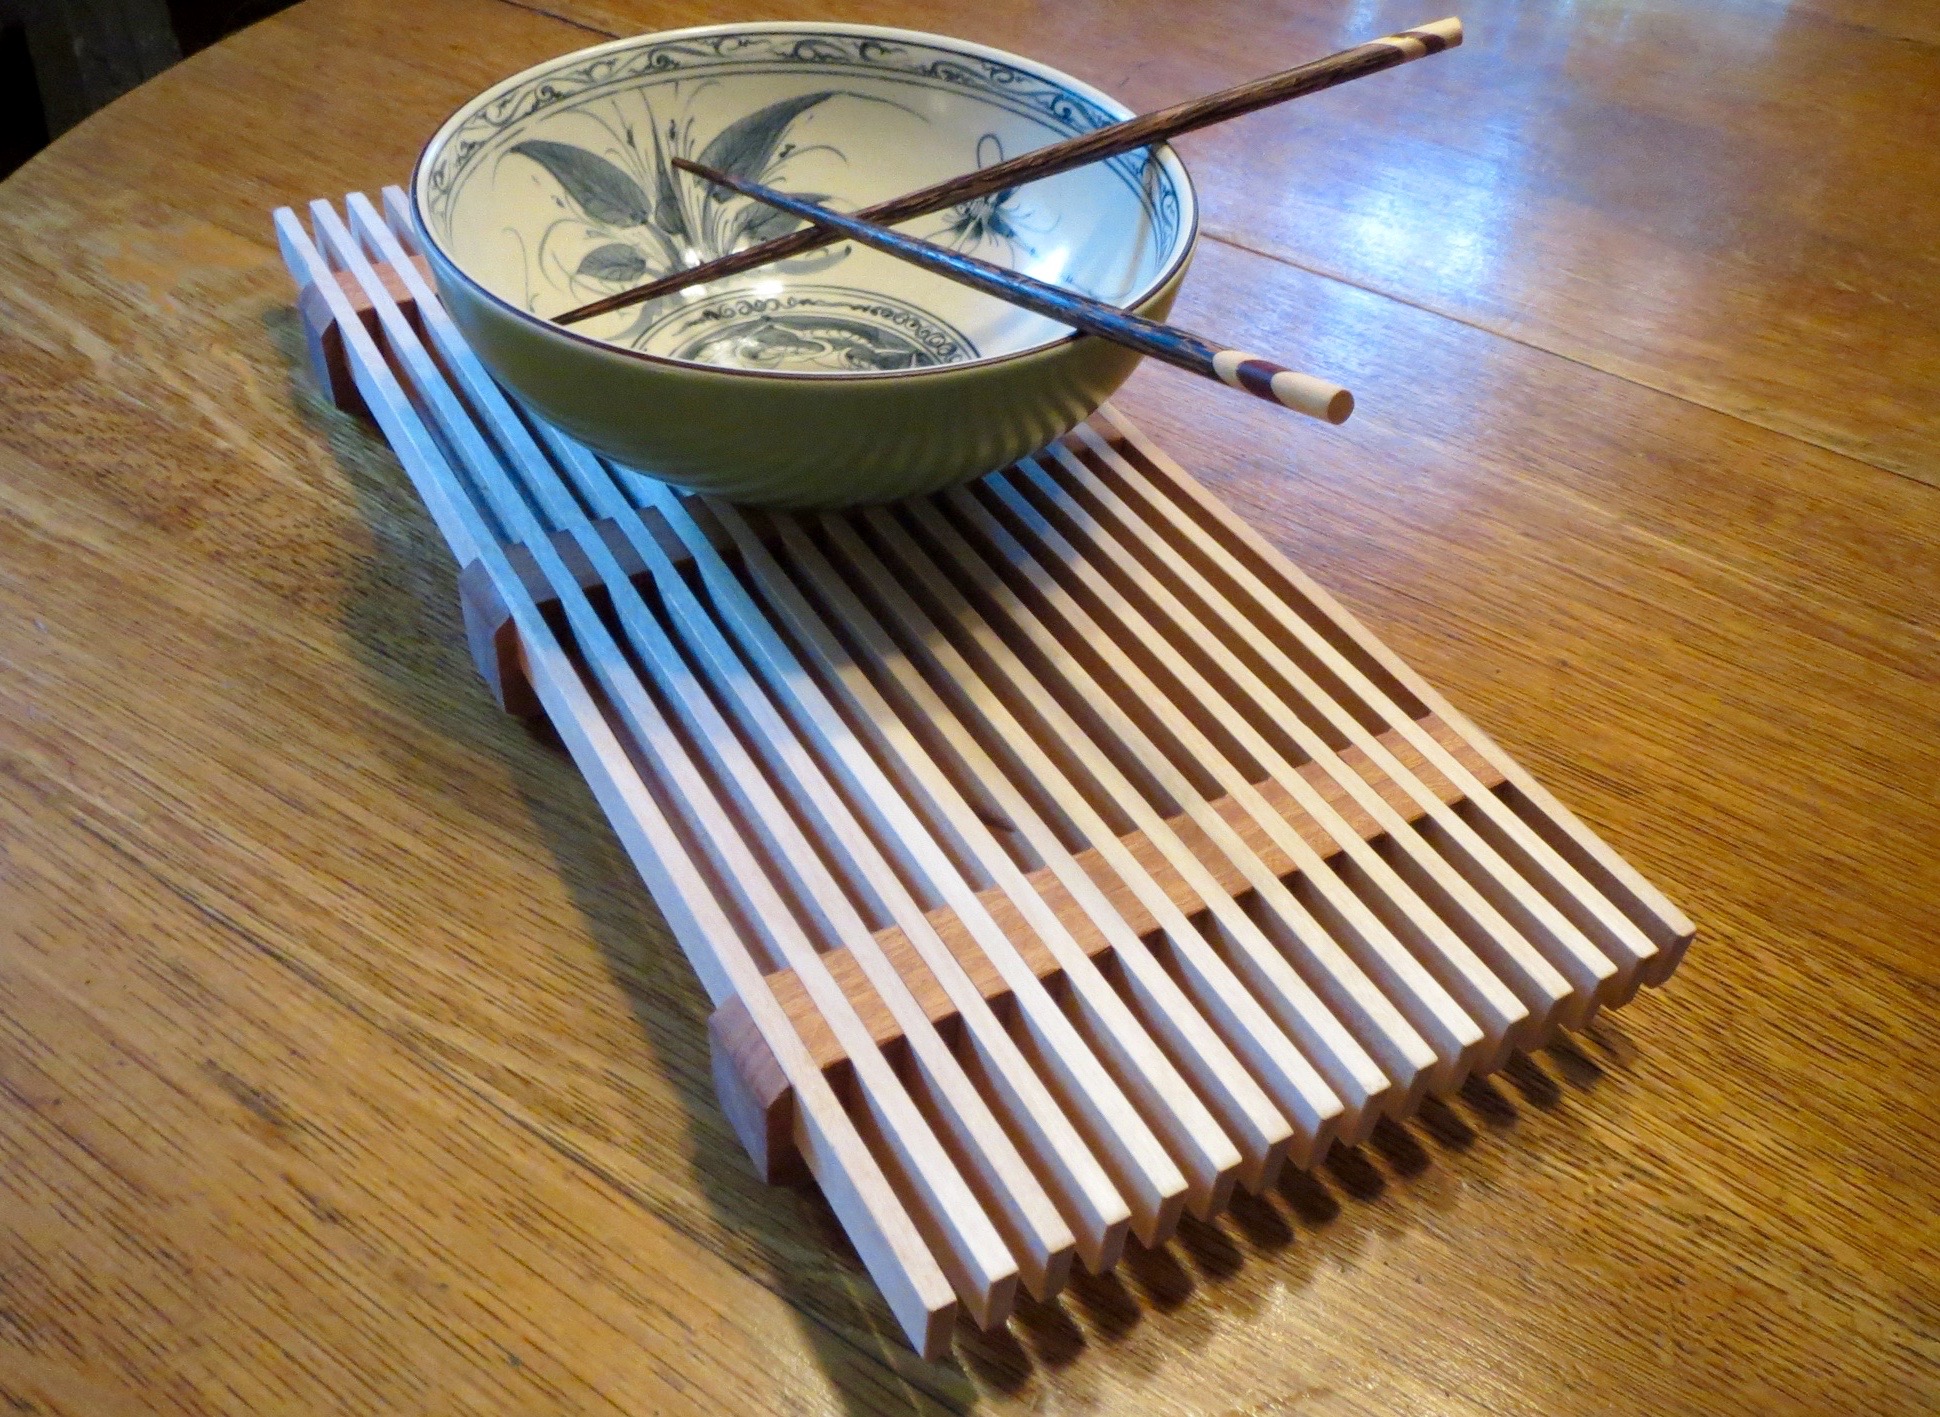
Here’s a simple project that looks great, and could easily burn up some of that scrap wood you’ve been hoarding for years. This elegant trivet will grace your table, and you can be sure friends will be asking for trivets for their tables, too.
Prepping the Wood
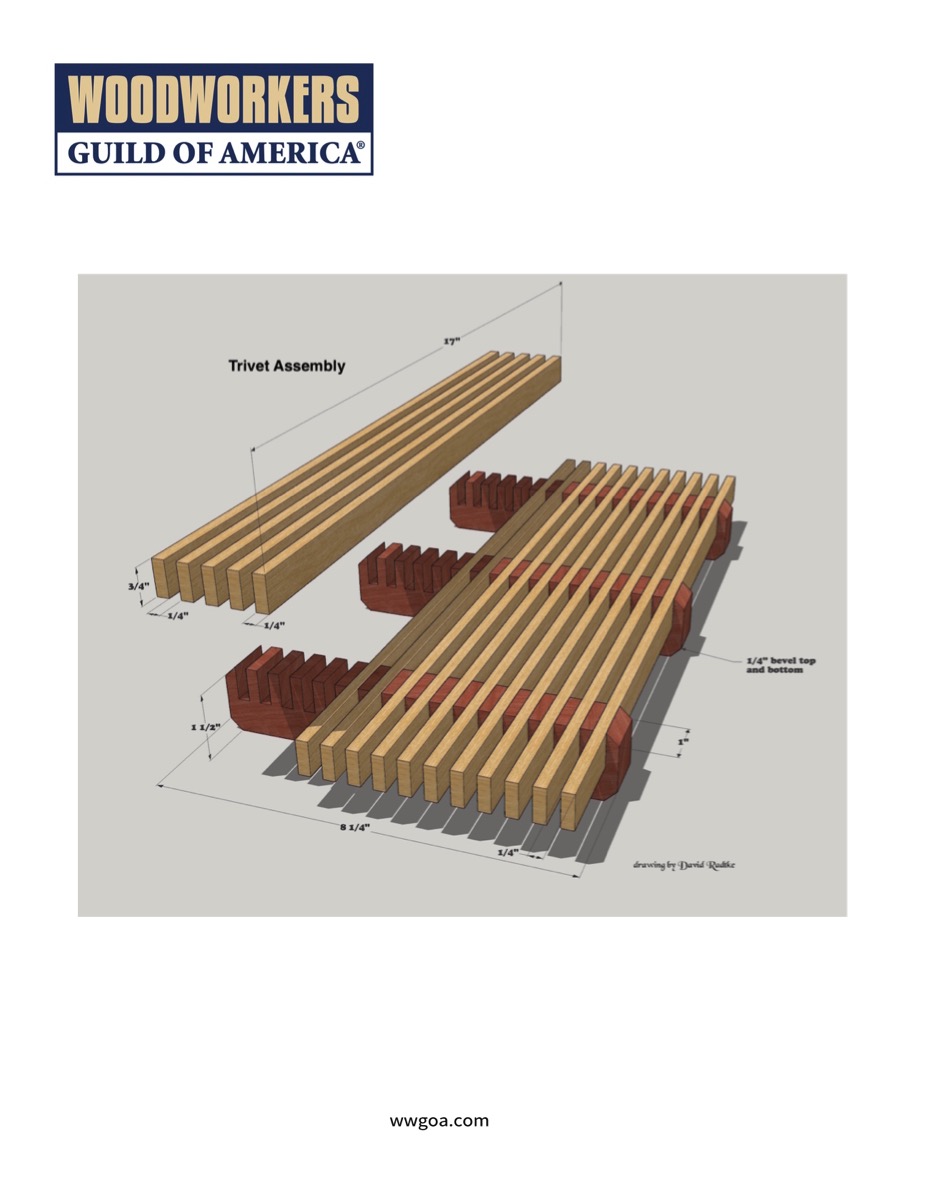
Check the drawing for the dimensions of the feet, and make up blanks that size. If you glue stock face to face to make up the pieces, keep the glue joint vertical on the finished blanks. This makes the fingers stronger, since there are different grain patterns reinforcing each side. The slots are spaced evenly with the help of a box joint jig. Check out WWGOA’s shop-made box joint jig here.
Cutting the Slots
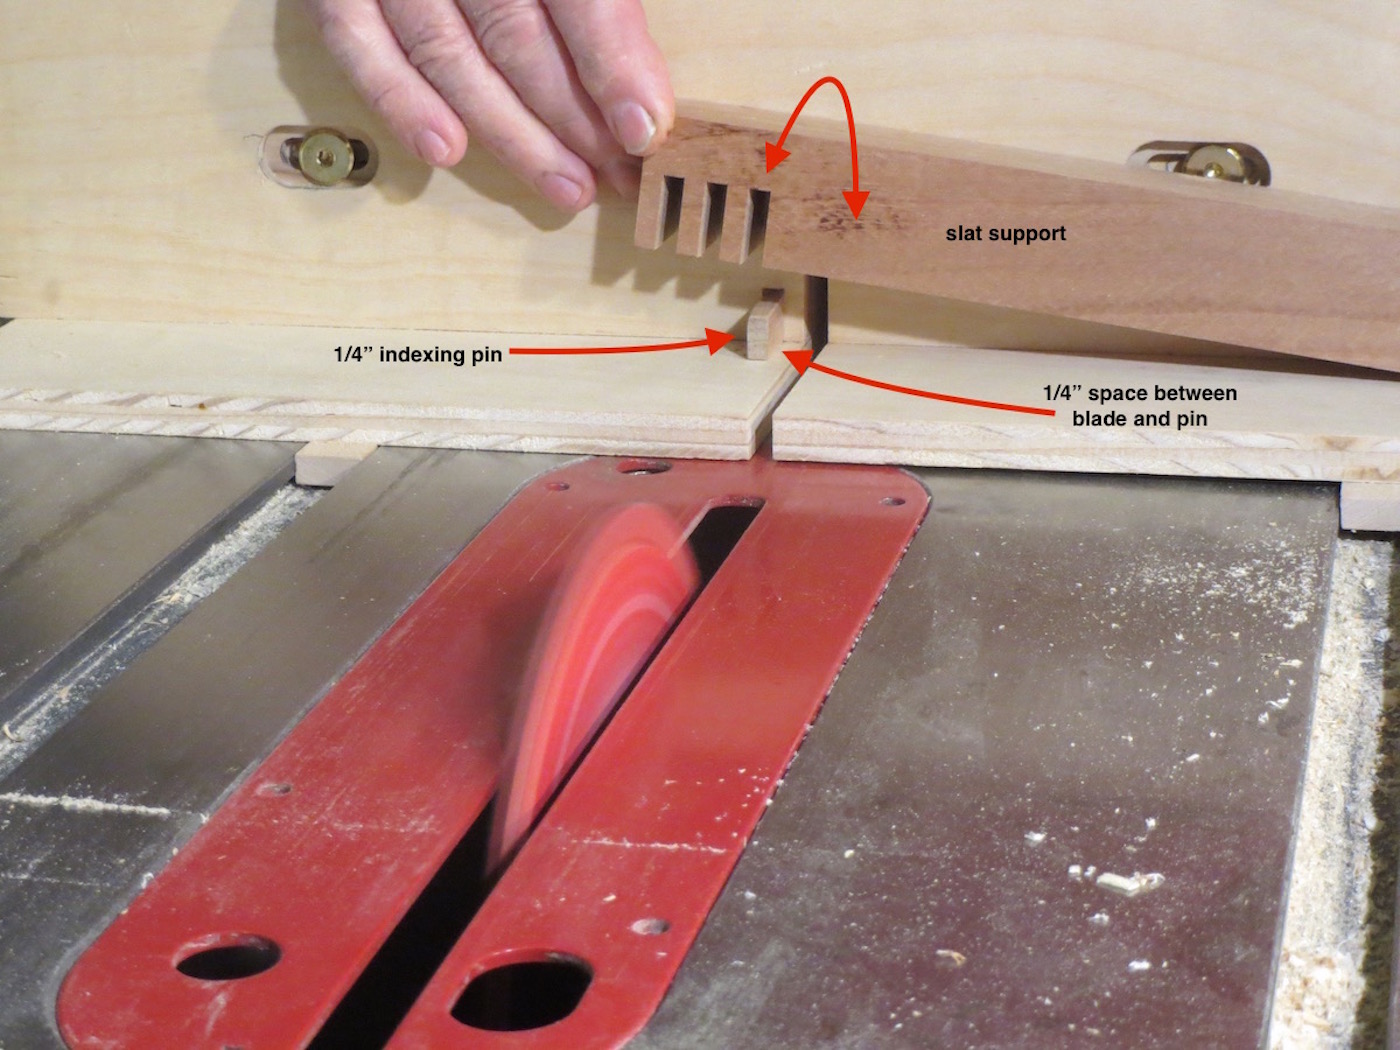
Cut the slots in the sapele slat supports with a box-joint jig. The jig will ensure that the spaces between the slats will be even. Be sure to cut the supports about 1-1/2" longer than shown in the drawing so you've got extra wood to grip as you feed the workpieces through the dado blade.

Hold the workpiece firmly against the jig to minimize tear out. Cut sixteen slots into each of the three slat supports.
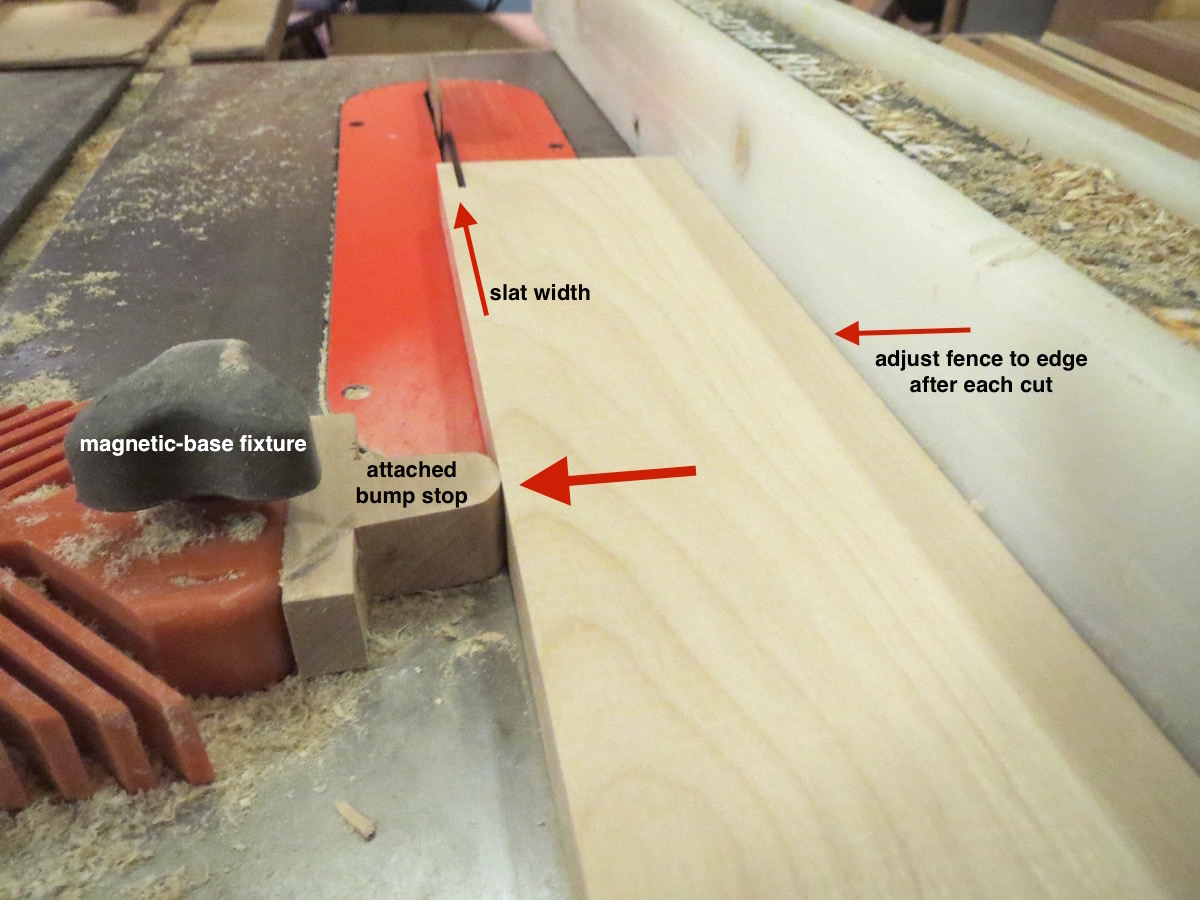
The sixteen birch slats are ¼” thick strips cut from ¾” thick boards. Cut the slats so that they slip into the dado-cut grooves easily, but aren’t sloppy. During glue up the fingers of the slat supports will swell and provide tight fitting joints. The slats should be about 1/64” or so slimmer than the width of the dado blade cut and 17” long. For help with this process look at our article that covers ripping thin strips.
Sand the slat supports, especially on the sides, to remove any fuzzy edges left by the dado blade cuts. Keep the extra length on the pieces until assembly is completed.
Assembly
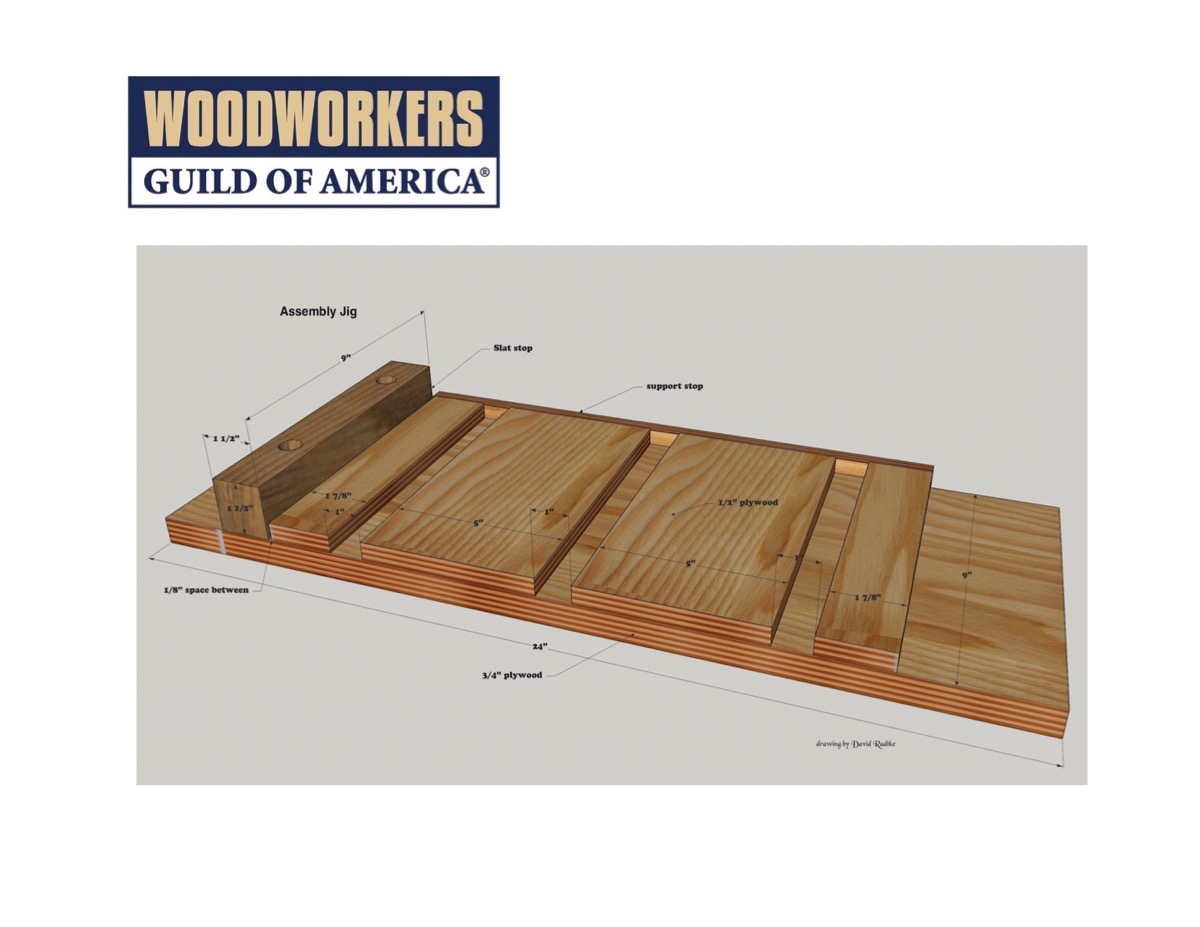
Assembly is much easier if you build this simple jig. Build the lower platform of the jig from flat 3/4" plywood and the upper spacers of the jig should be 1/2" plywood.

Load the slotted supports into the recessed channels. This will hold the parts parallel and flat during assembly. Note that the ends that are bearing against the back stop have been cut, leaving a 1/4" finger on the outside end.
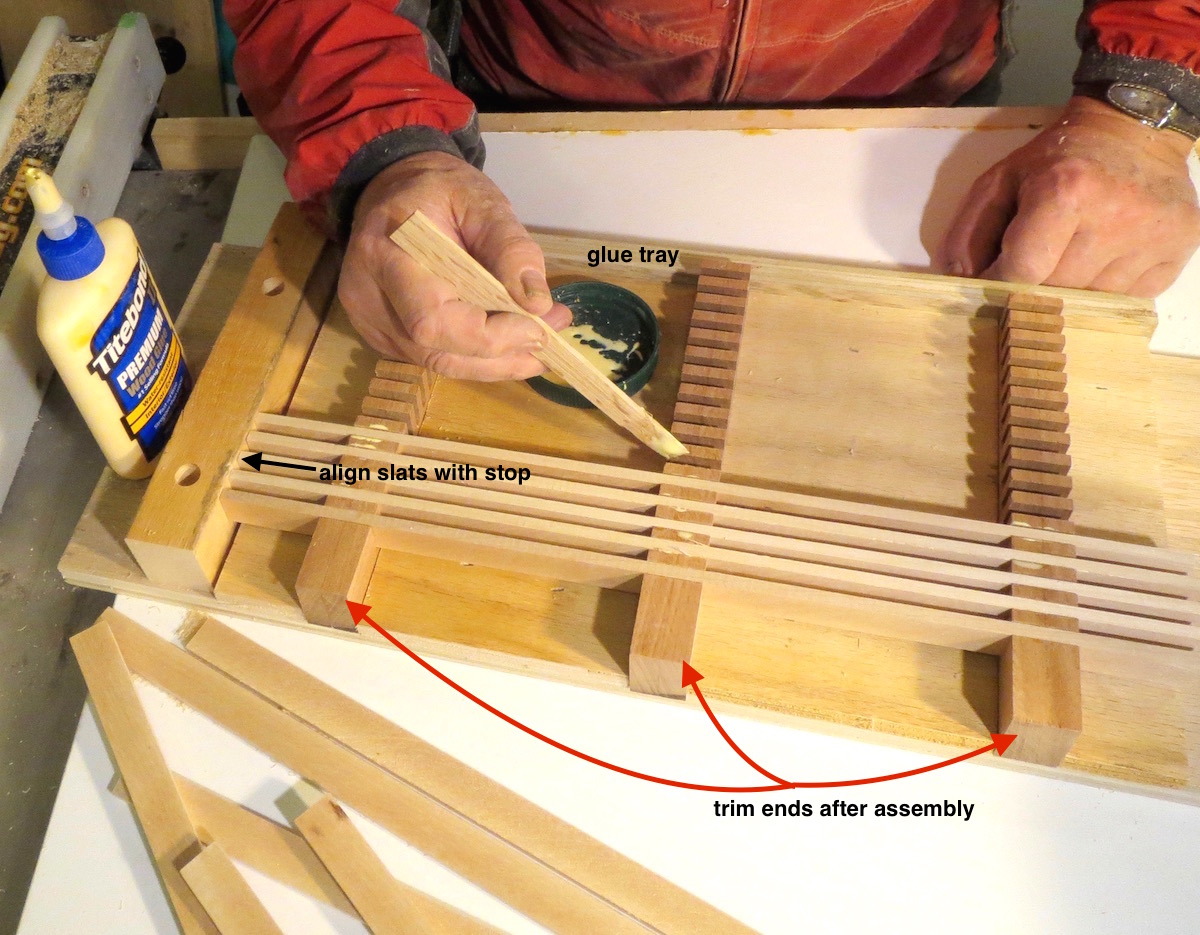
Apply glue to the slots. Don't add too much glue or you'll have a mess to clean up. Lightly coat the inner walls of each groove. As soon as the assembly is complete, gently lift the assembly from the jig to make sure any oozed glue doesn't stick to the assembly jig. Rest the assembly on a flat surface until the glue sets. To avoid the potential of sticking the project to the jig you can apply a light coat of paste wax on the surface of the jig near the support channels. Cut the uncut ends of the supports, leaving a 1/4" finger behind.
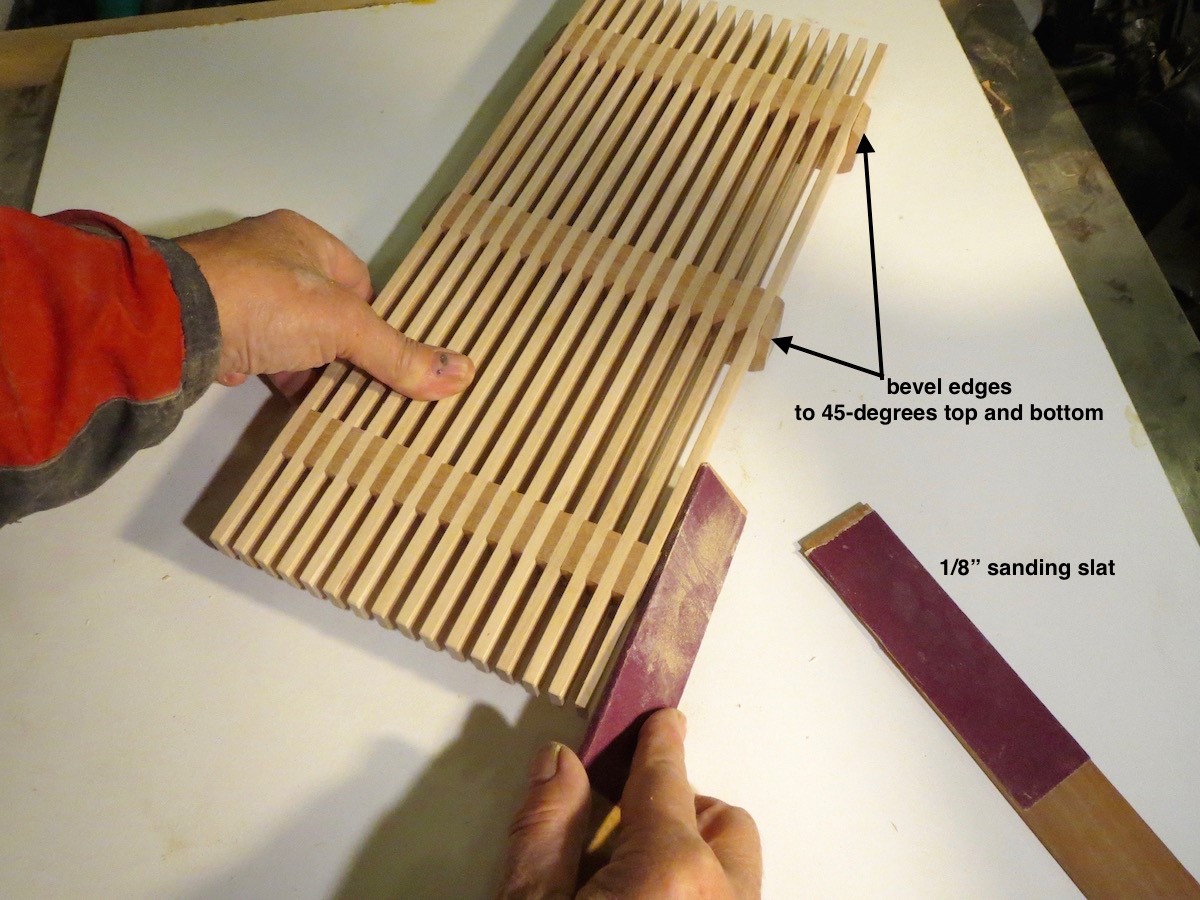
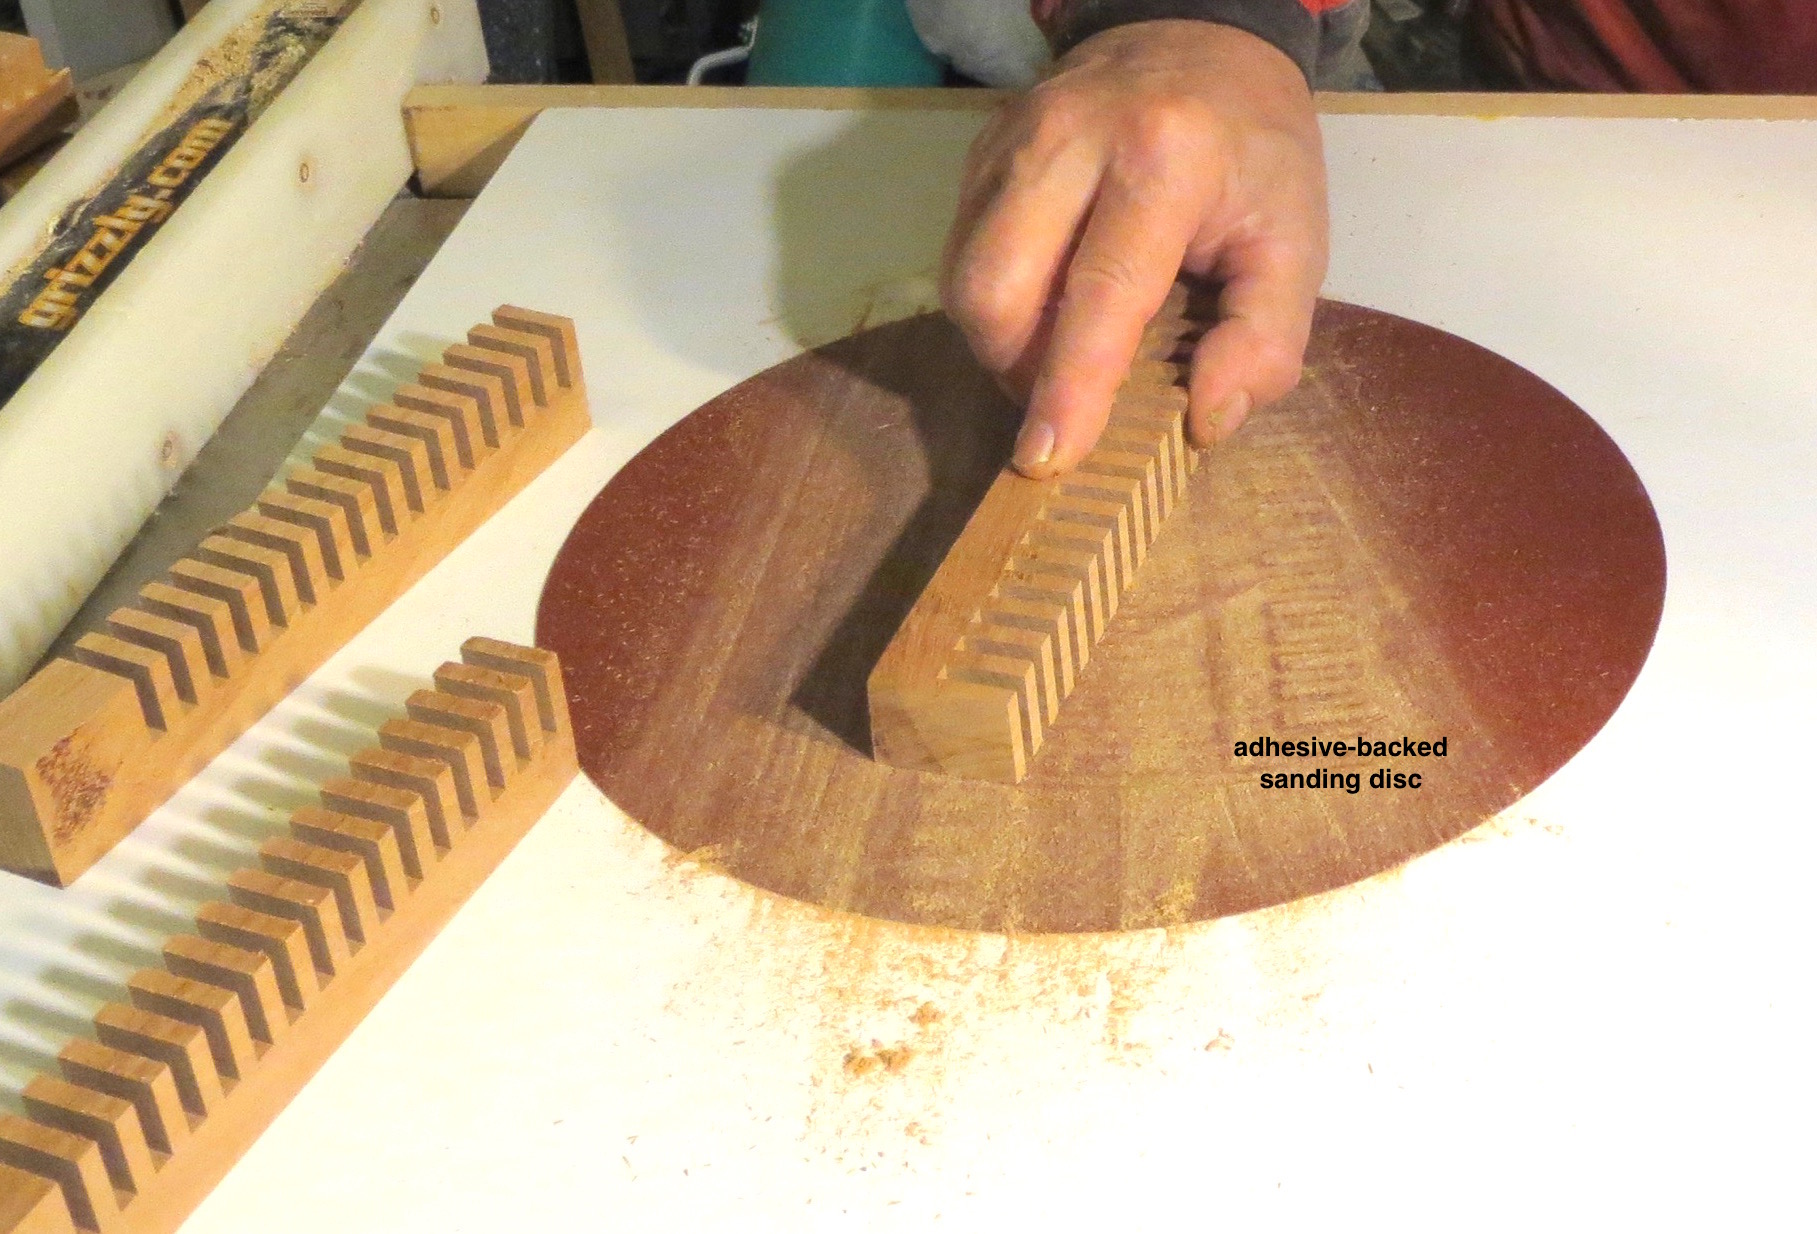
Sand bevels on to the support ends for a finished look. You can use a fine hand saw or a file to initiate the bevel cuts then dress it to final shape with the sandpaper slats. The shop-made sandpaper slats work great for sanding any glue spots between the slats and in tight spots around the supports. I used a random orbital sander to sand the top flat and even the slats with the fingers of the supports. Final sand to 220 grit and then use your favorite oil finish for a natural look on your new trivet.

Share tips, start a discussion or ask other students a question. If you have a question for an expert, please click here.
Already a member?

Christmas gifts?
On the assembly jig, what is the distance from the slat stop to the end of the jig?
Looks like an interesting DIY woodworking item to make
The project is great and multiple trivets should be made at one time since there is a dedicated assembly jig. It should also be stated that any 2 contrasting woods can be used.
Good
looks good
Hello, how does one apply the oil finish between the slats (1/4" slots) on the assembled trivet? Small brush? Spray? Thank you.
<strong> Ticket 20273 Can you bevel the edges with the table saw? It would seem that sanding the edges to a 45 degree angle would be imprecise.
Thanks, looks like fun to build
lucked into a good table saw. Used this project to get started; and I am now ready for assembly. What kind of finish do your recommend?