MAKE YOUR ROUTER A MORE FLEXIBLE TOOL WITH THESE SHOP-MADE BASE-PLATES.
 Everyone knows that the router is an incredibly versatile tool. A huge variety of router bits, aftermarket jigs, fences and guides for sale at home renovation and specialty woodworking stores make the possibilities for the router seem endless.
The easiest way to broaden the scope of your router, however, won't require a trip to the store. I want to show you how to make three base plates; a large-hole base plate, a router table base plate, and a circle jig base plate. Each one takes about a half hour to make and your router will become three times as versatile as before.
Everyone knows that the router is an incredibly versatile tool. A huge variety of router bits, aftermarket jigs, fences and guides for sale at home renovation and specialty woodworking stores make the possibilities for the router seem endless.
The easiest way to broaden the scope of your router, however, won't require a trip to the store. I want to show you how to make three base plates; a large-hole base plate, a router table base plate, and a circle jig base plate. Each one takes about a half hour to make and your router will become three times as versatile as before.

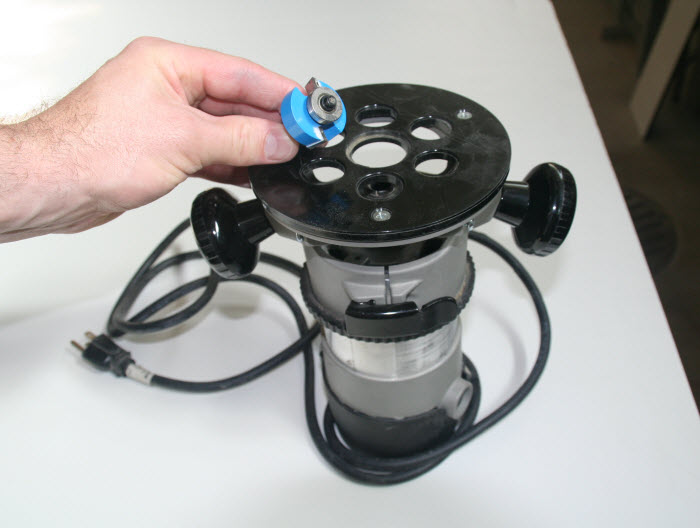 Homemade Router Plate. I bought a new rabbet bit for my router and was excited to try it out. Has this ever happened to you? When you tried to mount the bit in your router, you found the hole in the factory base plate was too small for the router bit to fit through. While some router bits are really too big to run in a hand held router, this bit is safe, but the hole is just too small.
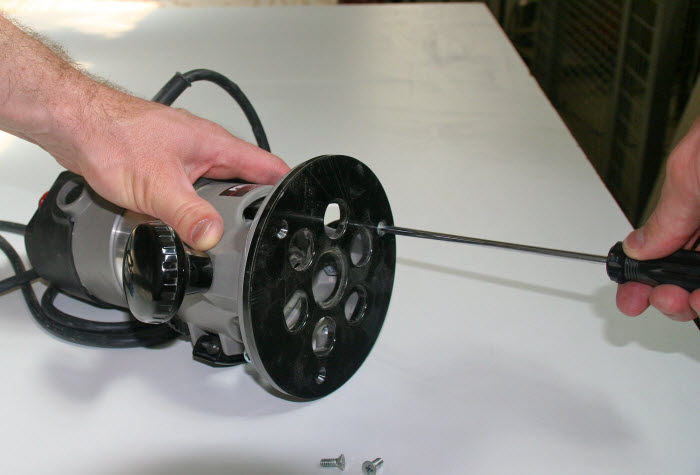 Rather than track down a different sized rabbet bit, just make a new base plate for your router that can accommodate your new bit. The first step is to remove the existing base plate. These are usually 1/4" thick and made out of a plastic material. Use a screwdriver to unscrew the mounting screws that hold the base plate to the router.
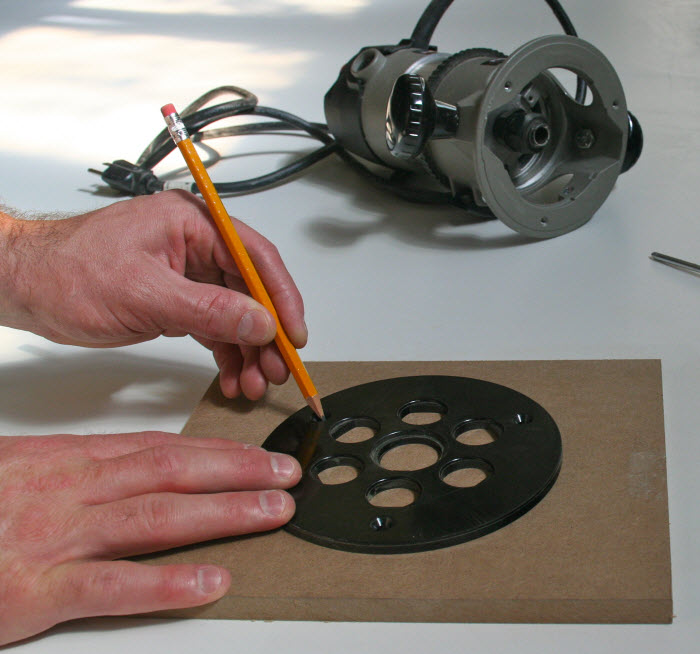 Next, trace the location of the center hole and the mounting holes onto your future base place. I like to use 1/2" thick MDF because I usually have scrap around my shop, and it is thick enough to countersink the mounting screws. Mark the center of the middle hole for boring out the waste.
 Once you have the location of the holes marked, bore the center hole out with a Forstner bit mounted in your drill press. Bore a hole at least 1/4" bigger than the cutter head on your router bit. This gives enough clearance for the bit to spin freely. Clamp the base plate to the drill press table to make sure it doesn't go flying across the room.
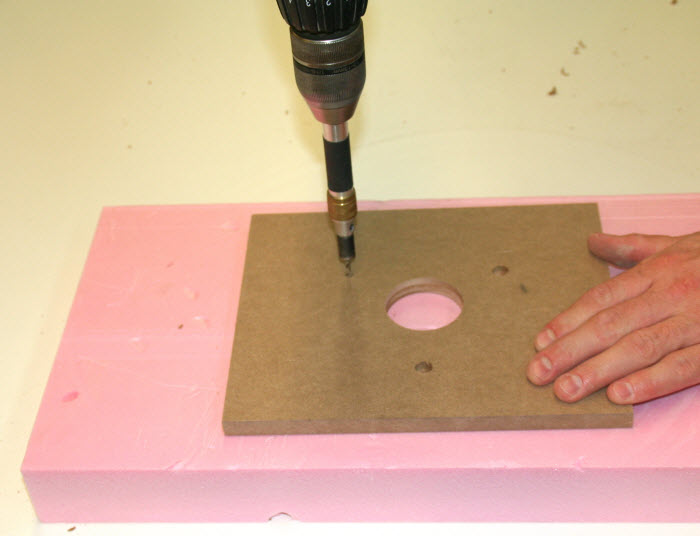 Next, drill and countersink the pilot holes in the base plate for the mounting screws. I use a small piece of 2" pink insulating foam to drill into so I don't mar my bench top. I use a combination drill bit/countersink. The pilot hole is usually a little small on these combo bits, so you may have to ream it out with a slightly larger drill bit. Because the new base is thicker than the old one, you'll need to make sure that the screw holes are deep enough, and the screws long enough, to get plenty of bite into the router base.
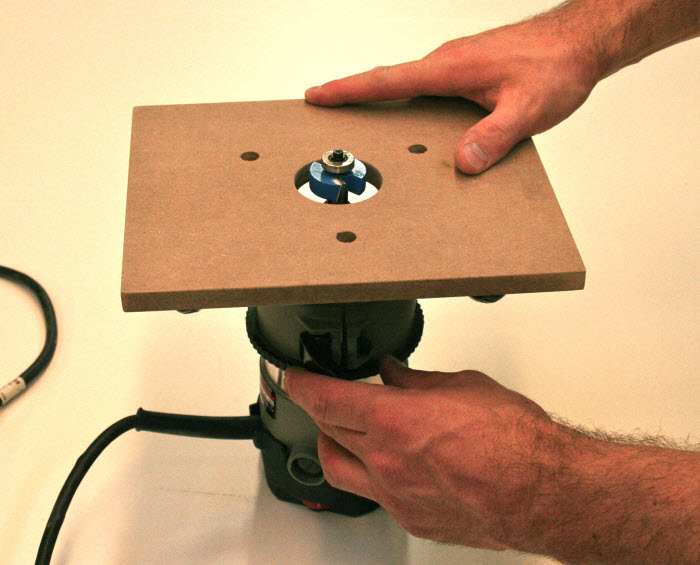 Now the rabbet bit fits! Lightly sand the surfaces and edges with sandpaper wrapped around a block to knock off any sharp or protruding spots on the new base. Once you have the pilot holes and countersink drilled, screw the new base plate onto the router. Here, I am adjusting the bit for height in the new base plate.

Faster, Easier, Safer! Make a Simple Homemade Router Table. I'm always amazed at how impatient I have been. Although I'm embarrassed to admit it, in the past I have flipped a router over, rested it on the motor and done small chamfers and round-overs... but not any more now that I have this "router table" hanging on my wall!
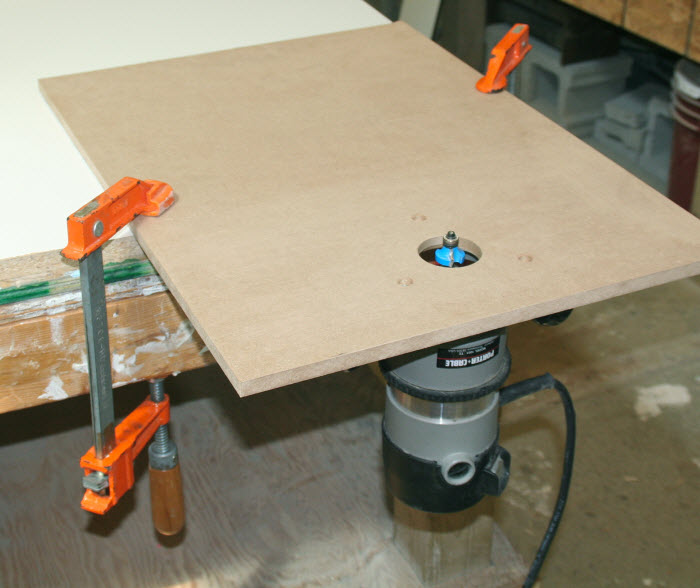 Another way to use a home-made router base is to make the simplest router table imaginable! Follow the same steps as before, but with a larger piece of MDF, and clamp it upside down to your workbench. This one is 18" x 22" and is perfect for rounding over small parts. It is safer than setting your router upside down on your bench, and the larger table size makes it much more stable.
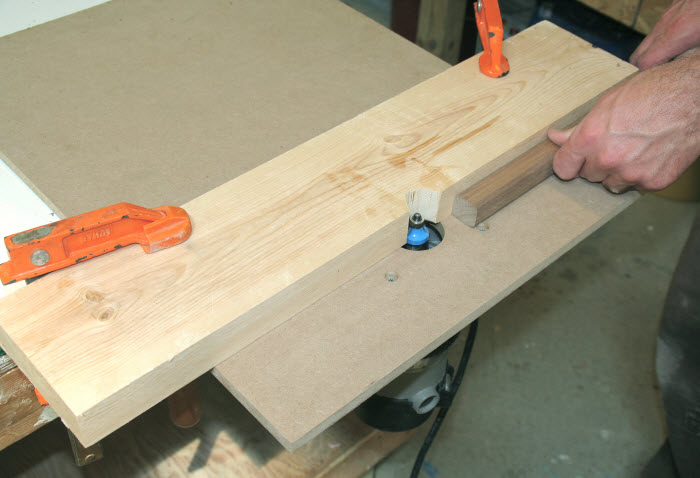 If you need a fence, there is an easy answer for that too. Just joint 2 edges of a scrap 2 x 4 and cut out a small void where you want your bit to go. If you just need a straight edge, don't bother with the hole. Clamp it where you want it and you're re ready for lightweight shaping! It's not beautiful, but it gets the job done.
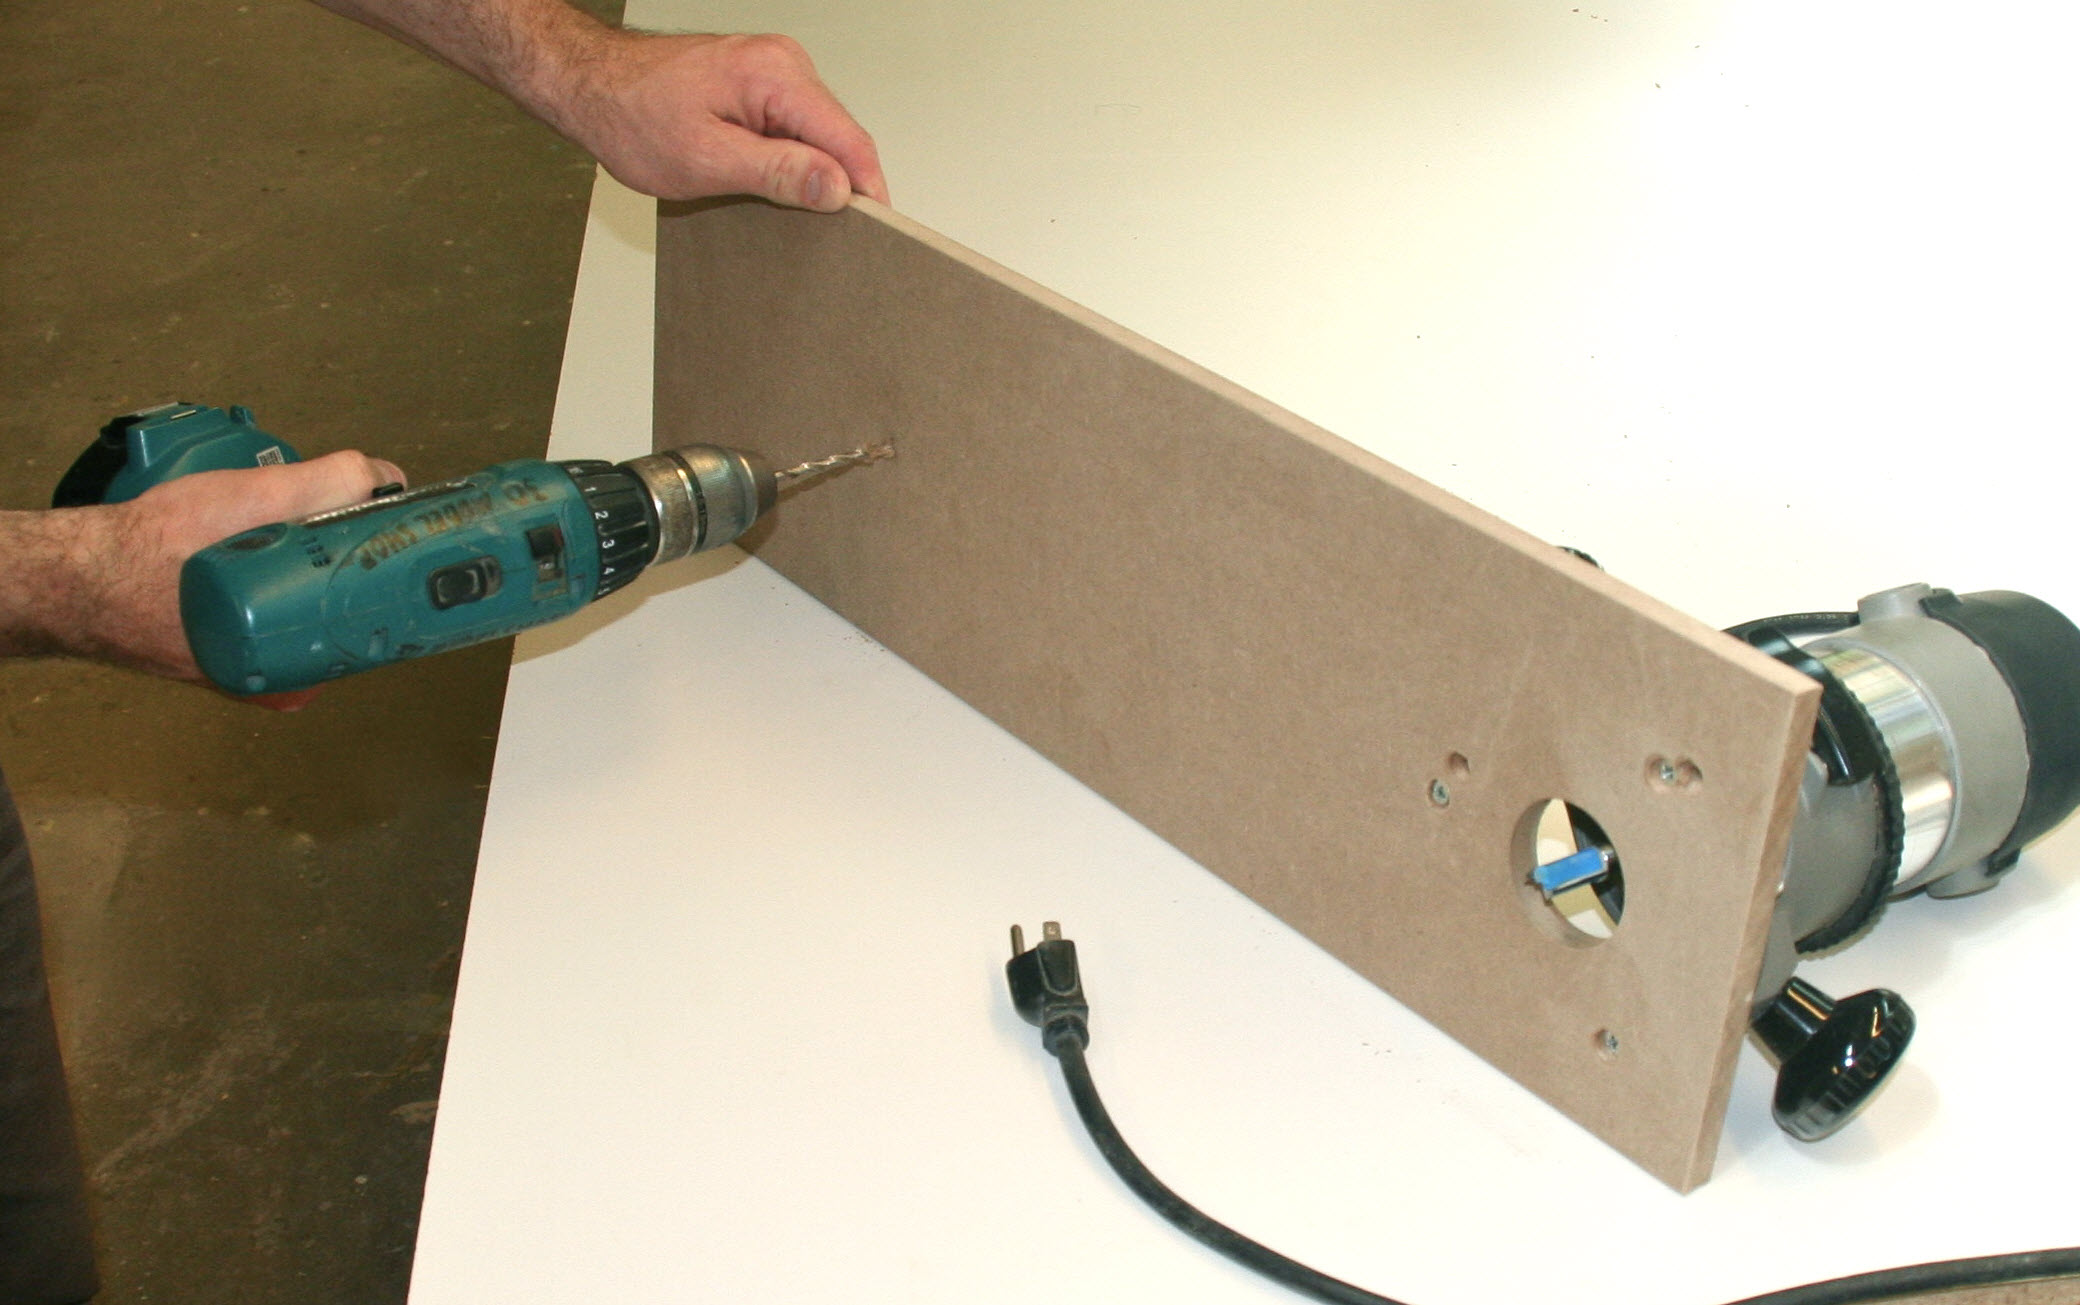
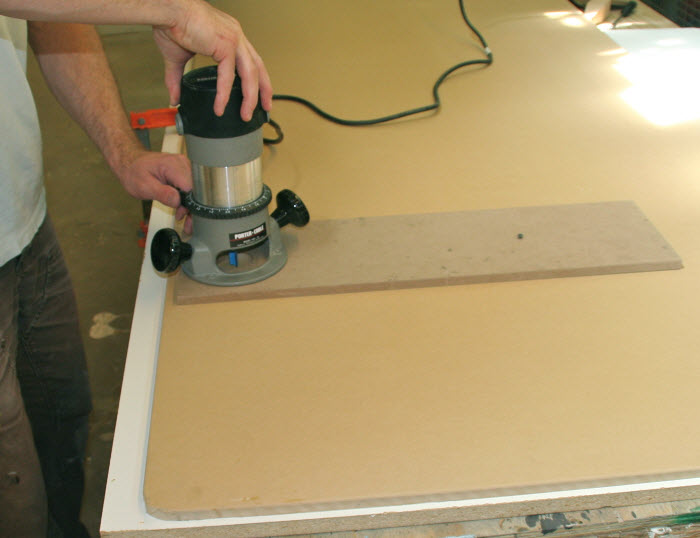
Circle Template Too! Making a circle template using the same technique is just as easy as the other home-made jigs. Make a base plate approximately 8" x 30" long. Mark and bore the holes on one end of the jig.
 Once you've mounted the router in the jig, measure one half the distance from the edge of the router blade (turned parallel to the long side of the jig) and mark that point with a pencil. I needed a 30" round table top, so I measured 15" from the router bit to my center.
 Drill at your mark for the center of your circle in the bottom of the jig.
 Drill a screw through the center hole you drilled through the jig into your work-piece. If you are making a template, you can drill through the entire piece, or if you are making a finished piece, be sure to secure the jig in the center hole on the BOTTOM of your piece. While this operation may also use a plunge router, I'm doing it with a fixed base. Turn the router on and gently lower the router bit into the work piece.
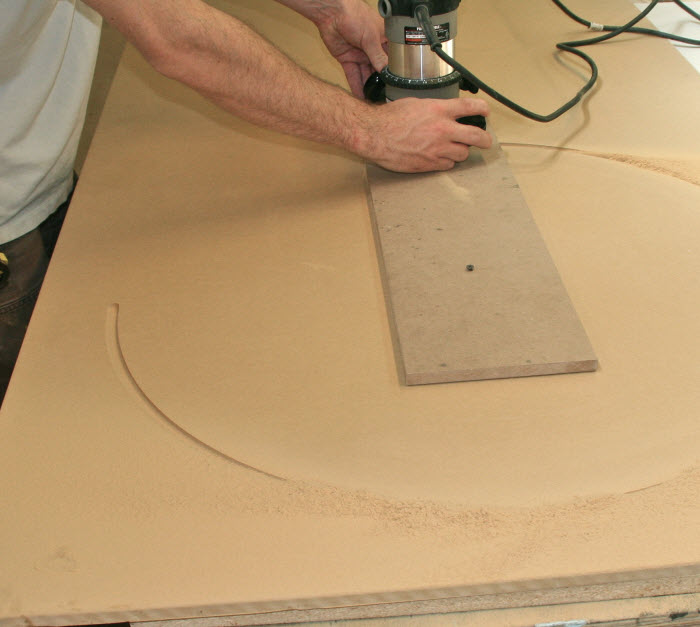 Gently push the router through your wood, and the router will follow the radius you determined. Make multiple passes, lowering 1/8" at a time. This is the safest method that yields the cleanest cut.
Photos By Author

Awesome information!!.. Thank You
Very simple as well as excellent solutions, thanx!!
Will this work with aCraftsman router?
First class and easy way to expand use of the best tool in the shop!
Thank you for showing me on how to do the router base
The images on this page do not load.
Looks good
Primery
I had a router table base plate but over the years the weight of the router has caused it to bend. I was looking for material to make a new one but never thought of MDF. I'll give it a try.
I am searching for a router.