Where the proverbial "rubber meets the road" in dust collection is where the ductwork ties into the tool to extract dust while the tool is in operation. In my opinion most tool manufacturers treat dust collection as an afterthought, and do not design the tools to provide adequate removal of dust and debris. To put it simply, the ports are generally too small and poorly positioned, thereby leaving most of the microscopic dust particles hanging in the air where our lungs become the dust collection system.
Therefore, if we want to take full advantage of our powerful dust collection system and optimized ductwork, we need to give some extra effort in the final connection to our tools. This means modifying or replacing the dust ports on some tools, and creating a dust capture mechanism from scratch in other cases. Be judicious here and your efforts will be rewarded with clean air. If you take the easy route and just accept what the tool manufacturer provides for dust collection, you may have regrets.

This article is by no means a definitive guide, but rather a tour through my shop where I will show you examples of how I have connected various tools, and in most cases made huge improvements over what came "in the box" with each tool. You can use these ideas as a starting point, and come up with some great ideas of your own to maximize the dust captured at each tool.

 Tool ports. Before I jump into the tour, let's take a look at an example of how to make custom tool ports. I have seen several different approaches, but I like this one because it is simple, cheap, sturdy and works well with PVC couplers that I use as quick disconnects at the end of flexible tubing.
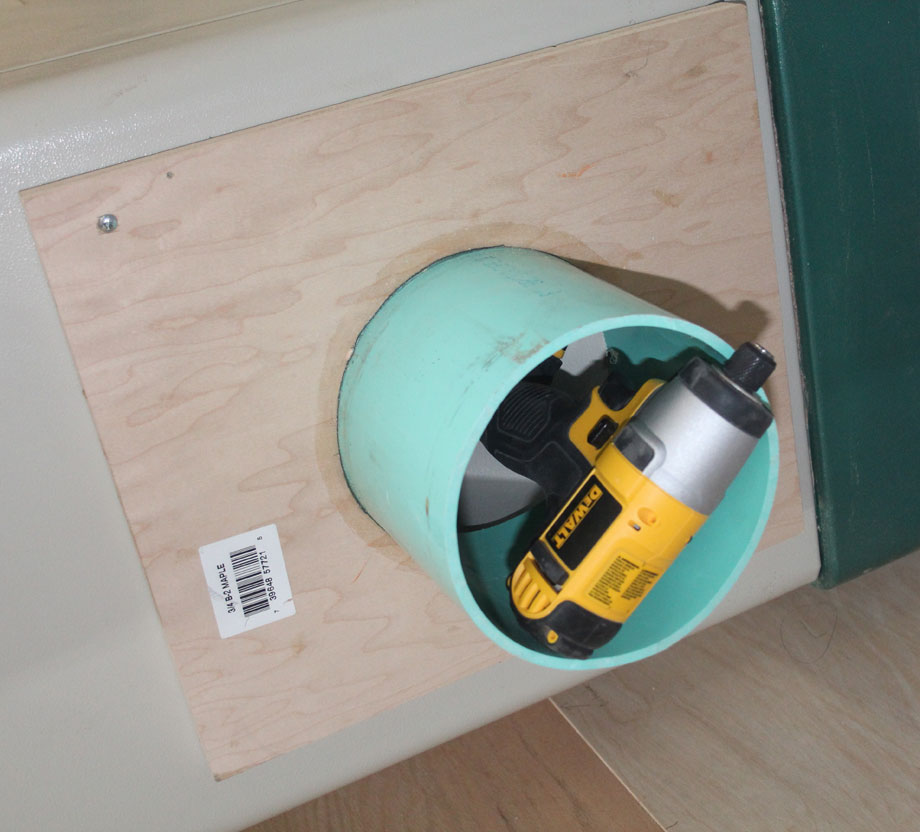
Ideally you will place a 6" port as close to where the dust is being produced as possible, and I have never purchased a tool that had a standard 6" port, or even an optional one for that matter. So, you will have to make your own ports, and in some cases, cut holes in your tools to accommodate the port. The picture shows a shop made 6" port on a jointer, with a drill stuck in it to illustrate the massive size. That port allows massive air movement, and allows my dust collector to pull everything that is not securely attached to the tool.
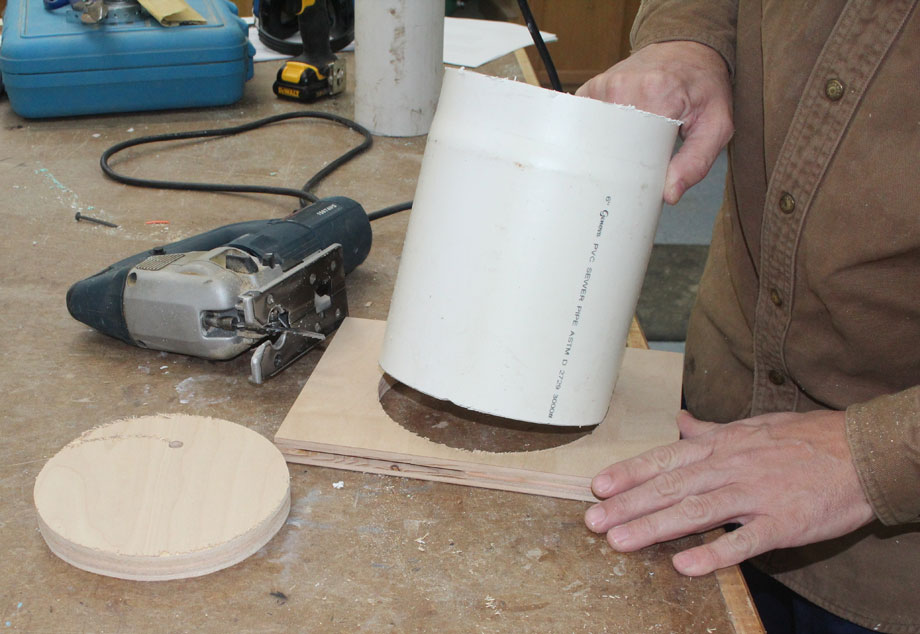 Simple to make. Take a 6" piece of PVC, set it on a piece of plywood or MDF, trace a line around the outside of the pipe, and cut the hole. Set the PVC in the hole and caulk it on the outside. Then place 1/4" foam weather stripping around the perimeter of the plywood, and use sheet metal screws to attach to your tool. If the stock port opening on the tool isn't large enough, or isn't there, use a jigsaw with appropriate metal cutting blade to modify or create the opening.
Tool hookup examples from my shop.
In this section I will share some examples of dust extraction at a few tools in my shop to give you some ideas. Some tools like planers and jointers are straightforward; hook up to a single port (ideally 6" for most tools) and you will get most of the fine dust. Other tools such as miter saws and router tables require a bit more thought and ingenuity, in some cases requiring multiple ports and a bit of simple fabrication. Here is a look at a few examples:
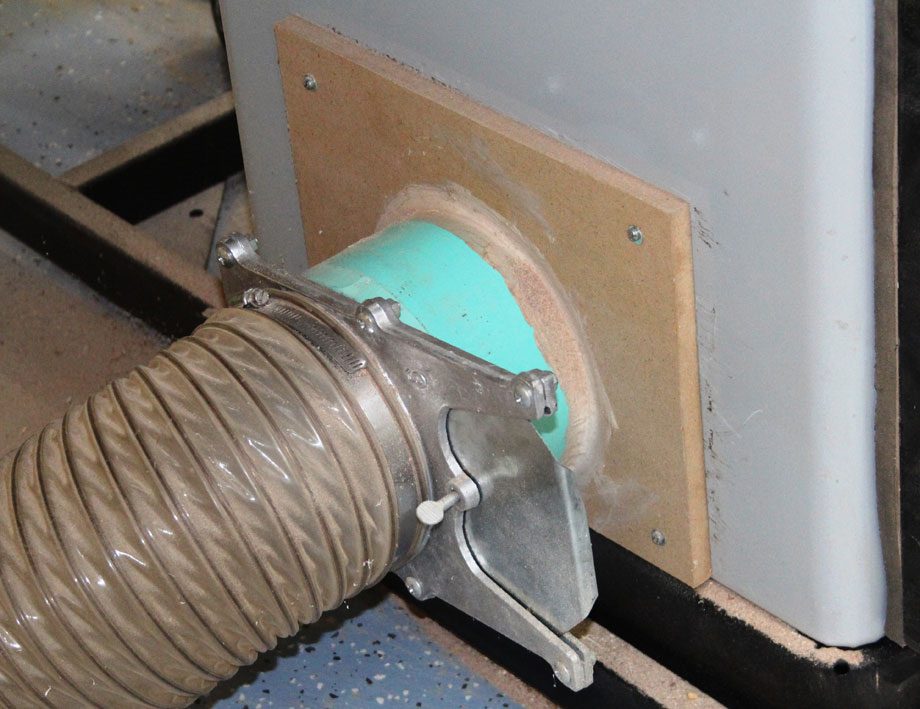 Table saw. I replaced the stock 4" port with a shop-made 6" port, and ran a short section of 6" flex hose to the tool. Mine is actually a poor example because I only capture dust from the cabinet of the saw. After upgrading to a larger dust collector I now have adequate suction and I plan to add an over arm guard with dust capture. At least I have a 6" port at the cabinet, and with over 1300 CFM it keeps the cabinet and its contents clean.
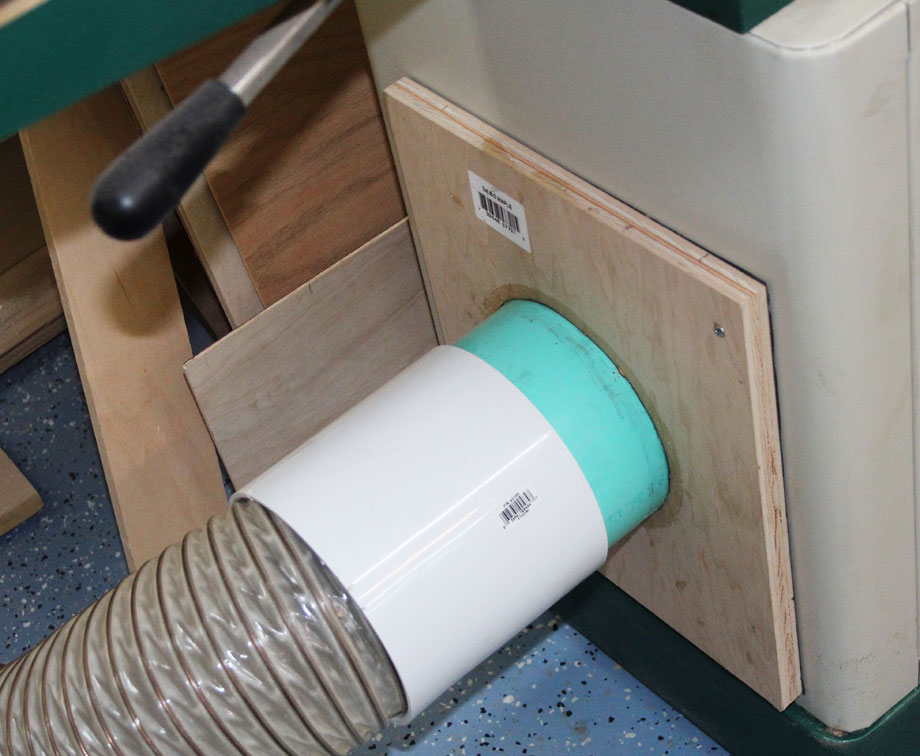 Jointer. I simply built a 6" tool port with quick disconnect as described above and it does a great job. This is my longest duct run with the lowest CFM measurement of any 6" port, and it still does a great job collecting dust and debris. By expanding to a 6" port over the stock 4" port that came with the tool, I see a massive improvement in air movement at the tool, and the upgrade took only about 30 minutes.
 Router table. Here I have a 4" port integrated into the fence, and another 4" duct extended into the cabinet right near the router. This captures a good amount of the dust, but I believe that I will modify this to use a 6" duct in the base which should be a great improvement. Also, it is a good idea to have the lower port set 6" or so from the router to allow proper cooling of the router.
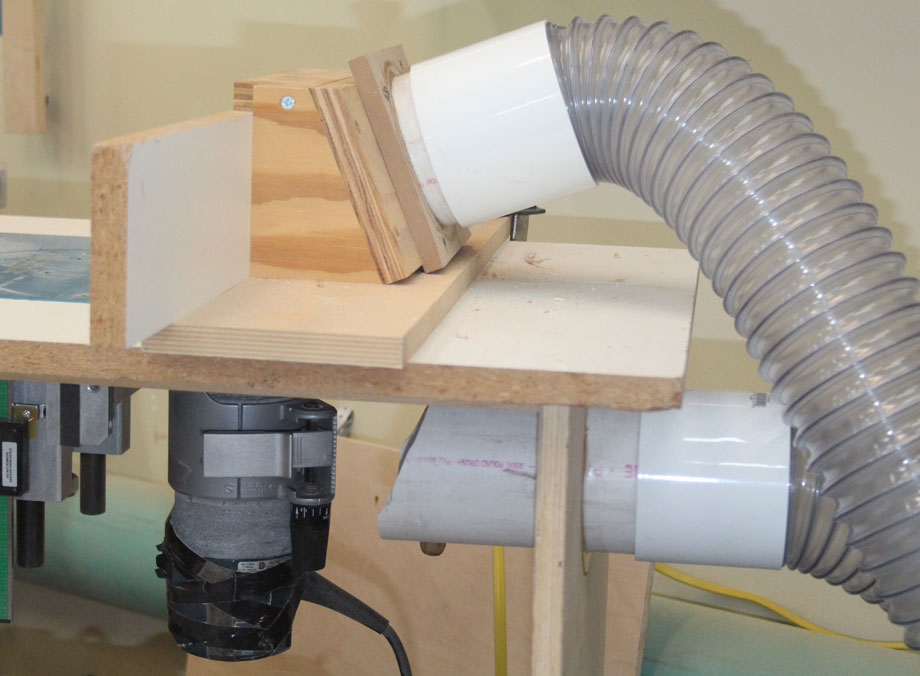
 Sliding Compound Miter Saw. Here I ran a 6" port from below into a shop made hood, and ran a short section of hose off the tools dust port, directing that dust toward my duct. This is perhaps the hardest tool to capture dust from, especially for sliding saws, so you will want put some thought into this one. I would see some incremental improvement by running another dust port directly underneath the bed of the saw where I still have a small amount of dust escaping collection. You will want at least 1000 CFM at this tool, and ideally 1300 or more, since you are producing dust up to 2 feet away from the port at times.
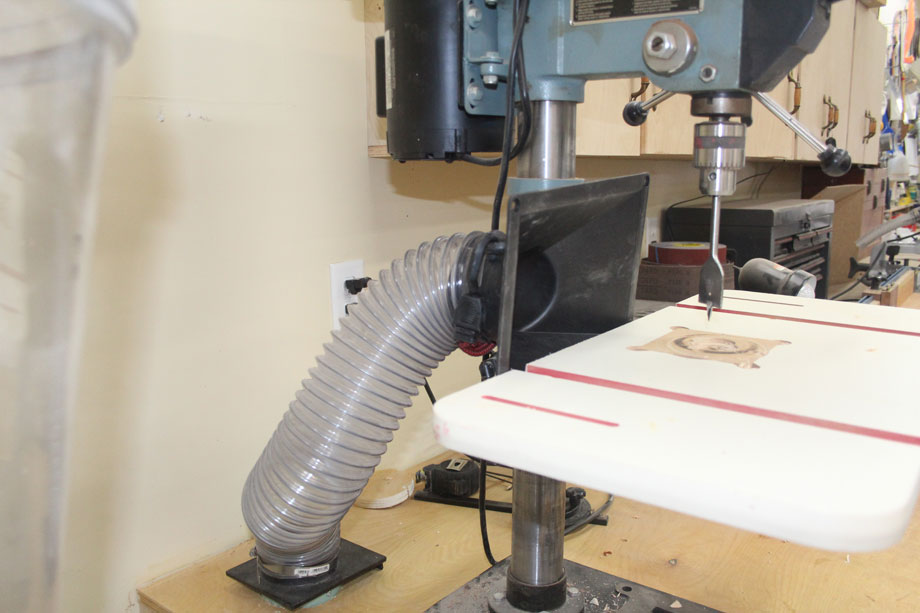 Drill press. I simply used the 4" port that came standard with one of my other tools (which I upgraded to use a 6" port), and used a bungee cord to attach it to my drill press. I probably wouldn't bother hooking my drill press up to dust collection for typical drilling operations because drill bits do not send a lot of fine dust into the air, but I occasionally use it with a small drum sander in the chuck, so this setup works great for that application. An easy improvement here would be to add a second 4" line to capture dust from the other side of the drill press, but the current setup captures the majority of dust and shavings.
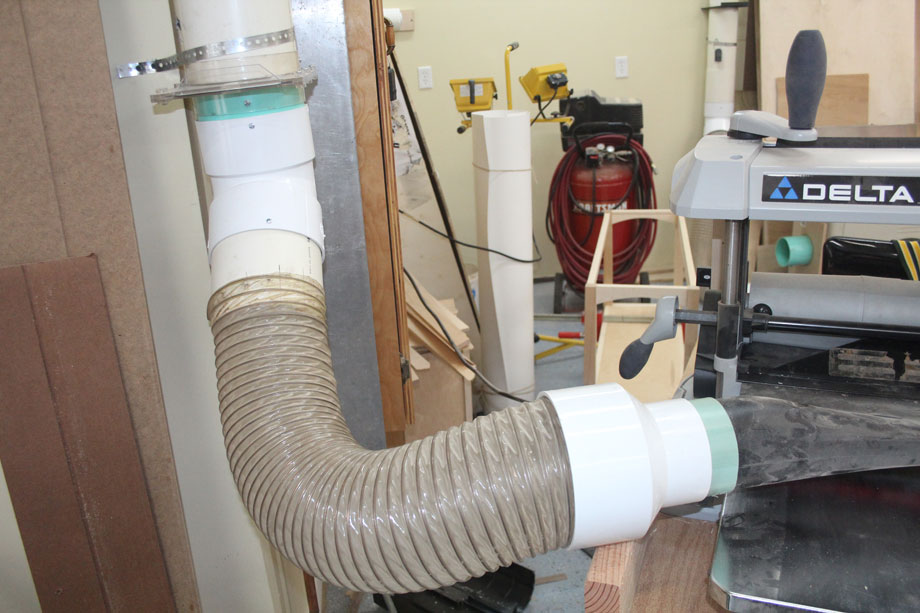 Planer. I ran 6" pipe all the way to a tapered reducer to 4" at the very end of the line. I would rather have a 6" connection to the dust pickup, but because a planer is well enclosed to contain the dust and debris, this setup works well for my 13" planer. For larger planers I would likely configure a 6" port or dual 4" ports.
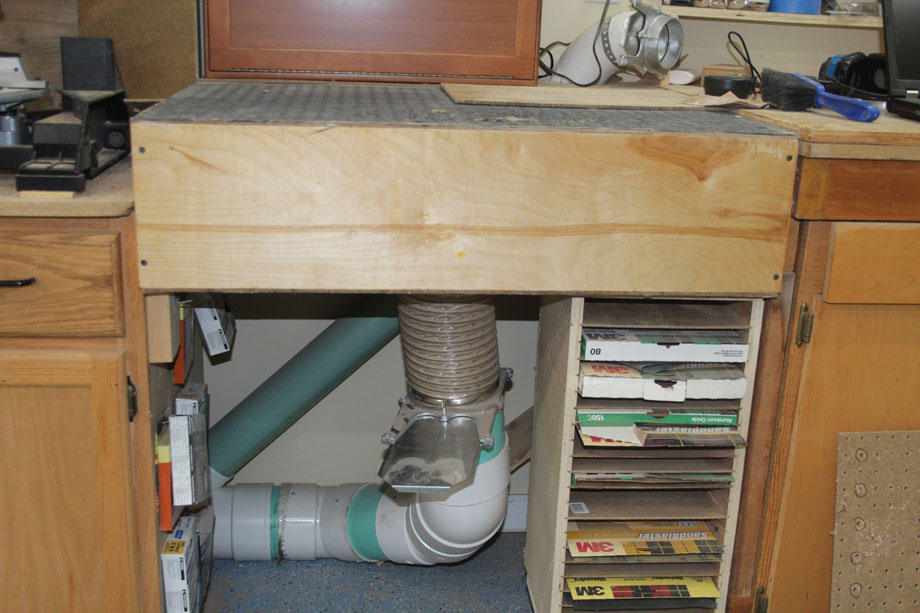 Downdraft table. This is a simple device that I built based on the Bill Pentz design using pegboard coated in rubber attached to a reinforced box. I plumbed with a 6" pipe in the middle of the bottom, and now with my cyclone upgrade complete this station has adequate suction and works great. This table also serves as an extension table for my workbench as well as my miter saw, so it is a great multi-function addition to the shop.
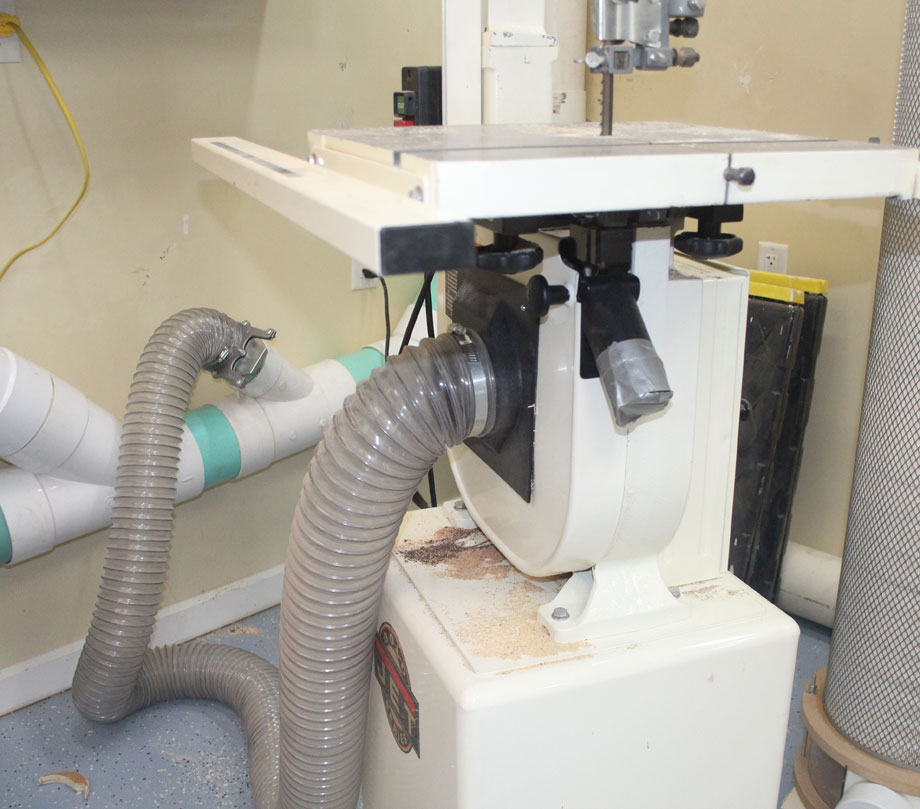 Band saw. The standard 2-1/2" port on my band saw is borderline worthless. I have upgraded it by cutting a hole through the lower door and connecting a 4" tool port. A 6" port would be better, but I was concerned that it would be in the way as I operated the tool. More dust could be gathered by configuring an additional hose connected to the 2-1/2" port which is currently sealed with duct tape to optimize collection through the 4" port; a project that is on my to-do list.
Summary.
I hope that in the years to come our tool suppliers will do us a service and include better dust extraction in their tool designs. Some vendors are starting to show progress, but most have a ways to go. In the meantime, the more you can do to capture the fine dust that is generated at each source, the healthier your shop environment will become.
Photos By Author

good ideas
Very helpful suggestions and pictures
Hi Paul, Thanks for your great information. I do some woodworking as a hobby in a small shop. I have decided to move up from a large shop vac to a 2 HP 1550 CFM Shopfox collector. My band saw does have a 4" port but the Hitachi miter saw and Dewalt "Job site" table saws both have 2 1/2 inch ports. I also have a 36" HF lathe. The run would be no more than 10 feet. Do you suggest that I use 6" PVC or Metal ducting for the main run, then reduce down to 4" and then reduce again to 2 1/2 for the saws? Or should I just go with a 4" main line? I'm not sure I would feel comfortable trying to cut out a portion of the table saw. The other question....which main line material would be easier to fit 4" and 2 1/2 inch hoses to,,,PVC or metal ducting?
If I have 4" ports coming off my dust collector, should I still put 6" on my machines? If yes, do put the larger hose run towards the collector or closer to the machine? I also agree that dust collection and fittings need to be more standardized. I'm always buying different fittings/couplings etc. and most don't fit.
I have a small shop,I use a 20 Gal shop vac and 3"PVC ducting W 2 3" flex hoses ( one at each end of my shop) I use a bag filter in the vac. The suction is great and I adapted all my bench & hand tools to it.I exhaust the vac outside the shop. I don't have room for a larger vac. or cyclone.
Cannot view any phots relative to dust collection
My 5 h.p. Grizzly table saw had a small hose inside the case between the dust collection port and a housing around the blade. It repeatedly clogged so I took the hose out. I also attached magnets to plywood to close the port around the blade tilt pointer. Dust collection is still not enough. I need to open the hole at the connection point further, as I just discovered. Thanks for the article.
I've found that on my Jet 14" bandsaw, moving the dust collection to a point directly below the table surface allows the roller bearing guides to last a lot longer. Using some PVC fittings, I surround the blade and top of the lower guide to pull the dust away before it gets into the lower cabinet.
Paul can you make a list of CFM vs pipe diameter, ie the minimum CFM for, say, 2", 4" and 6" ducting? Or is there a formula based on run x diameter?
Remember as you increase the diameter of the collection hose or port the volume goes up but the velocity goes down. Without a good collector large hose will not help. Most good tool manufactures will tell you what volume or velocity is needed at their tools.