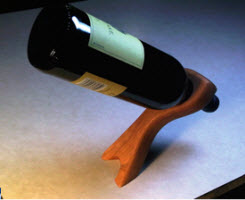
 Add a whimsical air to your next celebration by placing wine bottles in a seemingly impossible balancing act using these intriguing holders. These special holders support a standard 750-ml bottle of wine in perfect repose, while your guests will stand around it staring in a state of wonder. The trick to maintaining balance is in the angle of the base cut, and the distance from the top hole to the base. This plan will demystify the process and take the guesswork out by providing the measurements that make it work for you.
Click here for the Balancing Wine Bottle Holder plan
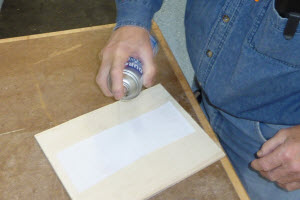 Start by creating your template. Download and print the supplied pattern, and apply to 1/4″ plywood or tempered hardboard using adhesive spray. Let the spray dry for about a minute before placing it on the template material, which will allow the paper pattern to be removed more easily.

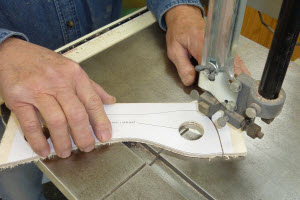 Cut out the template. First drill the 1-1/4″ holes as indicated on the template. Then, use either a band saw or scroll saw to cut to the pattern lines, and sand the edges smooth.

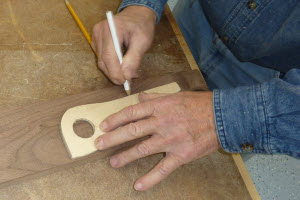 Prepare your stock. Any hardwood will work just fine. This is a perfect project to turn end cuts into holiday gifts, as the blank that you will need is only 3/4″x 3″ x 9″.Optionally, for greater stability you can use thicker stock such as 5/4 or 6/4. Trace the cut lines using the template. For better visibility, using a white pencil when using dark wood such as walnut.
 Drill holes. Use a 1-1/4″ bit to drill holes as positioned in the template. The bottom contour could also be cut on the band saw, but given the tight radius we generally do this at the drill press, which provides a quick hole that is consistent in size with the top hole, and leaves a smooth surface that saves on sanding time later.
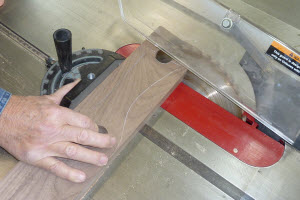 Cut the base angle. Prior to cutting the curved shape on the band saw, cut the base at a 35-degree angle.
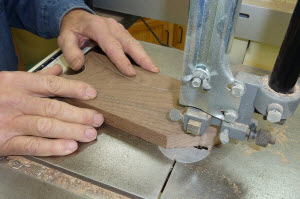 Cut rough shape on band saw. Using a band saw, cut the curved shapes, leaving the line for final shaping later.
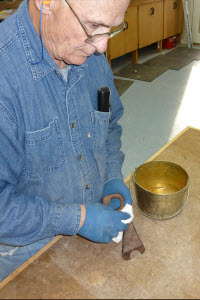
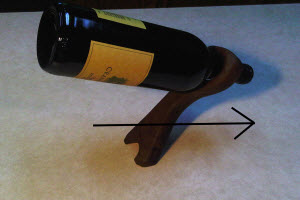 At this point it is a good idea to test the holder for balance. Before sanding, place a full 750-ml bottle of wine in the holder to see if it stays firmly balanced. You might find that it balances perfectly without further modification. If you are slightly off, it might feel ‘a bit tippy’. If you are grossly off, it won’t stand on its own at all. If it doesn’t balance properly, carefully feel which way the holder is leaning under the weight of the bottle and adjust the angle of the base with ‘tuning cuts’ on band saw as needed, or by lightly sanding with a disc sander. If the bottle leans to the right as shown by the arrow in this photo, decrease the angle of the base cut (try 34-degrees) so that the bottle holder stands more vertically. Sharpen the angle (try 36-degrees) if it leans the other way.
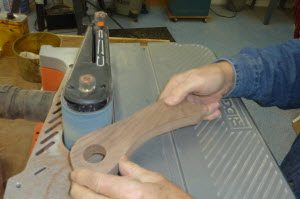 Sand to the line. Using a belt sander, carefully sand to the line for final shaping.
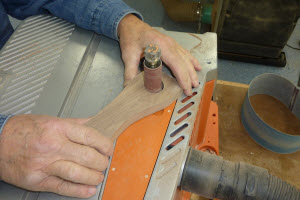 Use an oscillating spindle sander or other means to sand inside the holes. After all surfaces have been sanded using power equipment, hand sand to 400-grit to achieve a smooth feel.
 Finish using polyurethane or other durable finish. One way to support small pieces like this as the finish cures between coats is to tap some small finish nails about half way into a piece of scrap wood, leaving a bunch of nails sticking out a small amount at approximately the same height. This will support the piece without much contact surface area, allowing you to finish all sides in a single pass.
Once you get the balancing part down, you can experiment with other fun shapes and designs. If you modify the distance of the hole from the base, you will also have to adjust the angle of the base to establish balance. For example, if the hole is farther from the base, you will need to cut the base at a lesser angle. By experimenting you will find the angle that works for most any design.
Photos Paul Mayer Design and Construction by Vernon Mayer
Paul Mayer lives in Lakeville, Minnesota, and is a hopelessly addicted hobbyist woodworker with 12 years experience building custom furniture and other fun projects. He also assists his father, Vernon Mayer, in his woodworking business Vern’s Wood Goods where they build serving trays, cutting boards, kitchen utensils and other fine crafts.
Click here for the Balancing Wine Bottle Holder plan

Can't wait!
Looking forward to this project
Mine prints out as 8 3/4 will this work?
My security software is warning me not to download these plans. Is there a safe method to get the download?
I have opened and searched and searched this plan and can't not seem to find the template link? Please Help, or Help Please.
I would like a copy of the print for this project.
This looks neat.
Fun party gift!
Looks amazing
Thank You