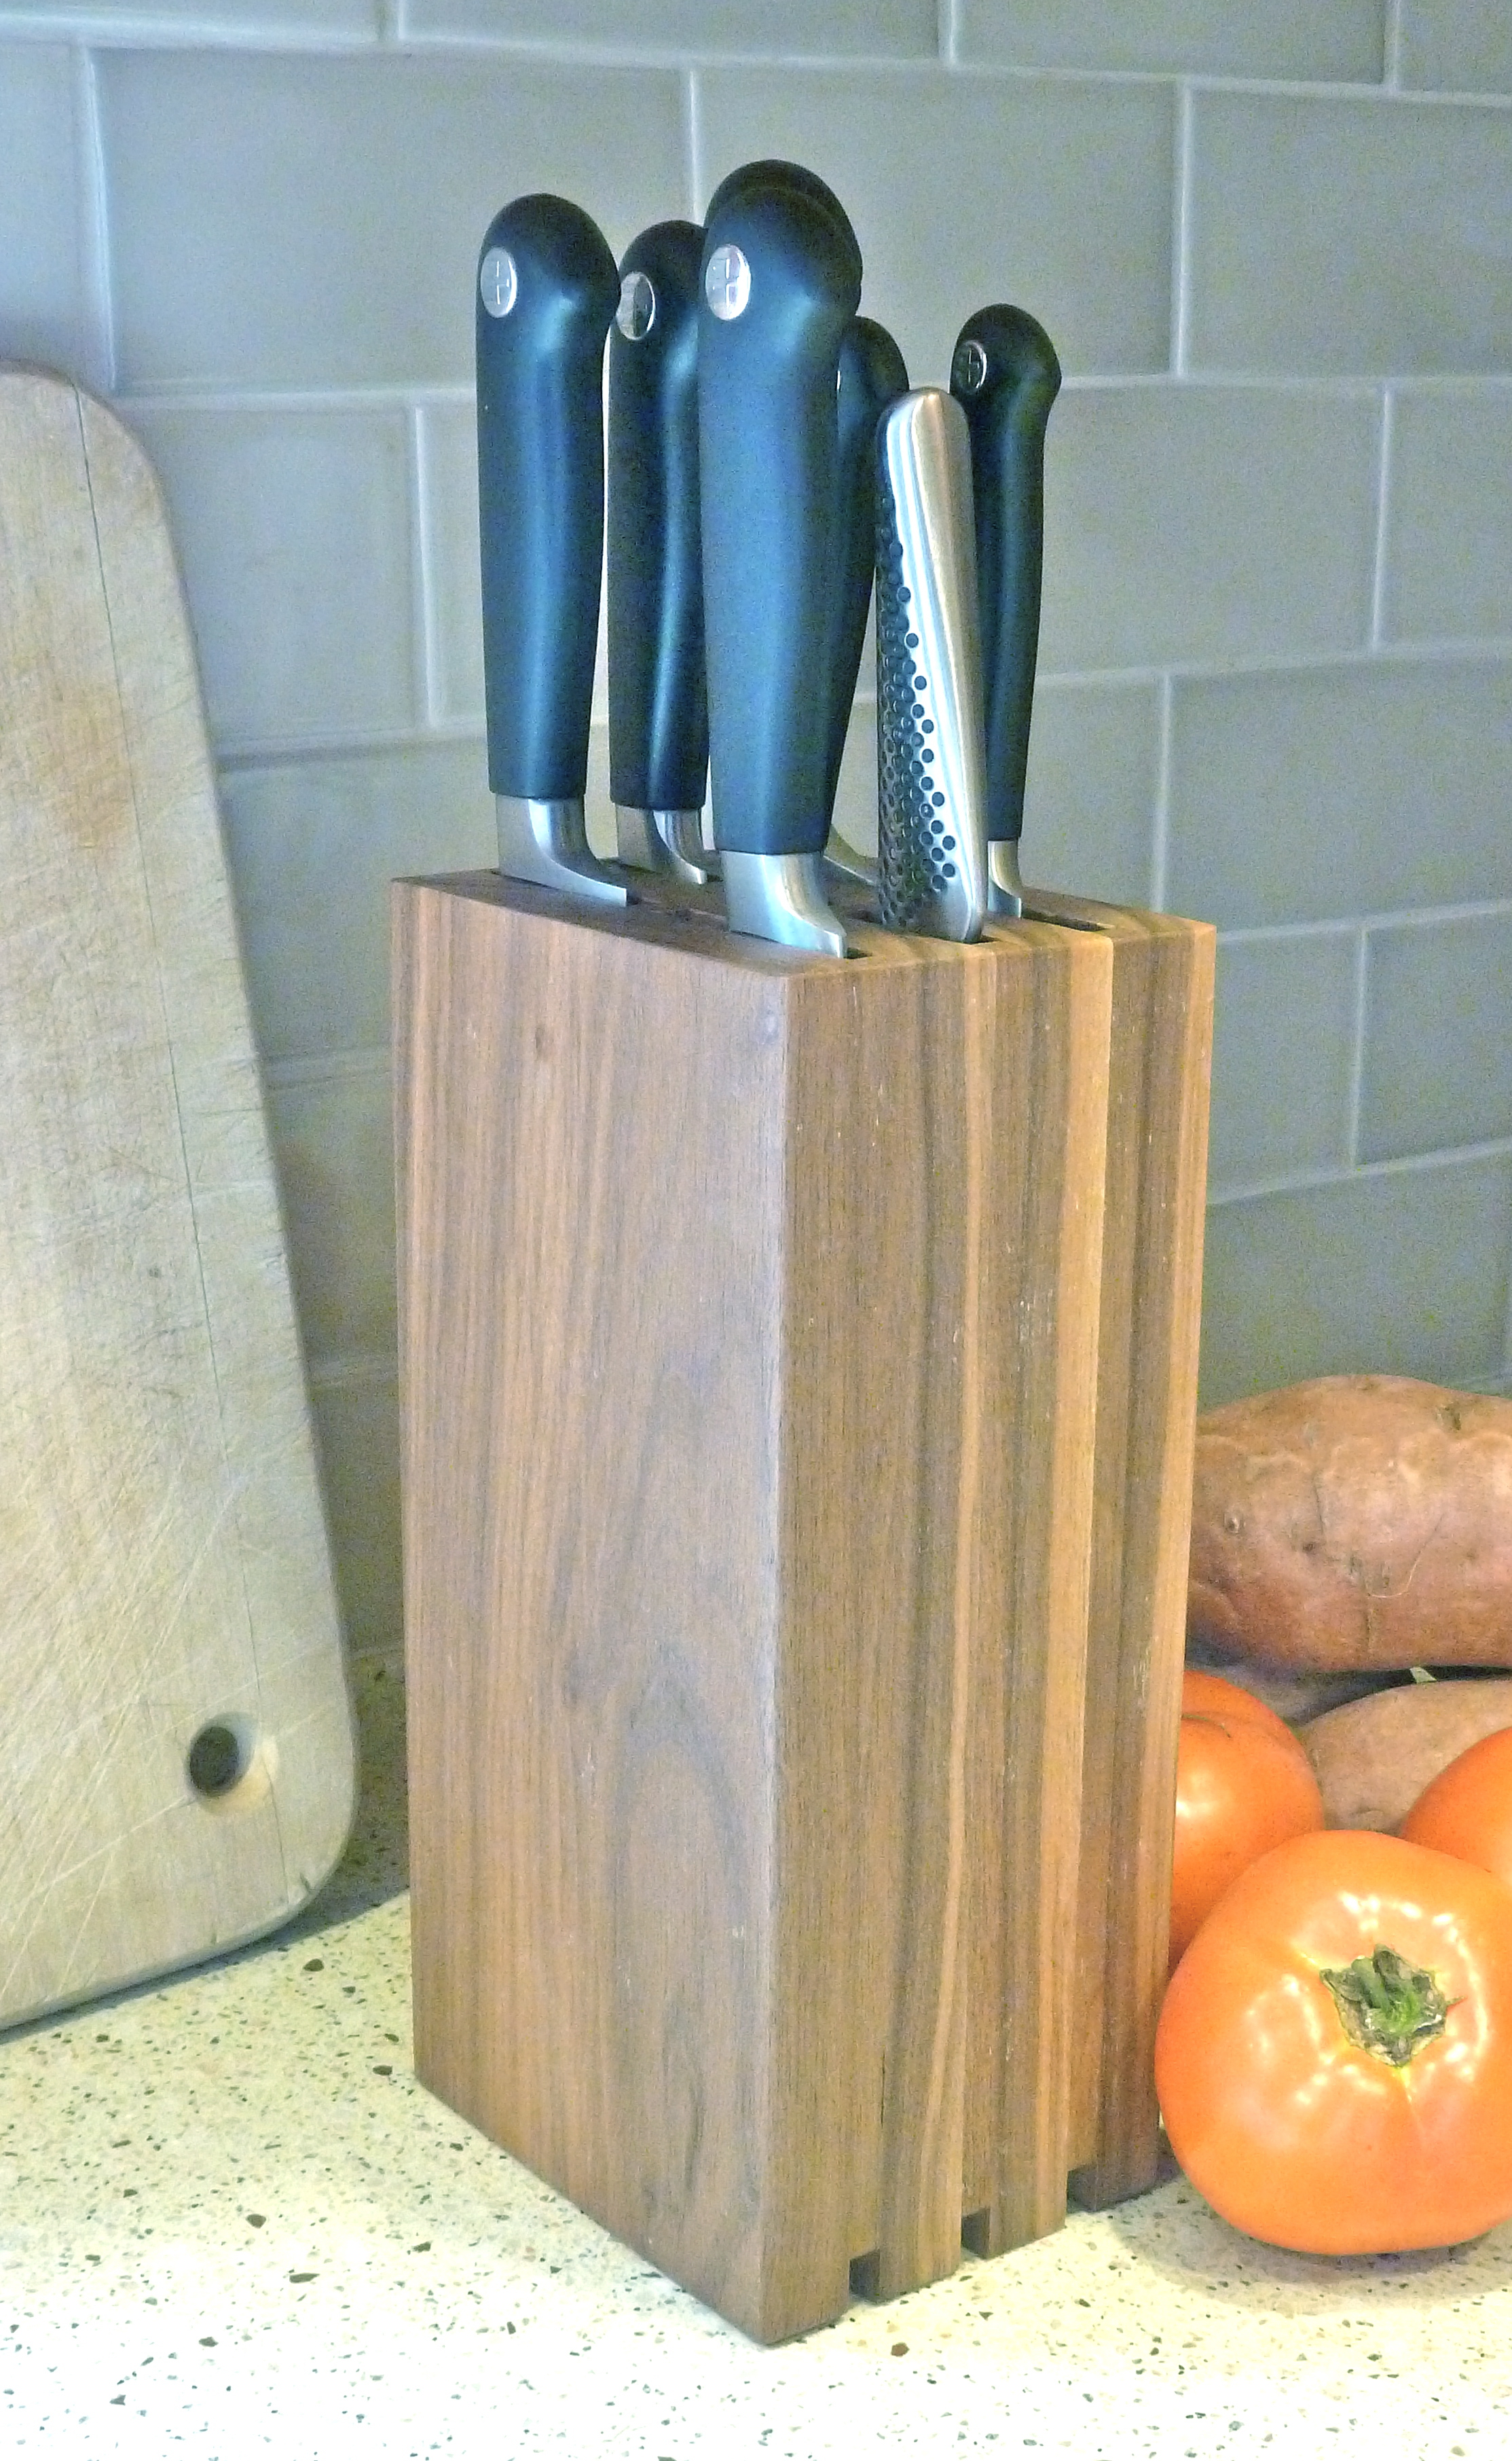
Storing kitchen knives is a perpetual problem. Some people buy them one by one, and when not in use, the knives jangle inside a drawer getting dull and nicked. Other people store an enormous set of nine or ten kitchen knives, six steak knives, scissors, and a sharpening steel in a huge angled knife block on the countertop. The angled block takes up valuable countertop real-estate even though only six or seven knives are regularly used. I am sure you know people like this (maybe you’re even one of them!) My upright design takes up less countertop space and shows off the natural beauty of dark walnut wood.The design is really simple: four vertical boards separated by ten strategically placed dividers. The dividers are shorter than the verticals so there is room to facilitate evaporation in case a knife is inserted wet after washing. It would be easy to make three or four of these in an afternoon, reserving an additional afternoon for finishing.

My design divides the block up to store seven knives; the big knife slots are about 1-7/8″ wide, which are perfect for chef’s knives, and the smaller slots are 1-1/8″ wide for paring and peeling knives. You can customize it easily for your recipient. I also think the knife block would look great in contrasting wood. Dark walnut and creamy colored maple always makes a great combination. Have fun! Your mother-in-law is going to love you!

MILL THE PARTS TO SIZE
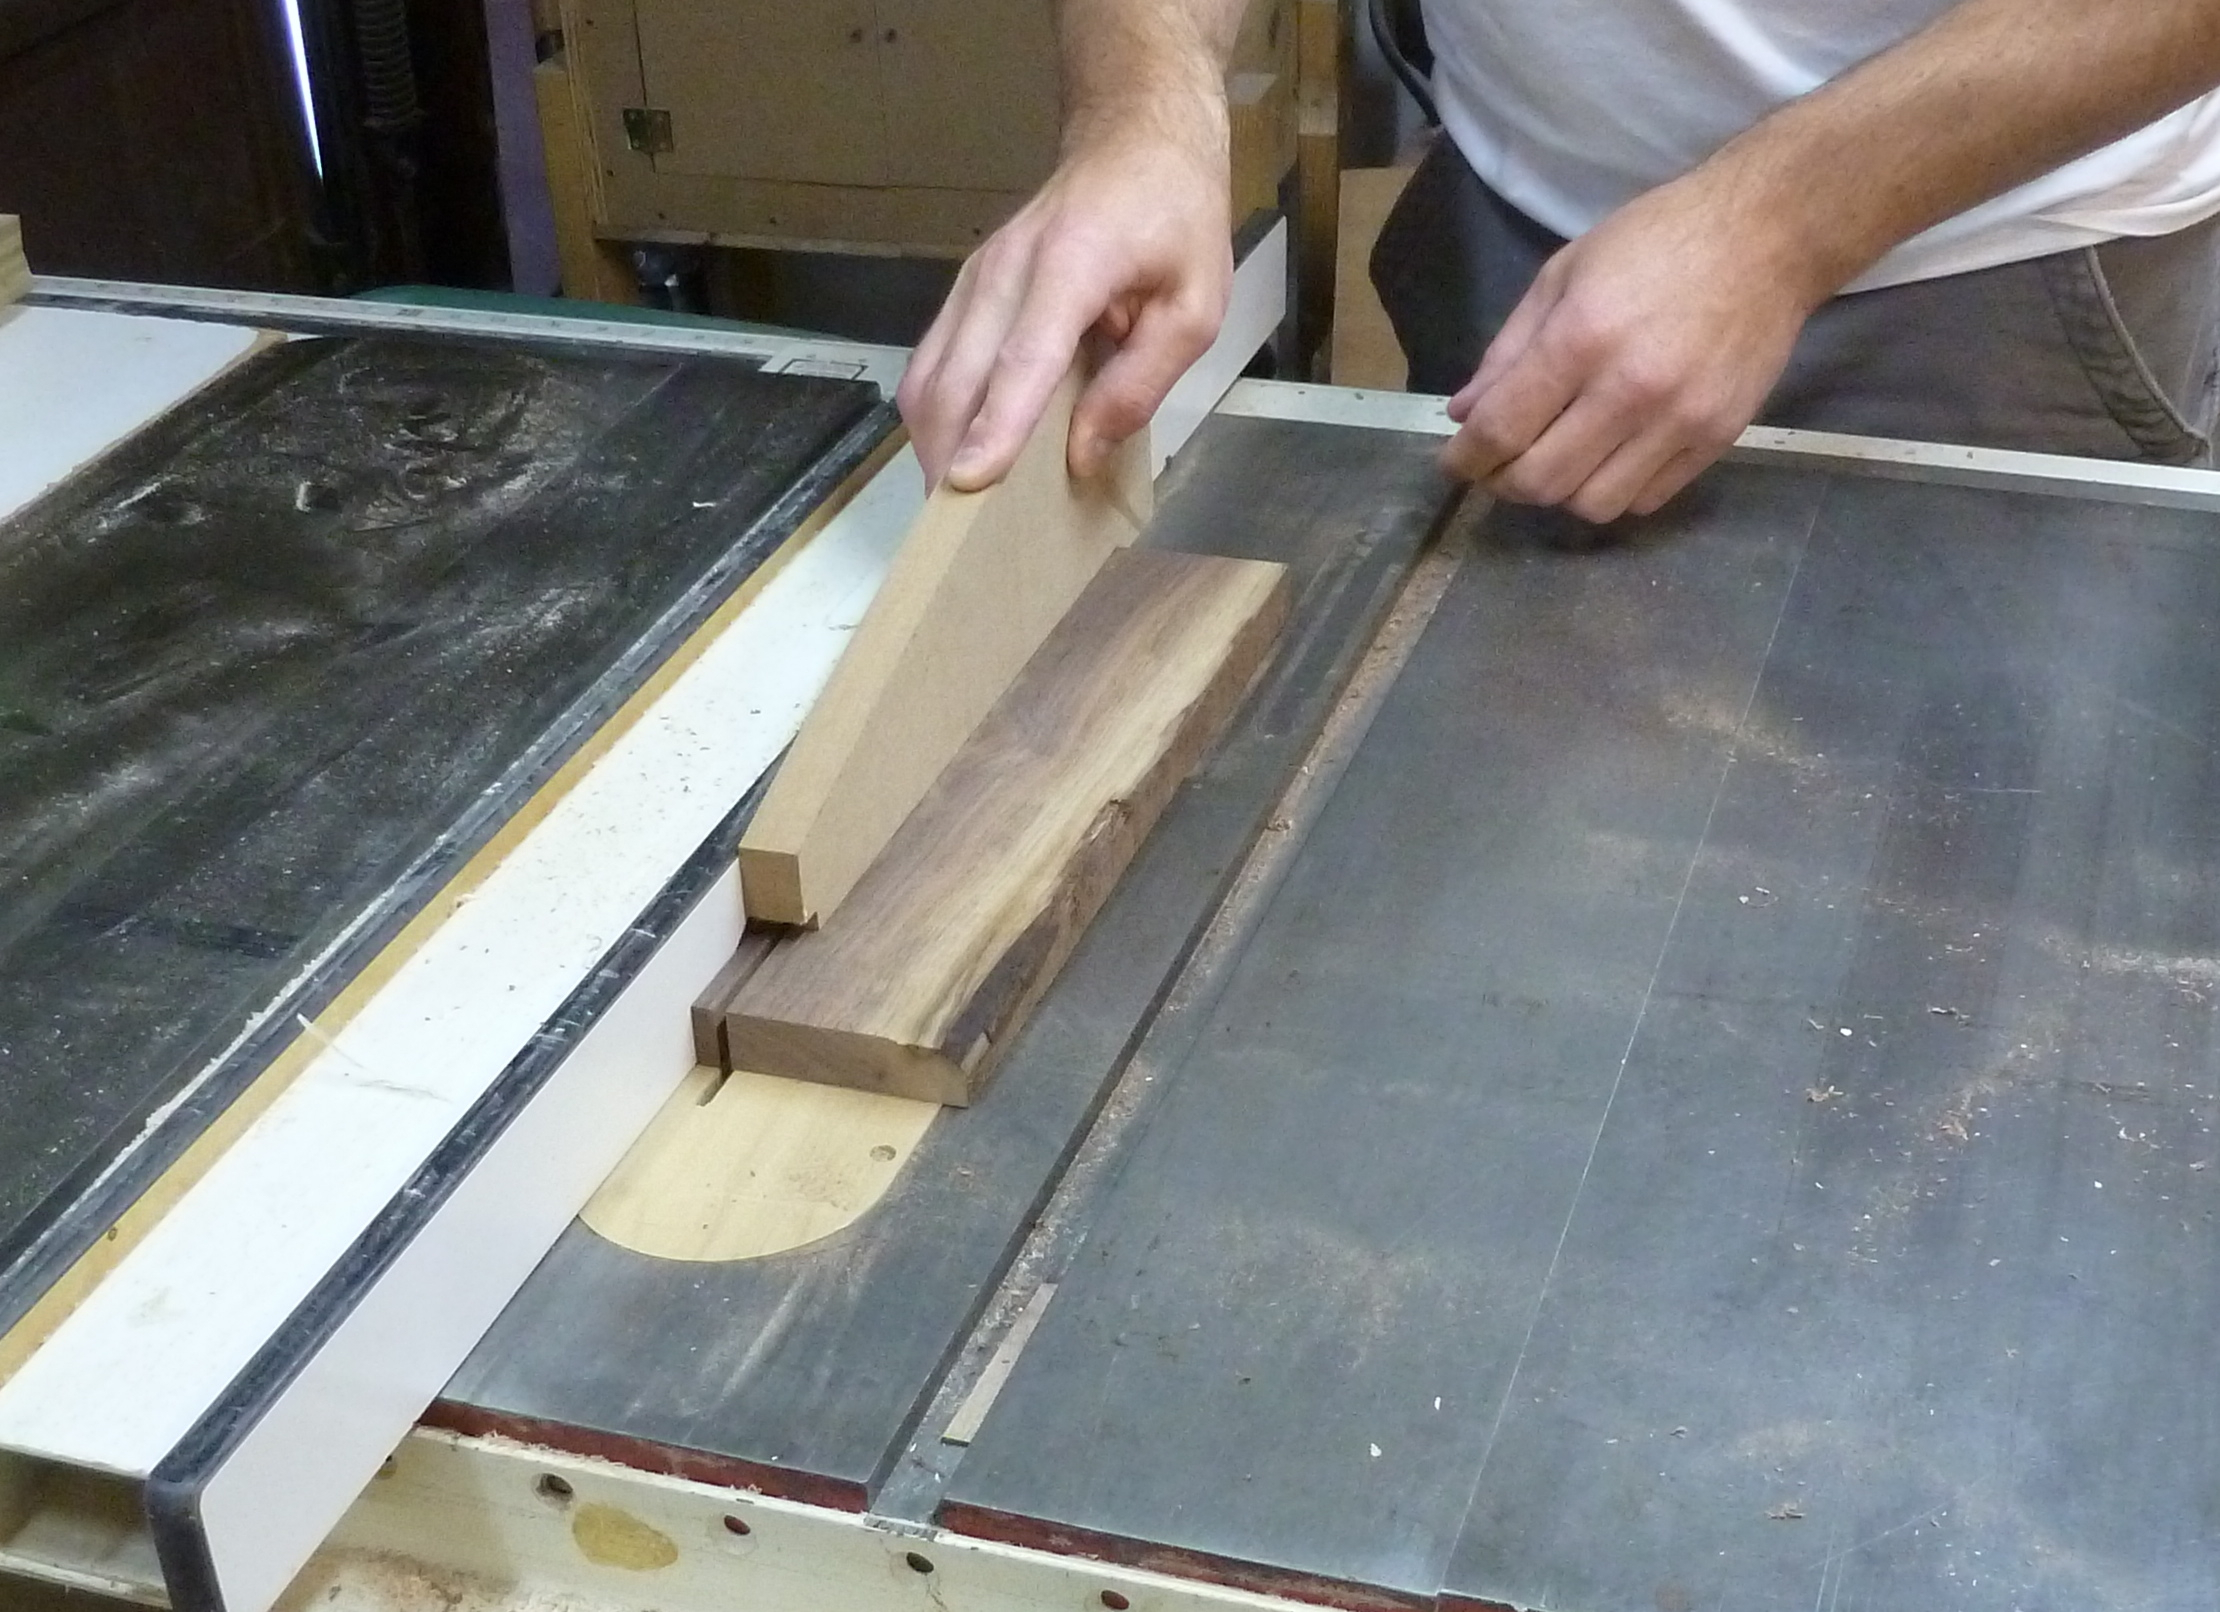
I rip 1/4″ wide blanks for the knife block dividers, using a sacrificial push block for the safest operation. I make as many of these strips as I’ll need for dividers.
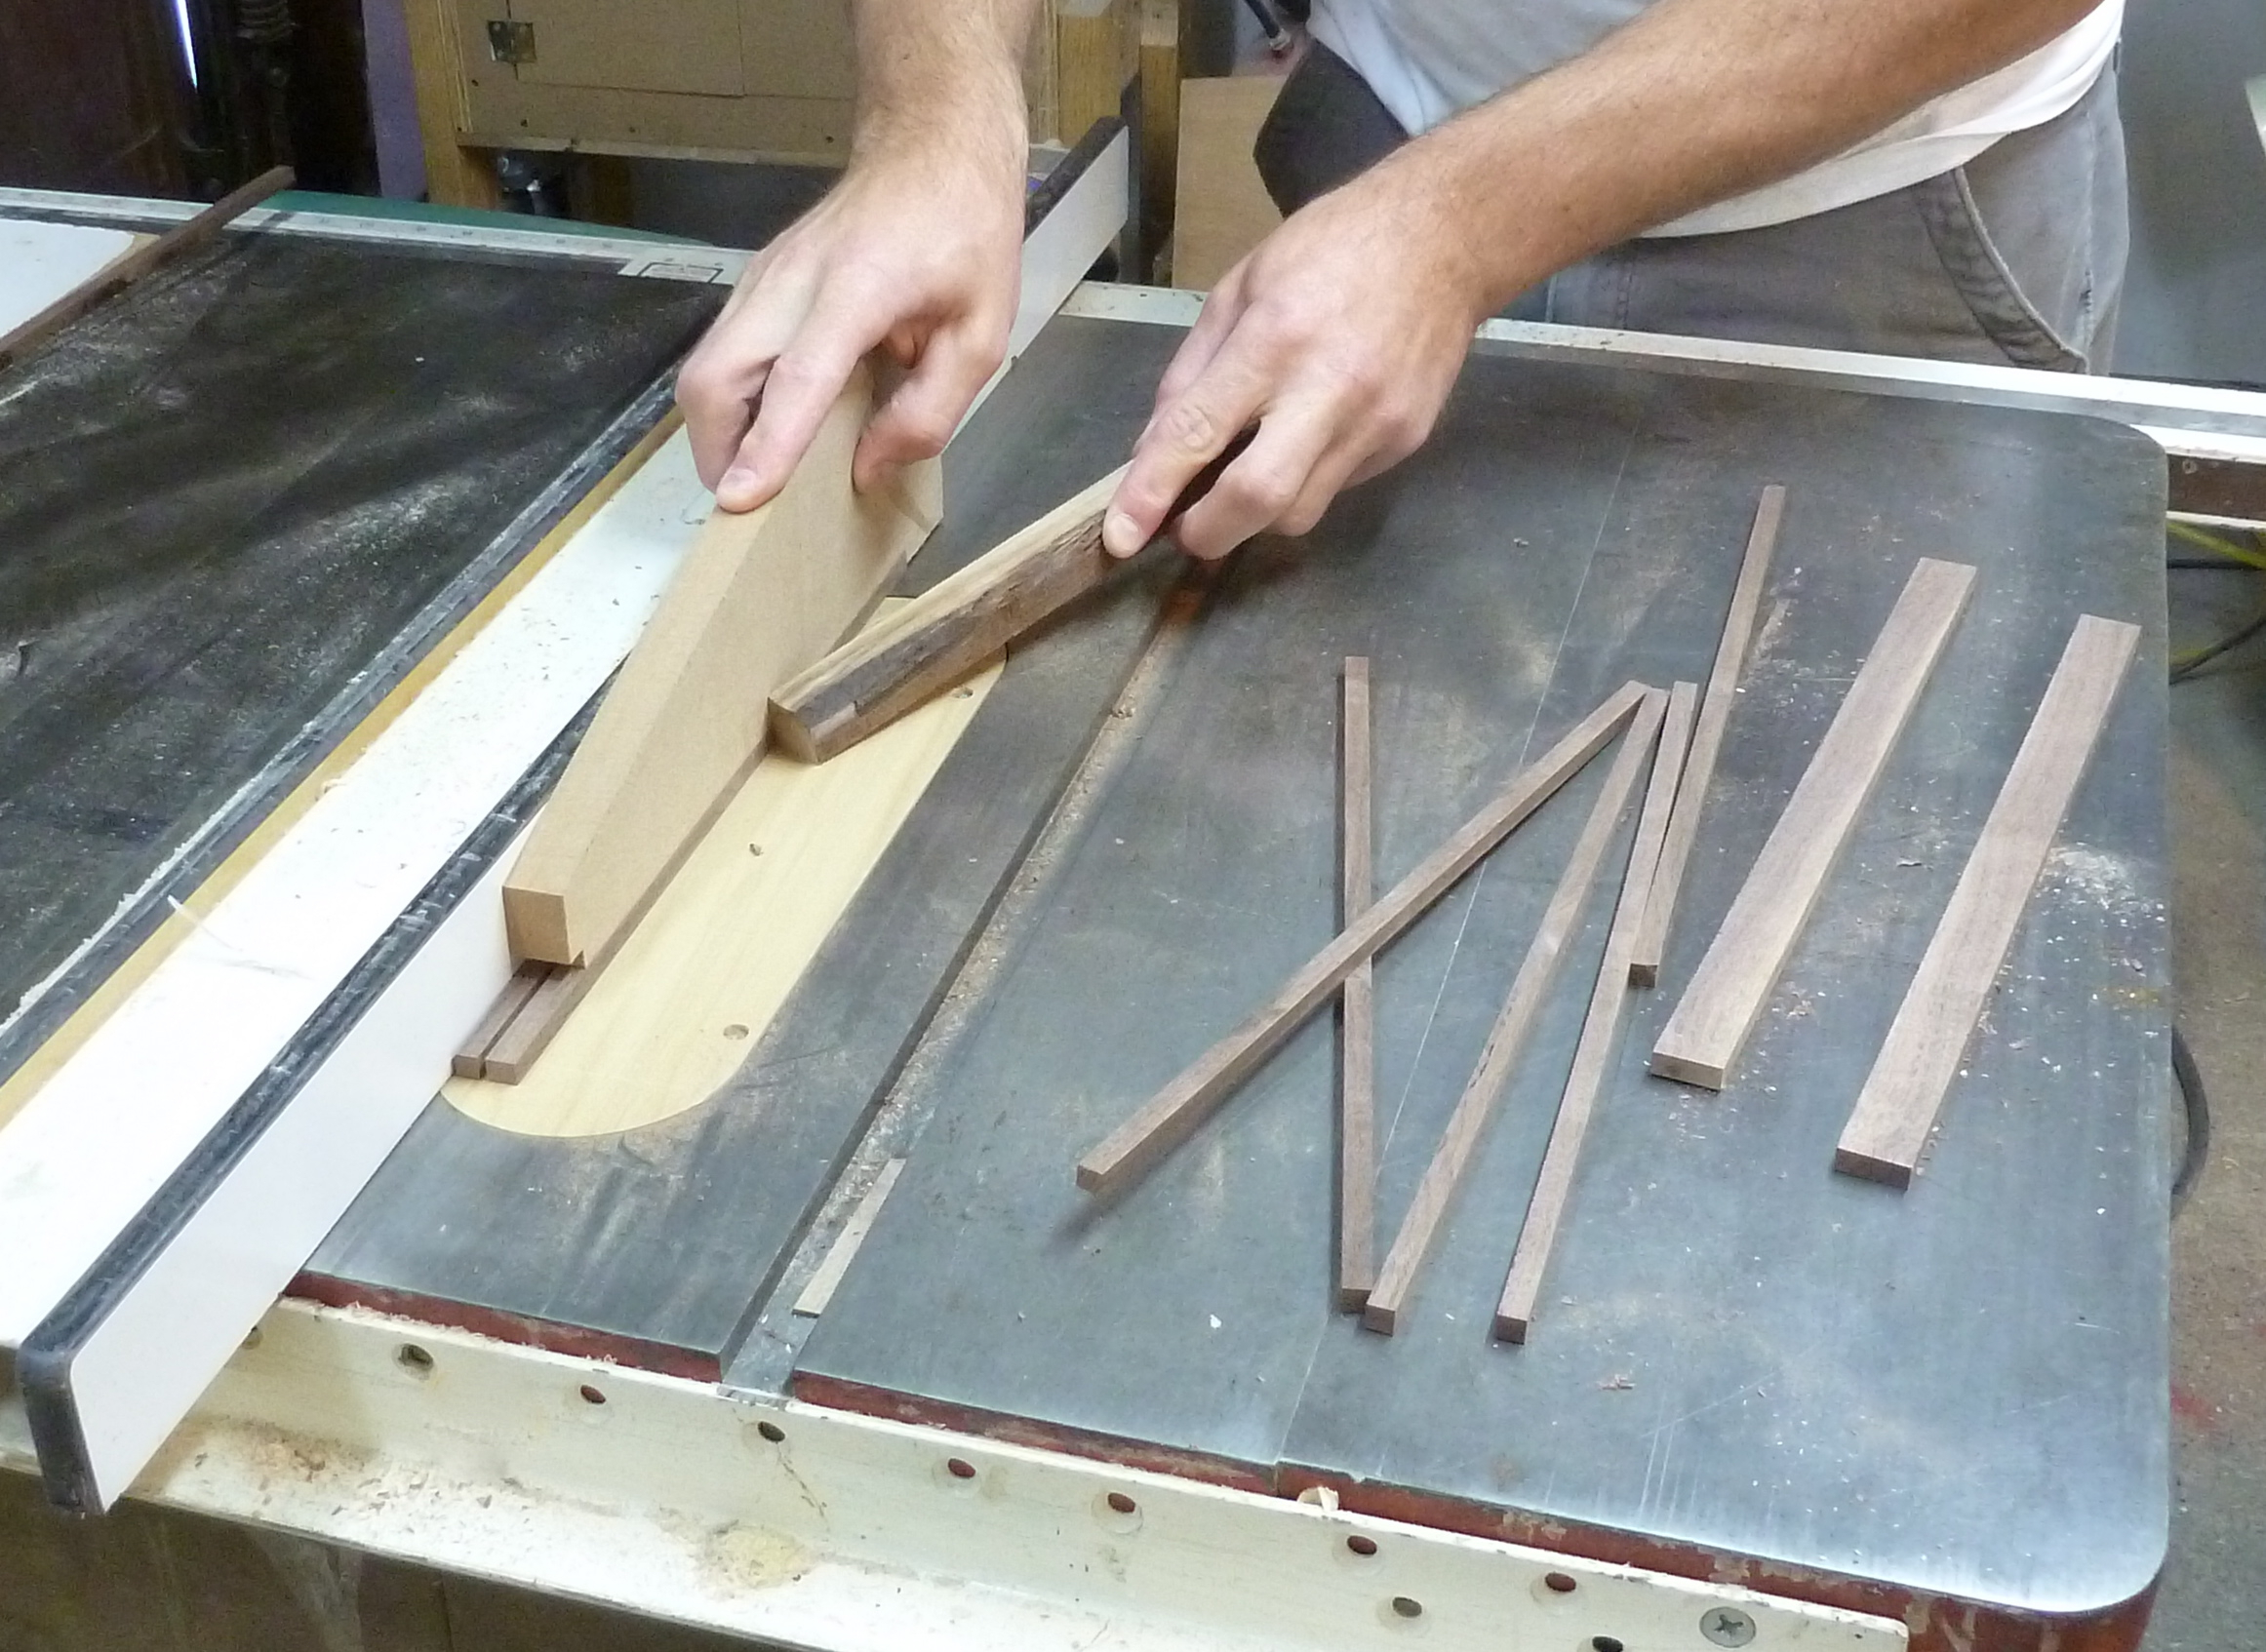
I use the double push block method to rip 1/4″ x 1/4″ square lengths. The divider blank is as wide as my push block, so I use a second push block to hold the stock tight against the fence. I only count on one divider per blank, as it is very difficult to control a thinner blank that is completely hidden by the push block.
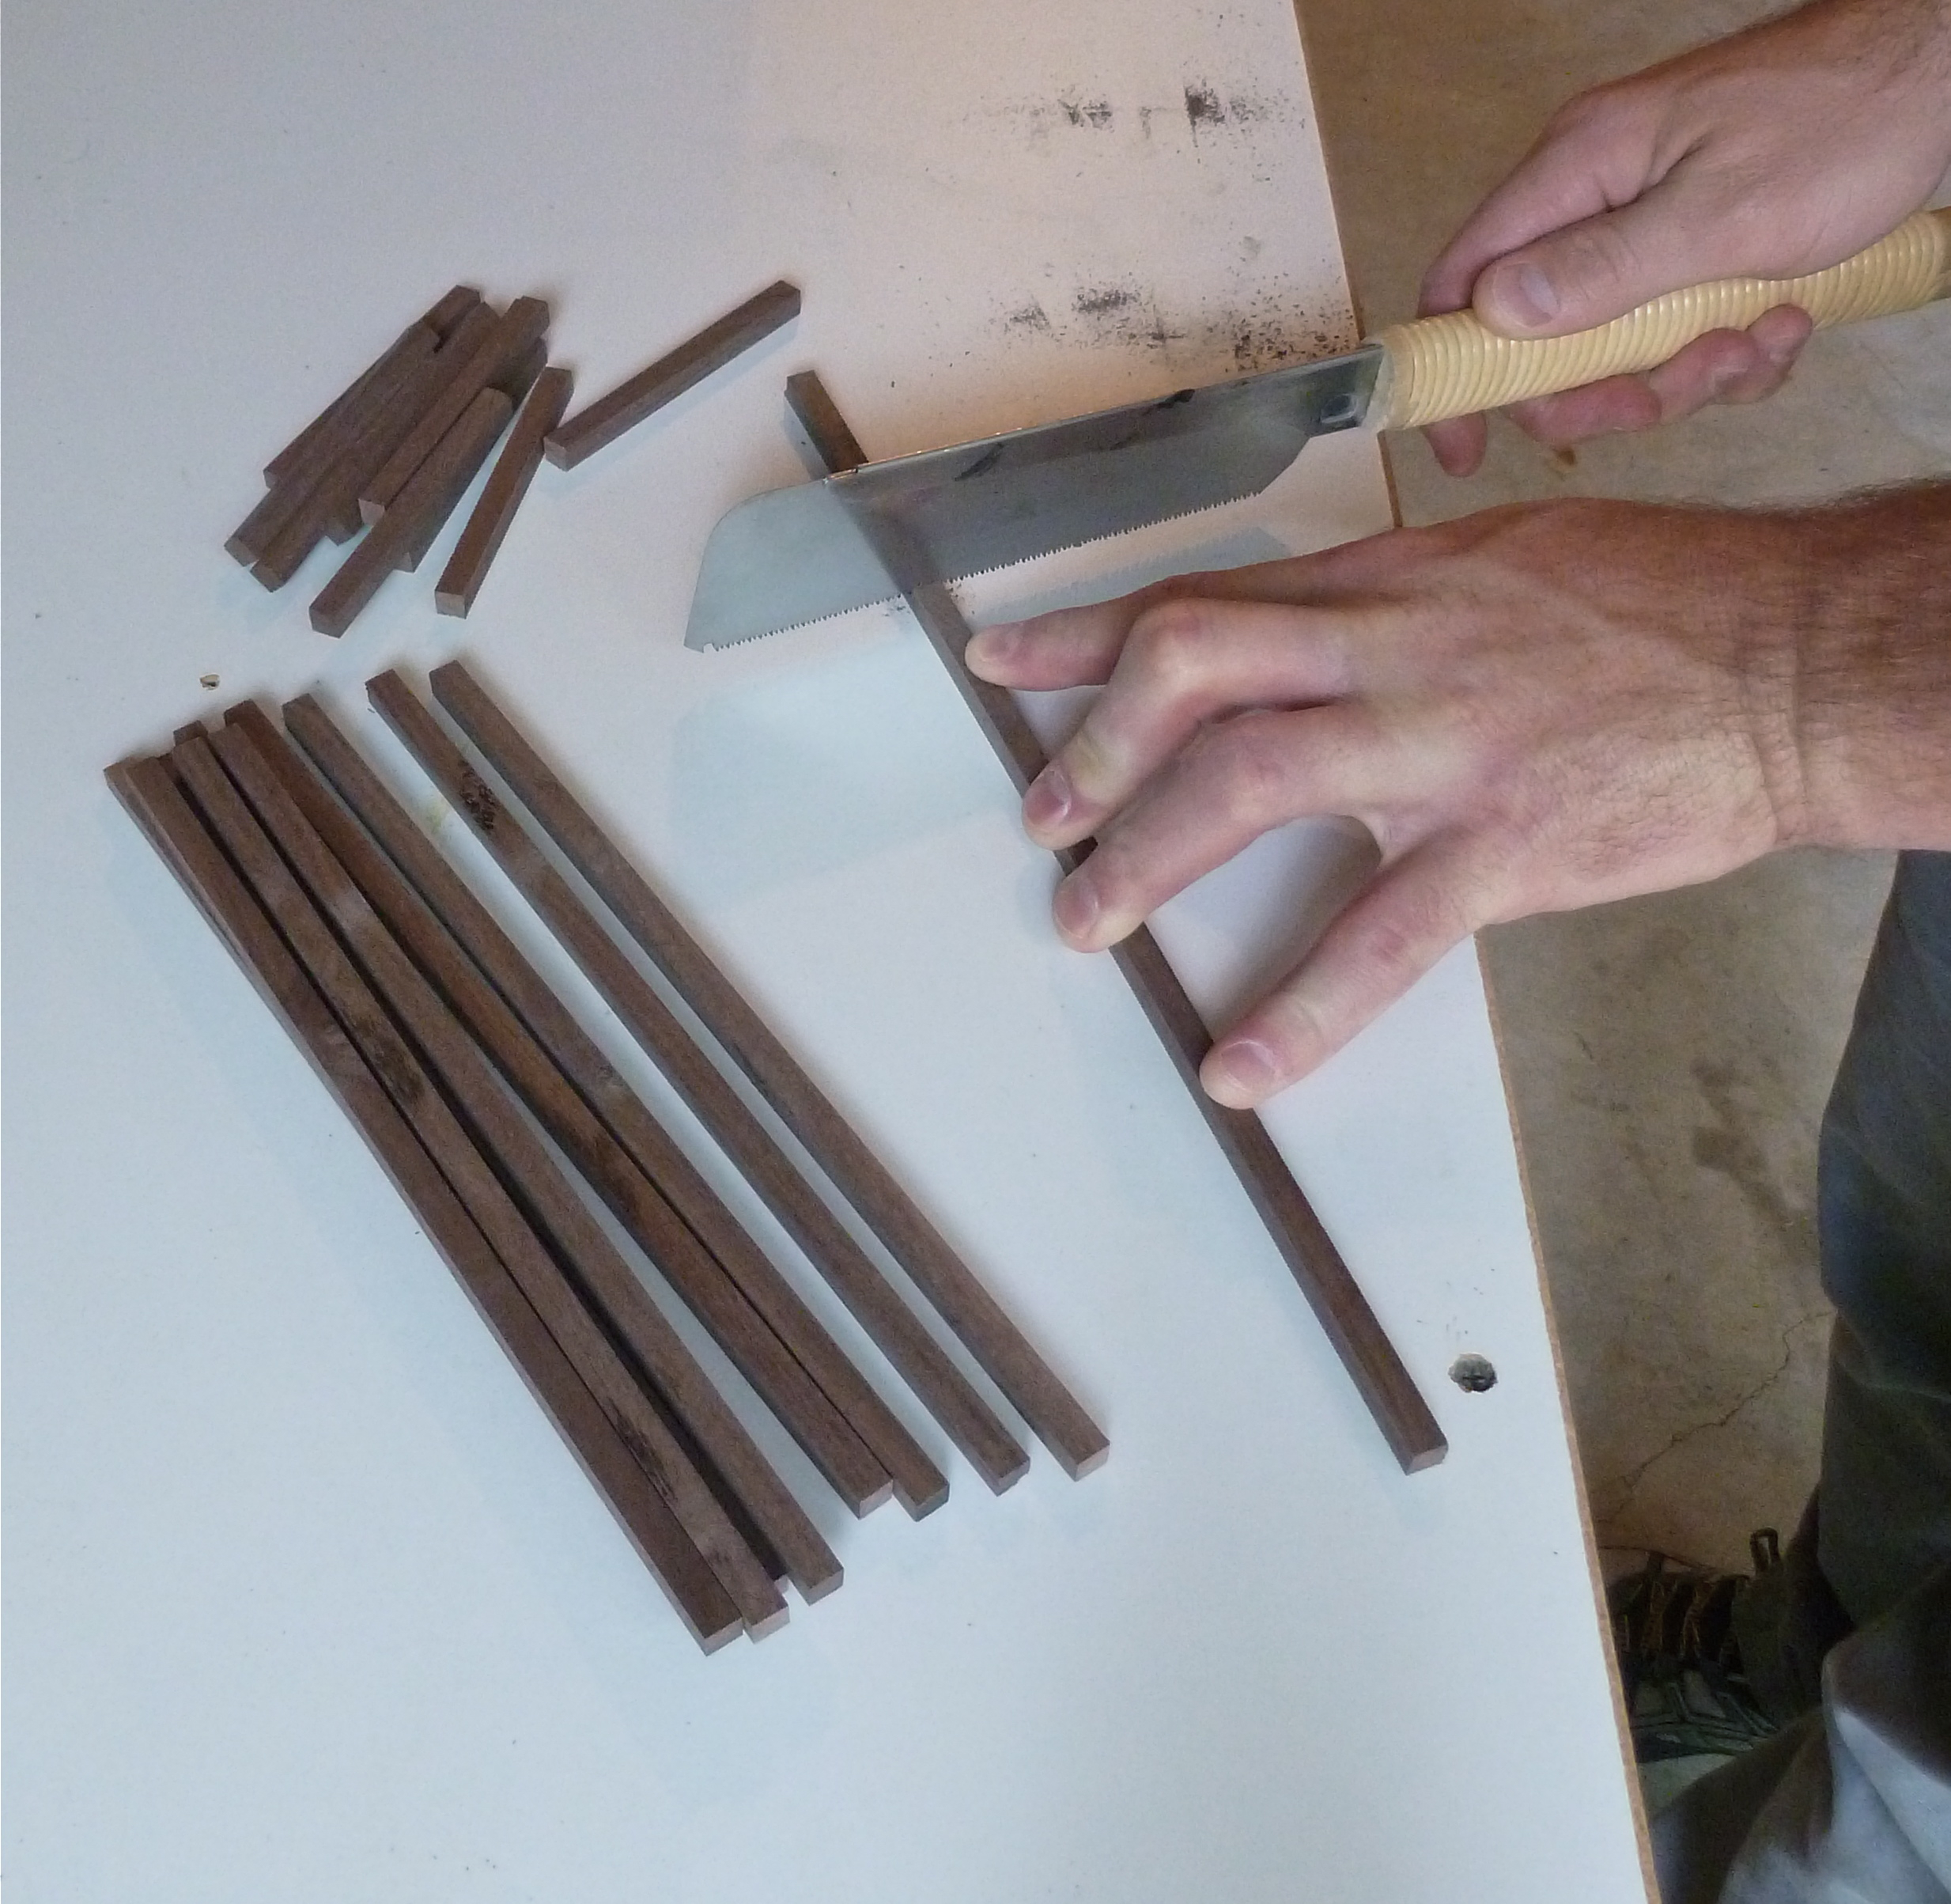
I am always reluctant to use a miter saw or table saw to cut small parts. Instead, I use a Japanese saw to chop the dividers to length. This razor sharp saw cuts these in no time flat.
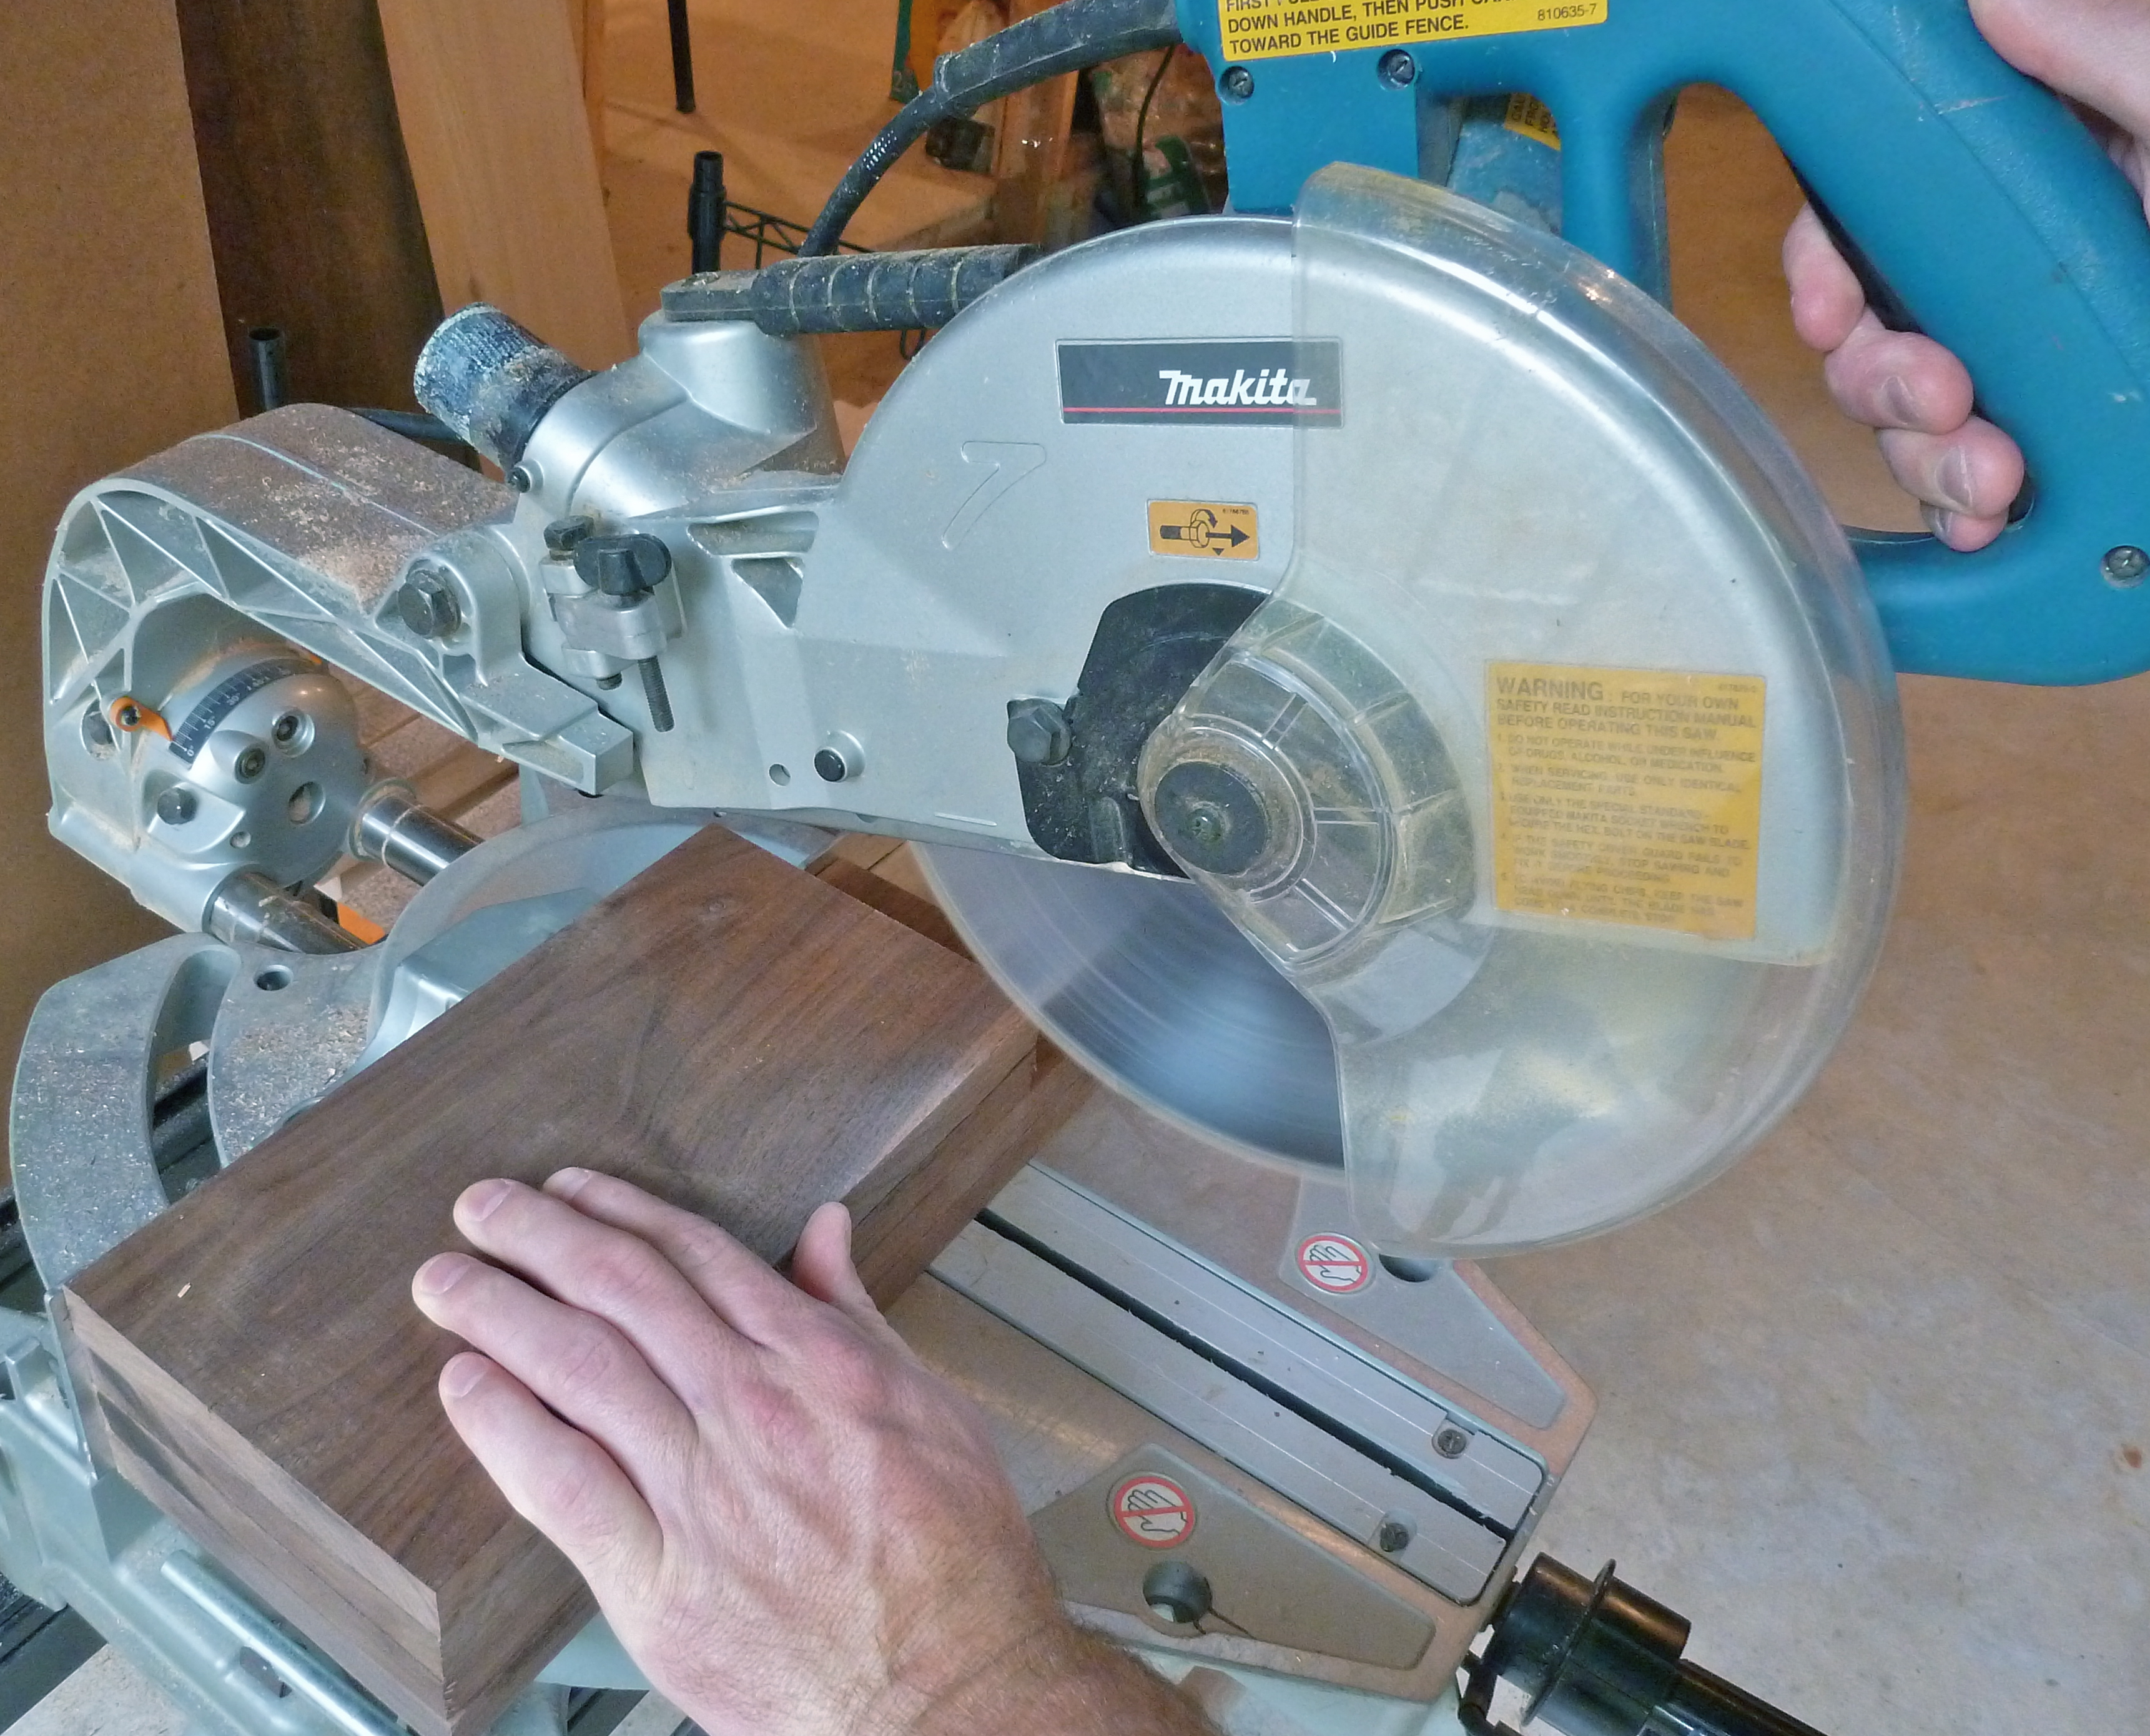
After ripping the verticals to width, I crosscut all four of the large pieces at once. This way, they are all guaranteed to be the same length. You can use a stop block, but I just align them all and chop to length. Make sure your chop saw can handle this much height; of course, you can use a miter sled on the table saw, too.
ASSEMBLY AND GLUE-UP
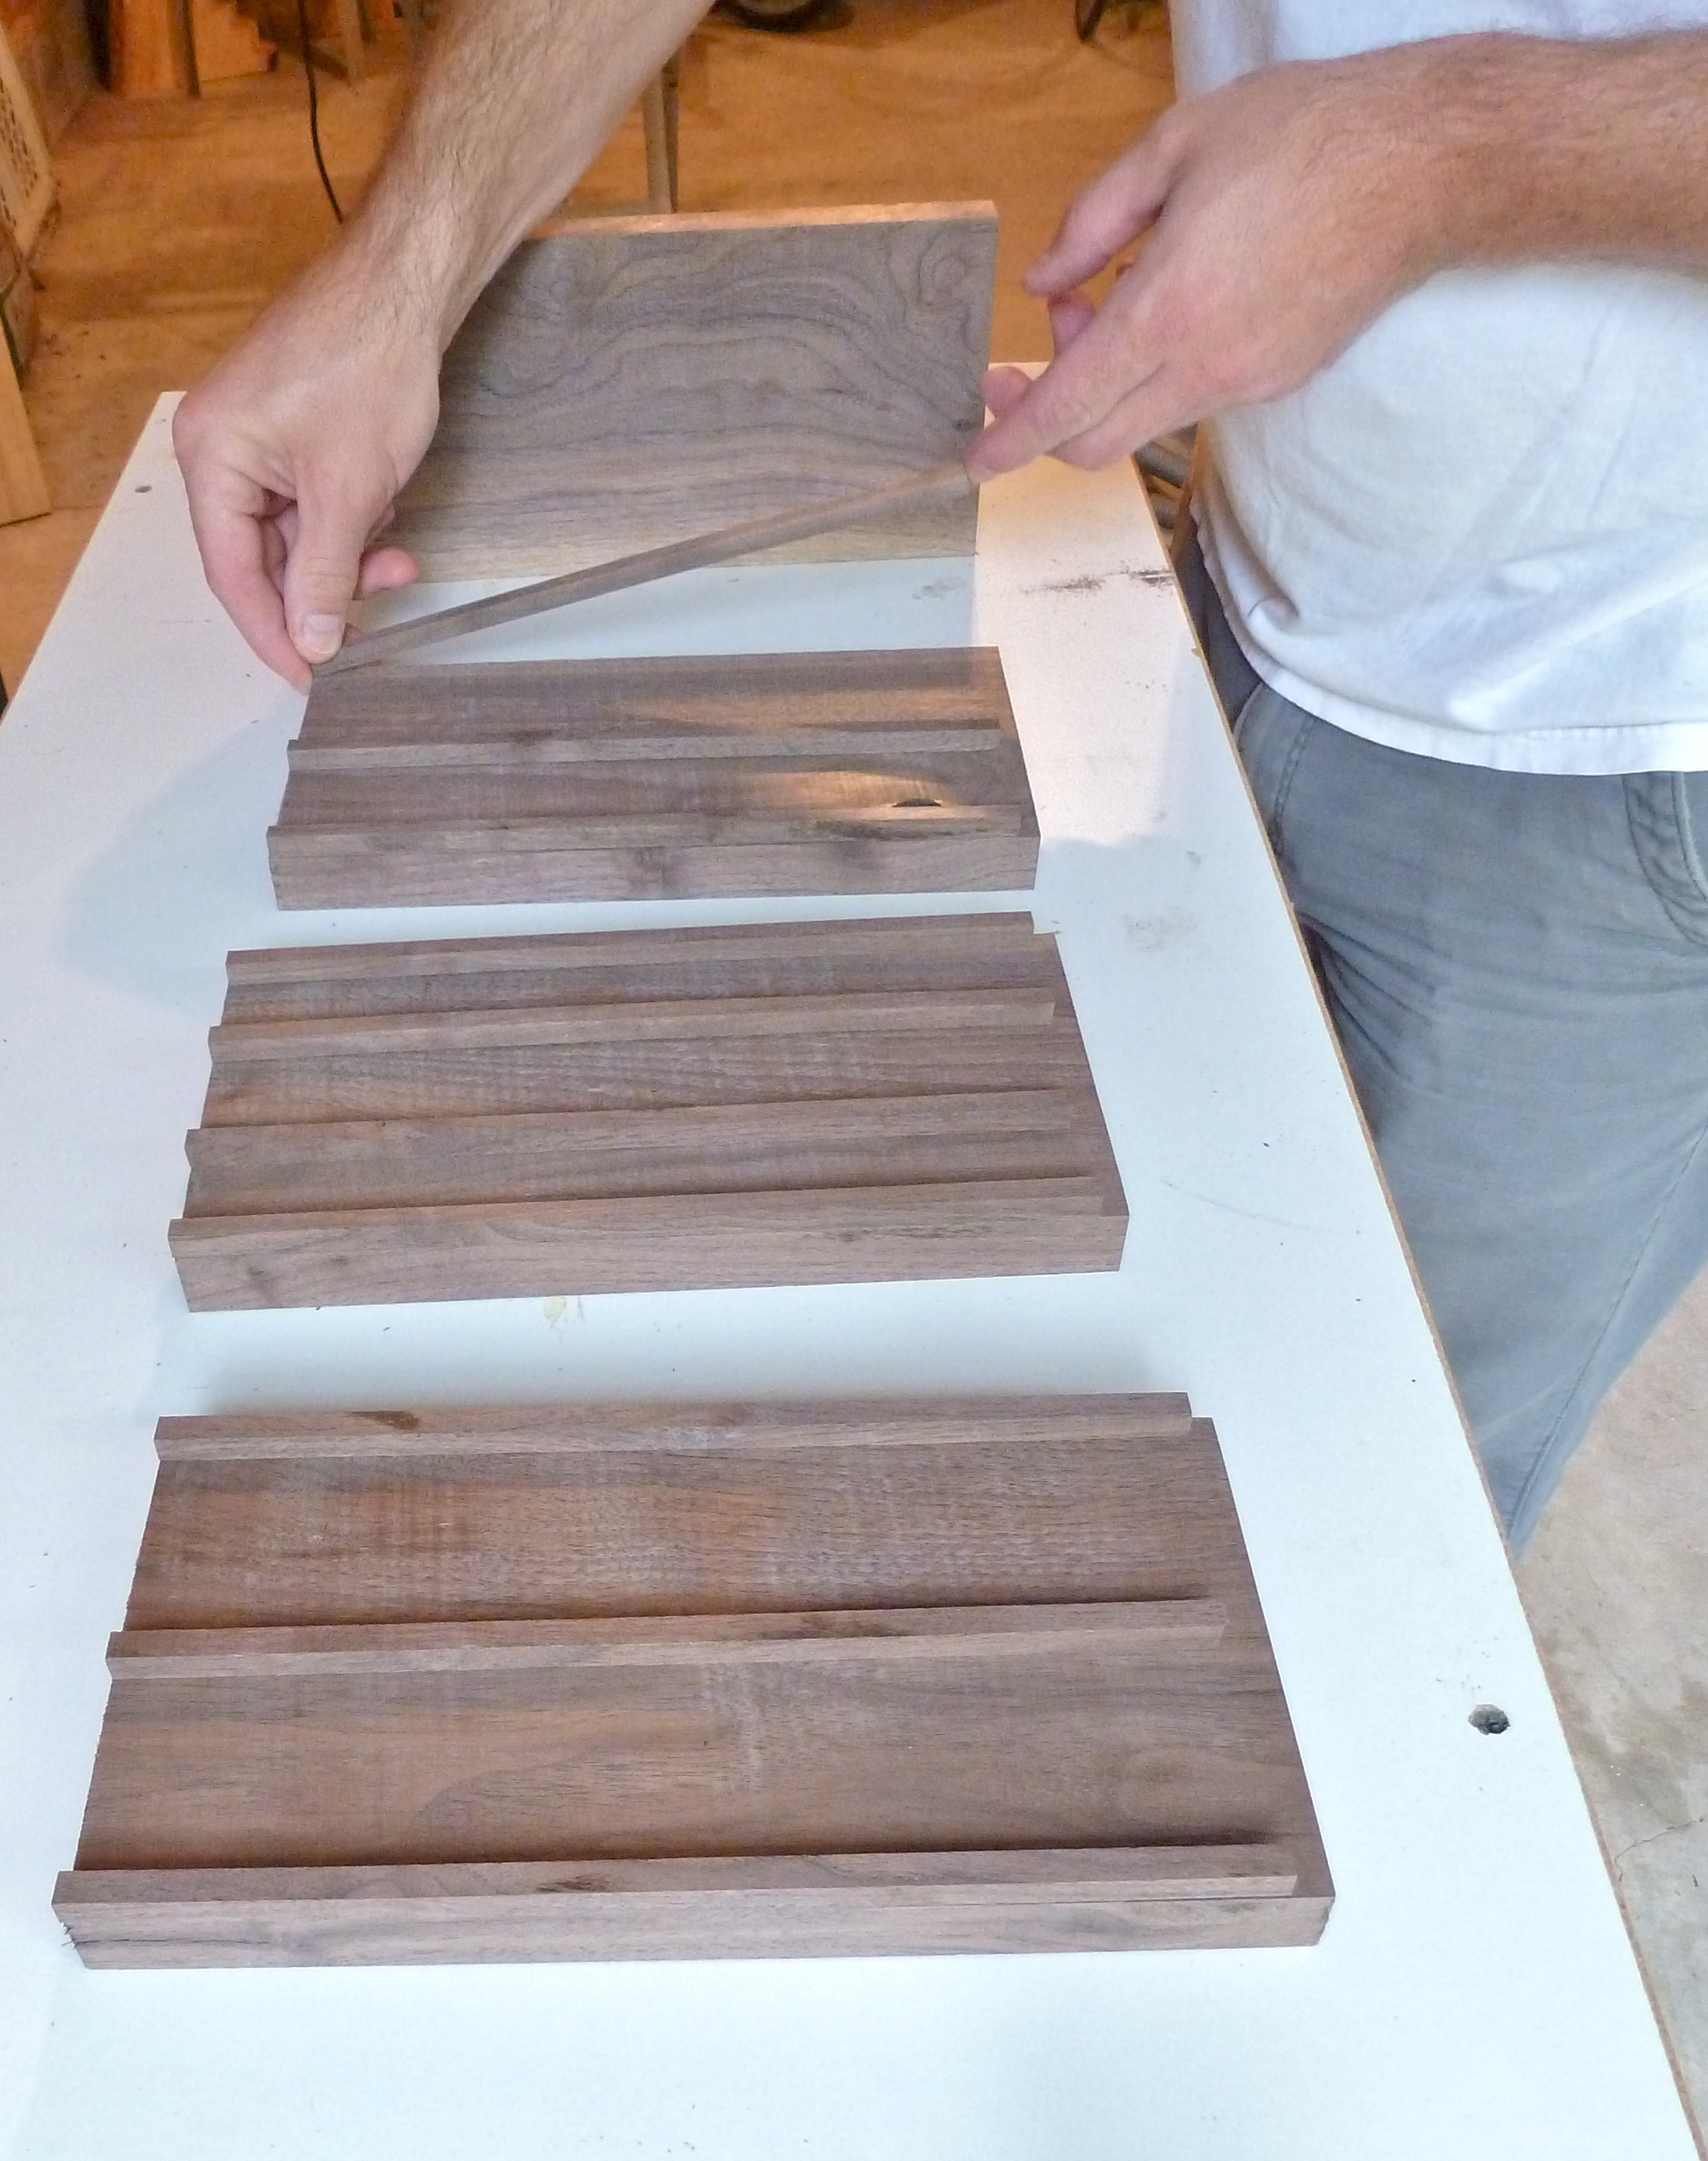
I like to lay out all of my parts of the three sub-assemblies to make sure they fit correctly before I commit with glue. The dividers are 1/2″ shorter than the verticals, so be sure to align them to one end. Although the glue up is simple, there are 14 pieces, so it never hurts to double check.
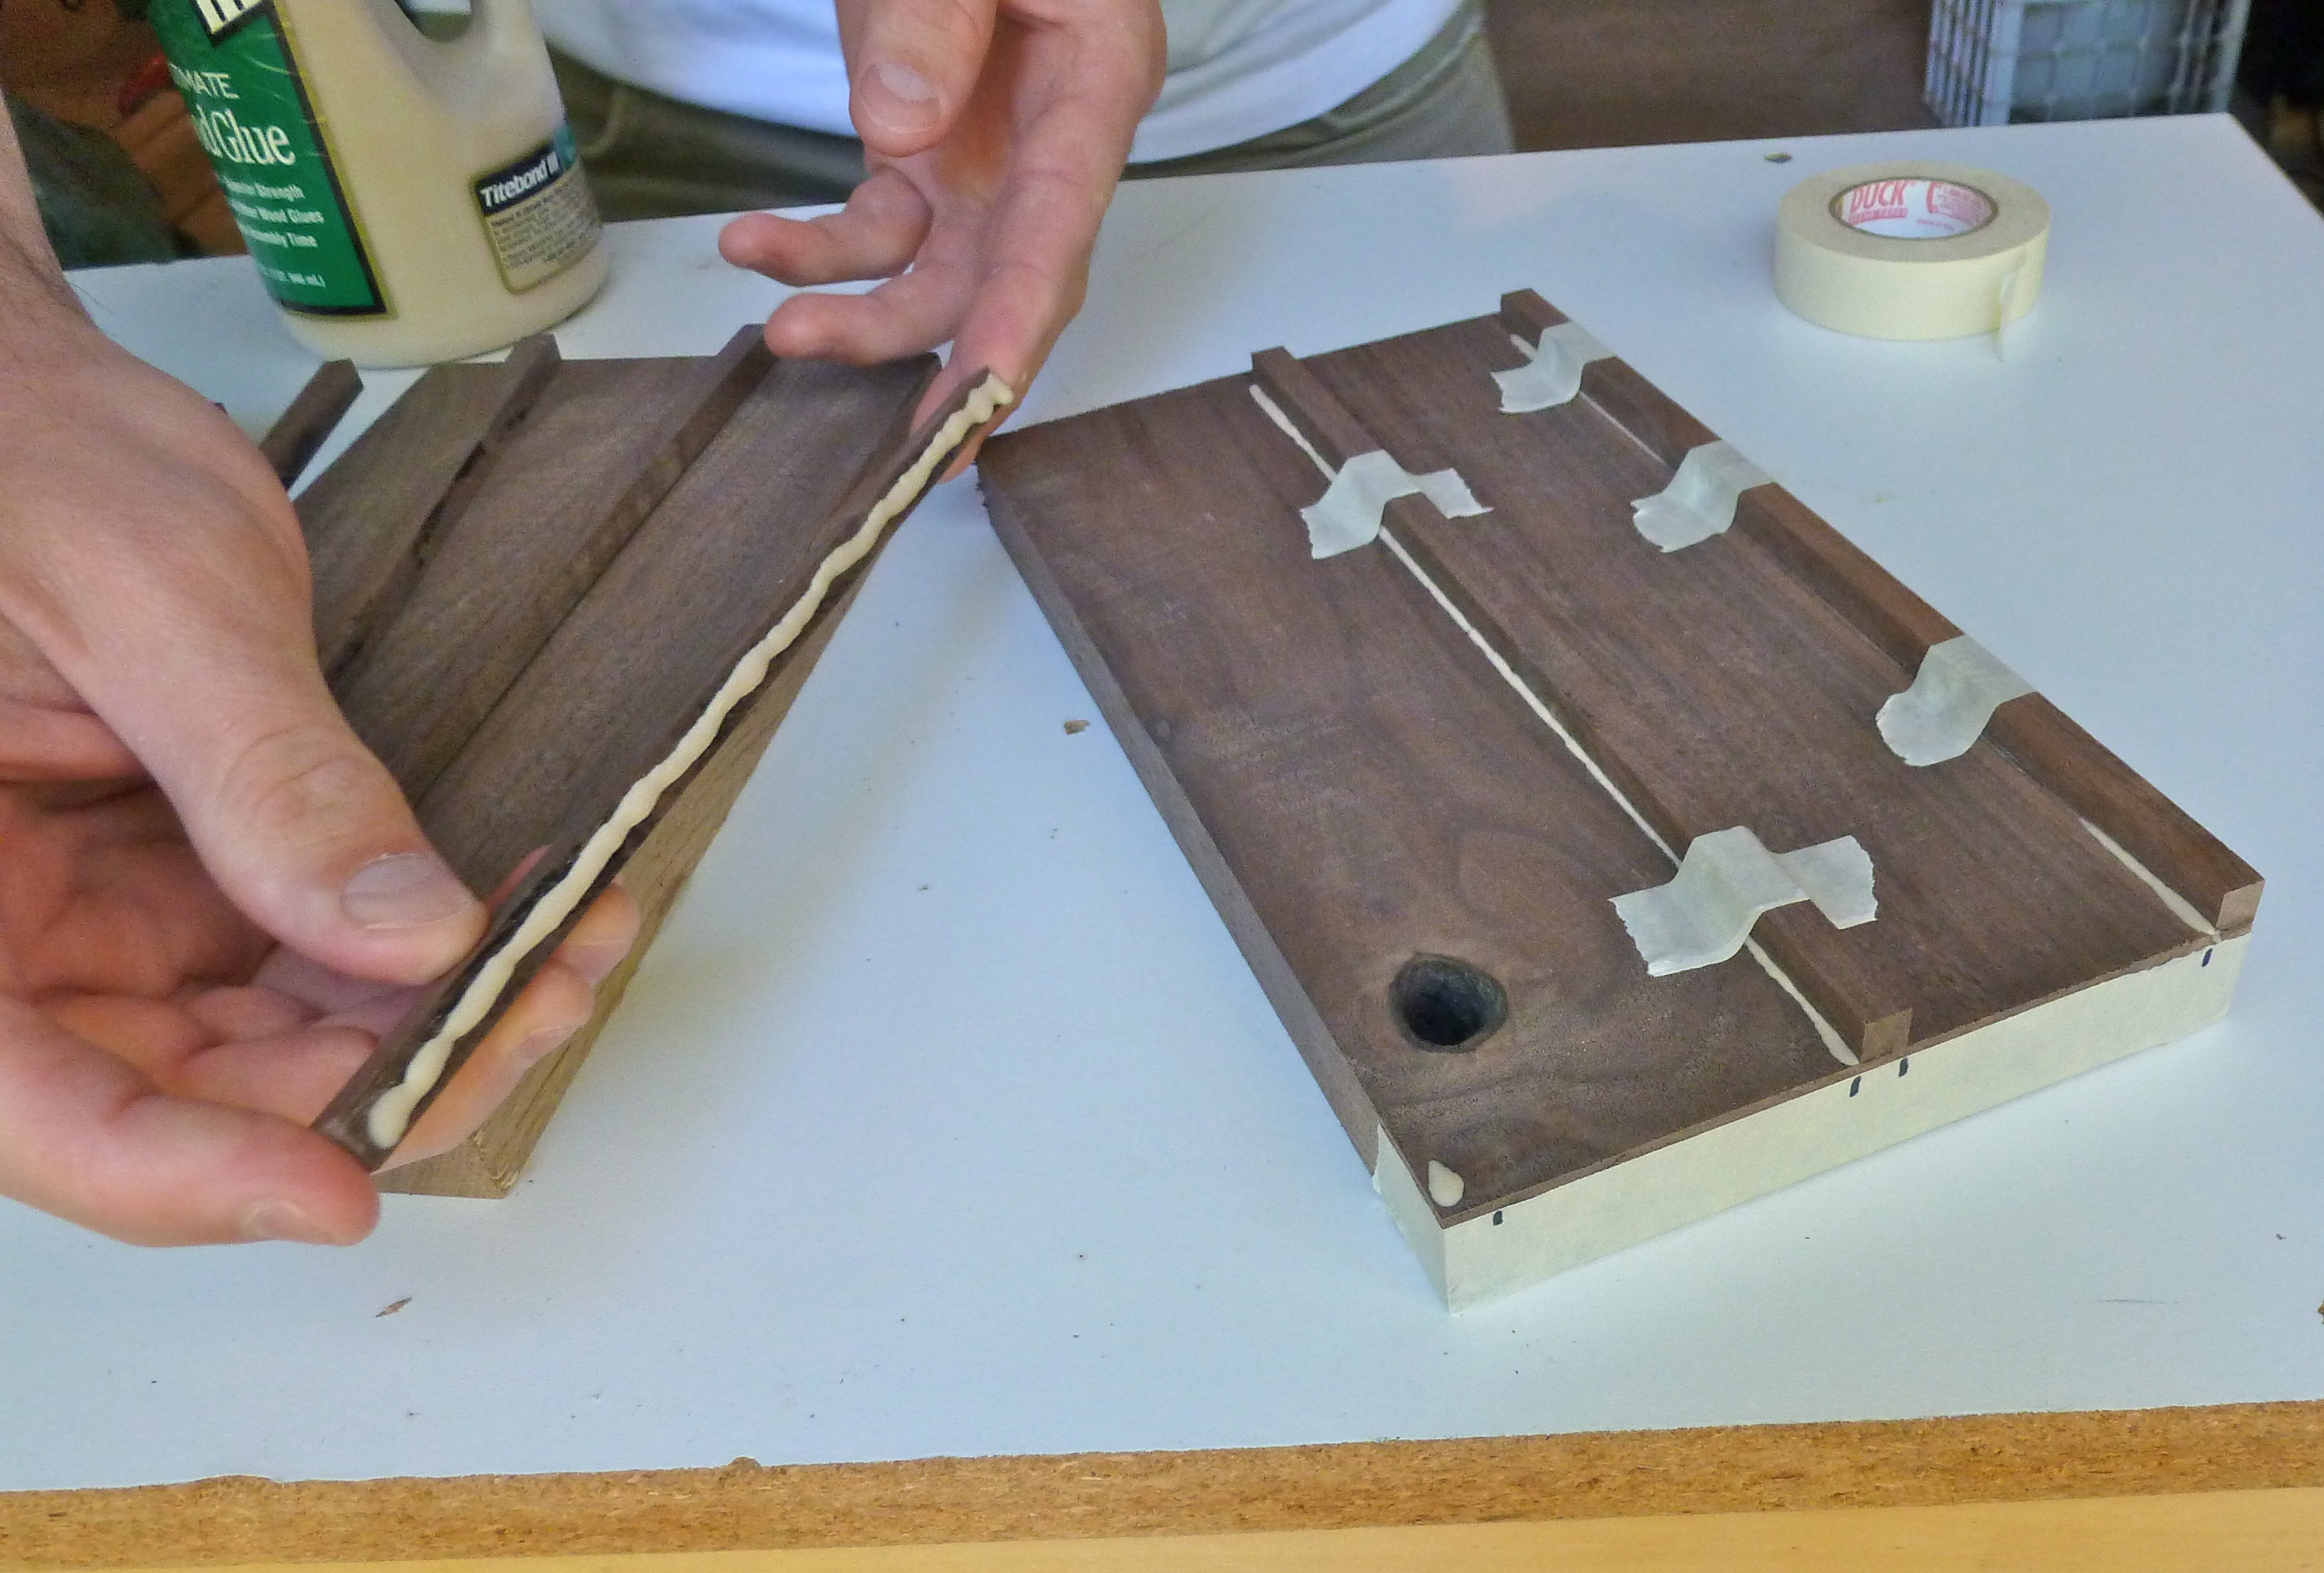
After I have laid all of the dividers out, I glue up three sub-assemblies of dividers and verticals. I use copious amounts of glue and “clamp” the dividers down with masking tape. Make sure there is a lot of squeeze out on each sub-assembly. I apply masking tape on the end of the verticals to mark my parts with permanent marker; pencil is hard to see on walnut, and permanent marker seeps into end grain and is difficult to sand off.
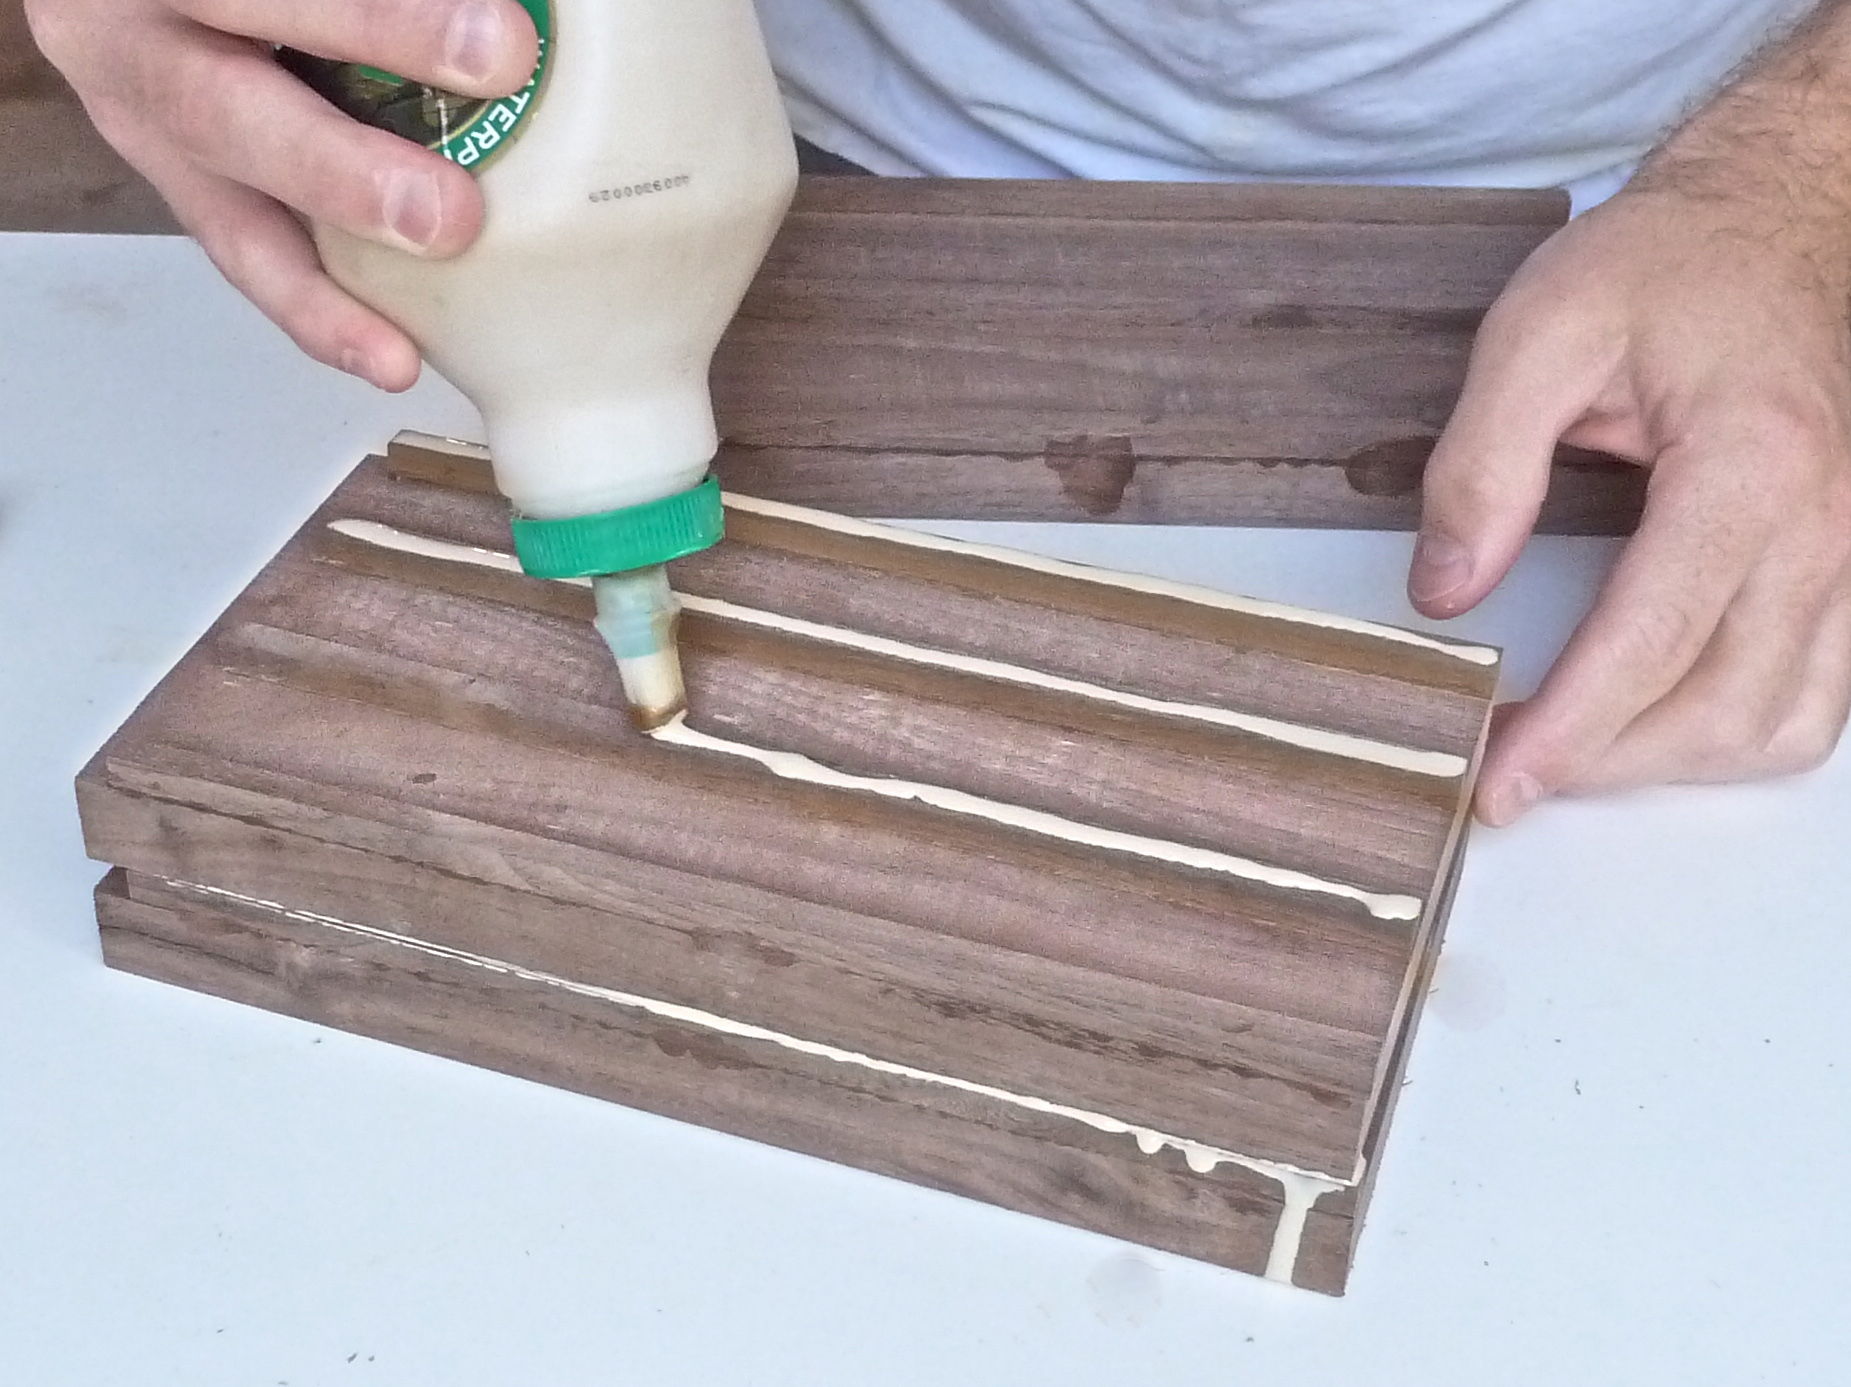
Once the glue has set for an hour or so, it is time to fix the sub-assemblies together. I apply a bead of glue across the tops of the dividers and continue with each sub-assembly until all are stacked up.
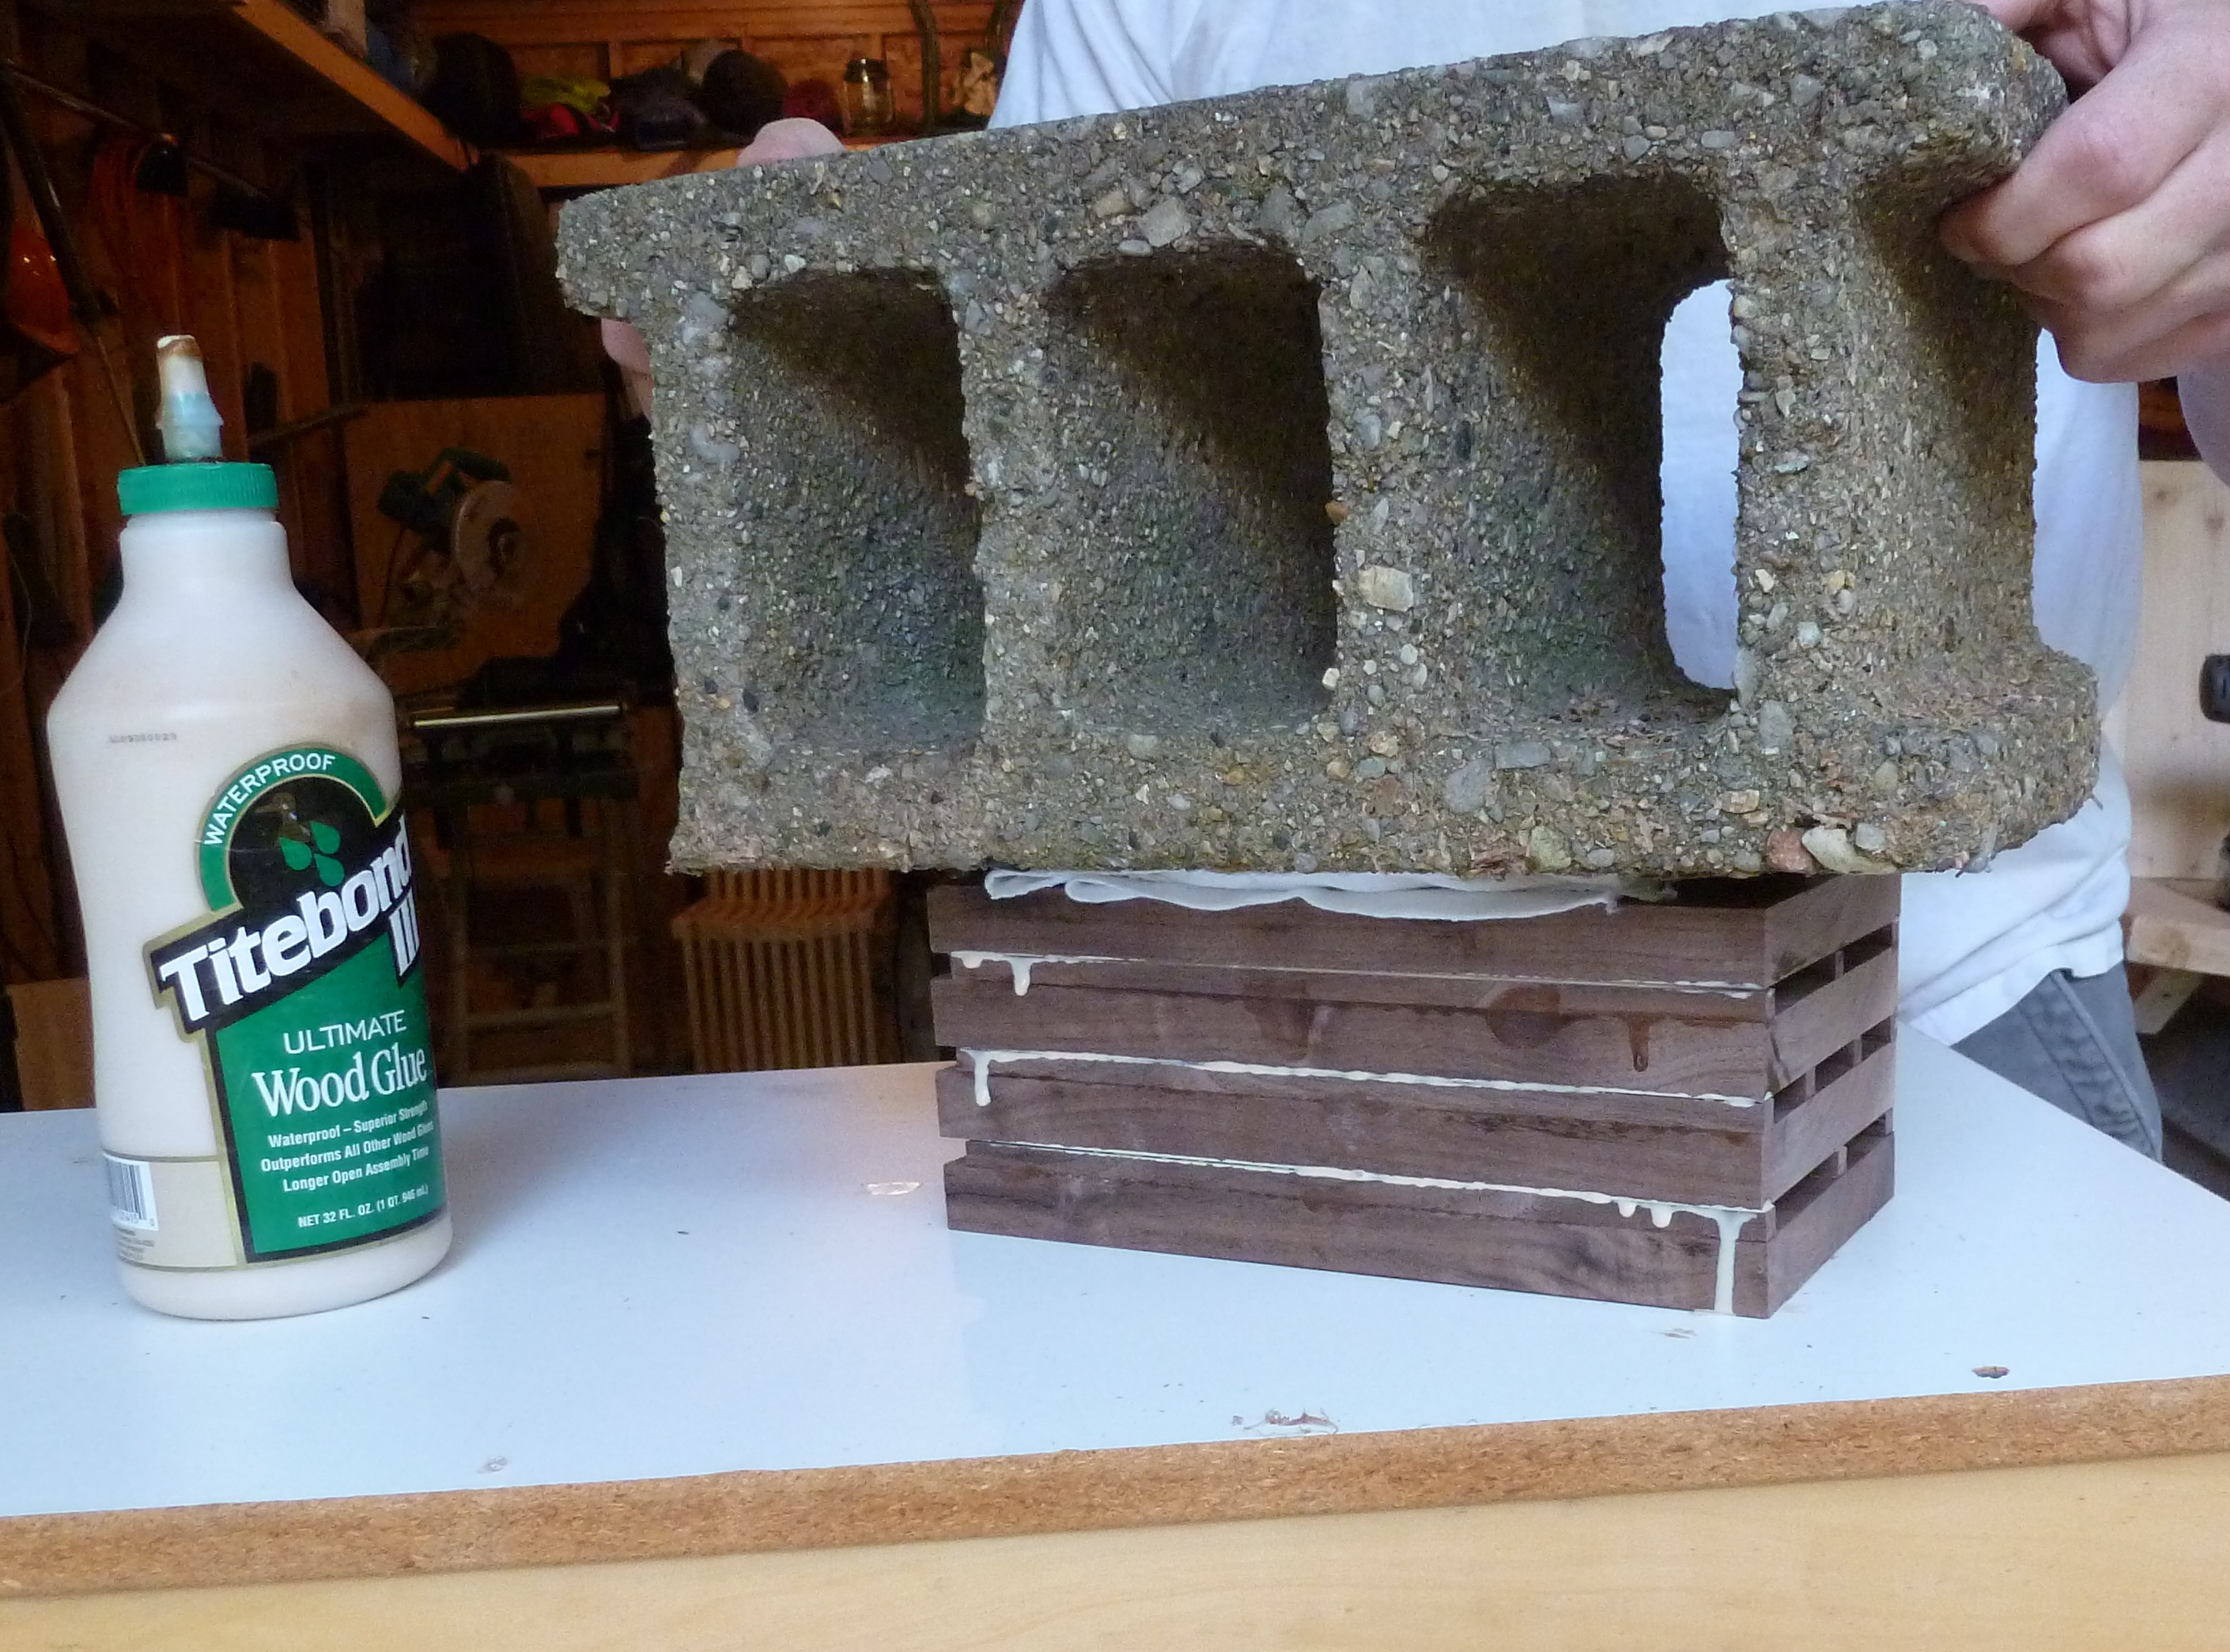
A concrete block is the most rudimentary clamp! If I were using clamps, it would be really difficult to keep the faces aligned because when the clamps are tightened down, the parts slide. Not so with a concrete block which relies on good old-fashioned gravity. I leave this undisturbed for a couple of hours and let the weight of the block work its magic.
CLEAN-UP AND FINISHING
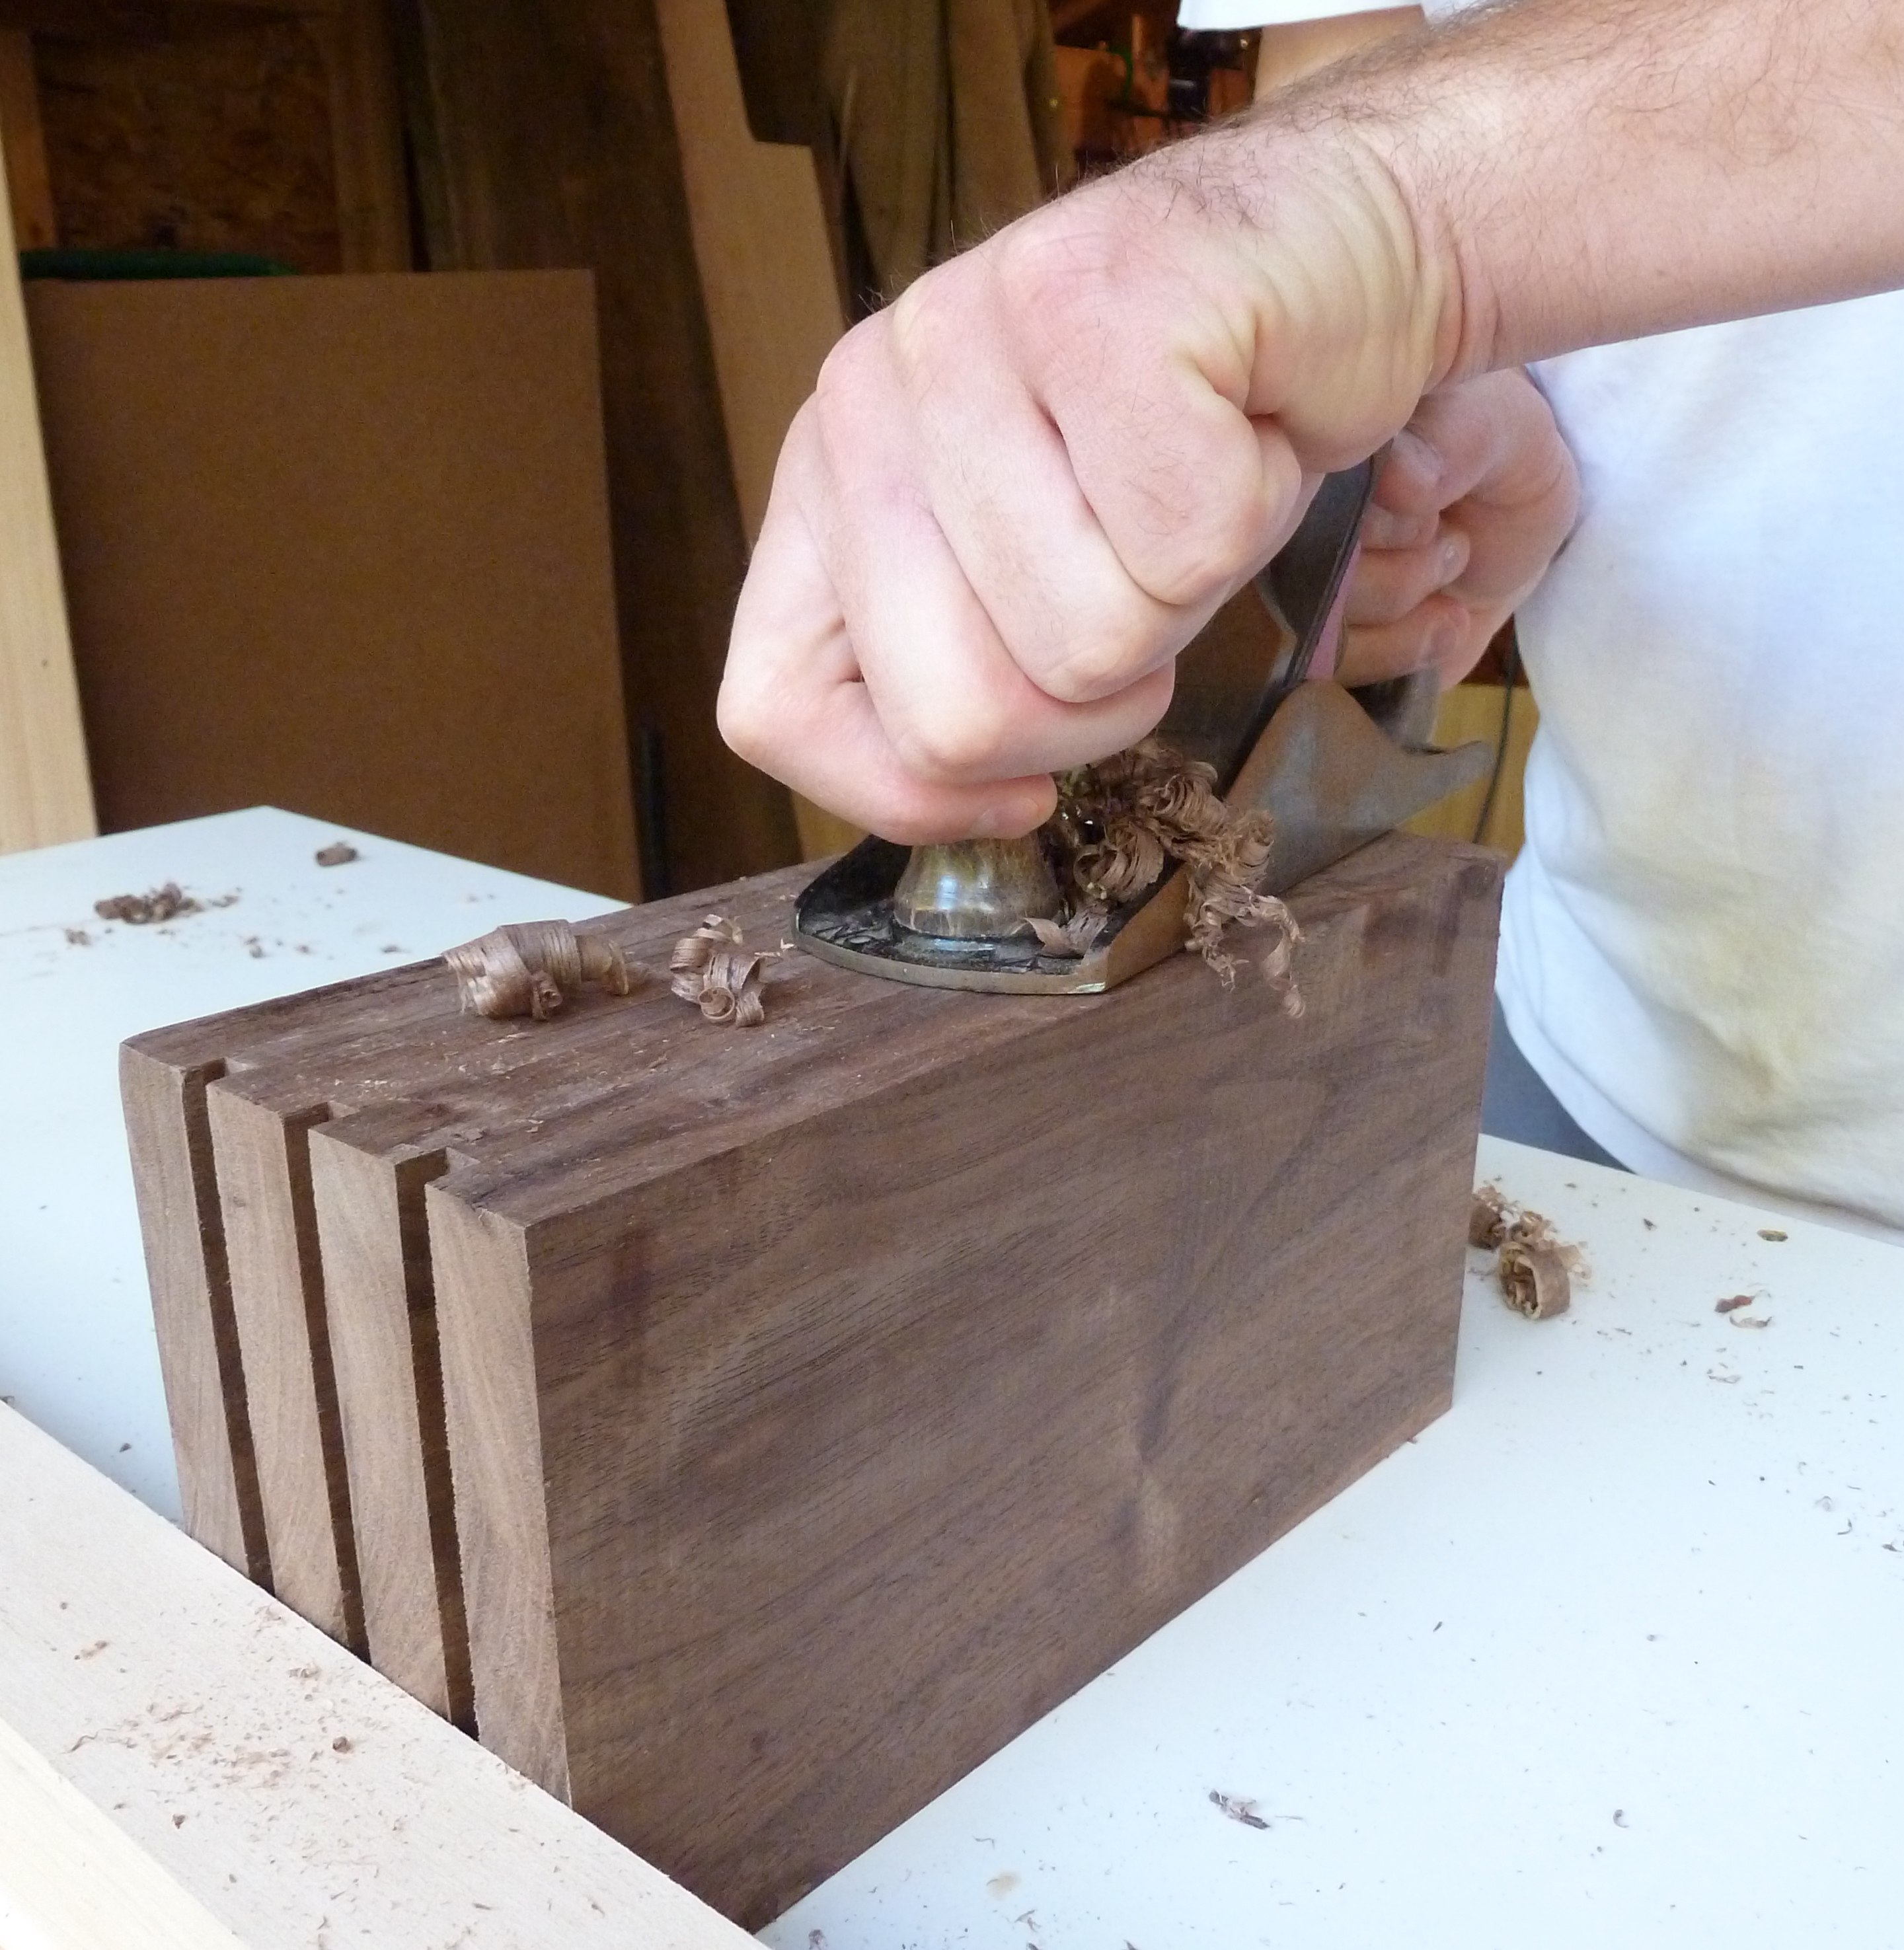
I plane any unevenness off the edges with a finely tuned hand plane after the glue has set. I also chamfer all of the edges while I have the hand plane out. Of course, if you are uncomfortable with a plane, you can use sandpaper instead.
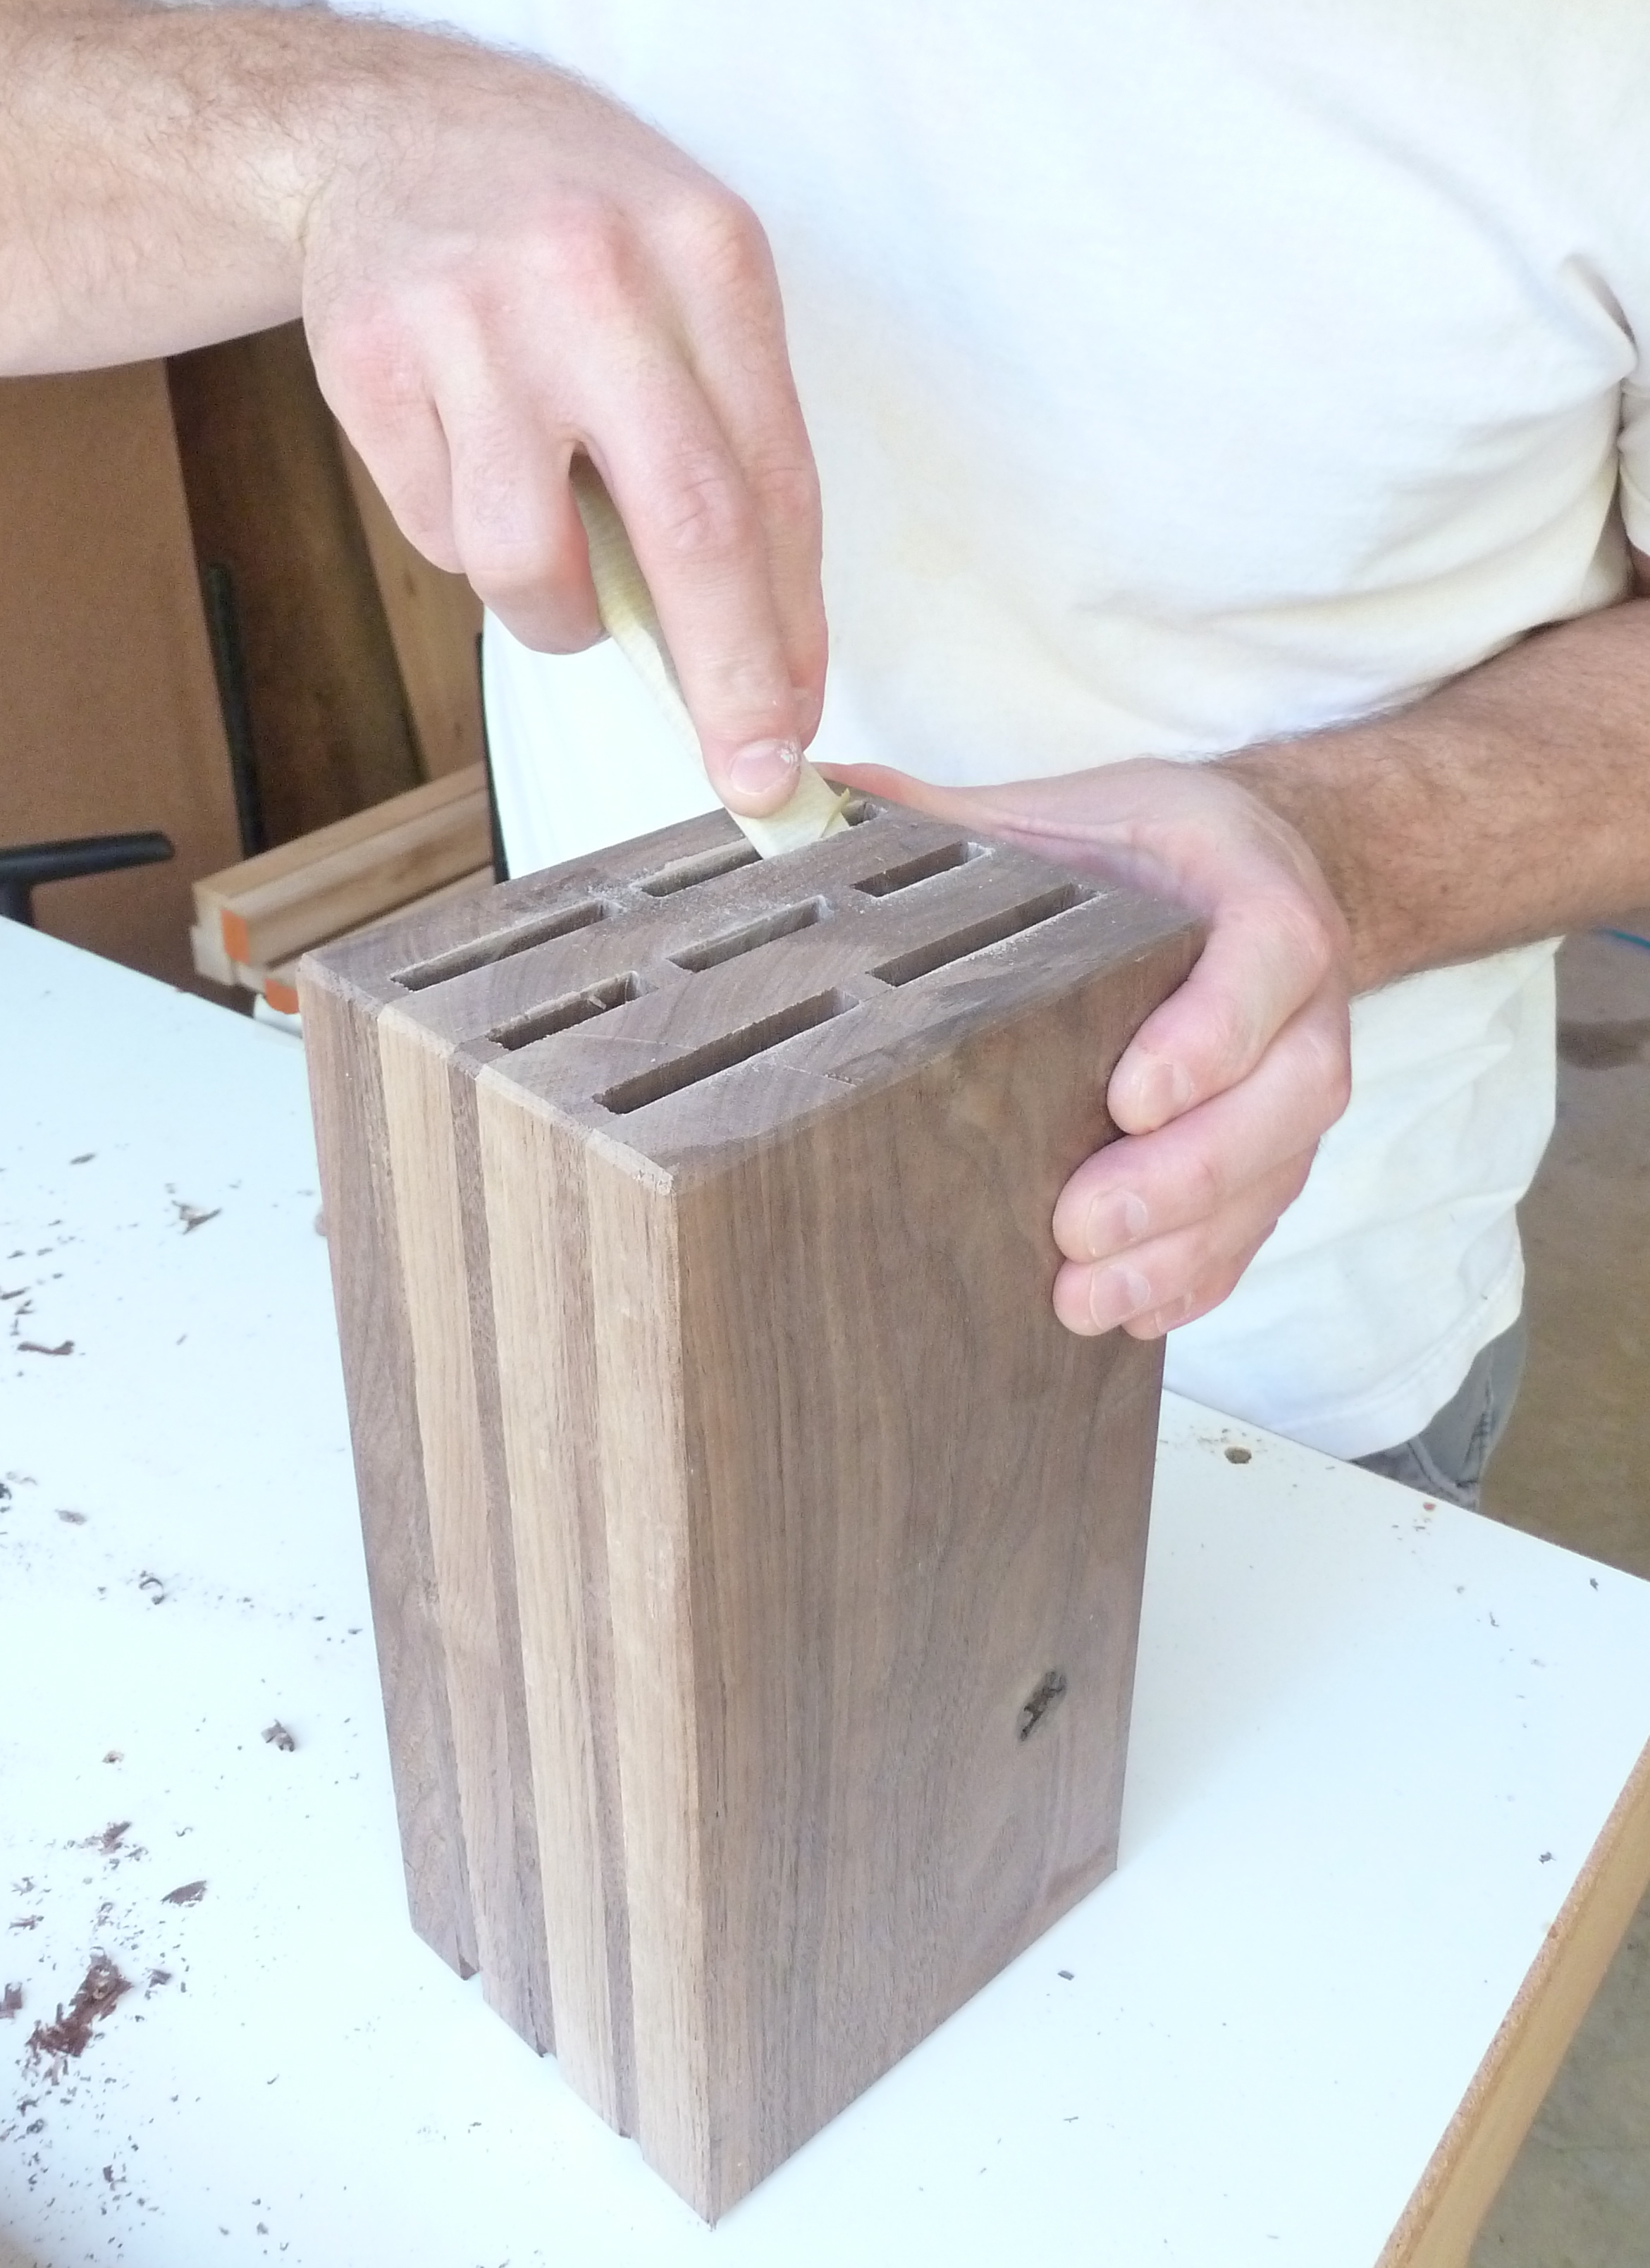
I wrap a piece of sandpaper around a thin, broad stick and use that to clean the knife slots. I flip the block over and round the edges on the bottom as well.

I use a wiping cloth to apply three coats of oil-based polyurethane to the block. Two pieces of scrap hold the block off my work surface so I can apply finish to every side of the block at once. I squeeze the cloth and gently wedge it into the knife slots to finish the insides as well. Sand with 320-grit paper between applications. If you can, wait a day or two for the finish to dry before wrapping the knife block and putting it under the tree.

I see you don't monetize your site, don't waste your traffic, you can earn extra cash every month because you've got high quality content. If you want to know how to make extra money, search for: Boorfe's tips best adsense alternative
It a very easy and beautiful project. I will try it. Thank you.
Hello. Why is there not a link to Georges video of him making the block. I found what looked like a old video. Same with wine bottle holder. Matt had a video too but no link. Just wondering?