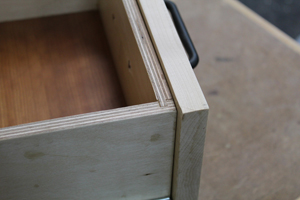
In the previous installment of this project we completed the top and shelf. Here we will build locking rabbet drawers with false fronts, attach drawer glide hardware, and wrap this project up. For details on the drawer construction see Diagram E.
In the previous installment of this project, we completed the cabinet body. Now we will construct the top using edge joined solid wood, and the adjustable shelf using edge banded plywood. For details on the shelf, see Diagram D. Cut plywood as specified in cut list. Be sure you get a good clean cut on…
In the previous installment of this project, we constructed the horizontal stretchers complete with tenons. Now we will focus on building the drawer bank using plywood joined with biscuits. We will also assemble the cabinet in two stages to simplify this otherwise complex glue-up. See Diagram C for details on construction of the drawer bank.…
In the previous installment of this project, we performed the milling operations on the legs, including mortises and tapers. Now we will turn our attention to the stretchers that join with the rails, milling tenons and arches where appropriate, as well as applying iron-on veneer banding to exposed plywood edges. Prepare the Stock Cut all…
In part one of this series, we provided an overview of the project as well as scaled drawings. Here we will begin construction of the project, starting with the legs where we will mill mortises that will join the face frame as well as side and rear rails. We will also taper the legs at…
In need of a media cabinet to house electronics gear for a new home theater room, I went to Seth Keller (WWGOA Contributing Editor and professional designer) for design assistance. My requirements were to allow for a large flat panel TV to sit on top (although mine is currently mounted to the wall above the…