 Working with big sheets of plywood, or worse yet MDF, can be a bear. Even on my cabinet saw, equipped with ample outfeed support, I dread man-handling those behemoth sheets. Its grunt work at best, and can be downright dangerous if the slightest thing goes wrong. I have stories among my circle of friends, and I will spare you the gory details.
The solution to this problem that can be found in some big-time cabinet shops and home centers is a panel saw, which is an amazing tool for quickly, easily and safely taming sheet goods. But two simple reasons prevent me and most other hobbyist woodworkers from taking the plunge into panel saw ownership. The first problem is price, and for me there don’t really need to be any other problems. At $900 for a basic model (and they go way up from there), I wouldn’t use it enough to justify the indulgence. Secondly, the dedicated footprint required for this tool is significant. Between the infeed space and the massive size of the tool itself, it is like having another stationary table saw for a specific task. These tools are impressive and a great asset for a shop, so if you have the space and the money, don’t let me talk you out of getting one. But if you are like me and don’t have one, the other or both, then read on.
As I looked around for options for breaking down sheet goods in my home workshop, I saw that there are many nice guide systems for circular saws that looked decent. Some guide systems even come with a circular saw, and these look like a great alternative to a panel saw. I knew I was getting warmer. But could I rig something like this up for my own circular saw, which cost $49 some 15 years ago and had mostly been used for building decks? I love cheap, but I hate junk. I wanted something that would deliver a chip-free edge on veneered plywood that would rival what a panel saw or high end guide system could deliver. If it compromised cut quality, I would go a different route.
My solution was a dirt-simple work around; a hardboard circular saw guide that is made custom for my circular saw. Here are some of the things that I love about this system:
- Cheap! I made two guides and had lots of material left over for about $13.
- Easy. Two guides took about an hour to make, and that included a coffee break.
- Zero clearance. The guides will prevent splintering on one side of the cut.
- Place directly on cut line. With many circular saw guides you have to accommodate the distance from the fence to the blade. Not here. Place the guide right on your cut line and go.
- Easy storage. These are super flat and durable. Drill a hole in them and hang them on the wall.
Make a Circular Saw Guide: DIY Panel Saw Instructions
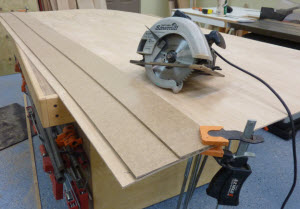
If I have successfully sold you on the idea of building one of these, let’s get started. First, the shopping list is pretty simple. You will need a 4′ x 8′ sheet of 1/4″ hardboard and a bit of glue. That’s enough material to make an 8 foot long guide for ripping, a 4 footer for cross-cuts, and have lots of leftover material for future jigs.
 First, cut pieces for base and fence. Cut a strip of hardboard 9″ wide and whatever length you want your guide long. The one I am making here is 8′ long. Then cut a strip of hardboard 5″ wide and the same length as the base, which will be used as the fence for your cutting guide. If you are tempted to keep the jig lighter by making the fence more narrow, be careful because the width adds rigidity which is critical for an accurate cutting guide, and it also provides more surface for clamping so that the clamp does not interfere with the circular saw operation, (I just saved you having to throw away your ‘rough draft’ project like I did with mine).
 Glue the fence to the base. Use your favorite woodworking glue. Align the edges, but don’t worry too much as we will trim it later.
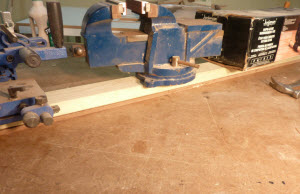 Place glue-up on flat surface and add weight to hold flat. This will keep the cutting guide flat as the glue dries. As an alternative to weighting it down, you might choose to use short brads to secure the two pieces together. Whatever you choose, be sure to keep the pieces held against a flat surface while the glue dries.
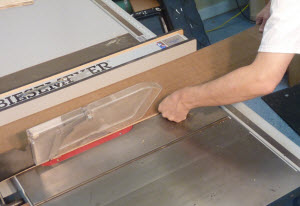
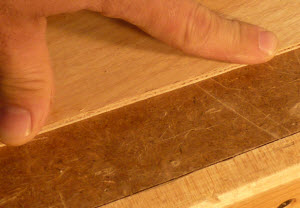
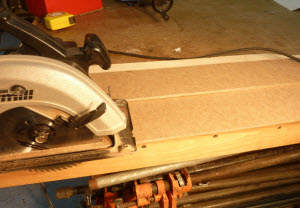 Cut base. Leave the edge overhanging enough so that your saw blade will not cut into anything that you don’t want it to. Hold your saw base carefully against the fence as you make this cut, leaving you a base that is perfectly matched to your saw, with a zero clearance edge that will deliver a chip-free cut on veneers.
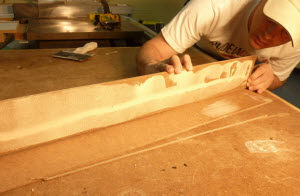
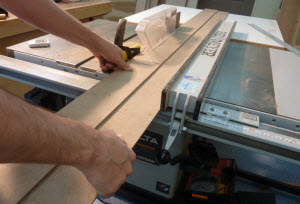 Trim the other edge. This is an optional step that will tidy up the guide. Place the non-fence side of your base against the fence on your saw, and adjust the fence so that you will remove material from both the base and fence of your guide for the entire length of cut. After this cut, the jig is complete.
Using the Guide:
Place guide directly on cut line. Mark the plywood for your cut. Then lay the guide directly on the line, placing the guide on the side of the line that you will keep. This will prevent chip out from occurring on the project itself, because the base of the guide system will serve as a backer board for the cut.
 Clamp the guide in place. Place the clamps where they will not interfere with the path of the saw’s motor.
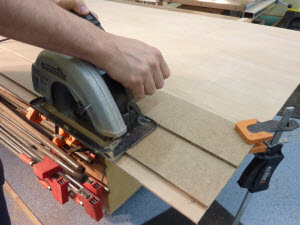 Make your cut. Carefully hold the saw tight against the fence and flat against the base for the length of the cut. Push steadily through the cut in one continuous motion.
 Perfect edge. If everything was set up correctly, your sheet should be trimmed perfectly to size, with a chip-free edge where you made your cut.
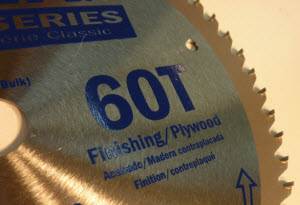 Blade selection. Be sure to find a good blade for cutting veneer plywood, and not just go with the junky blade that came with your saw, which is typically designed for cutting framing lumber. Look for a blade with a high tooth count, in the range of 50-60, thin kerf to minimize resistance as you move through the cut, and carbide tipped teeth to maximize the time span between sharpenings.
Photos By Author


I am a raw beginner. So please excuse me if this sounds ignorant. It seems that you still need a table saw to make this jig correctly am I right?
Thanks for this beautifully written post with great knowledge. This article really contains a lot more information about This Topic. Keep up writing so that we can get more informative blogs like this one.
That is one of the best set-ups of any I have seen. And it makes sense. Nearly every other guide is good for 1200mm or there abouts, this one handles 2420 sheets here in Aus.
very informative post. Thanks
[…] WWGOA.com […]
I've read countless articles and seen even more YouTube videos on how to make your own circular saw cutting guide. I find it interesting, but unfortunate, that ALL state something like, "First cut an 'x' in. wide, 8 ft. long strip of 1/2 in. or 3/4 in. plywood to use as your guide." There lies my issue. I need to be able to cut a straight edge for me to make my cutting guide...but I don't have a straight edge to begin with! Ok, I went to Home Depot and got an 8 ft. long board of Selex cmpc Trim Board as this was the straightest thing in the big box. I used this Selex board as my fence, and the rest is history. Did anybody else think of this, and what was your solution? Thanks in advance.
It's awesome in support of me to have a web page, which is valuable in support of my experience. thanks admin
There was a video on this project that I viewed months ago but now, I cannot locate it??? HELP!
Thank you very much! This is what I have been looking for! Very clearly presented! Can't wait to get mine built. I am using my table say much more now that I joined your great organization.
If you don't have room to bring home a full 4'x8'x1/4" hardboard sheet from your local lumber yard or home center, ask them to use THEIR panel saw to cut you 3 - 9" wide and 3 - 5" wide strips, 8' long. That gets you enough for three guides, plus a leftover strip for several No_Slack_Jack's saw base support pieces, and you can fit them in most vehicles. The few extra bucks are worth it.