For too many years I, like many others, simply dumped my small clamps into a bucket. That was OK for carrying them around the shop, but problems arose when I went to grab a specific size and found that it was all the way at the bottom of the pile. I quickly learned I needed to make something more efficient. So I decided to create my own clamp holder.
My initial prototype was a success, and it can be made with scrap around your shop! Follow along below to learn how to DIY your own clamp holders.
Audit Your Clamps
Here’s the thing to keep in mind before you start constructing your holder: not all clamps are the same. Specifically, the shape of the fixed jaw section can vary.
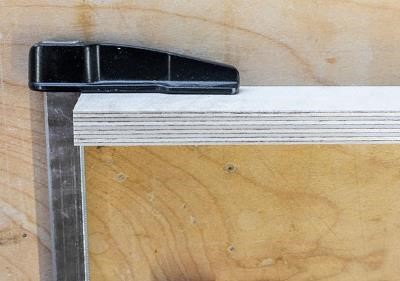
If you have any small light duty bar clamps, the fixed jaw is flat and can hang from a flat surface.
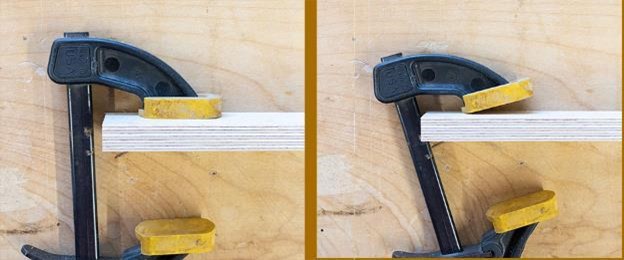
But there are other clamps that have arches or a raised head on their fixed jaw, meaning that if a clamp is resting on that pad, the clamp will rock inward.
If you get your clamps from various stores, flea markets, yard sales and store sales, you probably have an assortment of clamp shapes and designs. As such, you are much better off making a clamp holder that will accommodate a variety of clamp designs as opposed to designing your holder to fit one size and style of clamp.
Customize Your Clamp Holder
One area that can be customized is the distance between the clamps. Most clamps have a width (including the cushioned pad) of 1” or less, but some larger clamps have a width of 1½”.
There are two ways around this: cut some of the slots further apart (meaning fewer clamps can be held), or, when placing the clamps, alternate the slender with the larger. In the plans provided, I ended up doing both.
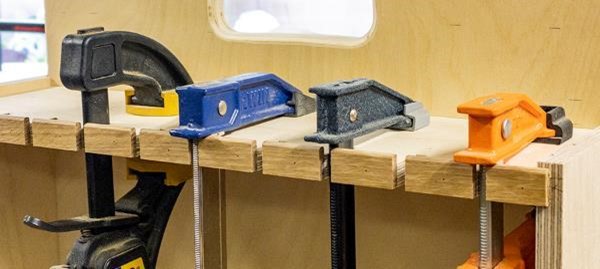
The facing placed on each shelf (⅛” proud of the top surface) is high enough to help support most clamps very well. Otherwise, the clamps with a high arch from the fixed jaw require a second lower shelf to “catch” the clamp’s bar from swinging in any further. In the image above, the first and third clamp depends upon the lower shelf while the second and fourth are resting on the shelf’s hard wood facing.
What You Need to Make These Clamp Holders
- Download the plans for the mid-sized clamp holder or small clamp holder.
- You can build these from any kind of plywood: pine, Baltic birch, whatever you’ve got on-hand, but do not use medium-density fibreboard.
- The center of each rack needs to be ¾” thick stock because we’re cutting a ¼” deep dado from each side.
- You will also need some ⅛” x ⅝” thick strips of hard wood. I used white oak I had around the shop, but any hard wood (ex. maple, hickory, etc.) will do fine.
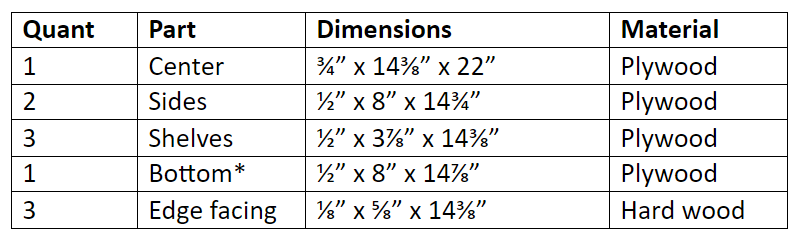
Cut List for the Small Clamp Holder
All parts are plywood (except facing). Note thickness variations
Cut List for the Large Clamp Holder
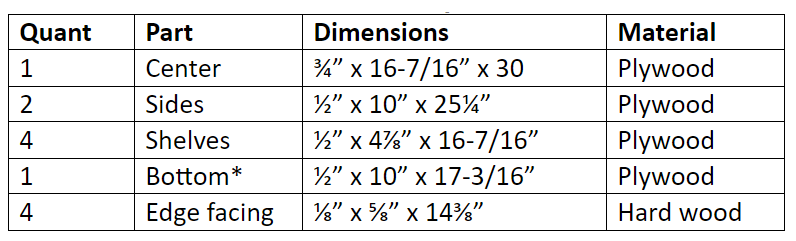
*Note: you may want to overcut the dimensions of the bottom until you are ready for final assembly.
As I’m rather short, I found carrying the mid-sized clamp holder wasn’t easy — it was entirely an arm lift for me. My solution: putting it on casters. If you’re tall, you may not need this modification, but if you do want casters, this choice from Amazon works well.
Constructing the Clamp Holder

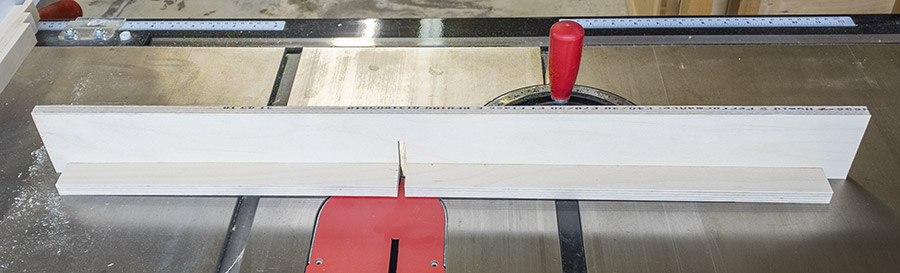
After cutting the parts to size, mark out the location of the four 1” Forstner bit holes.
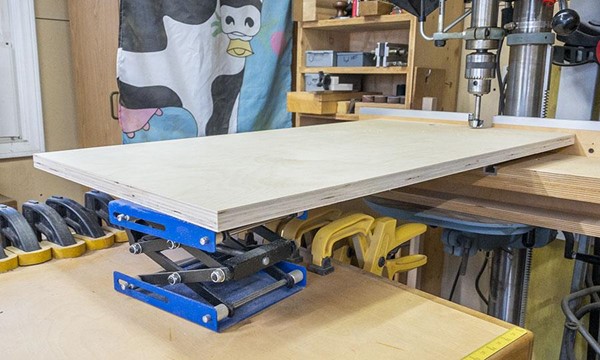
Drill the holes.
Pro Tip: I use a Lab Jack to support my board dead-on flat across my auxiliary table and the drill press table, which you can find on Amazon. Be aware that the lower priced models support much less weight than this model.
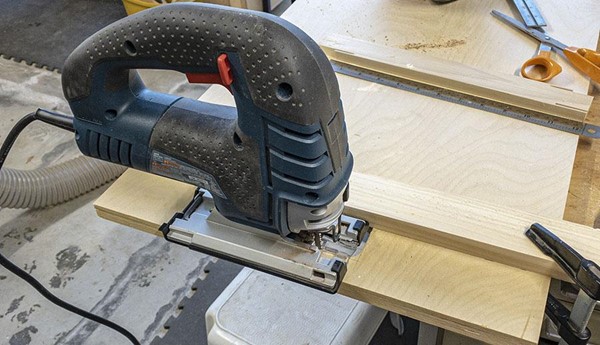
I used a hand-held jig saw to cut out the rest and then used a spindle sander to clean up the cut.
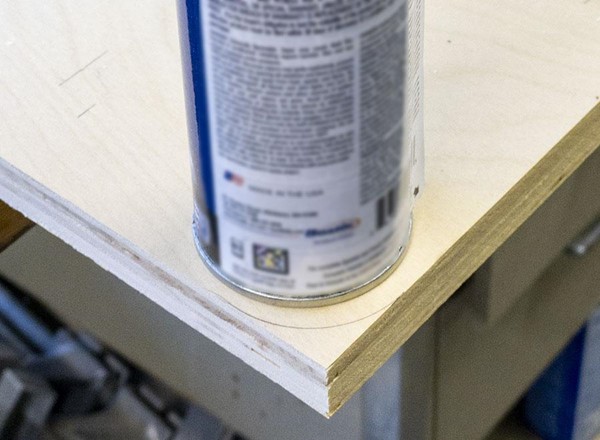
To round the corners, I grabbed an appropriately sized spray can in my shop, traced around the edge and cut it with my jig saw. This was cleaned up with my disk sander.
After some sanding I used a ¼” roundover bit to round over the hand hold and the top region of the center section. Make sure to stop the rounding over on the edge before the shelving starts. Sand by hand until smooth.
Cutting the Dadoes
Setting your dadoes for a good fit on your table saw is important. To see how it’s done, check out our video tutorial.
The first dado to cut is the one groove that runs down the center of both side pieces.
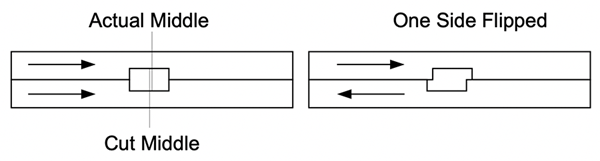
If you are not dead-on-center in this cut (which is actually very hard to do), be sure to maintain the alignment to each other. To check, hold the boards against each other so the grooves face each other. If the grooves don’t line up, flip one board 180 degrees. If this corrects the problem, mark the boards accordingly so it’s easier when you do the final assembly later.
Remember, any amount you’re off by is doubled if you assemble them in the wrong direction.
Cutting the Dadoes for the Shelves
You will notice in the plans that the location for all of the dadoes for the shelves are measured from the bottom. This helps maintain consistency on the cuts because each shelf is registered against the fence. If you miss-set the fence off ⅛” from the expected measurement on the initial cut, it’s not a big deal. But if you move the fence from one dado cut to the next for that setting, you’re going to have a bad day.
You need to be methodical when cutting the dadoes for the shelves. Set the blade-to-fence distance and then cut the center and side pieces for each respective shelf before moving the fence to the next location. Keep in mind that the small clamp holder has a shelf on one side while the medium clamp holder has a shelf on both sides. This process helps maintain the necessary consistency for all of the cuts.

For the side sections, you need to cut across the entire width of both side pieces. This creates a potential cosmetic issue because as you cut across the entire side, each shelf only occupies half of the side. That means on one side you will have a shelf dado with no shelf to fill that space.
There are several ways to deal with this:
1. Fill it in with a slip of the same plywood before final assembly.
2. Ignore it. If anyone asks, tell them it’s an important element of the design.
You can also cut the dadoes with a router and easily avoid the empty dado problem. However, if you do cut the dadoes this way, then you lose the registration the fence provides and final assembly might be more difficult.
Cut the Shelves
The shelves are cut last. There are three on the small clamp holder and four on the medium-sized clamp holder. Note that in the small-sized clamp holder plans, all slots are the same distance apart. But for the medium-sized clamp holder, I’ve set the slots at two different spaces to accommodate clamps with very wide rubber pads. If you don’t have any of these clamps and you know you’ll never ever get any, use the narrow setting for all four shelves.
I prepare the hard wood edge facing by using my block plane to knock down the edges of the top side then sand it smoothly round. This is glued onto the shelf itself. Rather than clamping, I placed a pinner nail in-between where the slots will be cut.
You do not need to be accurate in the width of your slots when setting up your dado blades. However, some clamp bars are exactly ¼” so you might want to make your ¼” dado blade cut a bit “fat” (with shims) to better accommodate these clamps.
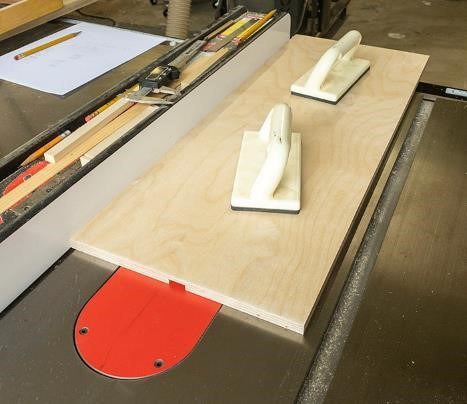
You will need to make a cutting jig for your miter fence, simply glue two pieces of wood at right angles to create a sacrificial back. Once dry, screw this onto your miter fence. Note that I have this long enough to cut the slots from one end through to the other.
This jig serves two purposes: one is to limit or prevent blowout on the back face of the cut. The other is that this will provide a very exact location to line up your cuts. Note that I’ve placed a line on the banding where I want the cut and an “x” on what side of the line I want to do the cut.
You will want to do a dry assembly to make sure the shelves with spaces for 10 slots is matched to the other shelf with 10 slots and that they are located on the side they should be located on. If you want to fill the extra dado slots with a piece of wood, now’s a good time to do that.
If you’ve done a good job in making slightly-tight dadoes, you may find that this will be a tad of a challenge to put together. Be sure to add the shelves on quickly (while the glue is still forgiving) after placing the center onto one of the sides as that will help align all the pieces.
At this point it’s time to do a final measurement of the bottom and do the final bottom piece cutting. Once cut, you can glue the bottom onto the body of your new clamp holder using brads, nails, or a pinner to hold it in place until the glue dries.
If you made the medium size clamp holder, load it up with clamps and see how easy it is to carry around. If this is awkward (or not easy), add the casters mentioned above.

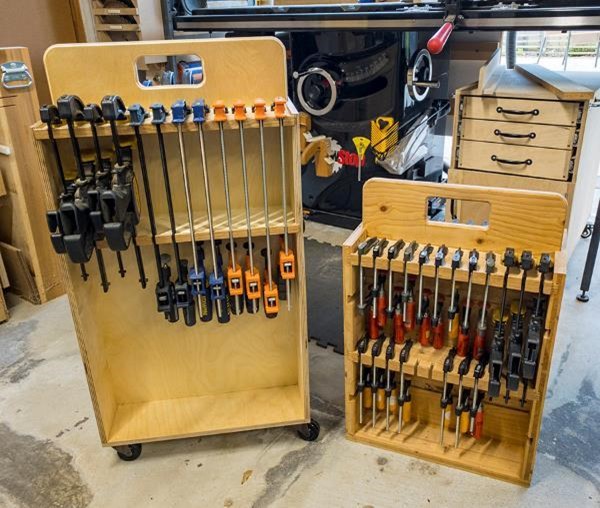
The last thing to point out is that the center handle region is also a handy place to leave spring clamps.
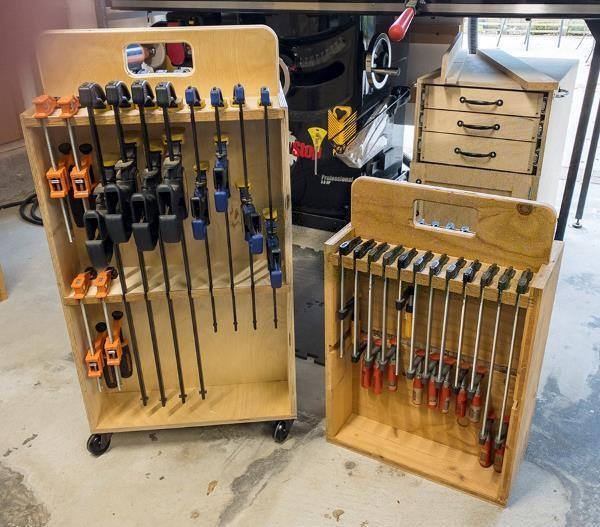
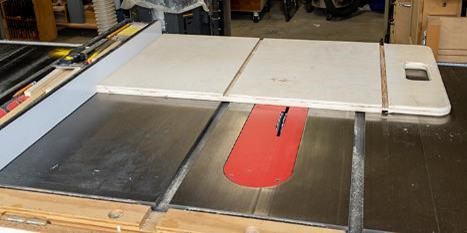
At the top of this article you can see one side of my clamp holders, below is the back side of the same holders. Enjoy!
Photos by Gary Coyne

Nice, but I went cheap. I have an L-shaped bracket screwed to a wall and various clamps are just clamped to the part that that sticks out away from the wall. I also have "broom holder clips" mounted onto a board , and the pipe clamps clip in there on the wall. I built a 2x2 frame near garage door track and all of my small clamps get clamped on those with sheet good stored between frame and wall.