This is the second in a two-part series on biscuit joiners. The first article provided instruction on using the machine. This article covers real-world applications of biscuits. View part one of the story here. You can also view a companion video to this article.
Edge band the shelves.
Biscuits can be used to apply edge banding to plywood shelves. They provide a nice aid in aligning the edge banding with the shelf, which will minimize the sanding necessary to achieve a flush surface. I generally use something in the range of 3/4″ x 1–1/4“ material for edge banding to give the shelves a more substantial appearance, and to reinforce the rigidity of the shelf, reducing the chance of the shelf sagging over the years under a load.
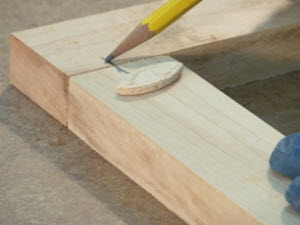
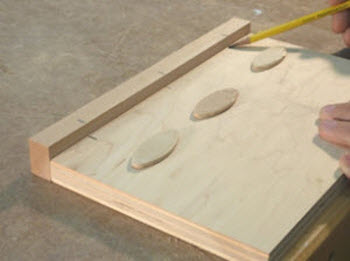 Position the banding material next to the shelf with both pieces top down on the bench, and draw your biscuit lines. The biscuit slot that is cut for a #20 biscuit is about 2-5/8” wide, so the centerline for your outside biscuits should be about 1-5/8” from the edge, leaving you a comfortable 1” margin. Then space your biscuits about 6-8” on center across the span of the shelf. Spacing is not critical, as these are primarily used for alignment purposes in this application. You just need them spaced closely enough so that the edge banding remains flush to the top of the shelf at all points between biscuits
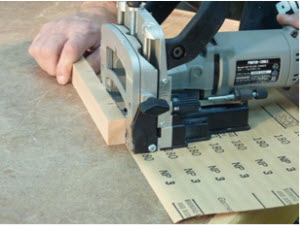 Set both the top of the shelf and the base of the biscuit joiner on the bench, align to the biscuit location mark, and mill biscuit slots. Then, when you are milling the slot for the banding material, place a couple sheets of paper, or even a piece of sandpaper, underneath the bed of the biscuit joiner. This will offset your registration by the thickness of the paper used, leaving the edge banding proud of the shelf top by that much. This makes is easy to sand, plane or route the banding material flush with the top of the shelf. If you don’t do this, you increase the risk of having the edge banding material drop slightly below the top surface of the shelf, leaving you with an ugly problem (don’t ask me why I know this). Apply ample glue, and clamp the pieces together for at least a half hour while the glue dries. You will need to lightly sand the top surfaces flush, but if you performed the setup procedure properly, your work should be minimal in the sanding step.
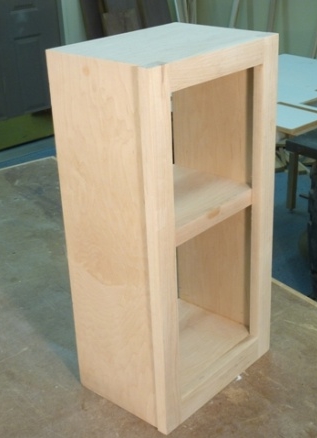
Attach shelves to the sides.
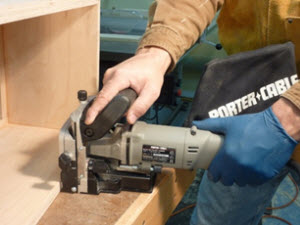
Here is a great way to attach shelves with a single setup for each side, and without using the biscuit joiner fence. Position a shelf in its desired location, clamp it securely to the side member, and clearly mark your biscuit locations. The biscuits will help bear the load that is placed on your shelf, so fit as many biscuits as feasible within the depth of your shelf.
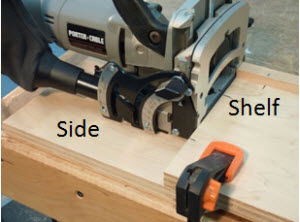 Next, set the biscuit jointer firmly on the side member, aligning the cut indicator center line with your witness mark and mill your slots in the shelf.
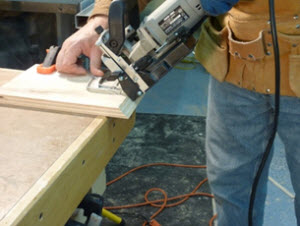
Then, without changing the clamping setup at all, repositioning the biscuit joiner to make plunge cuts into the side member, resting the bottom of the biscuit joiner against the edge of the shelf. Take your time here, holding the biscuit joiner firmly in place. A ¾” shelf does not provide an ideal reference plane for the biscuit joiner, but it is adequate because the tool’s face is also resting solidly on the side member during this operation. Repeat this operation for all shelves on both sides.
Miter the top.
Biscuit joinery is great way to add strength and aid in alignment (which can be tricky!) of miter joints. Make your 45-degree cuts to form the joint, and then set your biscuit joiner’s fence to 45-degrees (or 135-degrees if your biscuit joiner has this feature). Perform a test on scrap to ensure that your setup is right. Be sure that the biscuit slot does not blow out the side of the material, and if it does, use a smaller biscuit. Once your test setup is proven, mill the slots on your cabinet members. Again, positioning as many biscuits as you can in these joints.
Build a face frame.
You may need to scale down to smaller biscuits for face frames, depending on the width of your rails. The top rail in my face frame is 1-1/2”, which is too small for standard sized biscuits (#0, #10, and #20). For this size rail I needed to scale down to an FF (Face Frame) biscuit. These small biscuits lack the holding power for many applications, but they are adequate for face frame joinery where you mainly need to hold the joint solid until the face frame is attached to the carcase. At that point there will be no stress on the face frame corner joints.
 This is a simple butt joint, reinforced with biscuits. Align your pieces on the bench, mark your biscuit locations, and mill your slots. Be careful to measure not only the width of your biscuits, but also be aware of the size of slot that your tool will mill for the biscuit. The width of slot milled for an FF biscuit is about 1-3/8”, so you need to carefully position this slot in the center of a 1-1/2” rail so that the slot doesn’t peek through a side of the rail or style. Once the slots are milled, dry fit with biscuits to ensure proper alignment, then glue and clamp.
Attach the face frame.
Of all the methods for attaching face frames to a carcase, biscuits are my favorite. They offer a quick and simple solution, with no nail holes to fill, and they force things into alignment which can be tricky, particularly with a large face frame.
Lay the face frame in position on the carcase and draw biscuit placement lines. You don’t need many for this application, as the biscuits are primarily used for alignment. I generally place one biscuit on top and bottom, and one or two on each side. You want the placement lines visible on the inside of both the carcase members and the face frame, since you will reference off the outside edge of each when milling biscuit slots.
 Set both the carcase and biscuit joiner flat on your bench, secure the carcase, and mill slots at each biscuit placement line.
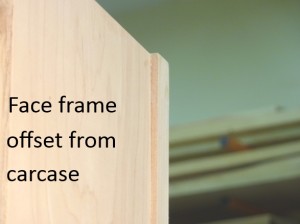 For face frame positioning with the carcase, I sometimes like to create about an 1/8” reveal by extending the face frame past each side member by that amount. This provides a little wiggle room in getting the face frame attached in a slight out-of-square condition, and it adds a nice shadow line as well.
Here is a tip for doing this without using the biscuit joiner’s fence. Set your biscuit joiner on a platform that is the same thickness of the reveal you are trying to create (for the 1/8” reveal here, I am using a clipboard). Then, align your biscuit joiner to the witness mark and mill the slot as you normally would. The height of the platform positions the biscuit joiner perfectly to create the desired reveal. Apply glue, biscuits, lots of clamps, and you are done!
Accessorize your biscuit joiner?
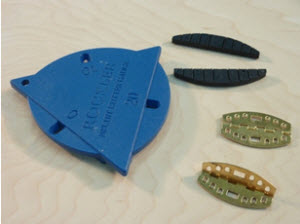
If you like biscuit joinery, you might want to check out some of the neat accessories available. You will find jewelry box hinges, glueless biscuit clamps, and even knock-down hardware that is designed to be placed in a biscuit slot. I even found a handy little gadget to determine the optimal size of biscuit for your application, as an alternative to doing a series of test cuts in scrap.
Conclusions.
Biscuit joinery provides one of the quickest ways to join two boards together, and can be used in a wide variety of applications to aid in alignment and add a bit of incremental strength. In this sample project we created miter joints, attached shelves, applied edge banding, built a face frame and attached it to the carcase; all with biscuits. Whether you are building cabinets, furniture, boxes, or other wooden items requiring joinery, a biscuit joiner is a great tool to master. Hopefully you have picked up a few tips in this tutorial to help you utilize your biscuit joiner in greater variety of woodworking joints, save a little time in the shop, and improve your quality and consistency with this tool.


I can read the text in Part 2, but the images are not loading, so there are no photos to refer to. I've tried clearing the cache on my Firefox and even tried the Ctrl-F5 and a reload of the page. Still no images
none of the biscuit joinery videos will play, how come