 In the US alone we consume over 400 million cups of coffee every day. Over half of the US population drinks coffee regularly. So, chances are you know someone that drinks coffee; it might even be you. A re-usable travel wooden mug makes a nice personal gift for the coffee drinkers in your life. The stainless steel insert and cover clean easily and the right finish makes the wooden body very durable.I’ve turned dozens of these mugs; from solid pieces of wood, glued up blocks with contrasting colors and using stave construction; the latter example is the basis for this article.

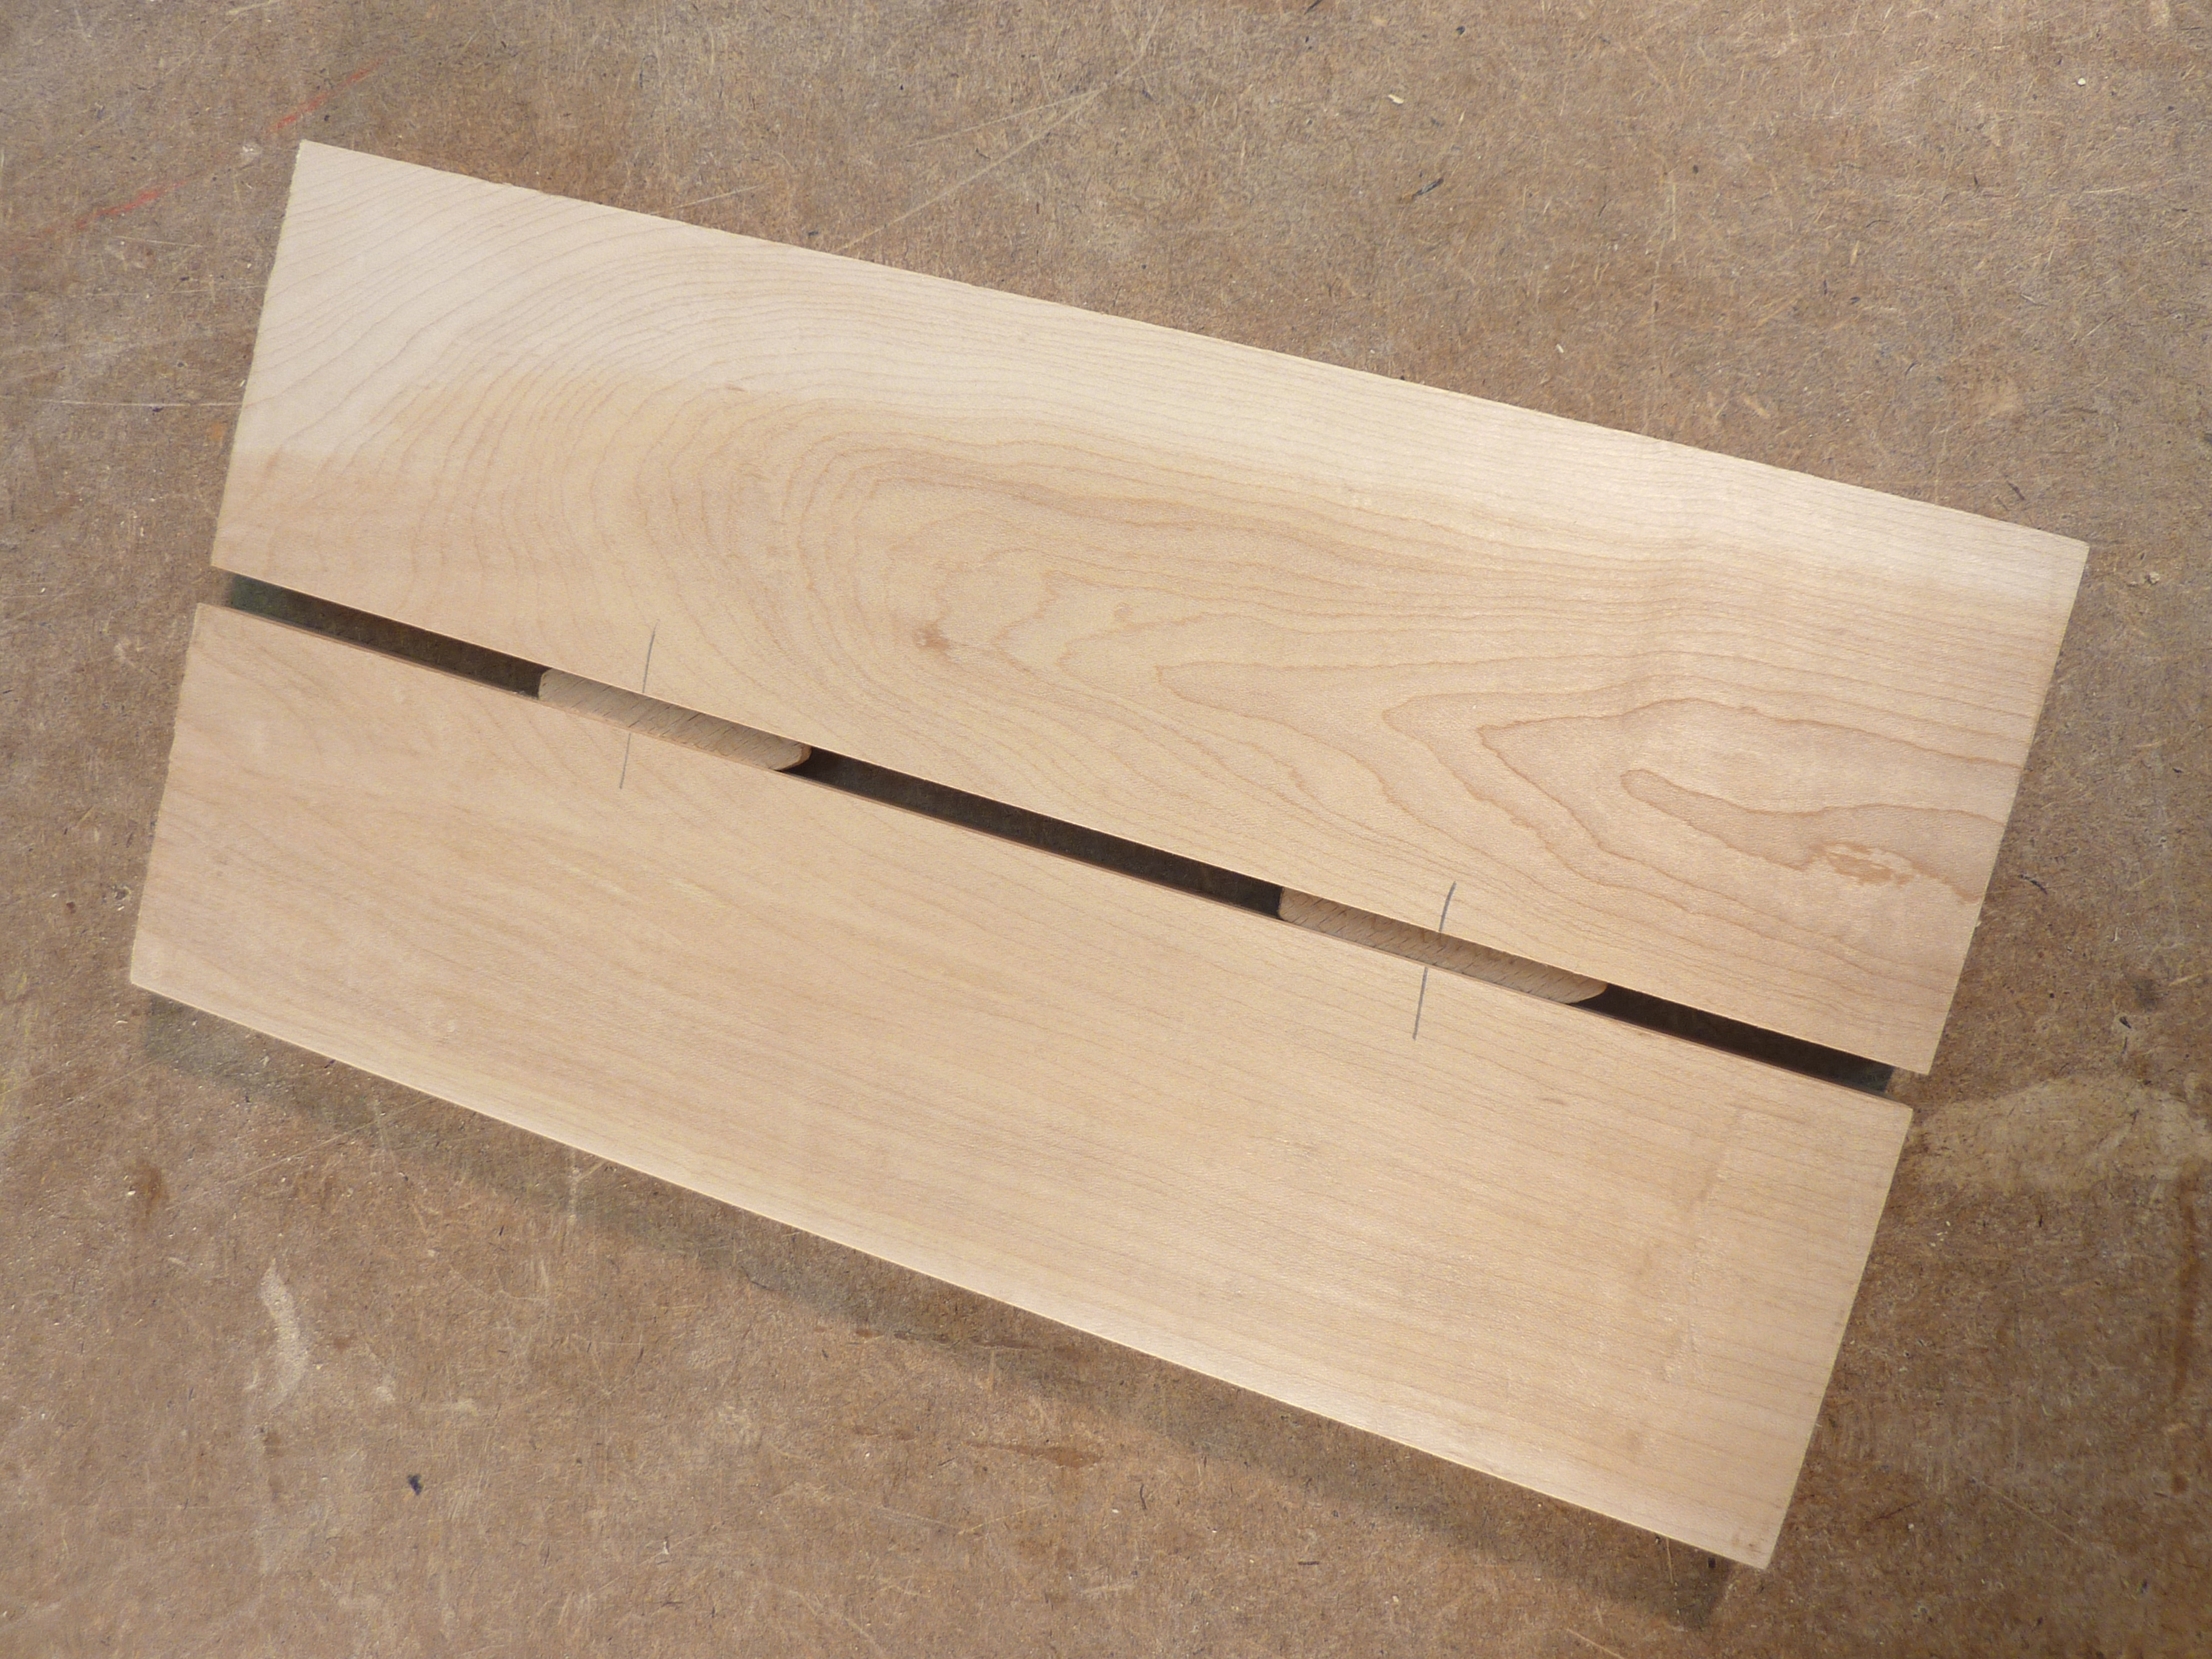
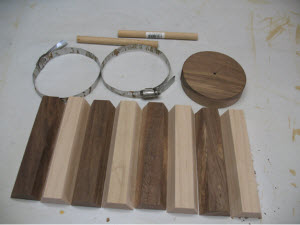 Start by cutting eight 6″ long staves from your selected hardwood; edges are cut at 22.5 degrees; the wide surface should be about 1-9/16″ wide; you’ll find the project allows a little forgiveness in this dimension — though not a lot. The key is having all the staves the same width. I cut a 50″ long stave and chop the 6″ pieces from that. You’ll also need a bottom disk, two 1/2″ dowels about 6″ long and two 5″ hose clamps.
In this example I used alternating staves of walnut and maple, with a walnut base. Lightly sand the bevels to ensure they are clean and free of inconsistencies.
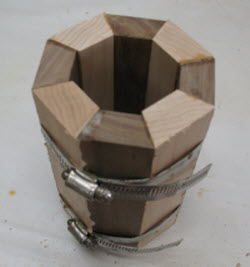
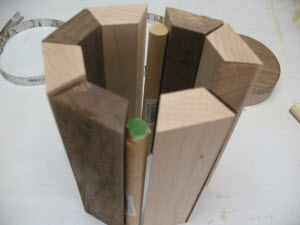 Next, we’ll assemble the staves and glue up 2 sides of the project as separate pieces. Use the 2 dowels as separator blocks between the halves. (Be sure when you glue up the halves you only put glue on 3 joints.)Using the dowels between the 2 halves allows for slight variation in the 22.5 degree angles; this avoids any gaps between staves.
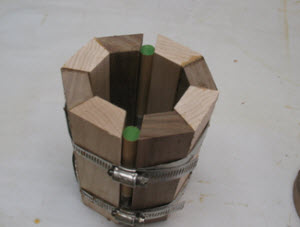 Clamp the staves and allow to cure for an hour or so.
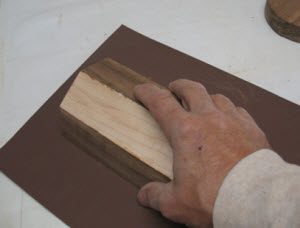 Remove the clamps and true the remaining joint surfaces using sandpaper on a true, flat surface.
 Once you’re sure the final surfaces are true, apply glue and clamp.
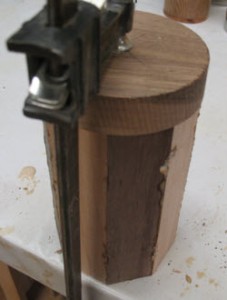 Now you’re ready to attach the base. I cut a 4″ circle of wood on the band saw for this. Before applying the disk I take a tiny slice of material off one end using a chop saw so the end grain surface is clean and dead flat. Apply glue and center the base, then clamp it.Once the glue is fully cured — I typically wait a day — your project blank is ready to turn.
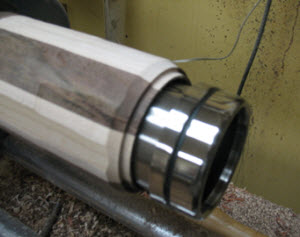
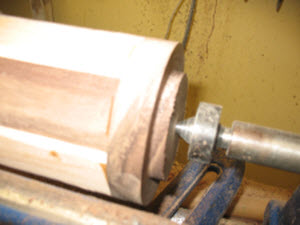 I start by attaching the blank to my scroll chuck using outward pressure in the open end of the blank. I turn a 2-3/4″ diameter tenon on the base about 1/4″ in from the end.Next, reverse the blank in the chuck, grasping the tenon. Be sure your project is held very securely in the chuck, the next step generates a lot of pressure on that tenon. Using an appropriate tool, hollow the inside of the blank until it fits the stainless steel insert — check it often. (Hint: if the insert doesn’t quite fit, draw a single line down the outside of the insert with a marker. Push the insert into the blank and rotate it slightly against the stationary blank. When you pull the insert free, you’ll see scuffing on the marker line, giving you some idea how far into the blank your insert fits before catching.)
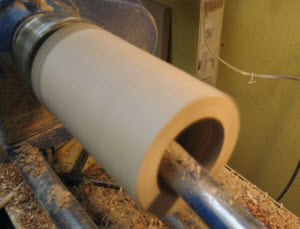 As you can see, my tool rest is inserted into the blank. I prefer to use a Hunter #3 or #4 carbide hollowing tool — very few catches and a good finish (Don’t sand the inside).Once your insert fits nicely you’re ready to turn, sand and finish the outside.
 Note: the inserts have a rolled edge — be sure to turn a flange on the top of your blank to seat inside that rolled edge.
 Finally, apply a few dots of silicone calk to the inside of the blank. When you press the insert into the blank the silicone ensures a tight fit and prevents separation of the two pieces. The silicone is flexible and resilient with both cold and hot liquids.I also run a very fine bead of silicone under the rolled edge of the insert OR on the flange of the blank. This provides a seal between the blank and the insert.
- Sources:
- Travel Mug Insert
- Rockler #27188
- (800) 279-4441
- Woodcraft Supplies #148542
- (800) 225-1153

Excellent. I've been utilising the Lifeventure Vacuum mug for some time now, but that's more suited to taking a hot drink to your destination, sitting down and drinking it in one go. If you're travelling on the bus or train it's a real faff to constantly unscrew the Lifeventure mug lid, deal with the resulting condensation drip, take a sip (and only a sip because invariably the metal rim of the mug is much too hot) and screw the lid back on - and then only IF you are able to screw it back on correctly, the Lifeventure mug lid threads are likely to do their very own thing over time. Both mine and my girlfriends have almost created new paths in the plastic thread, and it can be hugely frustrating and time-consuming hoping to get the lid back on properly! Obviously, you'll only learn you didn't have it back on properly when you realise it returned into your bag or pocket and leaked That's not to imply the Lifeventure mug isn't good - but it's more suitable for camping or hiking I think. So we were buying similar double-walled design mug with a better lid that's more suitable for drinking from on the go. The 720° mug up to now has been excellent. The inner wall looks only a little thinner and shinier (cheaper looking?) than the Lifeventure mug, but that is clearly a small quibble. I enjoy the overall look of the mug and the truth that you can sip from any the main top is great. It keeps your tea or coffee super-hot too and for quite a while! So far it's only been in my jacket pocket so I can't vouch for how leak proof it's, at some stage I'll keep it in my own bag to try The bottom line is, a bit pricey but ultimately it will pay for itself if you're buying your coffee out and about, most places now offer a discount for using your own mug. I bought two of those blind, based purely on positive reviews and I'm really pleased with the purchase, I would definitely buy again. UPDATE. A while on, and everyday use, the most effective edge of the outer plastic/paint material is coming away. Only on that area though. I have dropped it numerous times and the coating is coming away in those areas too, but that's to be expected where dropped. But top of the edge, all over? Is just a bit of a mystery. The Black one my partner uses is completely fine. Would the maker care to comment I
I also use router bits designed for making cedar strip canoes, which cut a bull nose on one side of a stave and a cove on the other side. They work well for making mugs, and you can use stock around 1/4 inch thick. As I glue them up, I wrap them around a solid cylinder of the inside diameter that I want, holding them in place with elastic bands. Glue the base and handle, seal, and enjoy.
Like presentation of different lathe projects to view. Presently doing some epoxy resin castings to turn on lathe.Anything available on these type of turnings would like to view. THANKS
I have made 6 of the wooden coffee mugs. 8 pieces, 120 mm long, 19 x 37 mm. Sides cut at 22..5 deg. Cut on my table saw with fence set at 22.5 deg using a 100 tooth blade. I glue all 8 piece same time and I use 3 x 100 mm hose clamps I always leave 24 hrs for glue to set. I use native local West Austraalia hardwoods, Jarrah an sheoak I use polyurethane glue but light waterspray inside to set glue faster but I leave in clamps for 24 hrs to set. I obtain my coffee mug stainless steel inserts from China. So much cheaper.
Awesome project, makes me want a lathe even more now.
[…] a cup, mug, or scoop featuring a smaller opening, simply drill the opening and use the bandsaw to cut the […]
like the cups
very very god detail
what about using a birds mouth bit. it would make nicer fit and easier to build.
I've always wanted to make one of these mugs but, given that it has to be washed, I'm not sure how to finish the wood to protect it. I'd appreciate any comments you might have!