The Cajon (pronounced ka-hone’) is a wooden percussion instrument that is simple to make, can be played as a fair substitute for a full trap set, and is used by professional musicians to deliver a full, rich sound in studio or live performance venues. This style drum has been around for hundreds of years and can be built by most woodworkers with basic tools and skills.
To help us get up to speed on the nuances of producing high-quality sound in a Cajon, I consulted with Joe Cruz, a veteran Cajon designer and builder from Minnesota who has built Cajons for many professional and amateur musicians. Joe has been refining his Cajon design for about a decade, and he was willing to share his secrets for those of us who want to take a crack at building our own. Joe even provided his personal scale drawing to simplify the building process if you want to take this on.
If you are still not convinced, click here to see a video of Joe playing a Cajon that he built.
 Joe is a well known professional musician in the Minneapolis/St. Paul area, skilled on stringed as well as percussion instruments. He is also an accomplished woodworker, with a stellar portfolio of furniture as well as turned pieces.
When he started building Cajons, he found it to be a great way to mingle his music and woodworking passions into a single project. Since building that first Cajon, he has continued to hone the design to achieve a richer sound, experimenting with materials and even incorporating a snare into the design (this is cool!).
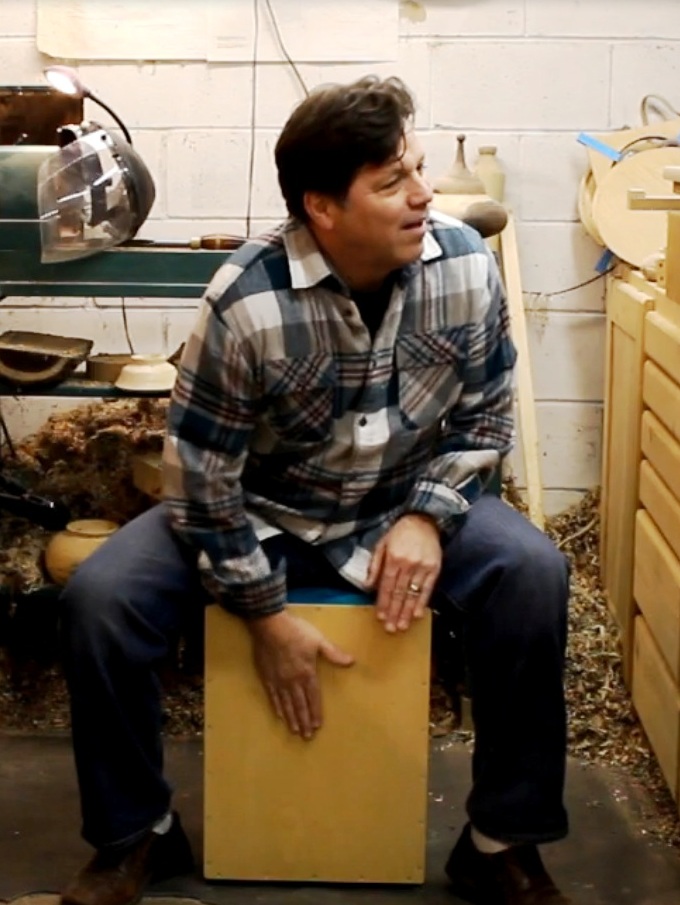
Don’t be fooled by the modest appearance of these drums. These relatively simple boxes deliver professional-sounding percussions, suitable for a variety of performance and studio environments. Cruz said; “When I work in small venues where it is not practical to bring in a full set of drums, the Cajon allows me to produce nearly any sound I need while requiring very little space. In fact, since it also serves as my chair, it doesn’t really require any additional space. It is also not as loud as a traditional trap set, so it serves as a way to scale back the volume for quieter venues. Mostly, I love the unique, rich sound, and the portability and versatility of the Cajon”.

Tips for making a Cajon
The Cajon can be built to a size that makes it ideal for the person using it. Because you sit on it while playing, the dimensions should provide a comfortable sitting platform for the intended drummer. Joe finds that the dimensions provided in his drawing produce a comfortable Cajon for most people, but obviously the dimensions can be adjusted as you see fit. The larger you build it, the lower the frequencies it will produce.
How to Build a Cajon Overview
You essentially will be building a big six sided box with a hole in it. First use rabbet joints to attach the sides to the top and bottom. The back is then fastened into a rabbet that is milled in the back edge of the top, bottom and side panels, and the front is simply attached with screws placed into pre-drilled holes.
Square up the sides
Joe cuts the playing surface (front) to the specific size in his plan (see plan here), and he uses a clamp to pull the sides into alignment with the front prior to attaching.
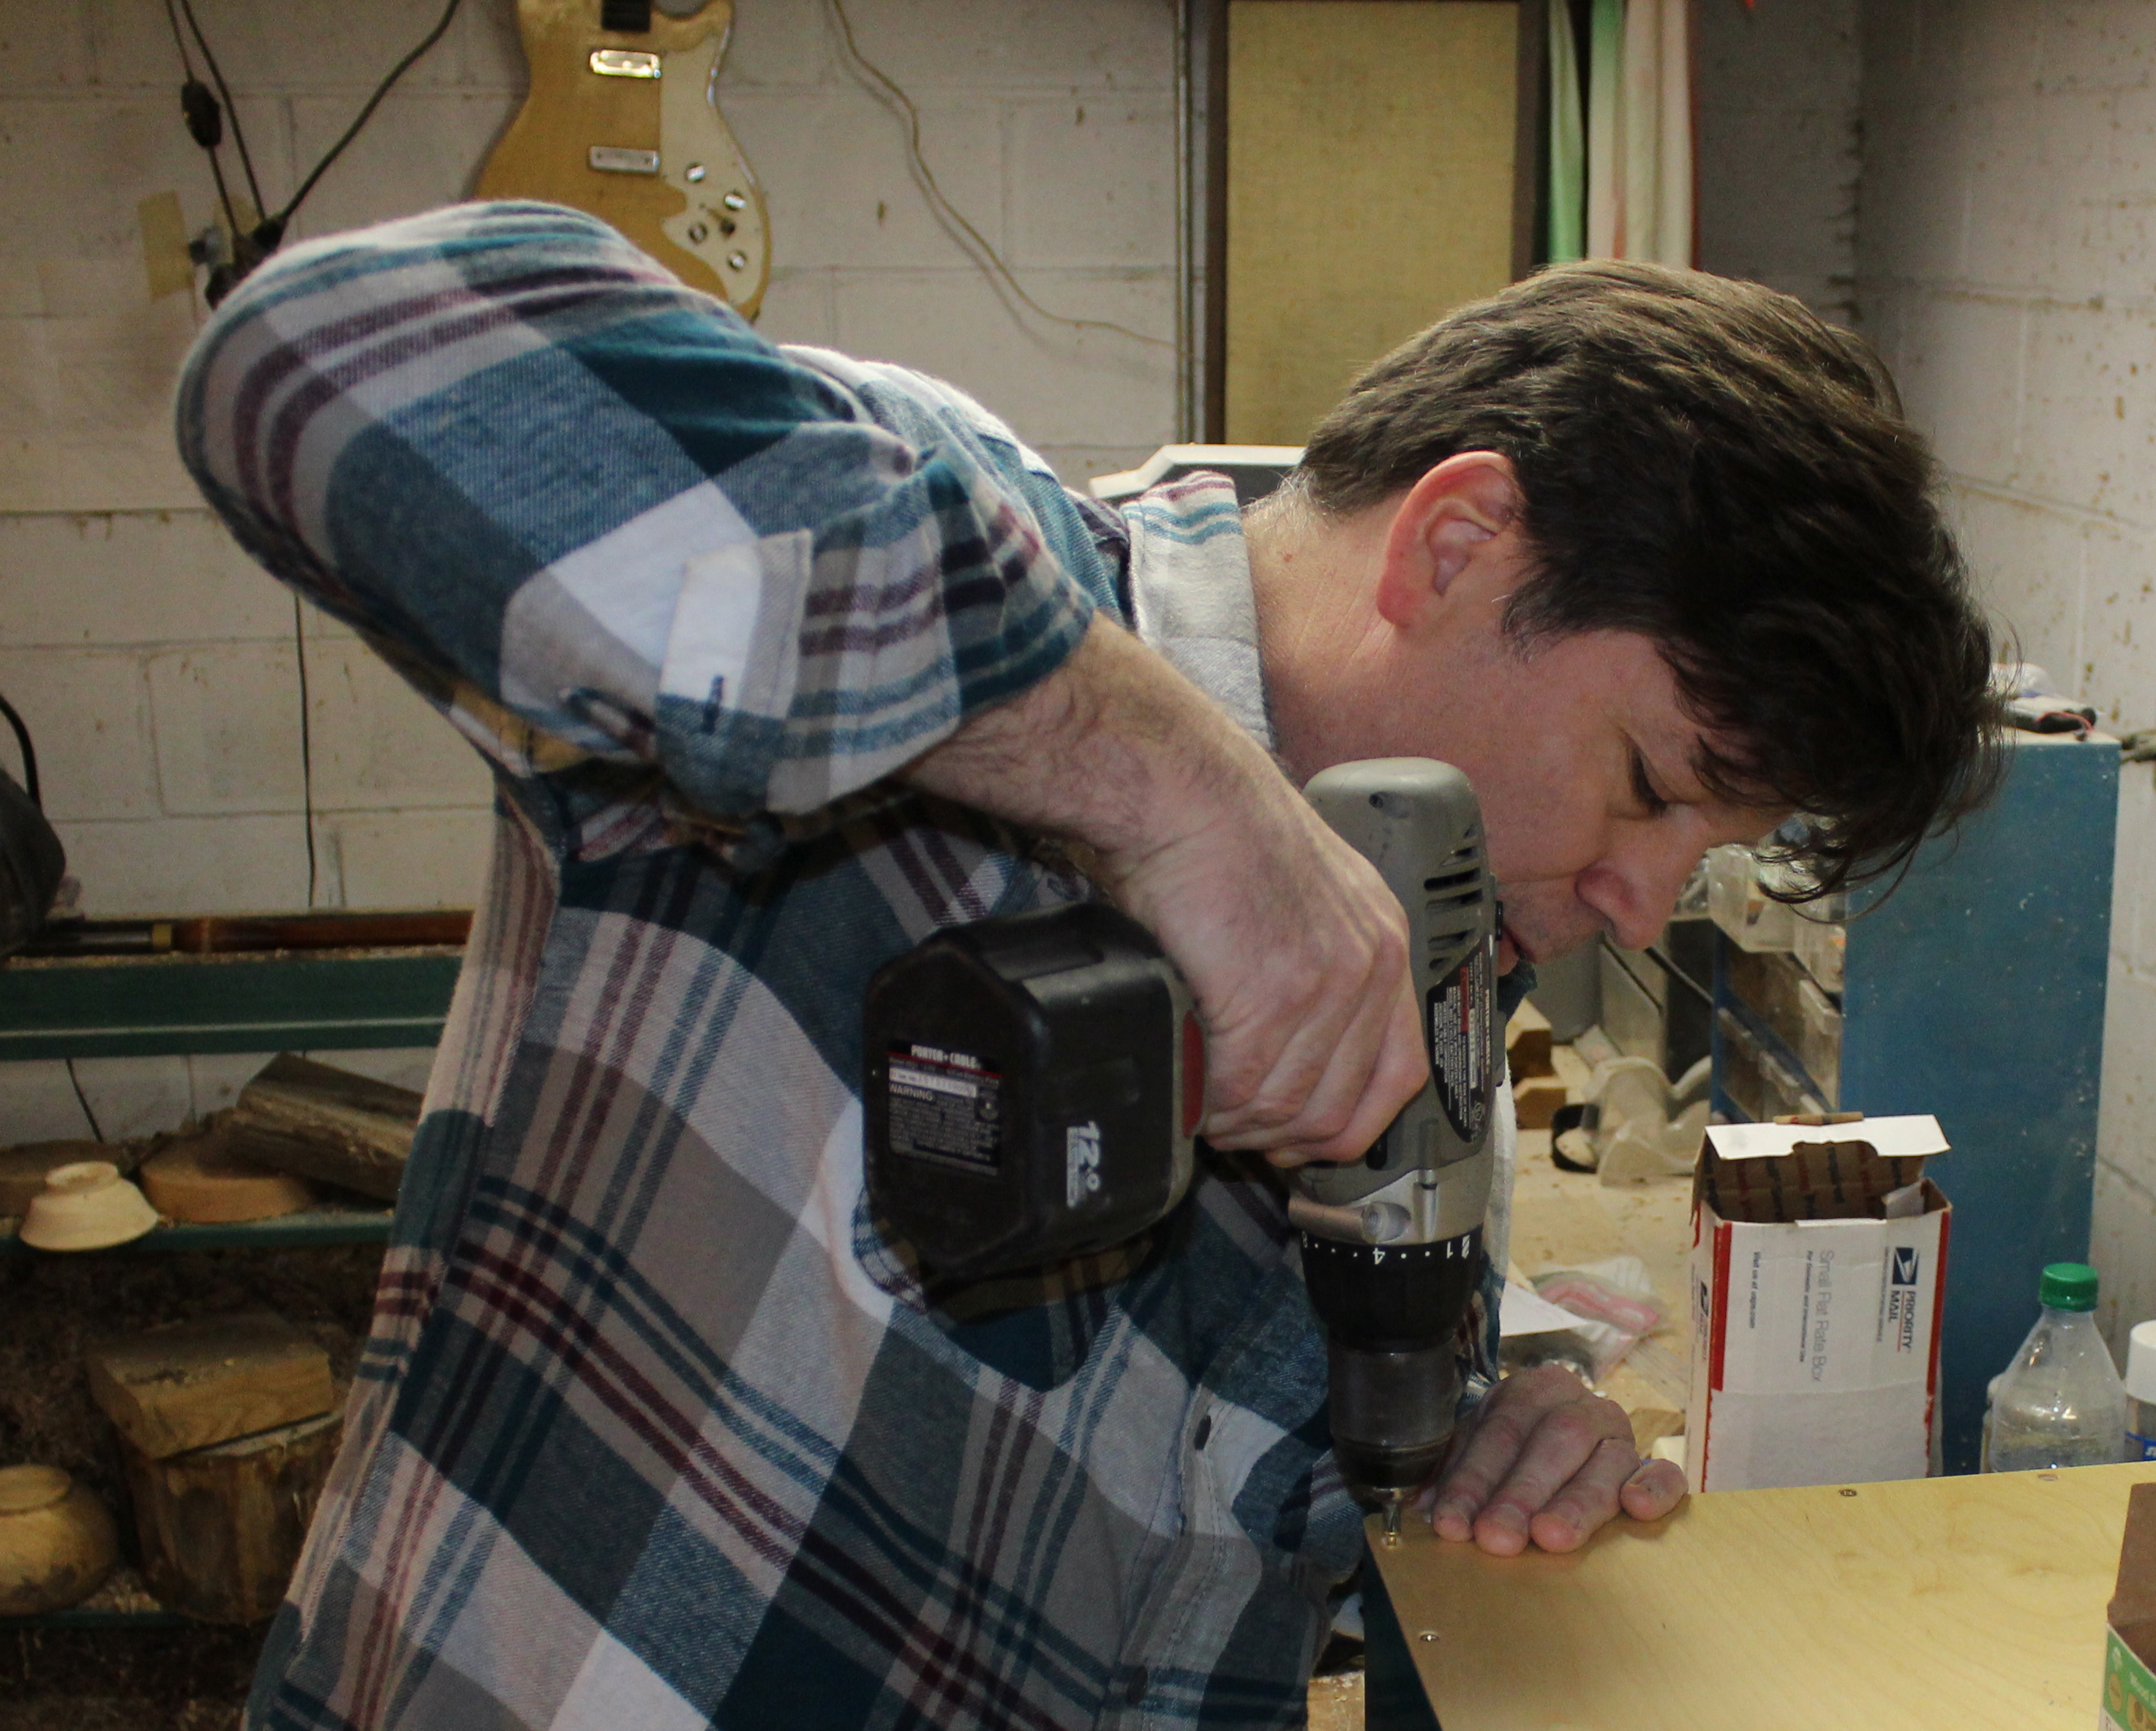
Attaching the front
Joe attaches the front with wood screws. This panel is visible while you are playing so you might want to use stainless steel or brass screws.
Let the top corners “slap”
Screws about every 3″, but at the top corners, leave about 4″-5″ with no screws. Leaving this gap creates a more powerful slapping sound when the drum face is struck.
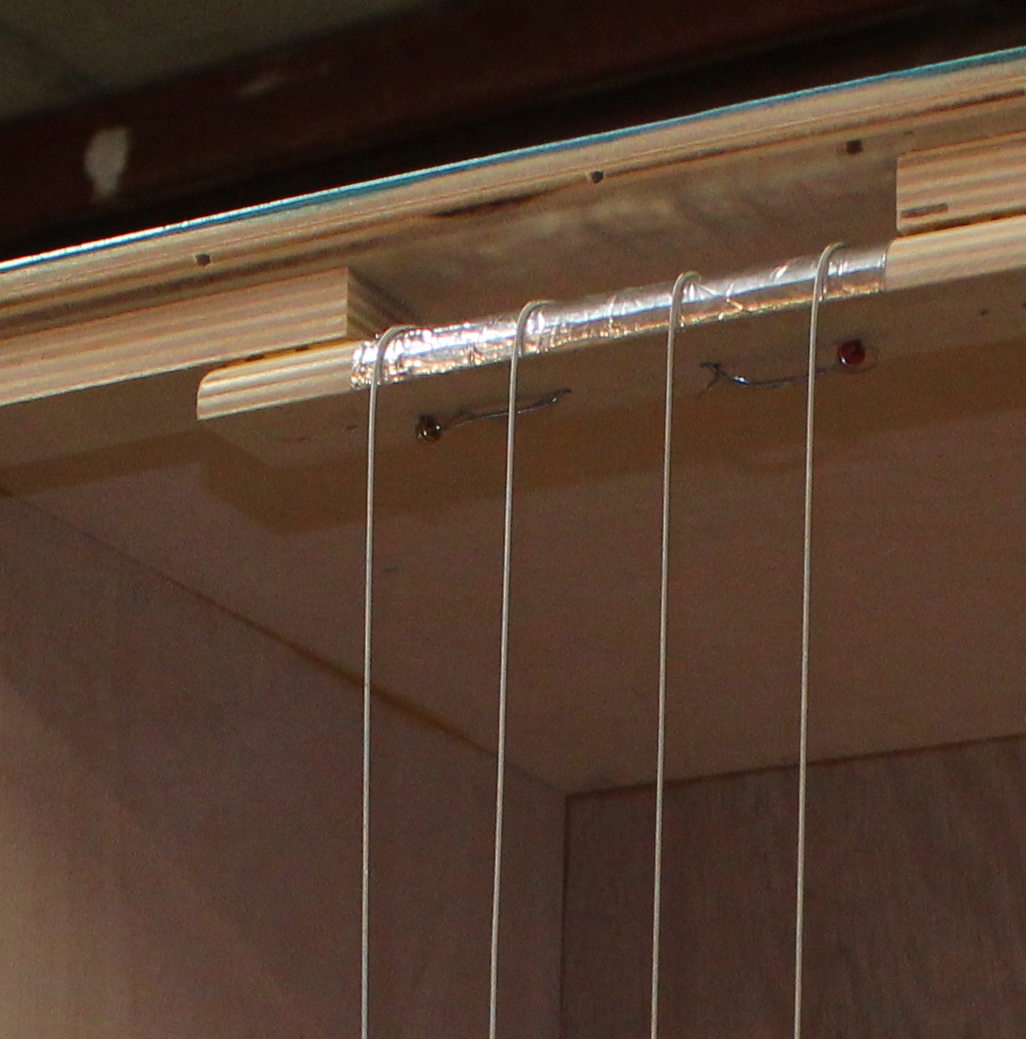
Built in snare
Many of Joe’s drums go out as strictly a drum, but some customers request a built in snare. If you want to attach a snare, you will simply attach guitar strings on the back side of the front head, stretching them so they are tight against the back panel. If you want to get fancy and allow their tension to be adjusted, there are several ways to do this. Joe has used guitar tuners, Hammered Dulcimer tuners or simple spring mechanism.

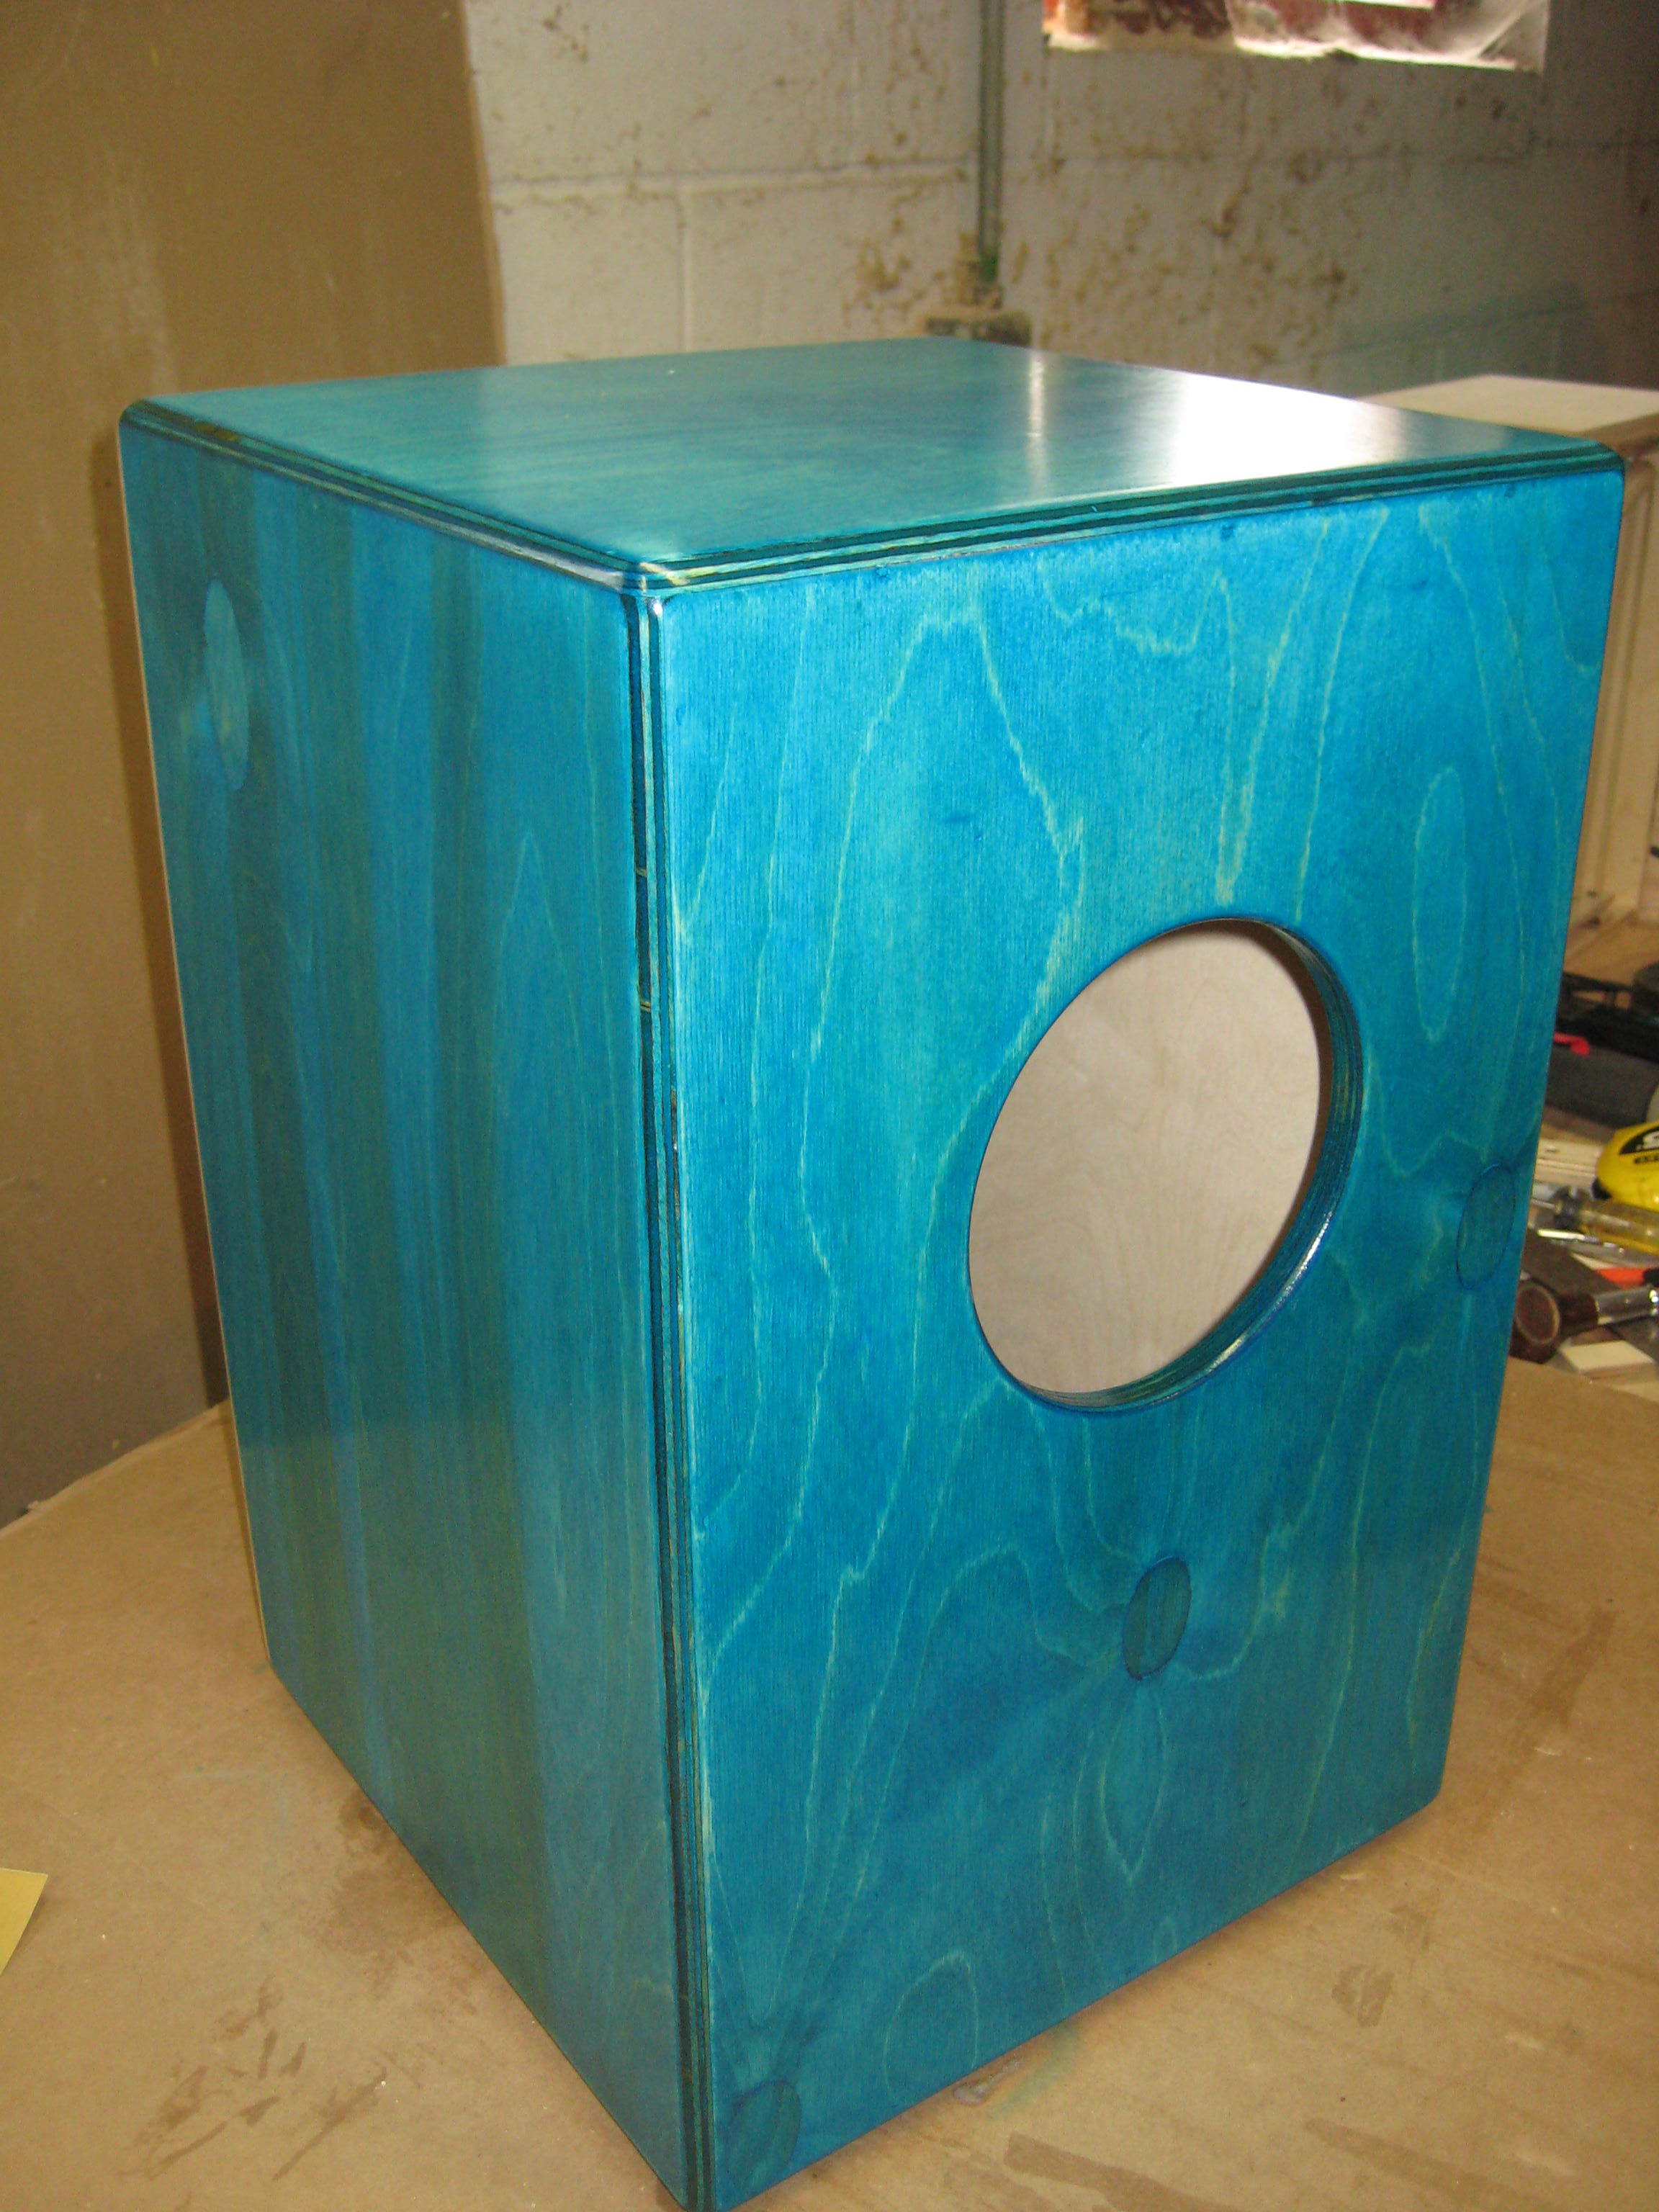
Sound port
4″- 5″ hole is milled in the back which will serve as a sound port. The hole is centered from left to right, and positioned 1/3 of the distance from the top to the floor. Some people prefer that this be milled into a side panel because that allows the back to be used as another playing surface, and because the back is made of a thinner material it produces a different sound.
Materials
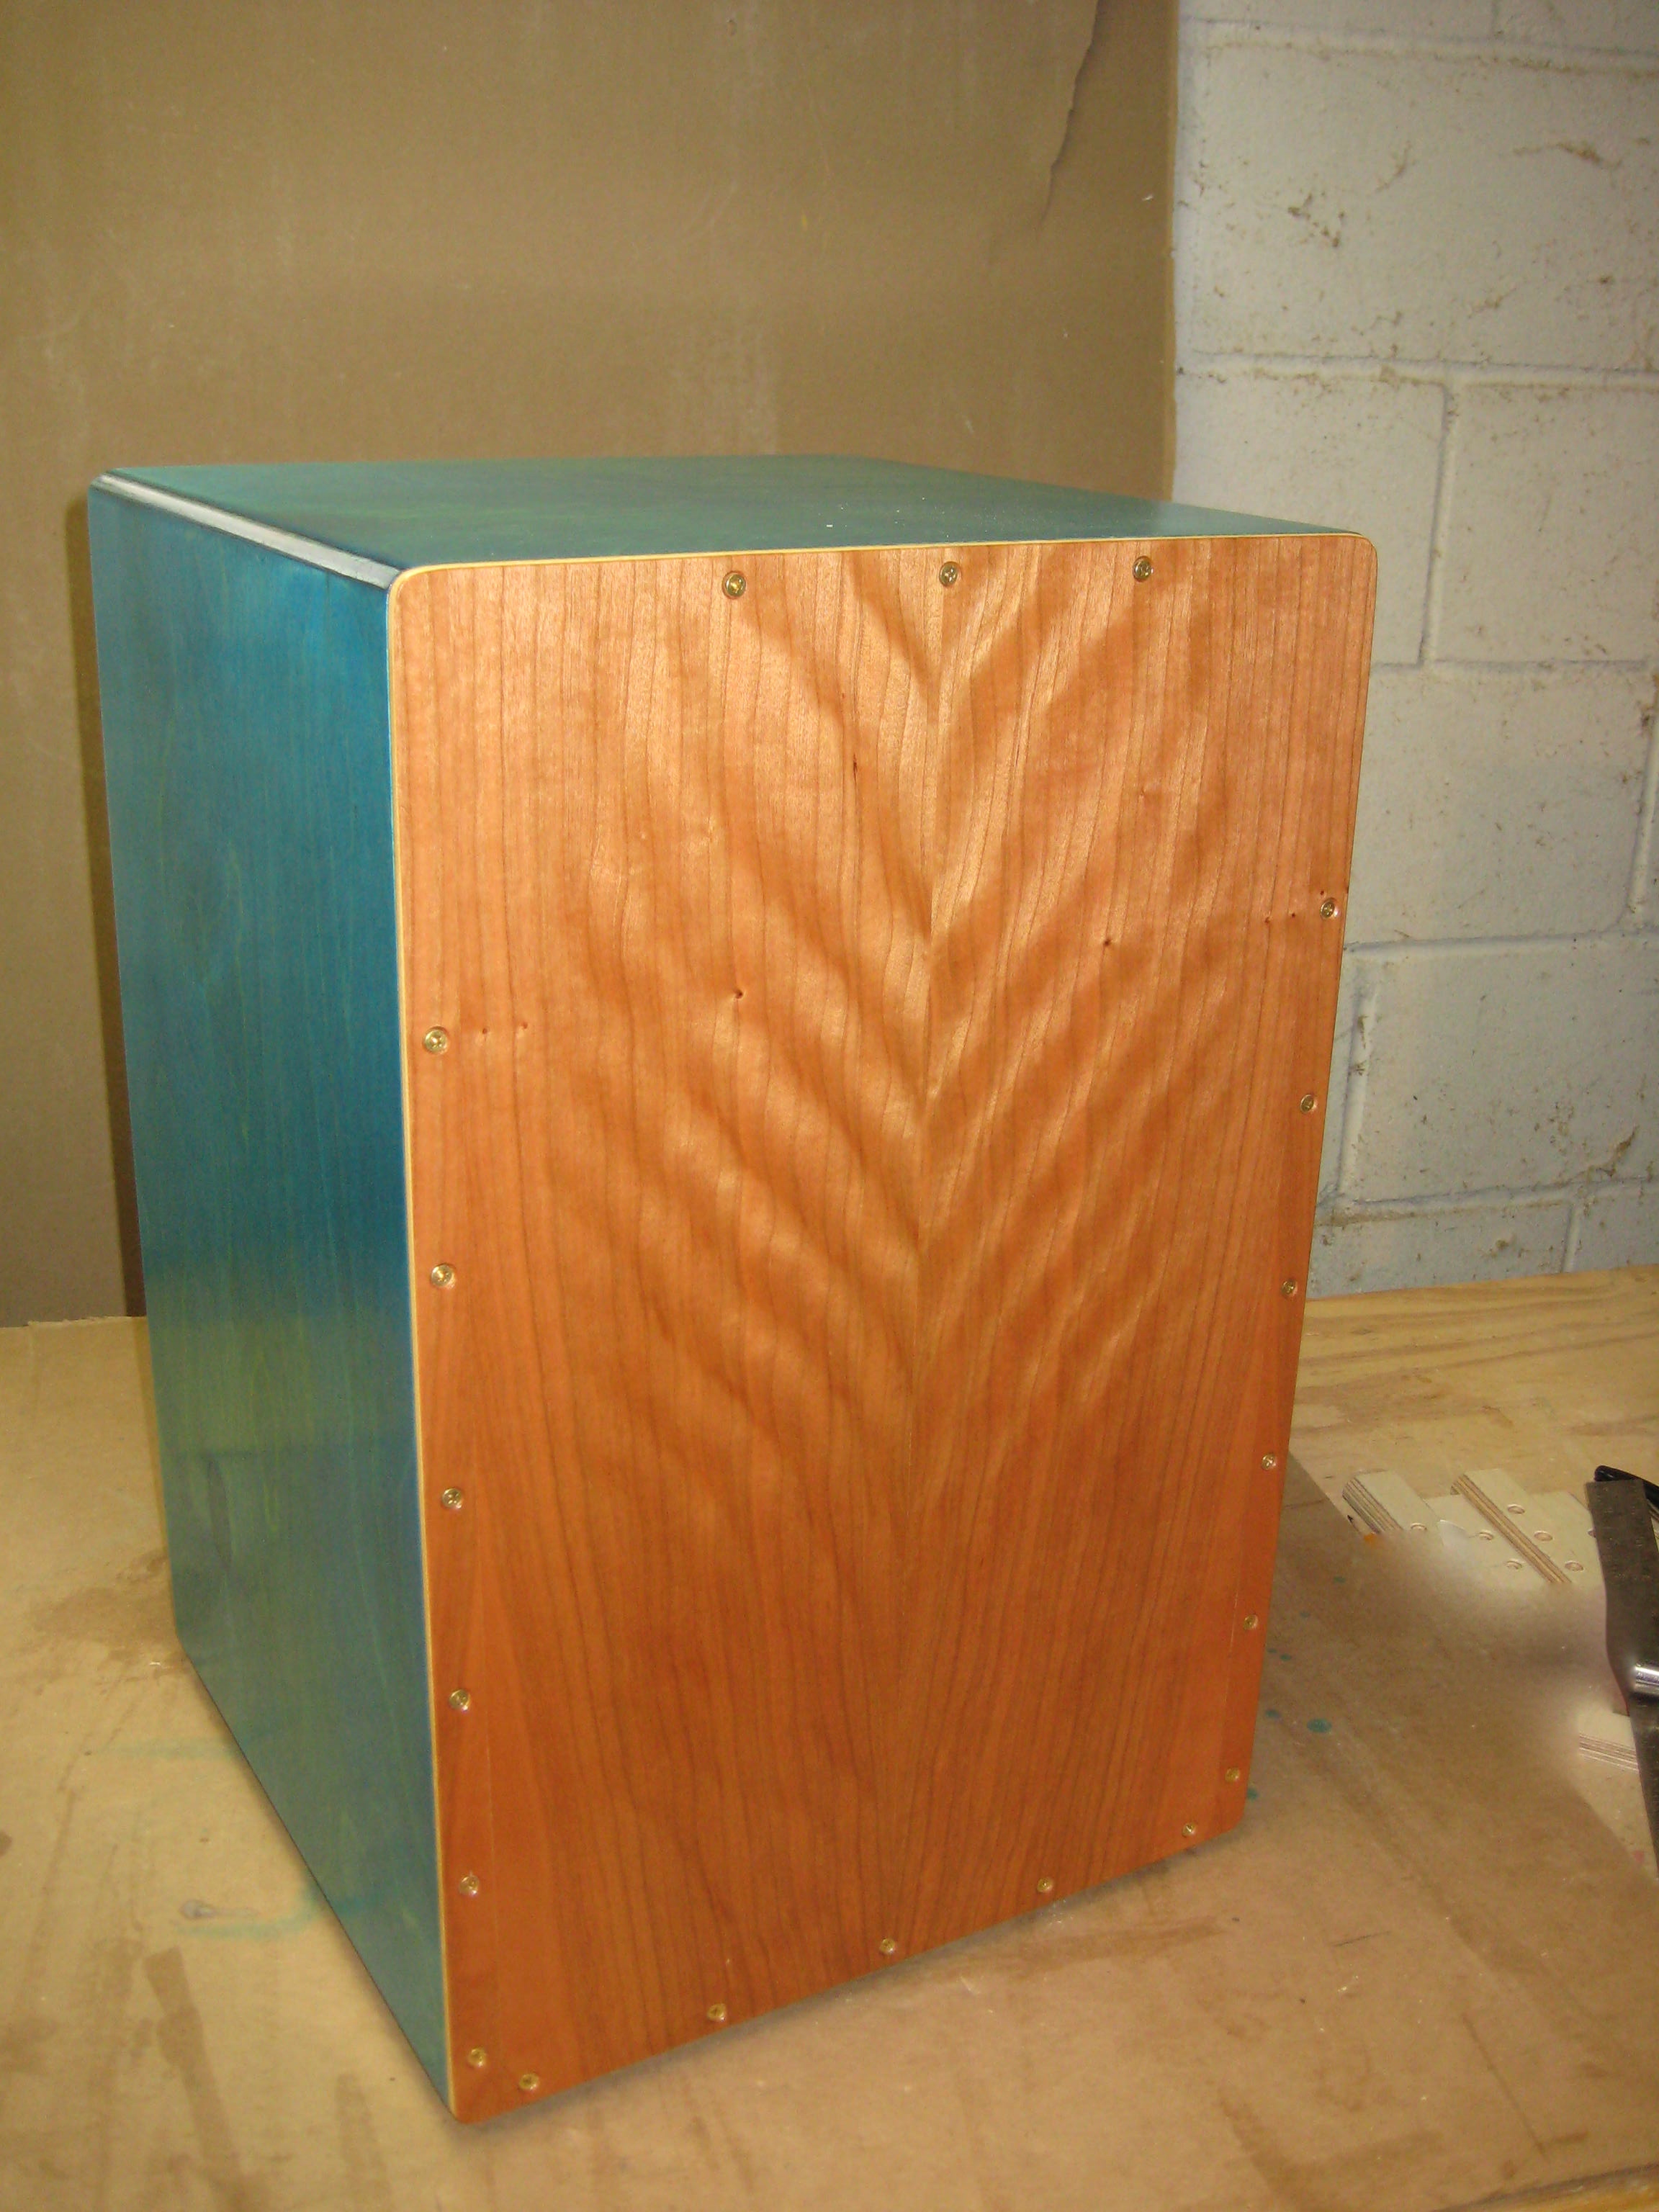
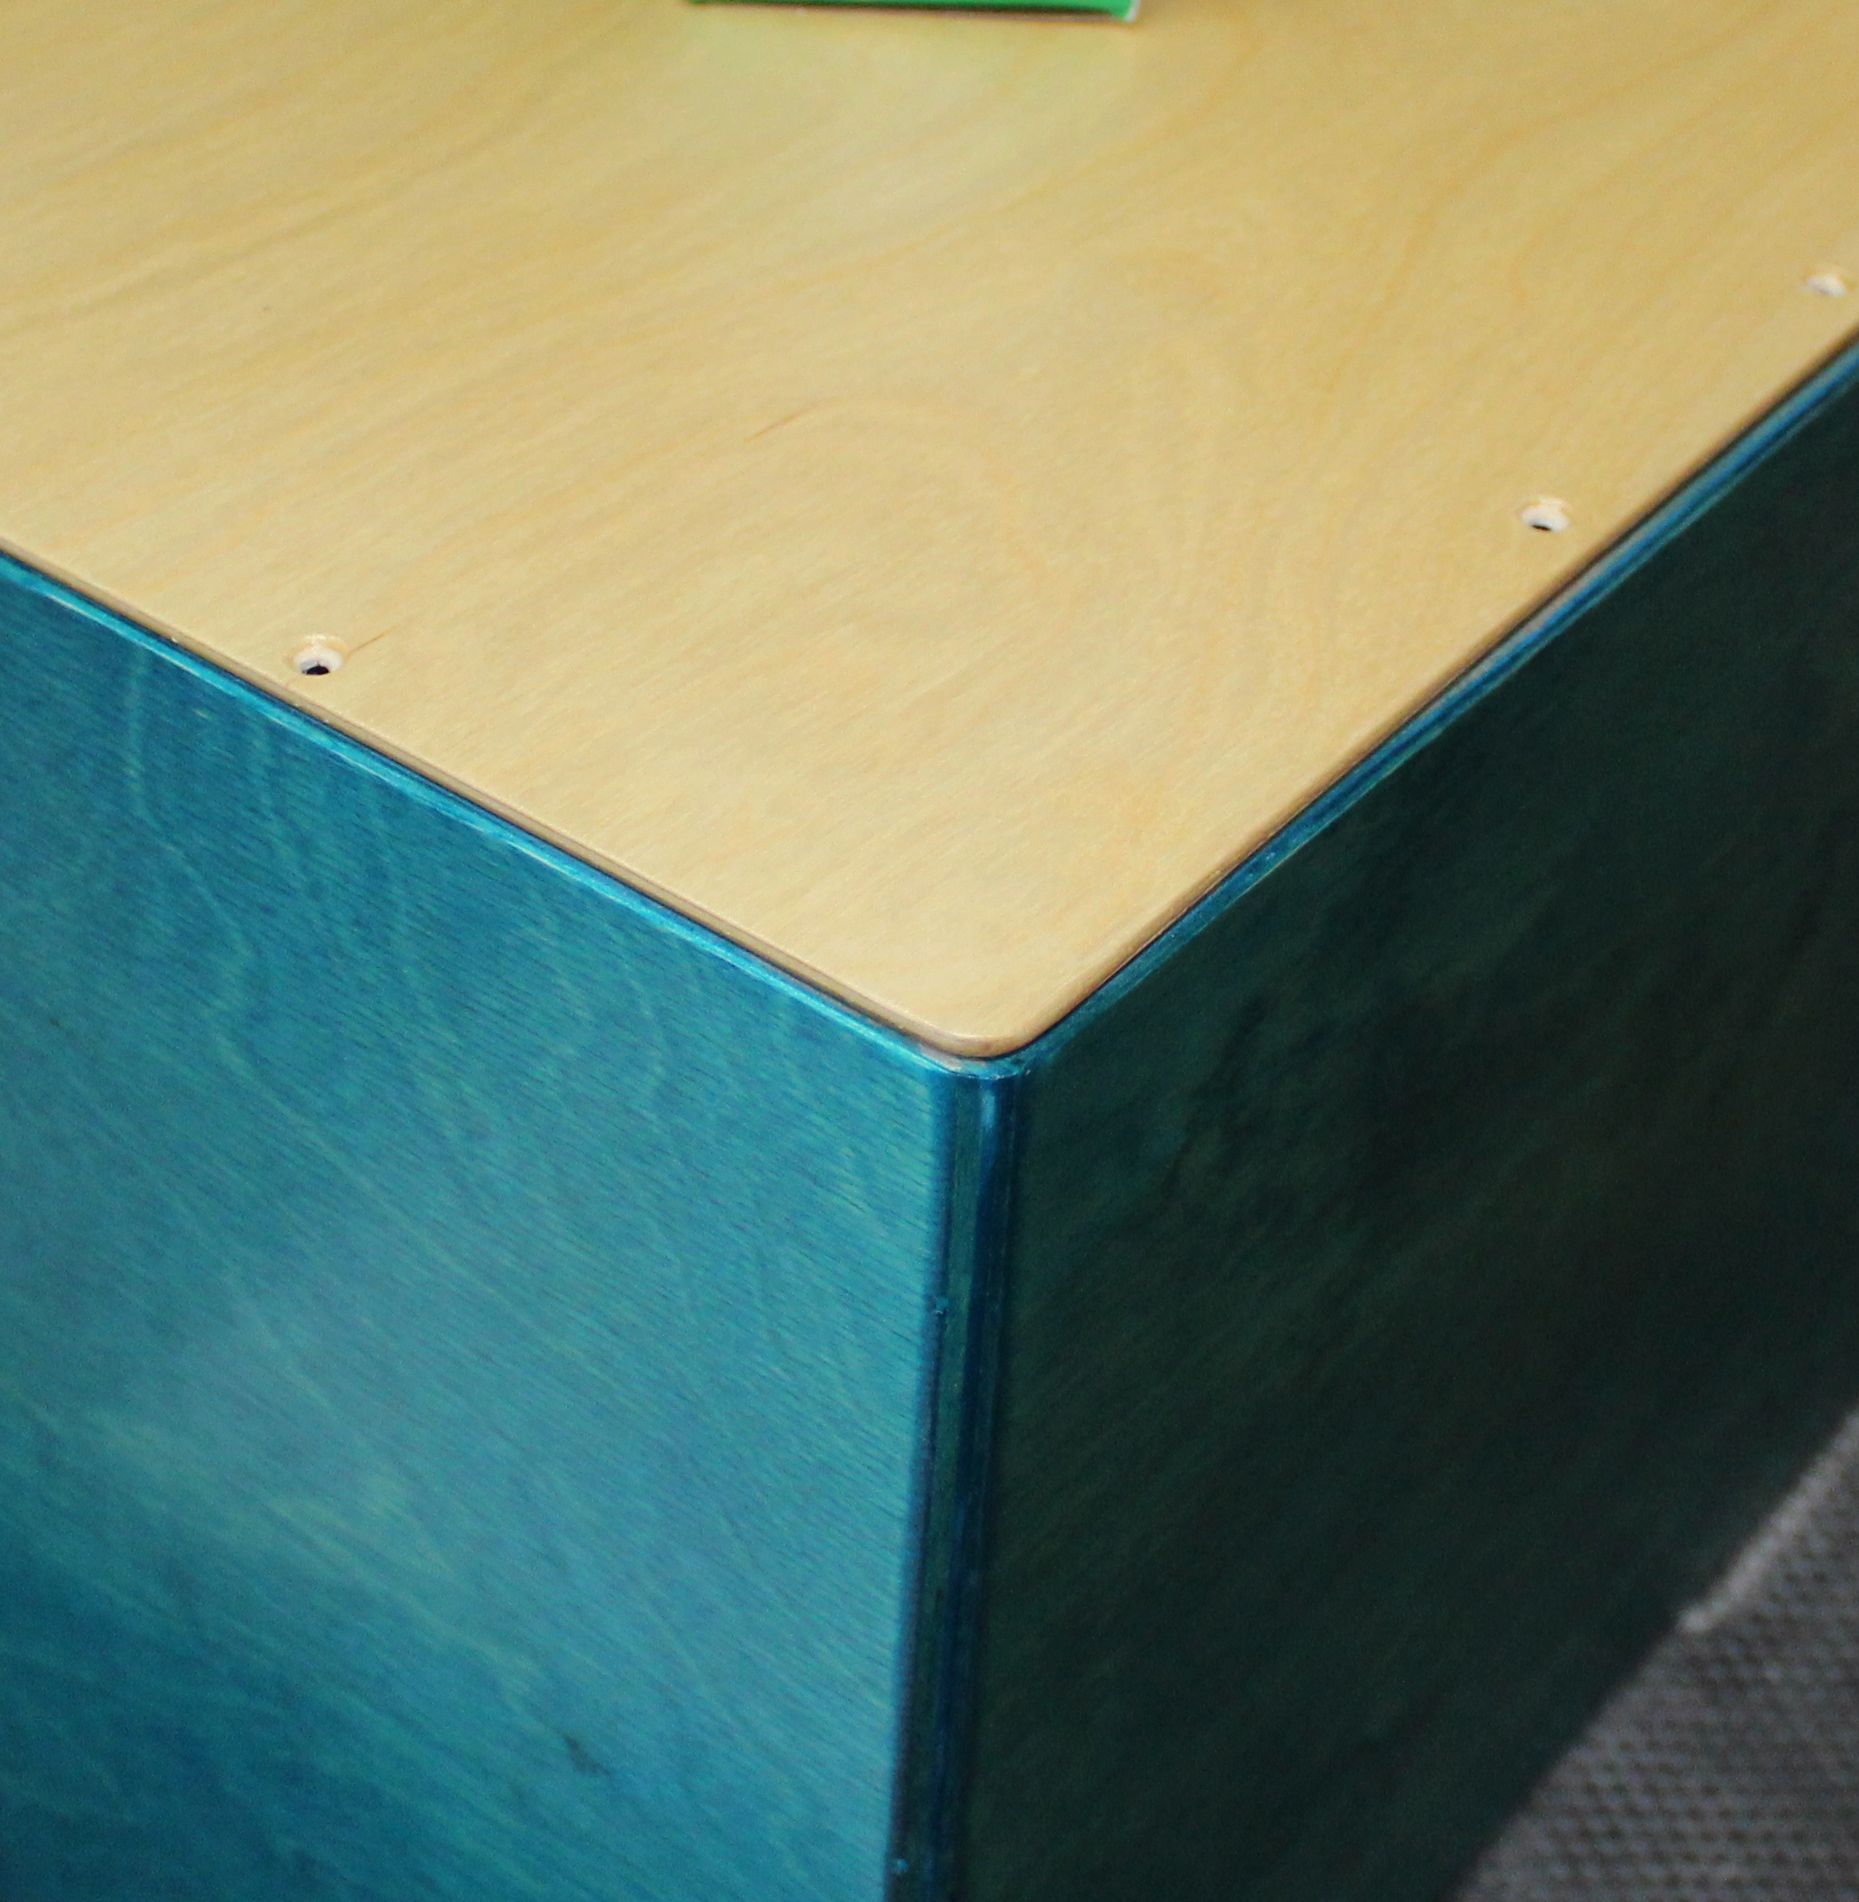
Joe prefers Baltic birch plywood for all components. The top, bottom and panels should use 1/2″ thick material, while the back which can use 1/4″ thick material to keep it lighter, and the front head is 1/8″ Baltic birch plywood. Baltic birch is a great choice for musical instruments as it is high quality plywood with no gaps, and it produces a clean sound with no unwanted vibration.Finish. Finishing is an important step for Cajons, as it serves to protect the instrument from some of the normal wear, and it can also help preserve the sound. Joe uses a wipe on poly on his drums and says “finishing the drum helps preserve the sound quality, as seasonal changes can alter the pitch and sound of the drum.”
The other finishing step that Joe takes is to apply turquoise dye to the body of the drum. While this step is purely aesthetic, it is the signature look of a ‘Joe Cruz Cajon’, so if you want to take this project ‘all the way’ you can make yours turquoise too.
A Few Final Tips for Building a Cajon
Joe provided some final suggestions for anyone who might be interested in building their own Cajon:
- When selecting the wood for the box, be sure to use straight wood, not warped wood.
- Joe likes to install rubber feet on the bottom of his Cajons because it saves the floor and drum from scratches.
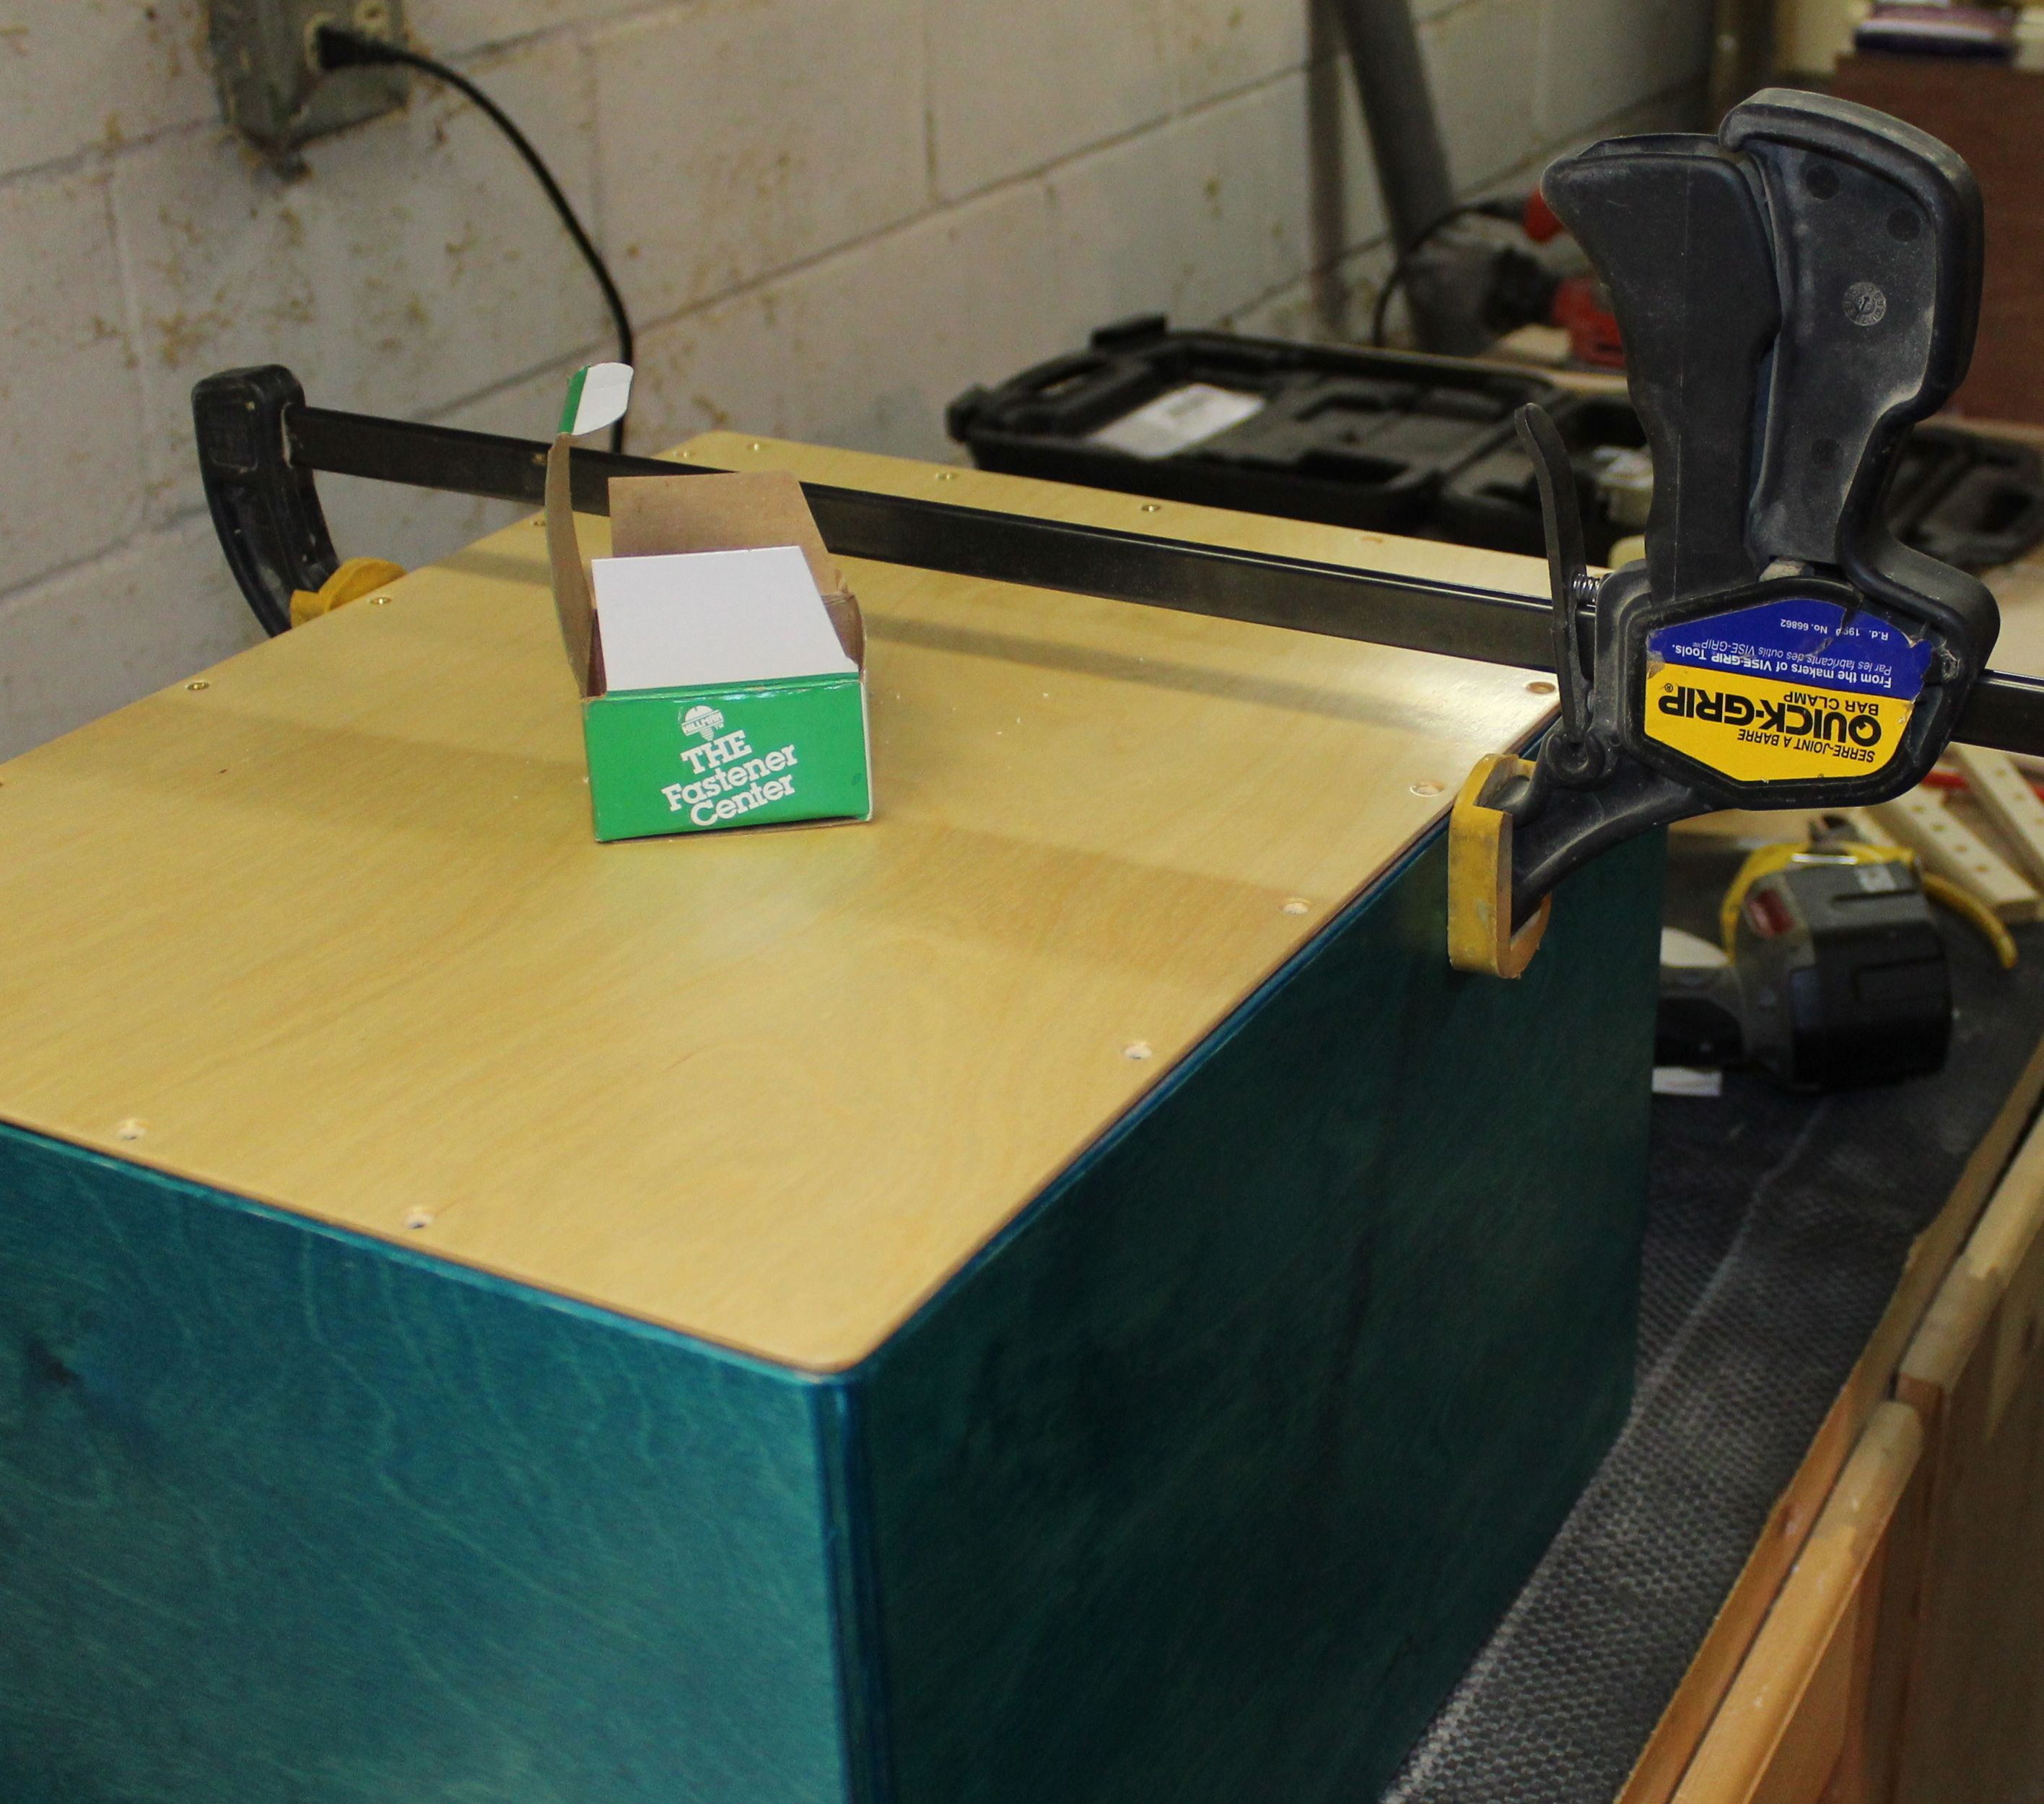
- Construct the box square, so the back and front fit well. Measure the diagonals carefully and be sure they are identical before the glue cures.
- When attaching the front head, if the 1/8″ plywood has a slight bow, attach the crown to the front edge (crown facing in), so the upper corners stick out slightly. This will give the corners more slap.
- After the front head is drilled and attached to the box, I trim it to the contour of the box using an edge trimming router bit.
- To get the upper corners to slap more (this gives a more lively sound), I stick a wedge in the upper corners between the head and the box, for a few days, which creates a slight gap between the front head and the box.
- Be aware of burning up hours playing your drum in your shop. It’s highly addictive, and now you have been given fair warning.
- Special thanks to Joe Cruz for sharing his secrets to building a high quality Cajon. You can learn more about Joe through his web site www.joecruzmusic.com.
Photos By Paul Mayer and Joe Cruz


I look forward to building this !
Does Joe create a special “roughed up” surface on the face of the cajone to give “sand block” sound, sorta like that beat up face of Tommy Emanuel’s acoustic guitar that he drags his fingers across?</strong>
hello all i can get in my Country is5.2 okume plywood will that work?
have played one, but will have my own soon!
look forward to making the instrument
look forward to playing
Just to let you know, the link finally works. You should tell people that it does not work in the Chrome browser. It now works in Safari and Firefox. However, before it did not work in any of them. You will continue to get complaints until you fix it for Chrome (arguably the most popular browser) or at least notify users not to use Chrome.
After 8 years there is still not a link included in the article, nor does any link in the comments section work. Brilliant WGOA! This could be considered a click bait article for views. 👏👏
As stated in Jan, this link has never worked. Do you really want this many people phoning in for help or can IT just fix the link? And yes I've tried every link in the article, hard and soft started and used four different browsers. If this has been a problem since "16" why are you putting it back up in a new email without working links? This all seems weird especially for members.
Anyone got plans for this box?