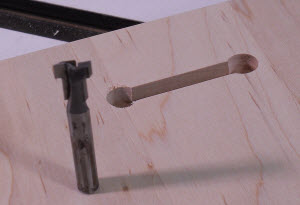
 If you're looking for a hardware-free way to hang picture frames or plaques on the wall, you need a keyhole router bit. Set up is simple, and results are great.When I make a picture frame or plaque, my preference for providing a way to hang it on the wall is to use a keyhole router bit. I like the fact that I don't need to go shopping for hanger hardware, and the slot provided by the keyhole bit allows the item to hang right against the wall, not stand off by the thickness of the hardware.
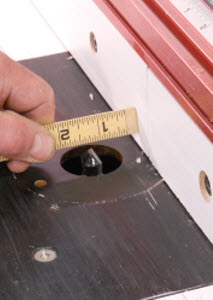 Router Table Set Up. Use a V-bit, not the keyhole cutter, to set up your router table.Measure from the point of the V-bit to the fence to locate the keyhole slot. I typically place the slot 1-1/4", on center, from the edge. Lock the fence in position.
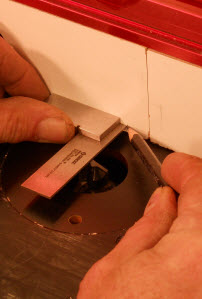 Use a square to transfer the location of the center of the bit to the face of the fence.
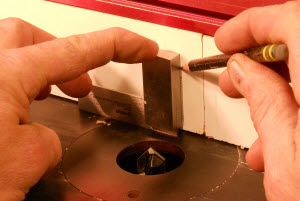 Square a line up the face of the fence, located on the mark you made in the previous step.
 Now you know where the center of the keyhole bit will be.
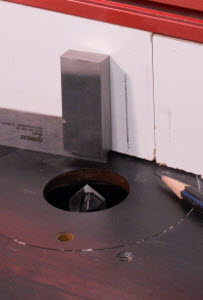
 The Keyhole Bit. Install the keyhole bit in the router table and set the height of the bit. Don't move the fence. For 3/4" stock I set the height of the bit to 1/4" from the table to the shoulder of the cutter. Set it lower for thinner material.
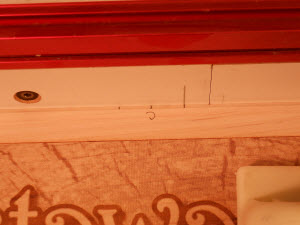
 Prepare the Material. Locate the center of the piece, then measure and mark 3/4" to each side of the center mark. The two outer lines will be the starting and stopping points of the keyhole cut.
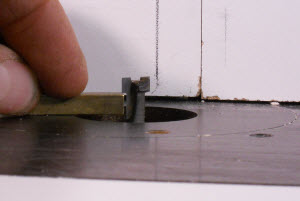
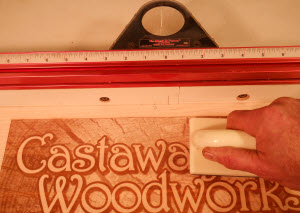
 Making the Cut. Turn on the router and position the edge of the plaque or frame against the fence, held above the cutter.
 Stop when the right layout mark is aligned with the cutter center line.The left layout mark on the plaque should be on the cutter center line.
 Plunge the plaque down on to the cutter and move right to left.
 Stop when the right layout mark is aligned with the cutter center line.
 Lift the plaque, pulling the spinning bit through the material.
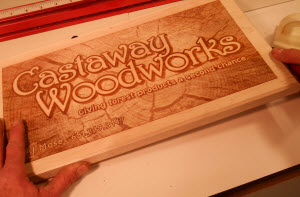
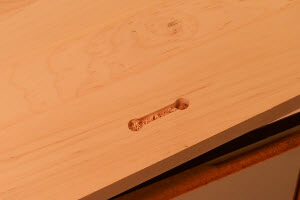 You've successfully produced a keyhole slot!
Photos By Author
Source:
Keyhole cutter
#3052
(800) 225-3982

George, the following makes no sense: "Stop when the right layout mark is aligned with the cutter center line. The left layout mark on the plaque should be on the cutter center line." Both marks cannot be on the center line. You must star on the left and end on the right.
To easily lift the plaque off of the spinning bit at the end of the cut. I place a thin tape at the right side of the plaque. Then at the end of the cut, I can easily lift the plaque off the bit.
I make the keyhole parallel to the top edge of whatever I'm hanging. Put the screw in the wall, engage the head on the back of your work, slide it left and right until it hangs straight, and you're set.
wouldn't you want the key hole cut to be perpendicular to the item you're hanging?