Few pieces of furniture get more abuse than a chair. That’s because chairs have to solve two contradictory problems; they must be light enough to be mobile but strong enough to hold the shifting weight of its occupant. Light joints, big loads and constant movement add up to a lot of wear and tear on chair joints. Its no wonder chairs are the most common repair item brought into my shop. Chances are, if you are a woodworker, you’ve been asked to fix loose joints on a chair, too. This article will show you how to do it right.
I cringe when I think of the first chair I repaired. I thought loose joints just needed a healthy dose of PVA glue and a little clamp pressure. The chair seemed good and strong when I was done but within a few months, the joints had come loose again. A little research and some lessons from a professional restorer taught me that my approach, though well intentioned, was completely wrong.
 Most chairs built before 1950 were put together with hot hide glue. The beauty of hide glue is that it is completely reversible. That allows you to reactivate the glue with a little water making repairs simple. PVA glue just messes things up.
Both PVA glue and hide glue work by soaking into the wood fiber. The problem with using PVA glue to fix hide glue joints assembled is that the cured hide glue acts as a sealer and keeps the new glue from properly penetrating the wood fibers. Yes, the water in the PVA glue will help reactivate the hide glue and possibly allow for some wood fiber saturation, but the joint will not have the strong glue bond it needs to withstand Uncle Henry shifting around in his chair at Thanksgiving. And worst of all, PVA glue is not reversible, making future repair work difficult.
In this article I will concentrate on how to repair joints that are structurally sound, but loose. I will show you how to fix broken dowels, clean off the inevitable PVA glue from previous repair attempts plus some basic strategies I’ve learned over the years to keep you out of trouble and guarantee a successful repair.
Let’s get started.
TOOLS NEEDED FOR CHAIR REPAIR
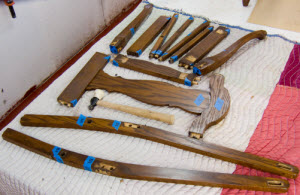
 These are my standard go-to tools for chair repair work. My wife says it looks like a Civil War surgeon’s field kit. I choose to take that as a compliment. You’ll see all these tools employed throughout this repair procedure. I always cover my bench with a moving blanket to protect the furniture parts.
HOW TO REPAIR A CHAIR STEP BY STEP
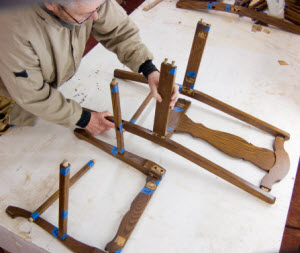
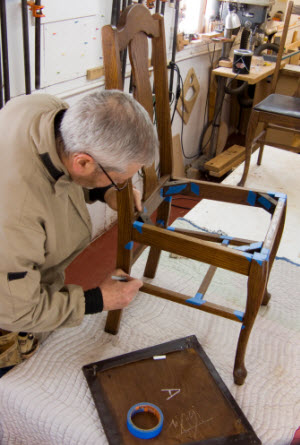 First, mark the joints for easy re-assembly. Chairs have a lot of parts and weird angles. Putting the chair back together without a road map is a frustrating, time-consuming activity you’ll only do once. I use painter’s tape designed for delicate surfaces and mark the joints with letters. When it’s time for reassembly, all I have to do is match up the letters. Even the glue blocks get marked.
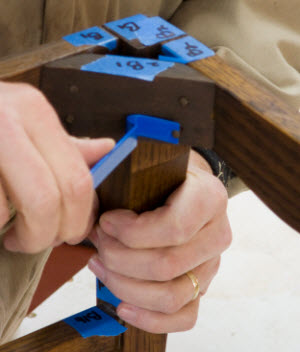 Remove all the fasteners. A mini-pry bar is just the ticket for tight spots like this.
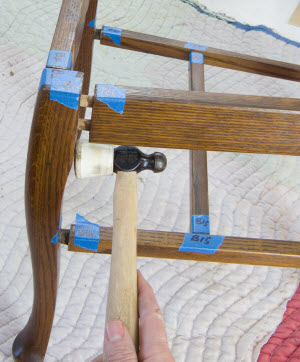 Knock the chair apart one section at a time with a rubber tipped mallet. Chairs generally consist of three sections: the front leg assembly, the rear leg or back assembly plus the stretchers and seat rails that connect the two. The joints on this chair came apart easily. For the joint that doesn’t want to give up, you may need hot water.
Tip: A rubber cane tip turns an ordinary hammer into a rubber mallet.
 A needle point glue injector is the perfect tool for getting hot water into stubborn joints. Denatured alcohol works as well, but I prefer hot water because it does not evaporate as fast, has no odor and is less likely to affect the surrounding finish. I use my glue pot heater to warm the water to 140-degrees, before I fill the bottle. A hot plate with a double boiler works as well.
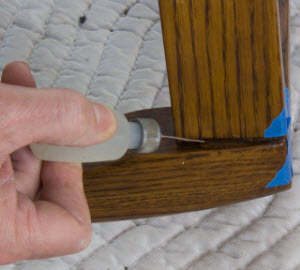 Squirt some hot water into a stubborn joint. Even if the joint is tight, the water will seep in through capillary action. Be patient and let the water work. You don’t want to break the joint in order to get it apart.
Important: If a joint is solid i.e., it won’t come apart with a few sharp blows from a mallet, I usually leave it alone. However, there are times when you need a joint to come apart in order to get at other joints that are loose. That’s when I reach for my needle point glue injector. (By the way, I have yet to use the glue injector to inject glue.)
 All the king’s horses and all the king’s men didn’t have painter’s tape and a Sharpie. Despite the previous repairs with yellow glue, this chair came apart easily. Unfortunately, the yellow glue I found in some of the joints meant more work was ahead before I could put Humpty-Dumpty together again.
Note: The back slat joints were sound so those joints were not taken apart.
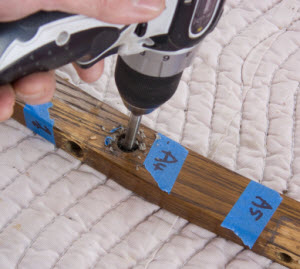
 A bit and brace works great to clean old glue from the mortise bottoms. You want to free up that space for glue overflow when you reassemble. Be sure to soak the mortise with hot water first to soften the glue. If yellow glue has been used on the joint, switch to a hot vinegar solution to help soften the glue. I prefer the brace over a power drill because it gives me complete control without the risk of a bit catch enlarging the hole. Select a bit that exactly matches the mortise diameter and use the mortise sides to guide the bit. If the mortise sides are not clean enough to guide the bit, use a Forstner bit (see below).
Tip: Old sock tops pad the hand clamp used to secure the chair leg for drilling.
 Use a Forstner bit if the mortise sides have chunks of glue and wood stuck to it. A Forstner bit has a flat bottom making it a prudent choice if the screw lead on an auger bit would penetrate the part before cleaning out the mortise bottom.
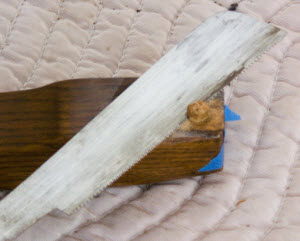 Cut off any broken dowels with a flush cut saw.
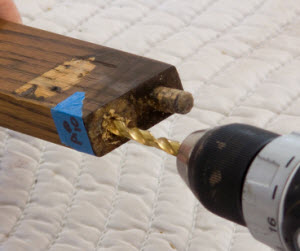
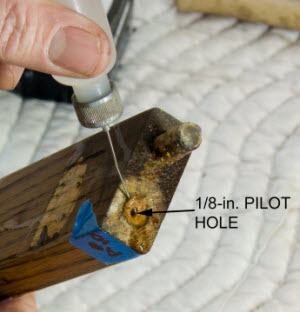 Drill a pilot hole through the center of the broken dowel. Inject the joint with hot water using a needlepoint glue injector. Let the joint soak for an hour or so and keep it filled with hot water. Dowels that aren’t loose, like the one above the broken dowel, can be left alone.
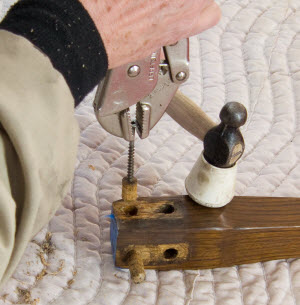 Thread a #10 screw into the pilot hole. Grab the screw with a vise grip and give the part a whack with a rubber mallet. In cross grain situations like the one shown here, the dowel will often pop free.
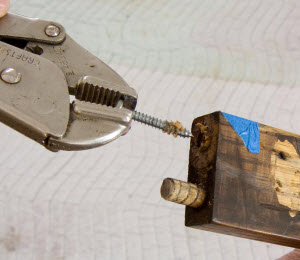 Some dowels just won’t give up their grip. When a dowel is set parallel to the grain as it is here, the joint is stronger than a cross-grain joint. Sometimes, the screw will strip out of the hole leaving the dowel behind. Rats!
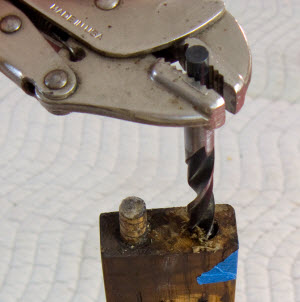
 Ream out the dowel with a twist bit. Choose a bit at least 1/16-in. smaller than the dowel to avoid damaging the mortise sides. Fill the hole with more hot water after the hole is drilled and let sit.
 Dig out the remaining dowel parts from the top of the mortise with a narrow knife. Take care not to enlarge the hole.
 Use a twist bit equal to the dowel diameter to finish cleaning out the mortise. I use a vise grip to hold the bit and ream by hand. If you choose to use a power drill, run the bit backwards to avoid a catch that could enlarge the hole.
Note: Square mortises are cleaned in much the same way as round ones. First, soak the mortise with hot water (use vinegar to soften PVA or yellow glue). Then shave the softened glue with a chisel. Use an undersized drill bit to get the dried glue out of the bottom of the mortise. Take care not to contact the mortise sides.
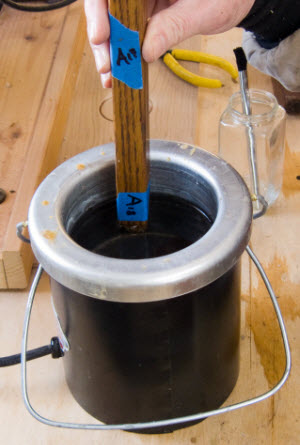 Now that the mortises are clean and broken dowels removed, it’s time to turn our attention to the tenons. Dip the tenon in the hot water bath. Hold for a few seconds then remove to inspect.
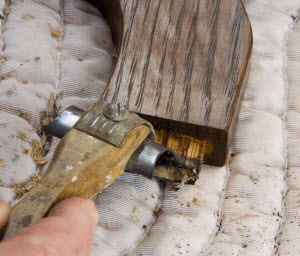
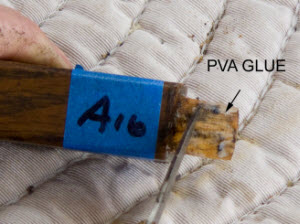 Scrape away any PVA glue that will show itself as a whitish residue. Hide glue will simply soften and turn tacky with the hot water. Typically, the PVA glue sits on top of the old hide glue and comes off easily. If the PVA glue is stuck fast, try switching to vinegar instead of water to soften the glue. Be careful not to scrape away the wood. You don’t want to make the tenon smaller. A brass brush is handy for removing the smaller bits of glue.
 Scrape square tenons clean of PVA glue with a small paint scraper.
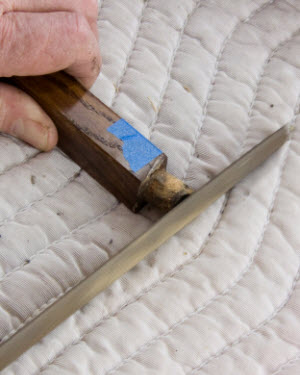 File off any excess glue stuck to tenon ends.
CHAIR REPAIR: TIME TO REASSEMBLE
 Dry fit the cleaned up and repaired chair. Don’t skip this step. It takes very little time and gives you a heads up on any problem areas you may have missed. Better now than in the middle of a glue up. (Remember, glue up rhymes with screw up.) Once assembled, practice setting clamps. Chairs can be tricky to clamp with all the angles and shapes. A dress rehearsal is a good idea before tackling the real thing. You don’t want the glue to set while you struggle with clamping strategies.
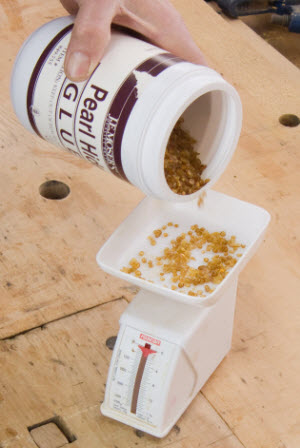 When reassembling with hide glue, weigh out the glue you need as per instructions on the jar. A kitchen scale works great for small quantities like this. A couple ounces worth of dry glue is plenty for a typical chair. Don’t skimp. Even though leftover hot hide glue won’t keep, you don’t want to be caught short before your chair is assembled. Put the measured glue in a glass jar and add water. Let the mixture soak for an hour.
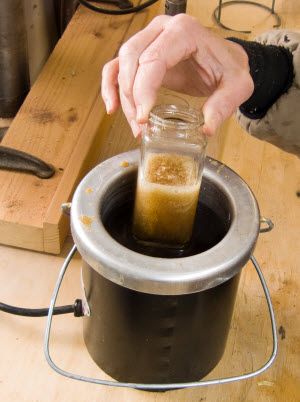 Put the cold glue mix in the glue pot. A commercial glue pot costs about $150 and is well worth the money. Essentially a double boiler, it keeps the glue at a constant 140-degrees. For small quantities, I fill the gluepot with water and let it come up to temperature, then set the glass jar in the water.
Note: You can use a hot plate and your own double boiler. Use a liquid thermometer to find a setting that will keep the water at 140-degrees.
 Once the glue is hot, the pot can be removed from the heated base to take to your bench. This allows you to take the glue to the project unfettered by an electrical cord. Return the pot to the base whenever there’s a break to keep the water heated. The glue will thicken as it sits in the pot. Add more water to keep the glue the consistency of honey. A disposable glue brush is a perfect applicator. Hot hide glue has a fast tack set but a long open time. That means parts will stick together almost on contact, but can be repositioned later without affecting the bond strength.
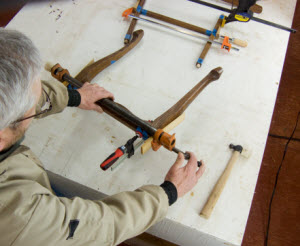 Assemble the chair in stages. Brush glue on the tenon and in the mortise then push the parts together by hand. Once you have one assembly done, such as the front leg assembly shown here, apply clamp pressure. Then, assemble the next section. Your goal is to glue the whole chair in one setting (or, in the case of a chair, sitting).
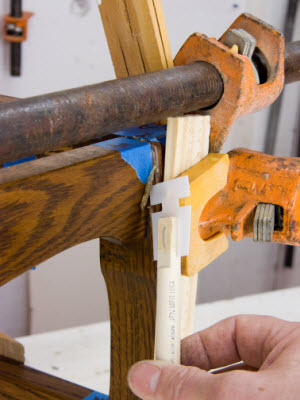
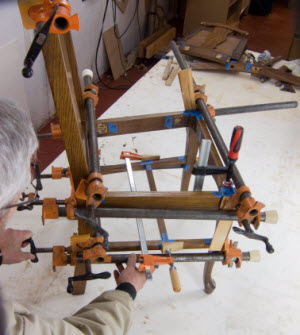 It takes an array of clamps and shims to get the whole chair assembled. Clamp pads protect the finish. Shims help compensate for the odd angles and keep the clamps from slipping as pressure is applied. It’s best to assemble the whole chair upright on a flat surface to insure all four legs make contact. You don’t want to assemble a chair that rocks.
 Peel off glue squeeze-out. Remove the foam from a used disposable brush and you’ll find the perfect hide glue peeler. Catch the glue when it’s rubbery and soft. If you try this too soon, the glue will smear; too late and the glue will have too much set to come off easily. Wipe down the outside of the joints with a damp rag to remove any remaining glue residue.
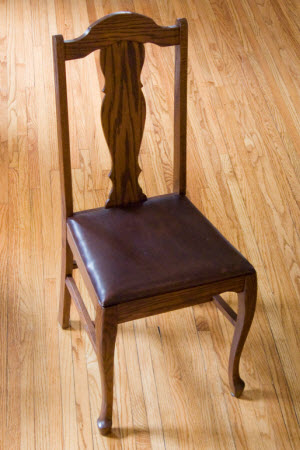 All fixed up and ready for another 100 years.
Photos By Author

I repaired an antique clock case using much the same technique. A "hot wax pot" is perfect for the hot hide glue and costs $25-$60.
Our dining chairs have no stretchers, leaving the seat rail joints very vulnerable to loosening over time. When I repair them, I believe the repair will be short-lived unless I beef up the joints. Other than stronger seat frame brackets (glue blocks), what else can I try on this type of chair?
All instructions should be as detailed and beautifully presented. Everything looked like I could attempt that project until it came to the glue up. The multitude of clamps and shims was daunting for sure. Terrific article. Thank you.
great example on restoring the chair thanks
Good,easily understandable information is important . Mix in a little humor and it becomes priceless 😀 nice job !
Very impressive! The clamping strategy has been one of my many challenges!
Excellent step by step illustration and commentary.
I have 4 chairs very similar. I just finished one repair. I read this article after completing the first chair. Wish I would have read it first. I learned a lot of what not to do. Great article. Thanks
Thank you for this GREAT information! Unfortunately I can't remember all this stuff. Can I add this article to my playlist so I can easily access for future reference? If not how can I re-visit when I need it? Thanks in advance! Rod
Really nice article; loved the breakdown into steps and the explanations